Business Profiles are sections of your account settings where you can assign company data and configure settings for your entire account. In order for your account to run smoothly, you must set up this section and configure the settings.
To help you better understand all the components and elements within the Business Profile, we'll go through each section and setting one-by-one, explain how to configure them, and provide you with some use cases so you can see the outcome.
Your Business Profile can be navigated quickly and easily. Additionally, we have provided some screenshots below to help you if you prefer to learn visually.
On your Topline OS, make sure you are in the correct account.
On the left side of your screen, click "SETTINGS".
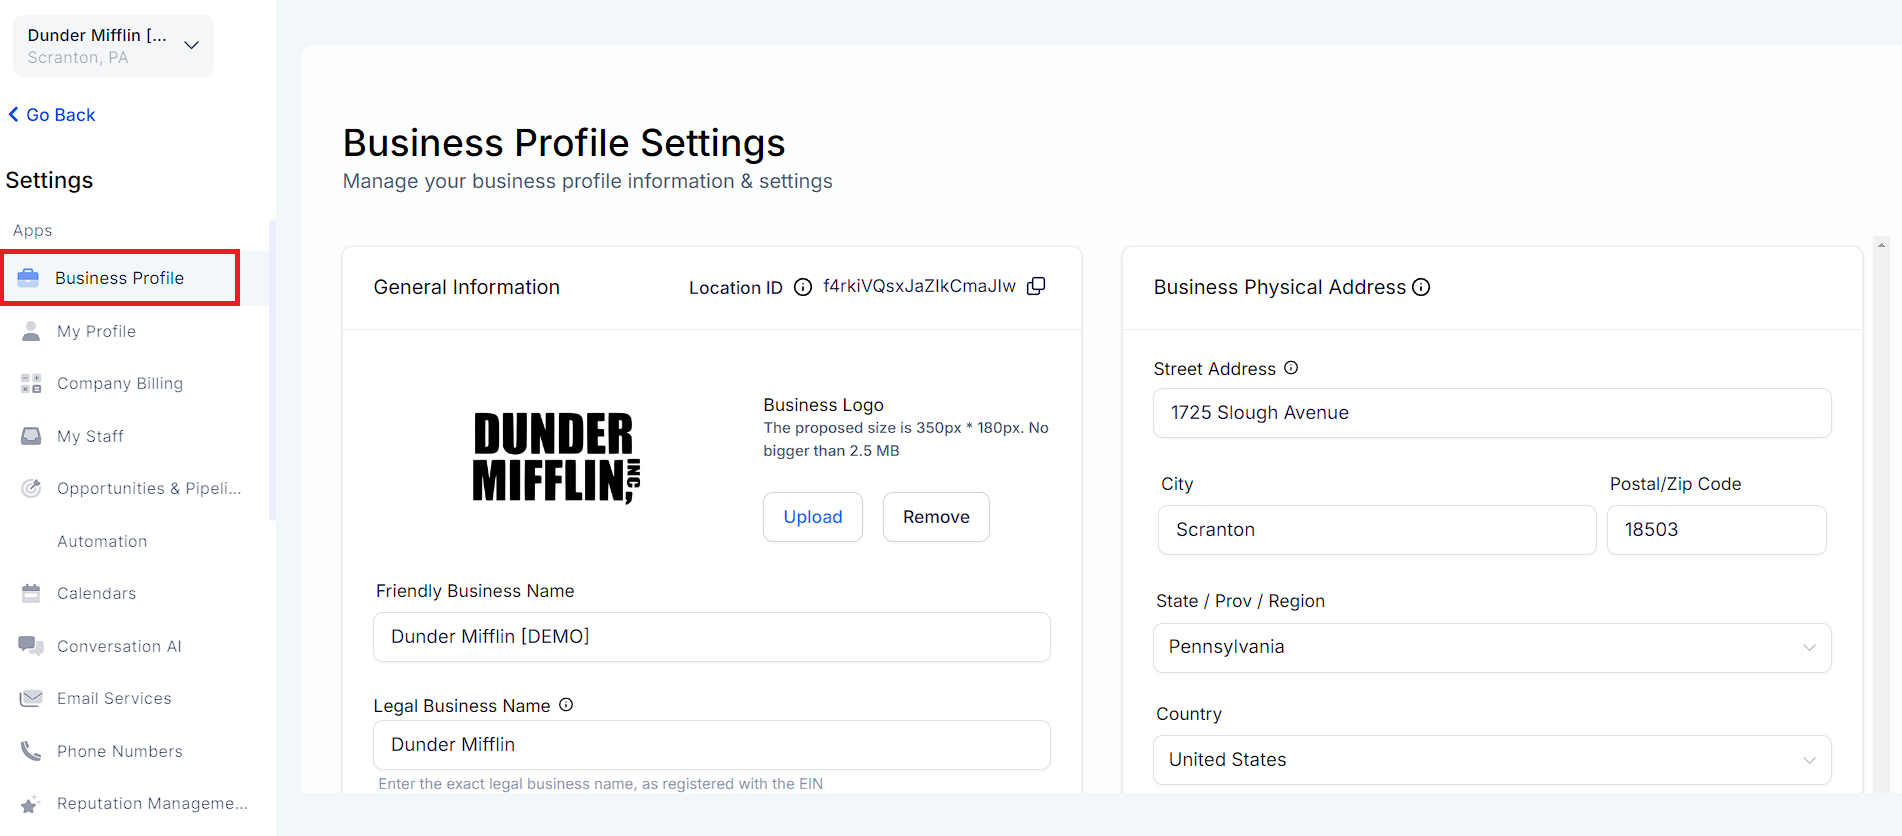
From the SETTINGS menu, select BUSINESS PROFILE from the left-hand navigation.
By default, the Business Profile is also the first page of settings, so once you click the SETTINGS button, it will appear automatically.


The General Information on your account is very important. Setting up "Branded Domain" and adding the necessary information here will ensure that anyone using Custom Fields or Trigger Links associated with this account is sending the correct information.
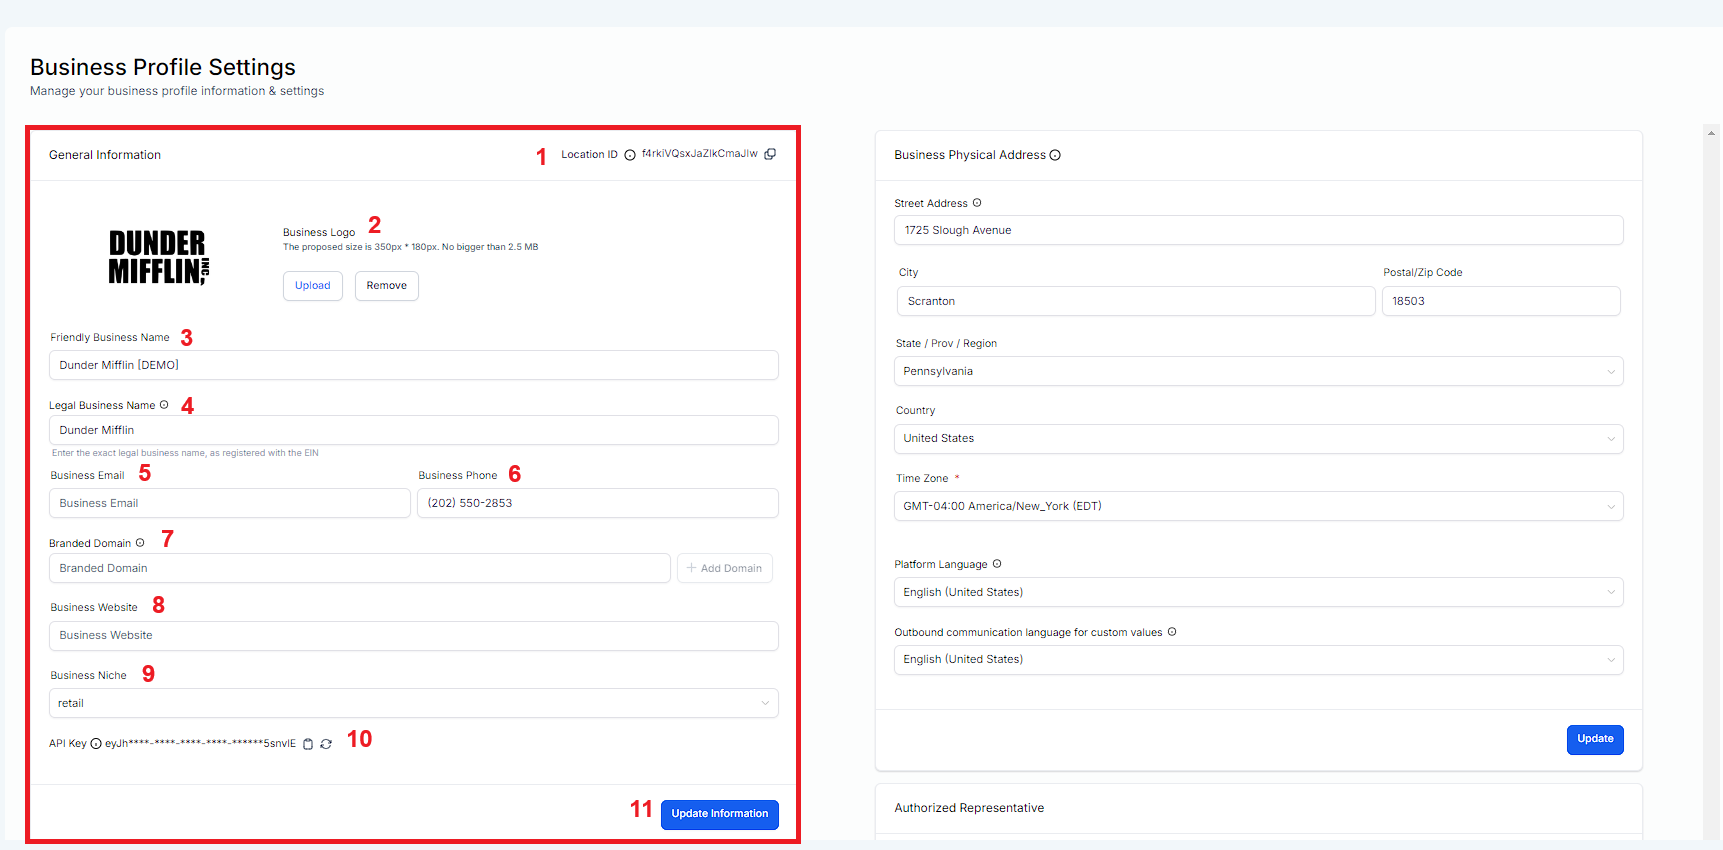
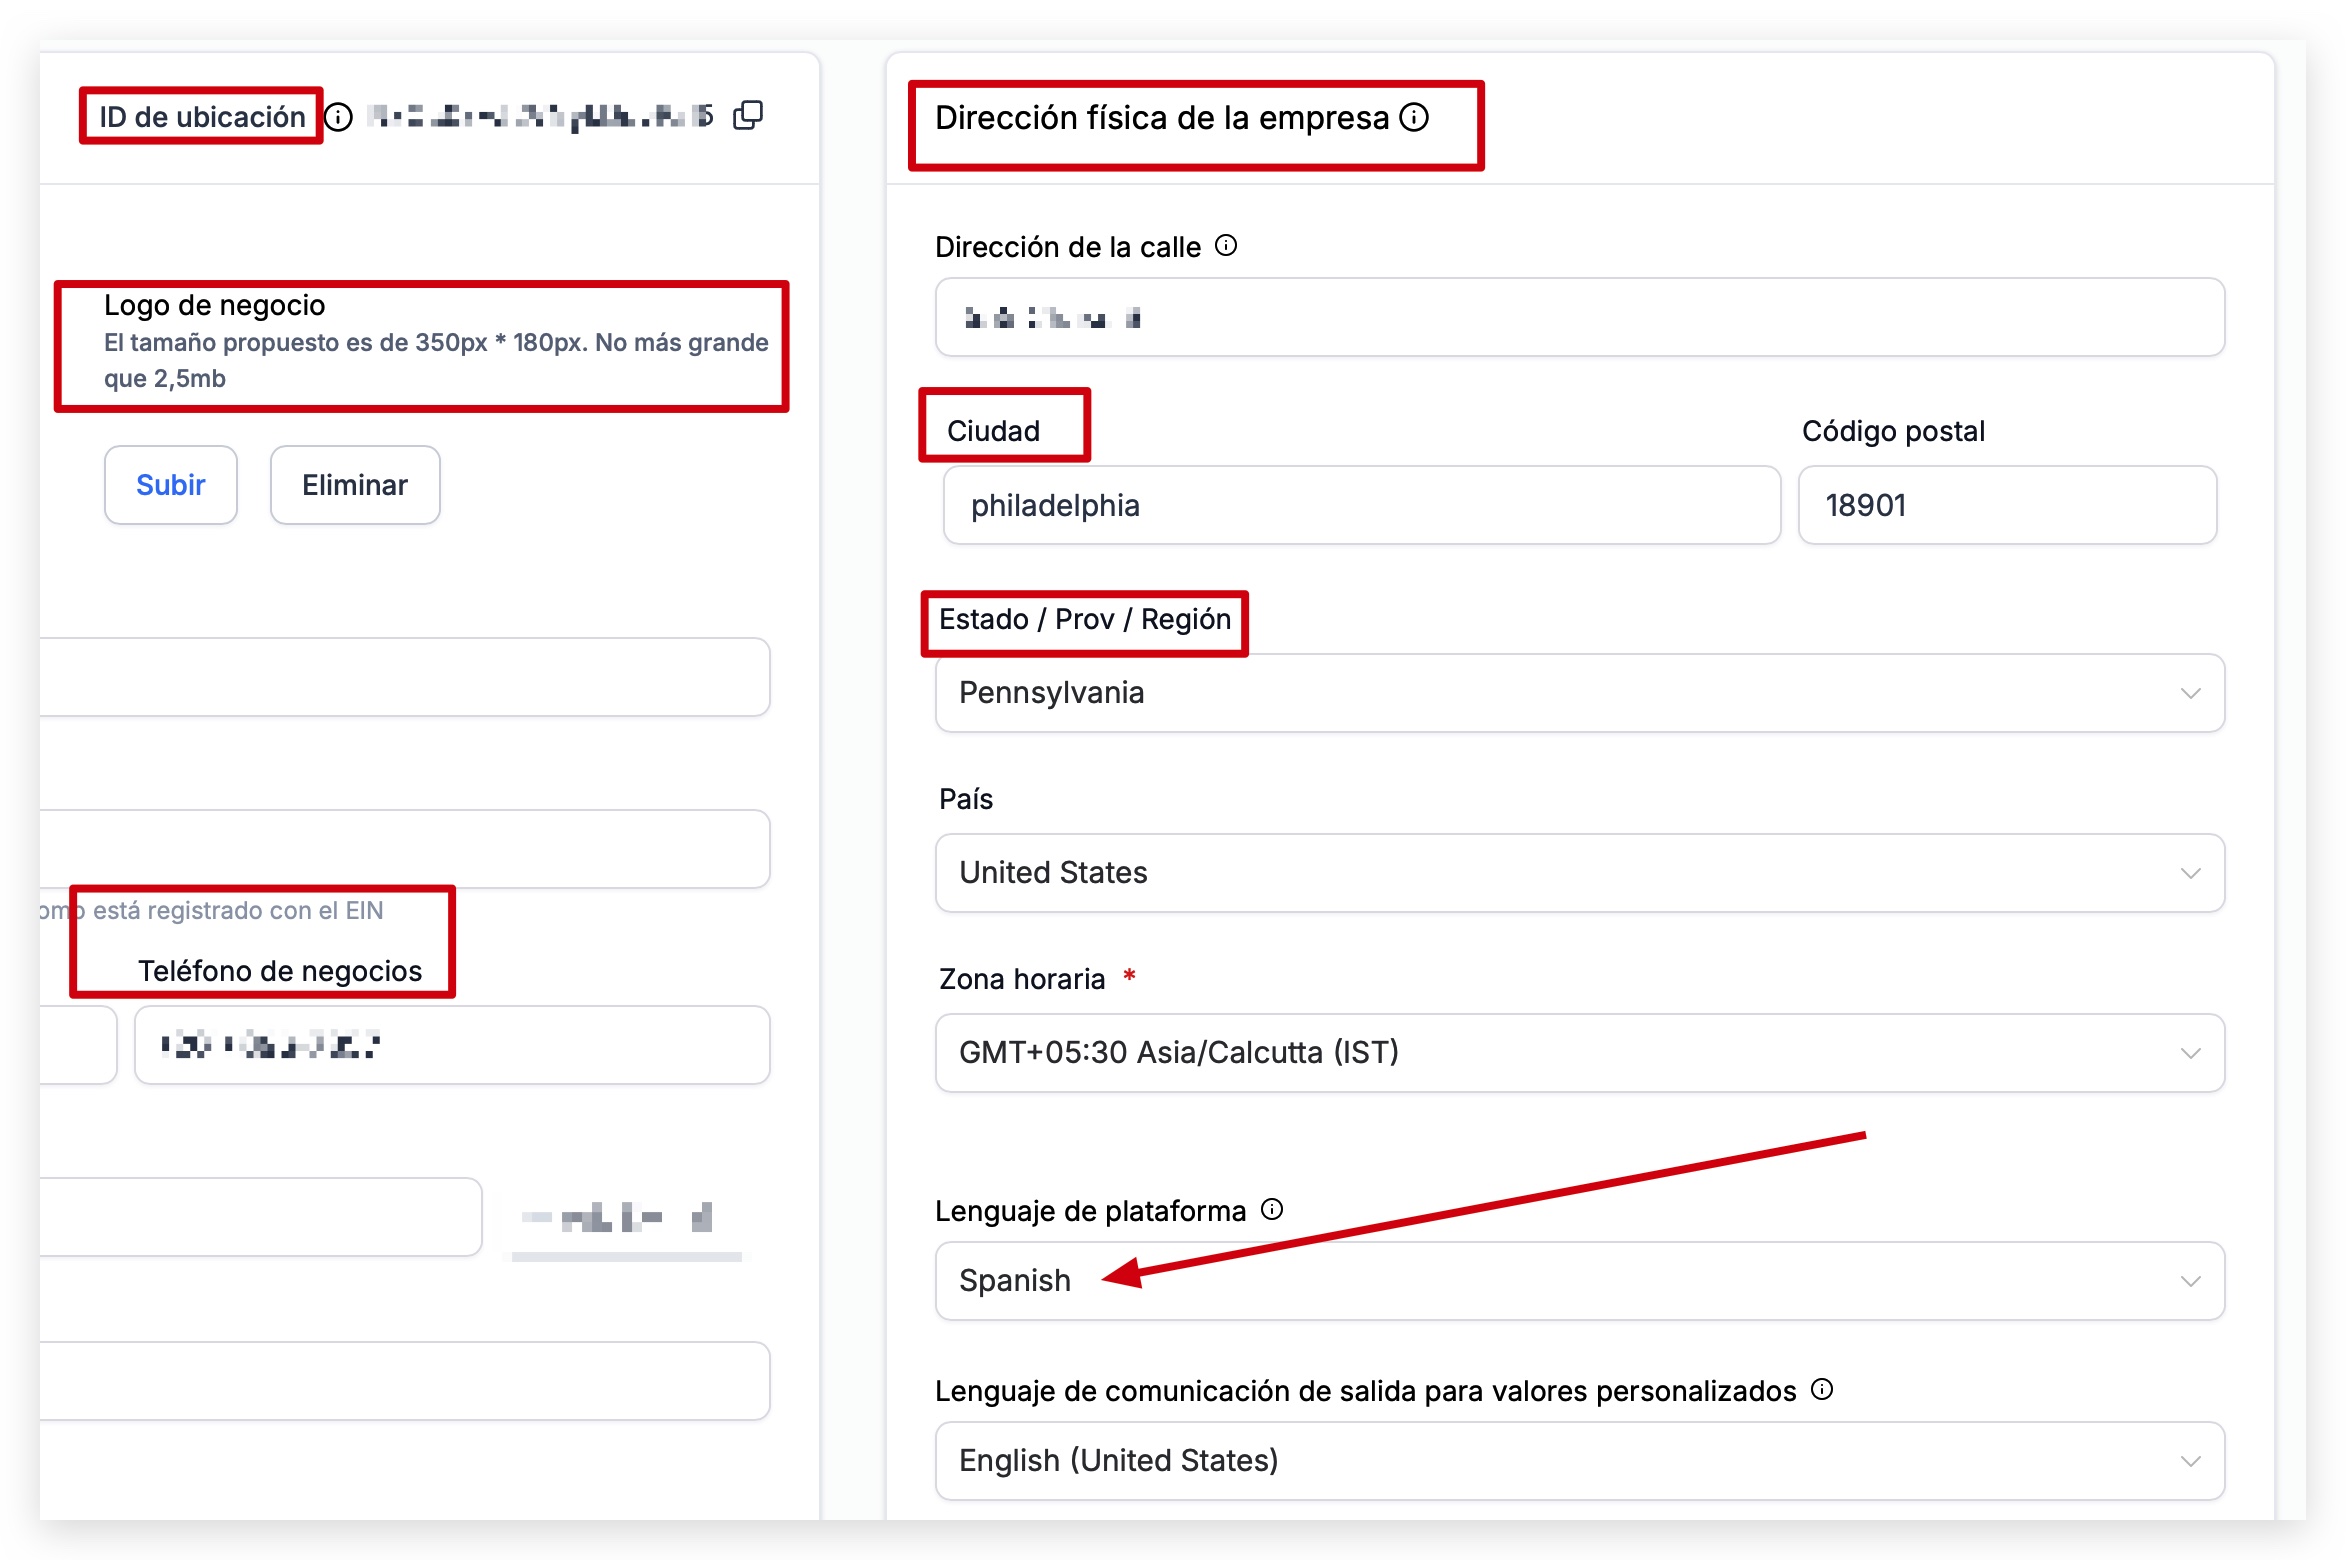
1. Location ID
When you interact with our support teams, they may request that you provide a location ID where you face a problem. Location ID is a unique ID given to every account in your account. This helps us identify your client's account and narrow down our troubleshooting efforts.
2. Business Logo
Upload the business logo you want to be associated with this account. The logo will represent this specific account when looking at the "Accounts" list in your Dashboard view, and can be used across many features of Topline OS, including invoices and emails, and even as a Custom Field in messaging.
Example: {{location.logo_url}}
3. Friendly Business Name
This is the name that will be used for your account (location) when using the Custom Field "Account -> Name" in messaging, workflows, and other areas across the app.
Example: {{location.name}}
4. Legal Business Name
The legal business name is the name that will be used in any future compliance registration. What you add here should perfectly match the business name as it is displayed on legal business documentation, such as your business license and registration paperwork.
5. Business Email
Enter the email you want to be used for this account when adding the Custom Field "Account -> Email" to messages, emails, workflows, or other areas in the app that allow for Custom Fields.
Example: {{location.email}}
6. Business Phone
Enter the phone number you want to be used for this account when adding the Custom Field "Account -> Phone" to messages, emails, workflows, or other areas in the app that allow for Custom Fields.
Example: {{location.phone}}
7. Branded Domain
Each account (location) can create a "branded domain" by connecting to a domain in their hosting provider. This branded domain will be used as the URL address for things like "Trigger Links", "Calendars", "Forms", "Surveys", and more.
Below are a few different help articles that will explain the Branded Domain in more detail and how to configure it for your account:
Domains In Topline OS
How to Configure Branded System-Generated Links (API Domain)
8. Business Website
Enter the website URL you want to be used for this account when adding the Custom Field "Account -> Website" to messages, emails, workflows, or other areas in the app that allow for Custom Fields.
Example: {{location.website}}
9. Business Niche
Assign a business niche to your account by choosing from the list in the dropdown. If you target multiple niches, choose the niche that best describes your target market.
10. API Key
API keys are used to connect 2 or more software applications together with the intention of sharing information and/or performing and action that requires the approval and validation of the software applications involved.
For example, when you create a Zap in Zapier, you are just connecting to the API of different software applications. Zapier just makes this a clean and "pretty" experience for the end user, but underneath all the cool looking software that Zapier provides is just a bunch of API keys connecting to each other depending on how you configure your Zaps.
Your account (or location) API Key can be used when connecting to Zapier and other applications that may require an API key to send or receive information to or from any specific account (location).
11. Update Information Button
When you're all finished updating your General Information, make sure to save.
Your Business Physical Address is a very important part of your Business Profile. In addition to verifying your business for certain features that may require verification, this information can also be used to add Custom Fields and Custom Values to messages, social posts, email campaigns, websites, and funnels.
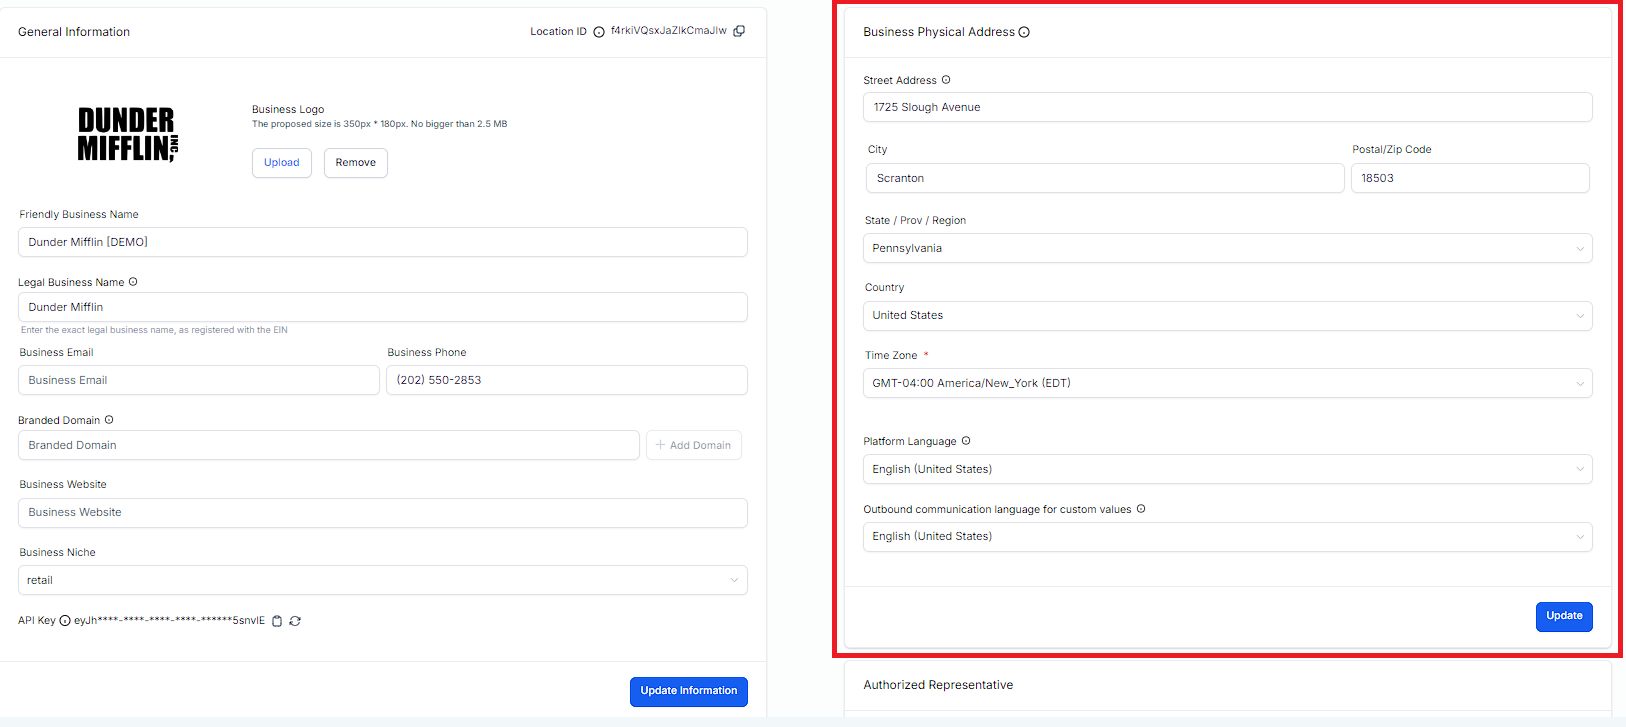
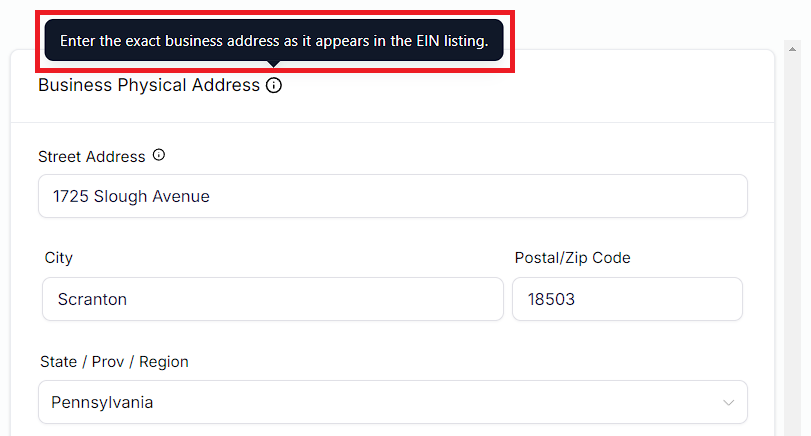
Automated events within campaigns use this field to determine when to send. Depending on the feature being used, such as workflows or email campaigns, you may be able to override this default Timezone setting. Always check your business profile settings and the feature settings to ensure the correct time zone is selected.

Your account displays in this language based on this setting. For example, if you are an English speaker and reader, you would want your Topline OS account displayed in English. In case you speak and read Spanish, you may want your account displayed in Spanish

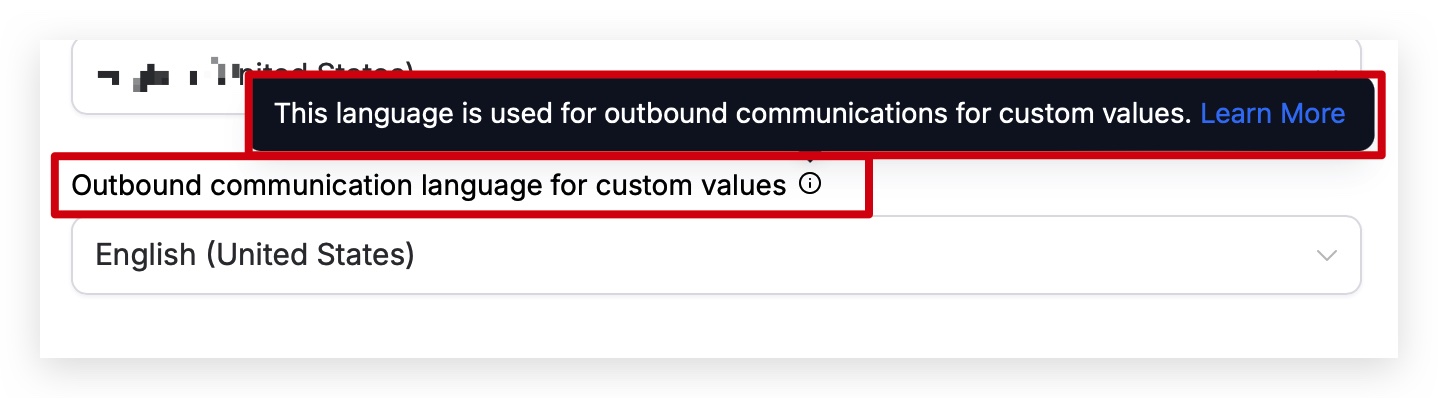
When you send Custom Fields and Custom Values in messages, Topline OS needs to know how you want that information displayed. When you choose the appropriate language here, you will ensure that when you send a message with Custom Fields or Custom Values, or use Custom Fields or Custom Values anywhere else, such as websites and funnels, the correct language is displayed.
Supported Languages:
English
English(Country Specific)
Dutch
French
German
Hungarian
Italian
Polish
Portuguese (Brazil)
Portuguese (Portugal)
Spanish
Danish
Below is a list of custom fields and custom values that are affected by changing the language in this setting. Please be aware that more may be added and affected in the future. We will do our best to update this list as needed:
{{appointment.start_time}}
{{appointment.end_time}}
{{appointment.only_start_date}}
{{appointment.only_end_date}}
{{appointment.only_start_time}}
{{appointment.only_end_time}}
{{appointment.month}}
{{appointment.month}}
{{appointment.day_of_week}}
{{right_now.time}}
{{right_now.day}}
{{right_now.day_of_week}}
{{right_now.month}}
{{right_now.month_english}}
{{right_now.month_name}}
{{right_now.middle_endian_date}}
{{right_now.little_endian_date}}
{{right_now.hour}}
{{right_now.hour_ampm}}
{{right_now.second}}
{{right_now.date}}
It is very important that you fill out this section with information about your business. You will need to provide information about your registration type and number (EIN, CCN, VAT, etc.) as well as your regions of operation. When applying for approval to send SMS messages, running an approved and legitimate business can make all the difference.

1. Business Type
Select the type of business you created. The drop-down will give you the following options to choose from:
Co-operative
Corporation
Limited Liability Company (LLC) or Sole-Proprietorship
Non-profit Corporation
Partnership.
2. Business Industry
Select the industry that you primarily serve. We understand that you may serve many different industries, but please select the one that best describes or most describes your target market.
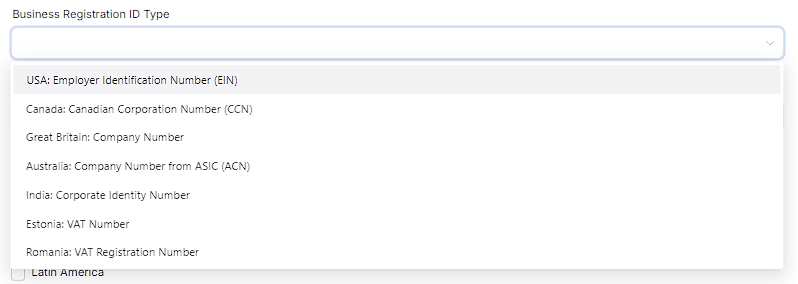
3. Business Registration ID Type
Select your business' registration type. If you are in the United States, you most likely will have an EIN unless you incorporated your business in a different country.
4. Business Registration Number
After you select your business's type of registration, you can add your registration number here.
5. Business Regions of Operations
Select the regions your business operates in. If you are a global company, select the regions that you do most of your sales in. This is a multi-select setting, so you are able to choose more than one region.
6. Update Information
Make sure you always click the update button after making changes so that your changes are properly saved.
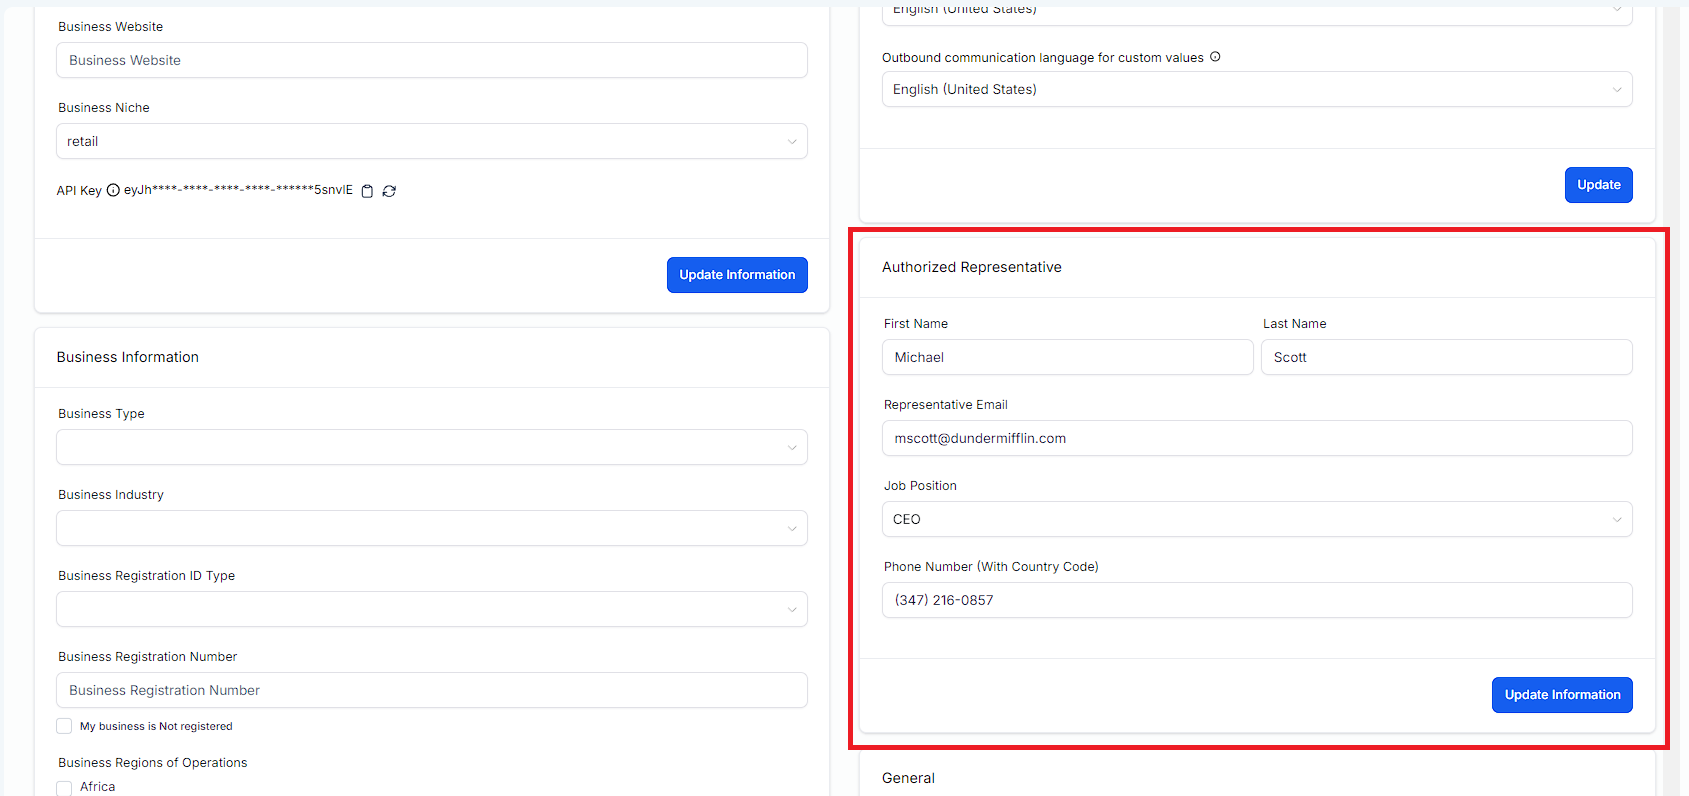
If your business has an authorized representative, please add their information here. If you are the authorized representative, please add your own information here.
This section of your Business Profile is extremely important, so we will breakdown each section below. This setting can have a significant impact on your account, so make sure you pay attention to it. There may be a problem in the CONTACTS section, and you may not know what to do about it. Upon reviewing these settings, you may realize you turned something on or off that shouldn't have been.
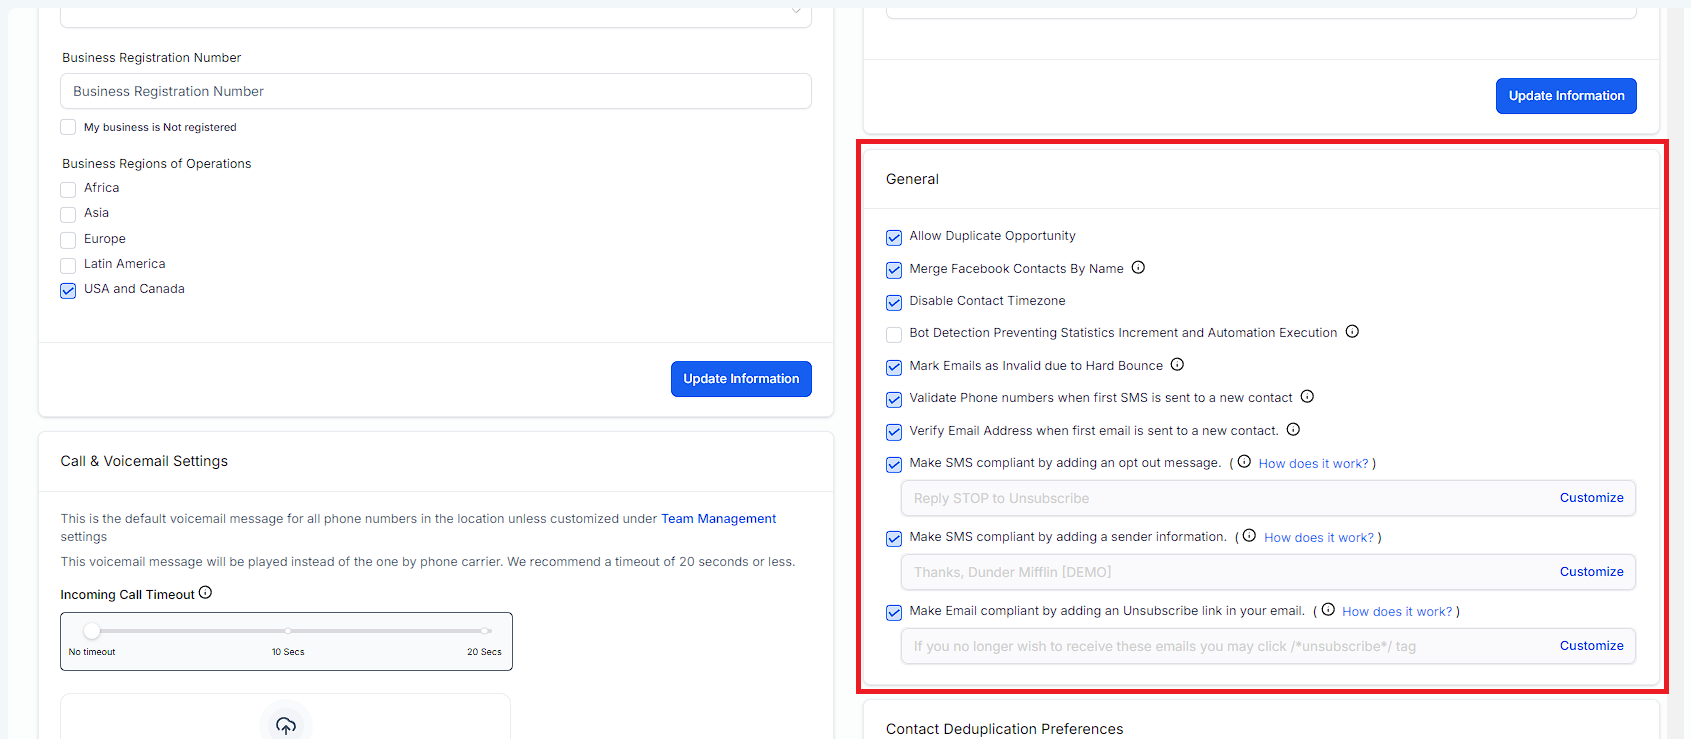
Turning this feature "ON" will allow duplicate opportunities in the same pipeline. If this is turned "ON", new opportunities will be created in the same pipeline instead of moving from one pipeline stage to another. In certain scenarios or use cases, this can be very useful, even necessary.
In your system, a new contact will be created when someone messages your company through Facebook Messenger. Since Facebook only sends us names, not phone numbers or email addresses, we can't contact the user.
If you want to keep your contact lists clean and organized and add another to contacts who reach out via Facebook, you can turn this feature on. messaging chain Topline OS will merge contacts with the same name as a contact who messages you from Facebook.
It is important to use your contact's timezone for various features. In this example, you are sending emails at 8 am EST, but your customers are in California (PST), which is 3 hours behind EST. In this case, you would send the same email at 5 am PST if you didn't take the contact's timezone into account.
Using this feature will allow you to turn off any recognition of the contact's time zone and only recognize the timezone assigned to the account, if necessary.
Topline OS allows you to "validate" email addresses for contacts, and you can mark emails as "invalid" if there is ever a hard bounce event. This feature can help you cut costs by not sending emails to contacts when they bounce back over and over.
Email actions in workflows will be automatically skipped when the address is marked as "Invalid".
You can automatically validate a contact's phone number when you send the first SMS message to a new number in your account. If the phone number is marked as "Invalid", the SMS message will not be sent. You will need to validate the phone number before sending SMS messages to this contact in the future.
Similar to validating phone numbers, this feature allows you to verify an email address the first time it is used in your account. If the email address is marked as "Invalid", the email will not be sent. You will need to verify the email address before sending emails to that contact in the future.
The importance of SMS compliance cannot be overstated. In order to prevent this from happening, Topline OS automatically configures "Opt-Out" messaging in all your accounts by default. The opt-out messages can be configured and even turned off (which we do not recommend), but to get you and your customers started, we enable this setting by default.
Making sure the "sender information" is in the SMS message is also very important for SMS compliance, just as opt-out messaging is. Sender information can be configured and turned off (which we do not recommend), but to get you and your customers started, this feature is enabled by default in all accounts.
In order to keep consumers safe and their information secure, new laws are passed constantly around sending emails. Therefore, Topline OS automatically configures the email unsubscribe link in all your accounts by default. The unsubscribe link can be customized and even turned off (which we do not recommend), but to get you and your customers started, we make sure it is turned on by default.
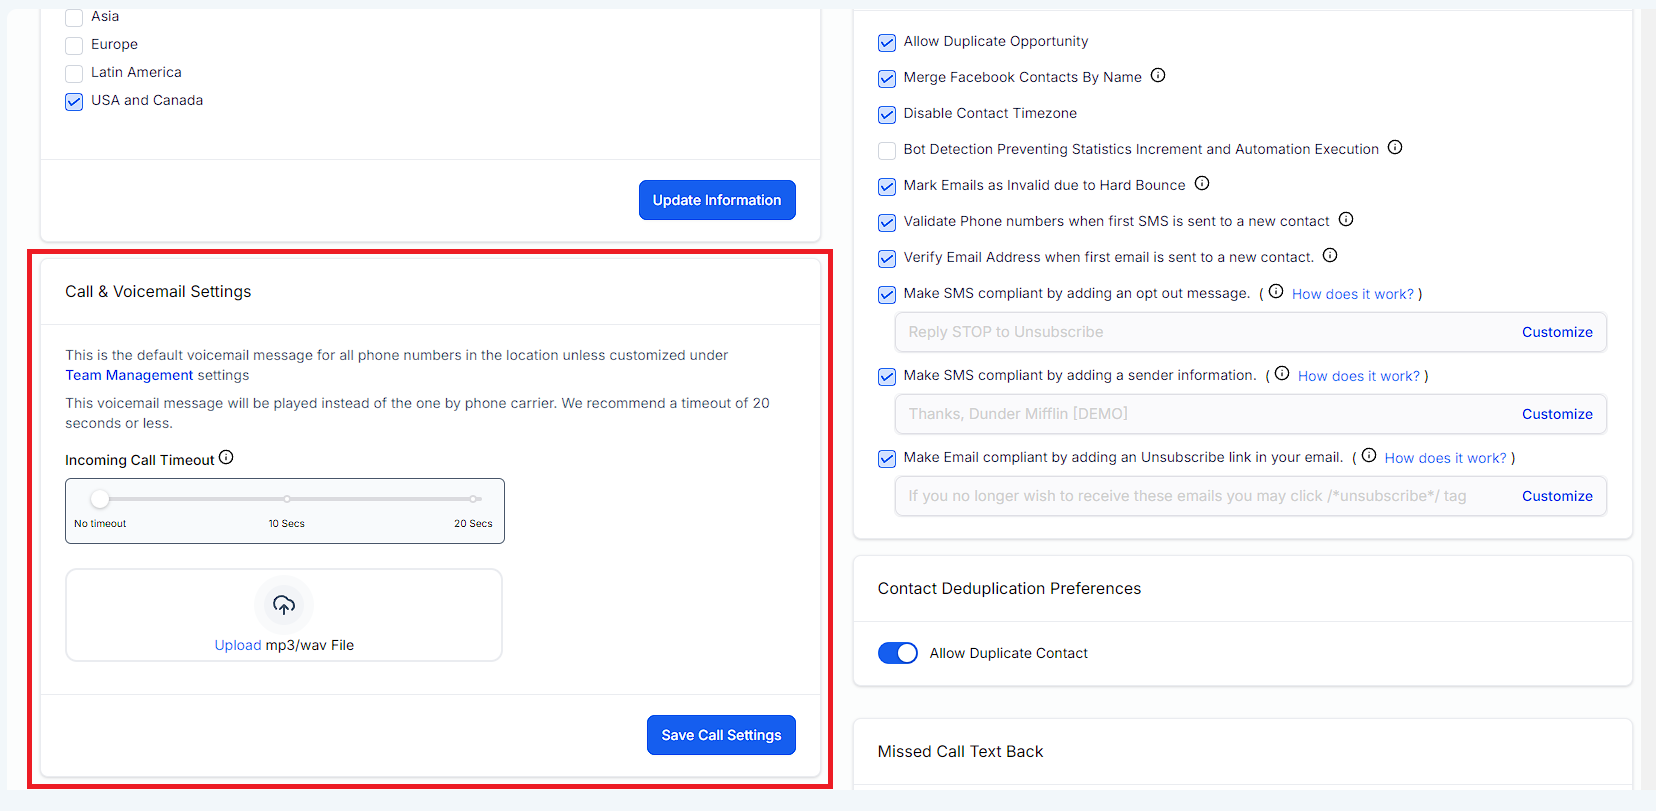
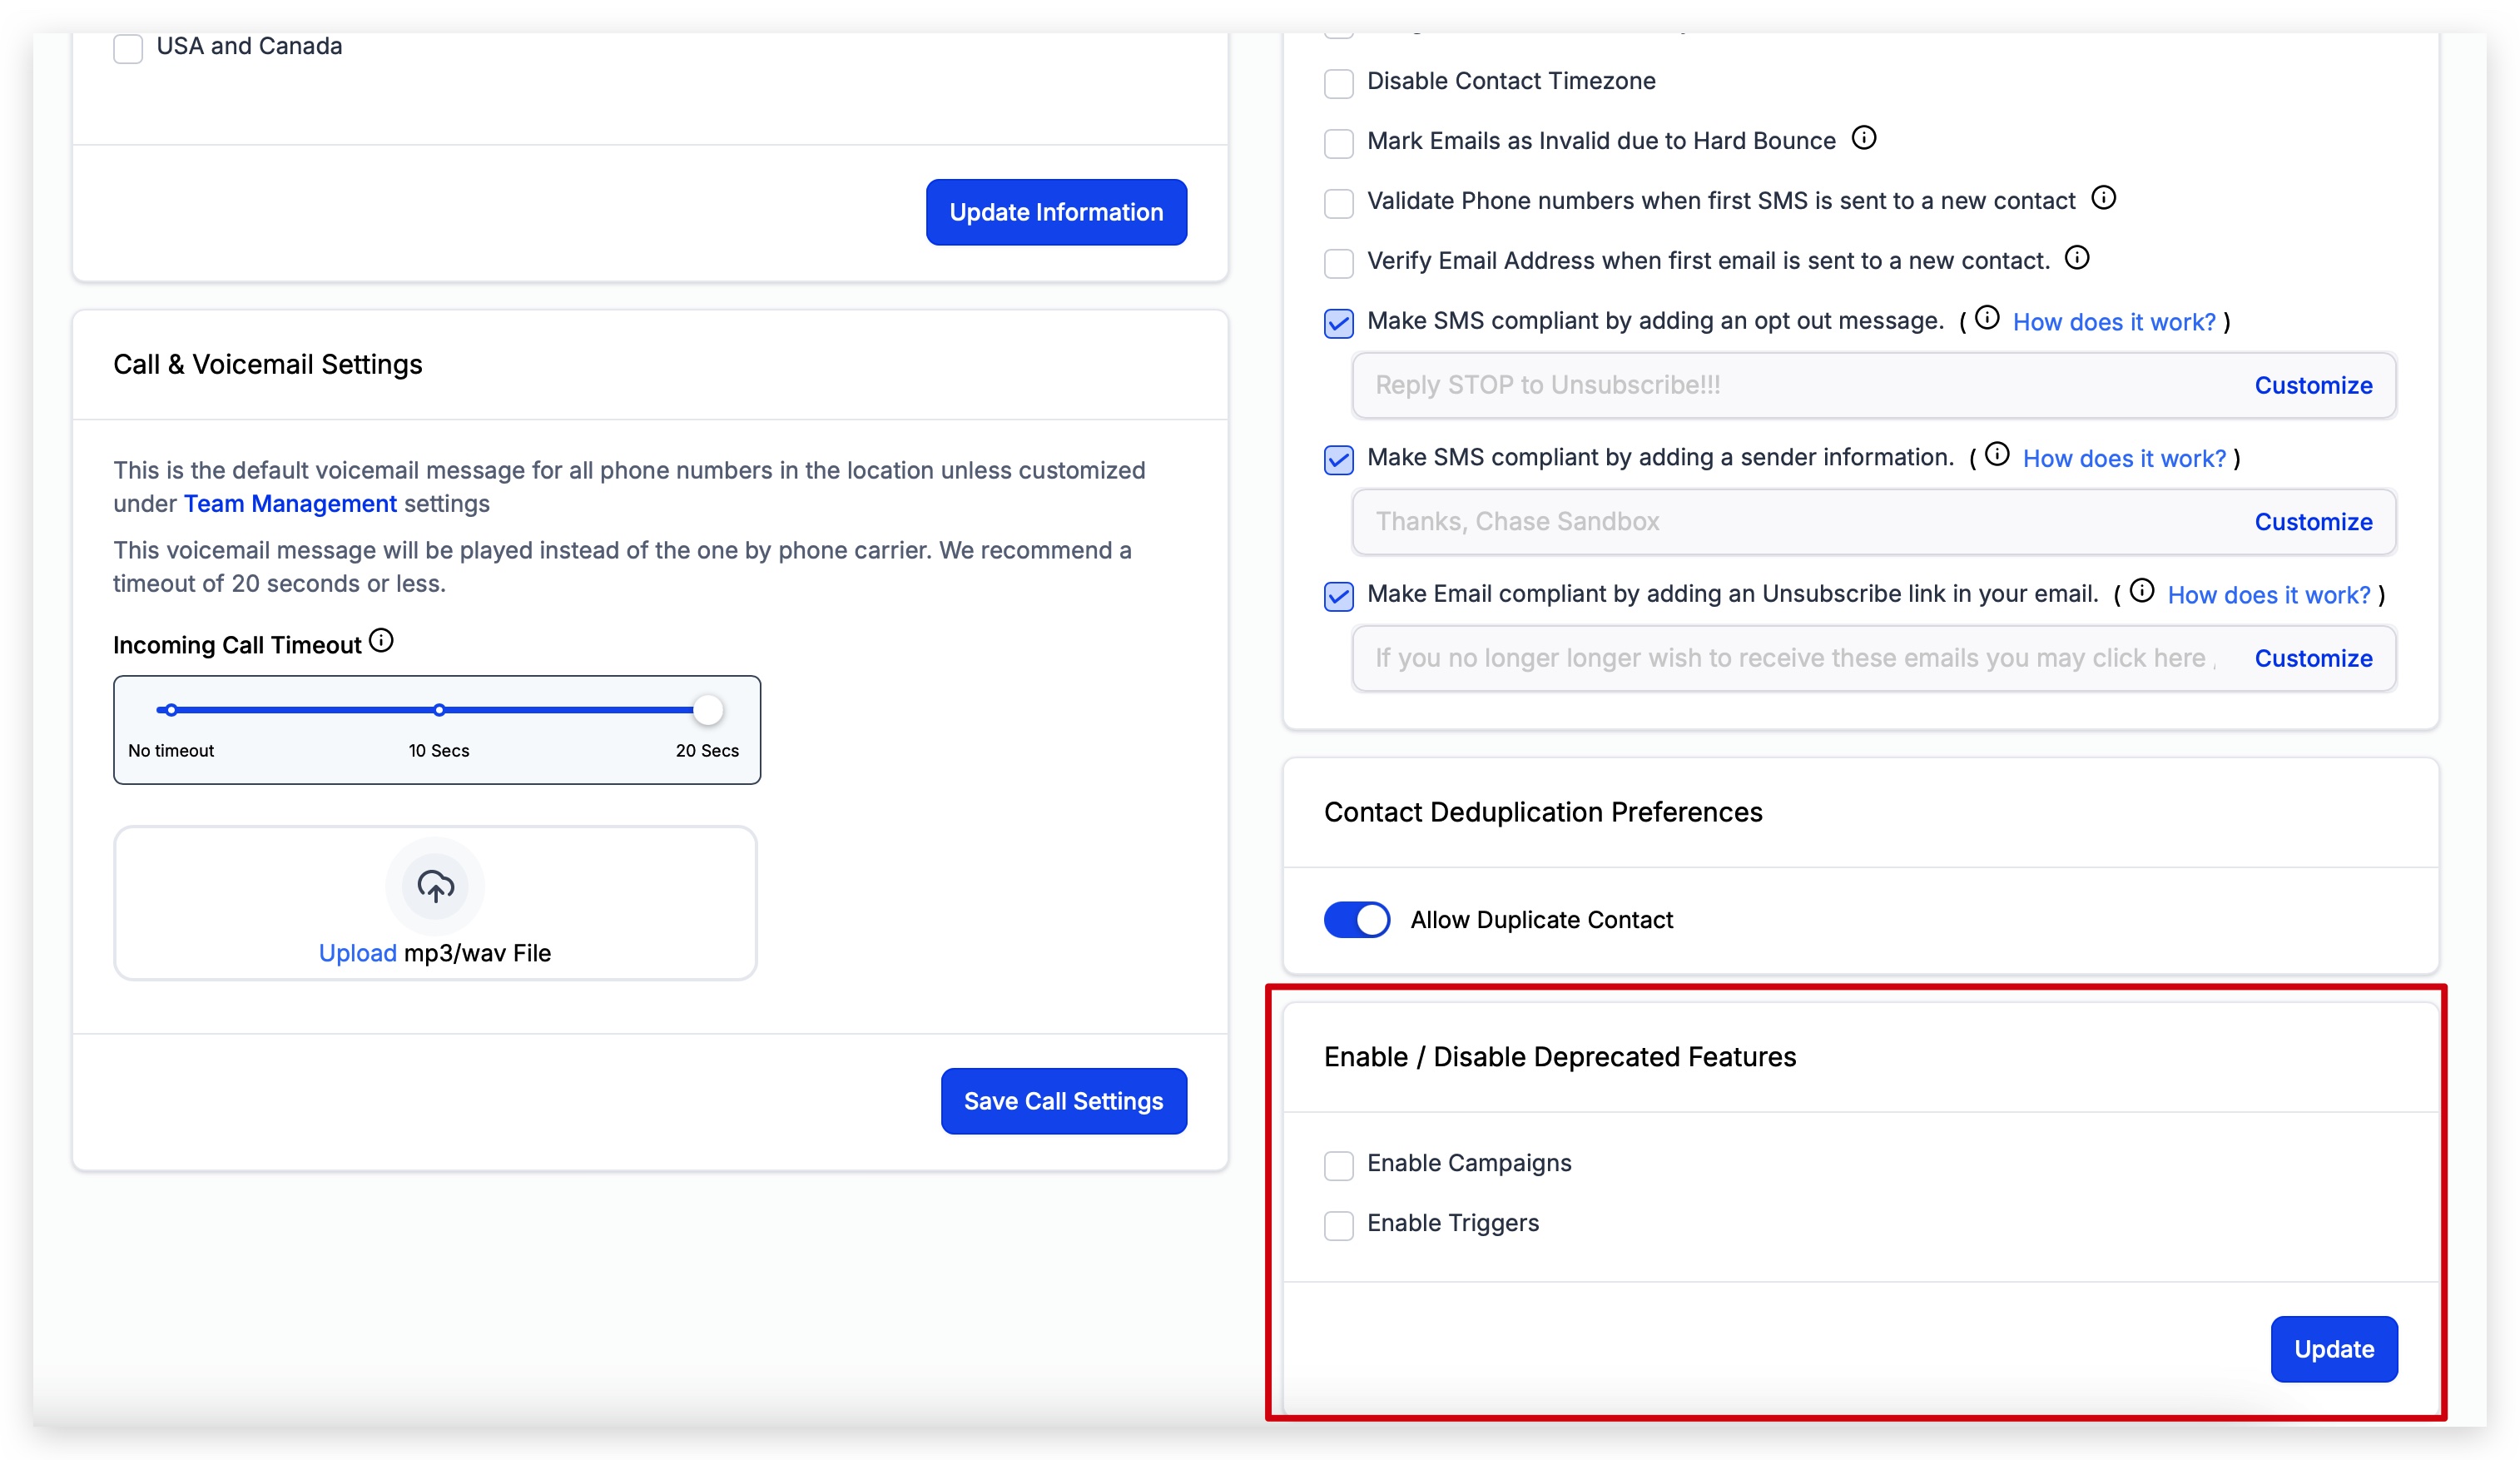
The following voicemail settings are applied to the entire account and are only overridden if you add a voicemail to an individual team member (Click Here to learn more about adding/configuring team members).
When you upload your account voicemail, the file needs to be in mp3 or WAV format.
Selecting the "Incoming Call Timeout" dictates how quickly the incoming call is pushed to voicemail.
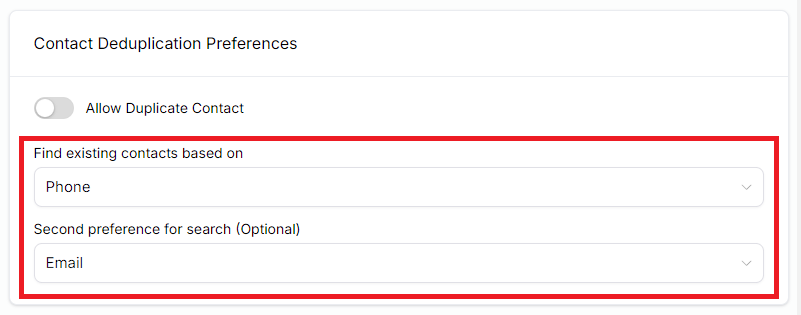
This setting allows you to control how your account treats duplicate contacts. If you want to "Allow Duplicate Contacts", you would toggle this setting into the ON position. If you DO NOT want duplicate contacts, you would toggle this setting to the OFF position.

Depreciated features are features in Topline OS that are no longer updated or supported by the engineering team and that are not offered to accounts by default. Currently Campaigns and Triggers and the only depreciated features in this list. They are depreciated because workflows have completely replaced them as a significantly superior option.
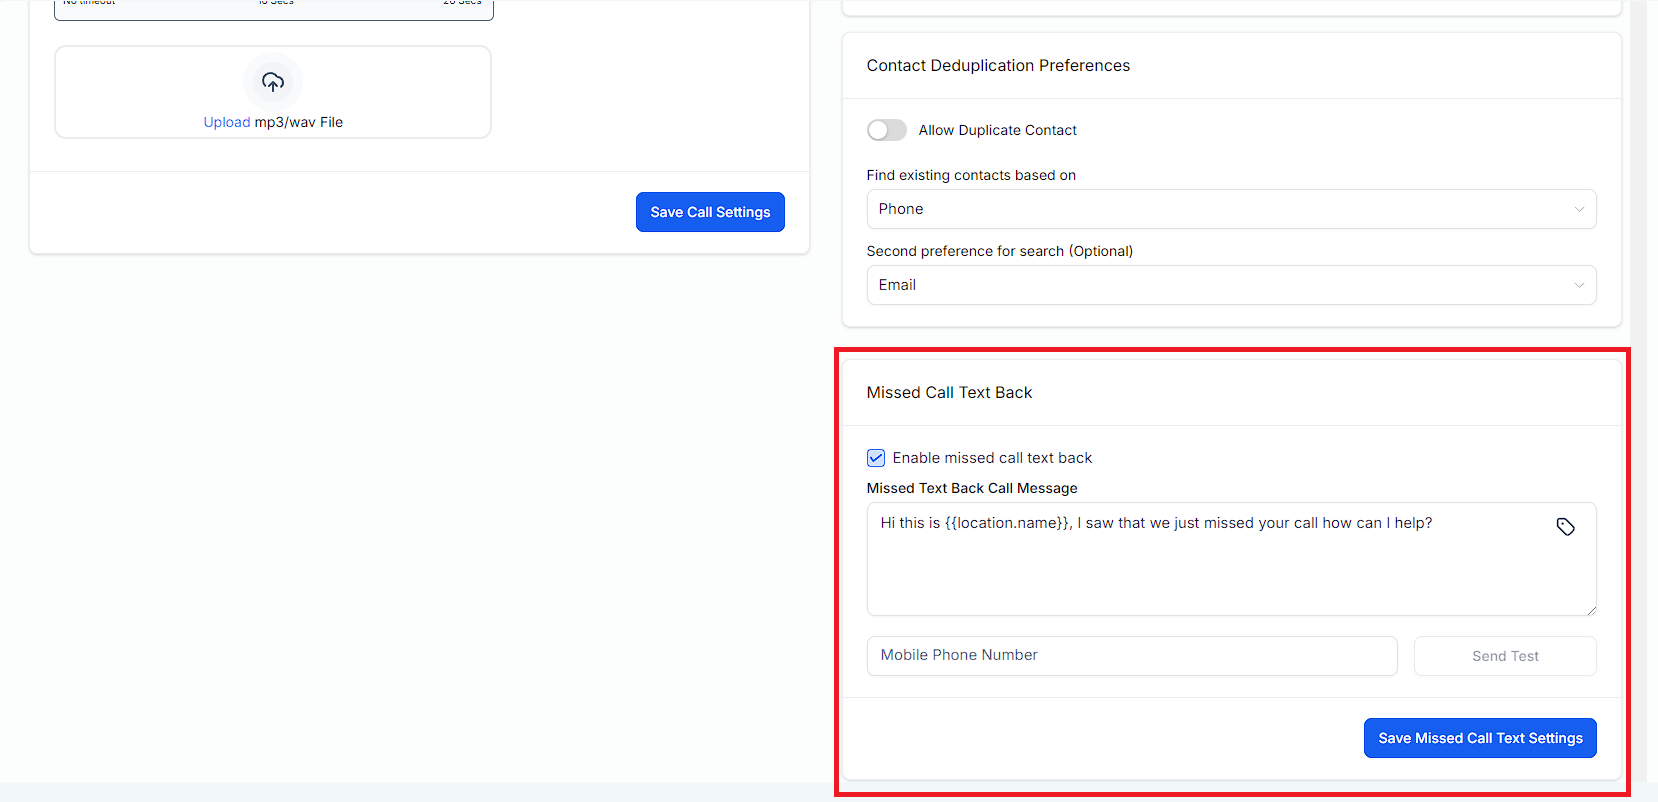
Missed call text back is an amazing feature for you and your customers and can be easily turned on and configured right here in your Business Profile settings!
Missed call text back will automatically send an SMS message to the caller who recently called but was unable to reach someone from your team.
In addition to configuring the exact SMS message that is sent, you can even add Custom Fields and Custom Values.
Click the save button below this feature when you're ready to start using Missed Call Text Back!