Tailor your dashboard experience by setting custom permissions according to your preferences. Whether you prefer privacy or collaborative sharing, our platform allows you to customize permissions seamlessly.
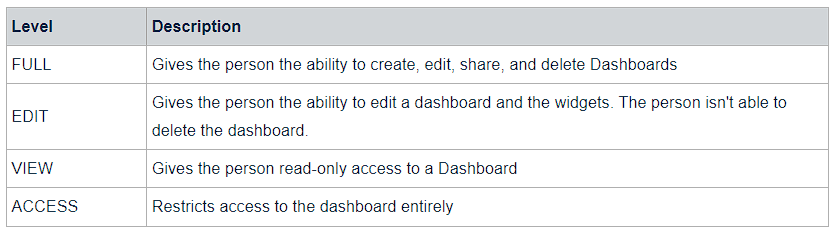
Dashboards offer the following levels of permissions:
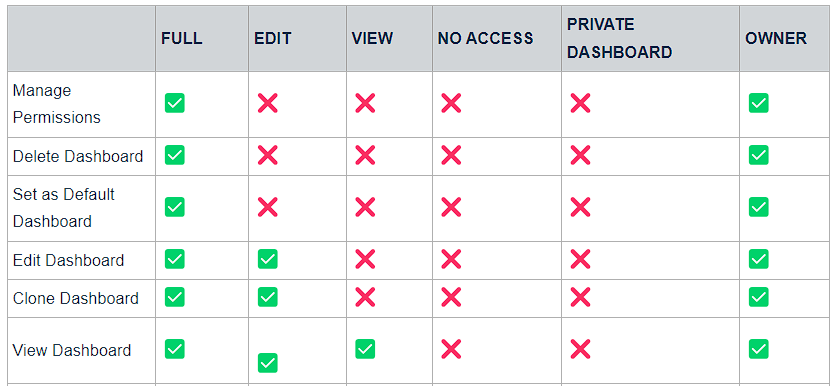
Here are how different actions on dashboards work for different level of permissions
Permissions screen and options changes as per the role of the logged in user
Account:
Account users can set access only for Account Admins and Account users
Admins and Users will always have FULL access to dashboards created by Account Admins/Users except Private Dashboards.
Dashboard Permissions within our platform follow a clear hierarchy to ensure smooth management of access levels:

This hierarchy dictates that permissions for lower-level roles are automatically adjusted based on changes made to higher-level roles, and vice versa.
This logic ensures that lower-level roles cannot possess higher access levels compared to higher-level roles, maintaining consistency and security across the platform.
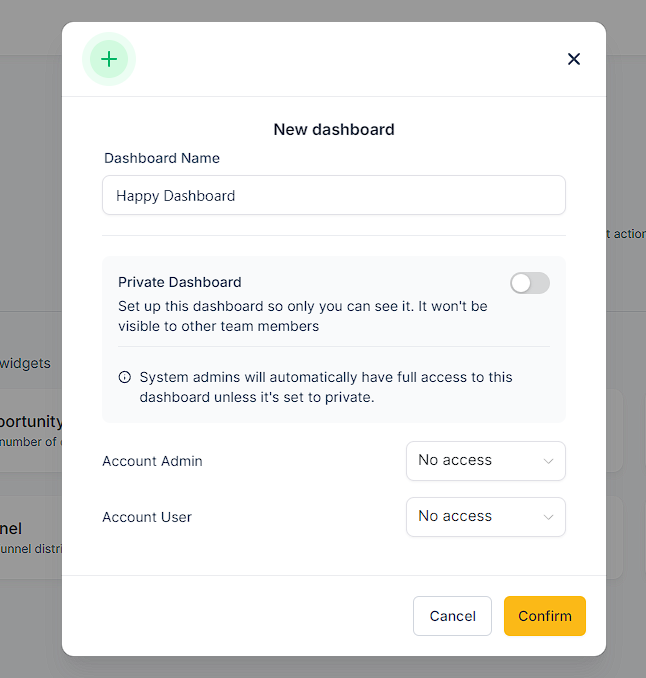
Customize permissions during the dashboard creation process.
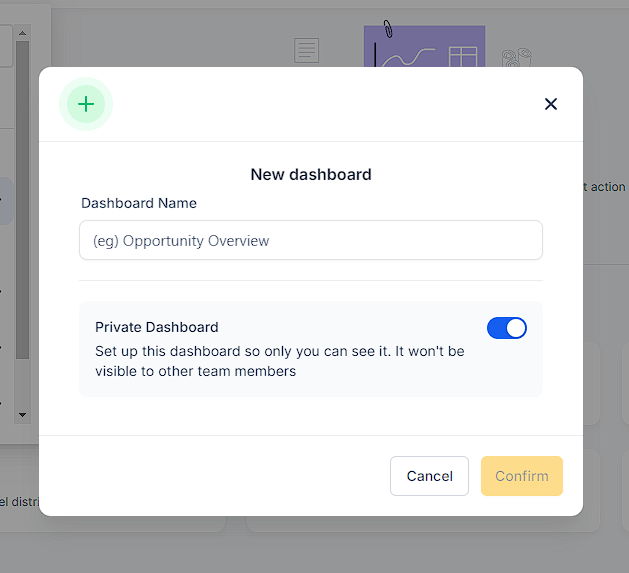
By default, new dashboards are set to Private. Click on the toggle to change the permissions for the dashboard.
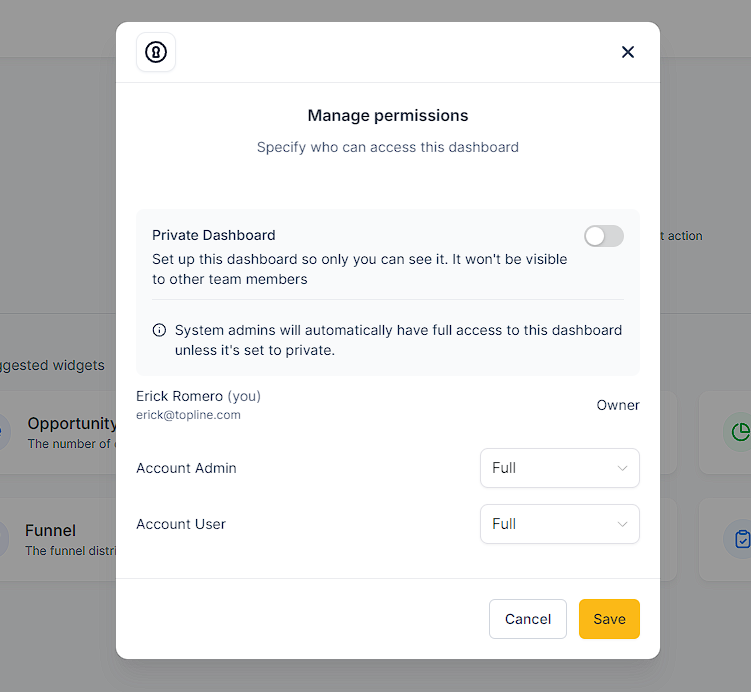
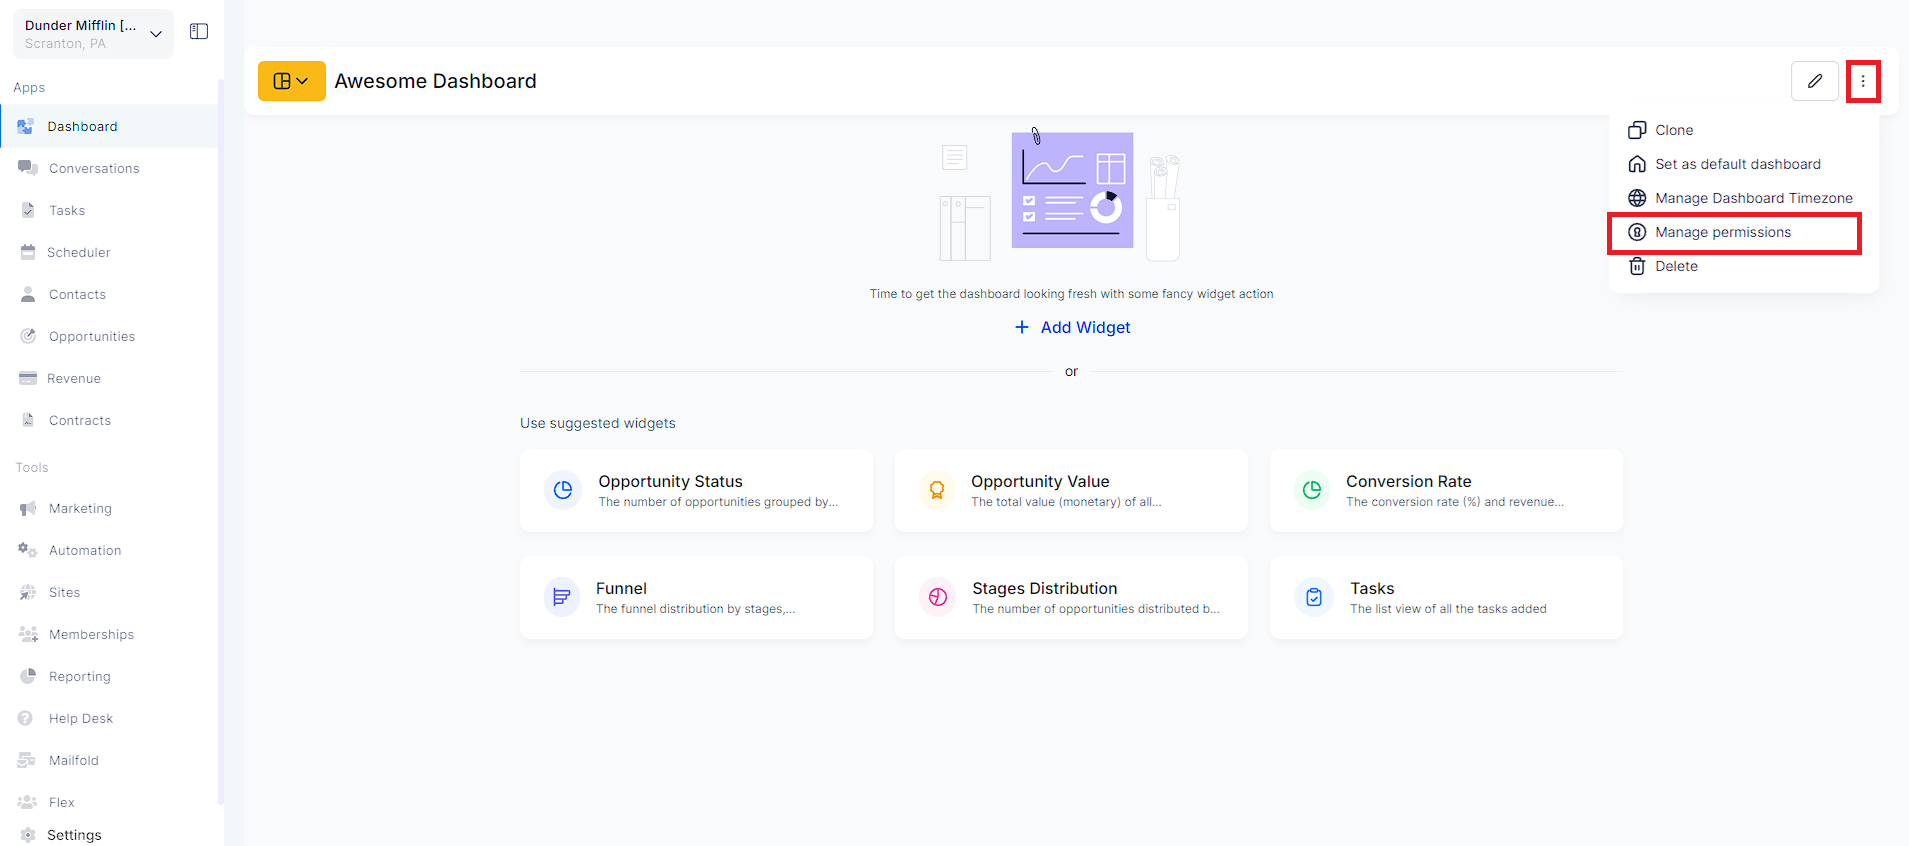
Navigate to the dashboard you want to manage. Click on the three dots located at the top right corner of the dashboard. Only Dashboard Owners and Users with FULL permission can manage and update dashboard permissions
Toggle Private Dashboard to keep the dashboard exclusively for yourself. Owners will get FULL access to all non-private dashboards.
If you want to share the dashboard with other team members and roles, make sure the Private Dashboard toggle is off.
Update the permissions as per the requirements.
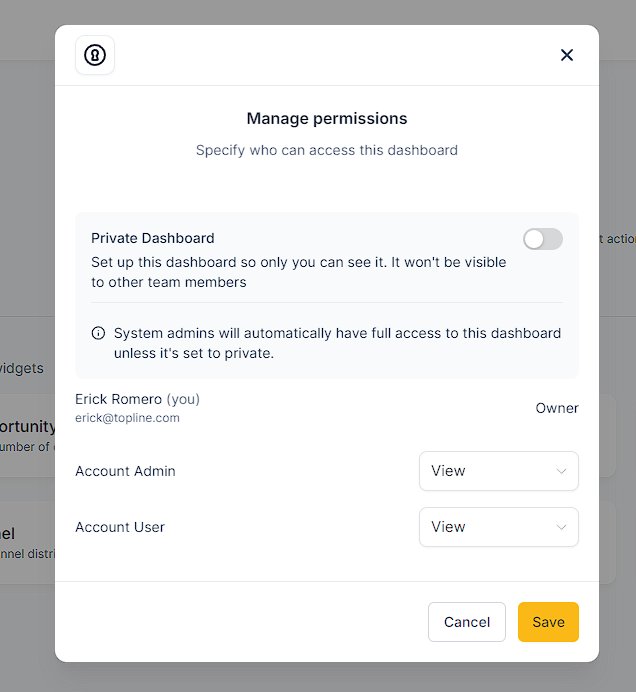
Click on "Save" to apply the updated permissions.
