Syncs all contacts that are created in QuickBooks already along with any new contacts created after the integration
Sends Review Request upon QuickBooks payment in Topline OS without any automation (only on the first invoice)
Automatically register sales receipts inside QuickBooks whenever a payment is made inside Topline OS for order forms, subscription payments, membership checkouts, and calendar payments
Automatically create an invoice inside QuickBooks as soon as an invoice is marked as sent inside Topline OS. This will also sync any updates made afterward inside Topline OS and mark it is paid inside QBO as soon as it is paid inside Topline OS.
This is applicable for any payment processed via order forms, calendars, or subsequent subscription payments as well
If a customer exists inside QBO with the same email id with which the transaction is processed, we will update the sales receipt corresponding to the same customer inside QB
If the customer is not present, we will create a new customer against the email id with which the transaction is processed
This will create a replica of the sent invoice, along with the total amount (including taxes and discounts) on QBO for frictionless accounting sync.
Any updates made on the invoice inside Topline OS will be updated on QBO. This will include any invoice status change transitions inside Topline OS, such as the invoice is paid by the customer, or invoice is voided on Topline OS or any further discount is added upon customer request.
This will not sync existing invoices already created within Topline OS. Only new invoices created from now on will get synced inside QBO.
If a customer exists inside QBO with the same email id with which the transaction is processed, we will update the sales receipt corresponding to the same customer inside QB.
If the customer is not present, we will create a new customer against the email ID with which the transaction is processed.
Please Note:

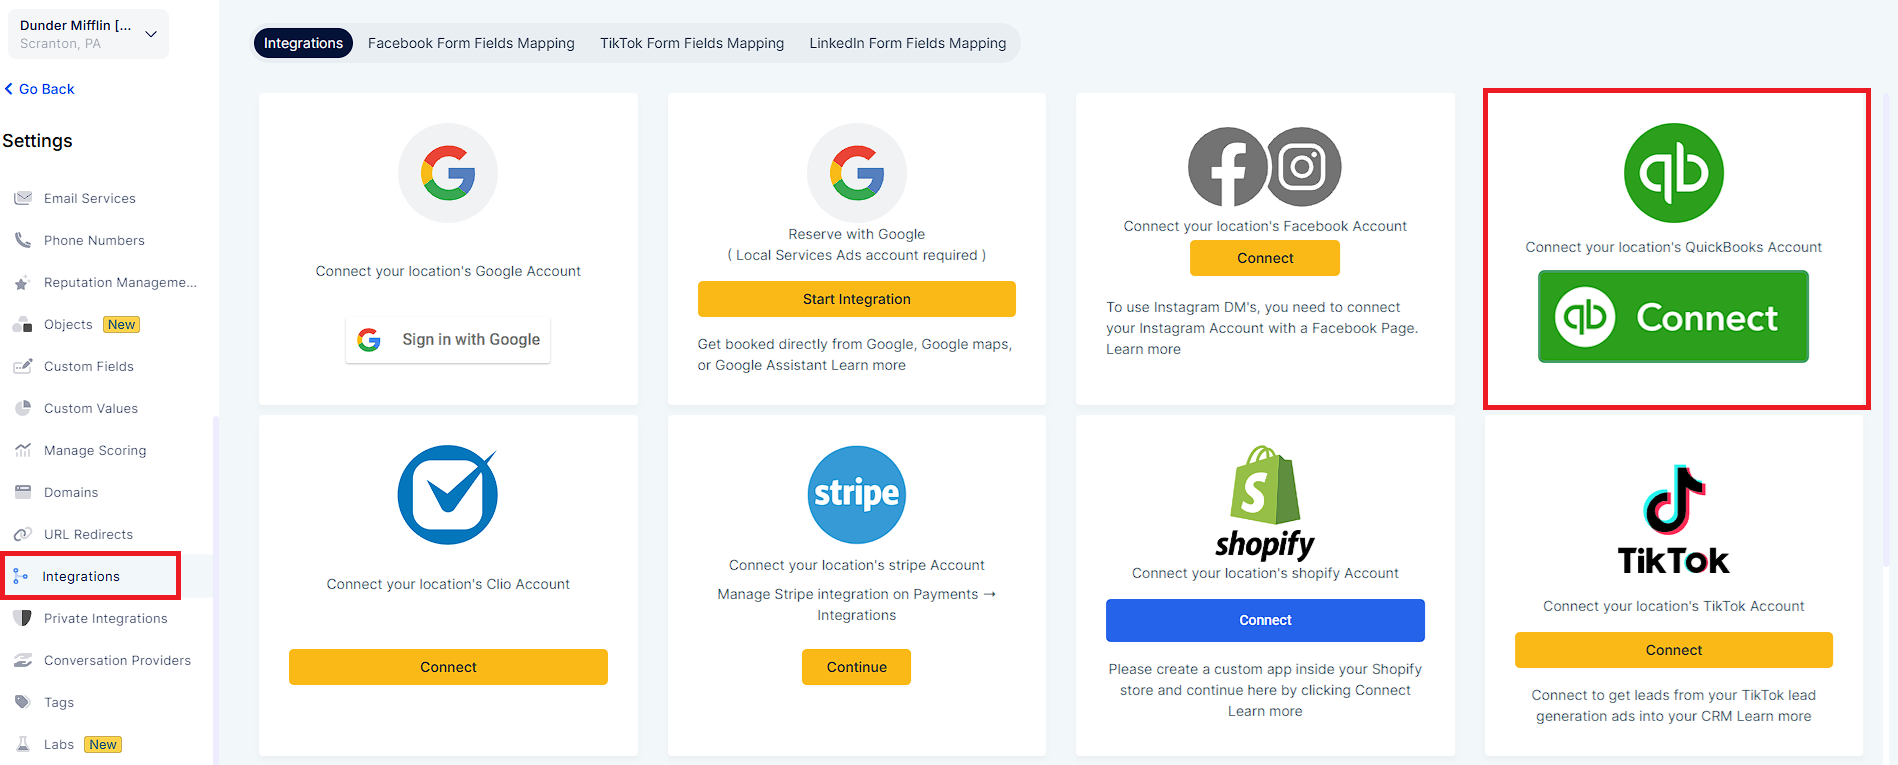
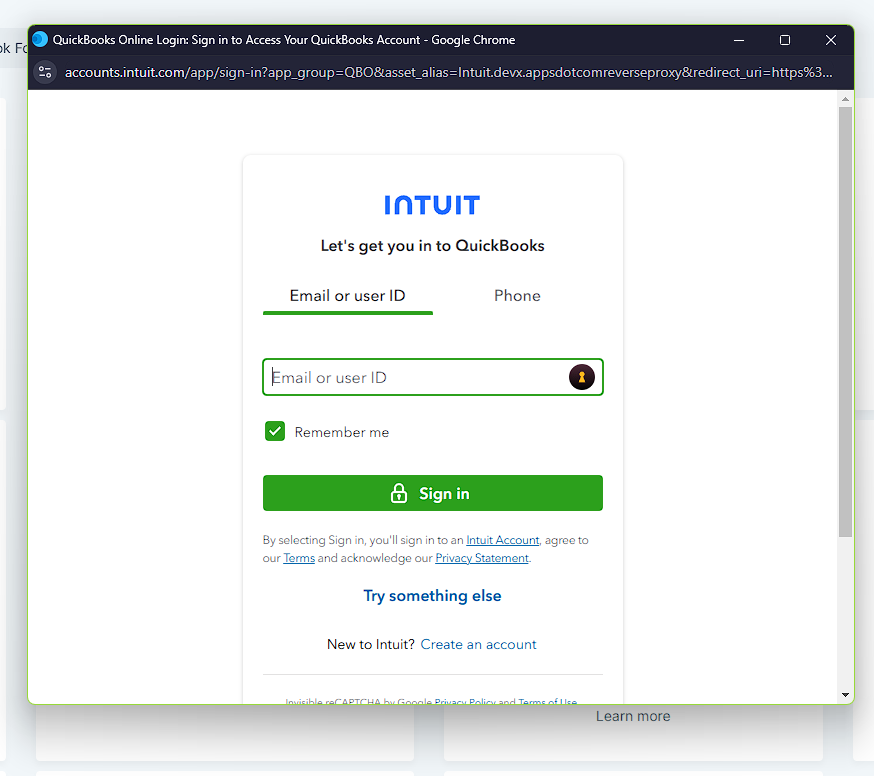
Head into your "Settings" > "Integrations" > Click on the "QB Connect" button > "Login"
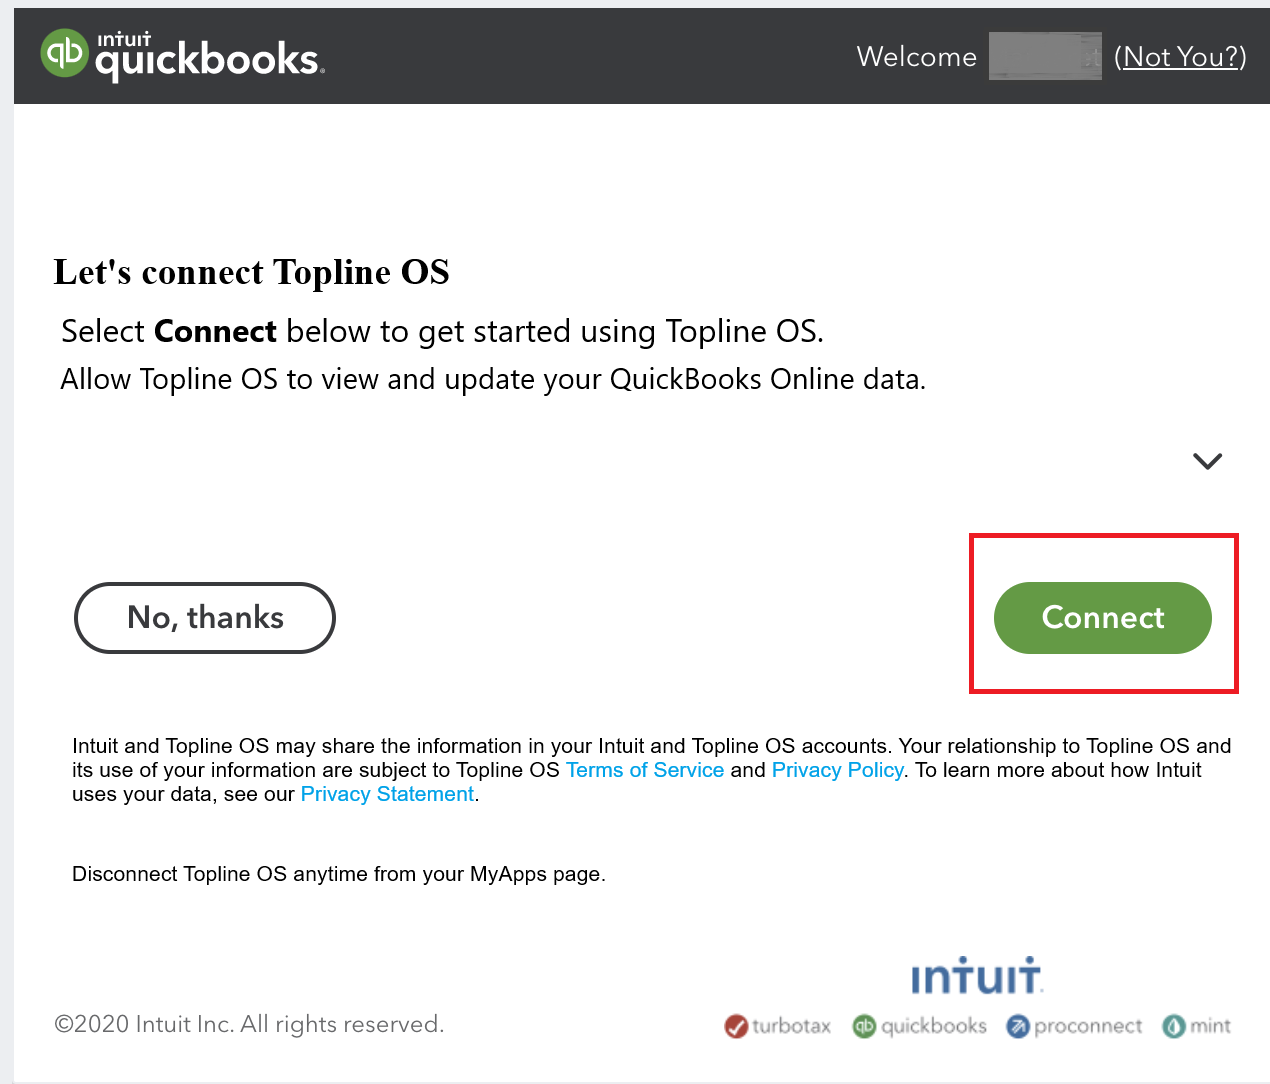
Make sure to "Accept All Permissions" > hit the "Connect" button.
Note:
