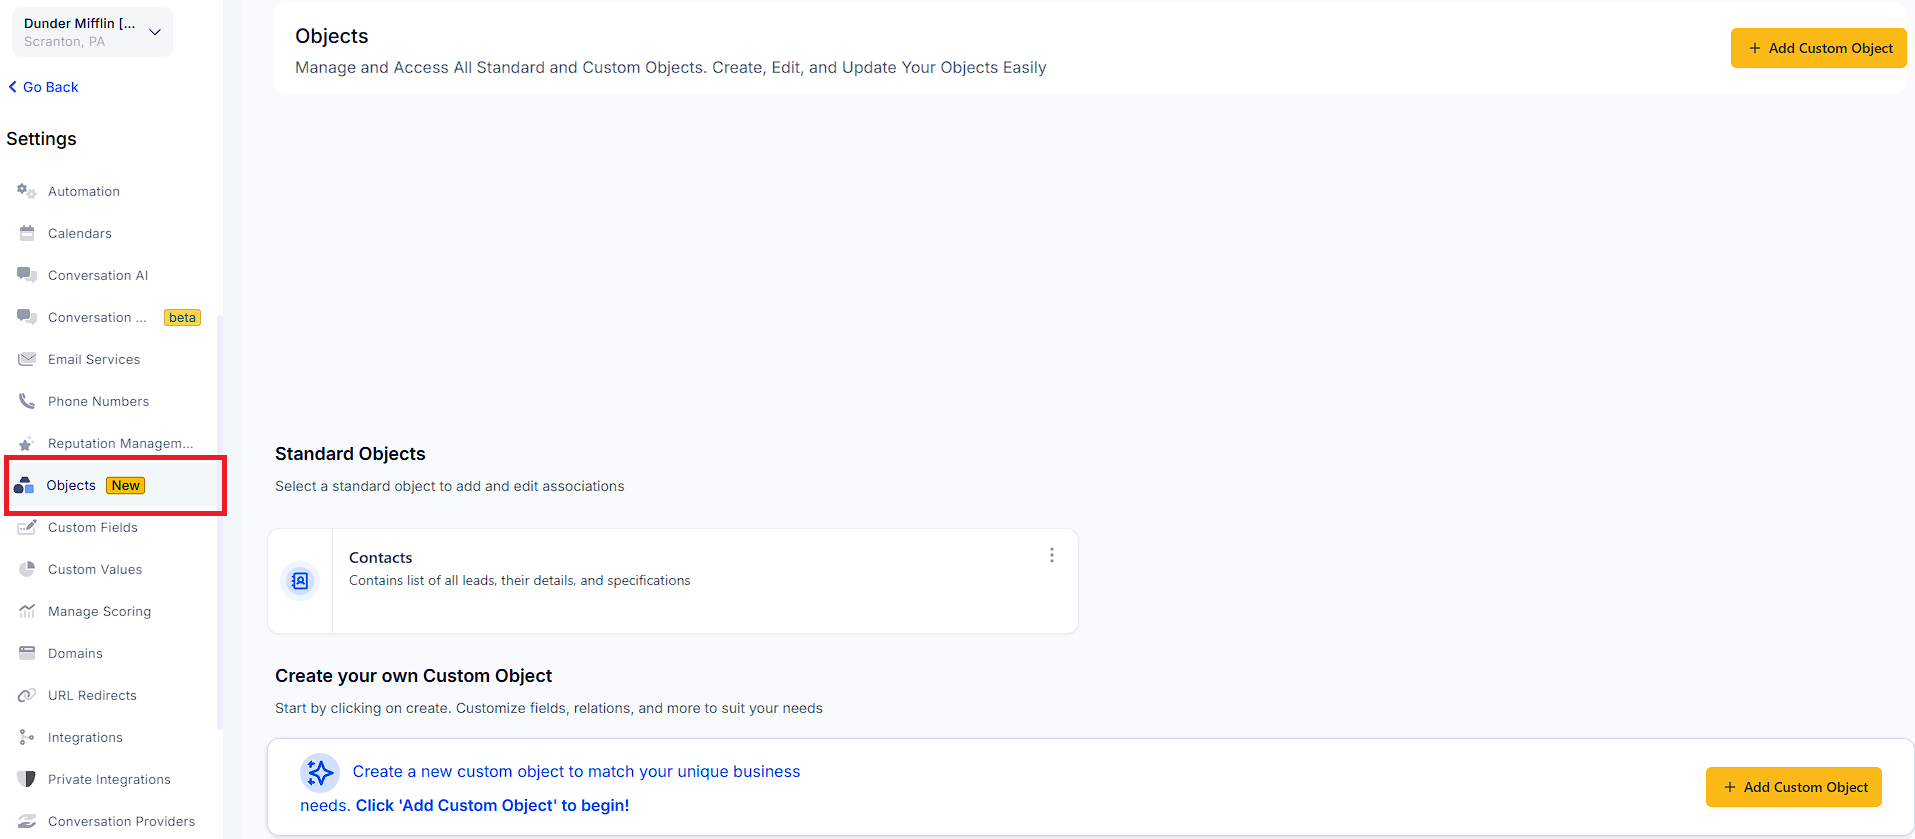
Navigate to the relevant custom object:
In the left-hand navigation panel, select the custom object type (e.g., Pets, Cars, etc.).
Click "Add" to Create a New Record:
On the top right corner of the screen, click on the Add button (e.g., “Add Pet”).
Fill in the Required Fields:
In the form that appears, enter the value for the primary field for that object.
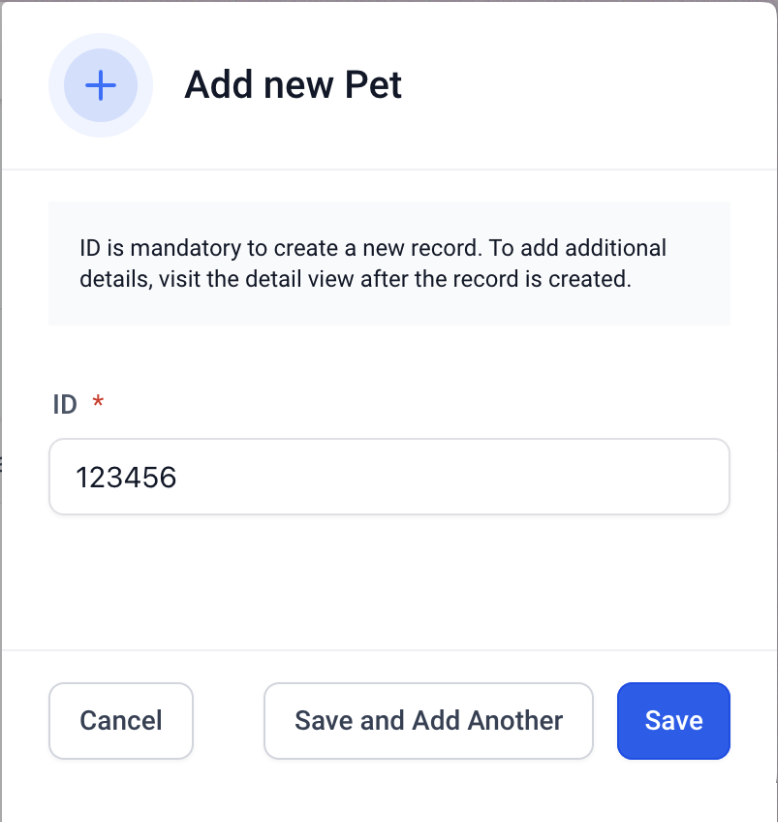
Save the Record:
Once the required information is added, click Save.
Optionally, you can choose Save and Add Another to create additional records without leaving the form.

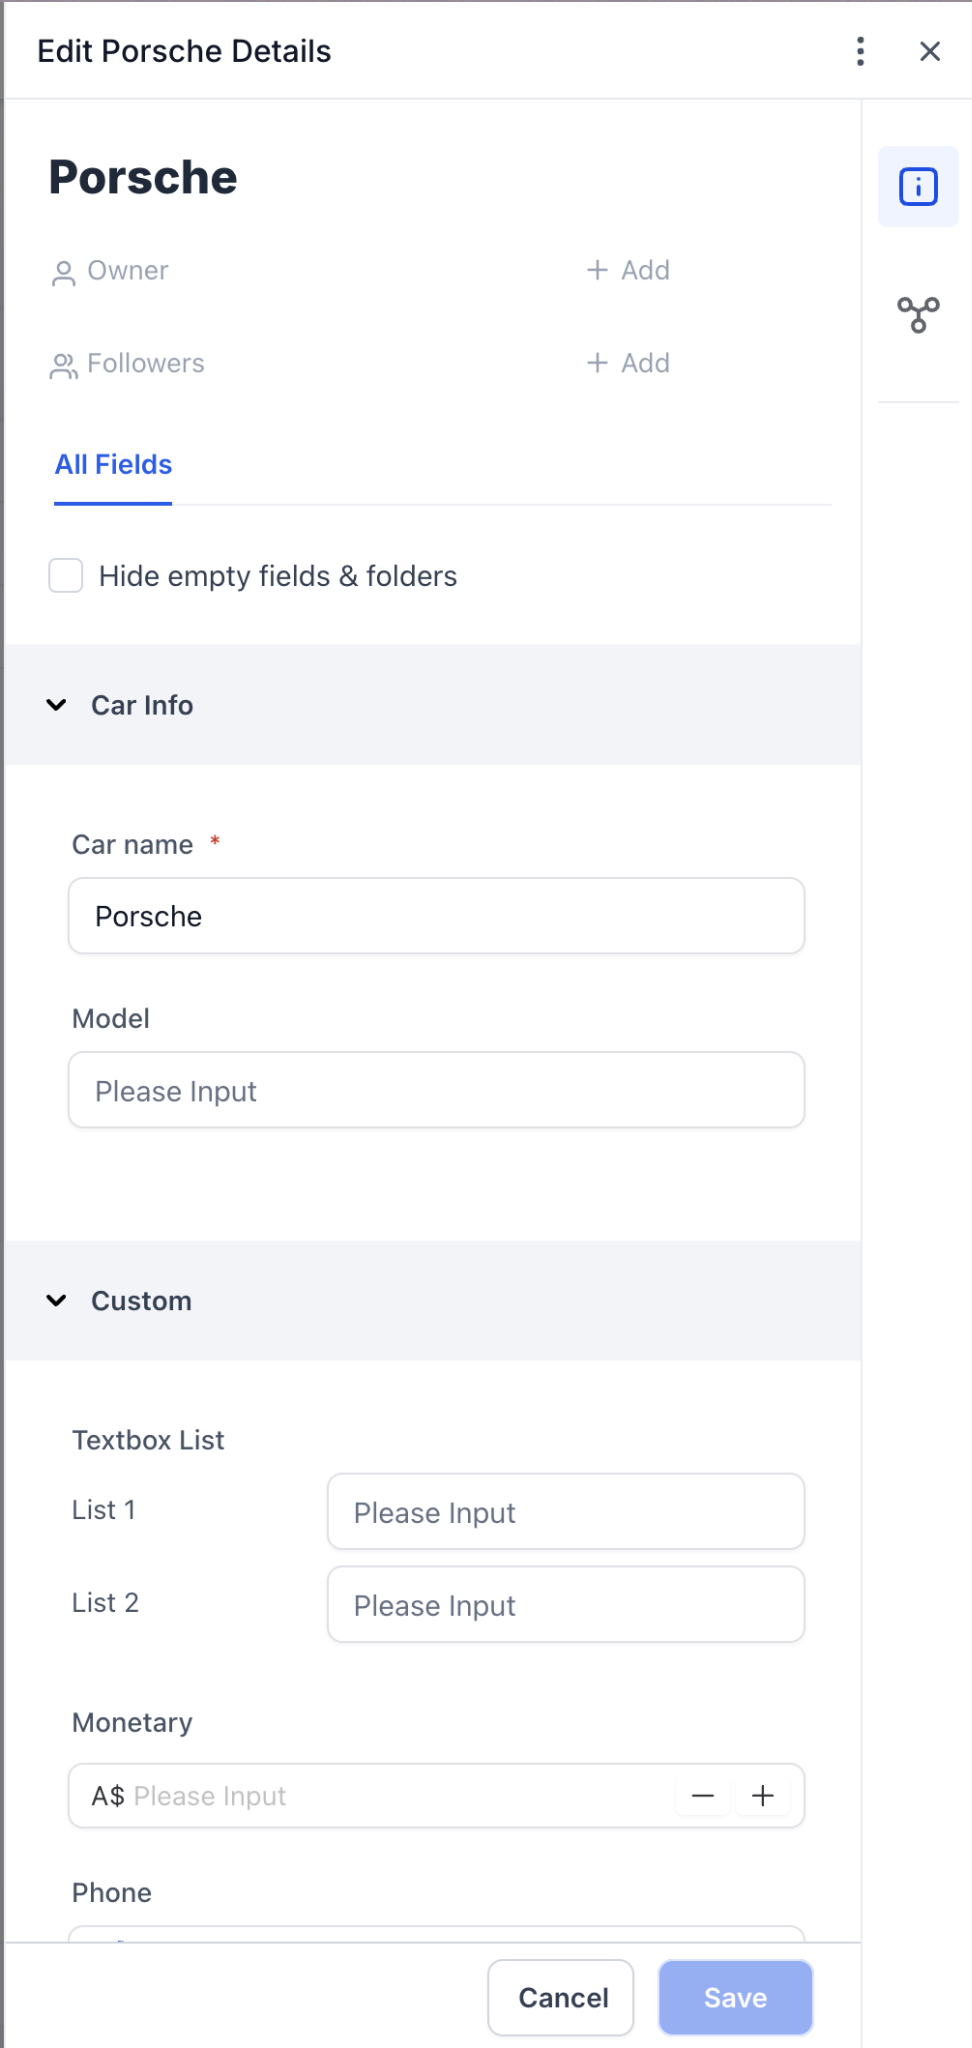
Open the Custom Object Record:
Navigate to the list of custom objects and locate the record you wish to update.
Click on the record name to open its details.
Edit the Required Fields:
Click the Edit button to make changes to the object.
Update fields such as text, numeric values, dropdowns, etc., based on the changes you need to apply.
Save Changes:
After making the necessary updates, click the Save button to apply changes.
Alternatively, click Cancel if you do not wish to save the changes.
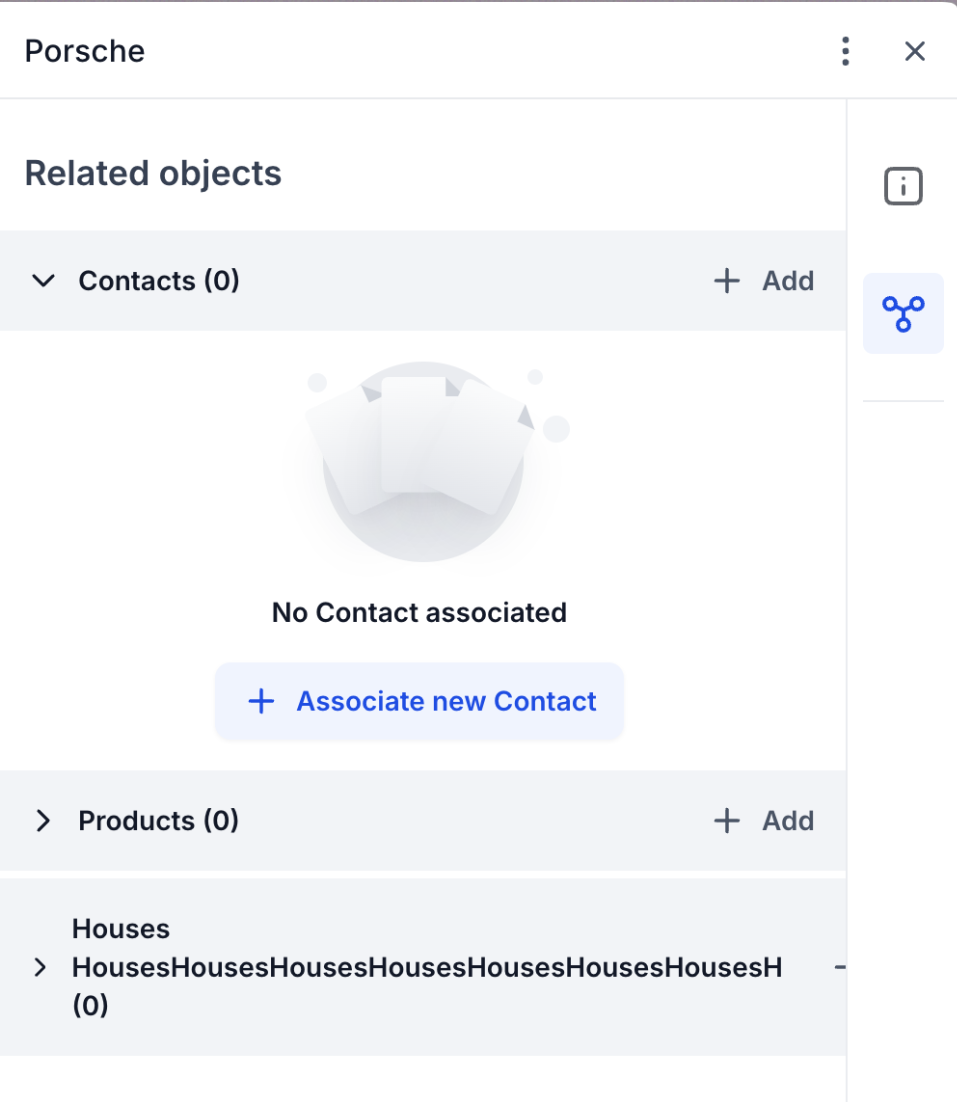
Navigate to the "Related Objects" Section:
Open the object record and locate the Related Objects section.
Click Add next to the object you want to associate (e.g., Contacts, Products).
Associate New Records:
Search for the related record (e.g., a contact) you want to associate and click Associate to link it to the custom object.
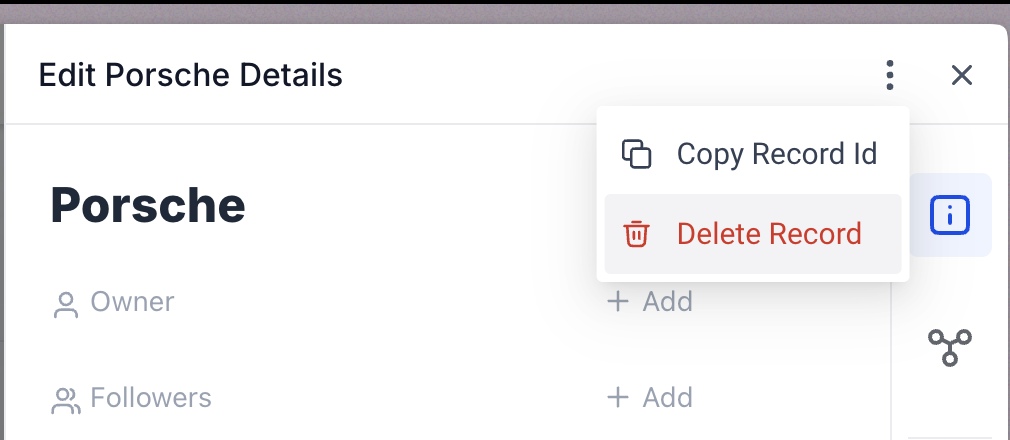
Open the Record:
Navigate to the record you wish to delete and open it.
Click on the Kebab (Three Dots) Menu:
In the record details view, click the kebab menu (three dots) on the top right.
Select "Delete":
From the dropdown, click Delete Record to permanently remove the record.
In the next confirmation modal, confirm the deletion.
