
Once you create a new funnel, you have to add a step. Each step is an actual page. (As an option, you can import pages from Click Funnels as well.)
Within the funnel builder, you can completely customize each step. From adding a calendar or map to choosing fonts and colors, creating pop-ups, and more, you can choose exactly what your funnel steps look like.
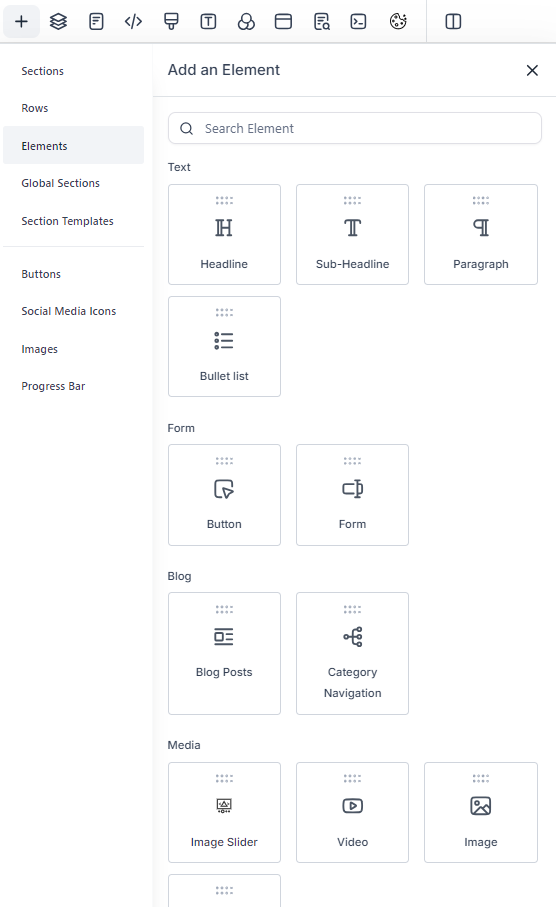
Each page is made up of the following pieces: Sections, Rows, Columns, and Elements. They need to be created in that order. Sections can house multiple rows, rows can house multiple columns and columns can house multiple elements.
Use the drag-and-drop features to add sections, rows, columns, and elements to the builder, and use the edit menu on the right-hand side for each specific piece to customize it as you wish.
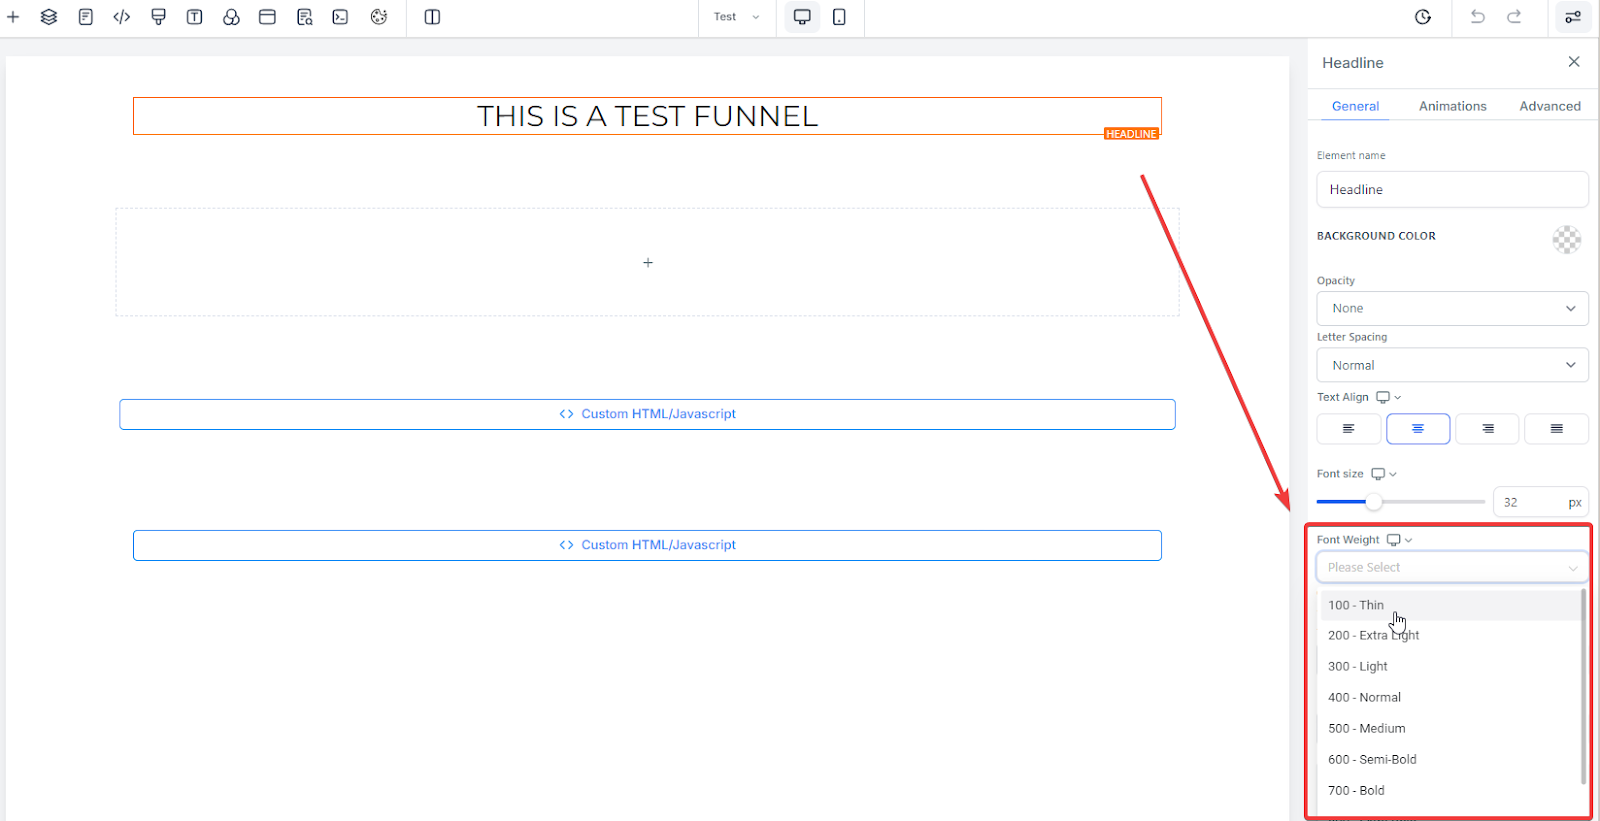
To regulate font weight for various components like text, buttons, and navigation menus in your funnels, navigate to the font weight settings within the builder. Select either the desktop or mobile view, and choose from options like light, medium, or bold to customize the appearance of your text. Ensure any pre-marked bold text is deselected to apply the desired font weight changes.
Within the elements section, add a Blog Post element to any funnel step, enabling seamless integration of blog content with various sorting options. This allows for dynamic content display by filtering recent posts, posts by category, or posts by author, making it easier to engage visitors. To use this feature, simply add the Blog Post element, and select the desired blog and filters.
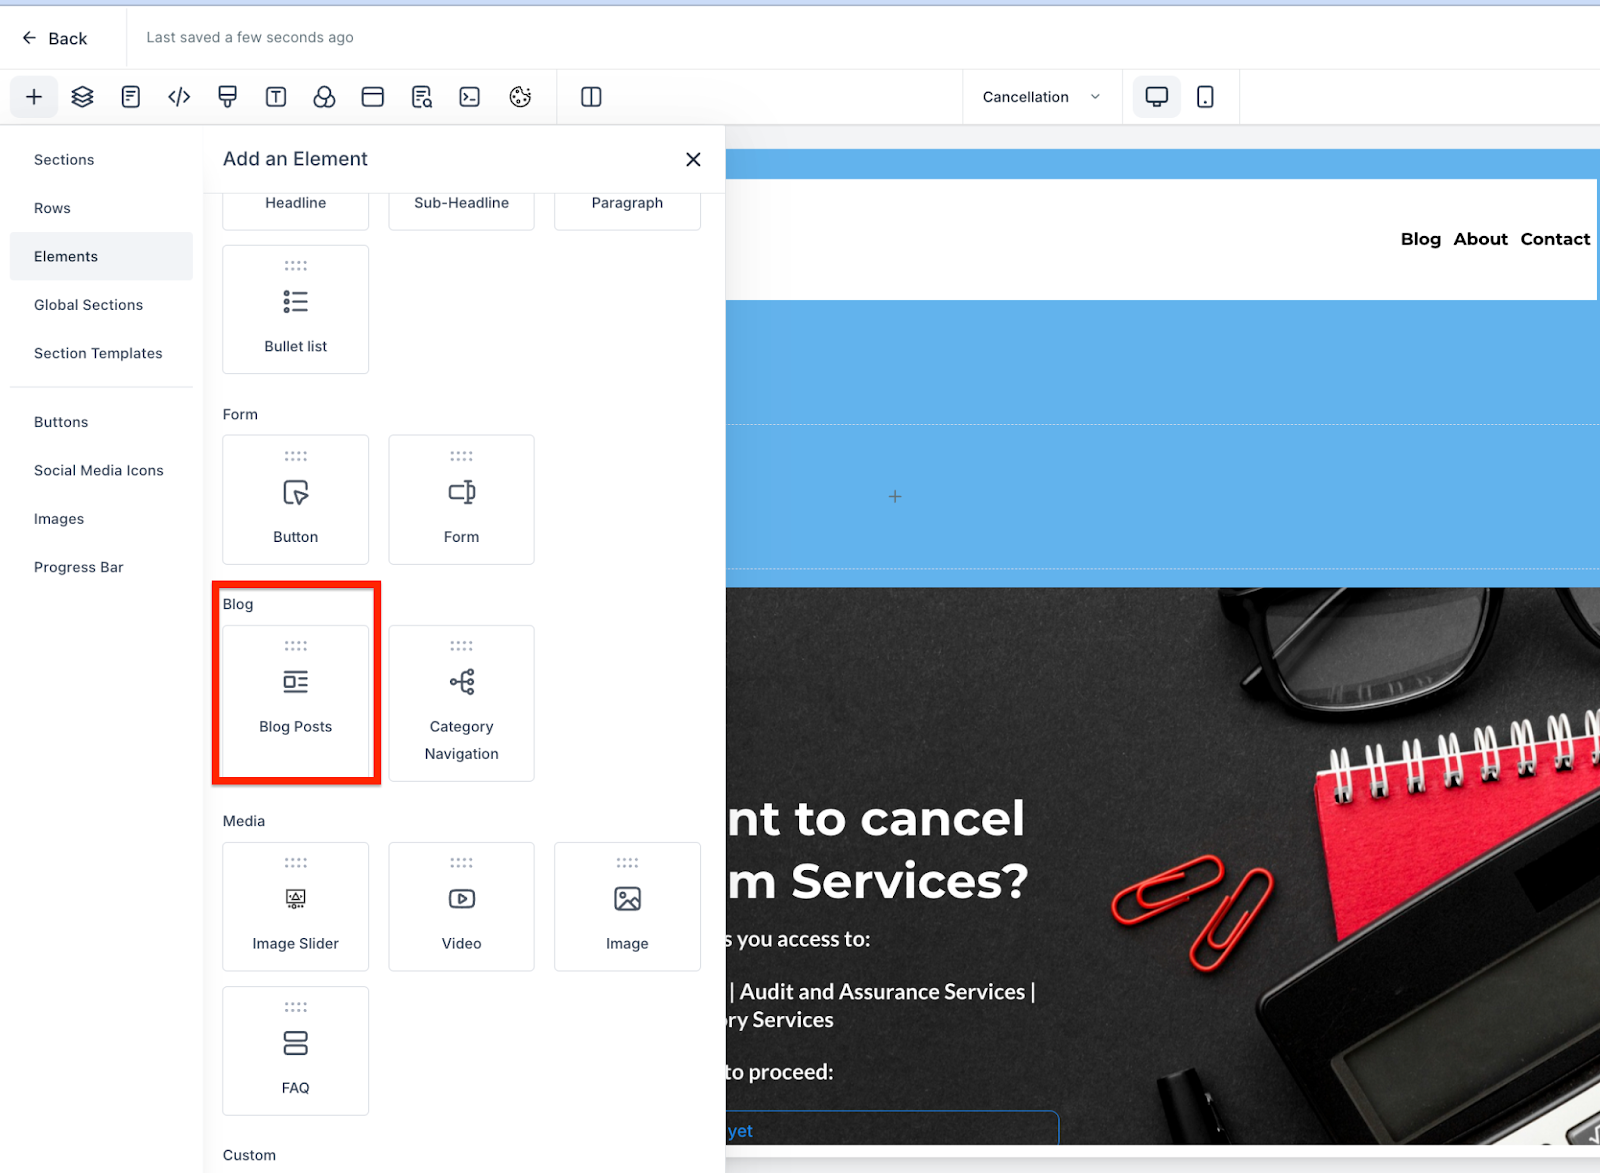
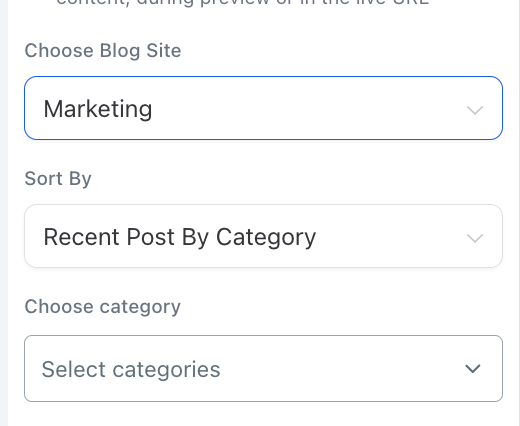
With the blog post element, select the blog name
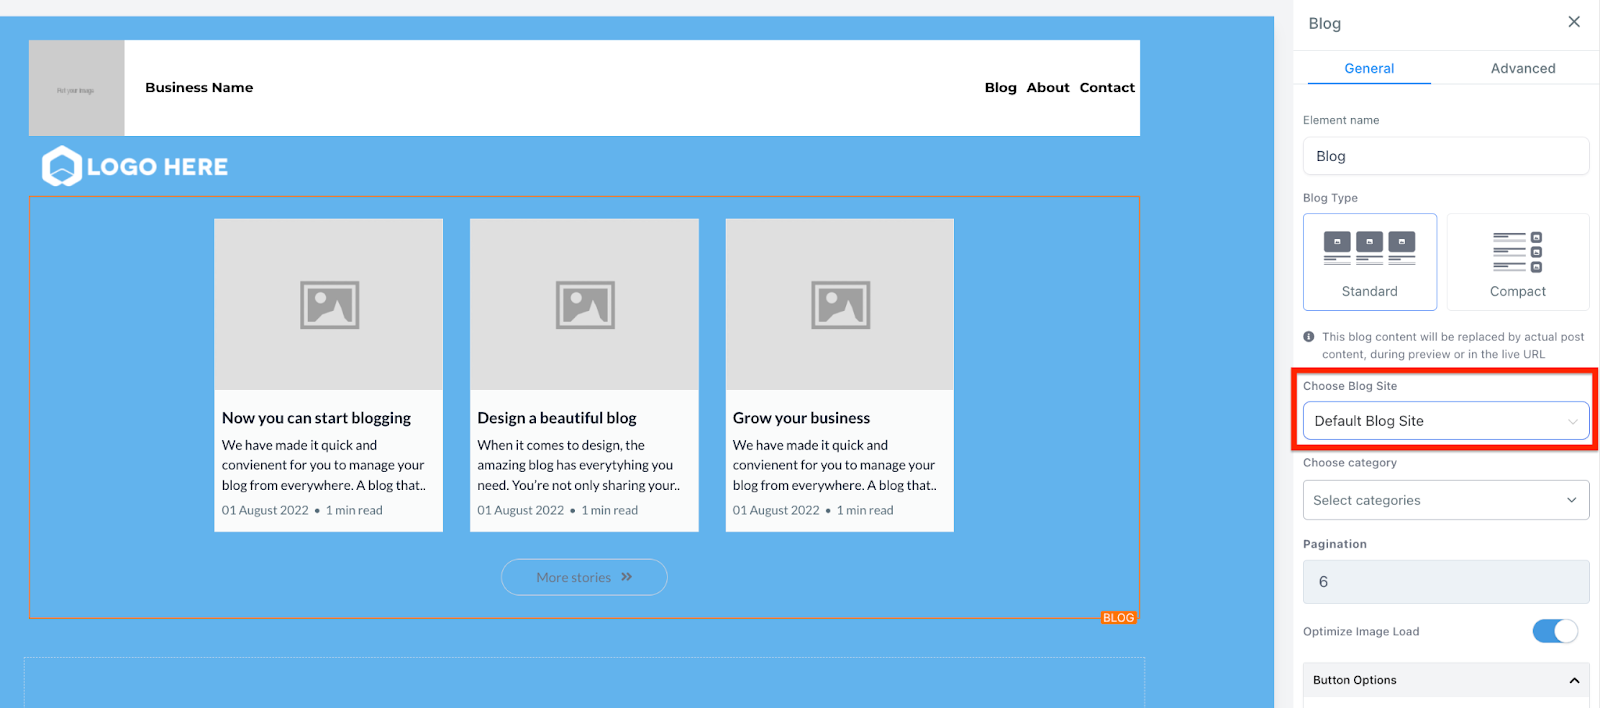
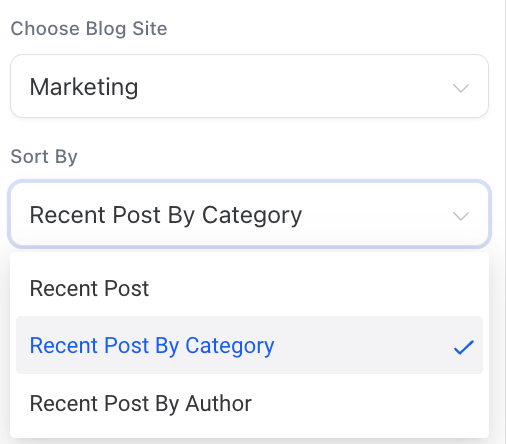
Filter by the blog post - Recent Post, Recent Post by Category and Recent Post by Author and select the category/author.
Note: Filtering will apply on updated date (date when blog post is published)
You can preview the page in its entirety to see what it will look like for your customers.
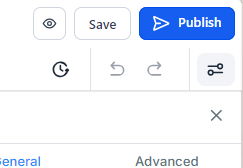
Be sure to save any changes before leaving the builder to confirm the updates you've made.
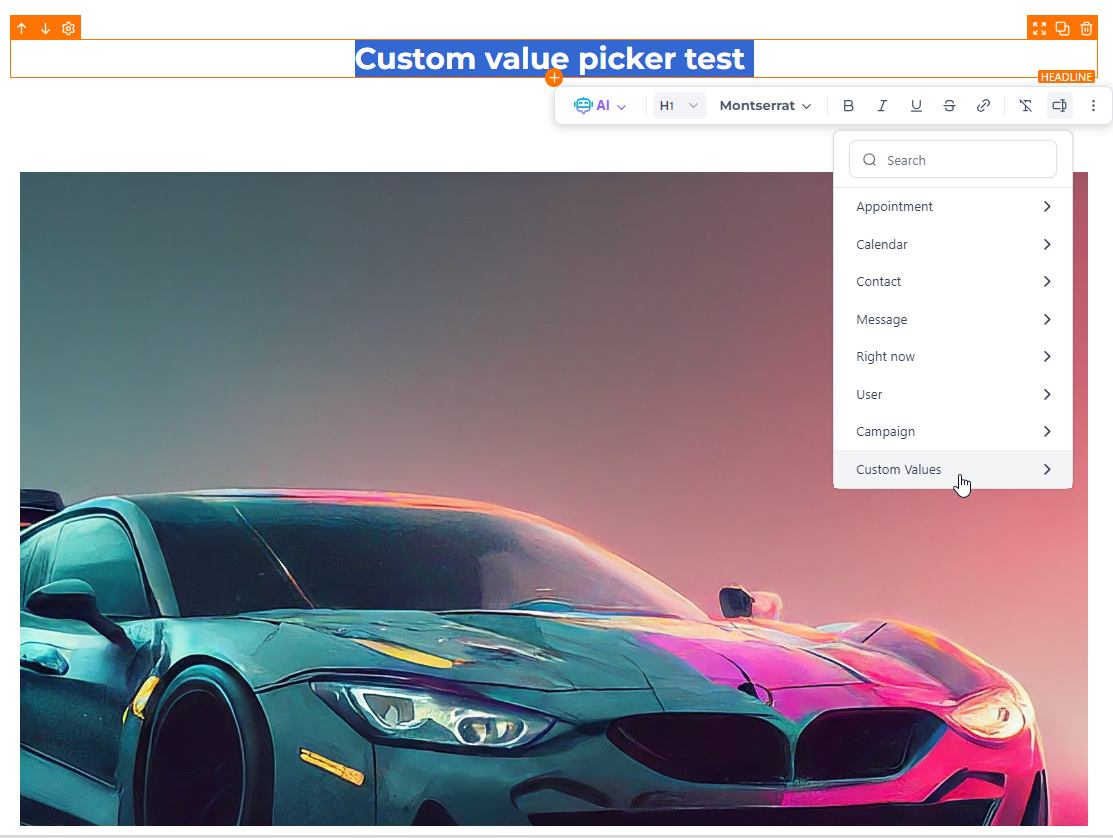
This feature is designed to streamline and accelerate the funnel-building process for users. The Custom Data Option Picker allows easy access and insertion of custom fields and values directly within the funnel page builder. This can be done either through the toolbar or by typing "{" in the text editor, making custom data tasks more efficient.
Benefit: Simplifies the creation process, allowing users to focus on building high-quality funnels quickly.
How to Use: In the funnel page builder, use the toolbar to find the Custom Data Option Picker or type "{" in your text editor to access the picker and insert custom fields/values.
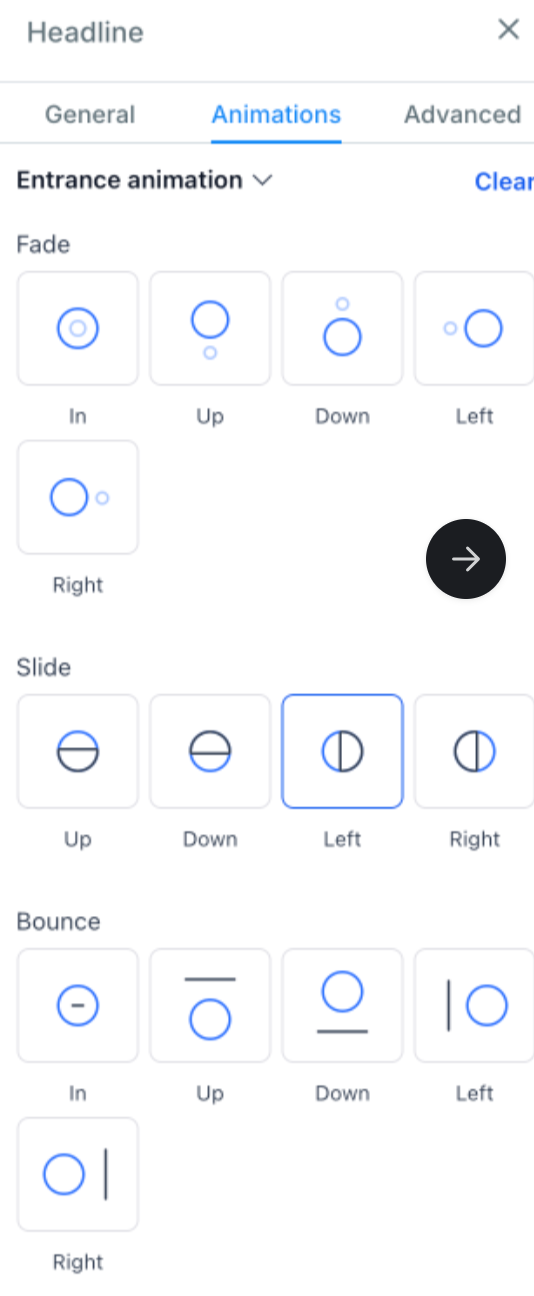
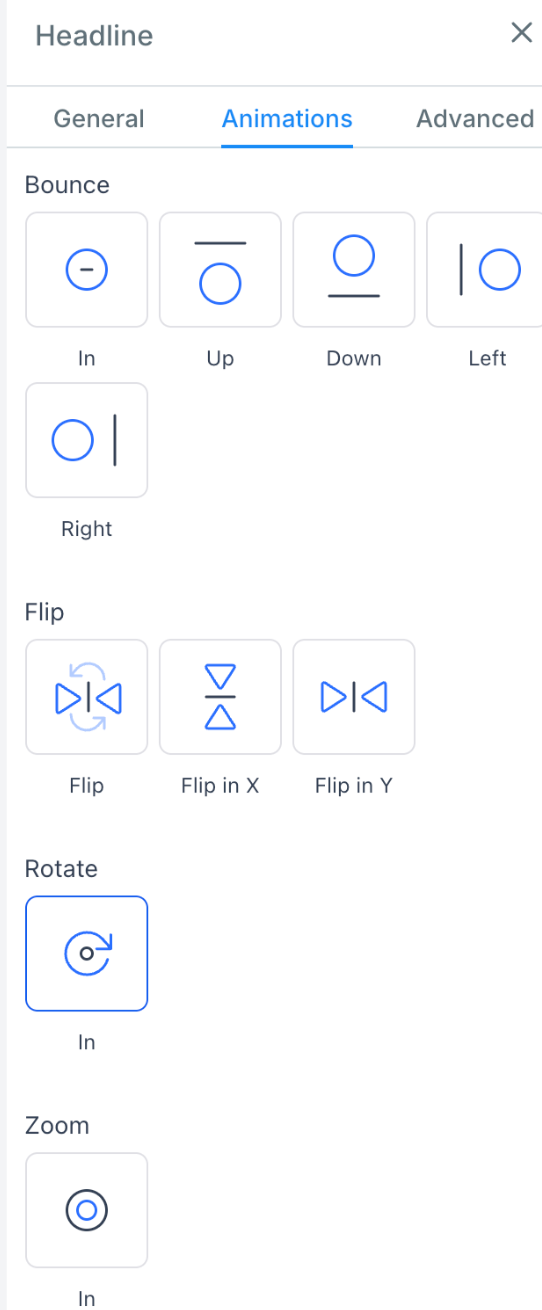
Entrance Animations for Text Elements allows you to add dynamic animations to headings, sub-headings, paragraphs, and bullet lists, making your online content more engaging. This feature helps capture audience attention by triggering animations when text comes into view. To use, navigate to the funnel/website editor, select the text to animate, choose an animation from the new animations tab, and preview the effect directly on the builder page before saving and publishing your changes.
Navigate from page to page within the builder: Use the page icon at the top left to go from page to page.

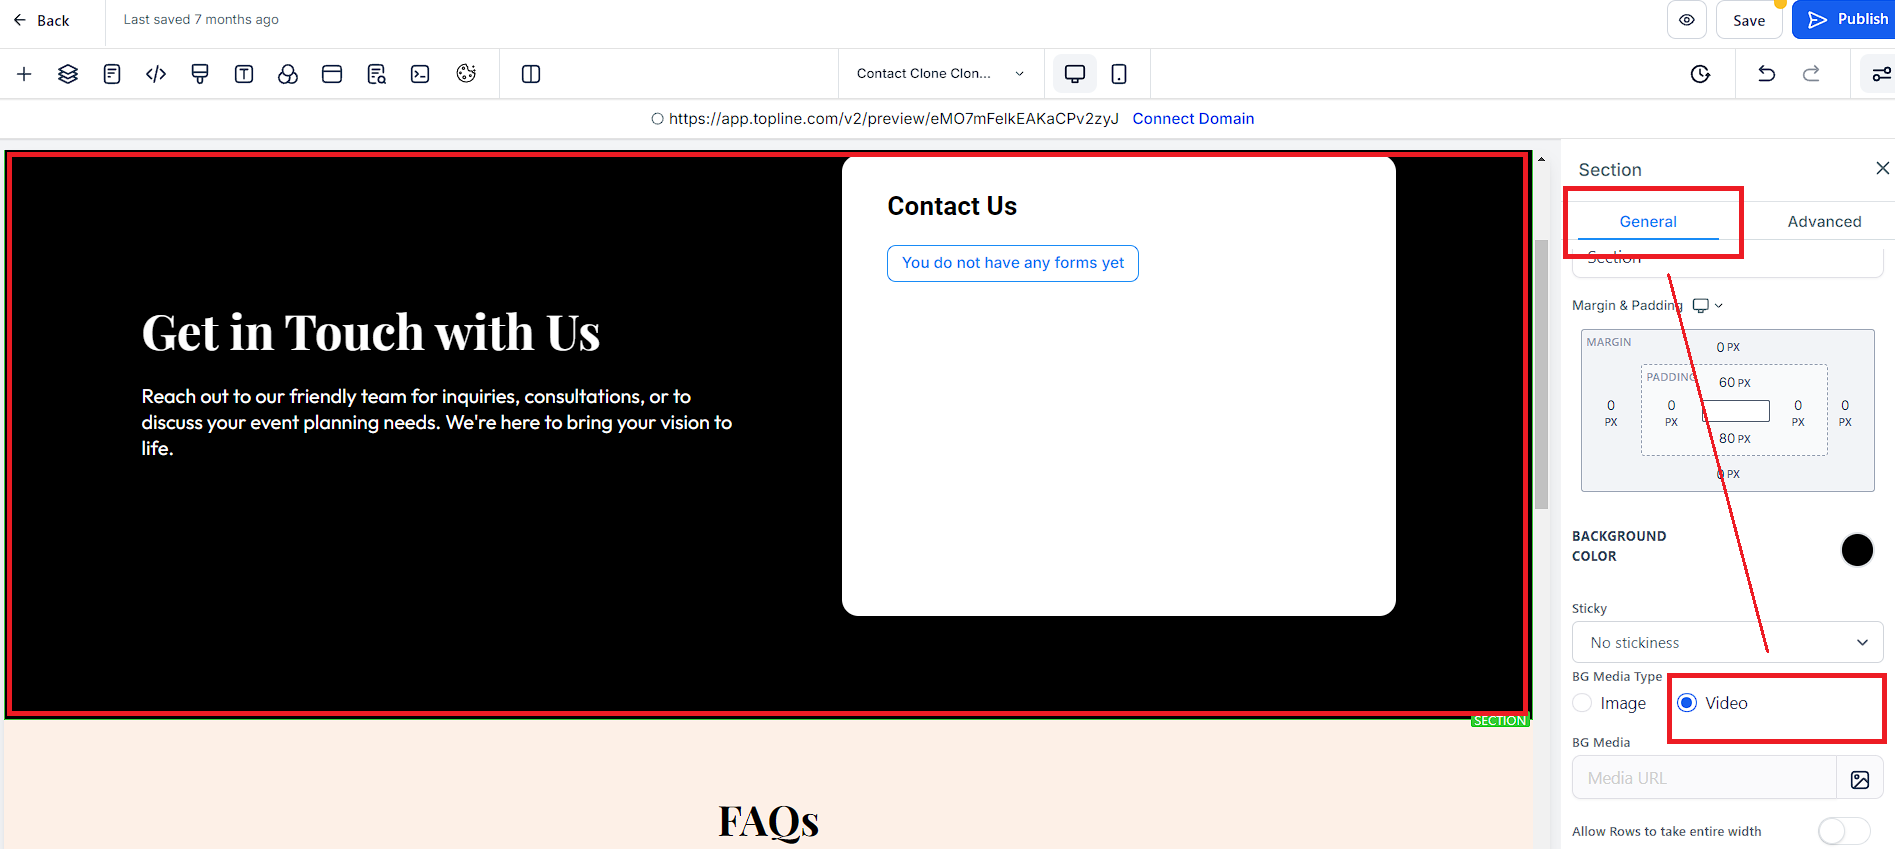
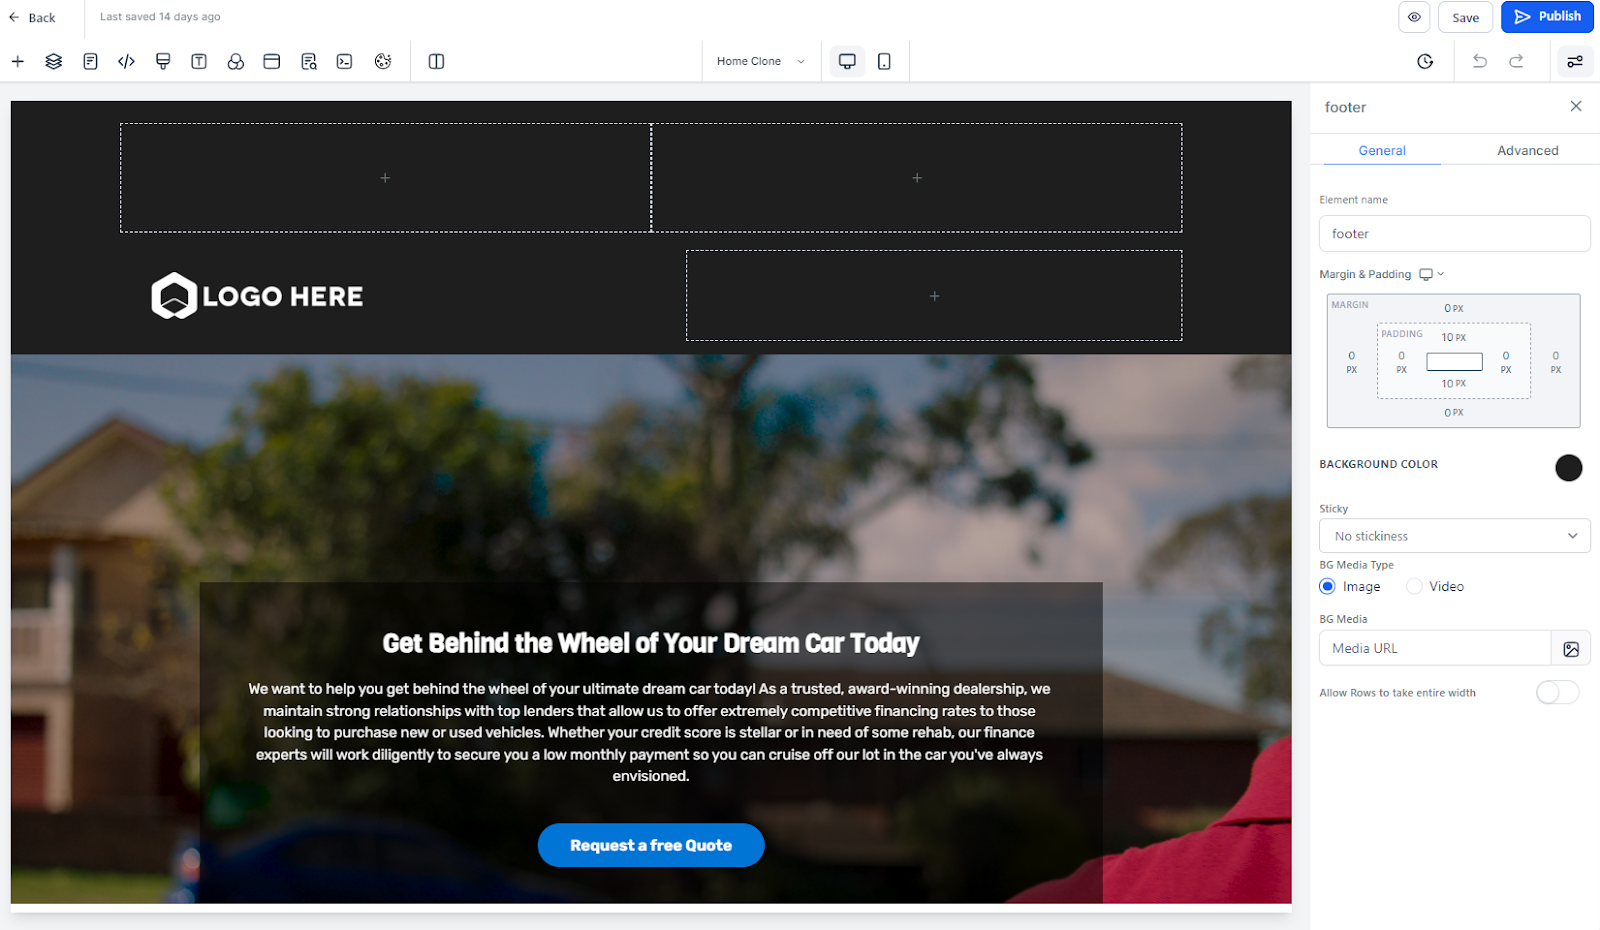
Select the section. On the right hand side in settings, change the BG media type to Video and select the video from media library. Click the Preview icon to see how the page looks in your browser.
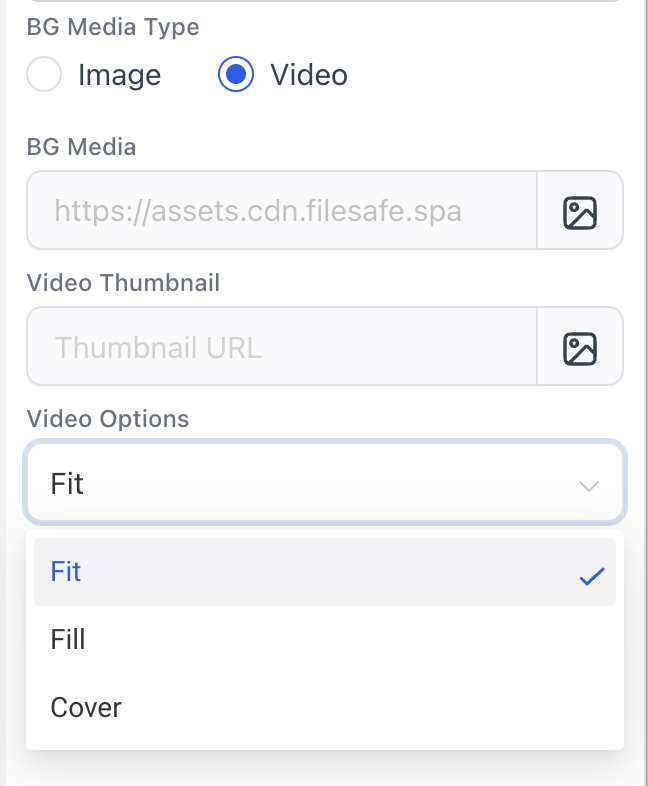
"Fit," "Fill," and "Cover" are options that allow you to control how the video background is displayed within a section, row, or column. These options determine how the video is scaled or cropped to fit the available space. Here's an explanation of each option:
When you choose the "Fit" option for your video background, the video is scaled to fit within the designated area while maintaining its aspect ratio. This means that the entire video will be visible, but there may be empty space (letterboxing) around the video if the aspect ratio of the video doesn't match the aspect ratio of the container. This option is ideal when you want the entire video to be visible, and you don't want any part of it to be cropped.
"Fill" is an option where the video is scaled to fill the entire designated area, even if it means cropping or stretching the video to do so. This means that the video will cover the entire background area, but it may not maintain its original aspect ratio. Some parts of the video may be cropped out to ensure it covers the entire background space. This option is useful when you want to ensure that the background is completely covered, even if it results in some parts of the video being cut off.
The "Cover" option is a balance between "Fit" and "Fill." In this case, the video is scaled to cover the entire designated area while maintaining its aspect ratio. The video will completely cover the background space, but it will not be stretched or cropped. This ensures that the entire video is visible, and there is no distortion, but there may be some empty space around the video if the aspect ratio doesn't perfectly match the container's aspect ratio. "Cover" is a good choice when you want to maximize the use of the background space without distorting the video.
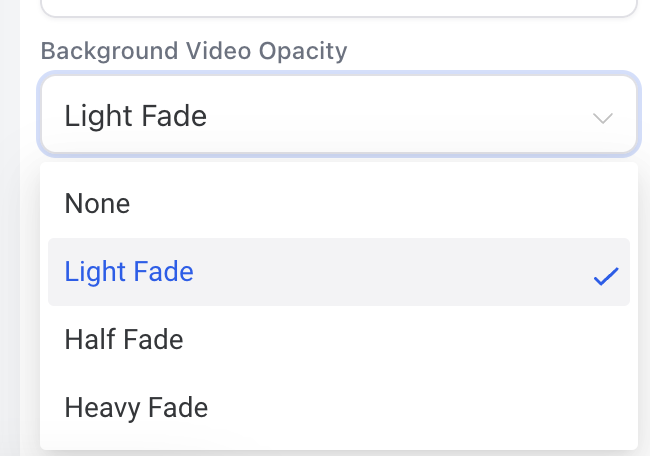
When "None" is selected or applied, it means there is no background opacity or transparency. The background is fully opaque, completely blocking any content or elements behind it. This option is useful when you want the background to be solid and fully visible, without any elements behind it showing through.
"Light Fade" introduces a subtle level of transparency to the background. It makes the background slightly see-through, allowing the content or elements behind it to show through, though the background remains largely visible. This effect is often used to create a delicate, soft, or understated background that complements the content without overpowering it.
"Half Fade" implies that the background is partially transparent, with a 50% opacity level. This means that the content or elements behind the background are clearly visible but still somewhat obscured by the background. "Half Fade" can be used to strike a balance between a prominent background and the content, offering a moderate level of visual separation.
"Heavy Fade" involves a significant level of transparency, with the background being almost see-through. The content or elements behind the background are prominently visible, and the background serves as a subtle backdrop rather than a dominant feature. This option is often chosen when you want to de-emphasize the background and prioritize the content or elements it overlays.
When the video loop toggle is "on," the video in the background plays continuously, automatically restarting when it reaches the end. This provides a seamless and engaging experience.
When the video loop toggle is "off," the video plays once and stops at the end of its playback. This is suitable for non-repeating video content or brief introductions.
Using the Typography tab allows you to ensure that all fonts are consistent throughout the funnel/website pages. When customizing the fonts, you can choose the specific color for text, links, and more.
Navigate to the “Settings” button at the top of the builder. Click into Typography.
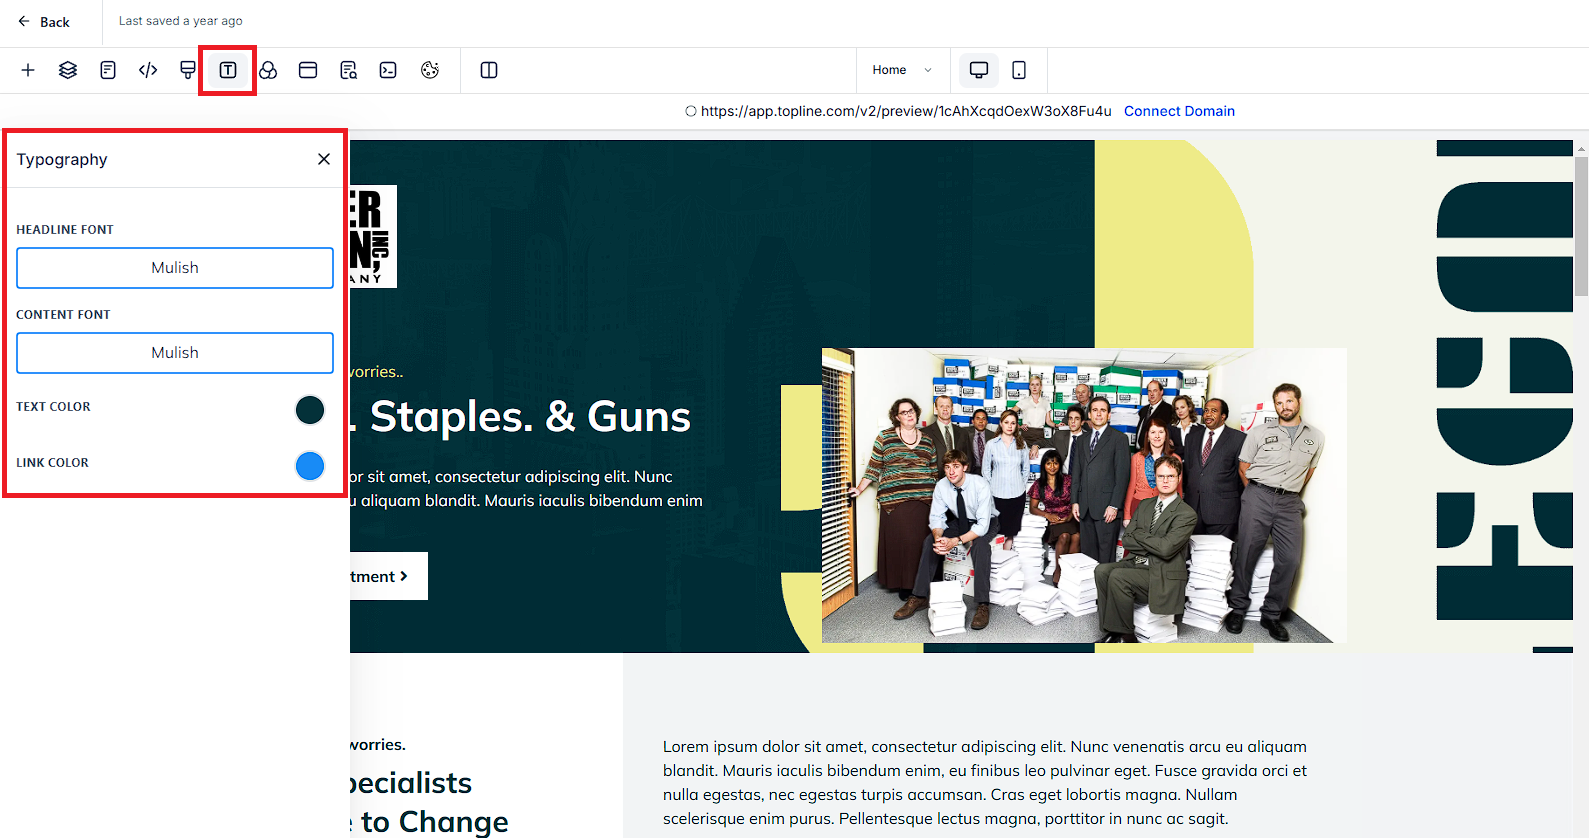
Choose the native Headline and Content fonts that will be used throughout the funnel.

