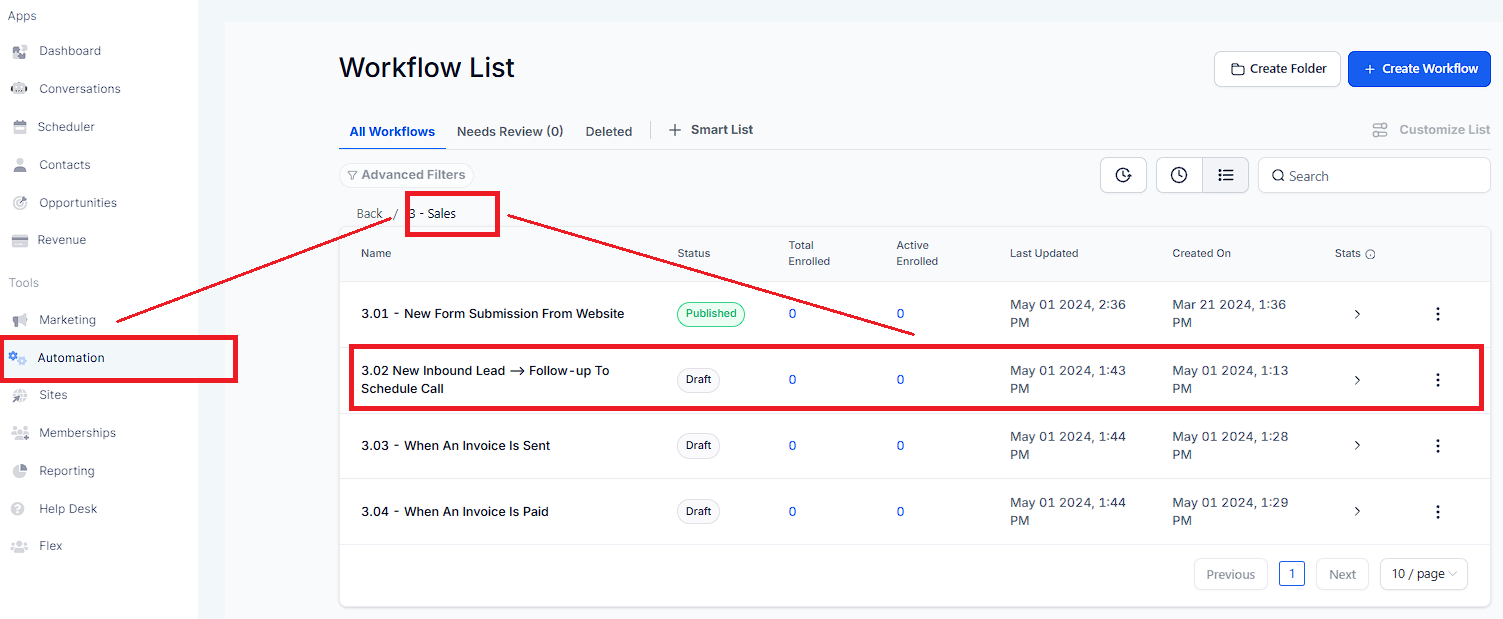
This workflow streamlines the process of managing new leads, ensuring that no potential client slips through the cracks. By automating the follow-up to schedule a call, users can efficiently prioritize their time and focus on building relationships, ultimately increasing conversion rates.
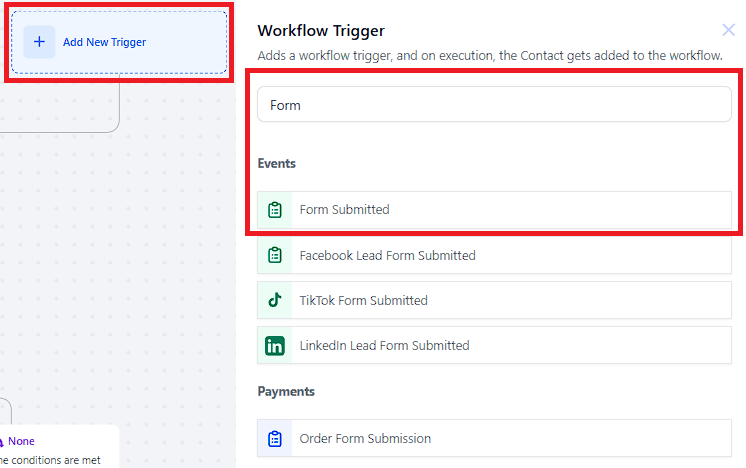
To add a trigger, click " + "Add New Trigger" and type "Form" or search the workflow "Form Submitted". In this case, the trigger is set to activate when a form is submitted.
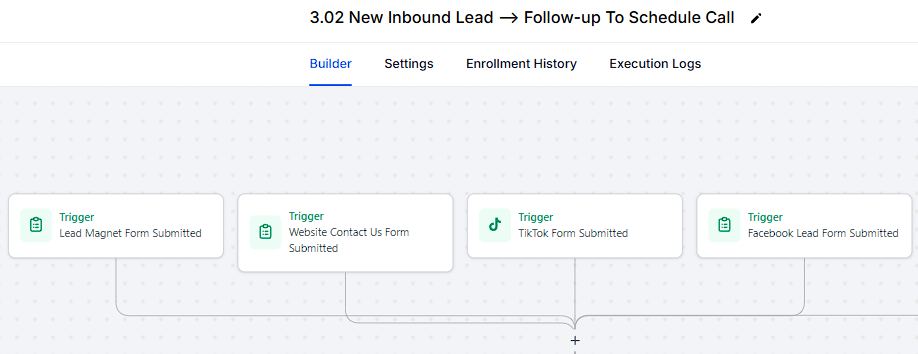
Lead Magnet Form Submitted
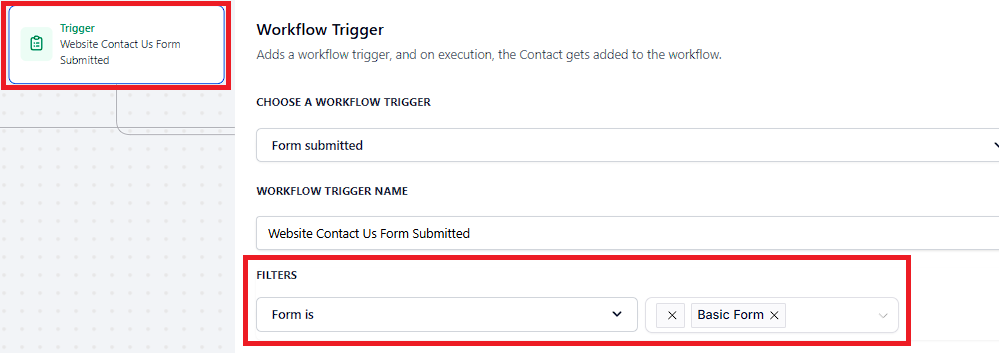
Website Contact Us Form Submitted
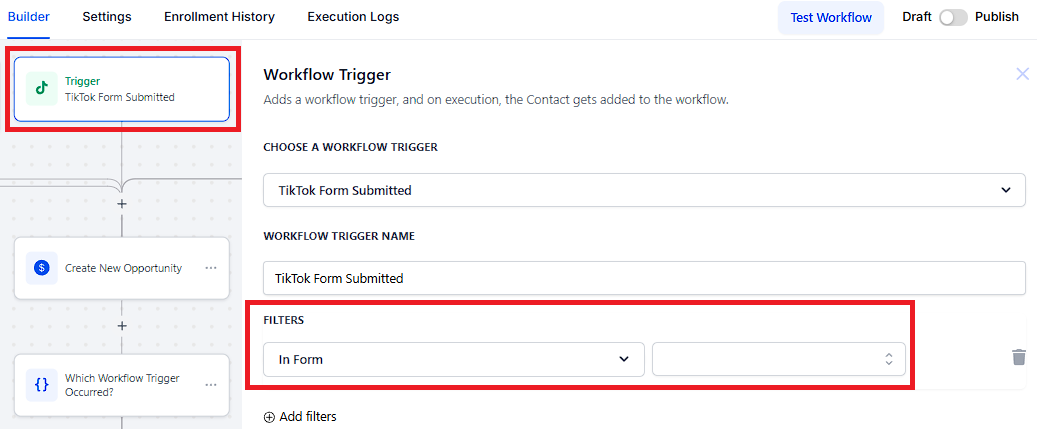
TikTok Form Submitted
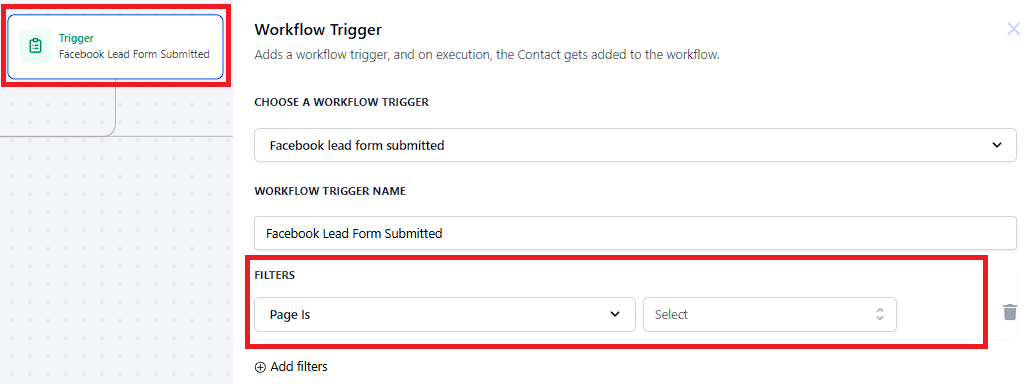
Facebook Lead Form Submitted
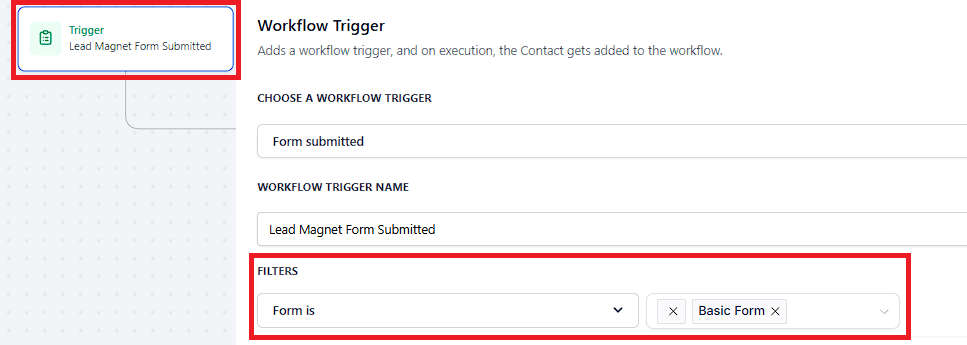
If the trigger is "Basic Form" submitted.
If the trigger is "Basic Form" submitted from the website.
If the trigger is "TikTok Form Submitted".
Example
You want to create a workflow that sends a thank-you email to users after they submit a feedback form on TikTok.
Workflow Trigger Name: "TikTok Feedback Thank You"
Filters:
In Form: "Basic Form" (Only submissions from this form will trigger the workflow)
Workflow Steps:
Trigger: TikTok Form Submitted (as configured above)
Action: Send Email - Thank the user for their feedback.
Action: Update Contact - Tag the contact as "Feedback Provided" to keep track of users who have submitted feedback.
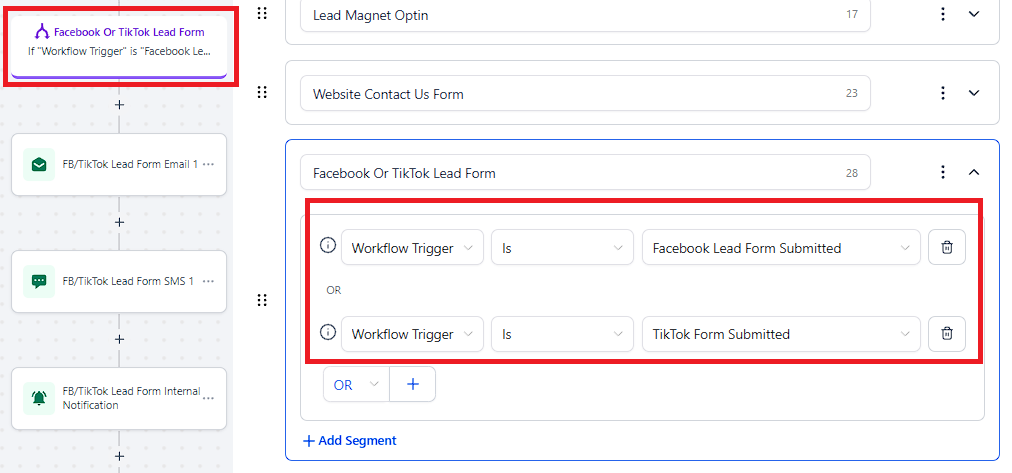
If the trigger is "Facebook Lead Form Submitted".
Example
Let’s say you are running a Facebook campaign to promote a new product, and you want to automatically send a welcome email to every person who submits the lead form.
Choose a Workflow Trigger:
Trigger: Facebook Lead Form Submitted
Workflow Trigger Name:
Name: New Product Lead Form Submission
Filters (Optional):
Filter Type: In Form
Form Name: [Select the specific Facebook Lead Form associated with the new product campaign]
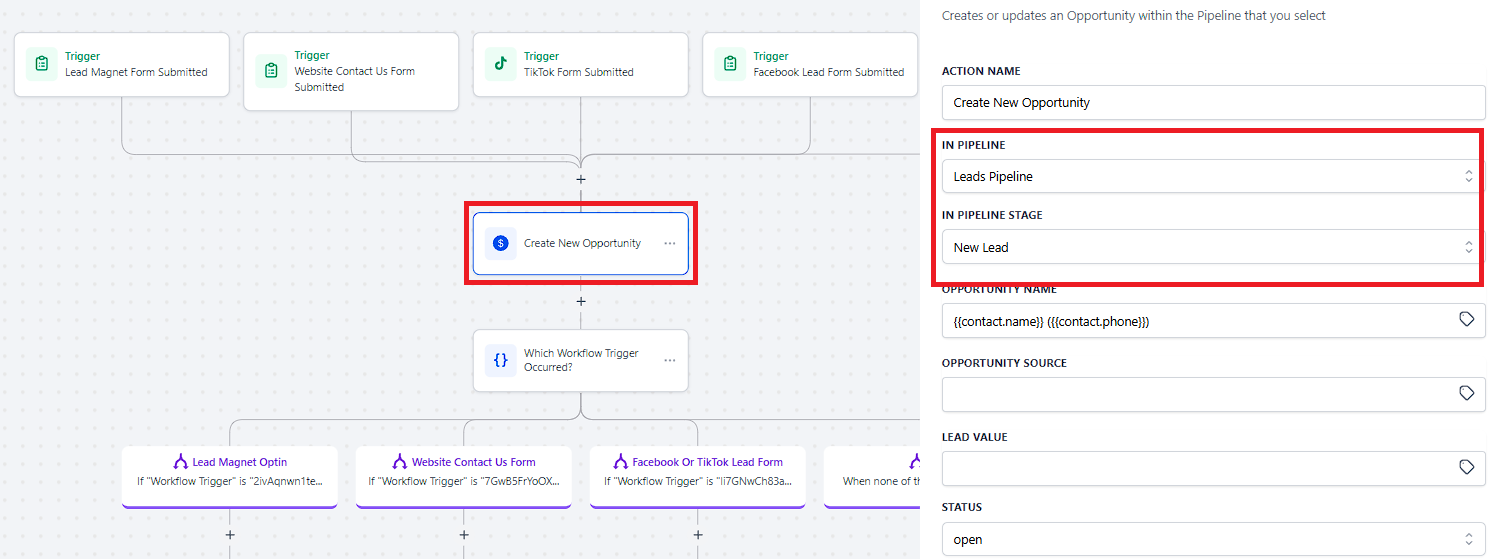
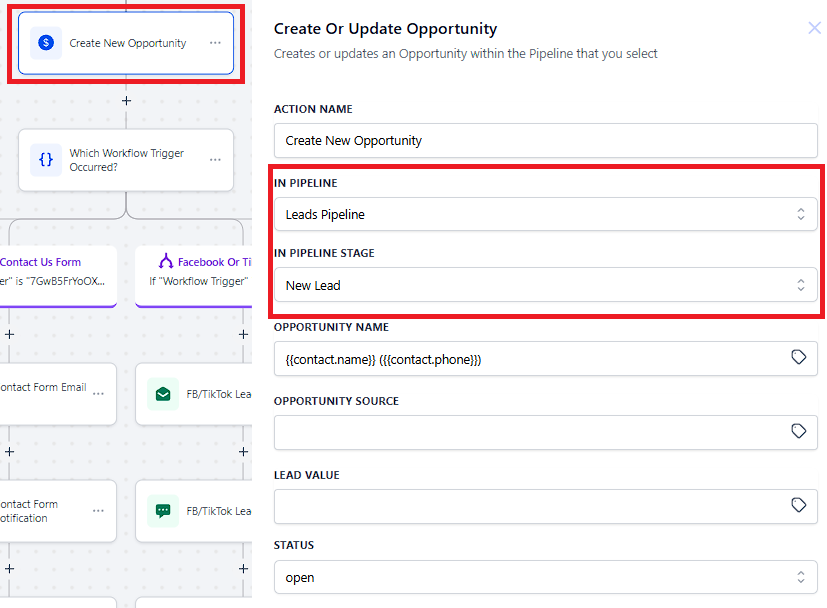
Click the "+" icon and select the action or type Create or Update Opportunity. This action creates or updates an Opportunity within the Pipeline that you select. The In Pipeline and Pipeline Stage is changed to Leads Pipeline and New Lead in this action.
Click the "+" icon and select the action or type If/Else. The "If/Else Condition" action in your automation workflow allows you to fork the contact's journey based on specific conditions.
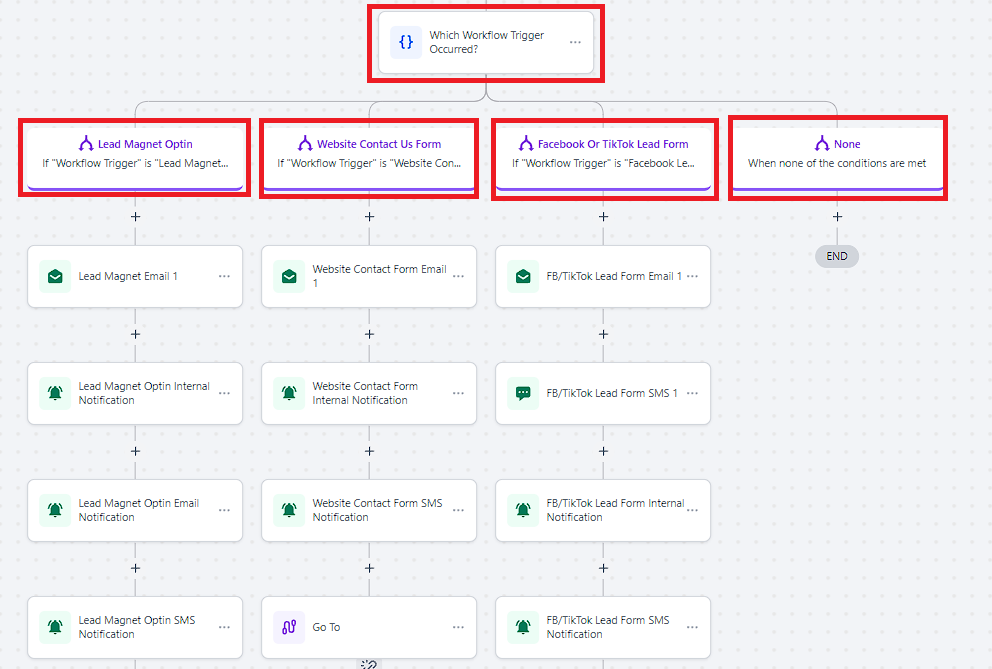
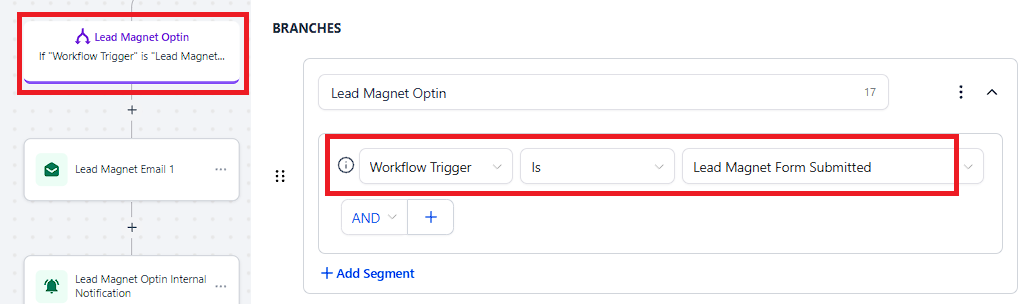
If the condition is "Lead Magnet Form Submitted".
Create or Update Opportunity
Click the "+" icon and select the action or type Create or Update. The In Pipeline and Pipeline Stage will be changed to "Lead Pipeline" and "New Lead".
Email Confirmation
Click the "+" icon and select the action or type Email. The "Email" action will be activated.

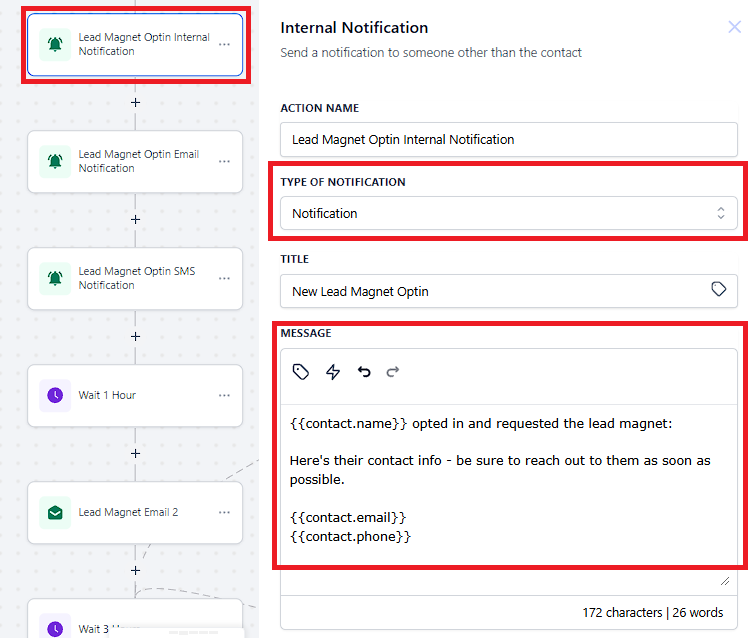
Internal Notification
Click the "+" icon and select the action or type Internal Notification. This will send a notification to all users that will appear on the notification icon and redirect user to Contact page.
Internal Email Notification
Click the "+" icon and select the action or type Internal Notification. This will send an email notification to all users about lead contact details.

Wait
To add this action, click the "+" icon and select or type Wait. This holds a Contact for 1 hour before proceeding to the next action.

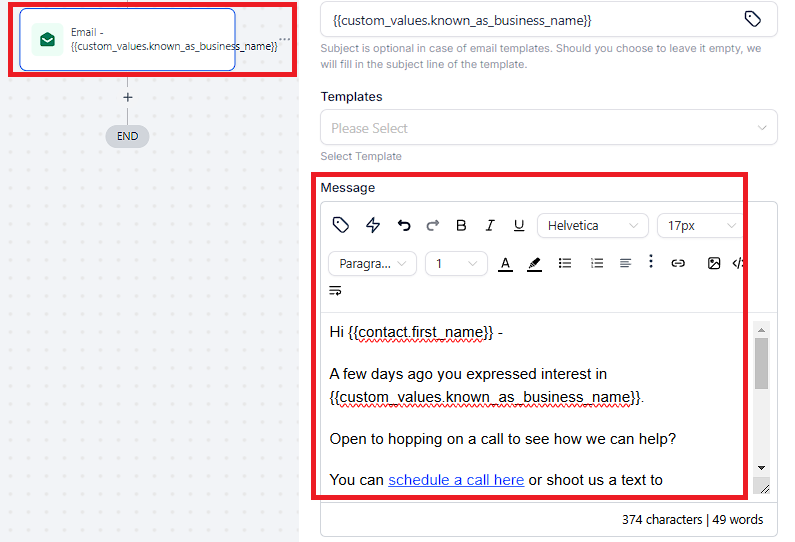
Send Email
To add this action, click the "+" icon and select or type Email. This action will send a Lead Magnet Email 2 to gather contact details and provide options to schedule an appointment.
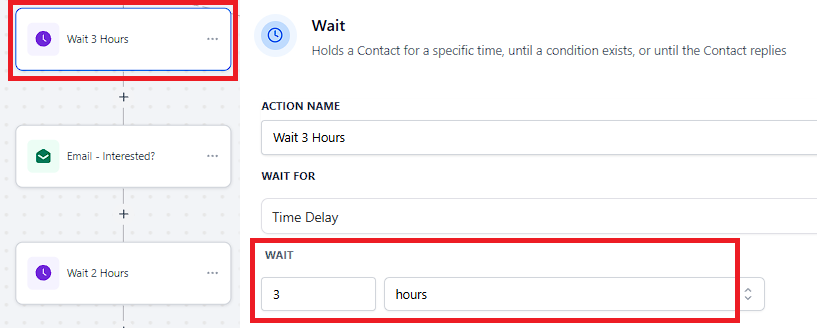
Wait
To add this action, click the "+" icon and select or type Wait. This holds a Contact for 3 hours before proceeding to the next action.
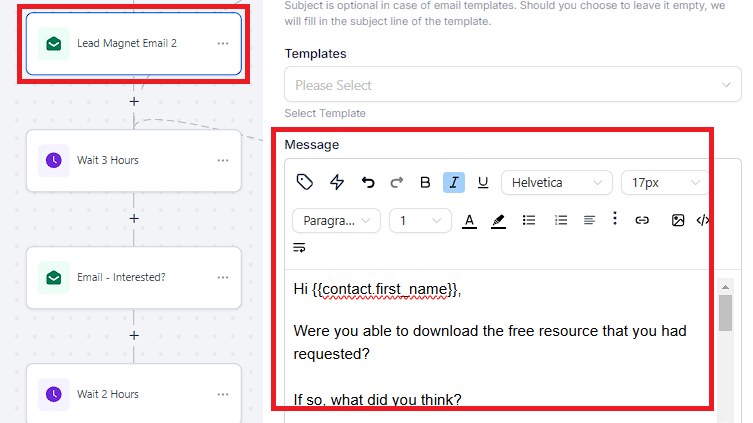
Send Email Follow Up
To add this action, click the "+" icon and select or type Email. This action will send a Lead Magnet Email 2 to gather contact details and provide options to schedule an appointment.
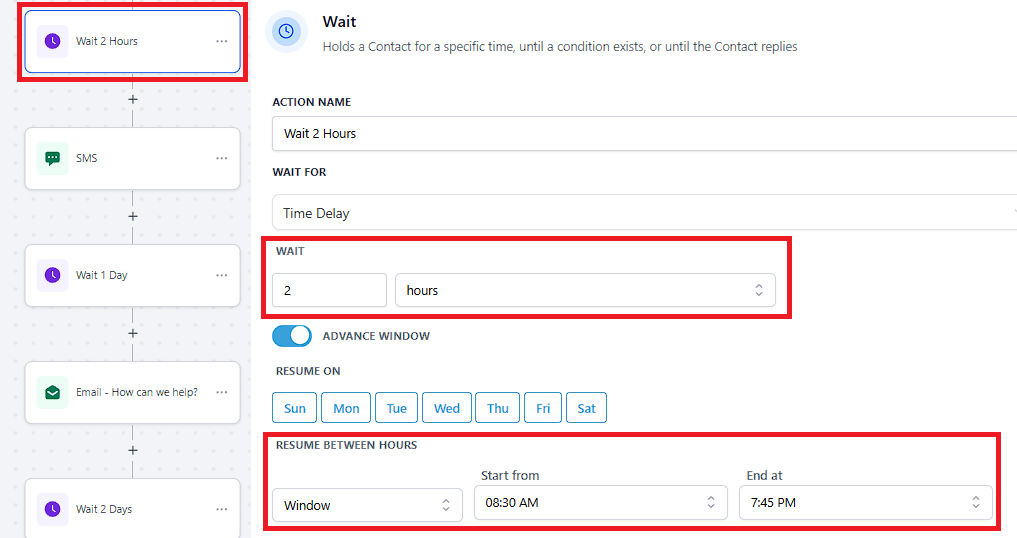
Wait
To add this action, click the "+" icon and select or type Wait. This holds a Contact for 2 hours before proceeding to the next action.
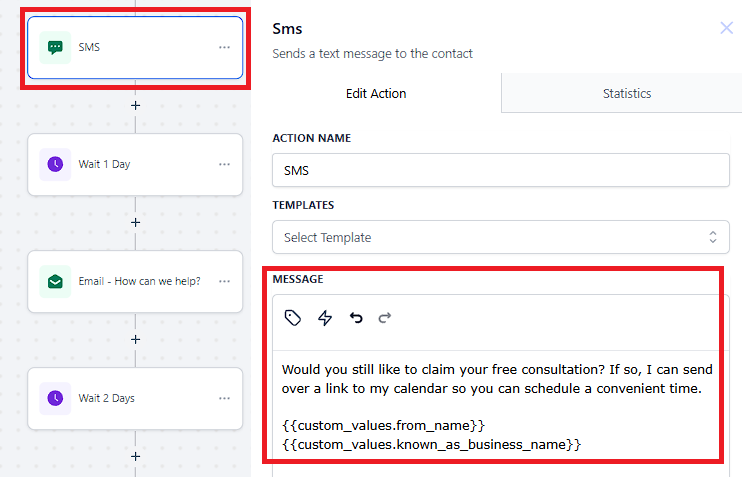
Send SMS
To add this action, click the "+" icon and select or type SMS. This action will send a follow up SMS to the contact and follow up free consultation.
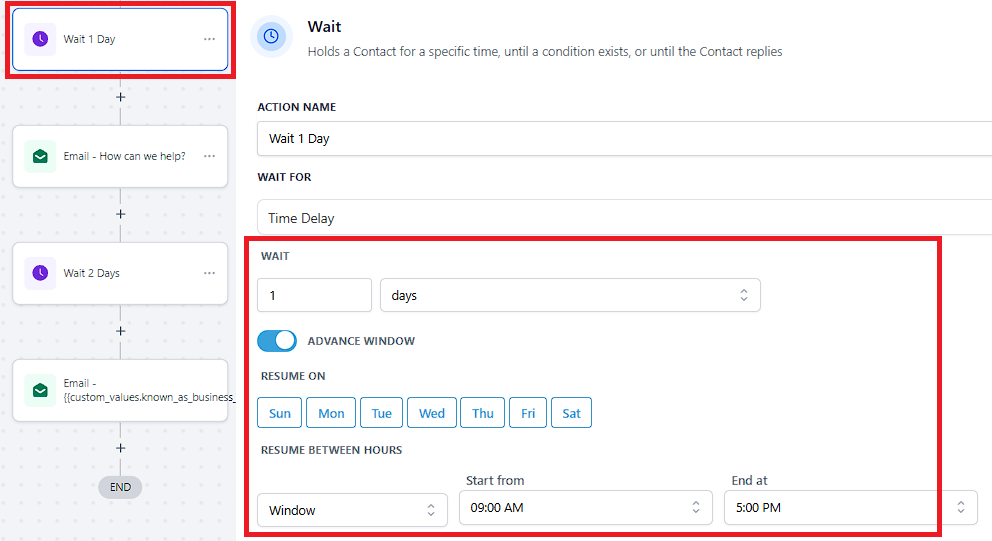
Wait
To add this action, click the "+" icon and select or type Wait. This holds a Contact for 1 day before proceeding to the next action.
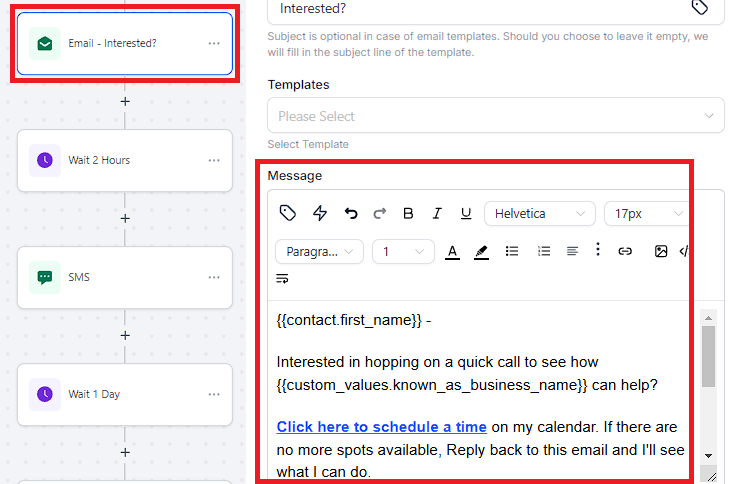
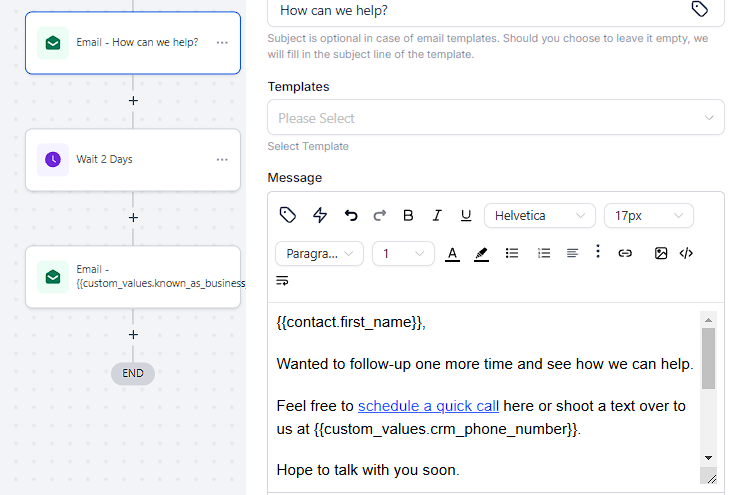
Send Email Follow Up
To add this action, click the "+" icon and select or type Email. This action will send an email follow up and provide options to schedule an appointment.
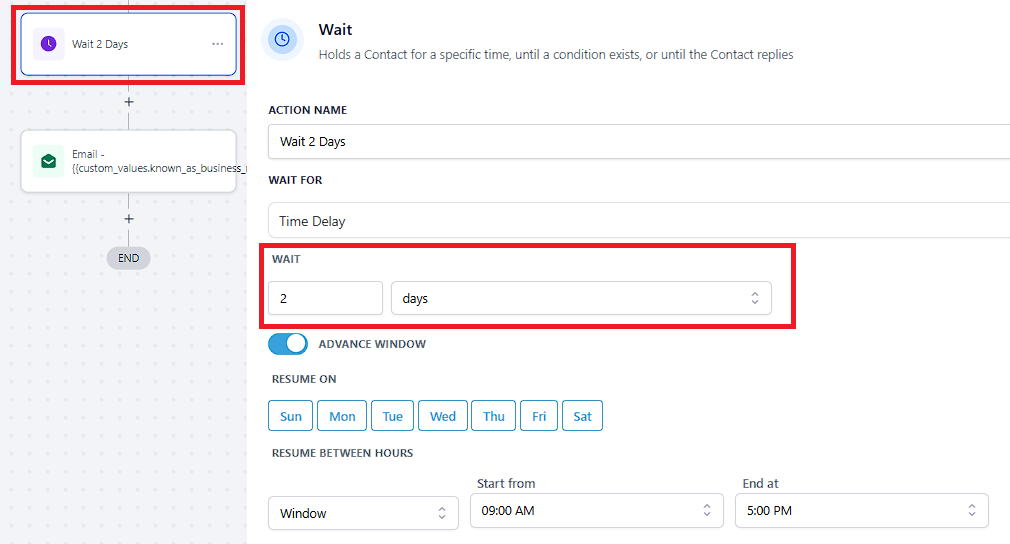
Wait
To add this action, click the "+" icon and select or type Wait. This holds a Contact for 2 days before proceeding to the next action.
Send Email Final Reminder
To add this action, click the "+" icon and select or type Email. This action will send an email follow up and provide options to schedule an appointment.
If the condition is "Website Contact Us Form Submitted".

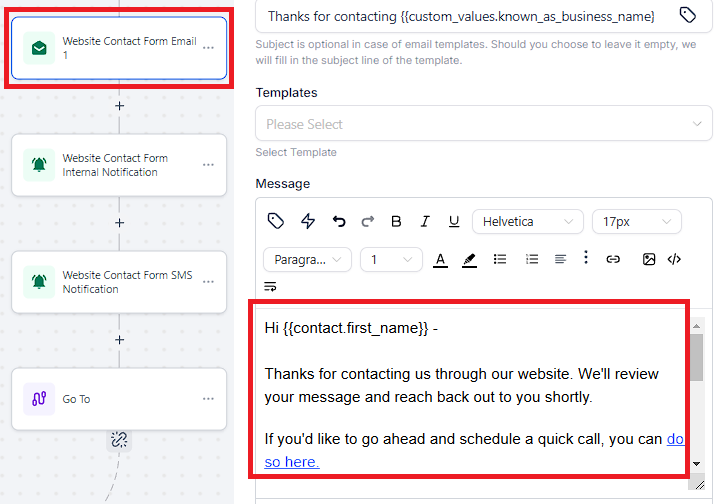
Send Email
To add this action, click the "+" icon and select or type Email. This action will send an email confirmation and provide options to schedule an appointment.
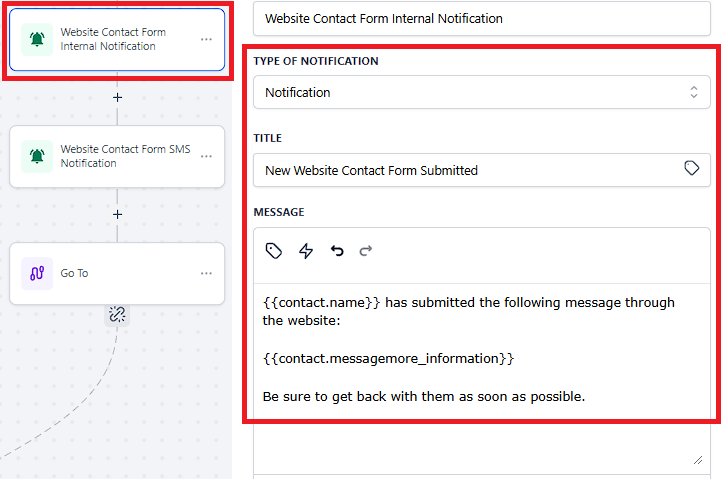
Internal Notification
Click the "+" icon and select the action or type Internal Notification. This will send a notification to all users that will appear on the notification icon and redirect user to Contact page.
Internal SMS Notification
Click the "+" icon and select the action or type Internal Notification. This will send a notification to a custom number with lead's contact details.

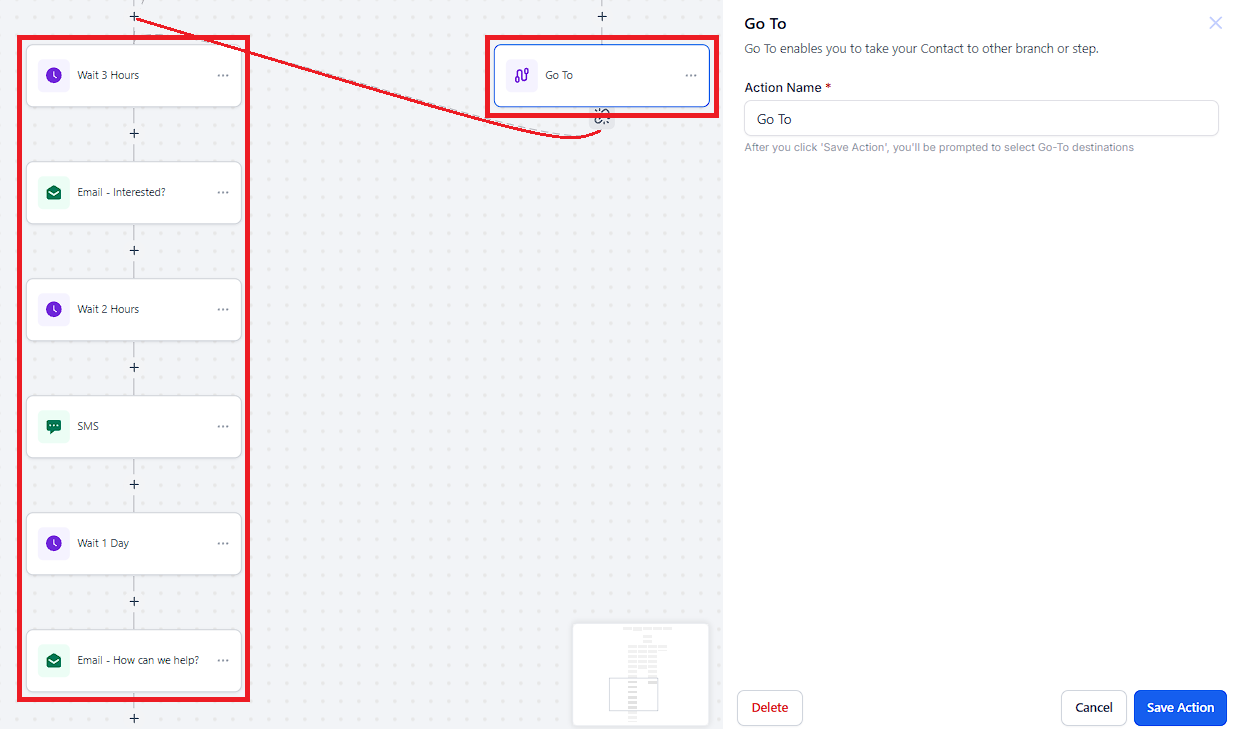
Go To
To use a Go-To step, simply add a Go-To event and then draw a line to where you want the contacts to jump. This Go-To event allows you to jump to "Wait - 3 Hours" workflow.

If the condition is "Facebook Lead Form Submitted" or "TikTok Form Submitted".
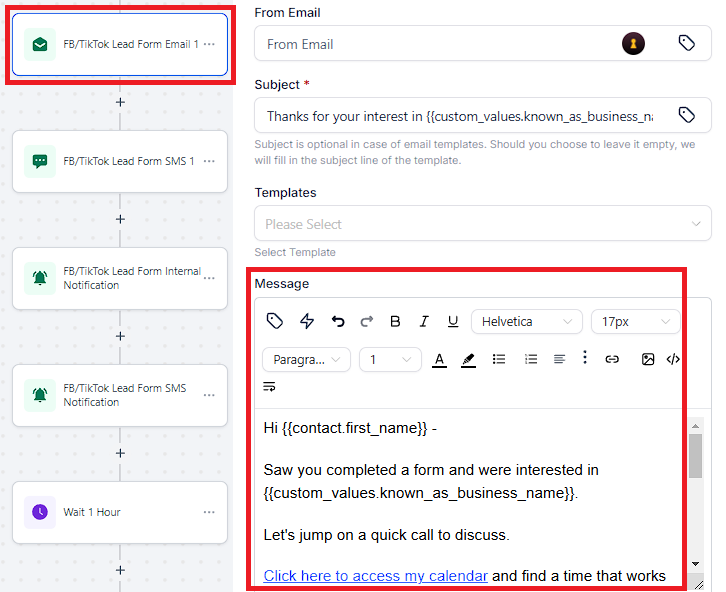
FB/TikTok Lead Form Email
To add this action, click the "+" icon and select or type Email. This action will send an email confirmation and provide options to schedule an appointment.
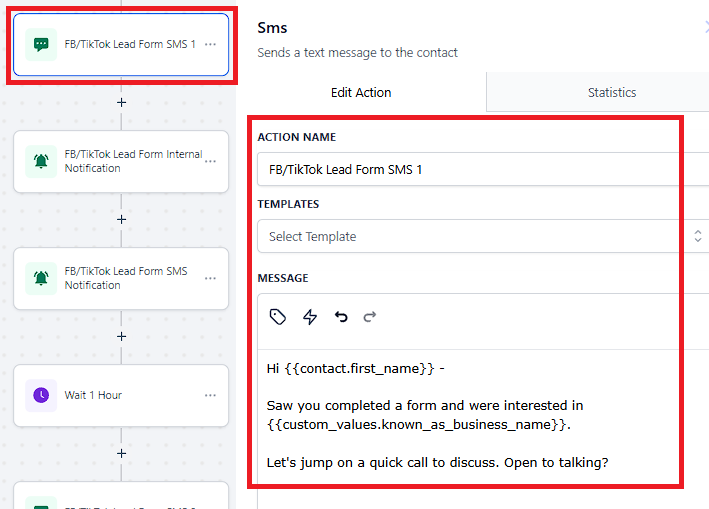
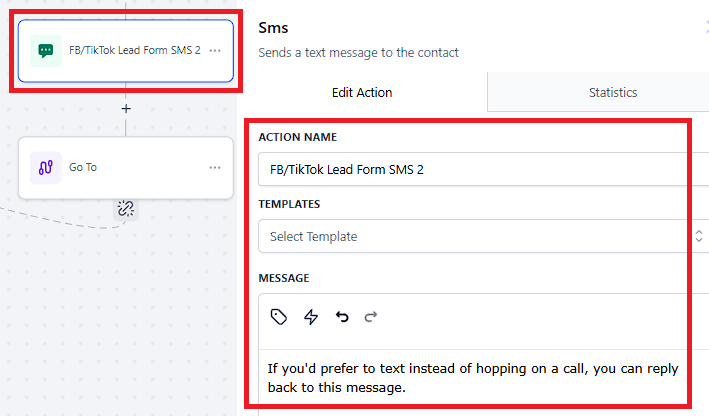
FB/TikTok Lead Form SMS
To add this action, click the "+" icon and select or type SMS. This action will send a follow up SMS to the contact.
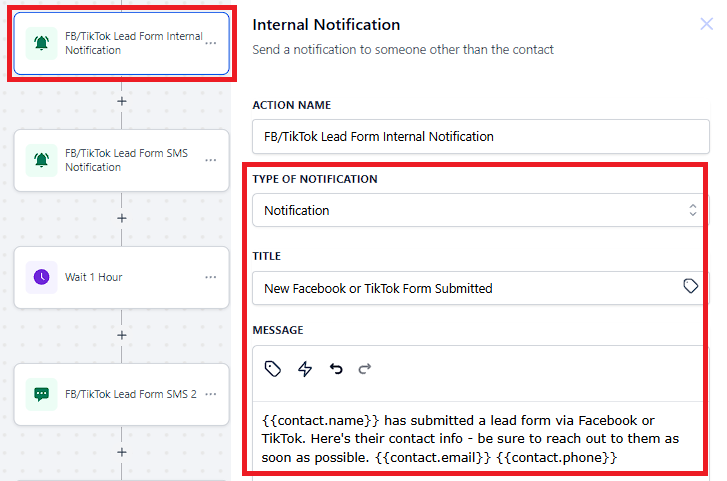
Internal Notification
Click the "+" icon and select the action or type Internal Notification. This will send a notification to all users that will appear on the notification icon and redirect user to Contact page.
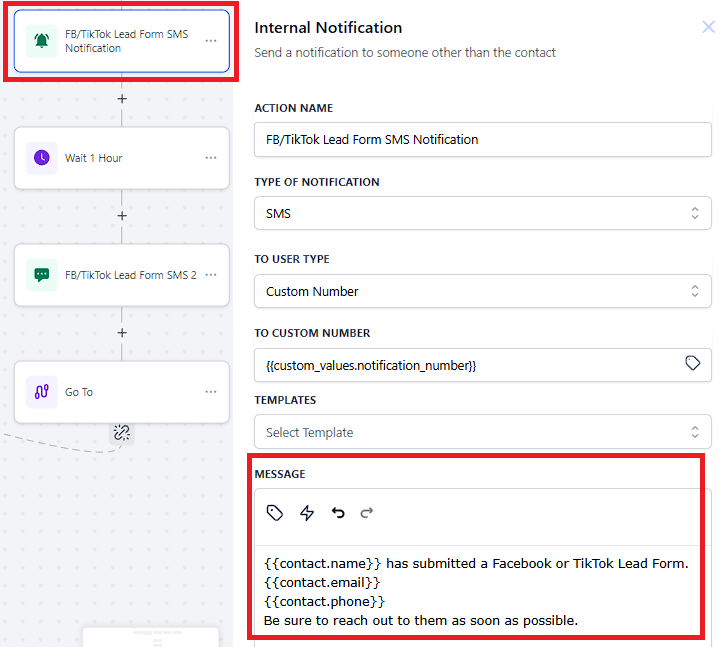
Internal SMS Notification
Click the "+" icon and select the action or type Internal Notification. This will send a notification to a custom number with lead's contact details.
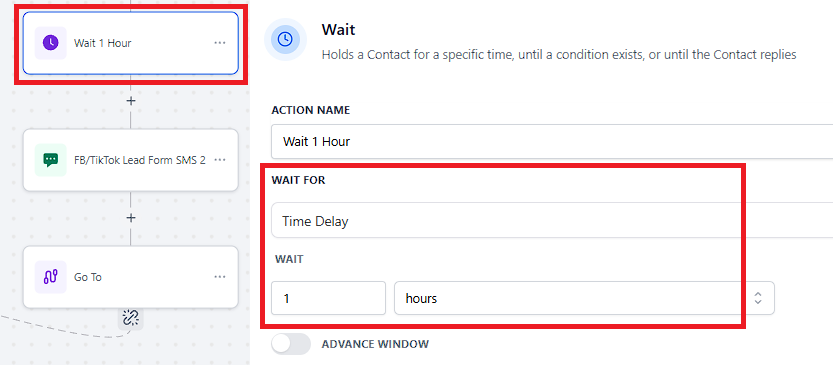
Wait
To add this action, click the "+" icon and select or type Wait. This holds a Contact for 1 hour before proceeding to the next action.
FB/TikTok SMS Follow Up
To add this action, click the "+" icon and select or type SMS. This action will send a follow up SMS.
Go To
To use a Go-To step, simply add a Go-To event and then draw a line to where you want the contacts to jump. This Go-To event allows you to jump to "Wait - 3 Hours" workflow.
When a form is submitted, a trigger will be activated.
Lead Magnet Form Submitted
Website Contact Us Form Submitted
TikTok Form Submitted
Facebook Lead Form Submitted
Creates an Opportunity within the Pipeline and changed it to Leads Pipeline and New Lead.
If/Else Condition Action will be activated - it will help you create personalized and dynamic workflows that adapt to your contact's behaviors.
Lead Magnet Optin
- Lead Magnet Email sent
- Lead Magnet Optin Internal Notification sent to all users
- Lead Magnet Optin Email Notification to a user
- Lead Magnet Optin SMS Notification to a custom #.
- Wait 1 hour
- Lead Magnet Email follow up sent
- Wait 3 hours
- Email follow up sent
- Wait 2 hours
- SMS follow up sent
- Wait 1 day
- Email reminder sent
- Wait 2 days
- Final Email Reminder sent
Website Contact Us Form
- Website Contact Form Email sent
- Internal Notification sent to all users
- SMS Notification to a custom #
- Go To: jump contacts from one event to another in Workflows
Facebook Or TikTok Lead Form
- FB/TikTok Lead Form Email sent
- FB/TikTok Lead Form SMS sent
- Internal Notification sent to all users
- SMS Notification to a custom #
- Wait 1 hour
- FB/TikTok Lead Form SMS follow up sent
- Go To: jump contacts from one event to another in Workflows
Don't forget to click "Save Action" for every update you've made.
"Save" and "Publish" the workflow once done.
