Streamlining your invoicing process can lead to significant improvement in cash flow and timely payments. It also reduces your administrative burden, freeing up your time for core business operations.
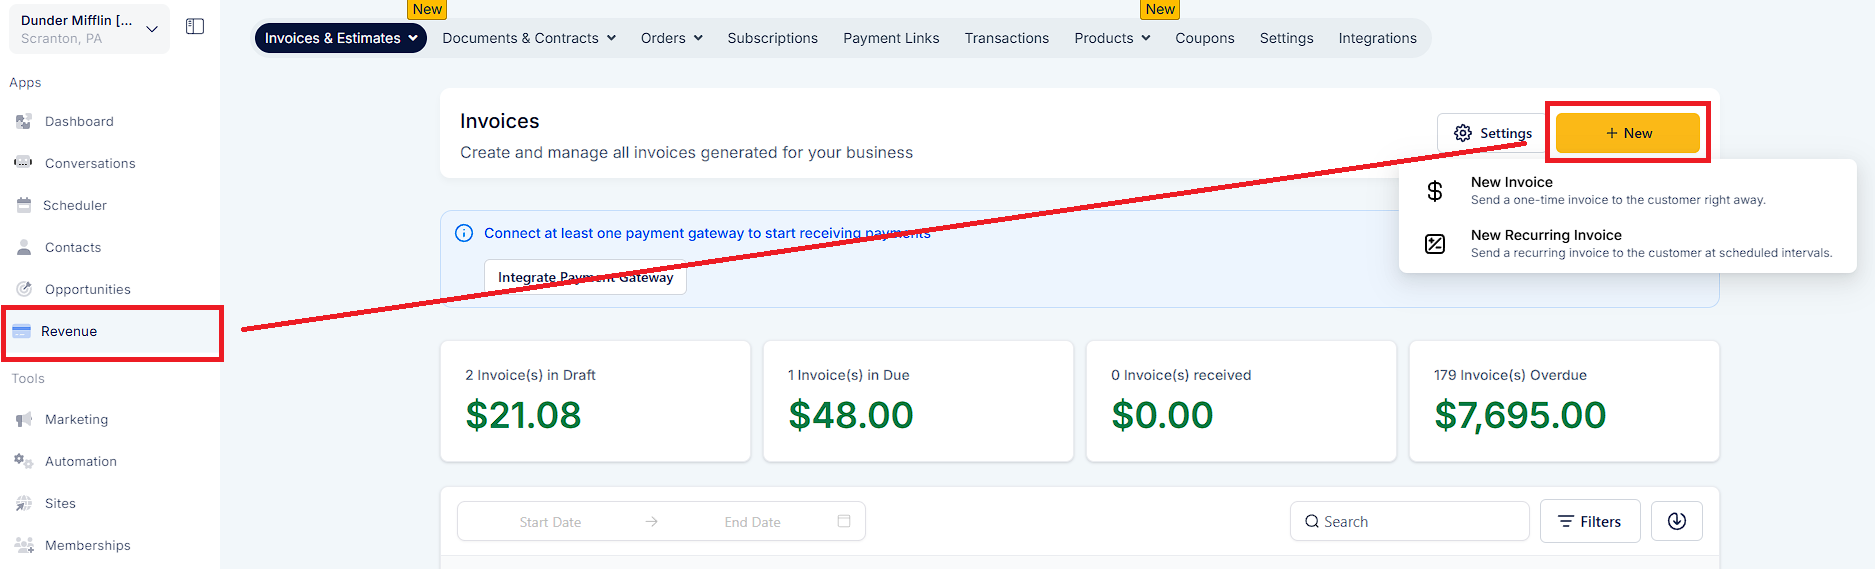
Go to the Revenue tab and click on the invoice tab
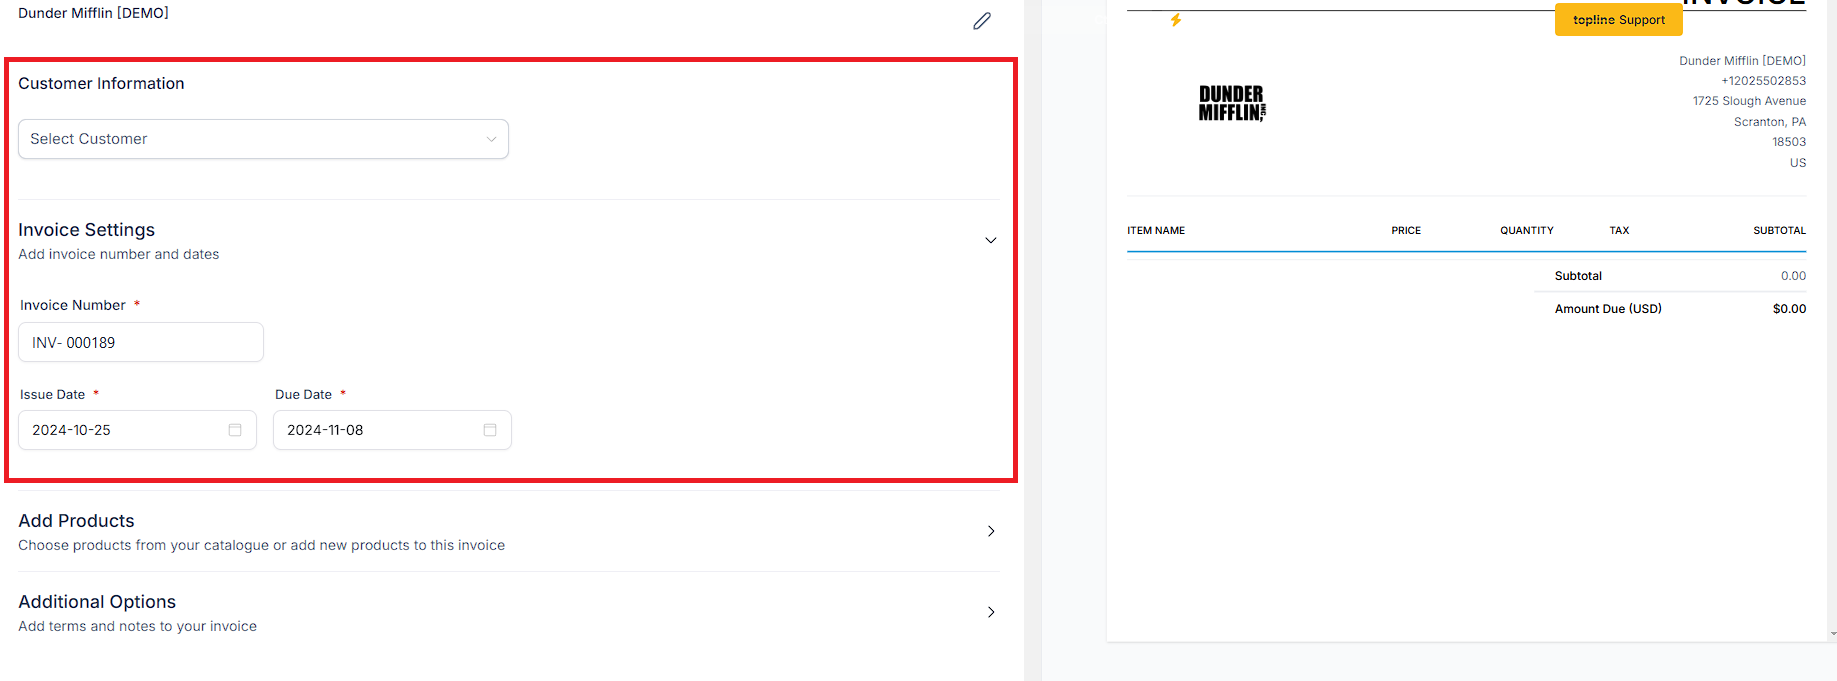
Click on the button "+ New" and start creating a new invoice.
By clicking +Add Product, you will be able to add the products, edit their price, and edit the quantity that you have already created in your products section.
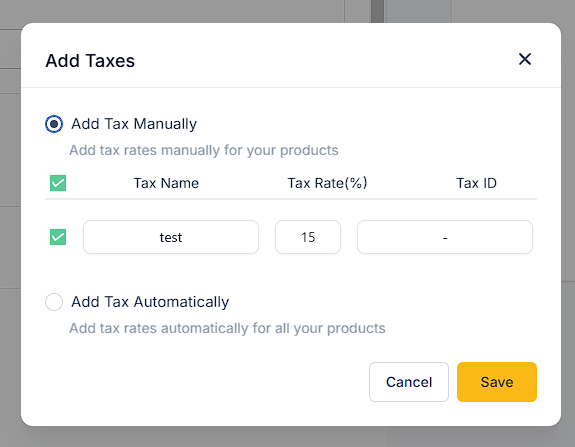
By clicking 3 dot icon, you can add tax.
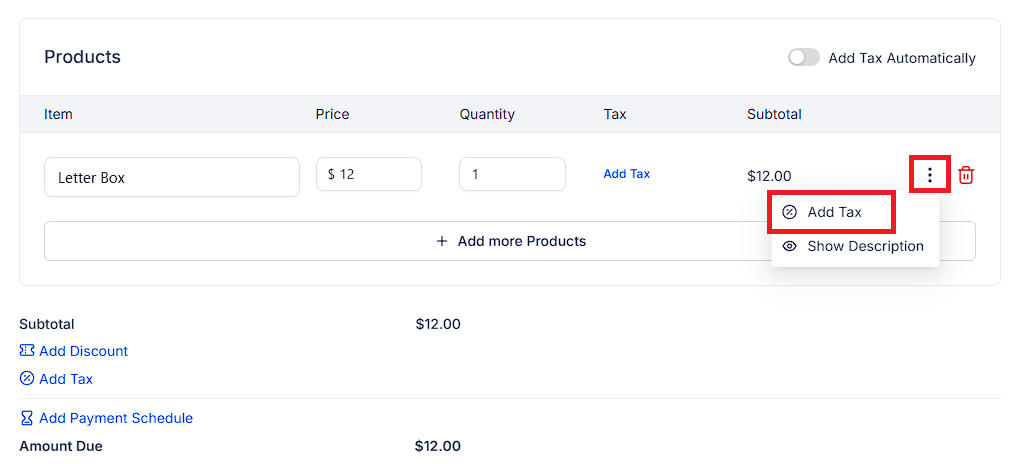
Click on Add Tax Manually.
Add the name of the Tax
Add rate in %
Add a description or Tax id number
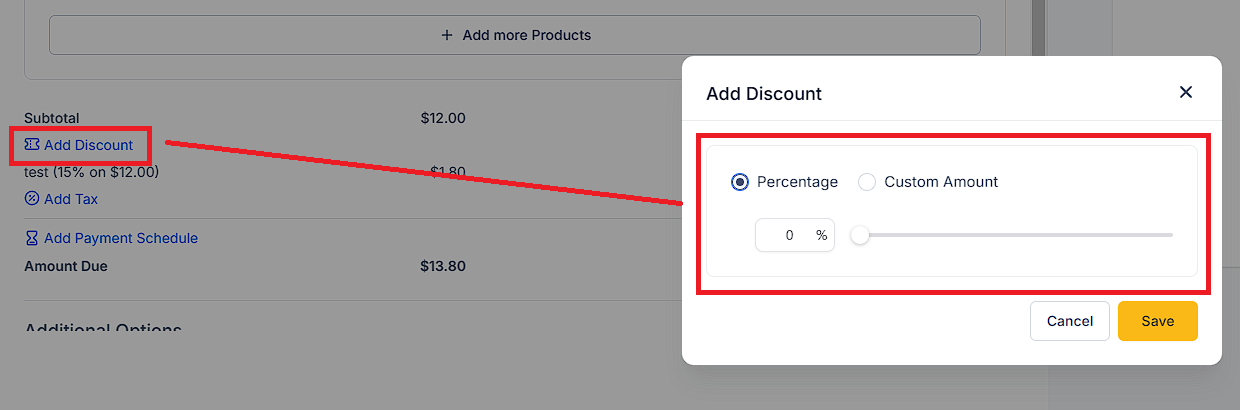
You can add a discount to this invoice by clicking on the "Add Discount" icon
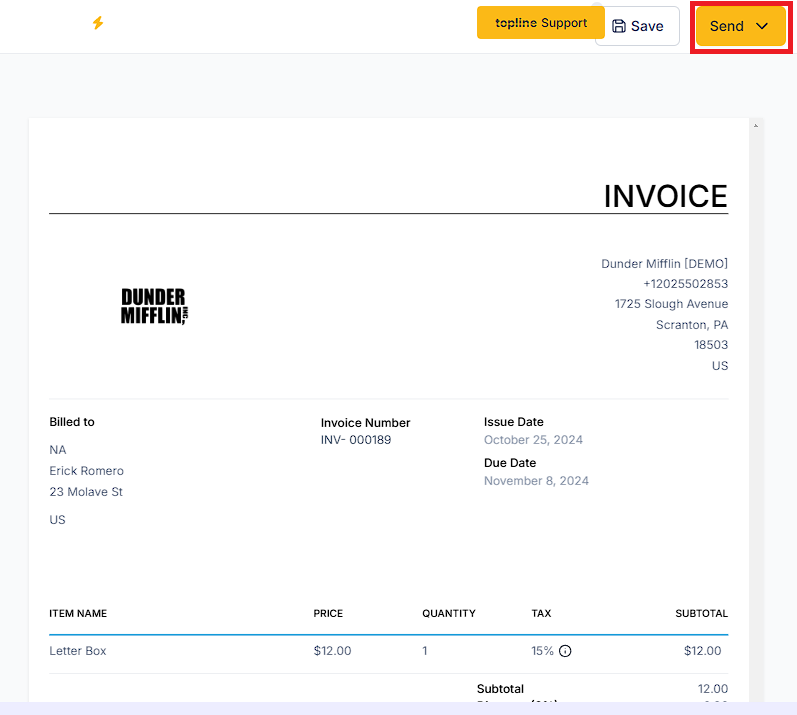
By clicking on the green button on the top right corner of the invoice, you will be able to send it to your client.
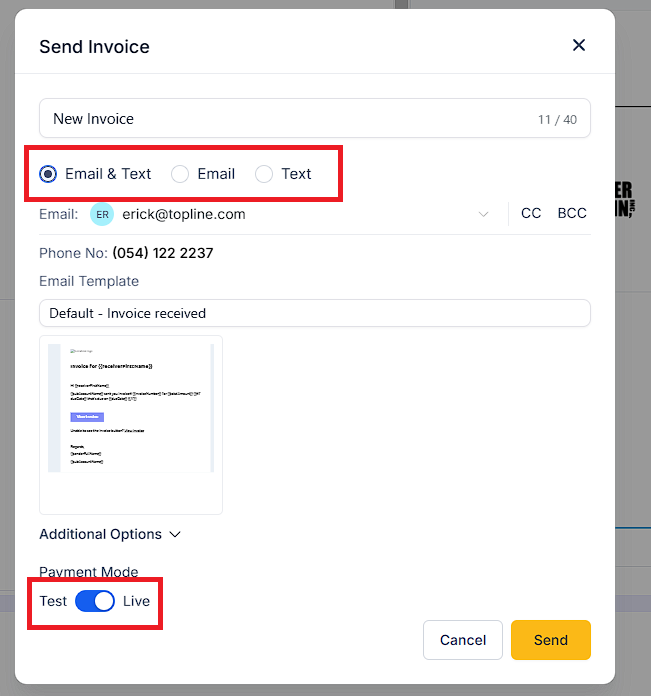
The invoice can also be sent via email and text if you want, as well as on test mode.
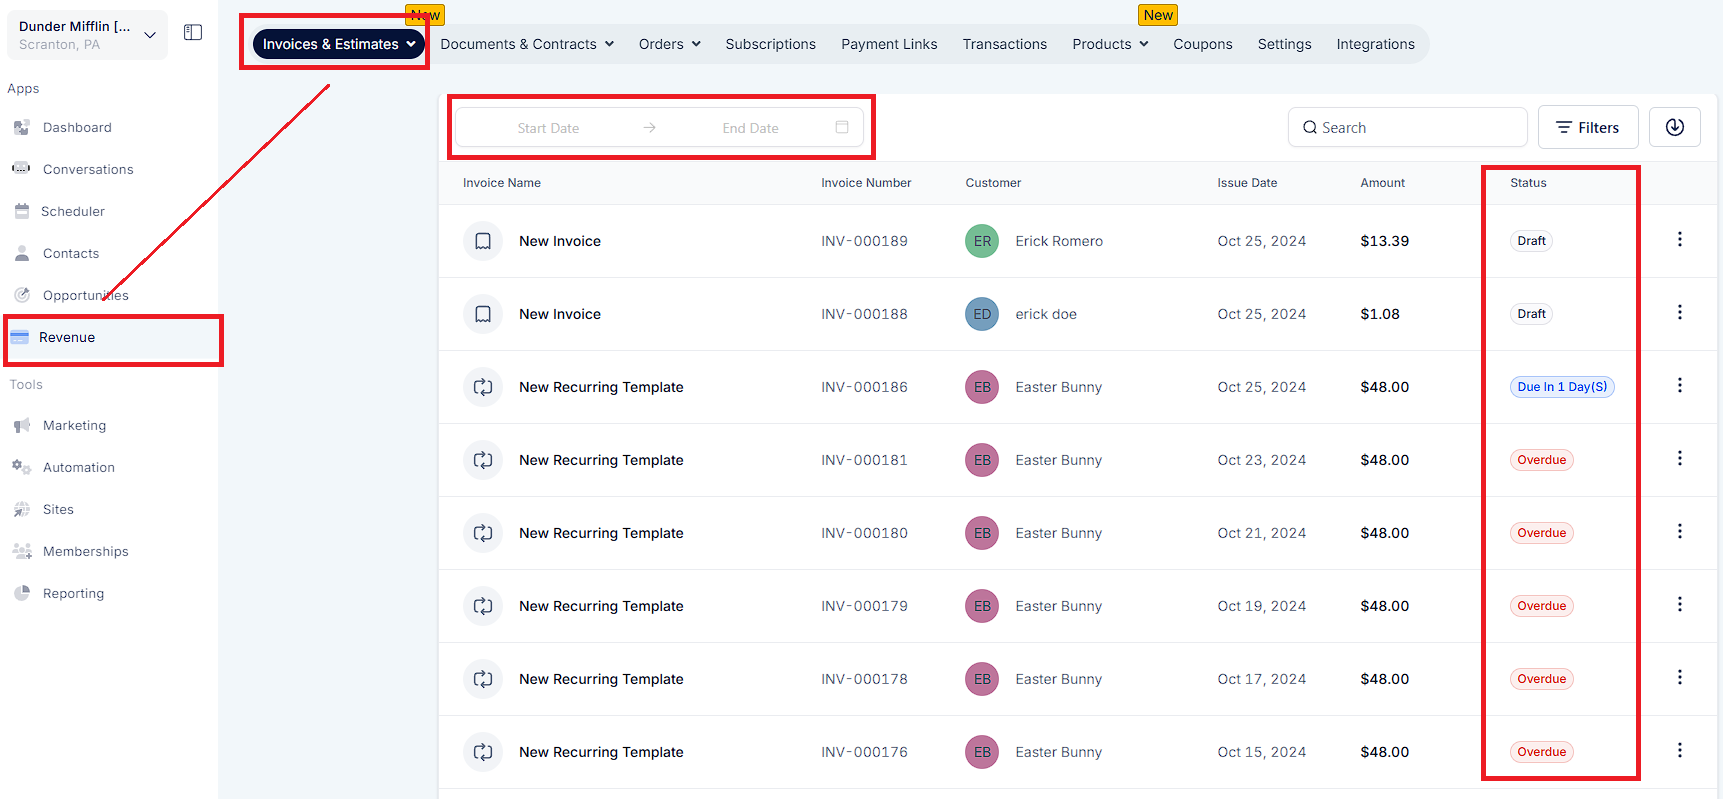
Go to the Invoices & Estimates tab where you will see the list of invoices and their statuses.
You can filter the invoices by status and date range as well
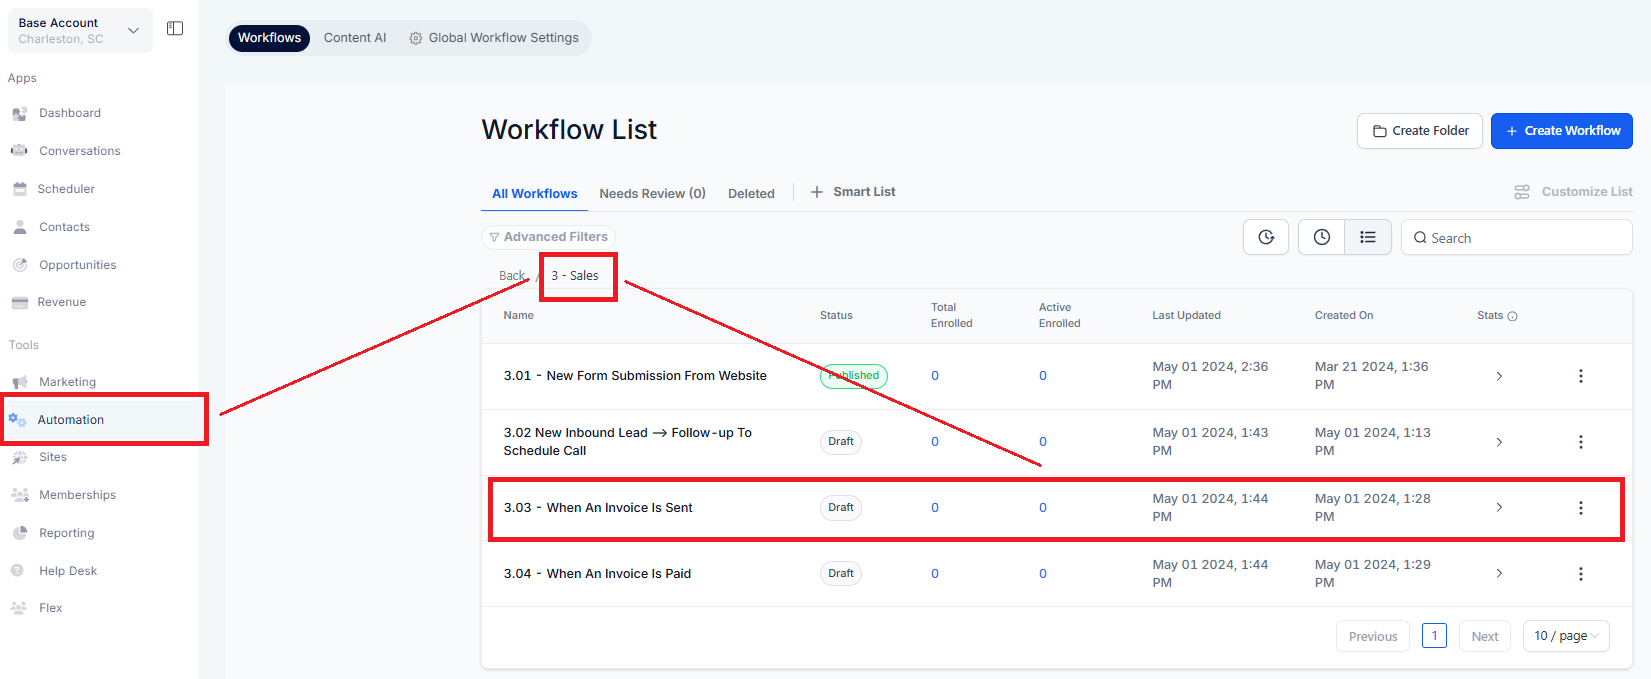
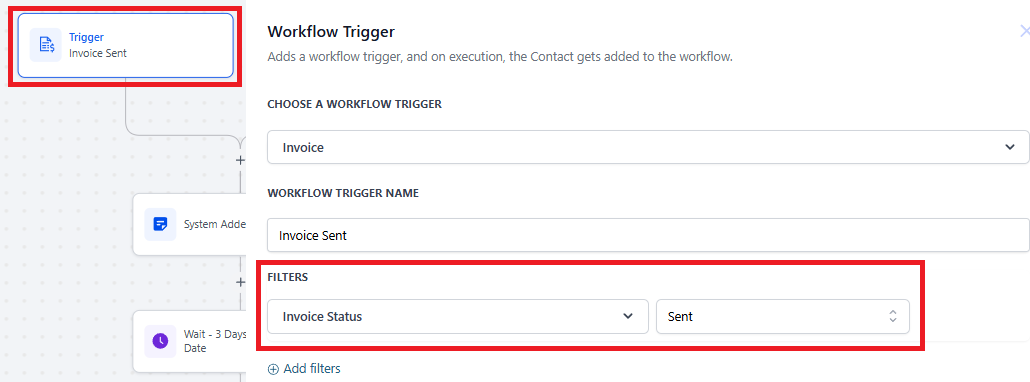
Click the "+" icon and select the action or type Invoice. In this case, the trigger is set to activate when an invoice is sent.
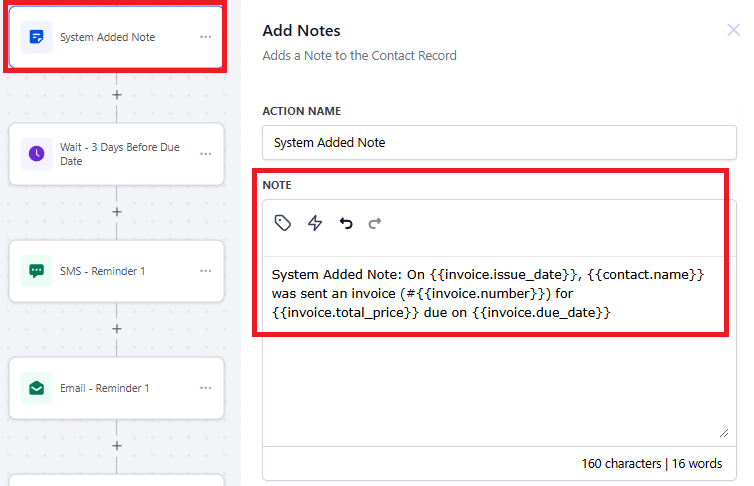
Click the "+" icon and select the action or type Add Notes. This action will add notes to the contact record.
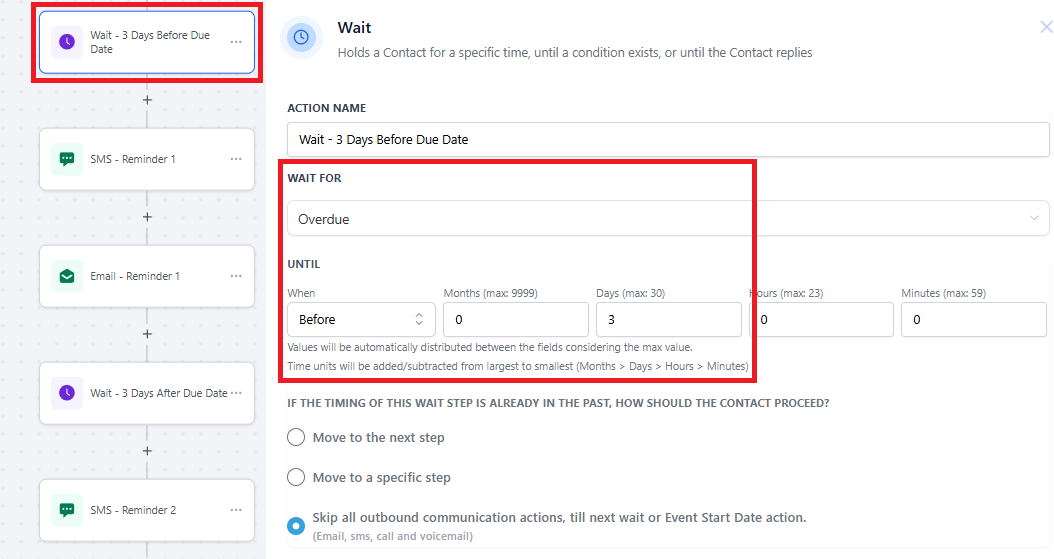
Click the "+" icon and select the action or type Wait. This action holds a Contact for a specific time, until a condition exists, or until the Contact replies.
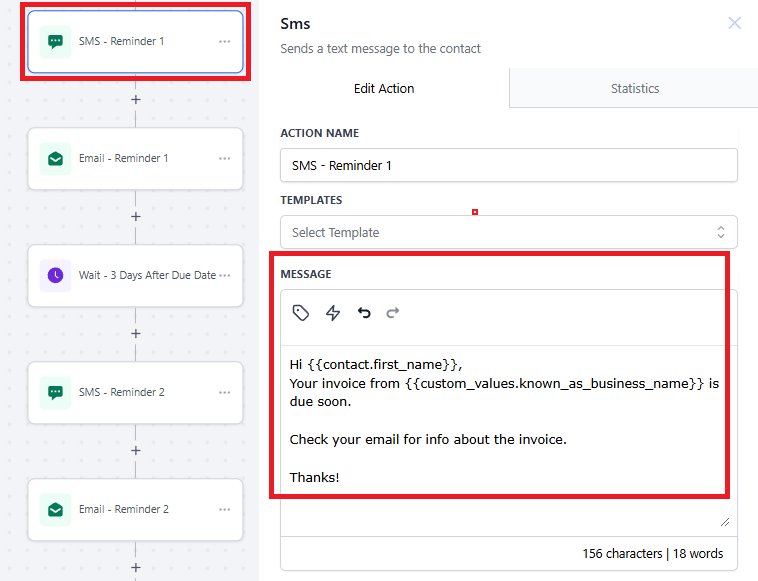
Click the "+" icon and select the action or type SMS. This action allows you to send SMS to the contact.
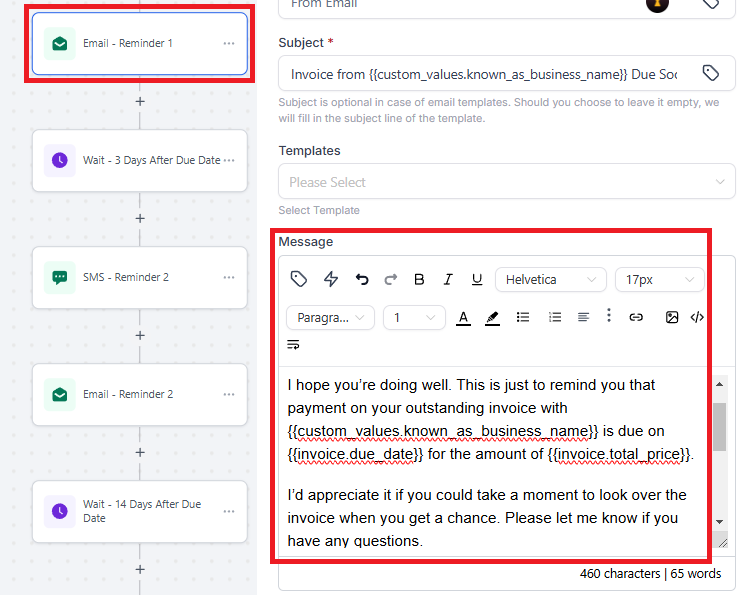
Click the "+" icon and select the action or type Email. The Email action in your automation workflow is designed to send emails to your contacts. Make sure to update the "From Name" and "From Email" and save the action.
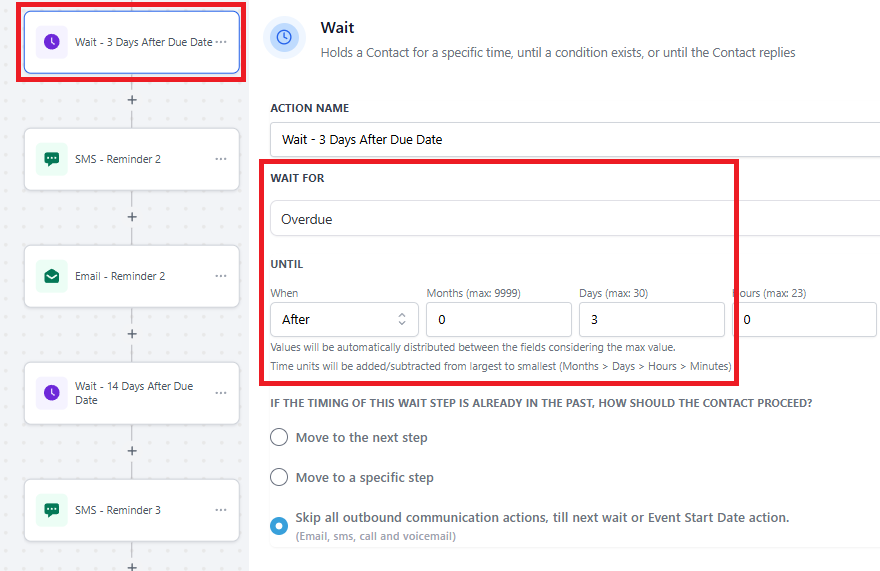
Click the "+" icon and select the action or type Wait. This holds a Contact for 3 days before proceeding to the next action.
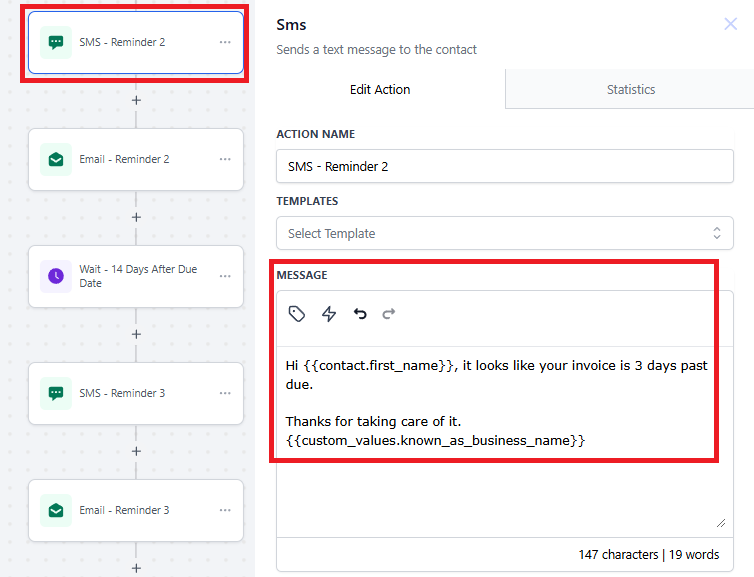
Click the "+" icon and select the action or type SMS. This action allows you to send SMS to the contact.
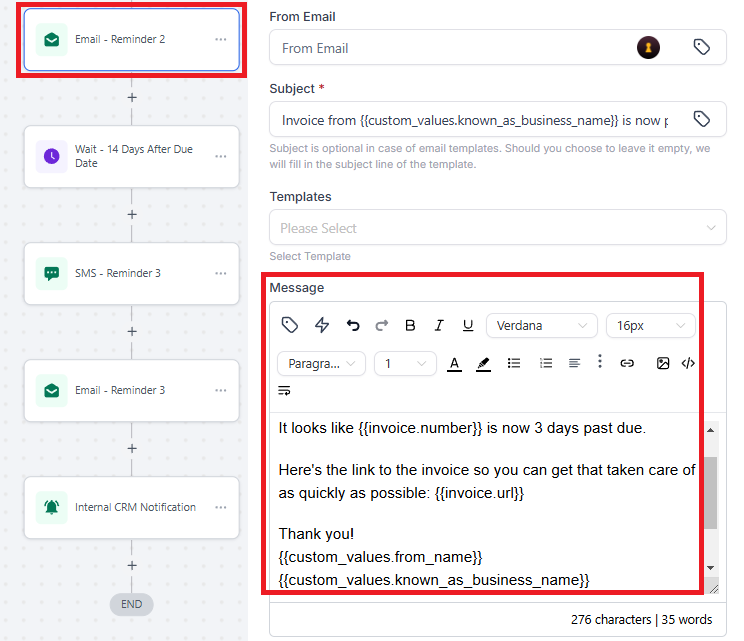
Click the "+" icon and select the action or type Email. This action will send follow up email after 3 days.
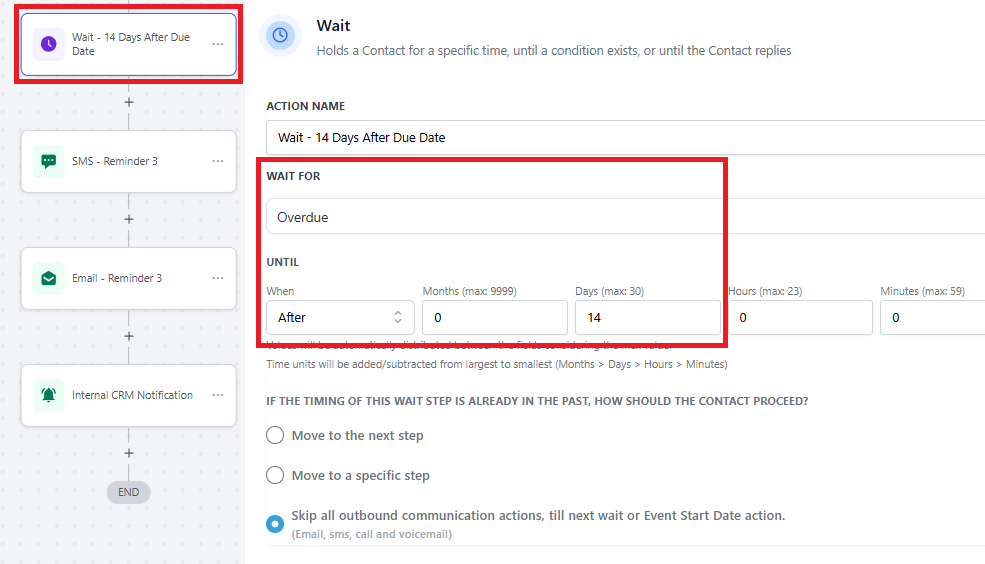
Click the "+" icon and select the action or type Wait. This holds a Contact for 14 days before proceeding to the next action.
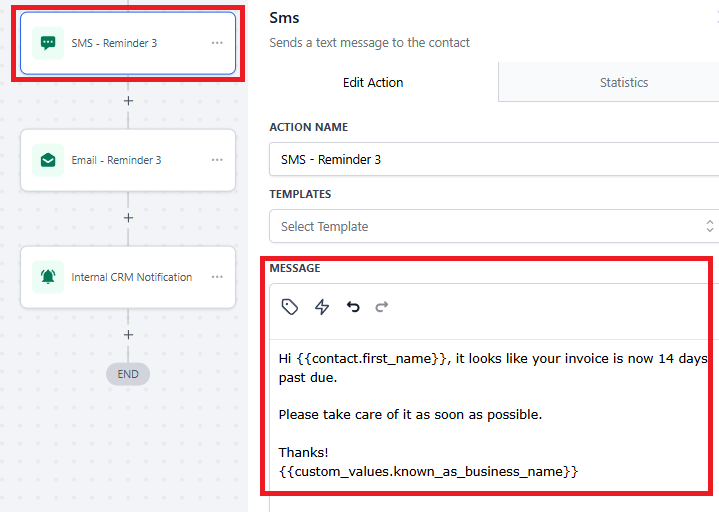
Click the "+" icon and select the action or type SMS. This action will send SMS after 14 days.
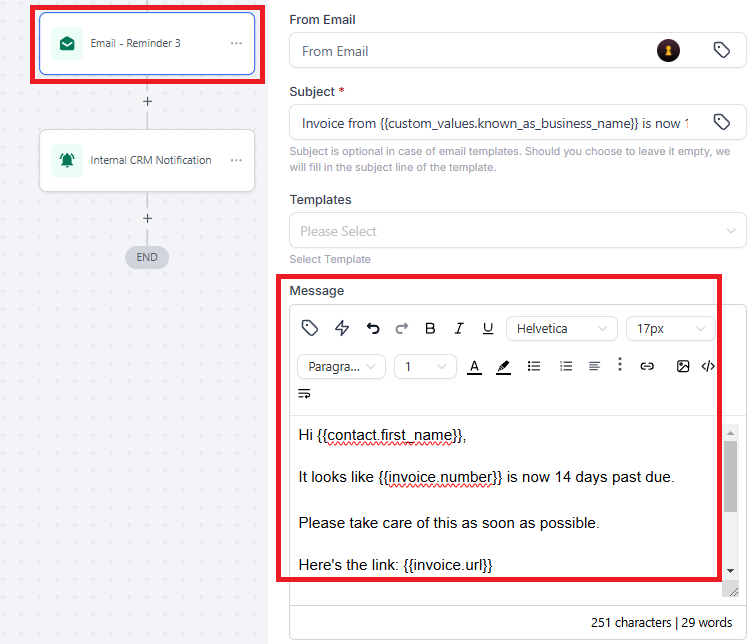
Click the "+" icon and select the action or type Email. This action will send follow up email after 14 days.
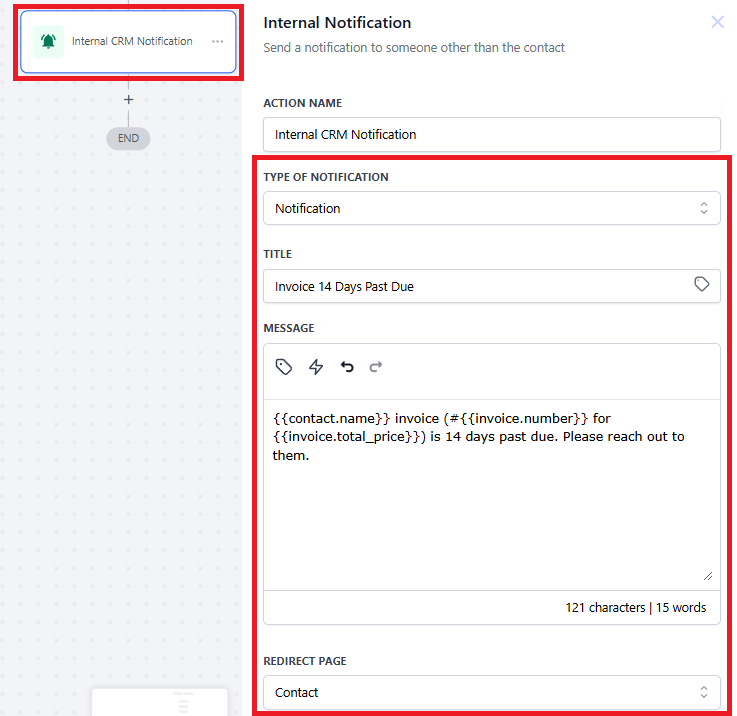
Click the "+" icon and select the action or type Internal Notification. This will send a notification to the assigned user to about contact’s overdue.