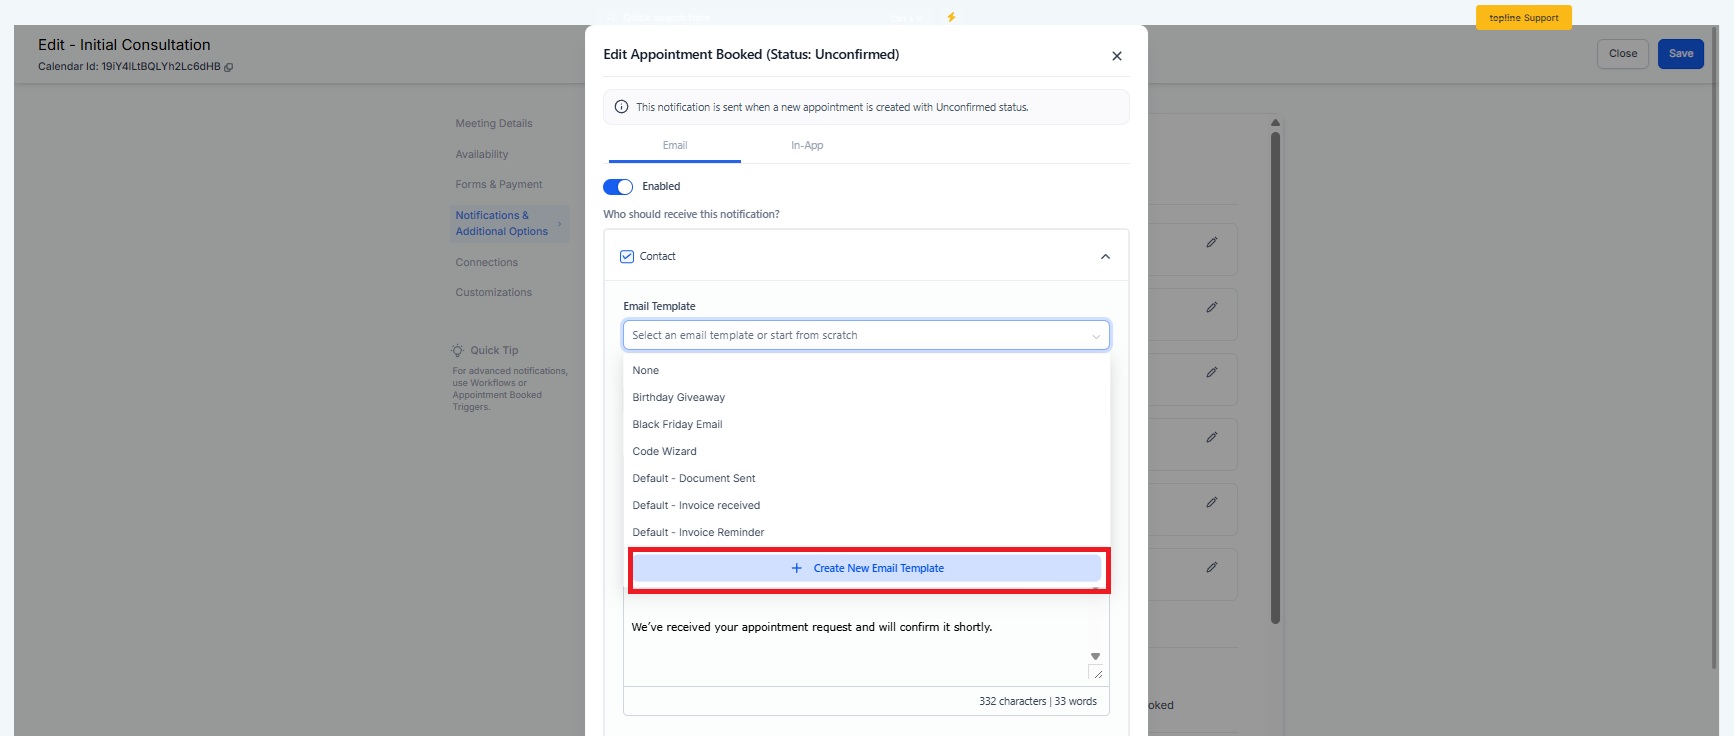
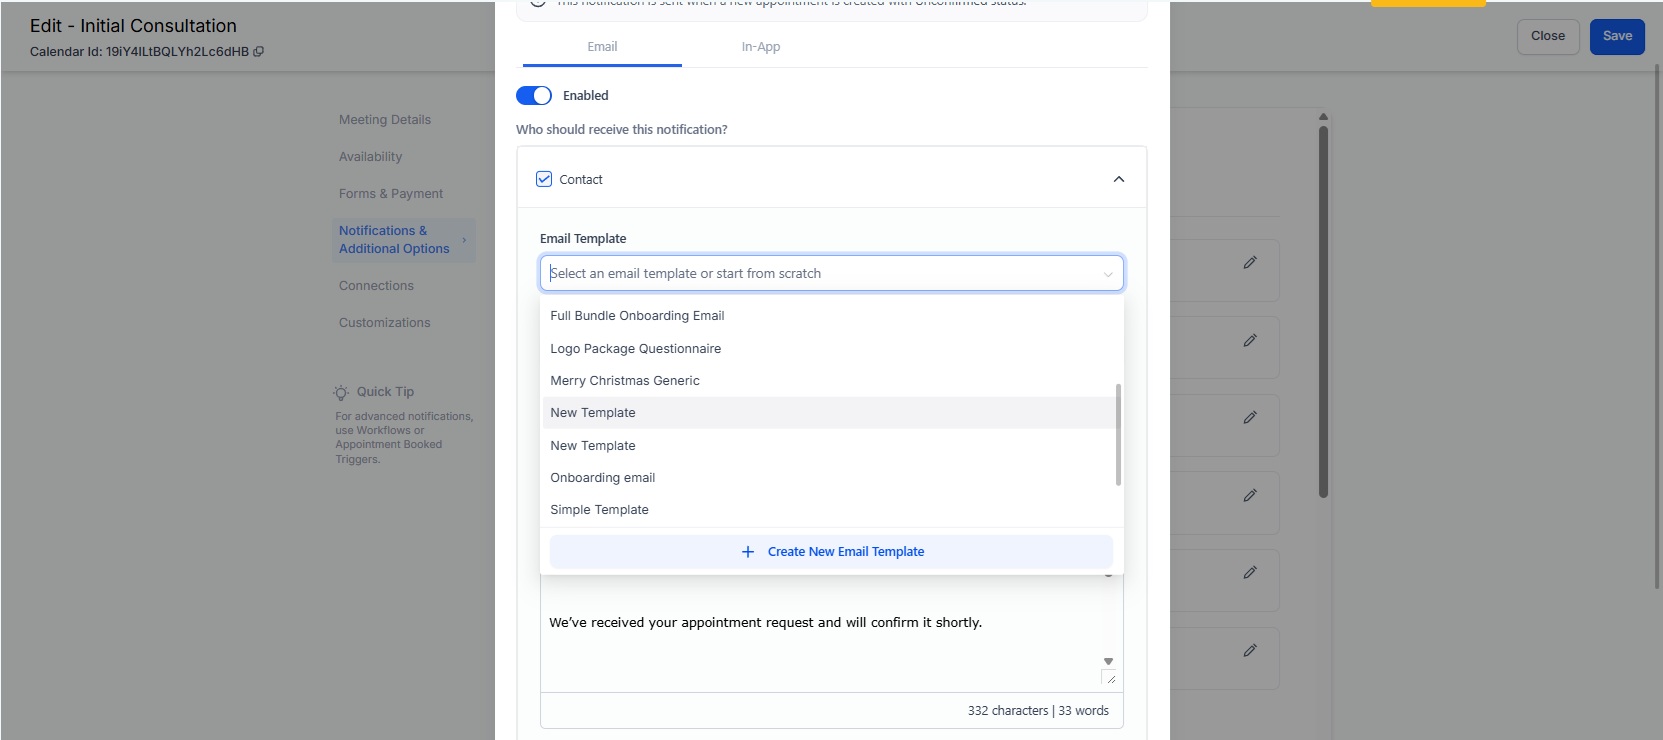
We’ve streamlined the process of setting up notification emails in Scheduler. Previously, users had to switch to the Marketing section to create an email template, then return to the Schedulers tab to select it. Now, you can create a new email template directly from within the Notifications settings while configuring your calendar.
Launch the template creation flow right from Notifications
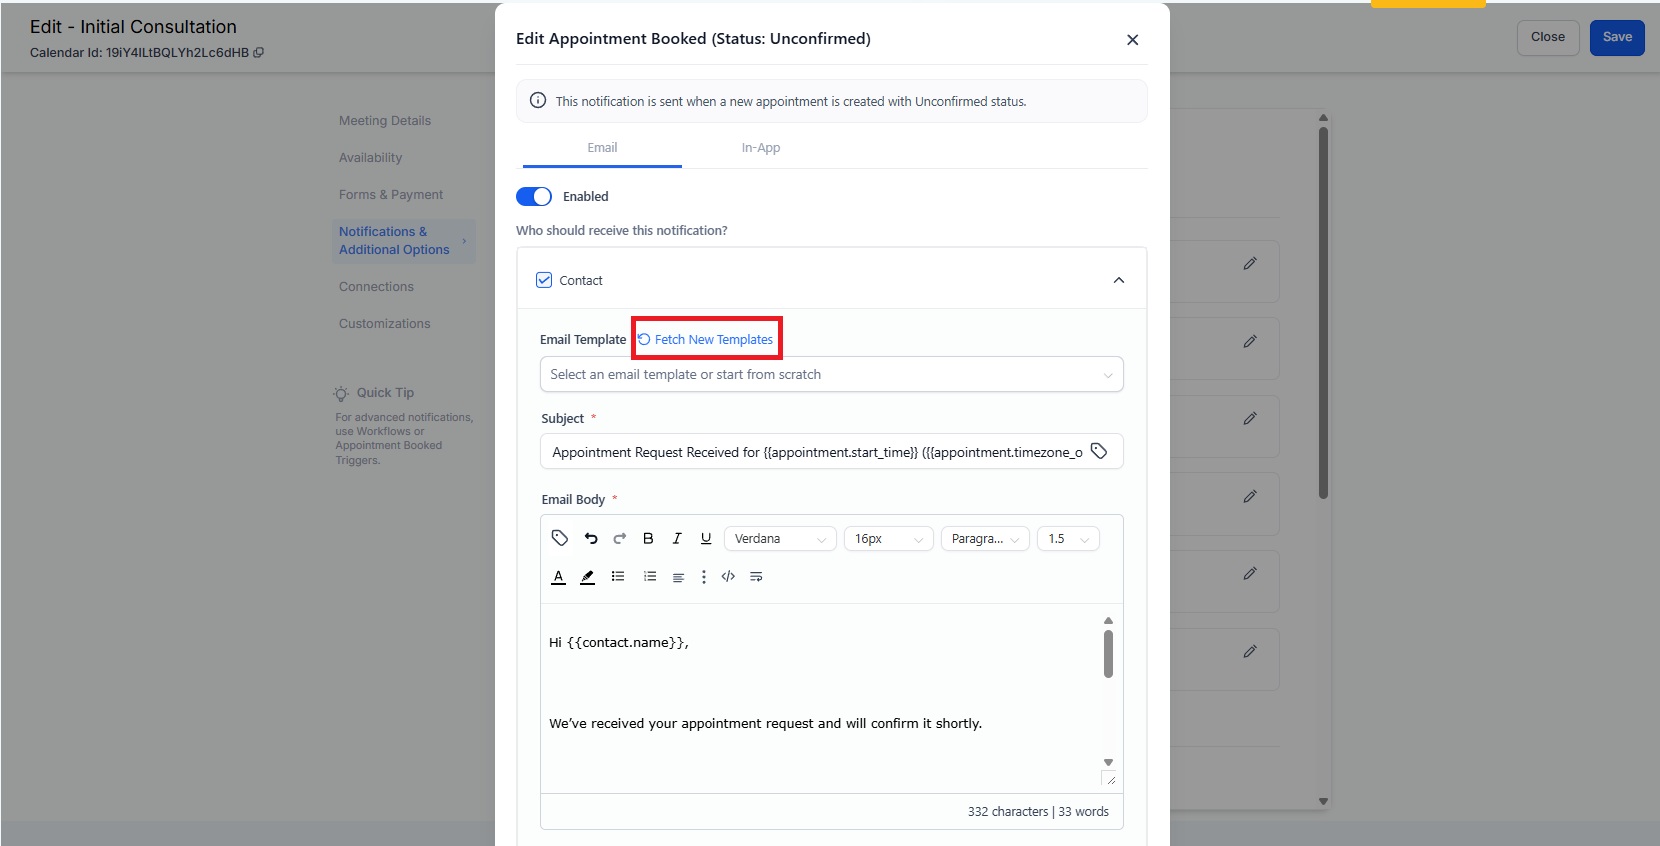
Once created, the new template appears in the dropdown for immediate selection
No more switching back and forth — it’s a faster, smoother experience
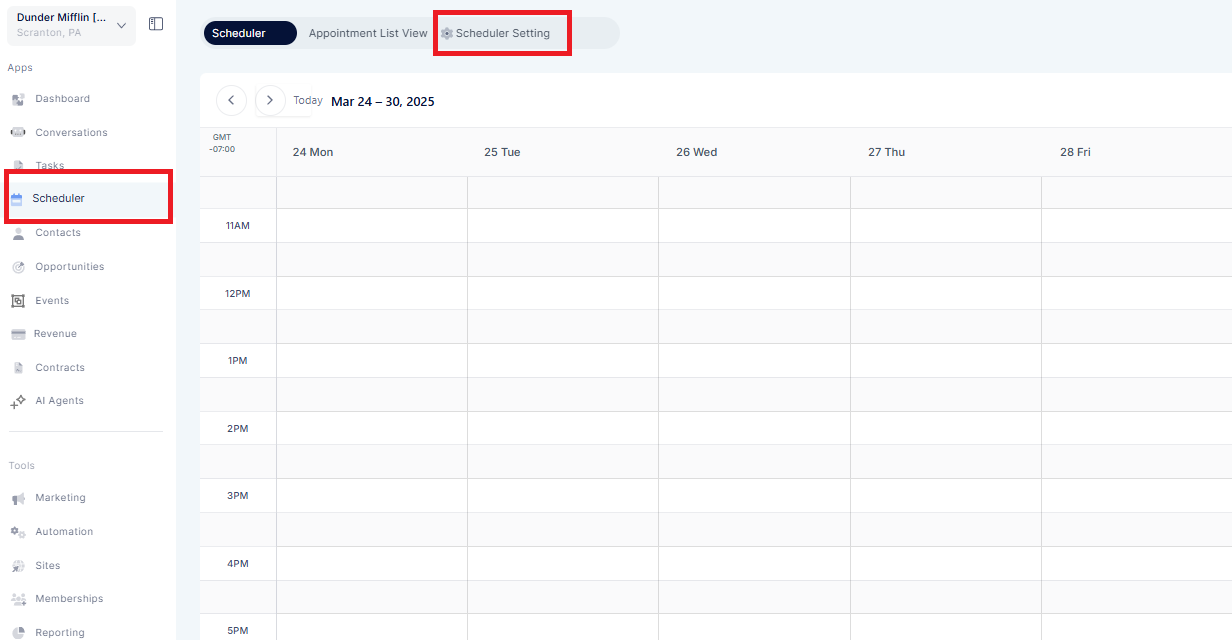
Step 1: Access Scheduler Settings
Log in to your Account > Scheduler > Scheduler Setting > Edit
Step 2: Select Notifications & Additional Options
Scroll down to the “Email Templates” section
Click on the “Create New Email Template”
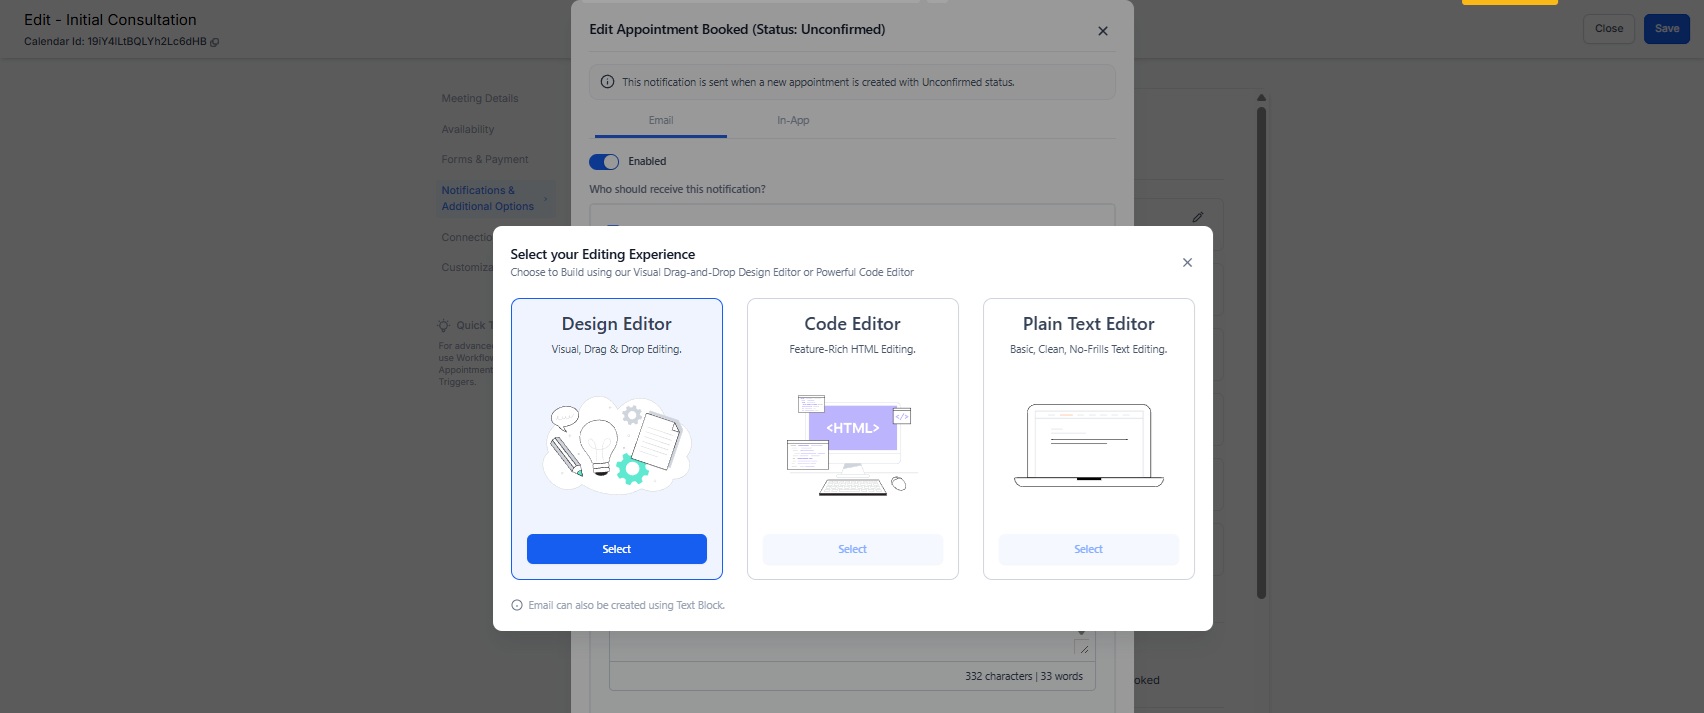
Step 3: Choose Template Type
Select the type of email template you want to create
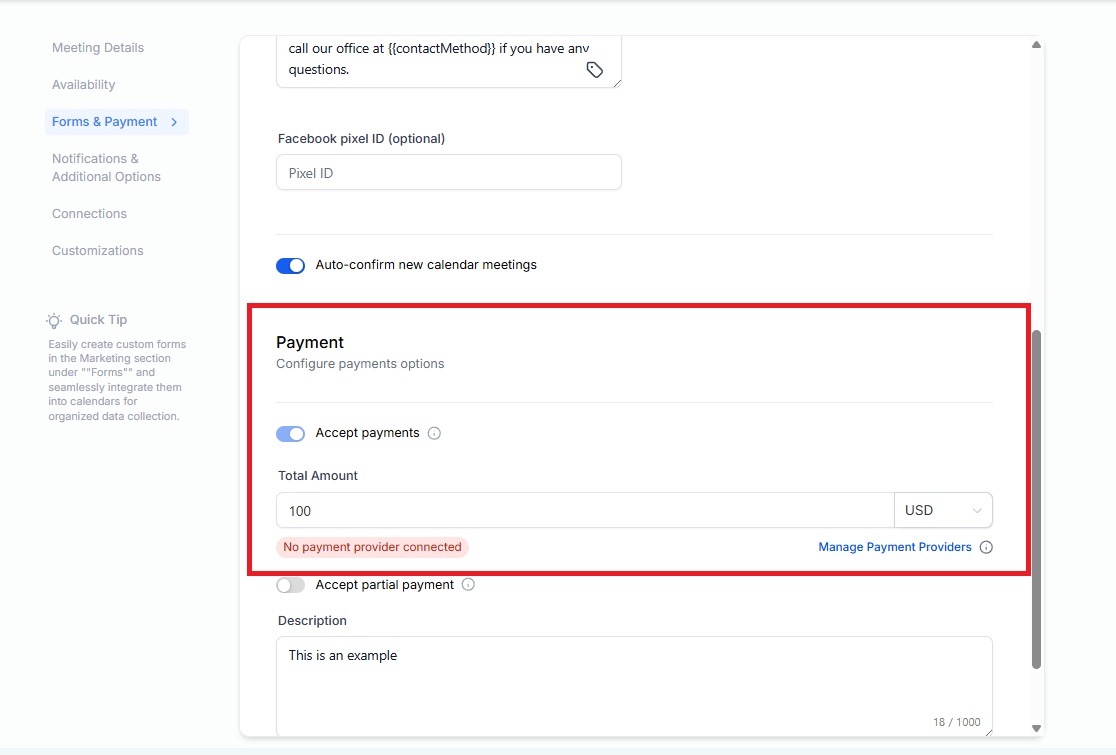
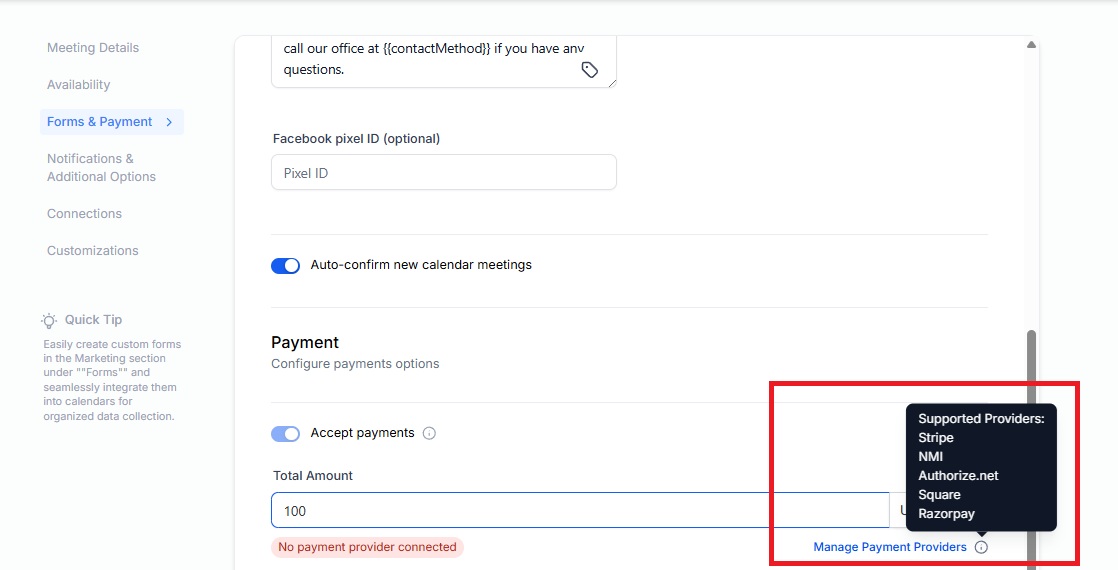
To reduce confusion around payment configurations, we've improved how it is displayed within Scheduler settings:
Users will now see a clear tag when no payment method is connected.
A button redirects users to the Payment Integrations section to connect a provider.
The default selected payment provider is shown.
A full list of supported providers is displayed to improve clarity.
Quick Benefits
Faster setup with fewer clicks and no context switching
A more collaborative and user-friendly experience
