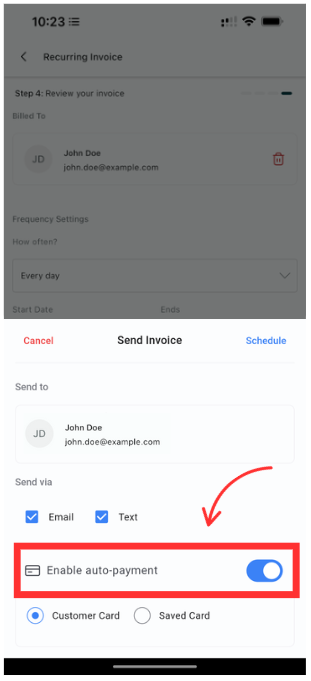
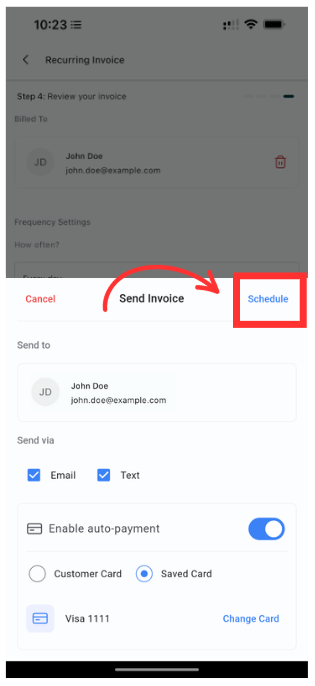
Enable Auto‑Payment while scheduling a recurring invoice, choose a saved or captured card, send once, and future charges run on schedule—no follow‑ups.
Auto‑Payment toggle when scheduling a recurring invoice
Choose the payment source:
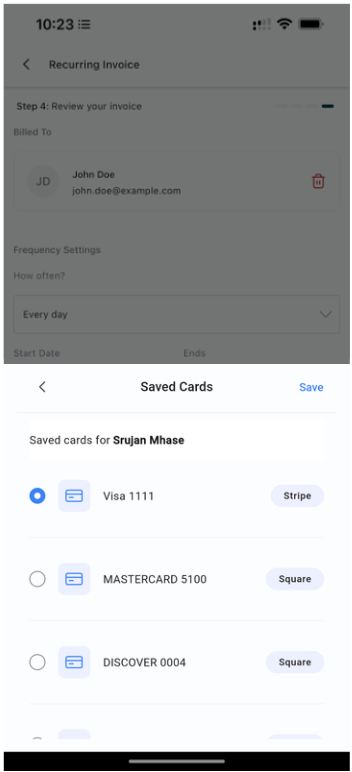
- Saved Card (card already on file)
- Customer Card (captured via Tap to Pay, Card on File, or online checkout)
Frictionless for customers after the first payment
POS flow: add recurring products → convert to invoice → set Auto‑Payment
A recurring invoice created via Invoices or POS
A customer card on file or captured
Card payments only (not cash or manual entry)
Step 1
Create the schedule: Mobile app → Invoices → New → Recurring invoice.
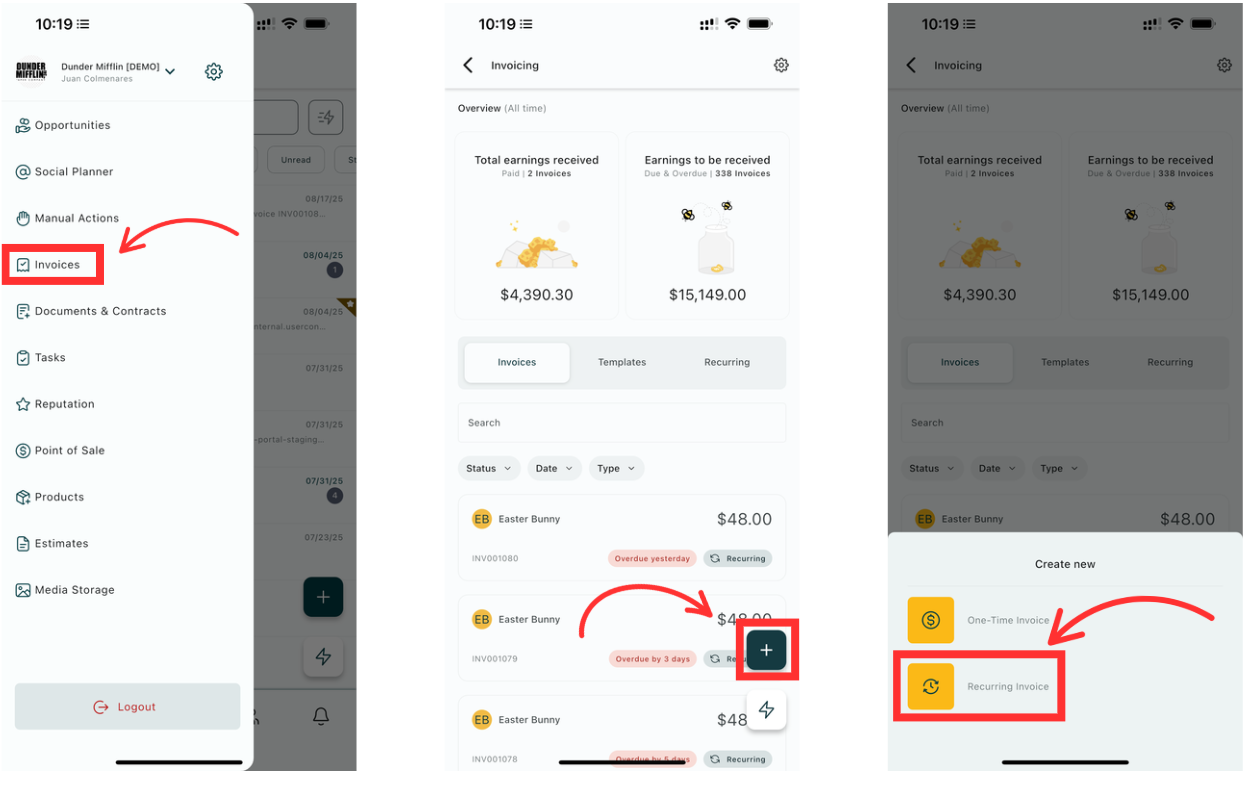
Step 2
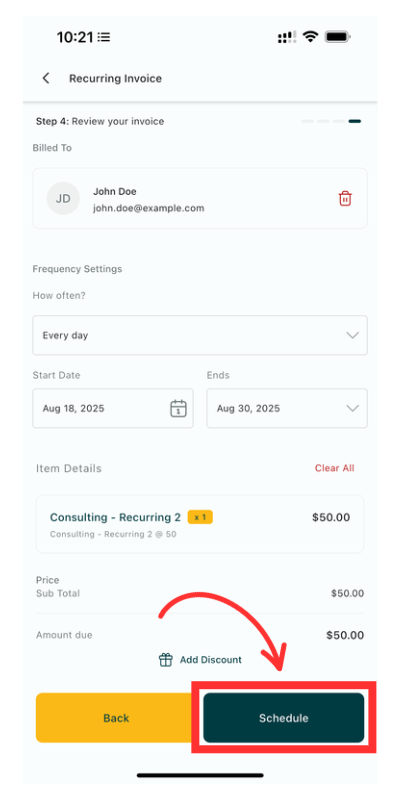
Add basics: select customer, items, billing frequency, start date.
Step 3
Enable Auto‑Payment: toggle “Enable Auto‑Payment” on the scheduling screen.
Step 4
Choose payment method: pick a Saved Card or use the Customer Card captured via Tap to Pay or online checkout.
Step 5
Review and send: confirm schedule details and send the invoice/schedule.
Step 6
Let it run: payments process automatically on each billing date; monitor status from the invoice timeline.
Confirm the right card before sending; keep card details updated to avoid failures.
For POS, add recurring products to the cart and “convert to invoice,” then enable Auto‑Payment during scheduling.
Use clear item names and memos so customers recognize charges.
Does this work with cash or manual entry?
No. Auto‑Payment requires a card.
Can I choose which card gets charged?
Yes. Select from Saved Card(s) or use the Customer Card captured via Tap to Pay or online checkout.
Can I enable Auto‑Payment after I’ve already sent the schedule?
Turn it on during scheduling. If it’s already sent, create or adjust the schedule with Auto‑Payment enabled.
What if a payment fails?
Update the customer’s card on file and retry the charge from the invoice workflow.
