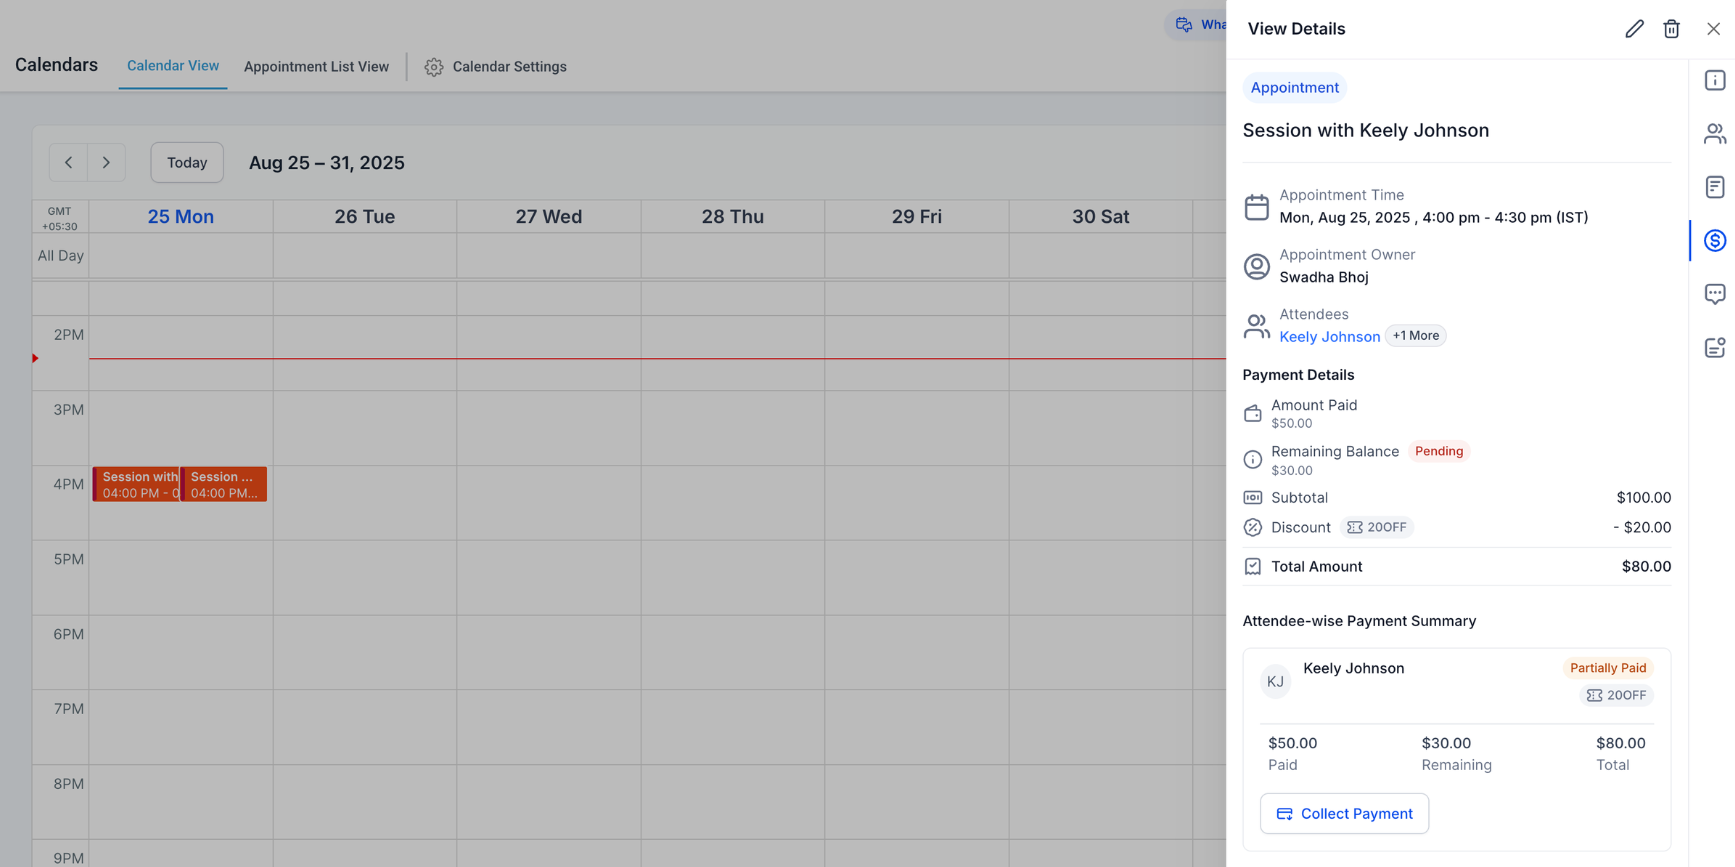
A new Payments tab in the appointment modal lets you create and send invoices, record payments, and review related billing details for that appointment and contact.
Payments tab inside the appointment modal
Create a new invoice or link an existing one
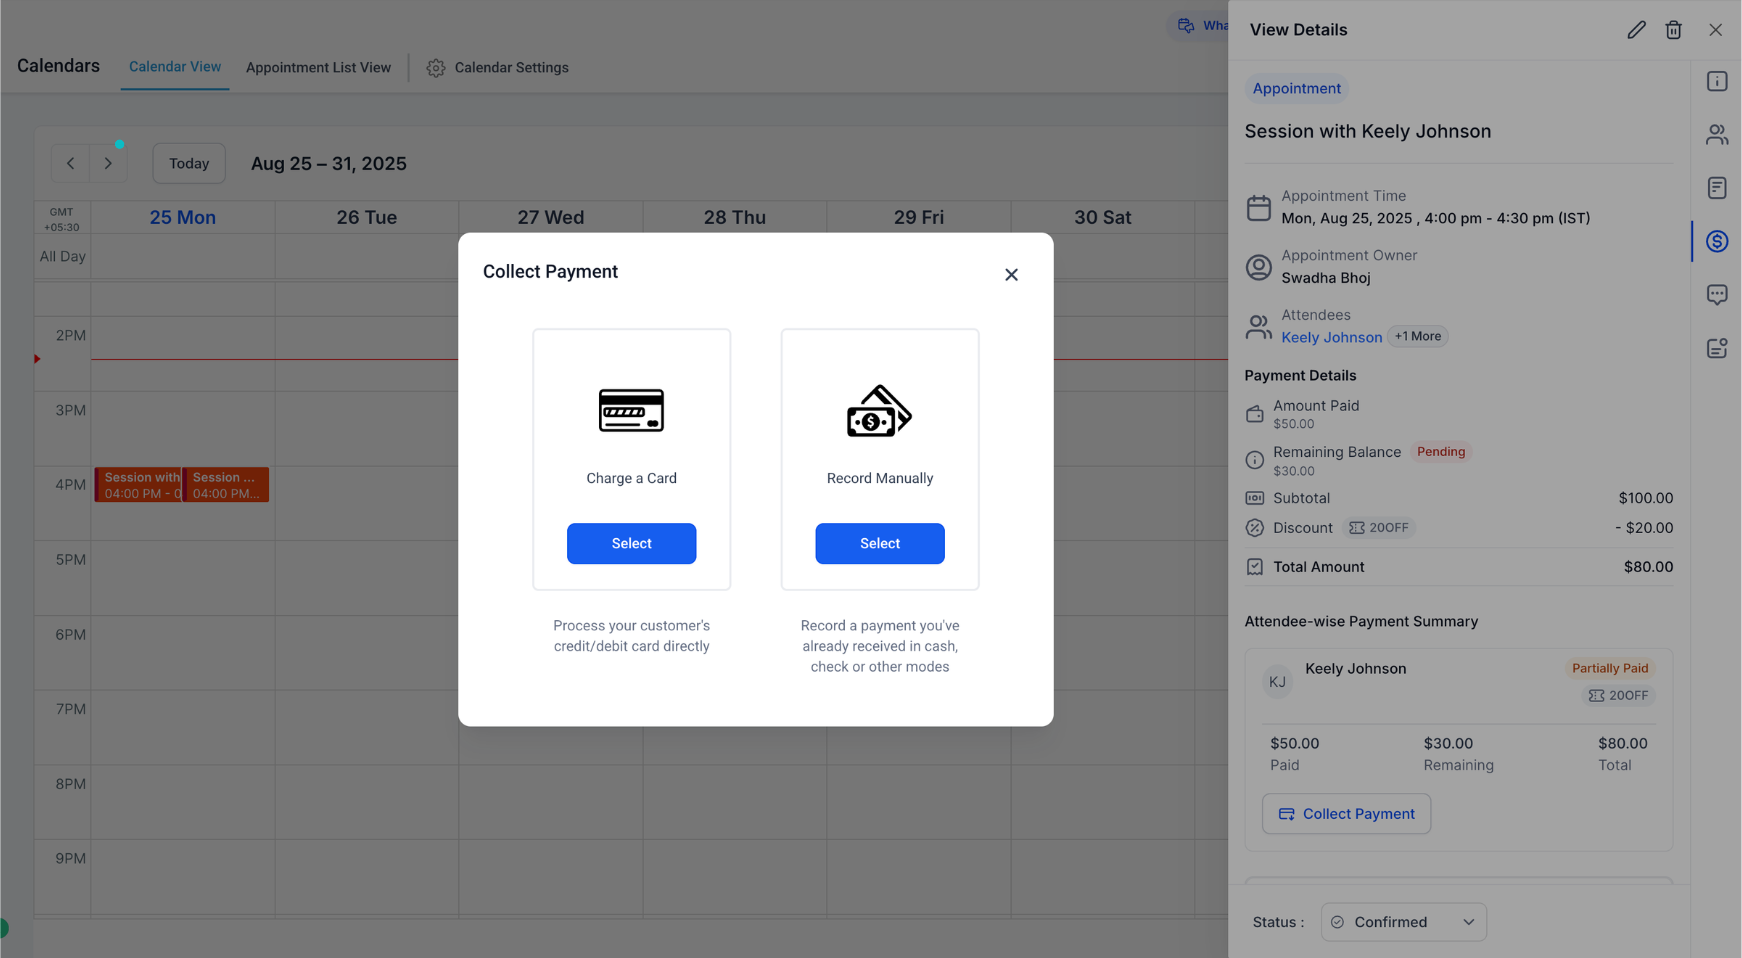
Send an invoice link or record a payment on the spot
See invoice and payment status alongside appointment details
Set up products, taxes, and payment processors first so checkout is smooth.
Use clear invoice names and memos so customers recognize the charge.
If you bill before or after the visit, keep a simple naming convention to track timing.
Step 1
Open Scheduler and click the appointment you want to bill.
Create an invoice, link an existing one or review the assign one for this contact.
Step 2
Click on Collect Payment and select the best option
Step 3
Save and confirm the status so you can see billing and appointment details in one place.
Where do I find the Payments tab
Click an appointment in Calendars. The Payments tab is inside the appointment modal.
Can I create an invoice without leaving the calendar
Yes. Use Create invoice in the Payments tab, then send or record payment.
Do I need a payment processor connected
Yes. Connect a supported processor in Payments to collect online payments.
Will the invoice link to the appointment and contact
Yes. The invoice you create from the modal is associated with that contact and appointment context.
Does this change reminders or scheduling
No. It adds billing tools inside the modal. Your reminders and scheduling settings stay the same.
