Topline OS now lets you attach photos to estimates. Add images per line item or to the estimate body, arrange them for clarity, and send a visual, professional estimate that speeds up approvals.
Add photos to estimates at the line item level or in the estimate body
Drag to reorder images and choose thumbnail or full width display
Cleaner viewer so recipients can click to enlarge and scan details
Images included in the sent PDF and customer view
Attach a photo to each line item that benefits from a visual, for example damaged part or finished example
Keep filenames clear and add brief captions if context helps decisions
Use before and after photos when proposing repairs or upgrades
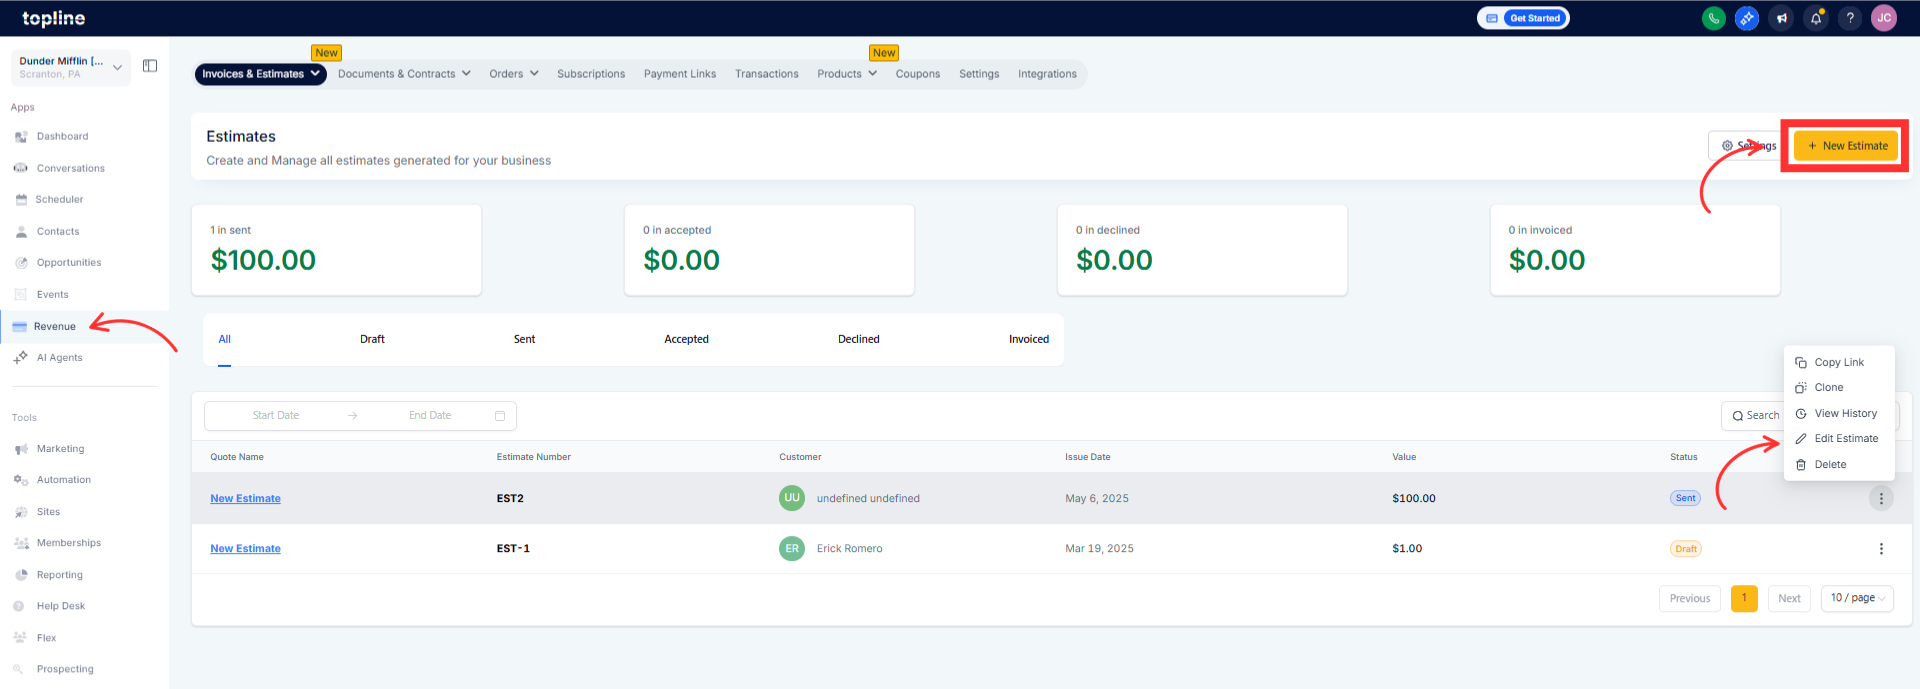
Step 1
Open Revenue and go to Estimates. Create a new estimate or edit an existing one.
Step 2
To add photos to the estimate body, use Add image in the editor and upload one or more files.
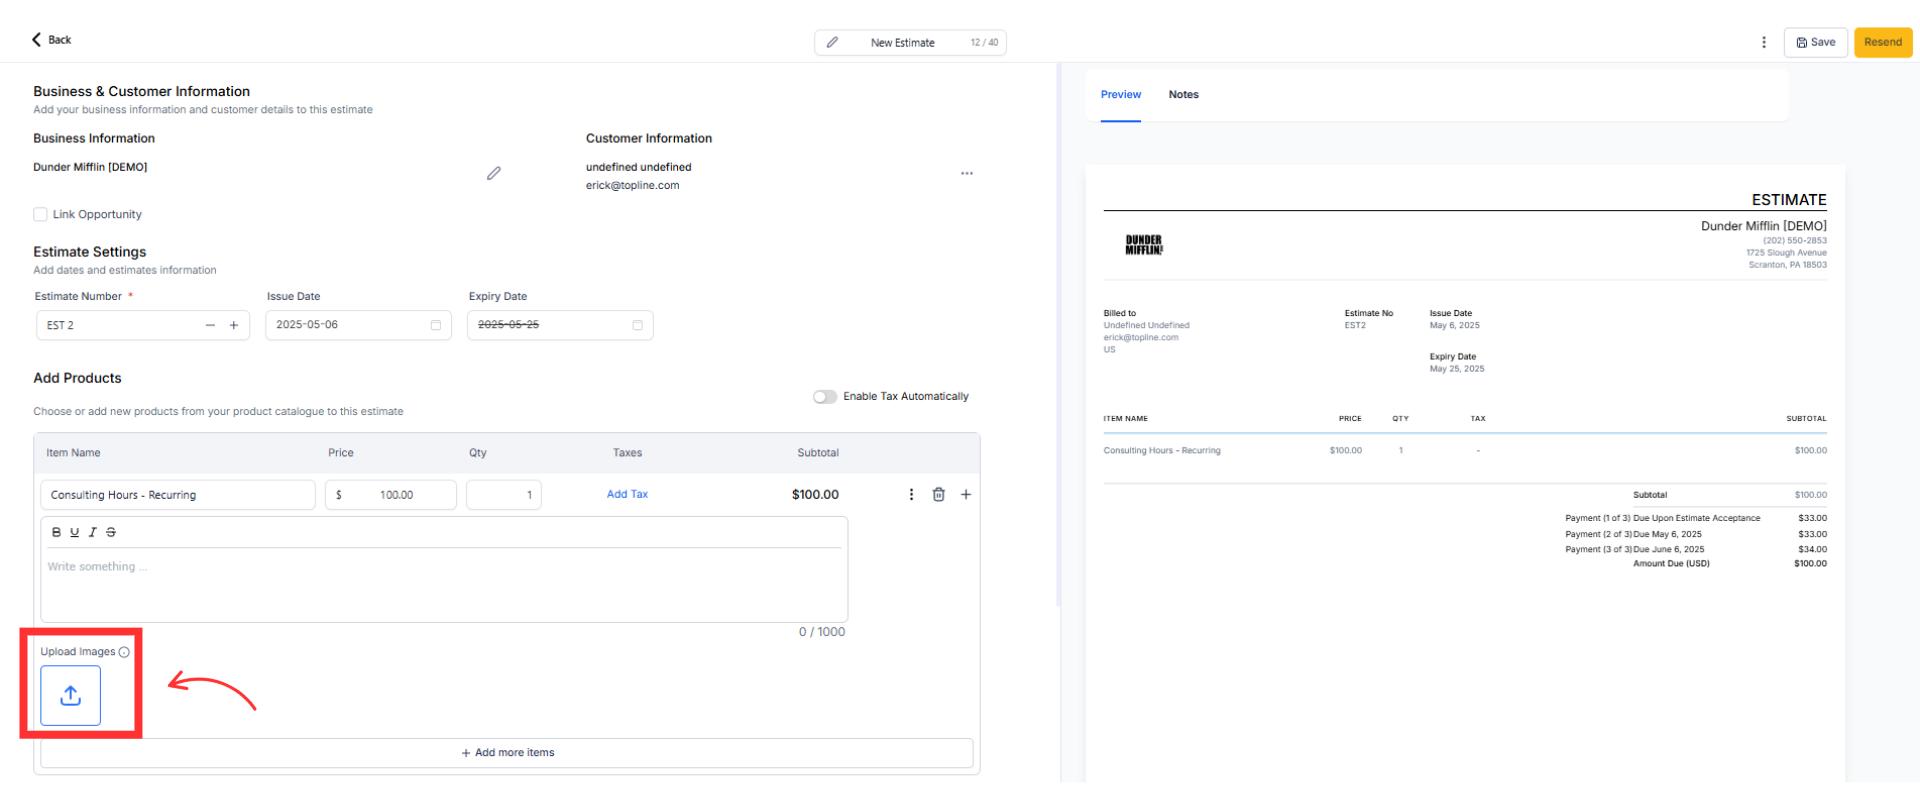
Step 3
To add photos to a line item, open the item, click Add image or Attach photo, and upload the relevant pictures.
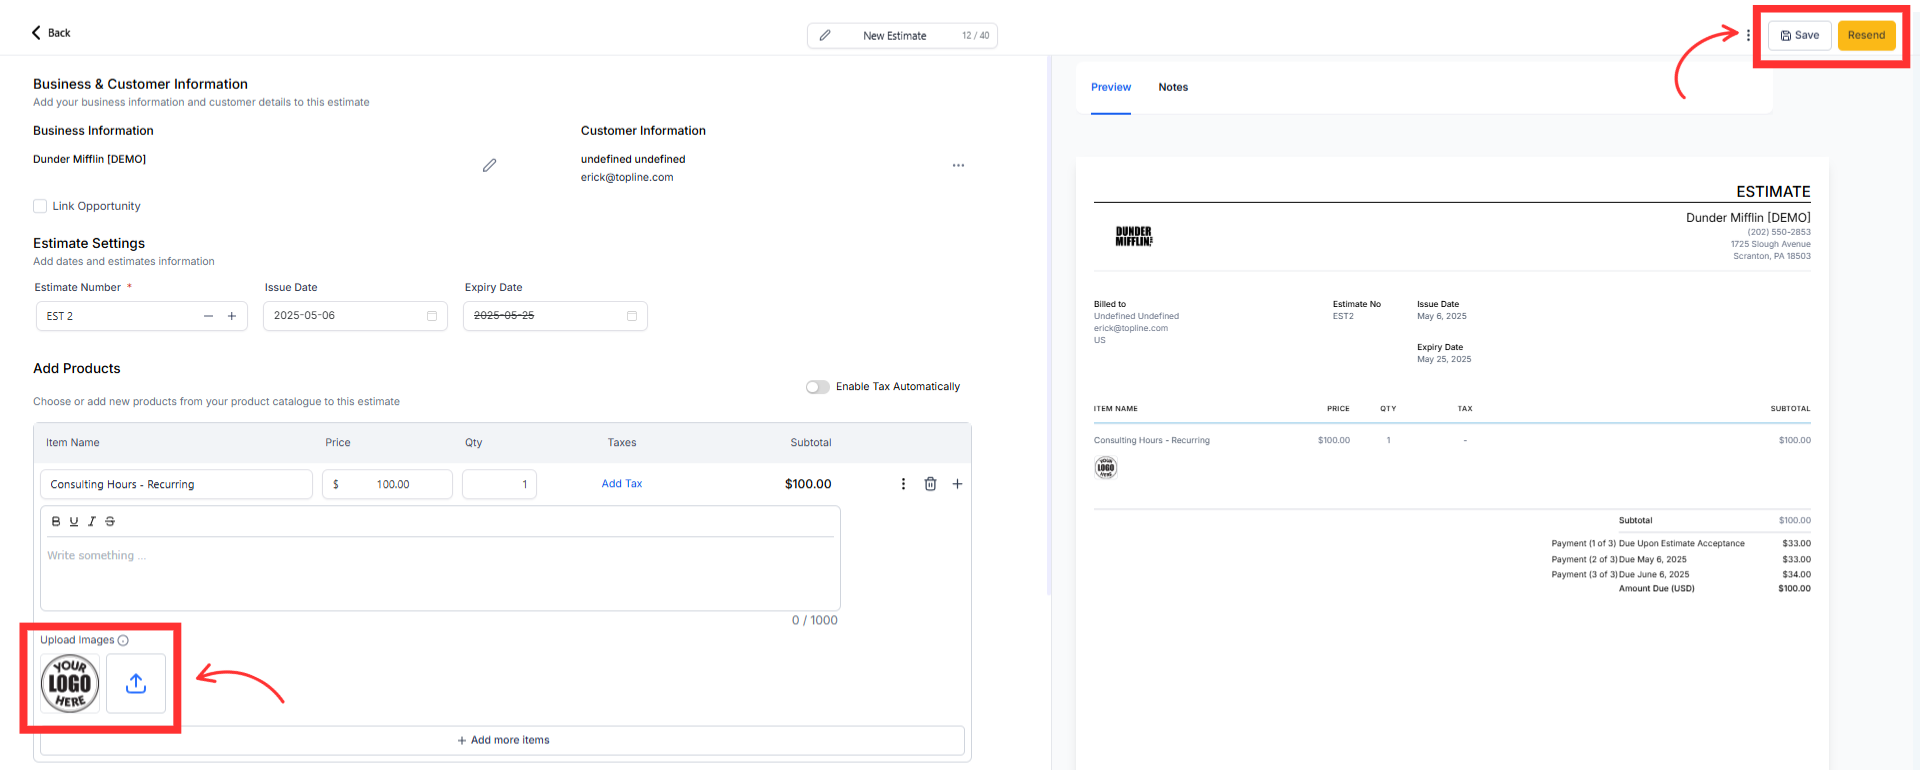
Step 4
Reorder images as needed. Choose display size such as thumbnail grid or full width where available. Save, then Send. Open the customer view or PDF to confirm images display correctly.
Are photos included in the PDF and the online estimate
Yes. Images appear in both the customer view and the exported PDF.
Can I add photos per line item
Yes. Attach images to specific items for clarity and keep general images in the estimate body.
What file types and sizes are supported
Common formats like JPG and PNG. Large files are compressed for faster sending.
Can the client click to enlarge images
Yes. The customer view supports enlarging images for better detail.
Will adding many images slow the estimate
Very large or numerous images can affect load time. Use web-optimized images and limit to what supports the decision.
