You can now clearly see the path a contact follows inside a workflow. Enhanced visual debugging highlights each step taken, making it easier to understand automation behavior, identify issues, and optimize workflow logic without guesswork.
• Visual highlighting of the contact path inside workflows
• Clear view of steps executed by a contact
• Improved debugging experience
• Faster identification of workflow issues
• Better transparency into automation behavior
• Use contact path highlighting when troubleshooting workflows
• Review execution paths after updating workflow logic
• Check branching conditions to ensure correct routing
• Test workflows with sample contacts for clarity
• Use visual debugging during optimization sessions
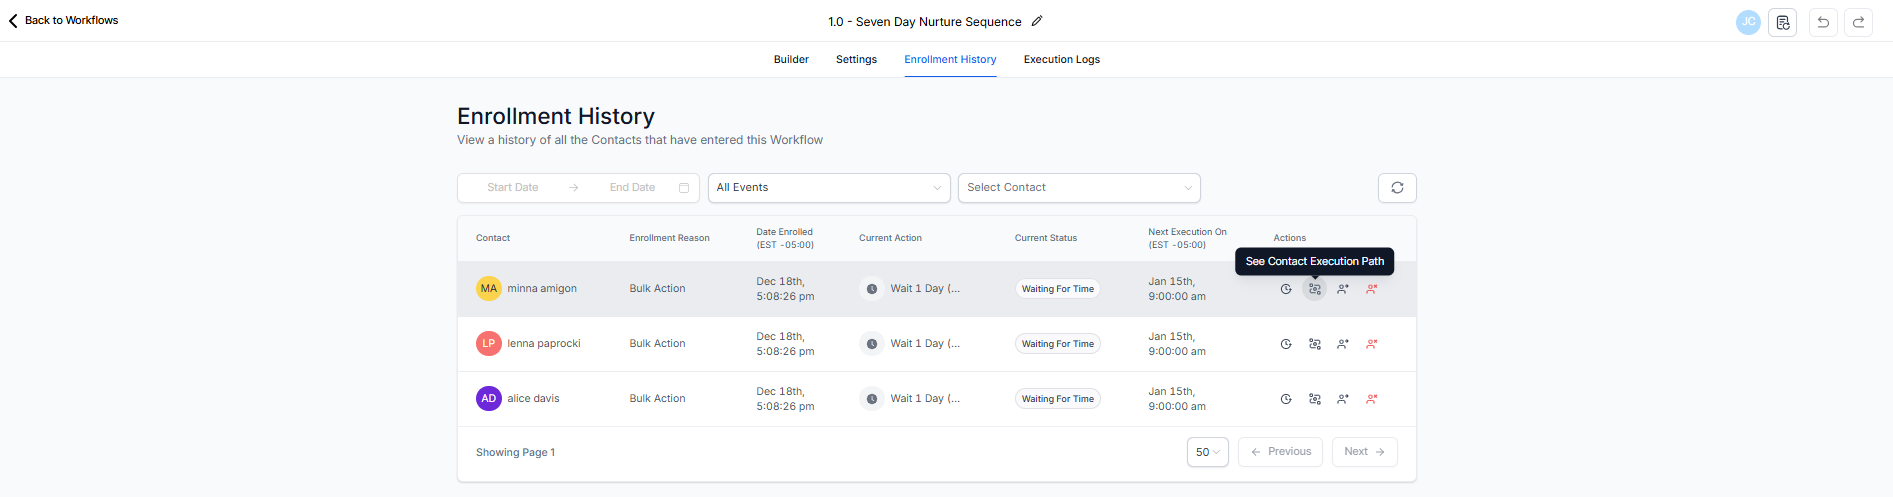
Step 1
Navigate to your automation section and open the desired workflow.

Step 2
Choose a contact that has moved through the workflow. Access the option to display the contact journey.
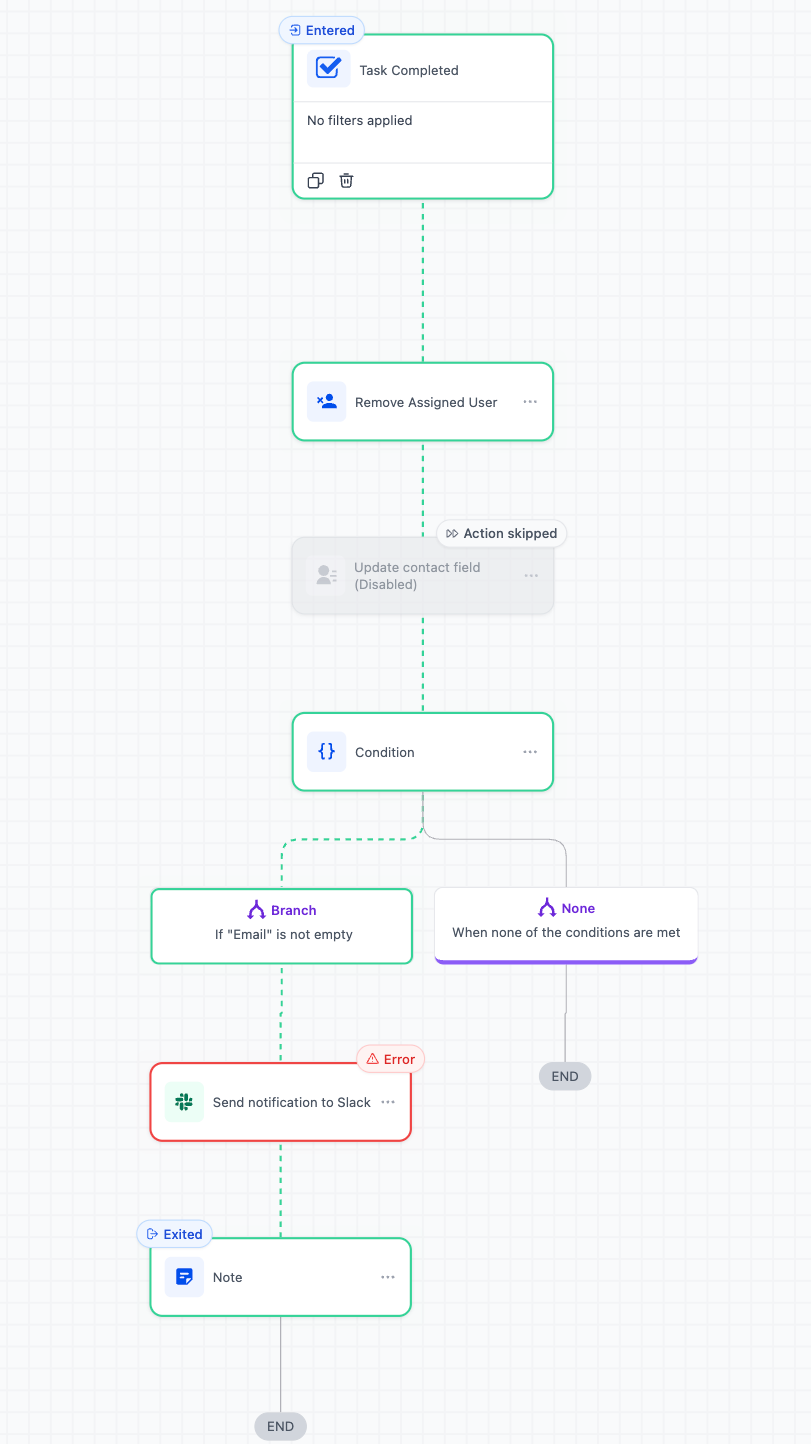
Step 3
Observe the visually highlighted path through the workflow. Look for unexpected branches or missed actions.
What does highlight contact path mean?
• It visually shows the steps a contact takes in a workflow.
Do I need to enable this feature?
• No, the visual debugging enhancement is available automatically.
Can I use this on existing workflows?
• Yes, it works with both new and existing workflows.
Does this change how workflows run?
• No, it only improves visibility for debugging.
Is this useful for complex workflows?
• Yes, it is especially helpful for workflows with multiple branches.
