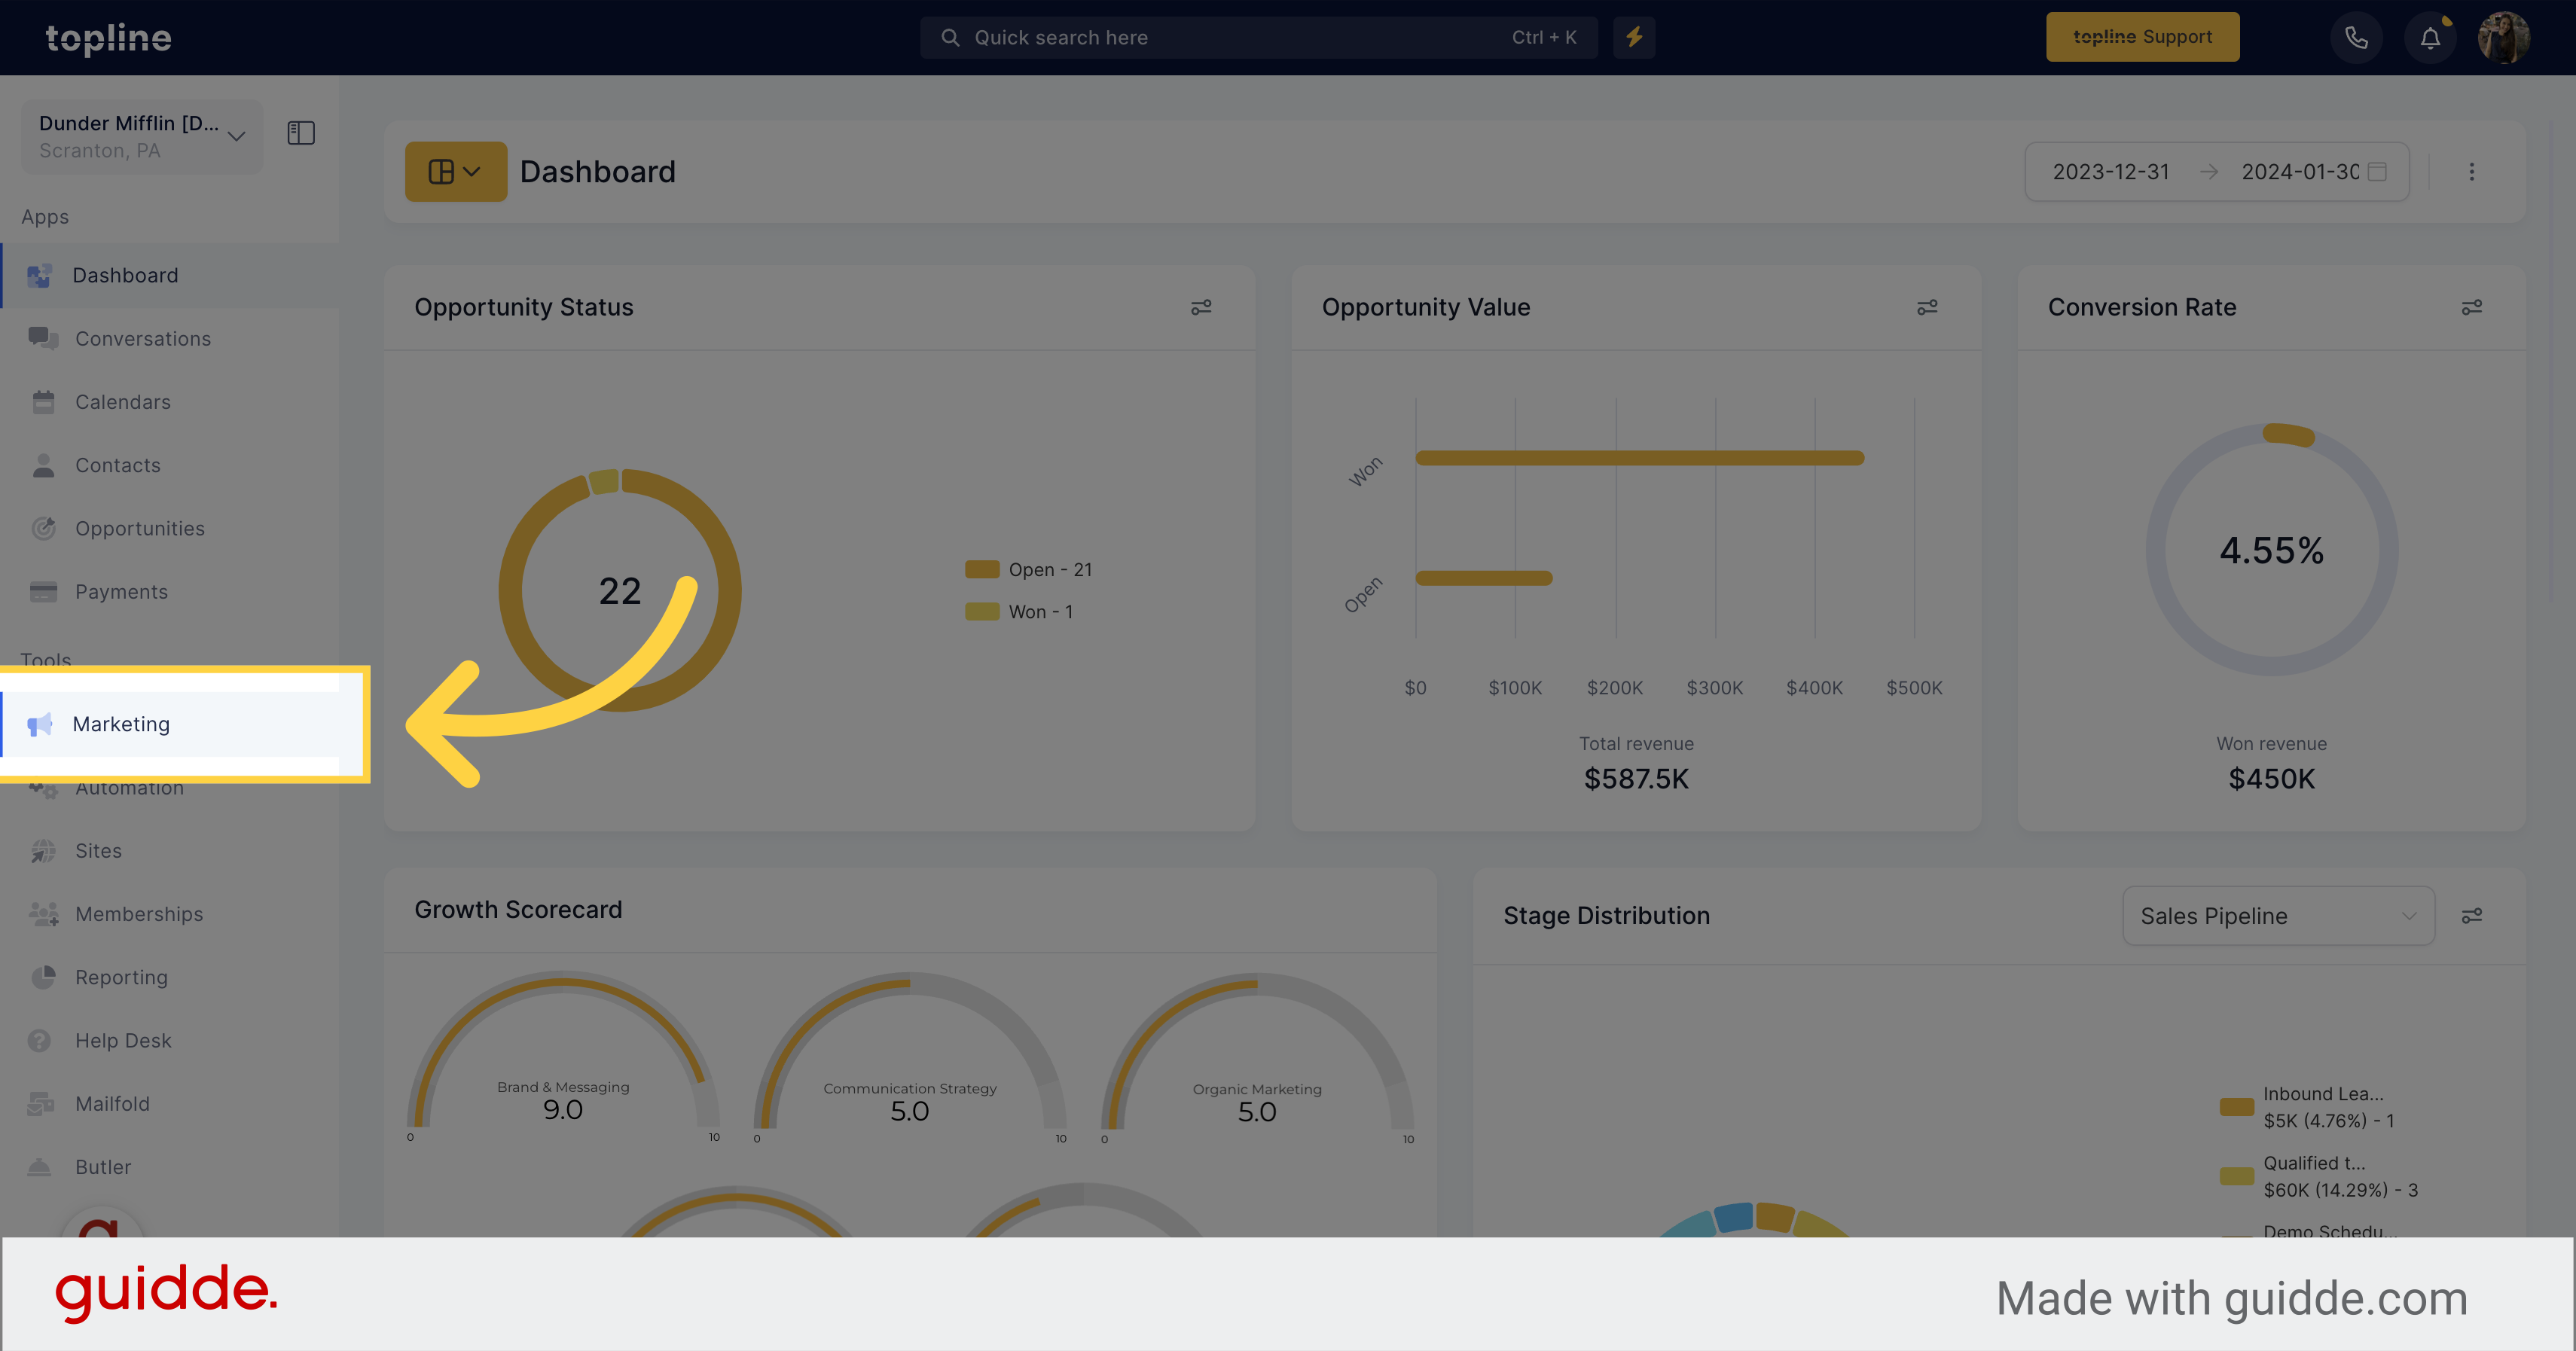
Click on the "Marketing" tab.
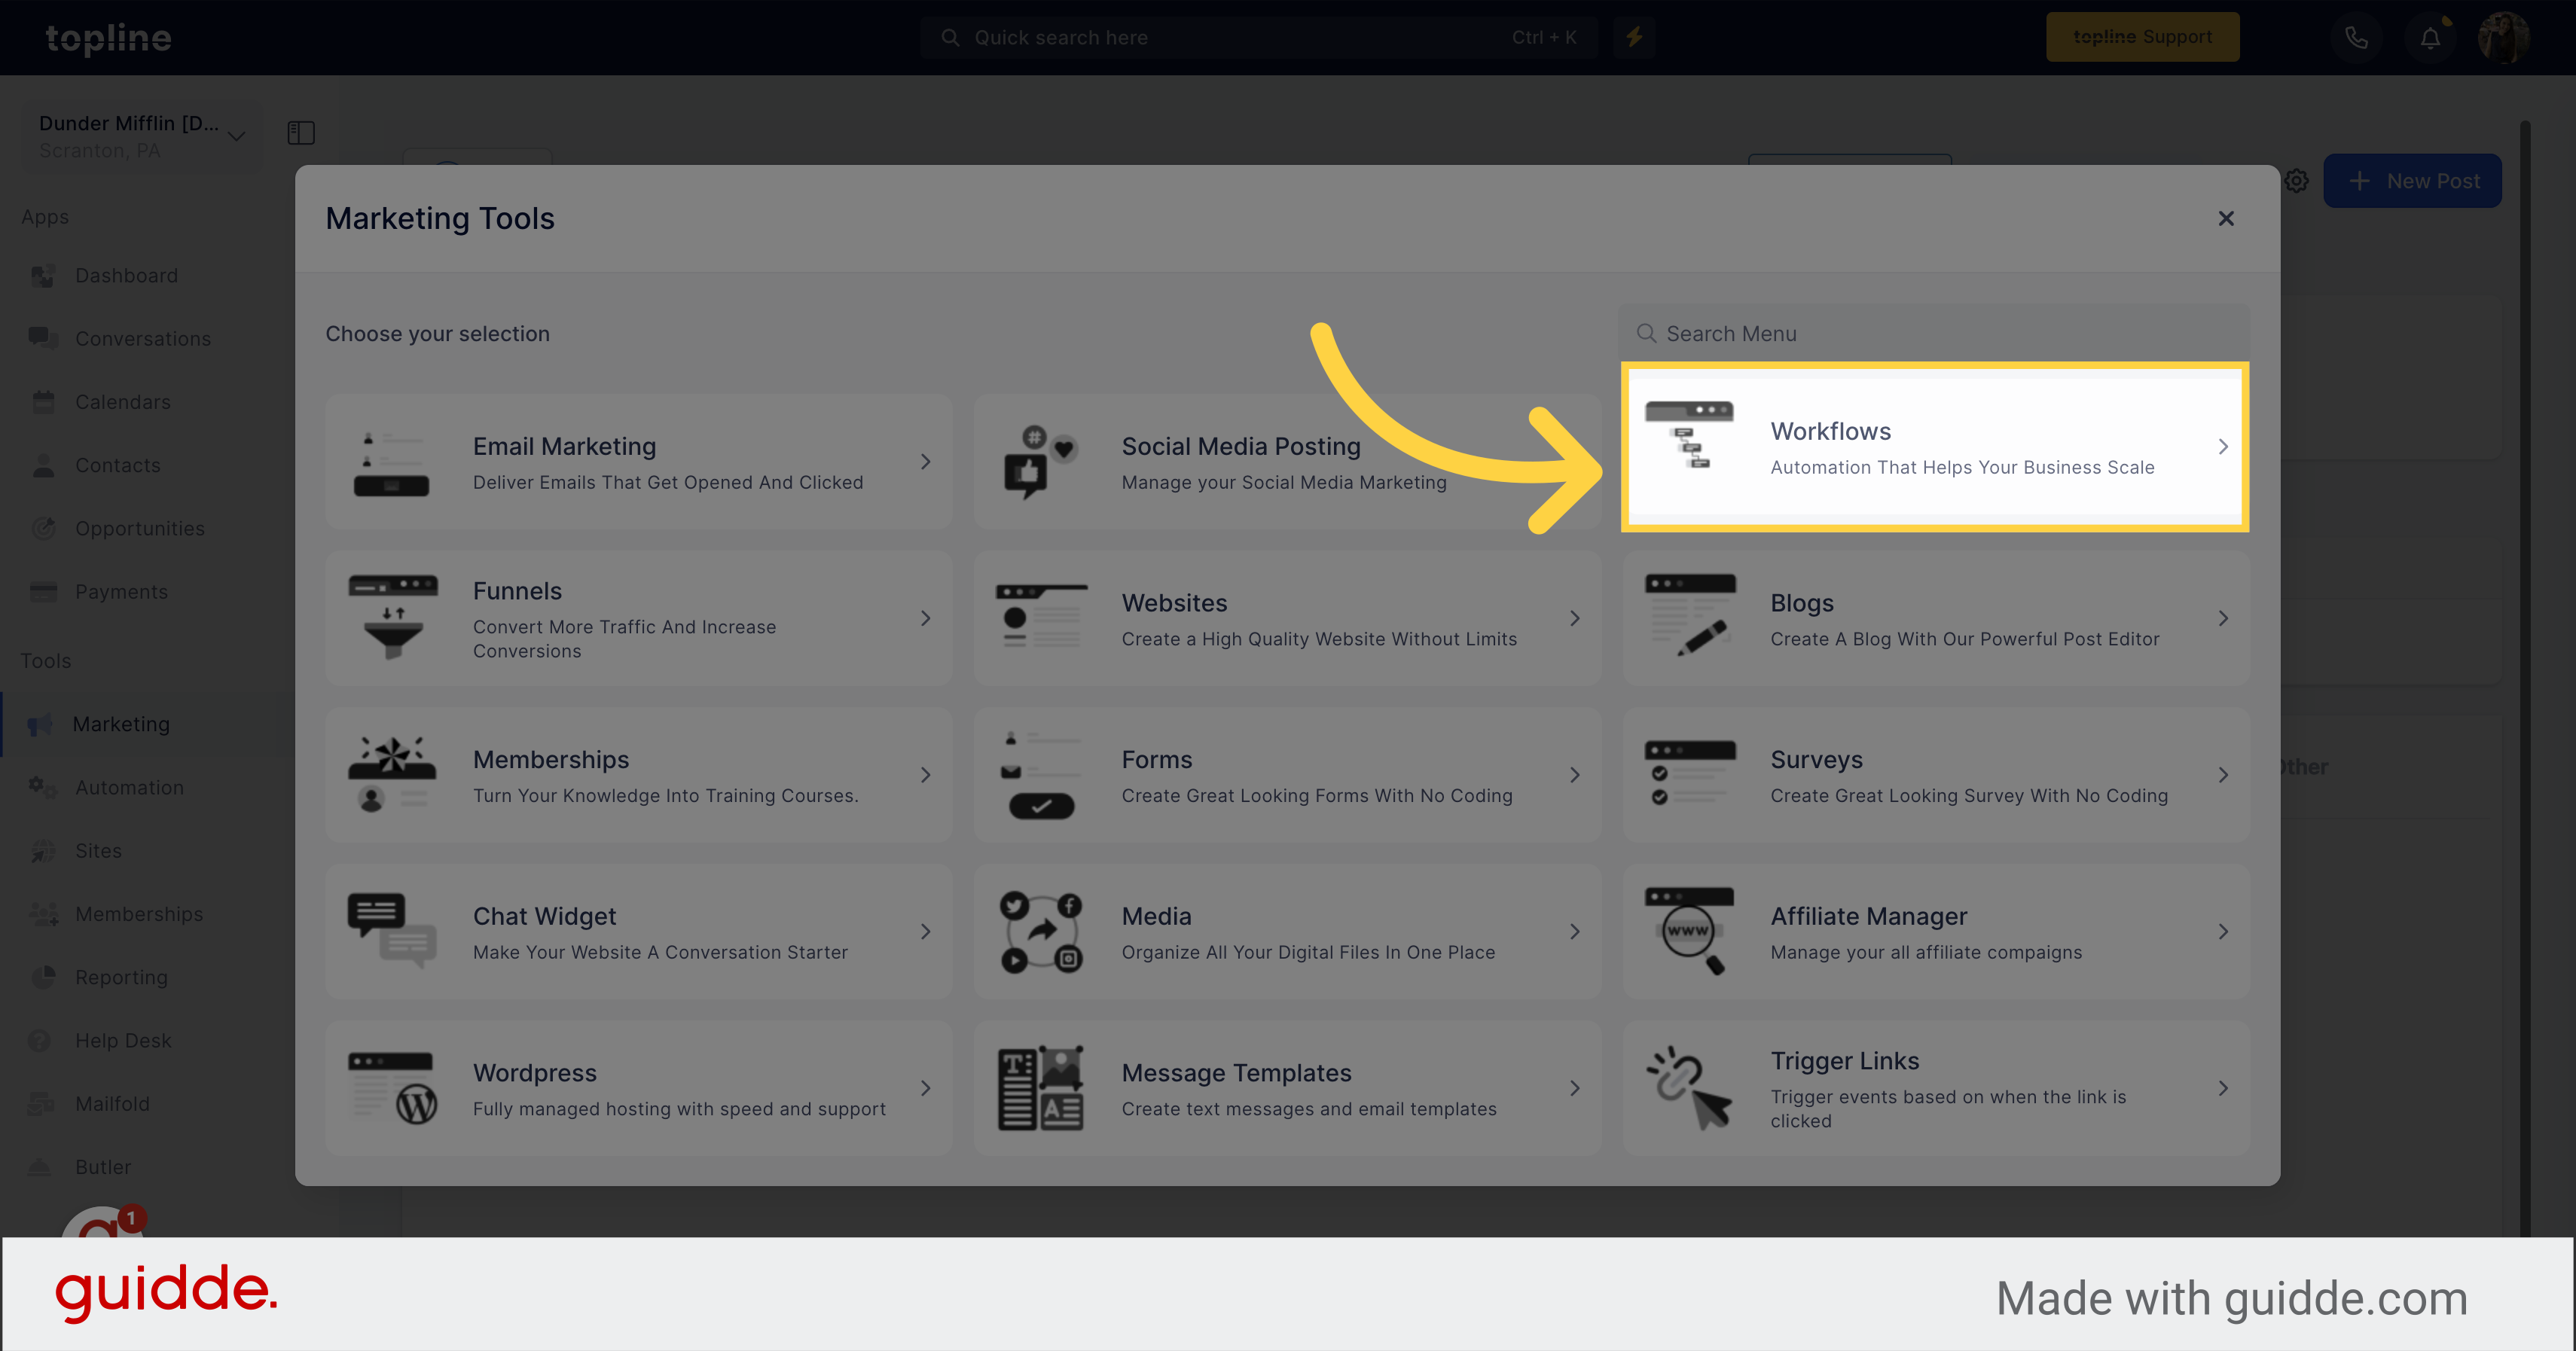
Click on the workflows tab.
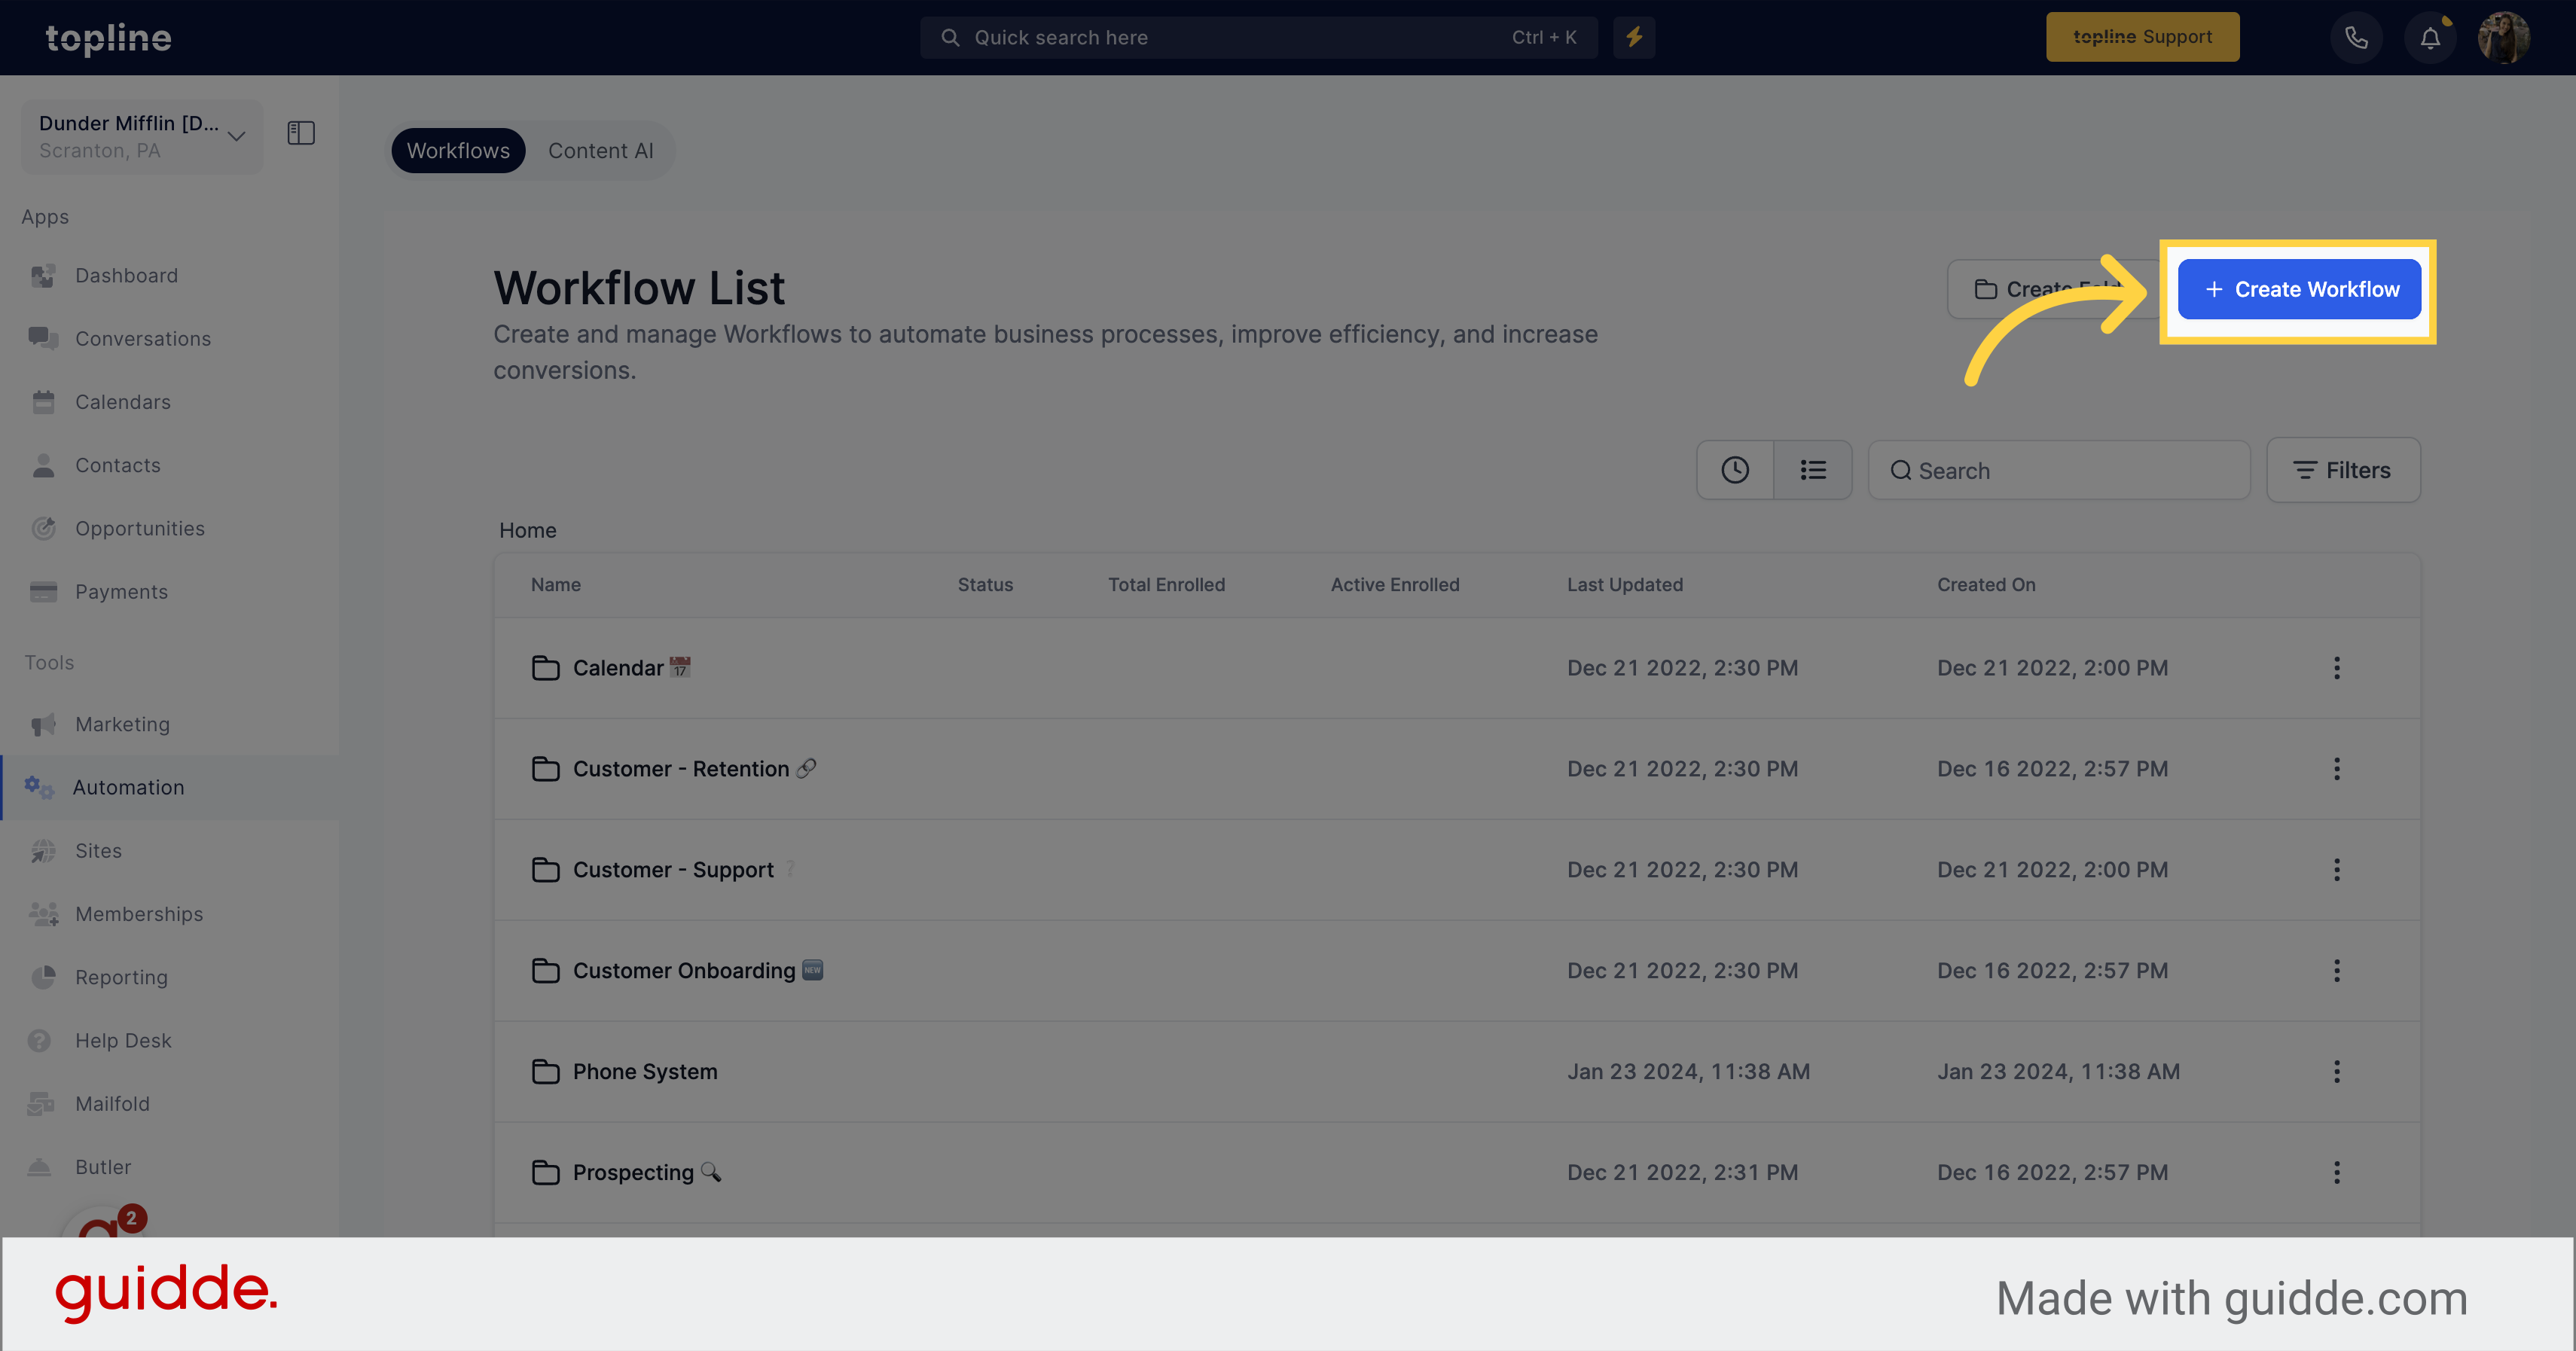
Click on the "Create Workflow" button located on the upper right side of the view.
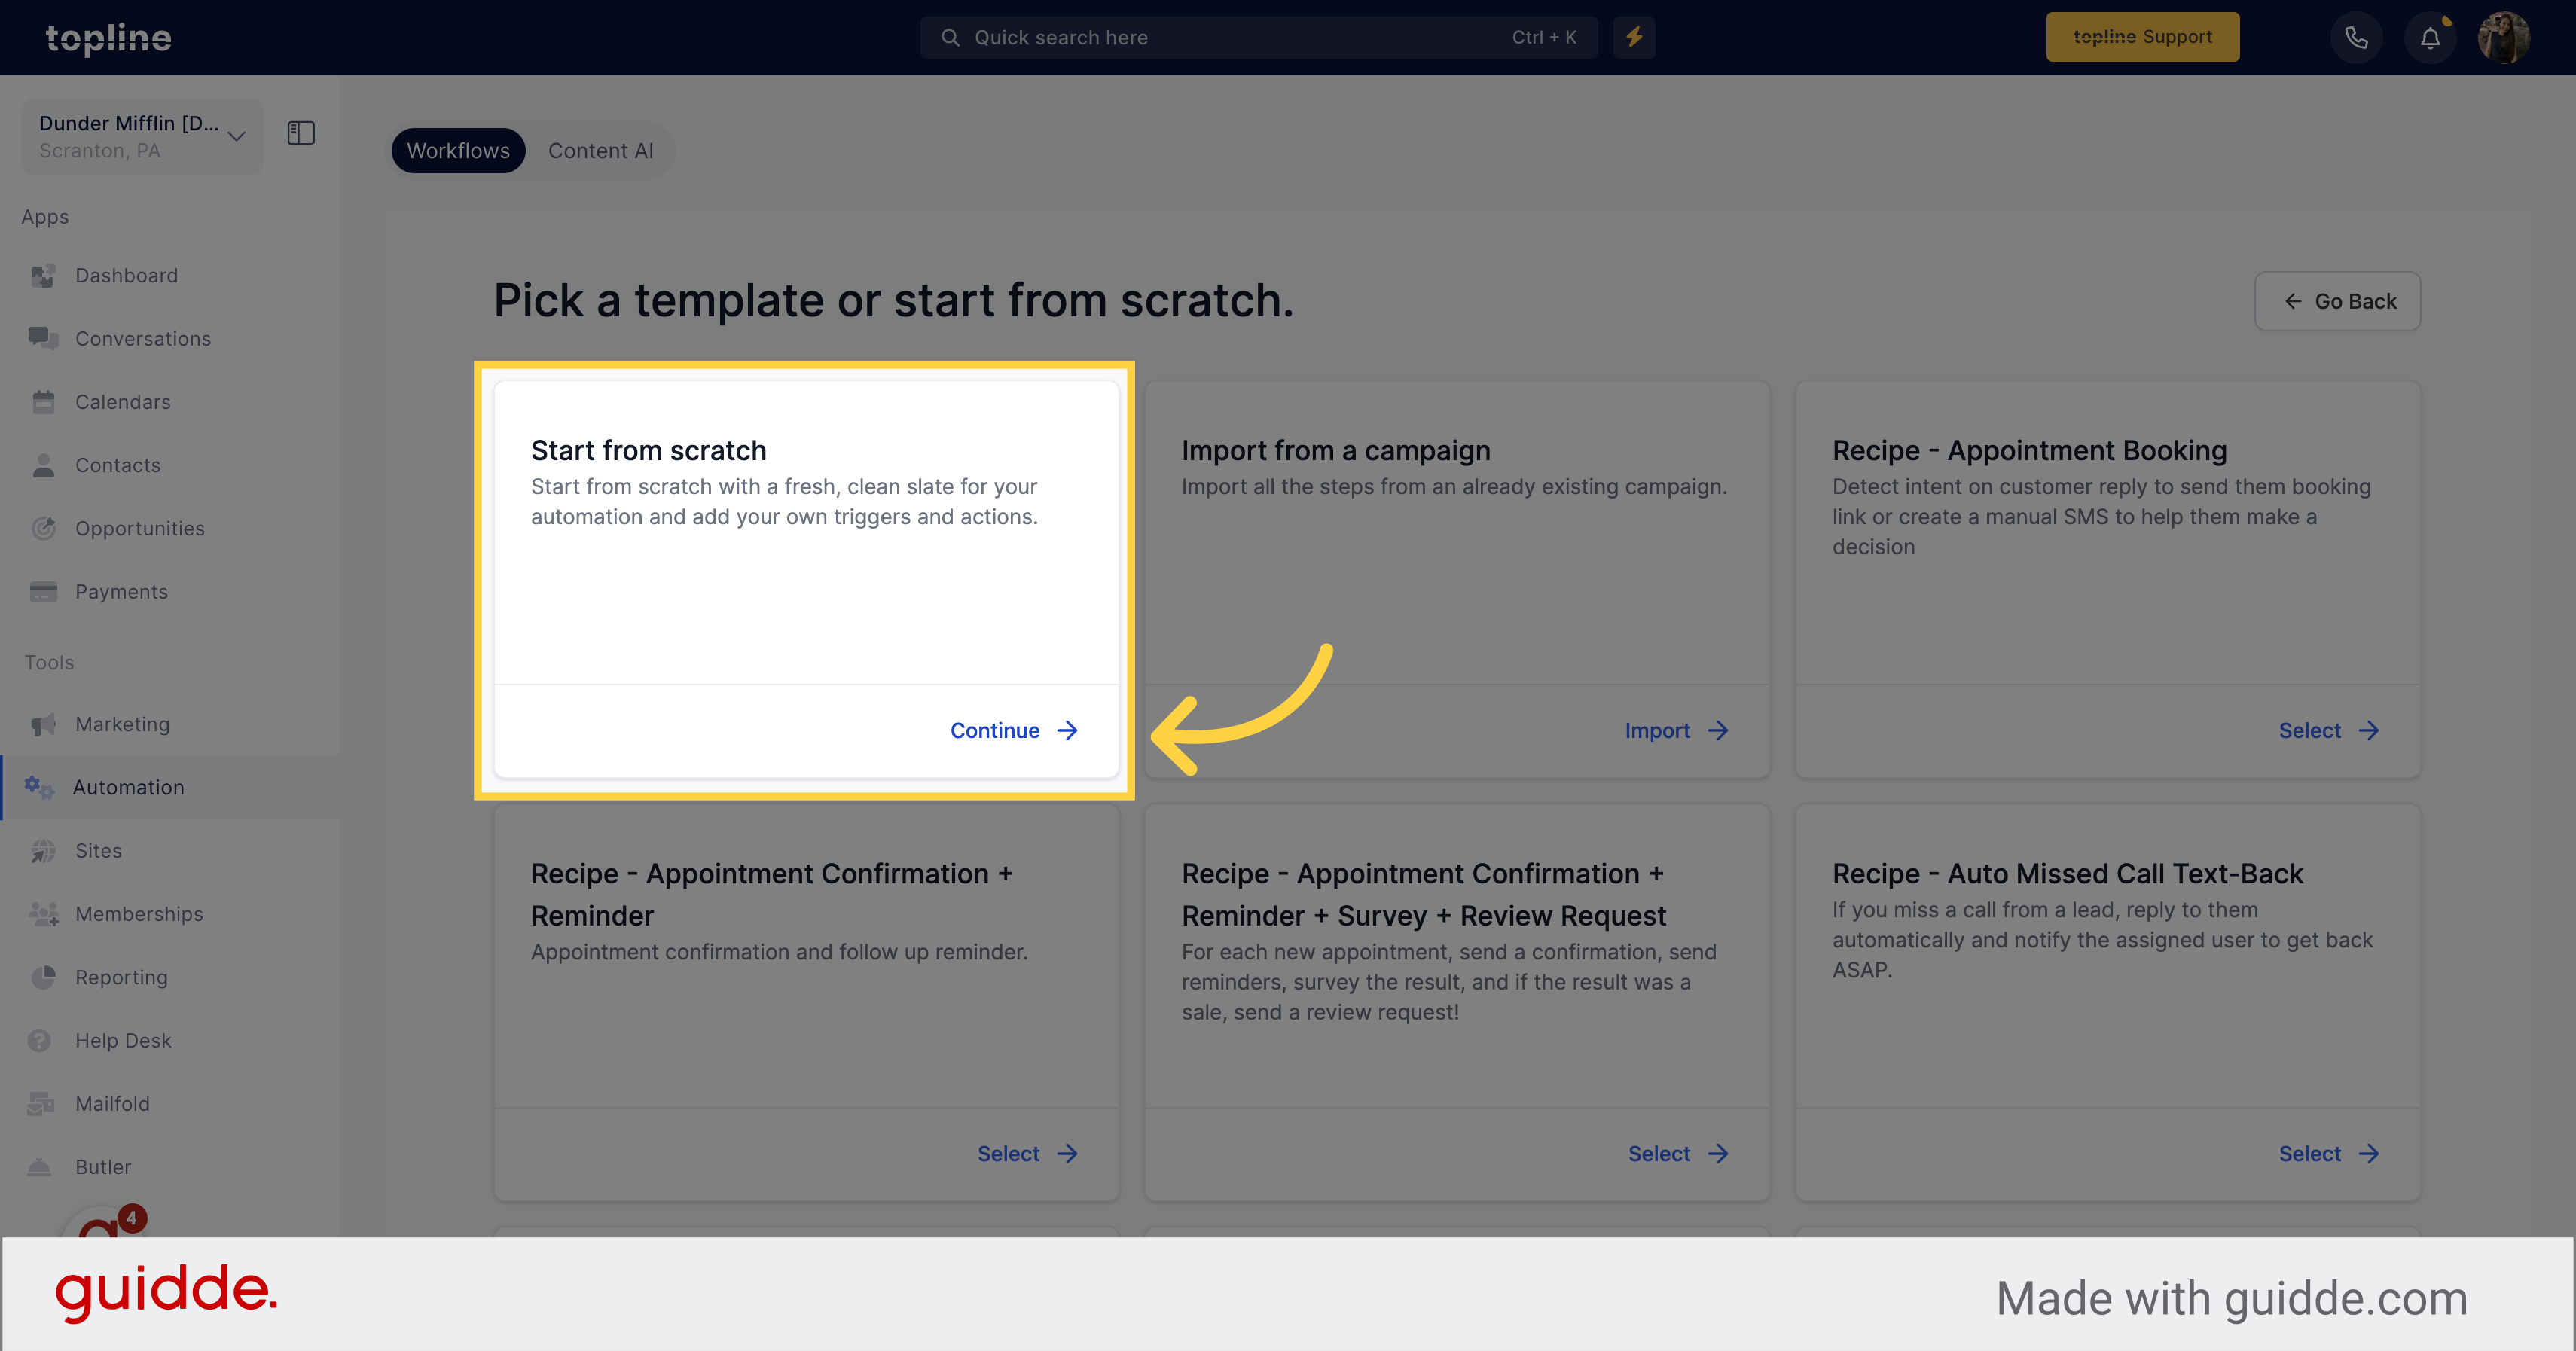
Click on the "Continue" button on the Start from Scratch option.
Click on the "+" icon to add the action.

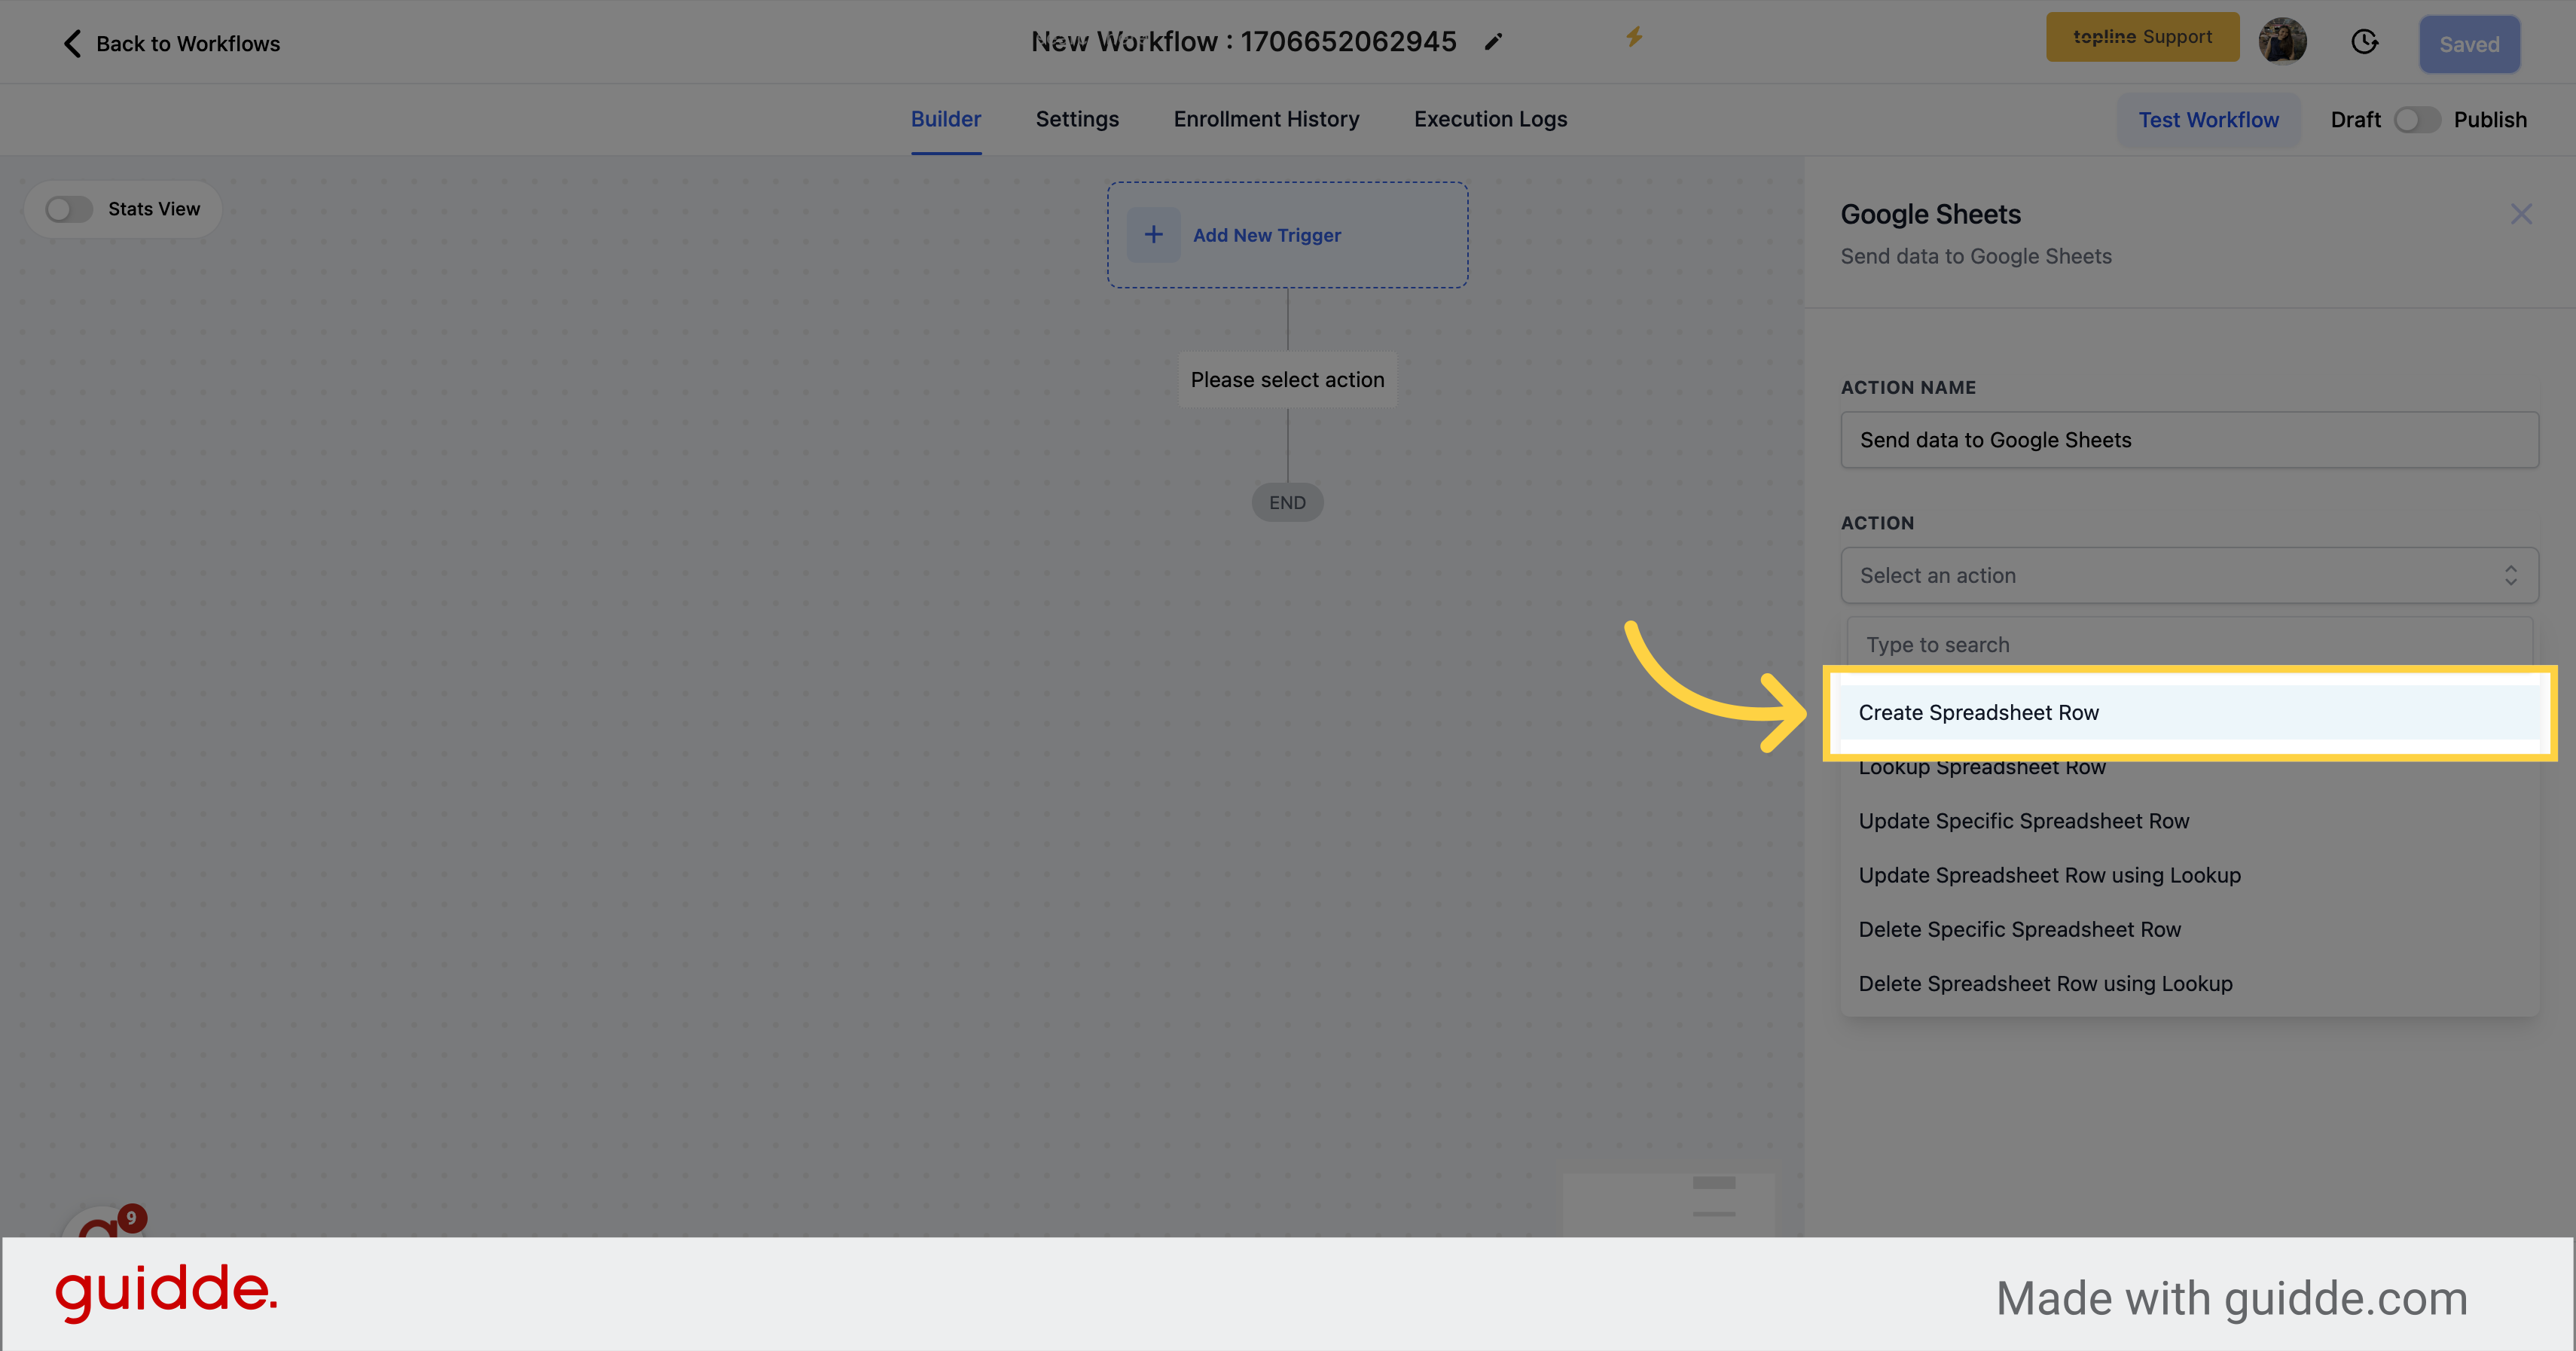
With our workflows, you can easily send, update, or delete rows in your Google Sheets documents. This provides you with a range of options for managing your data within your sheets, depending on your specific needs.
Whether you need to add new data to your sheet, update existing data, or remove outdated data, our system enables you to do so with ease. This allows you to automate and streamline your data management processes, reducing errors and increasing efficiency.
By leveraging the power of our workflow system, you can manage your data in Google Sheets with confidence, knowing that your data is accurate, up-to-date, and easily accessible.
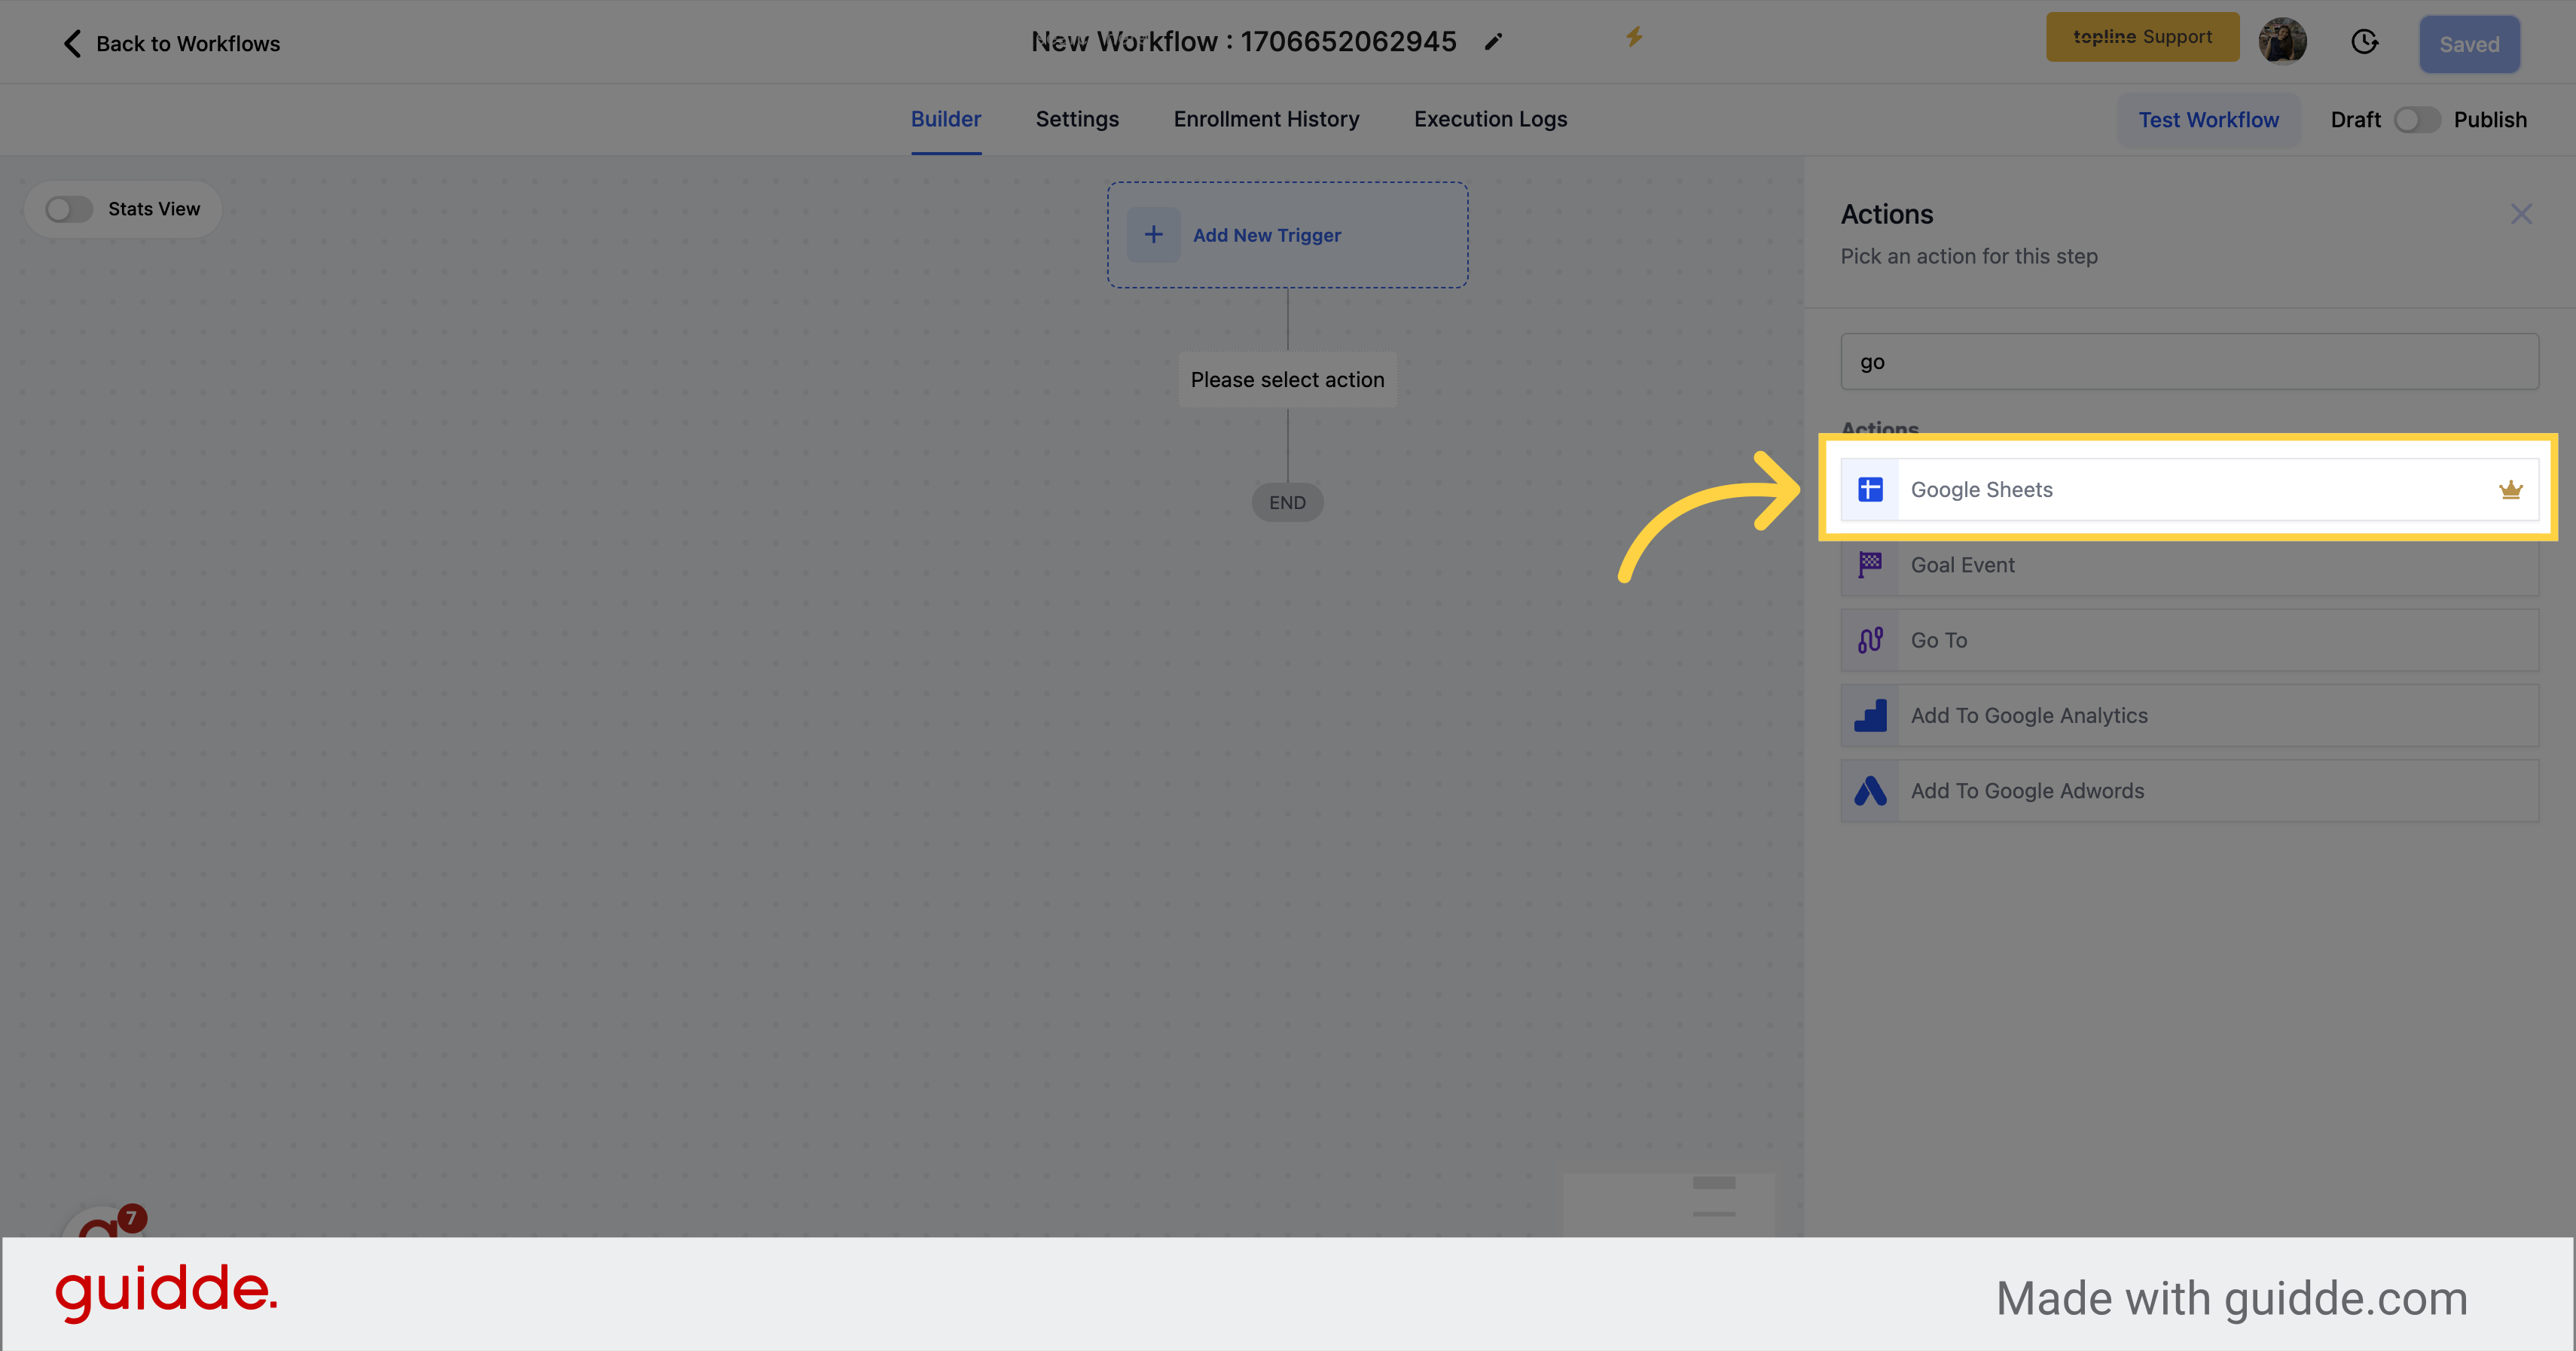
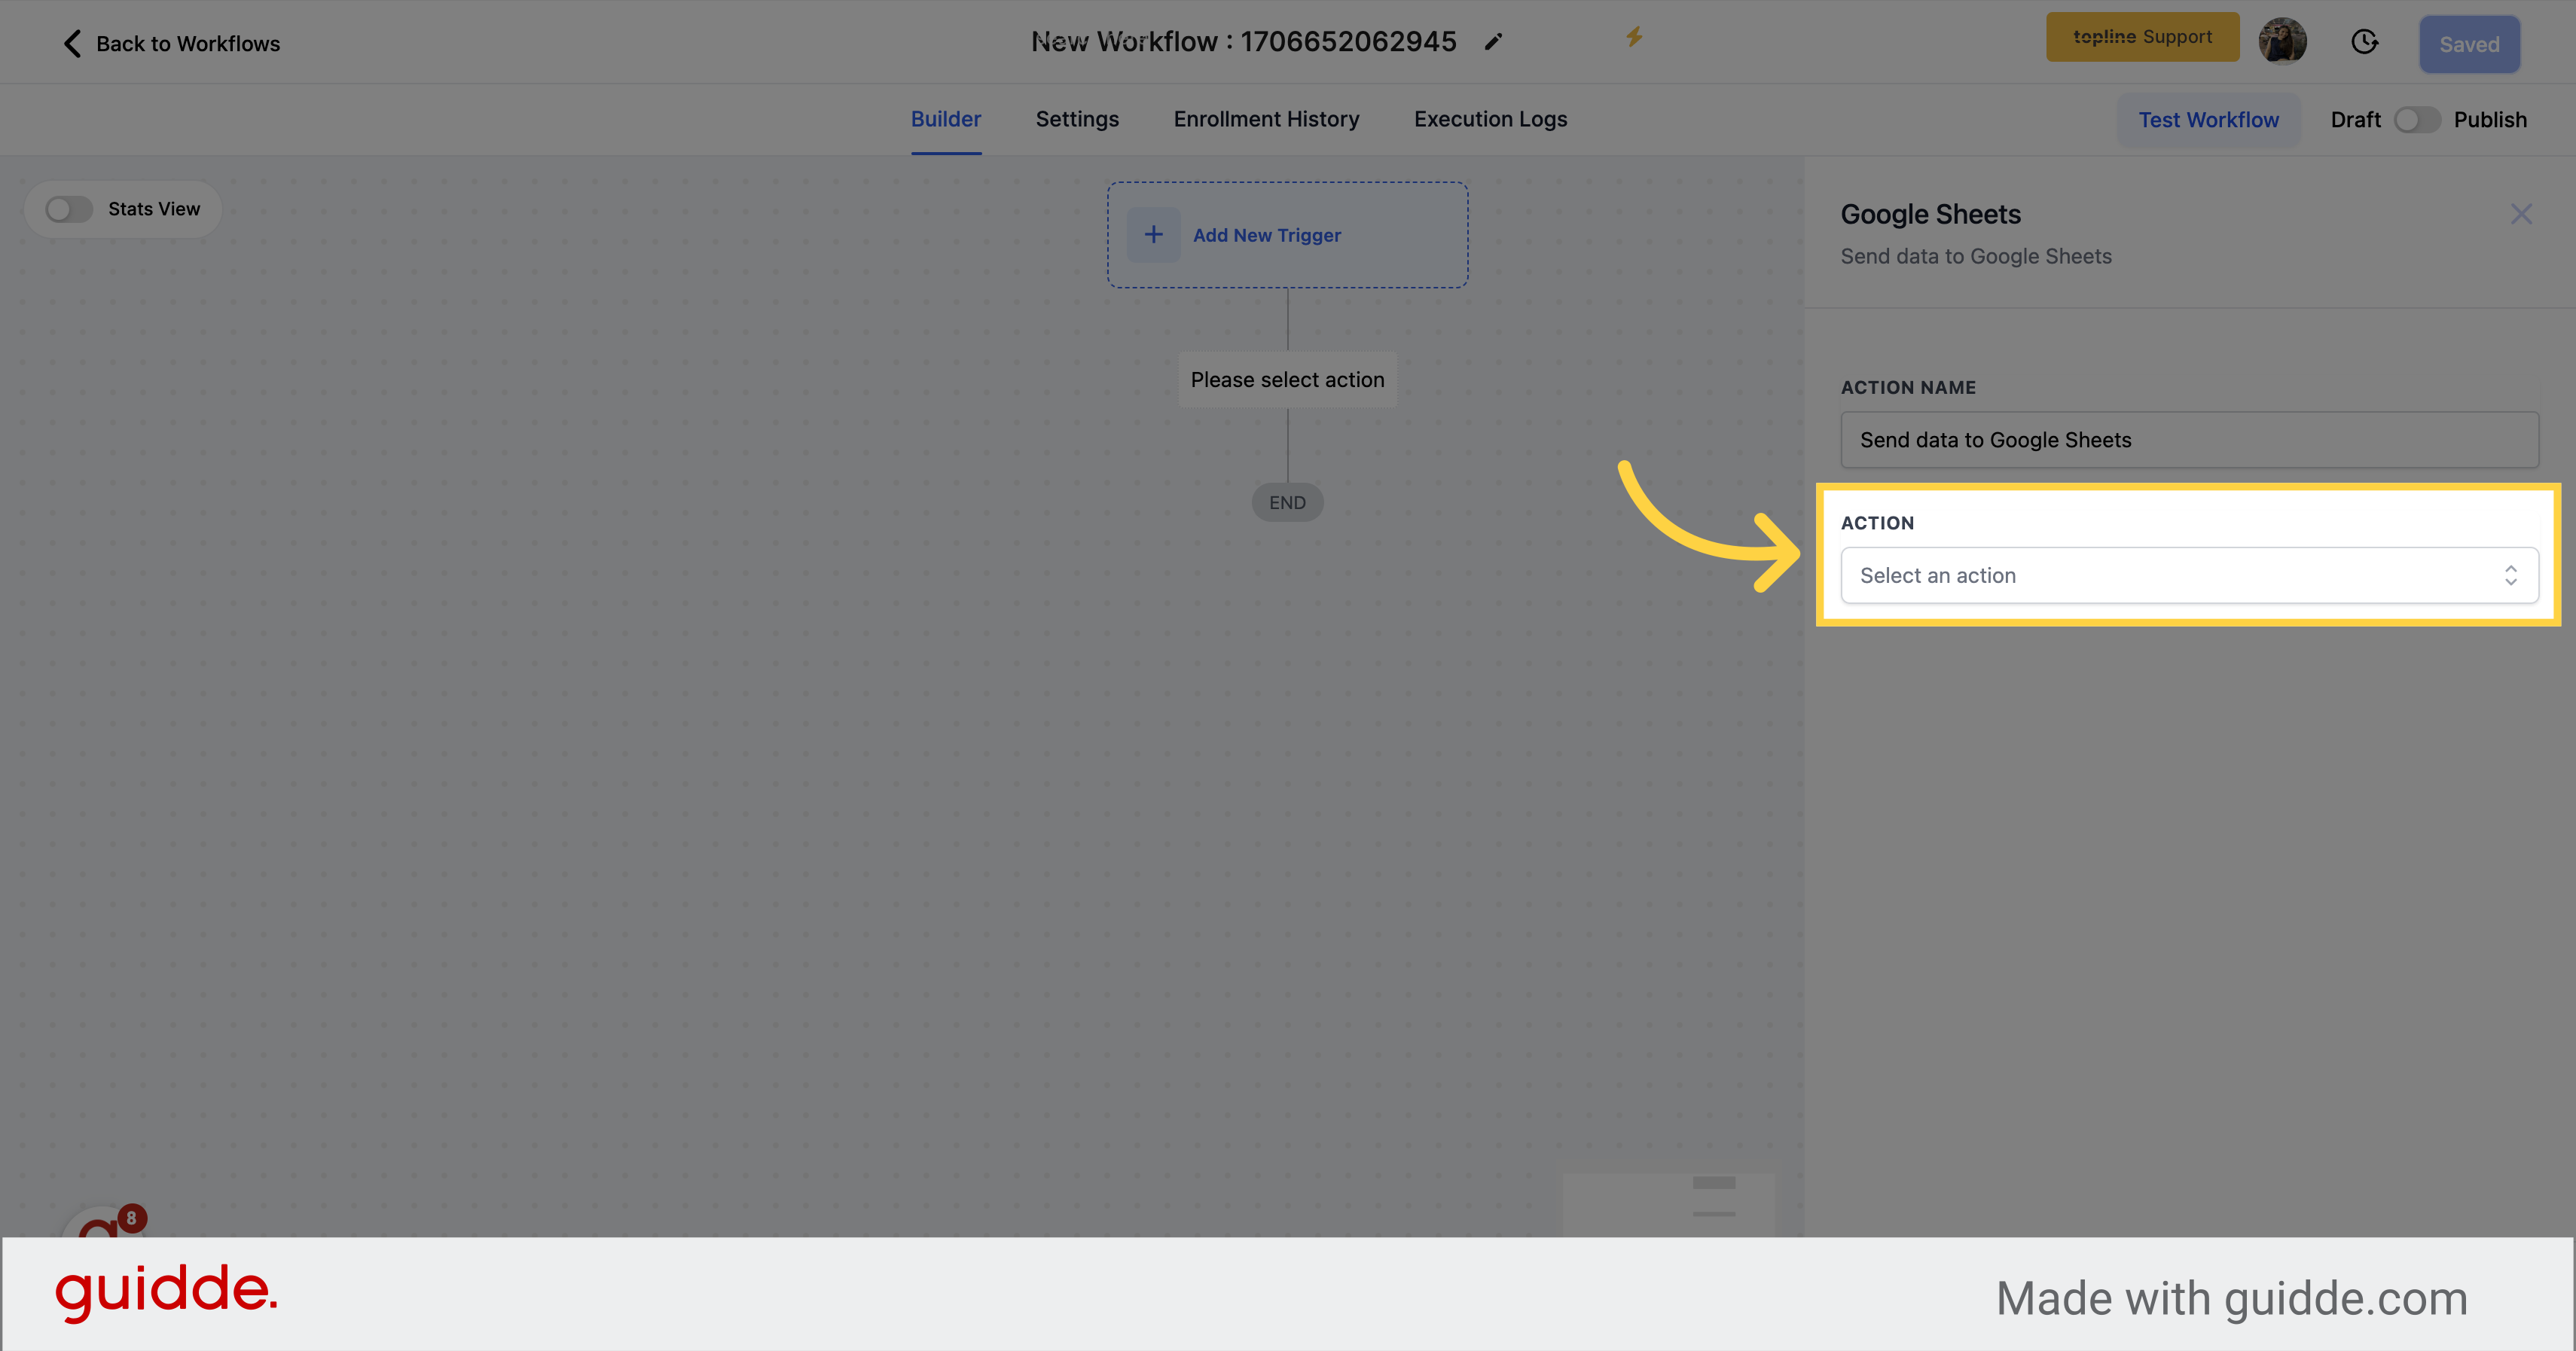
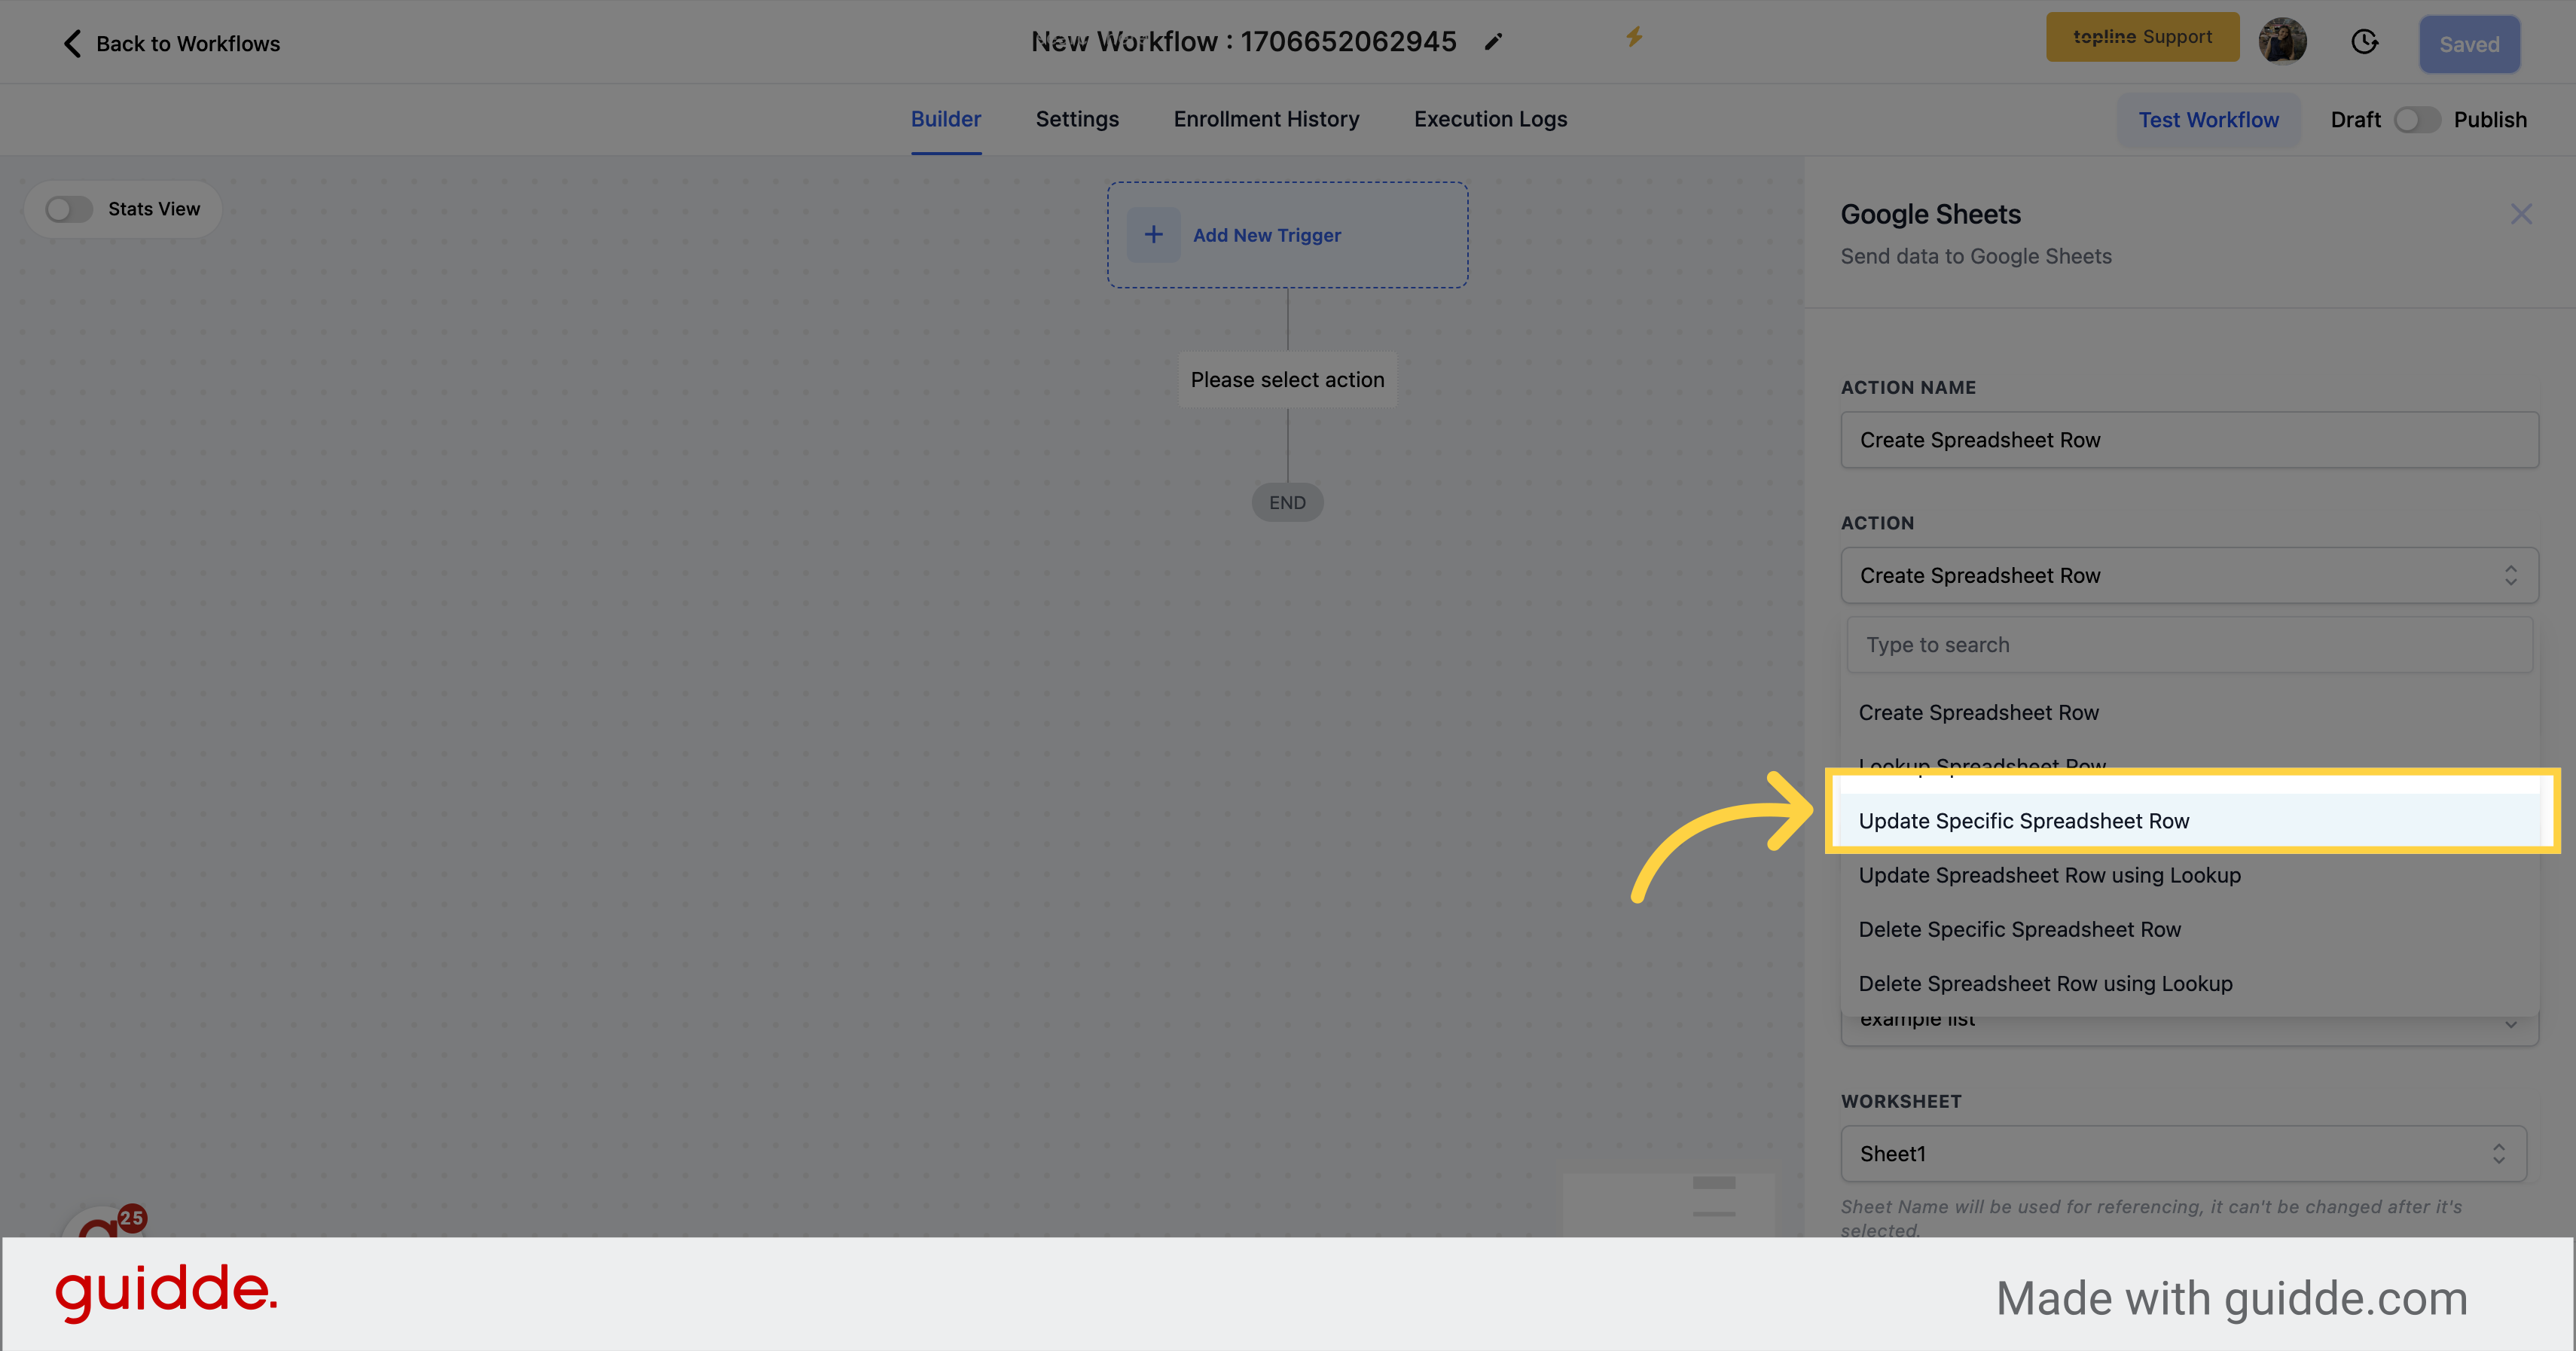
Click on the "Select an action" button.
Our LC Premium Actions enables you to send data to a Google Sheets document directly, without requiring any third-party integrations. All you need to do is integrate your Google account with our system and select the desired sheet from your Google Drive. From there, you can easily send data to the sheet using our intuitive user interface.
This eliminates the need for complex integration processes and provides a streamlined solution for sending data to Google Sheets. With our out-of-the-box functionality, you can quickly and easily automate your data workflows and simplify your data management processes.
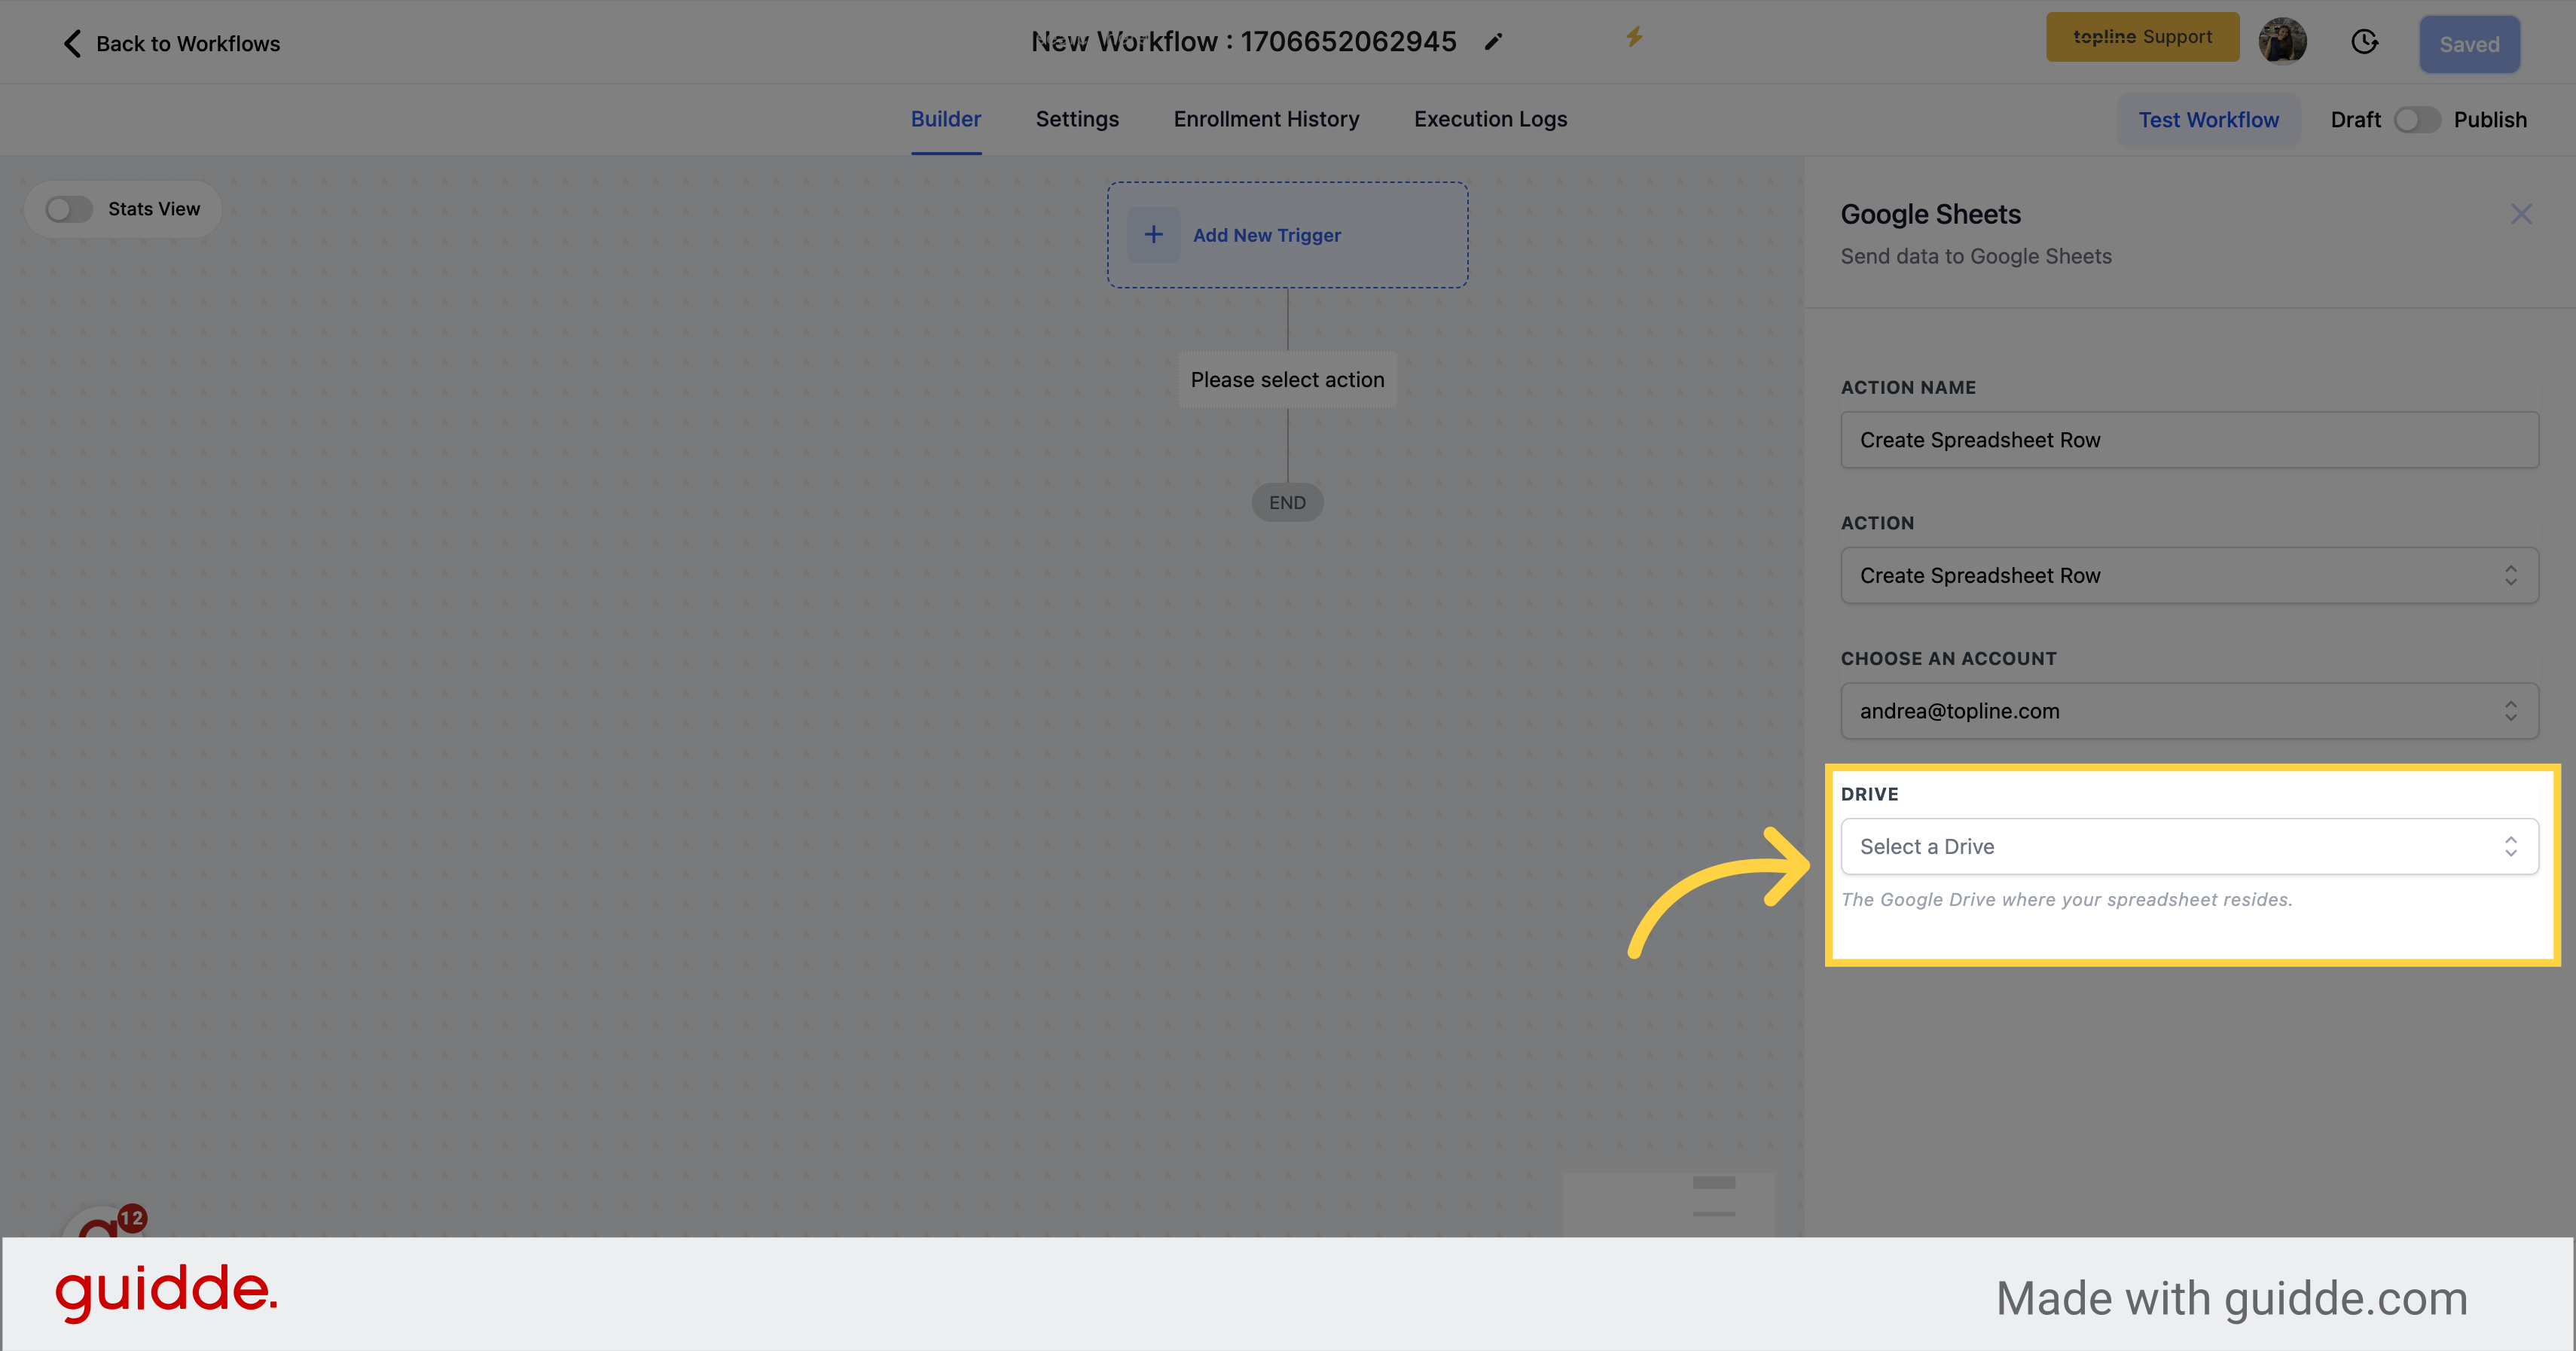
All your integrated Google accounts in your subaccount, will be displayed in the dropdown menu for you to choose from.

Once you have selected a Google account from the dropdown menu in our subaccount system, all associated Google Drives will be displayed for you to choose from. This allows you to select the specific Google Drive account that contains the target Google Sheets document that you want to send data to.
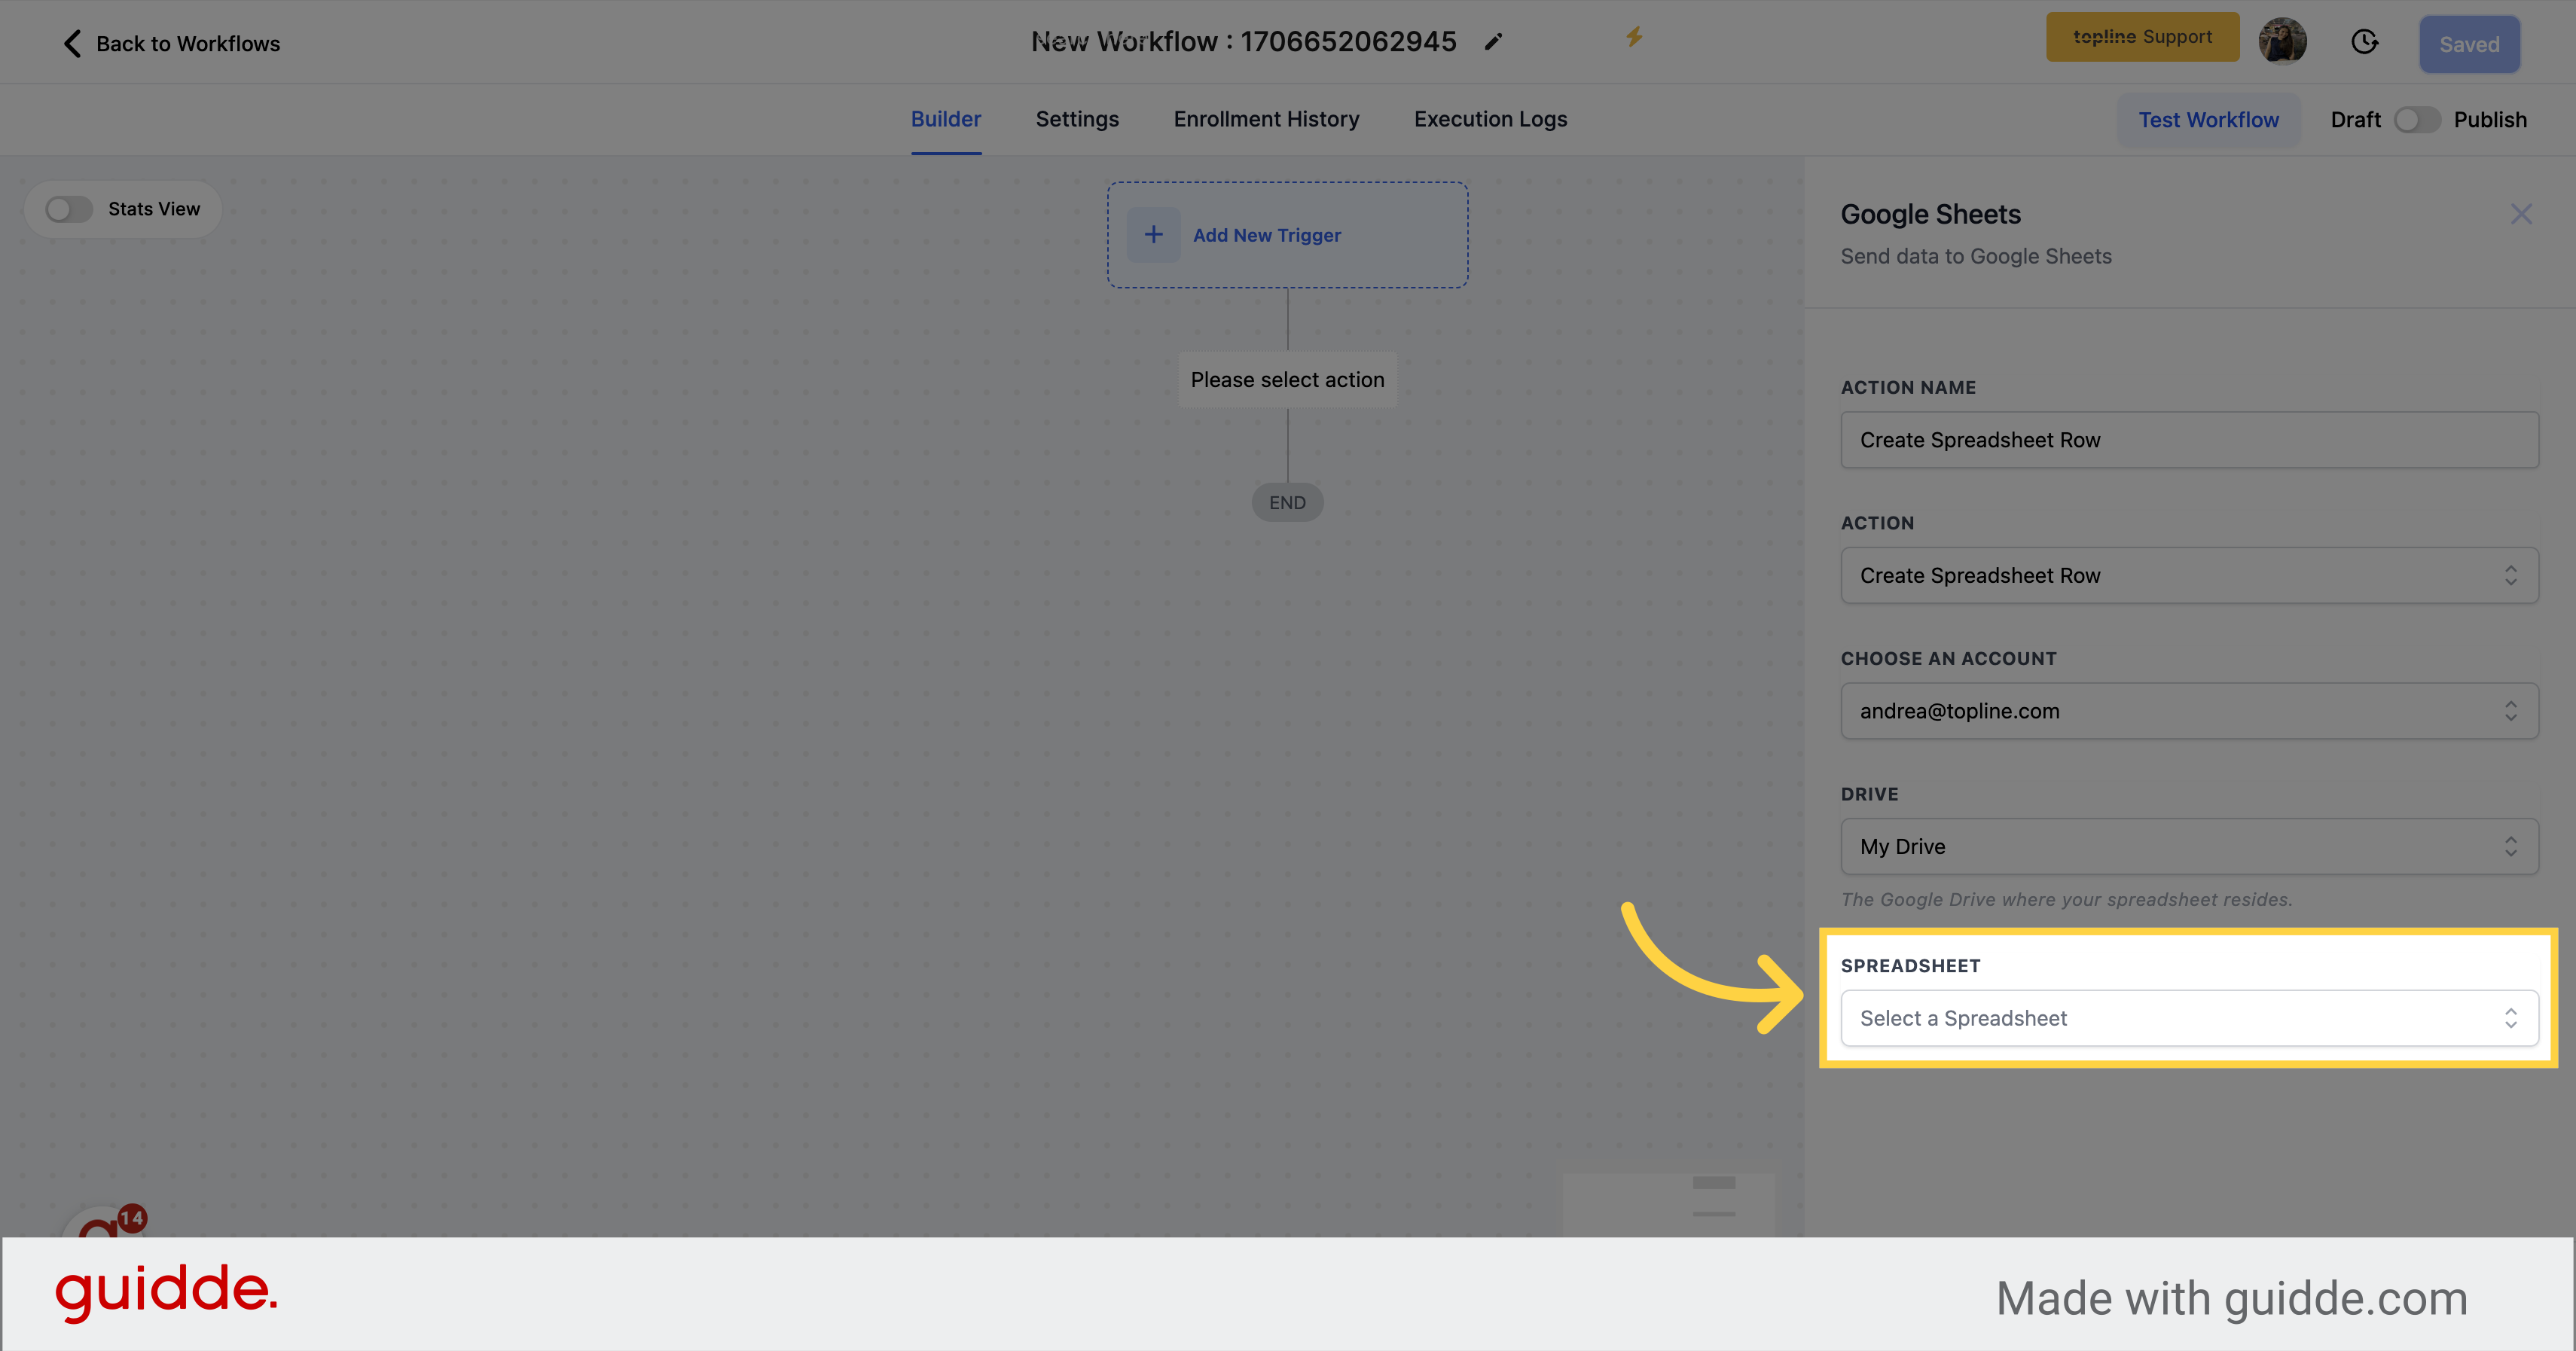
Once you have selected a Google Drive from the dropdown menu, all Spreadsheets associated to the selected Google Drive will be displayed for you to choose from.
This allows you to select the specific Google Spreadsheet document that you want to send data to.
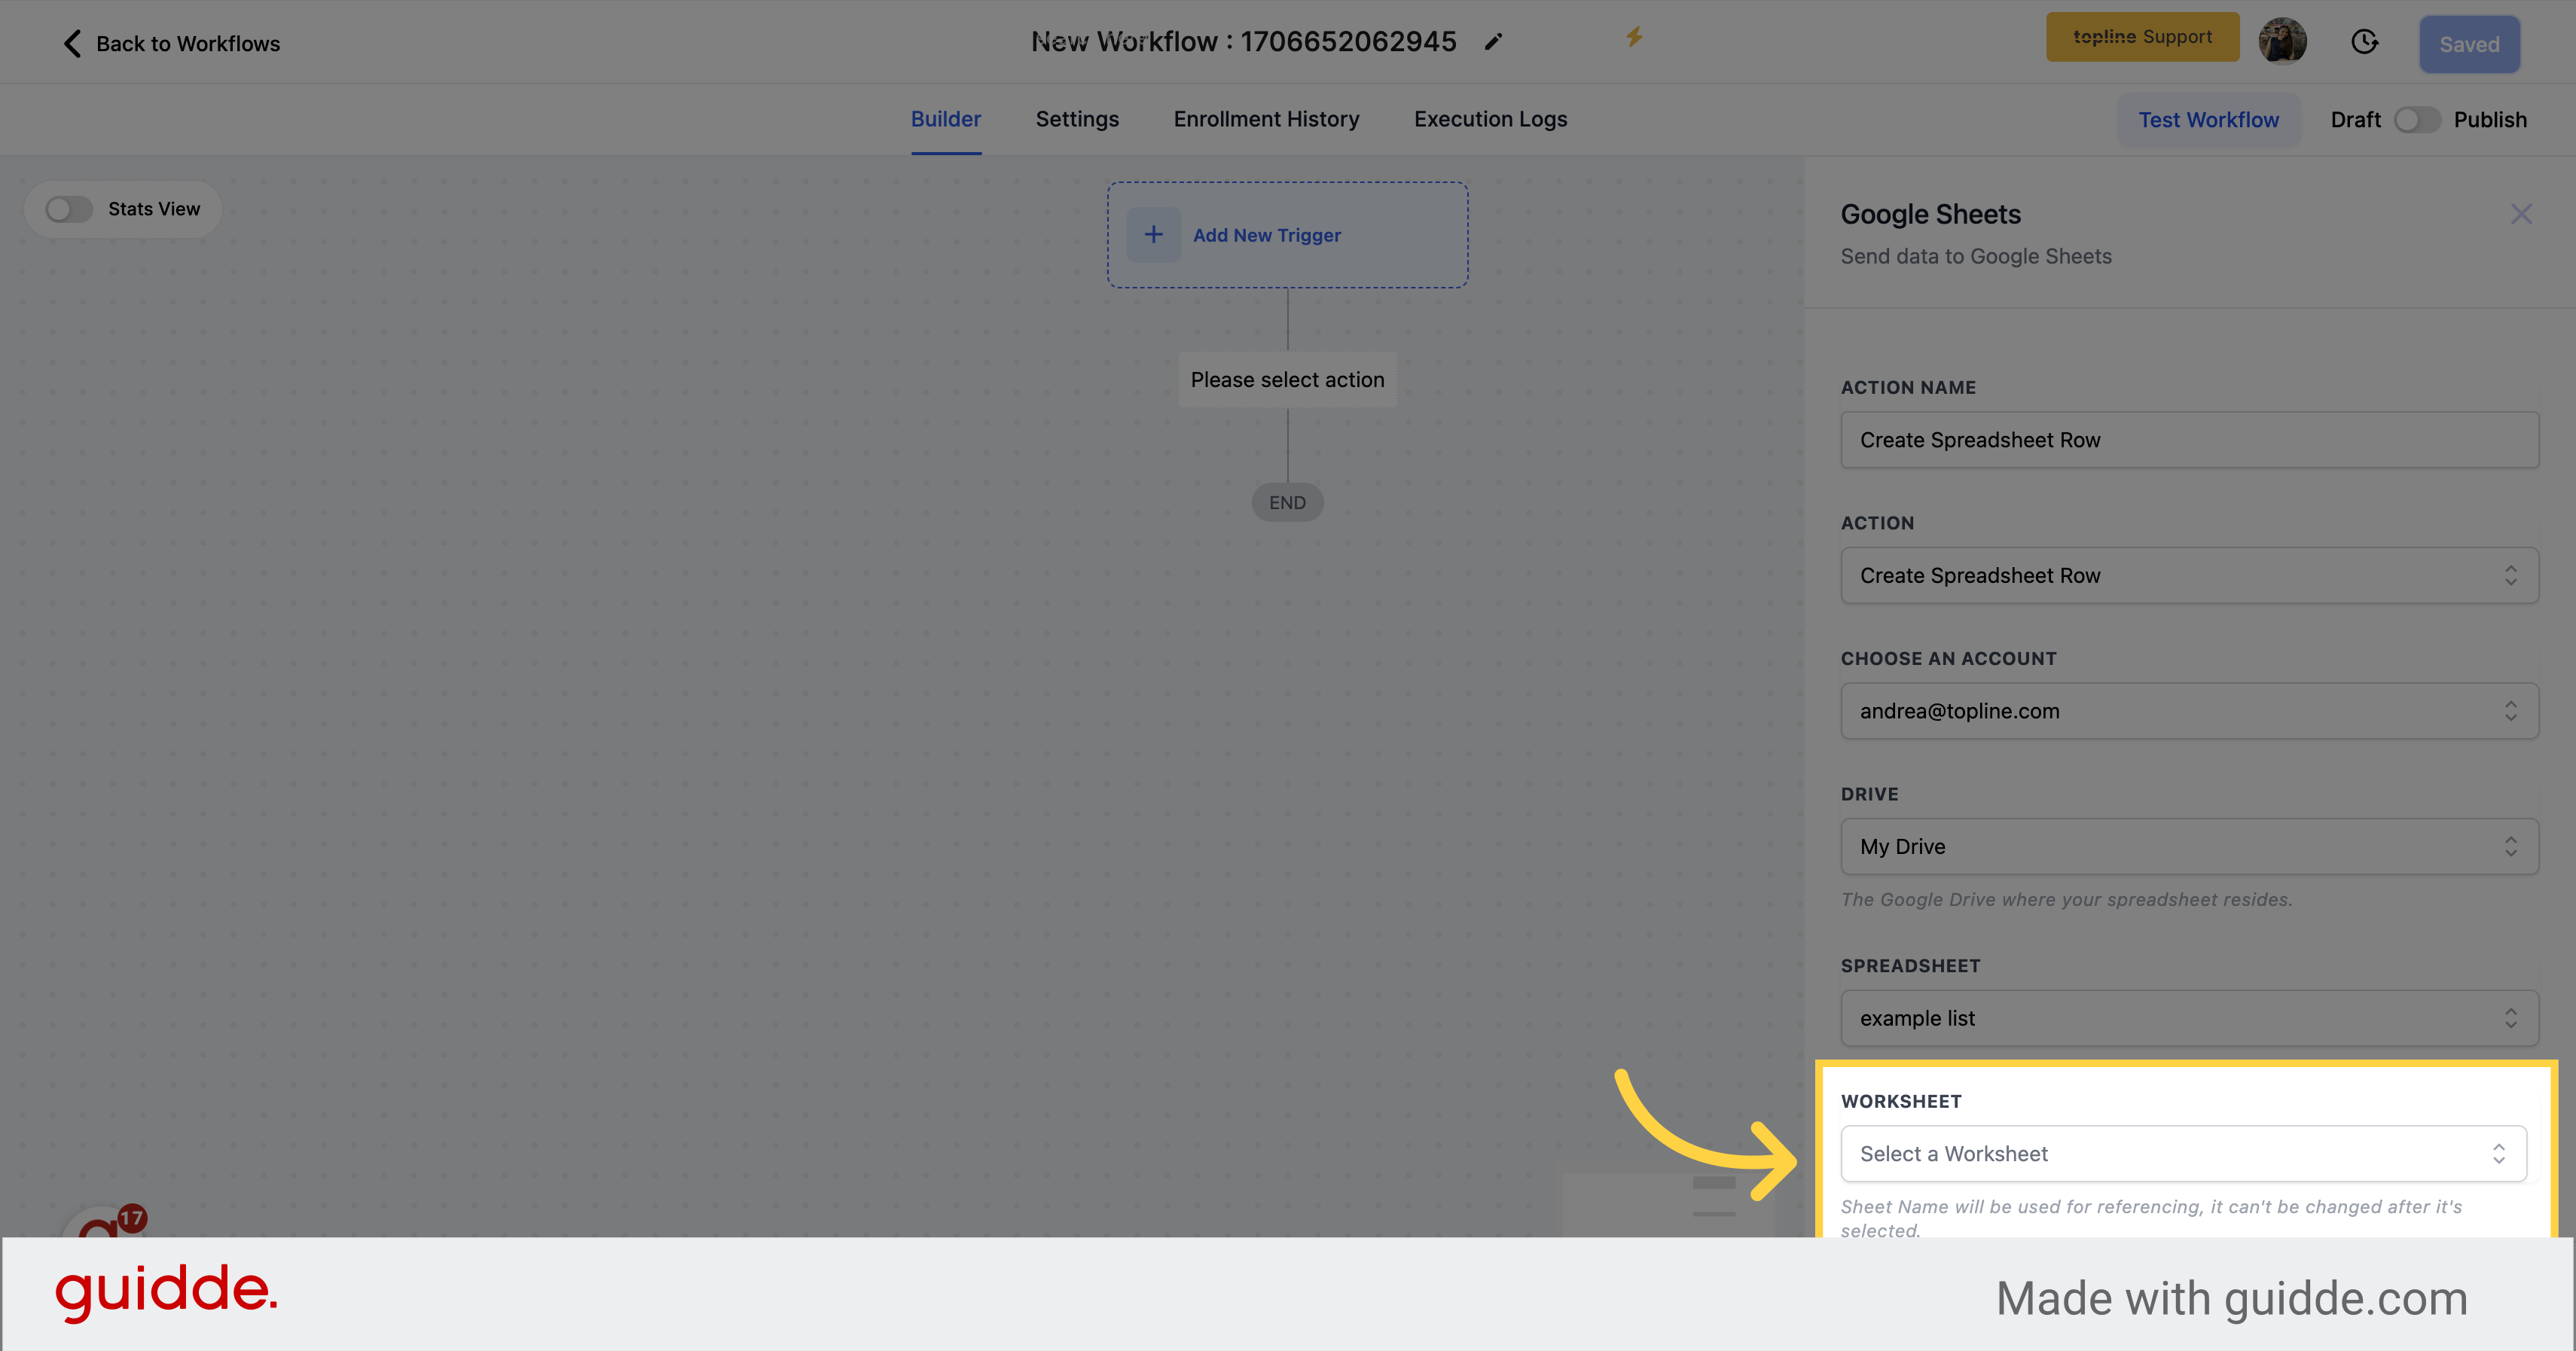
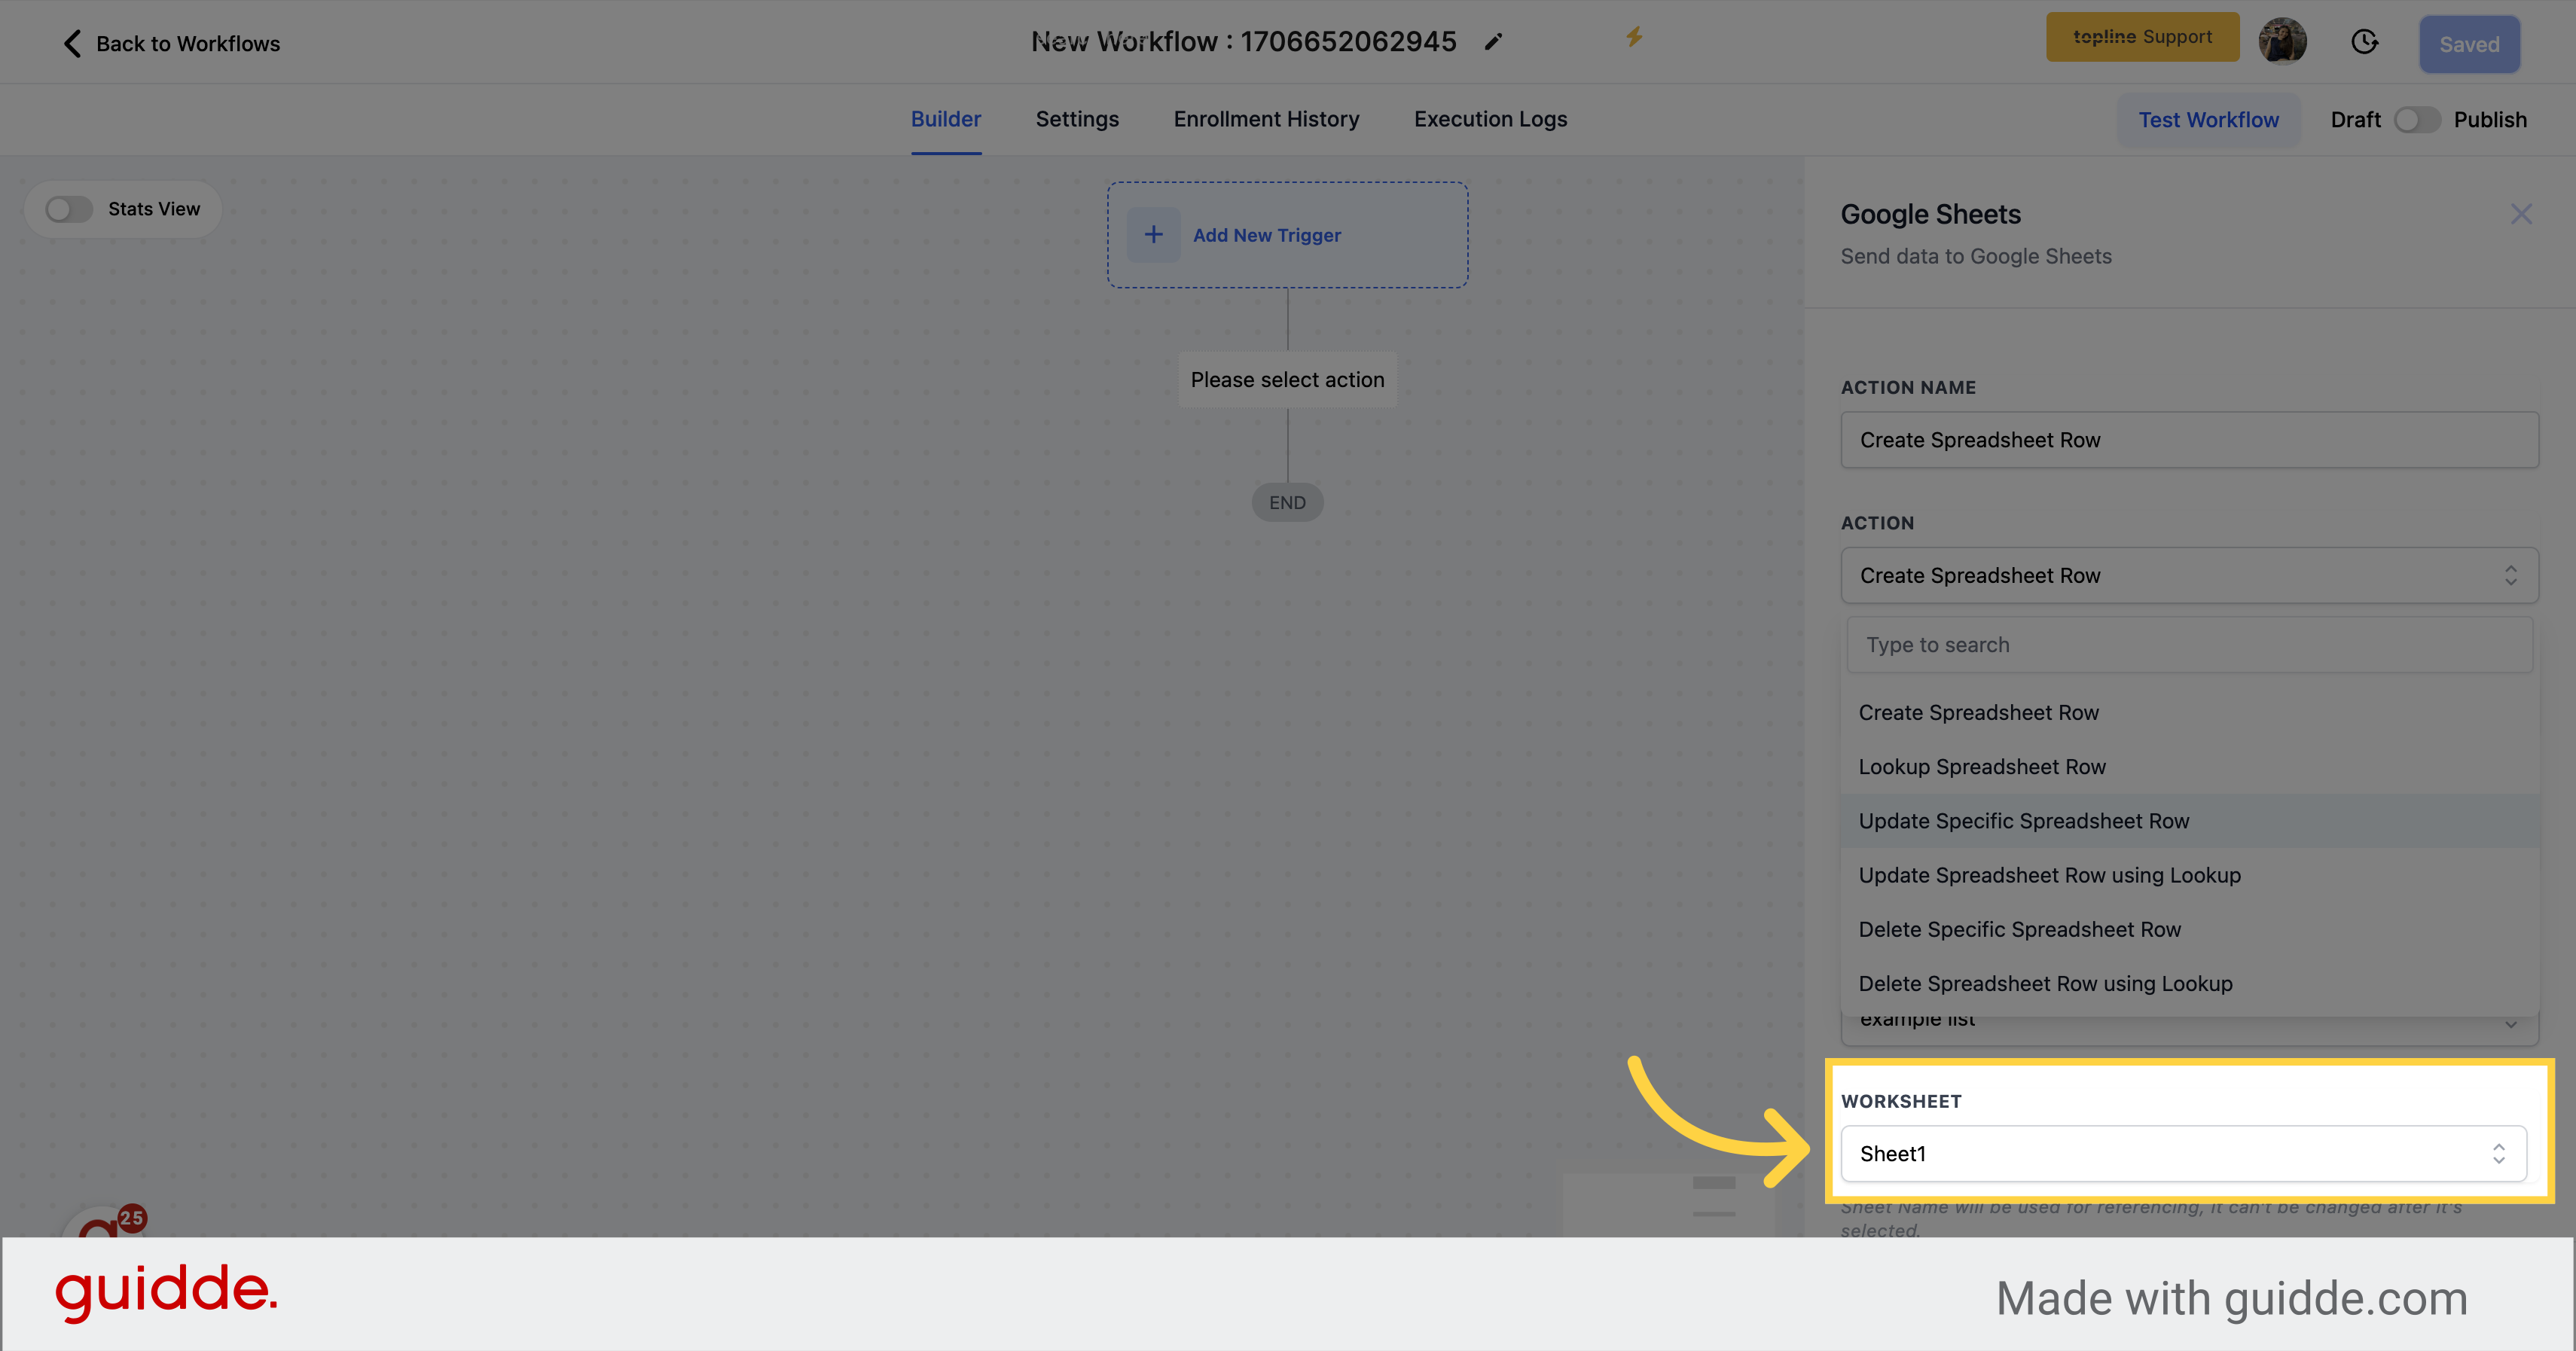
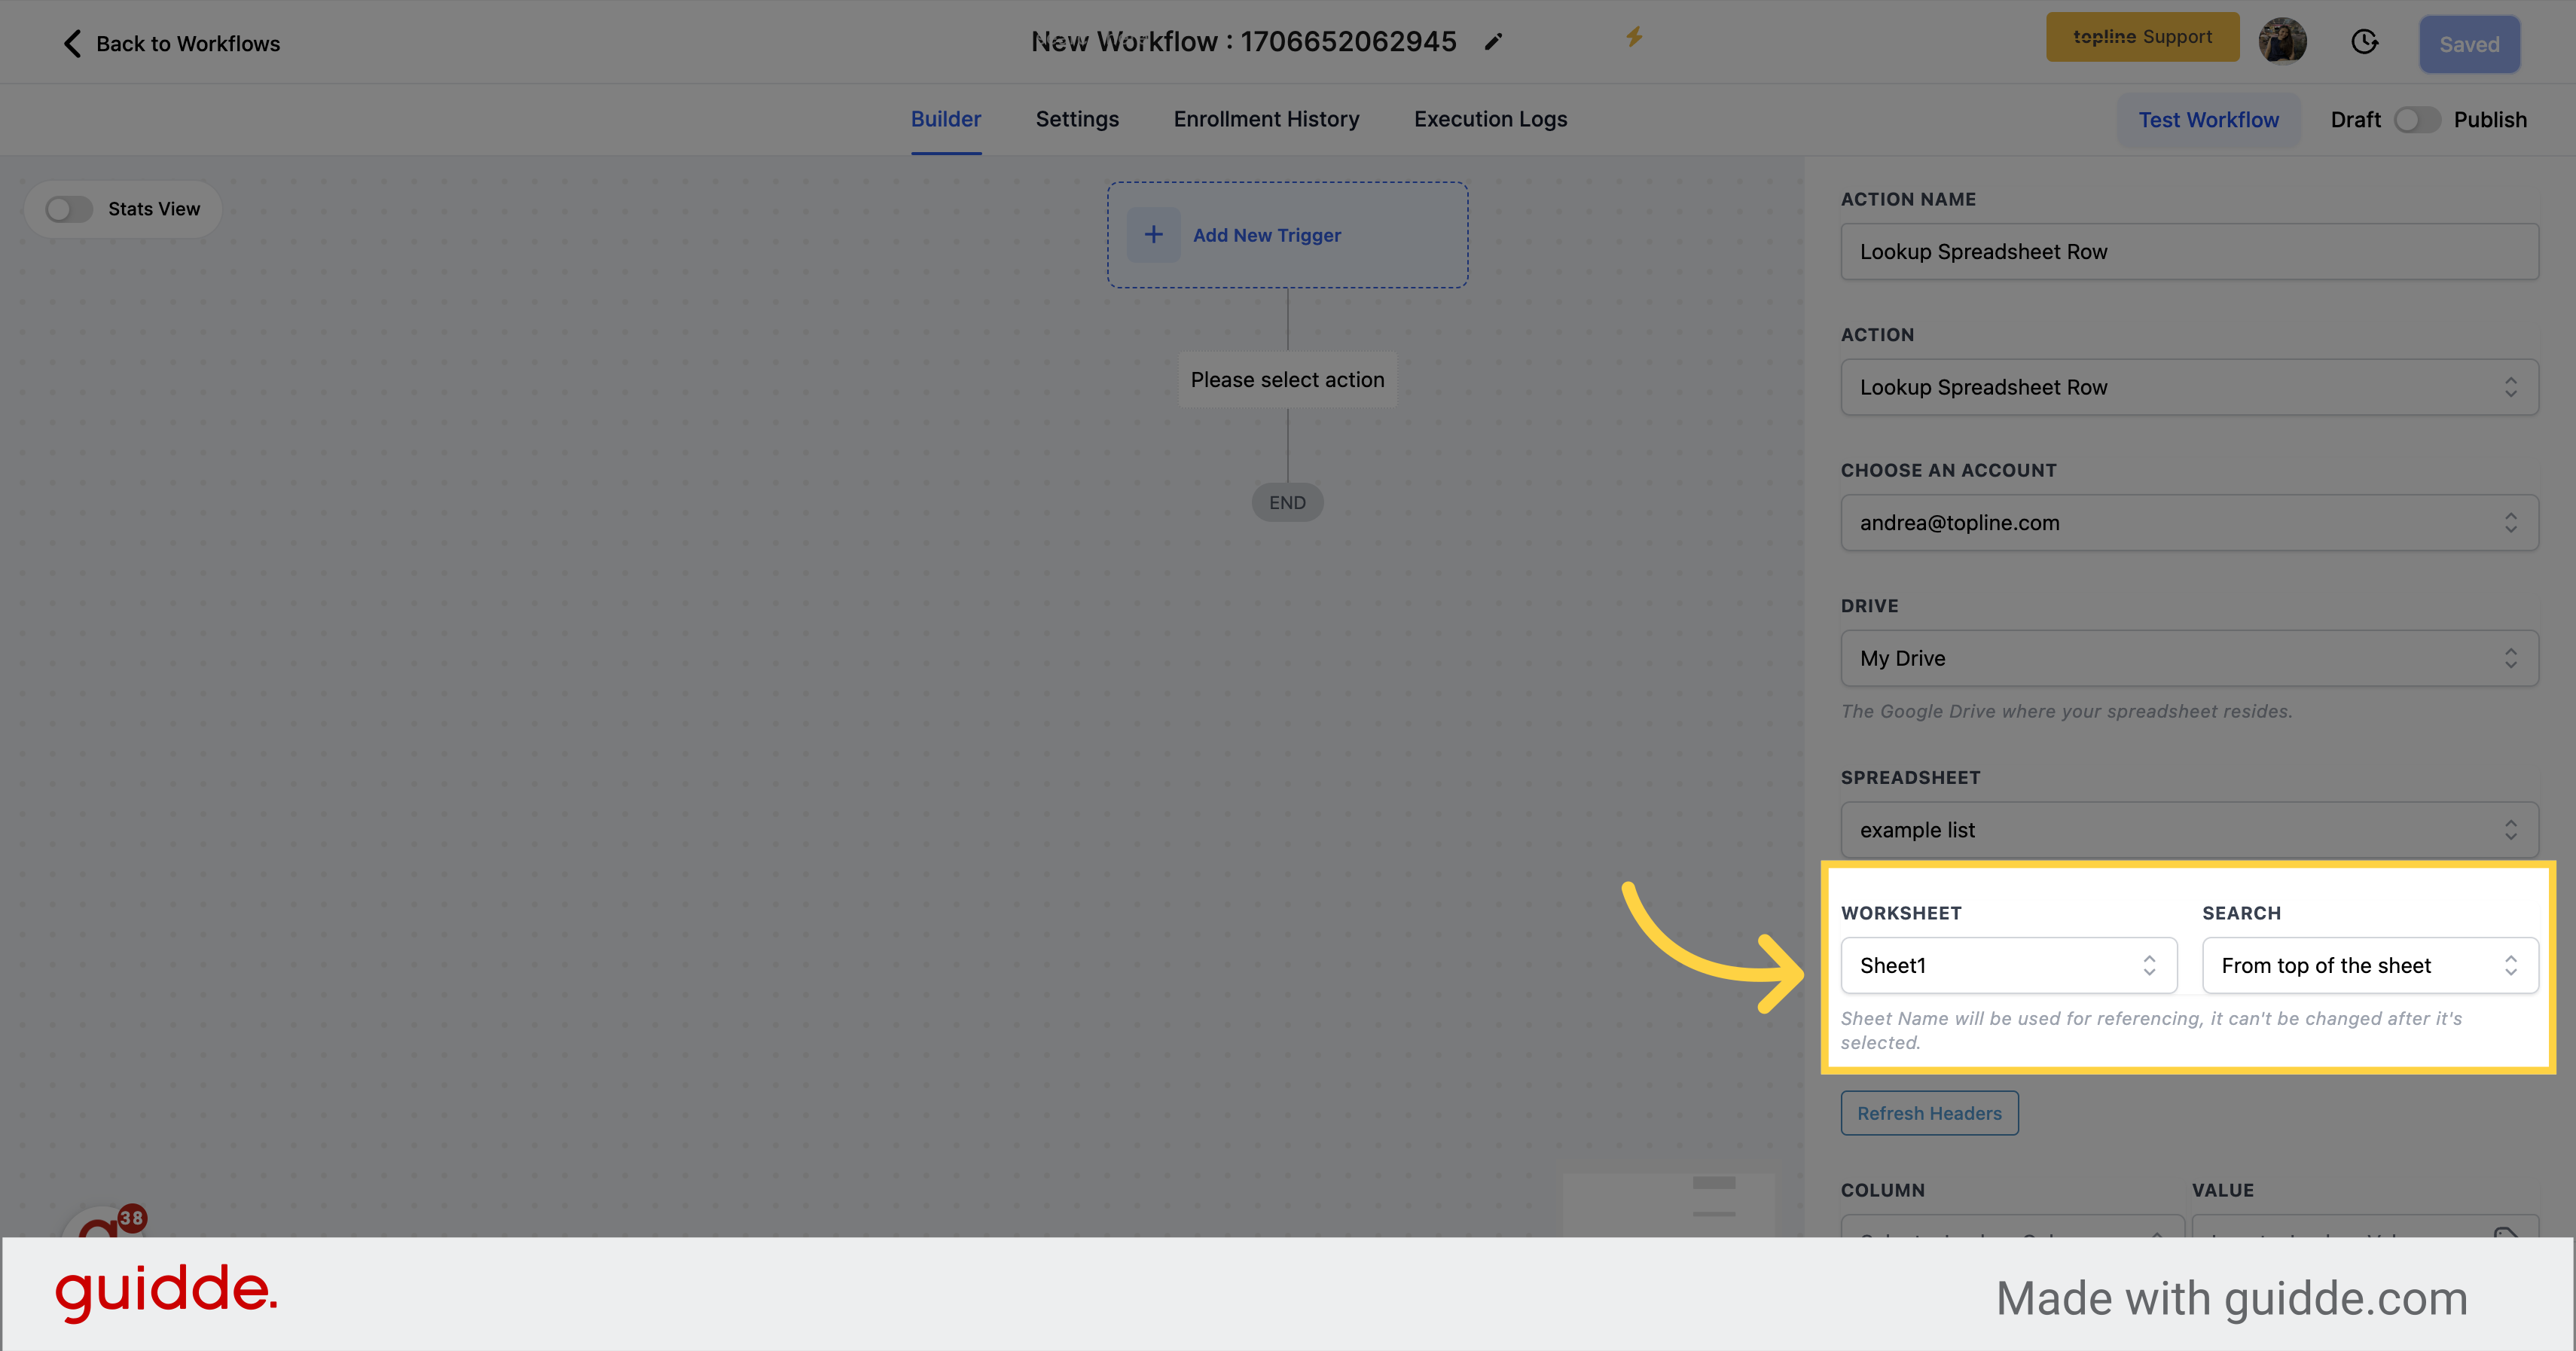
Once you have selected a Google Spreadsheet from the dropdown menu, all Worksheets inside that Spreadsheet will be displayed for you to choose from.
This allows you to select the specific Worksheet that you want to send data to.
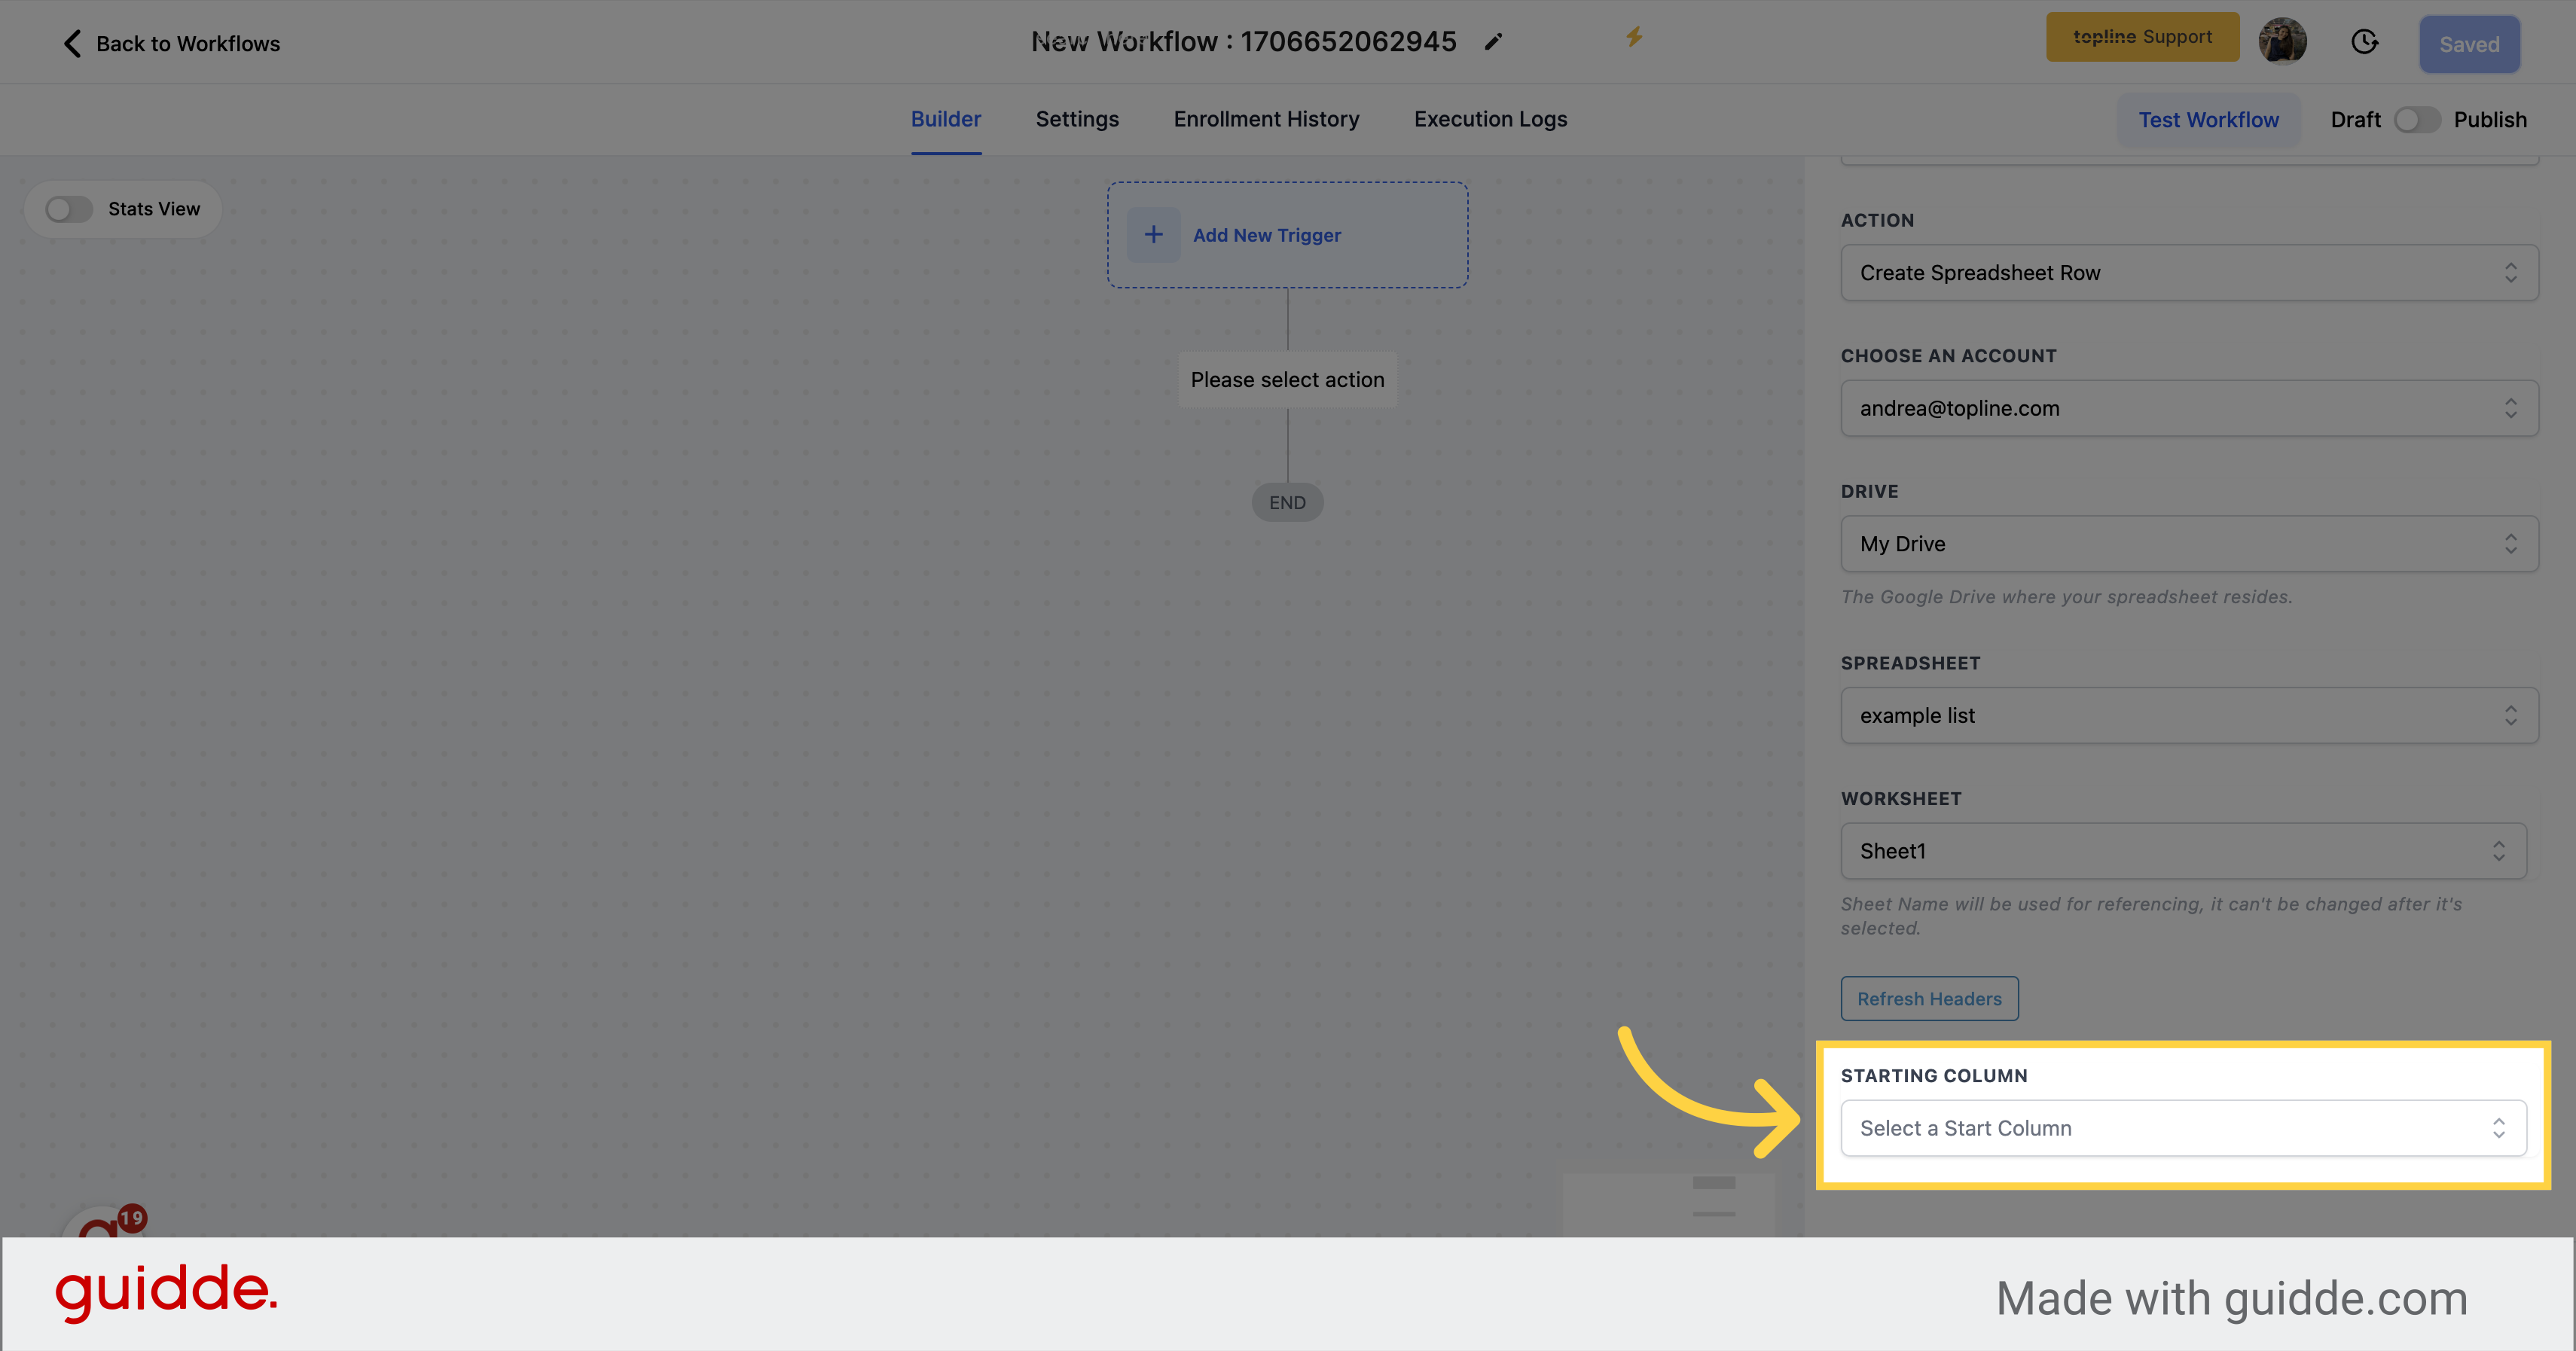
When sending data to a Google Sheets document using our workflow system, the first row of the sheet is automatically considered as the header row, and each column is labeled based on the header values in that row.
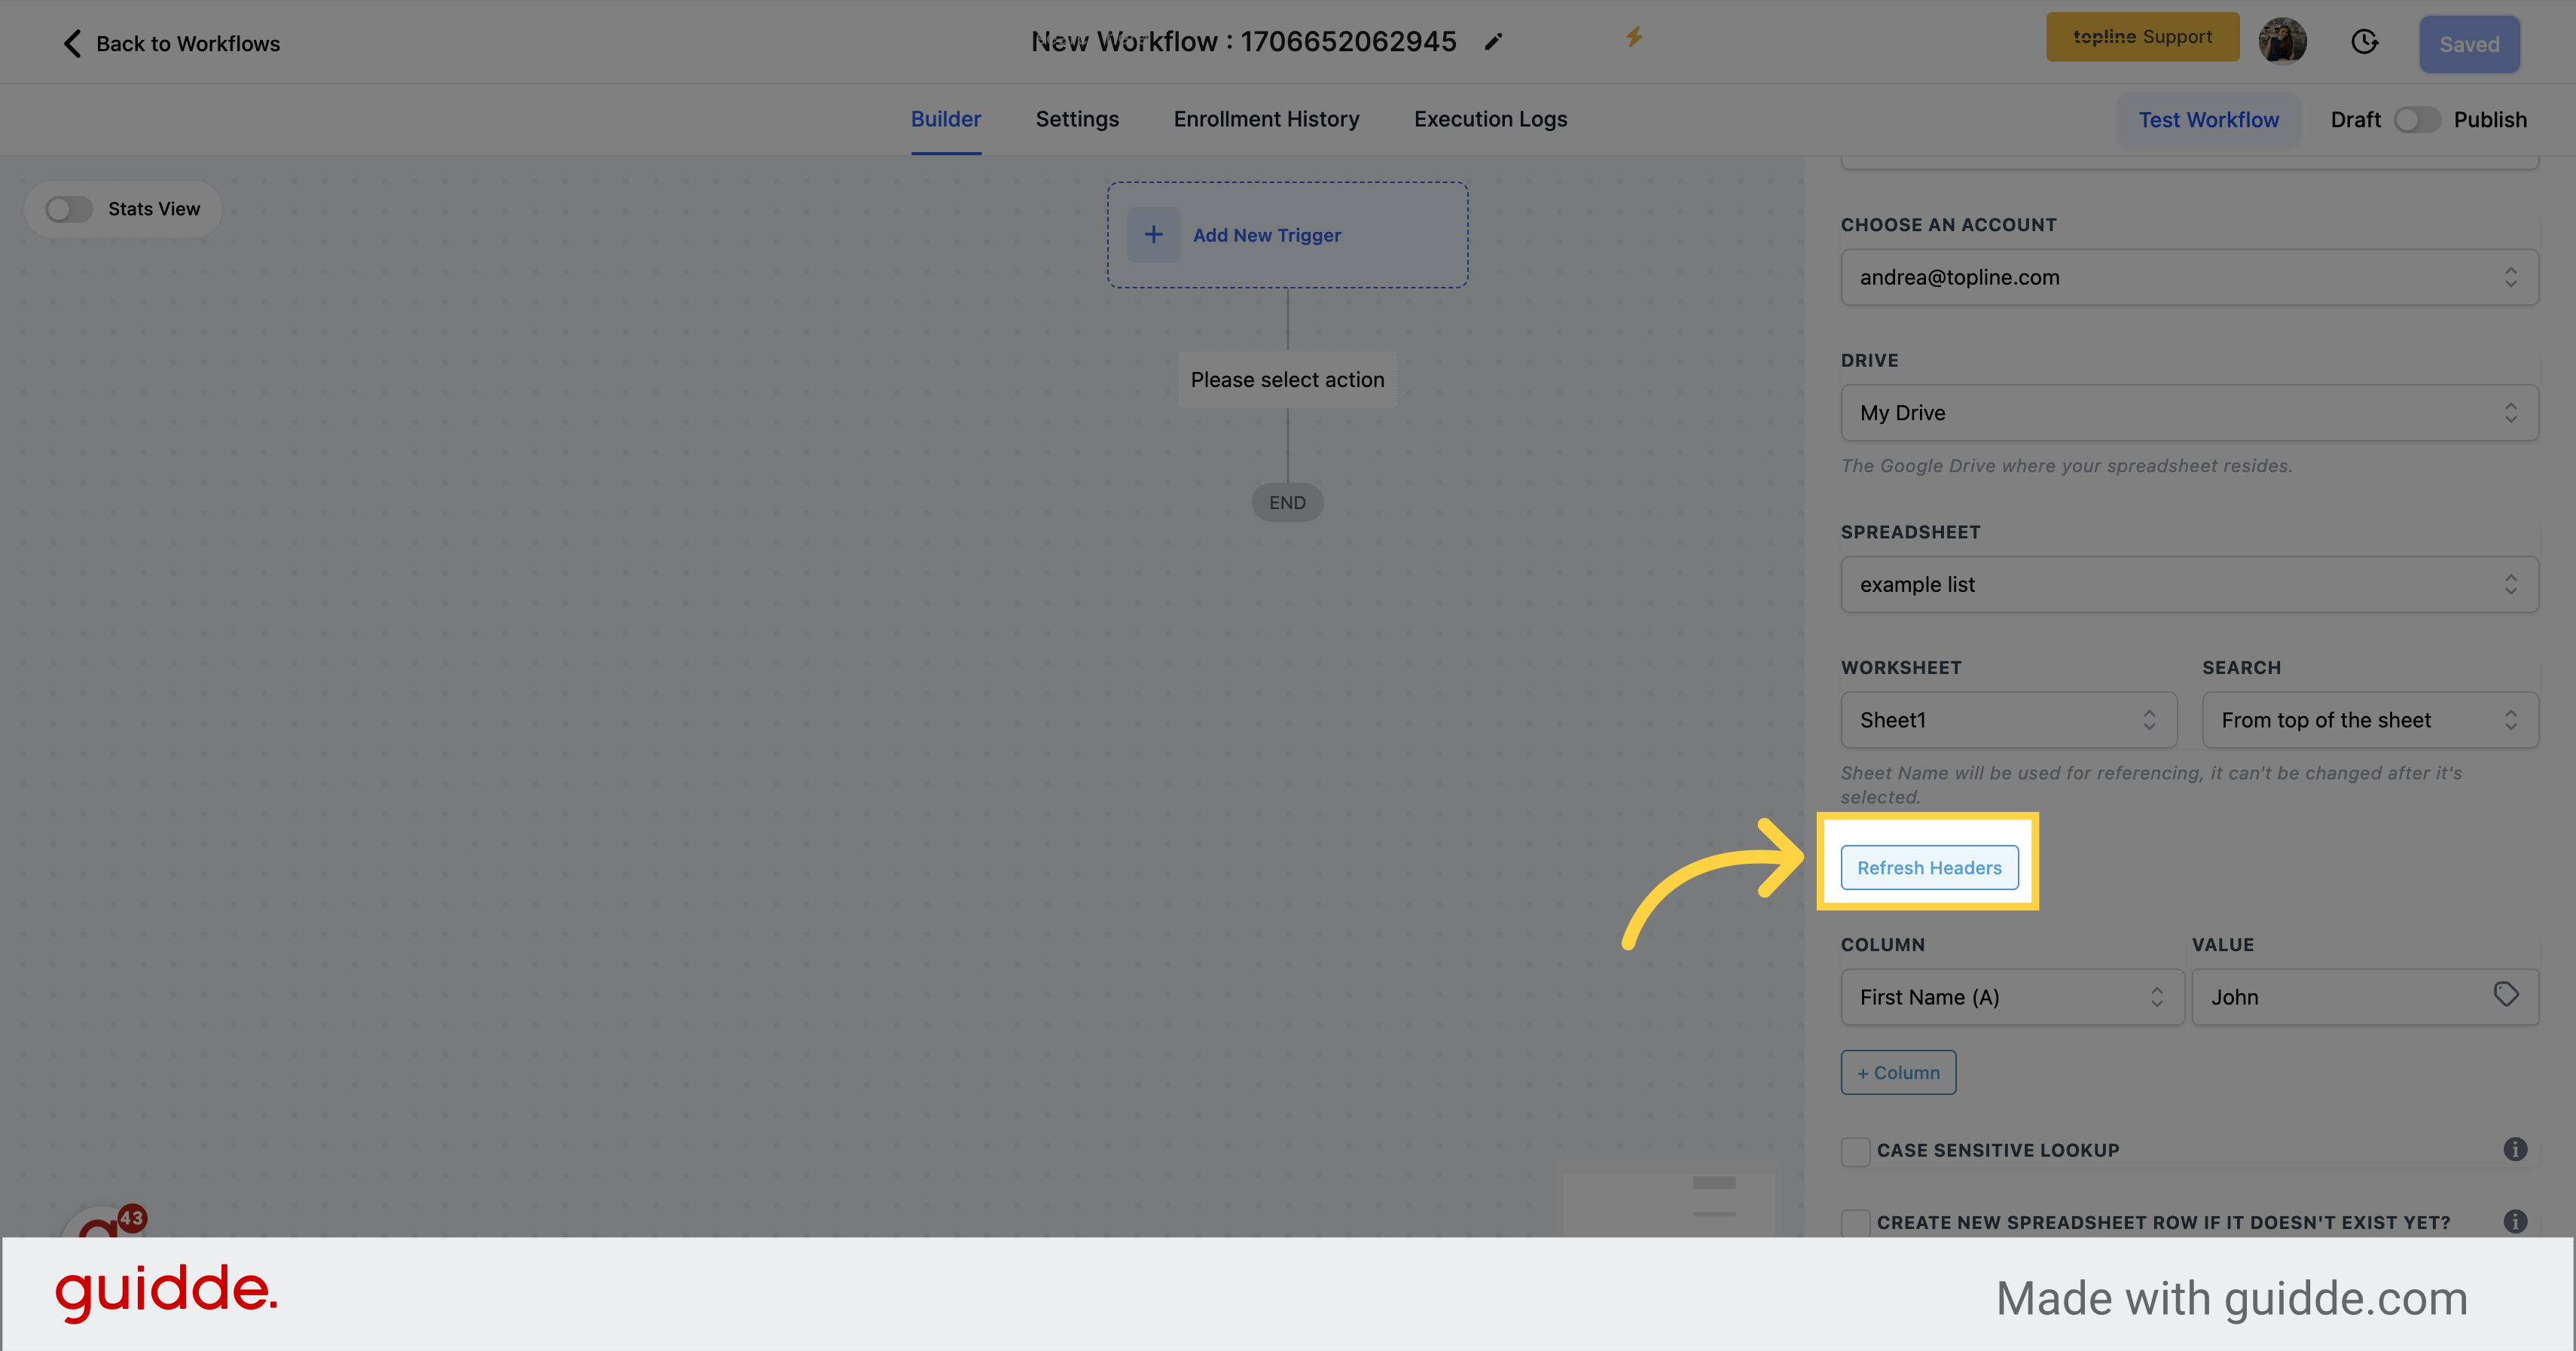
If you need to update the headers in the sheet, you can simply click the "Refresh Headers" button to fetch the latest header values from the sheet. This ensures that your data is properly mapped to the correct columns in the sheet, and that your workflow is up-to-date with the latest sheet configurations.
By providing this functionality, our system makes it easy to automate data management processes and ensure the accuracy of your data workflows.
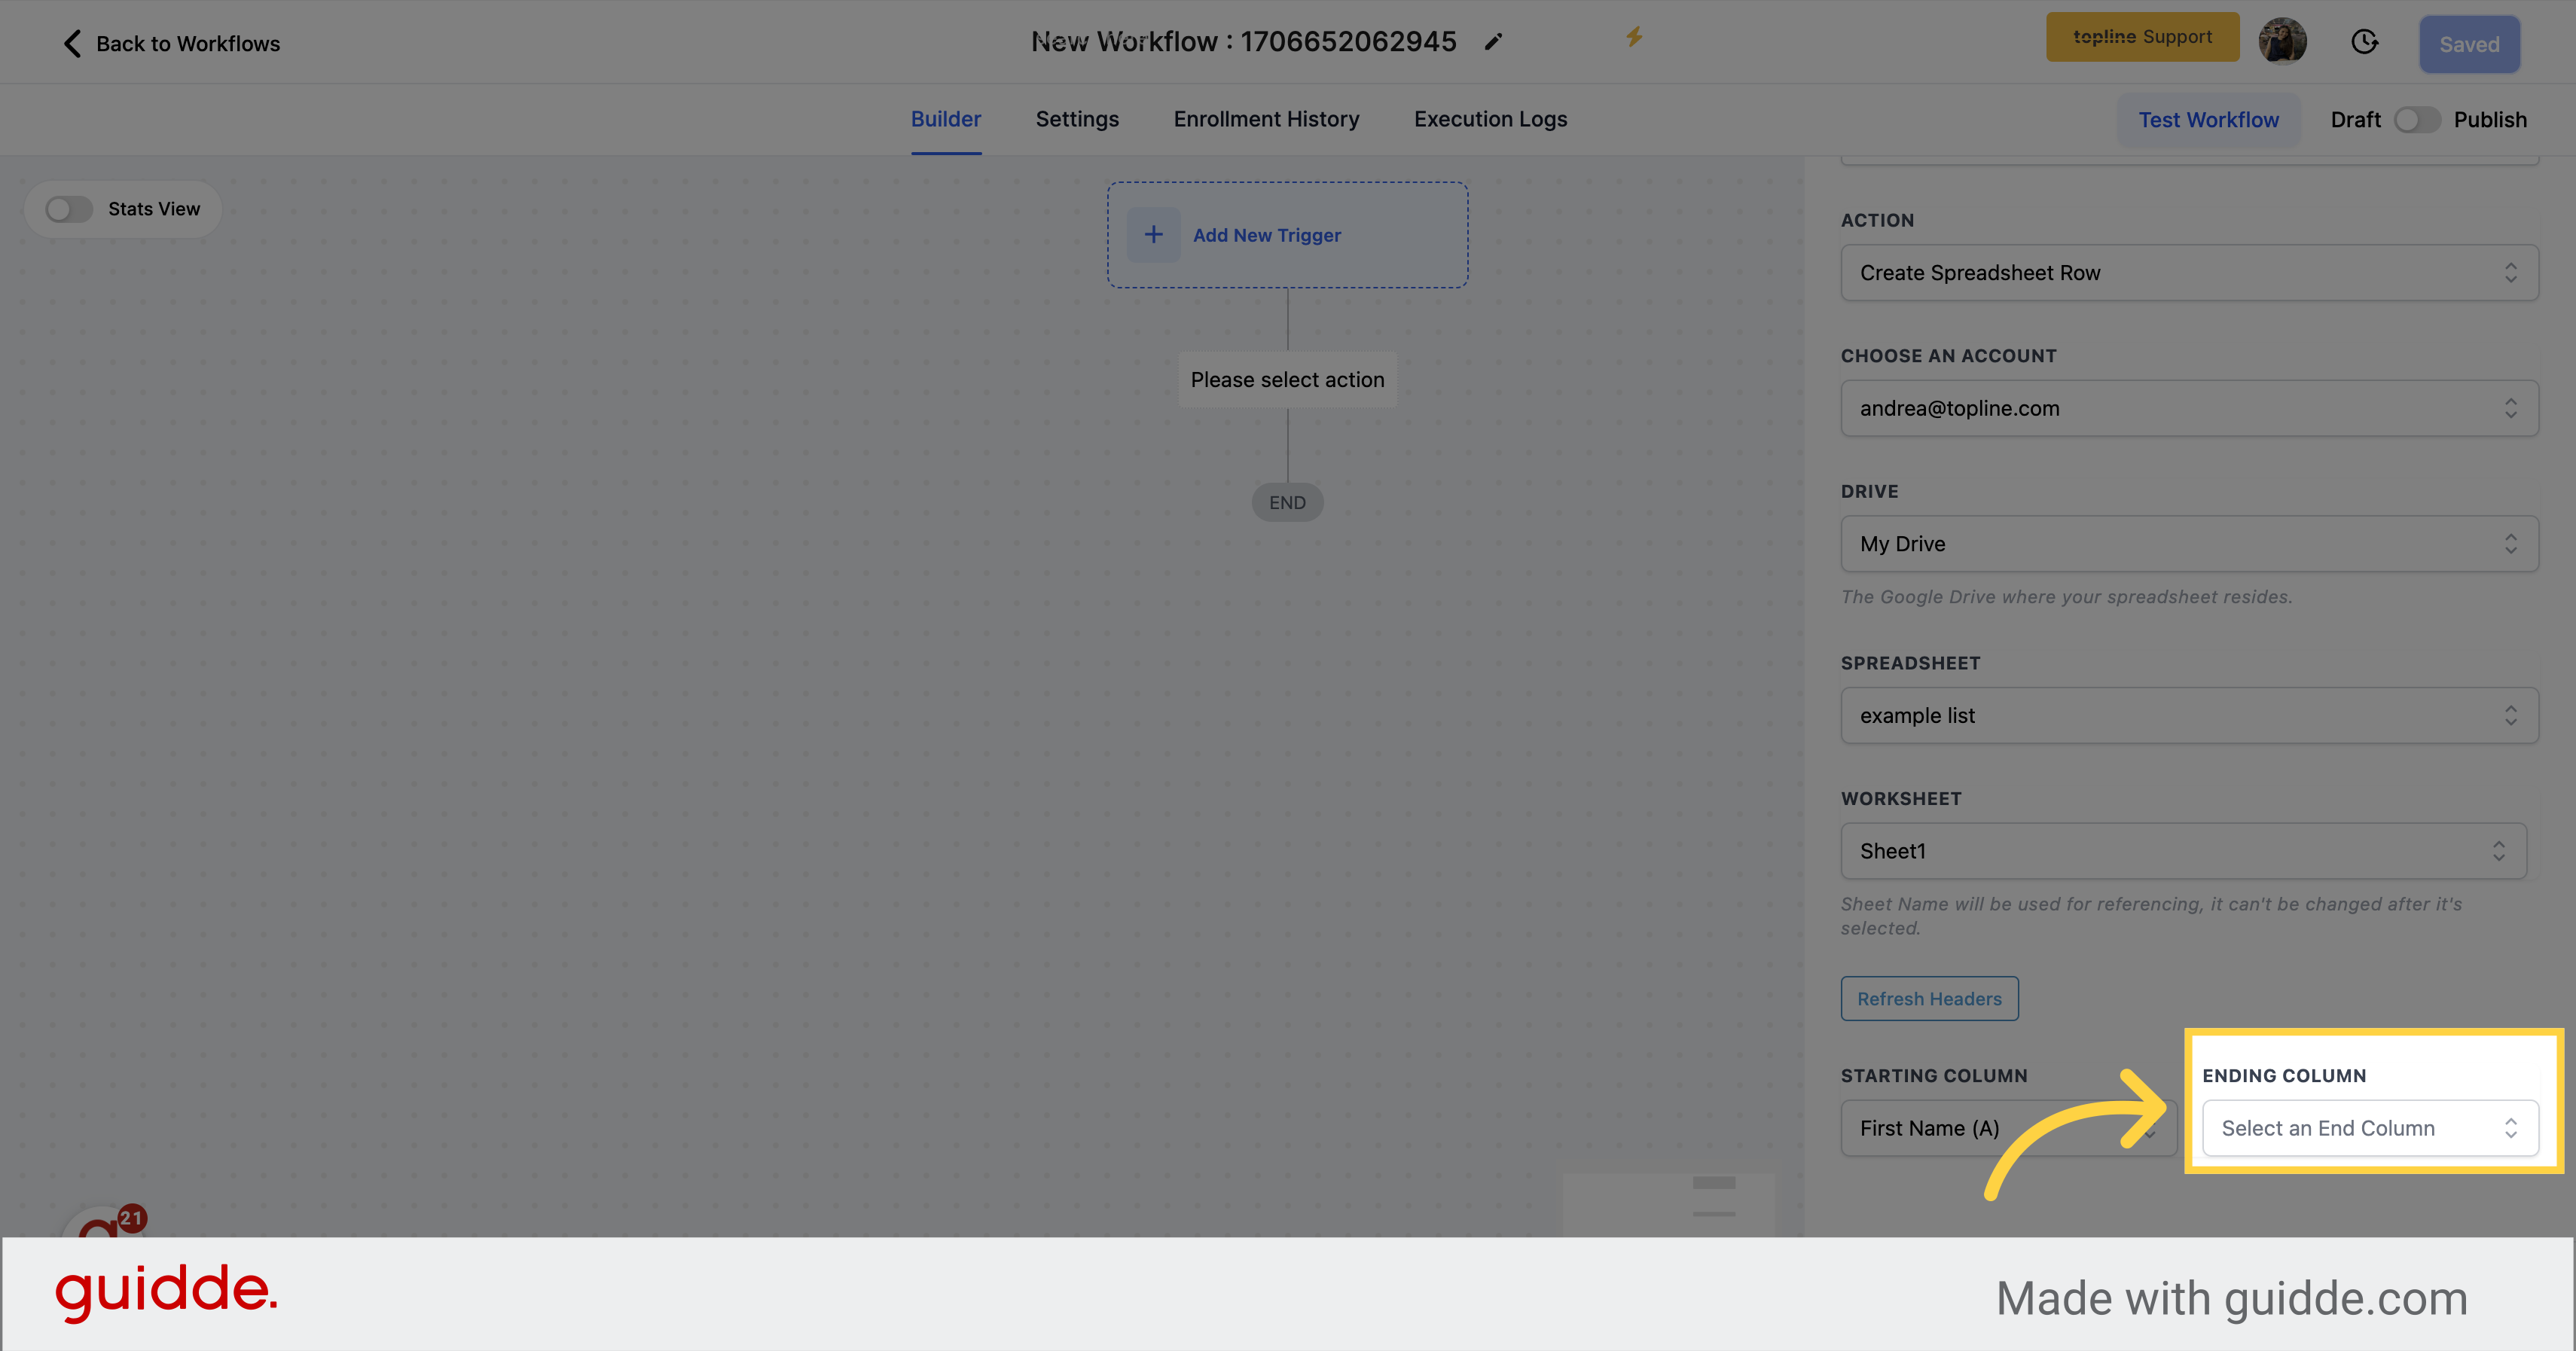
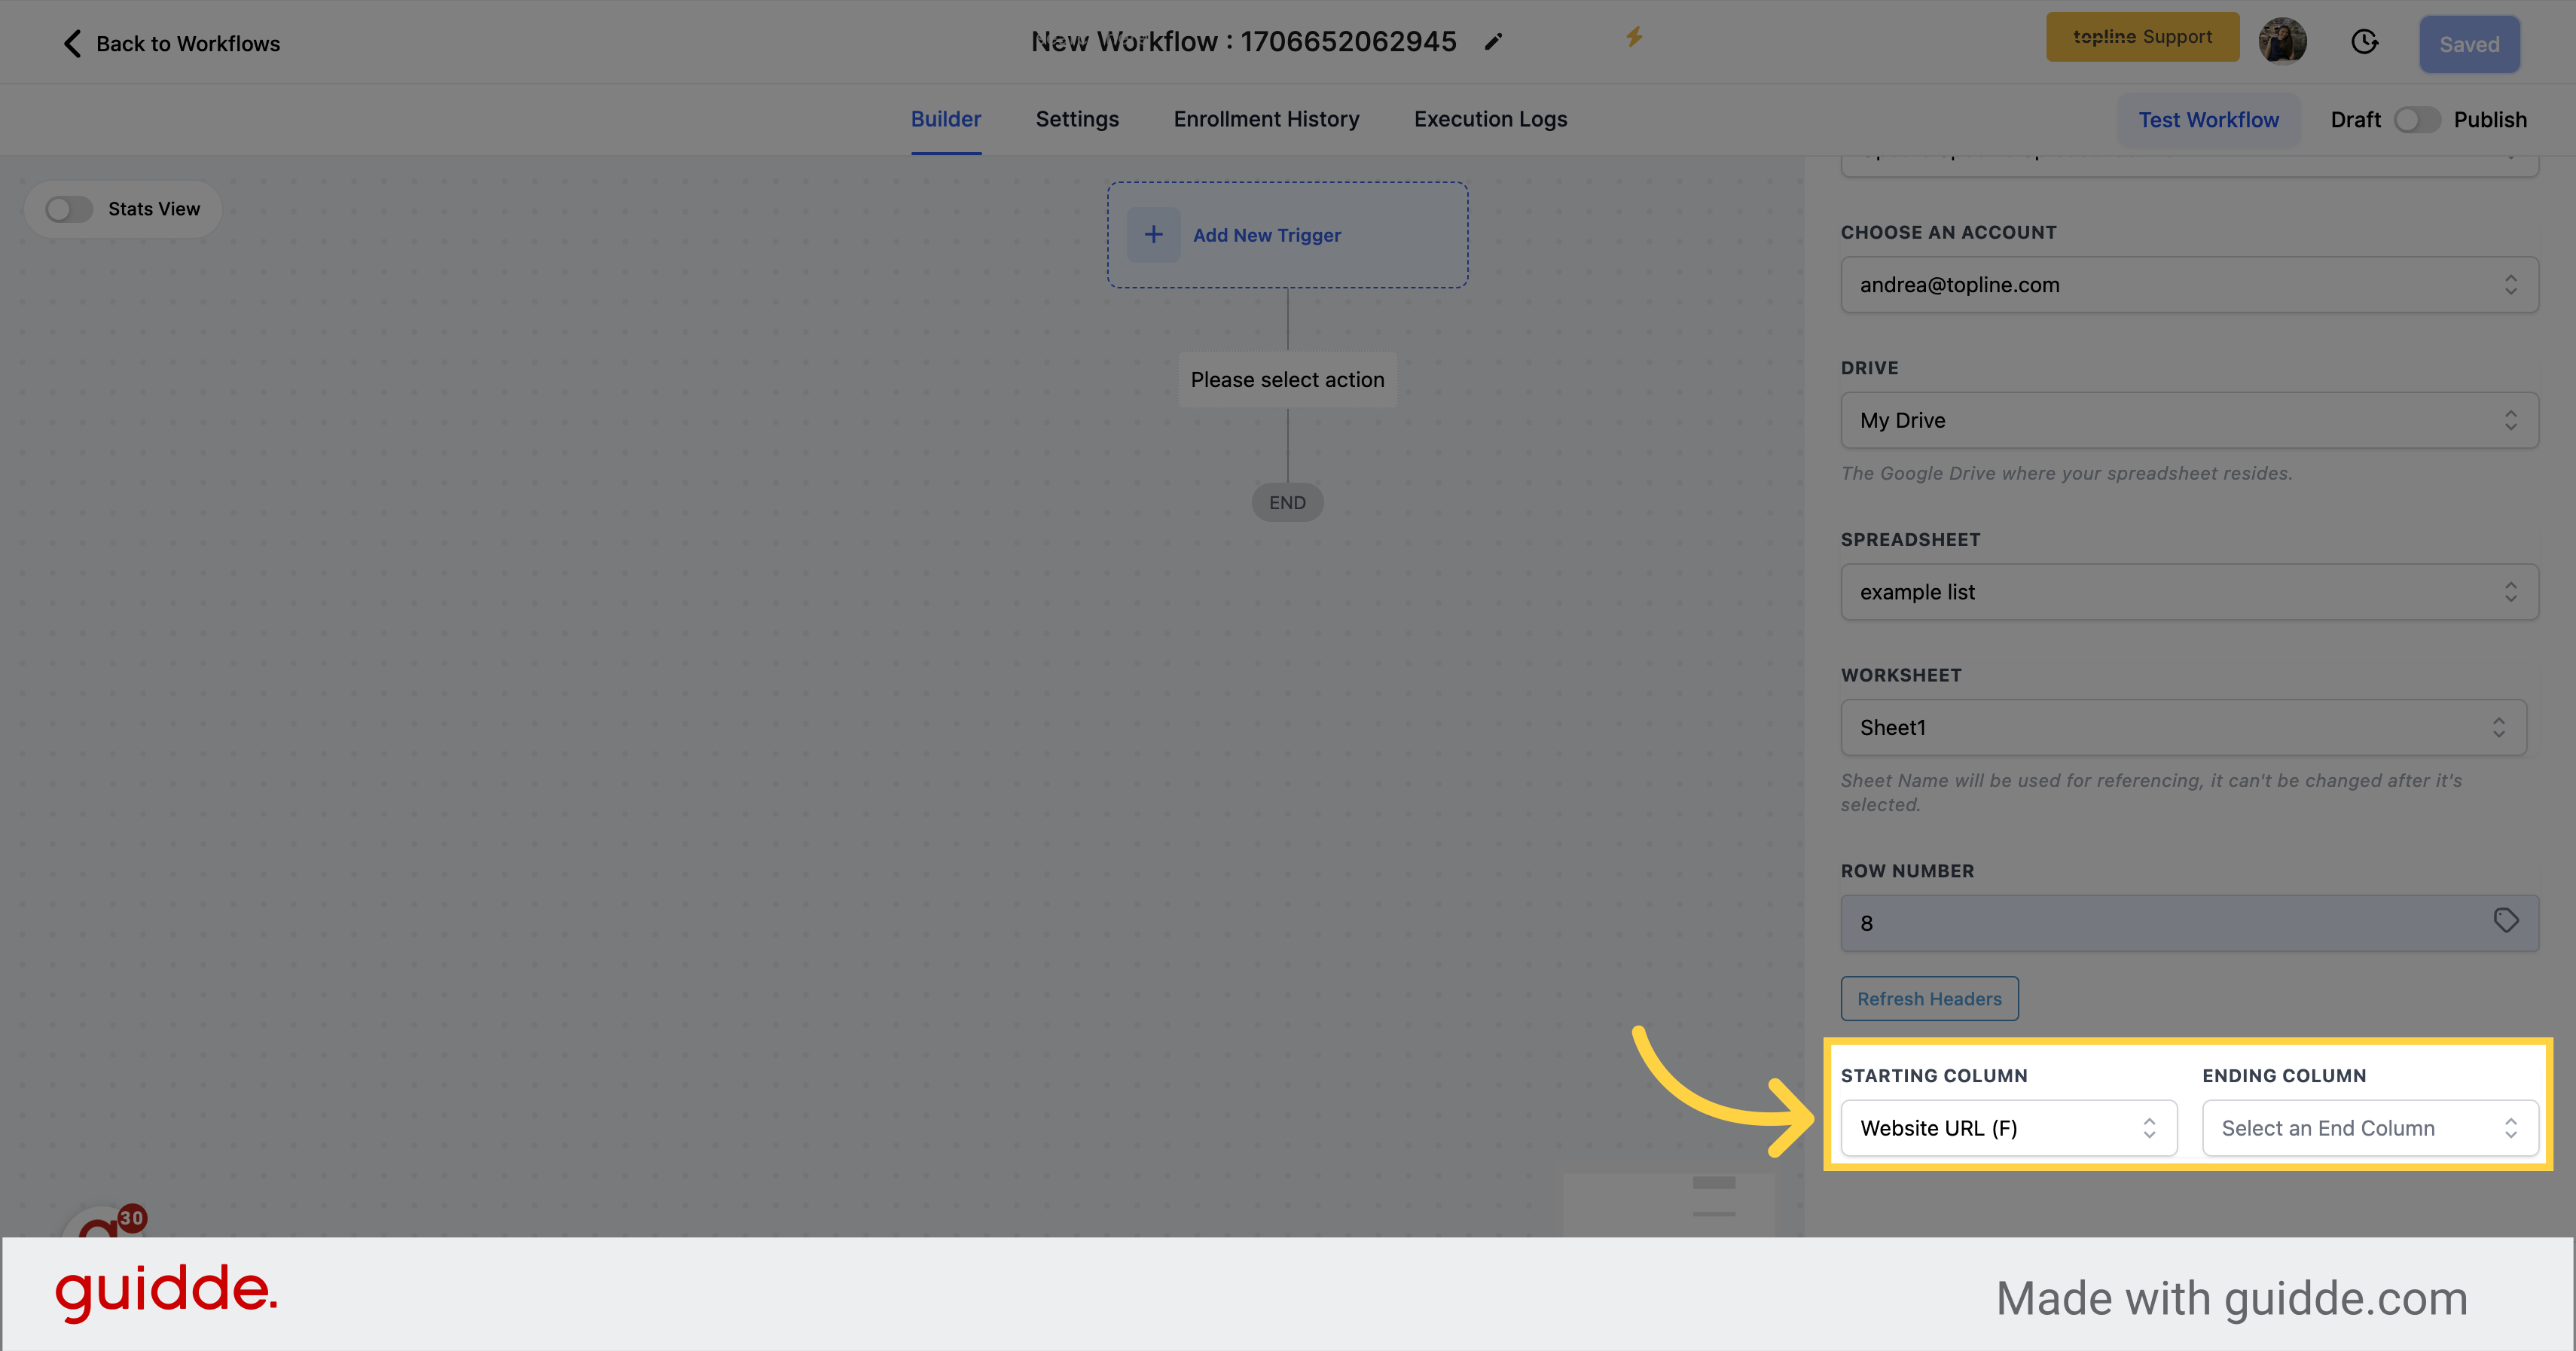
Click on the "Select an End Column" button.
The "Update Specific Spreadsheet Row" action enables us to modify the contents of a specific row by specifying its row number. This action updates the values in the corresponding columns of that row.
Select a worksheet within your spreadsheet that you wish to edit a row.
Specify the row number that you wish to modify in the spreadsheet.
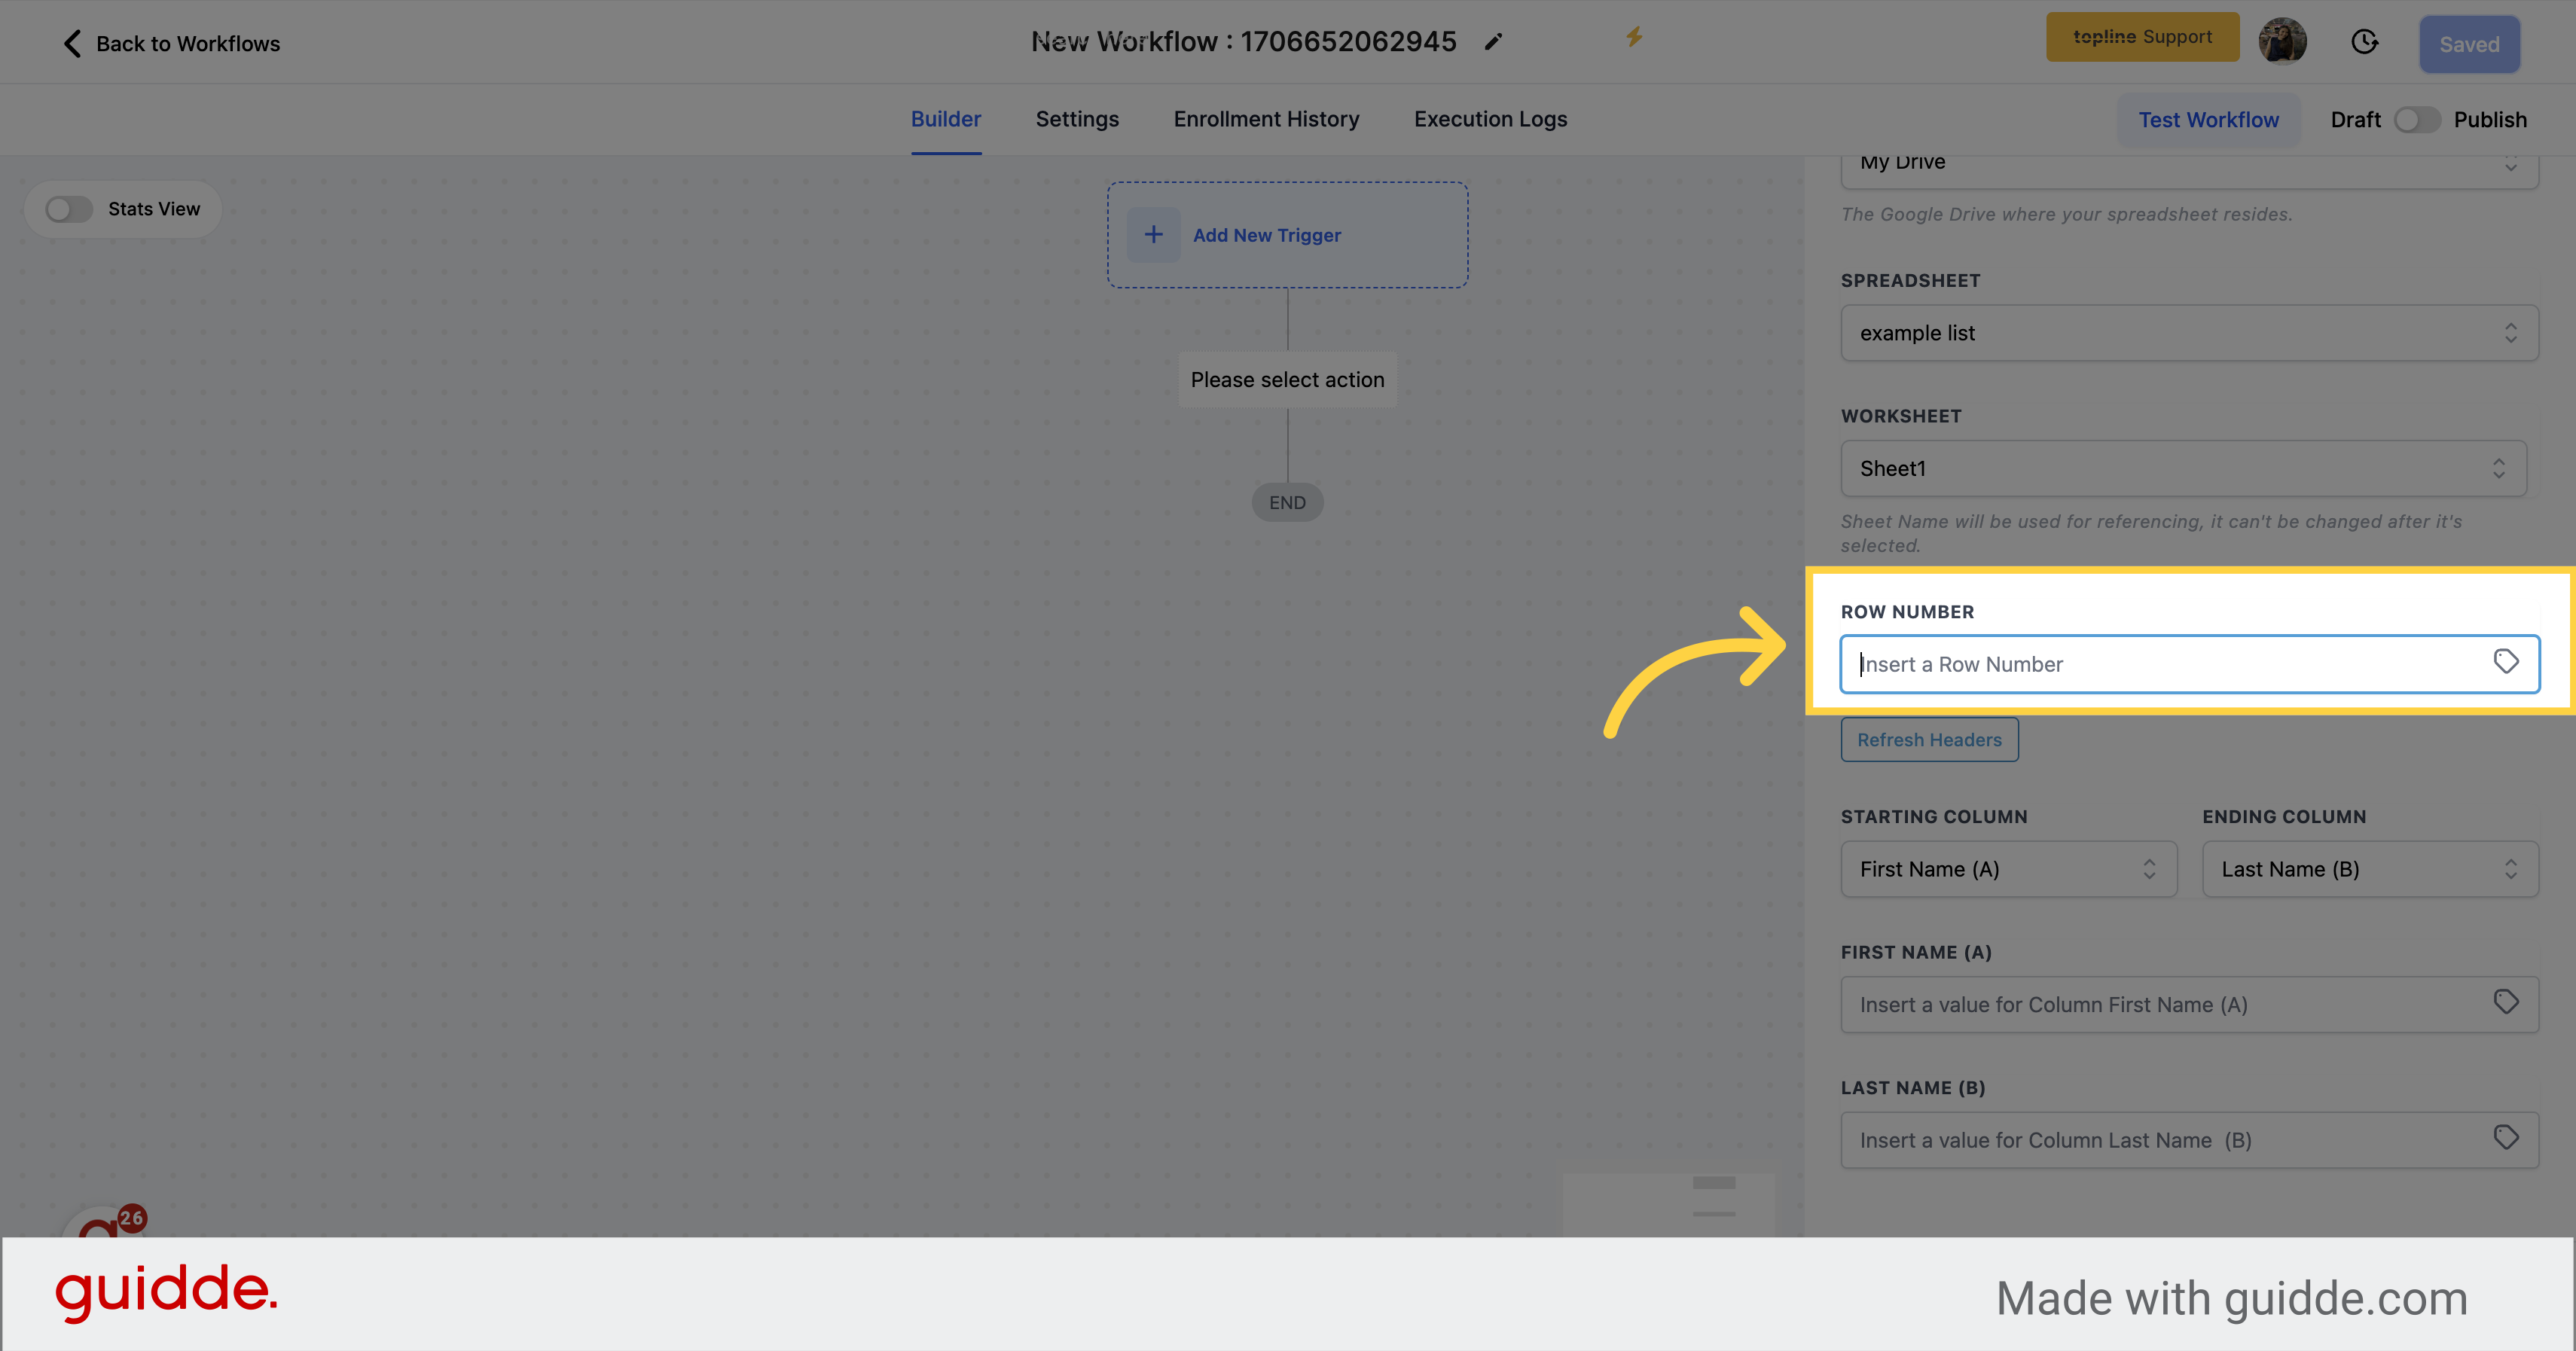
To update the desired columns, select the starting and ending columns.
If you do not wish to update a particular column, you can leave it blank.
The "Delete Specific Spreadsheet Row" action enables us to delete the contents of a specific row by specifying its row number. This action will clear the values in all of the columns of that row.
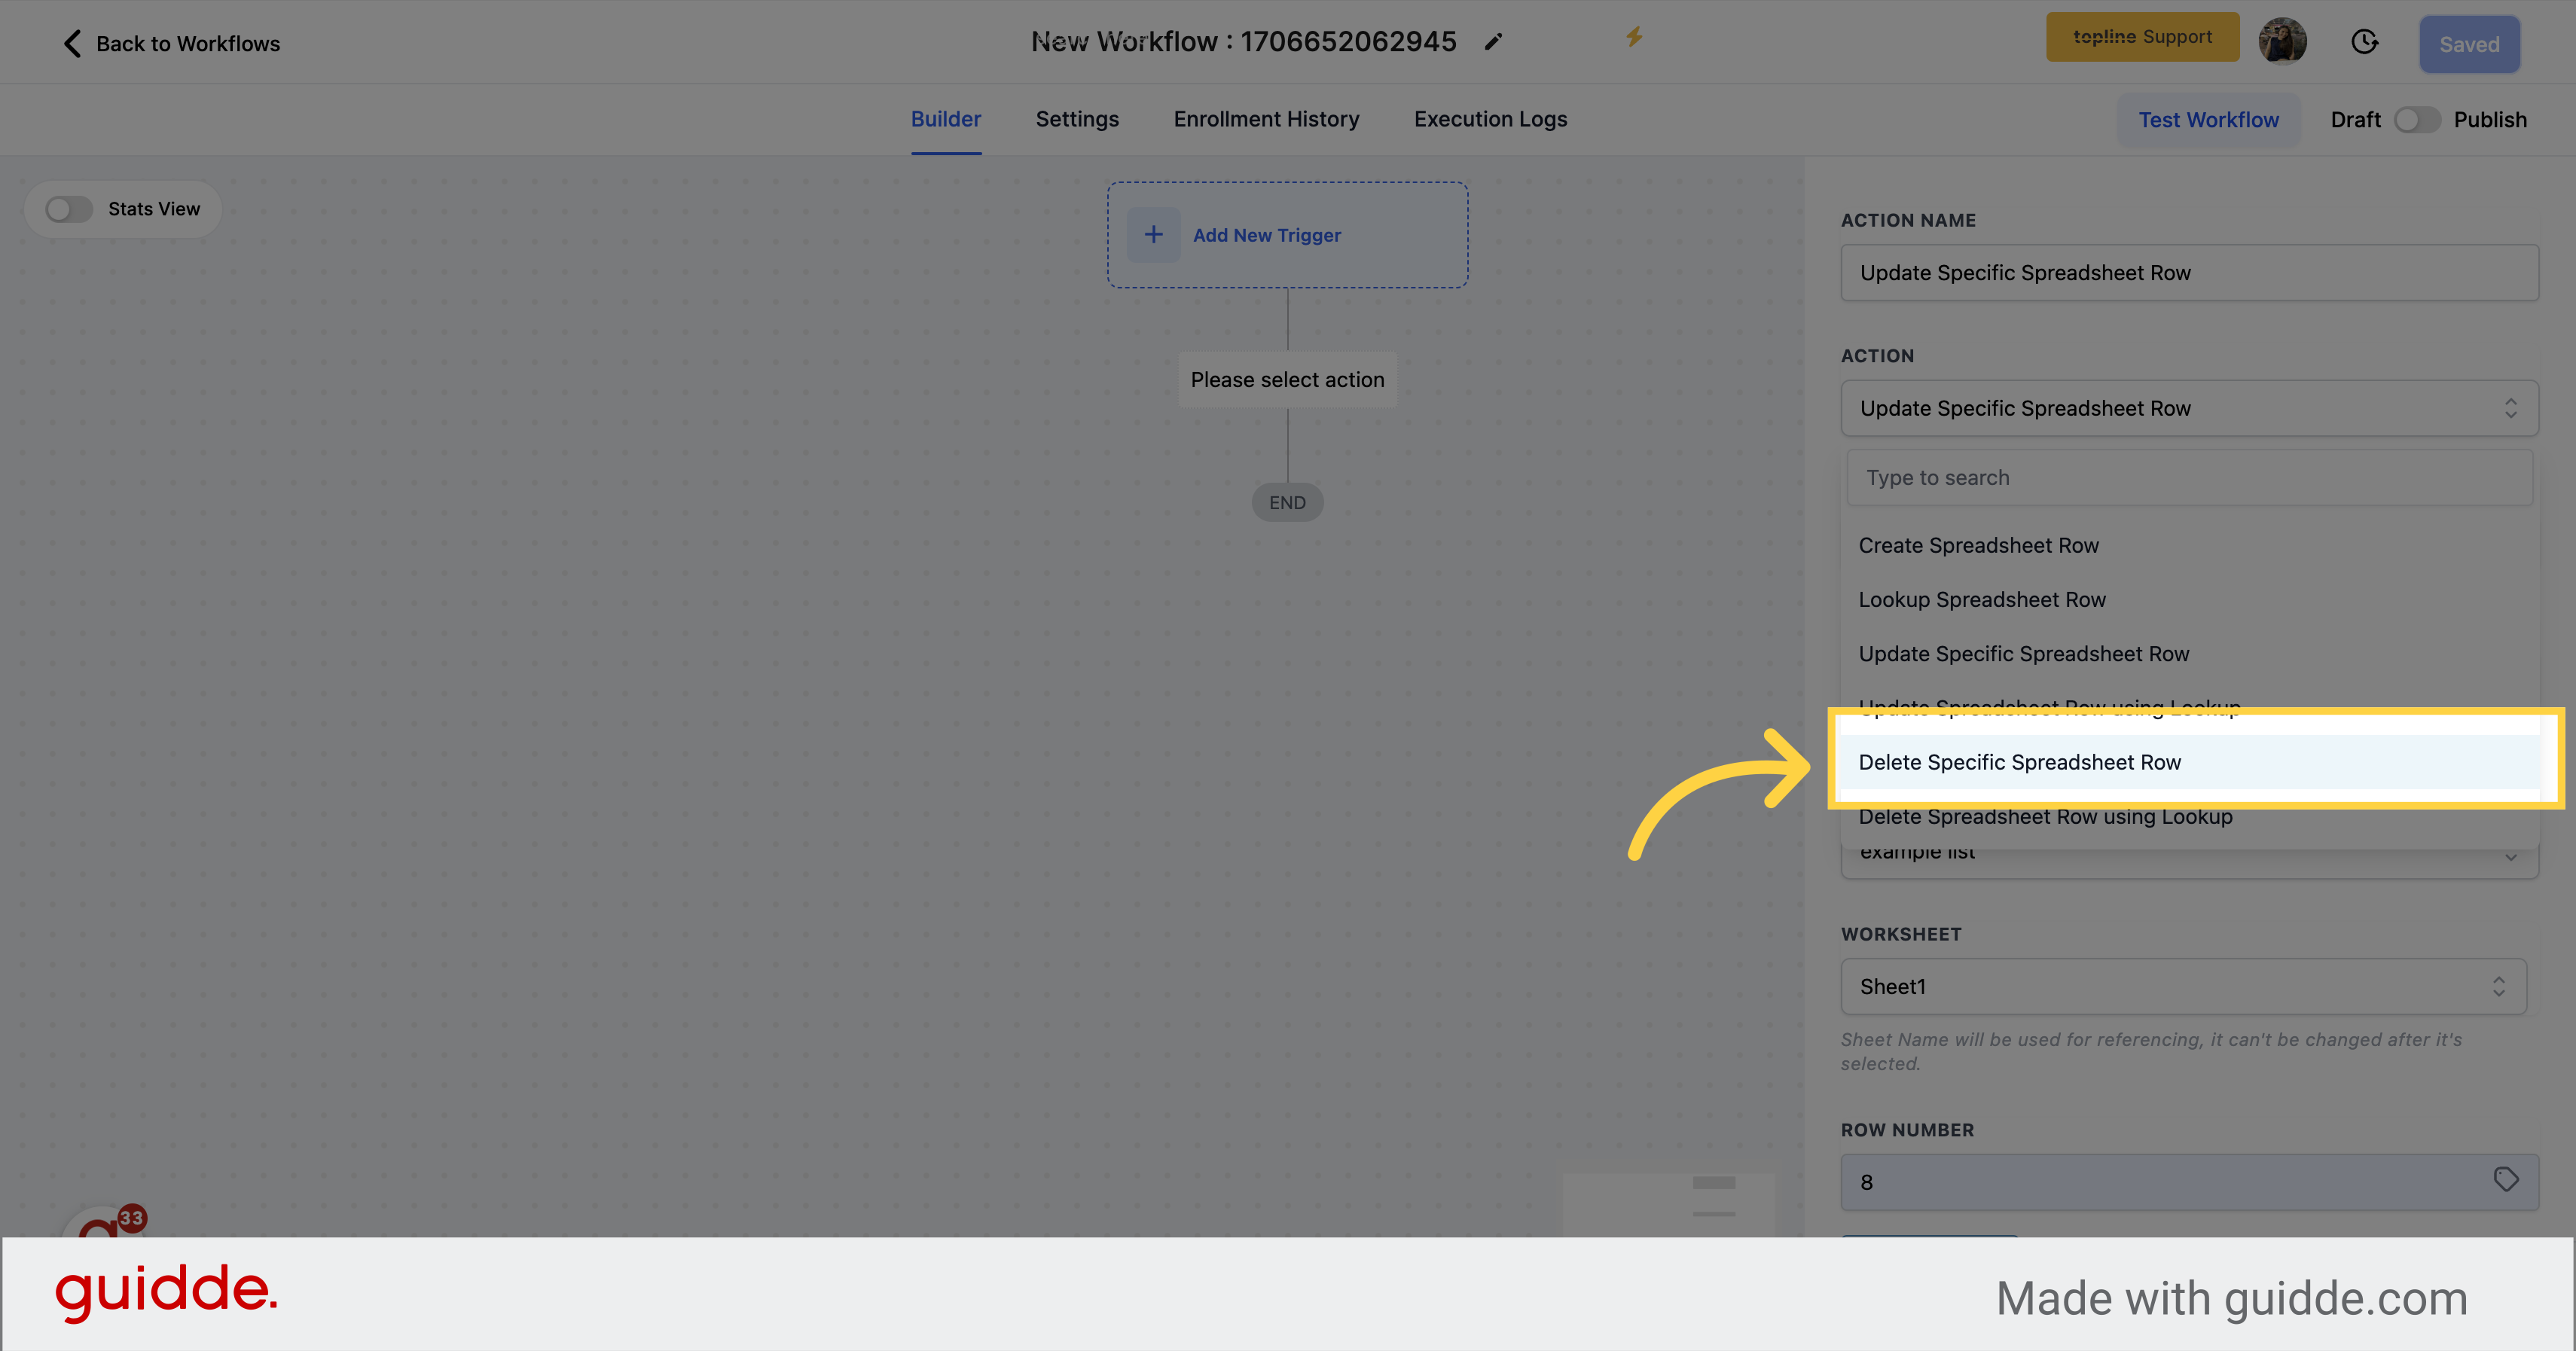
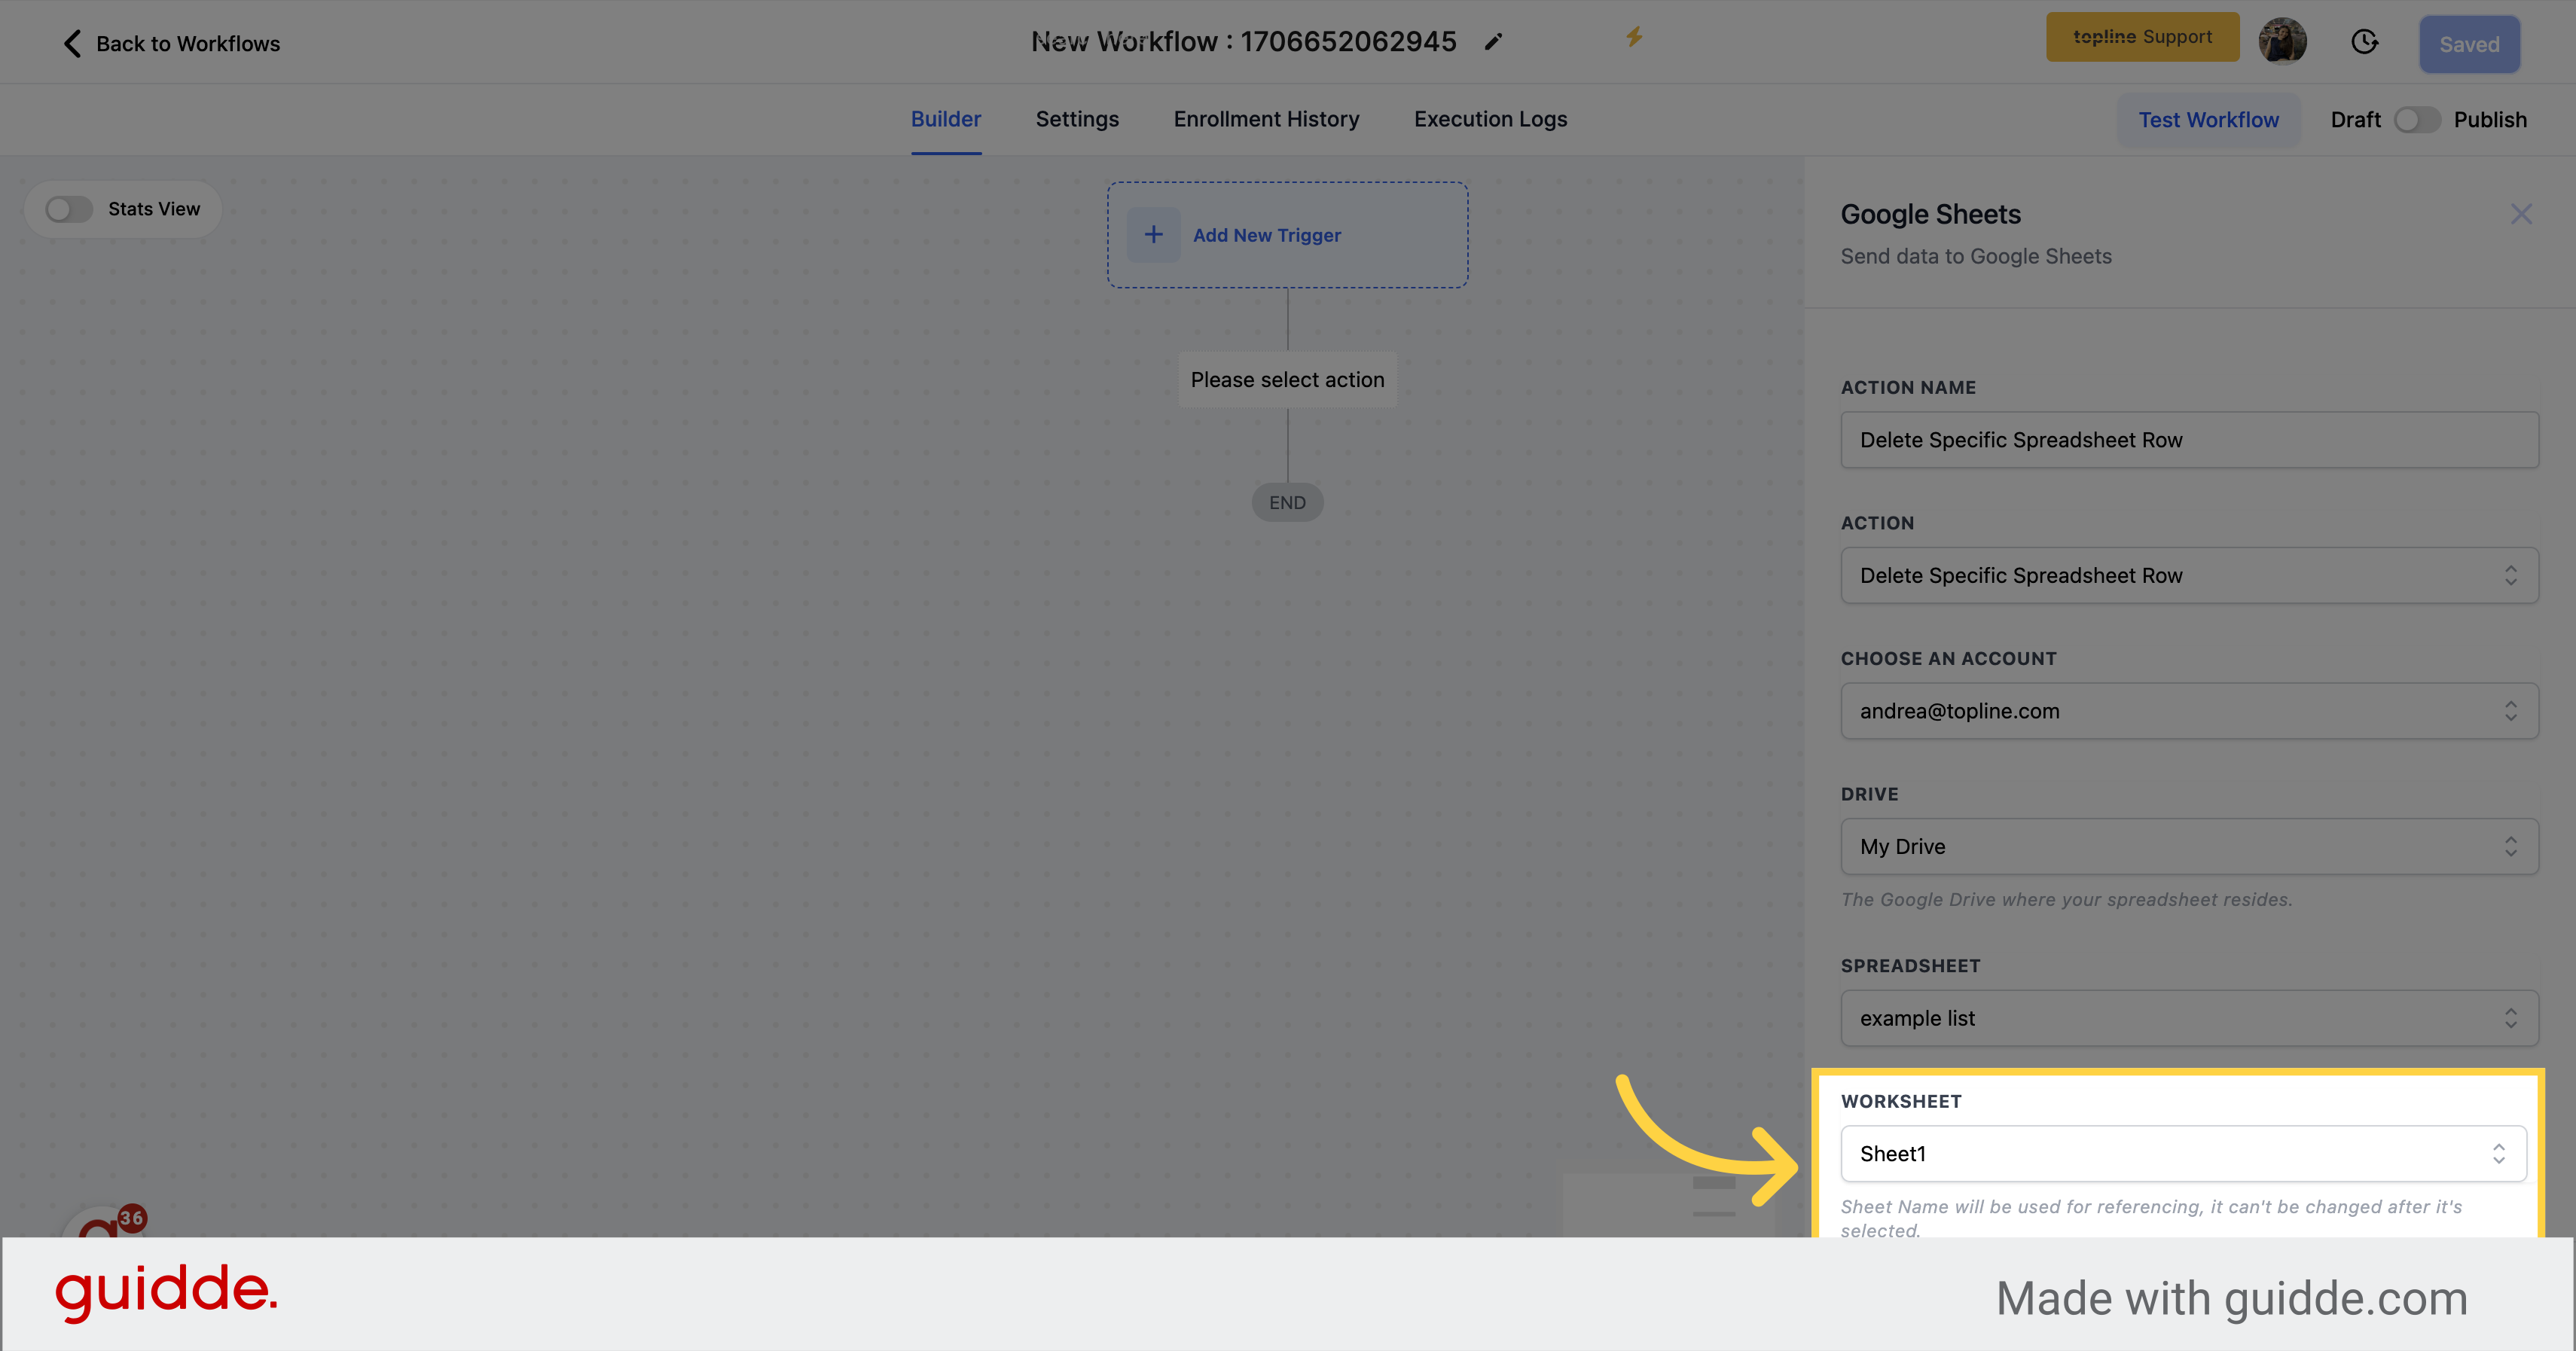
Select a worksheet within your spreadsheet that you wish to delete a row of.
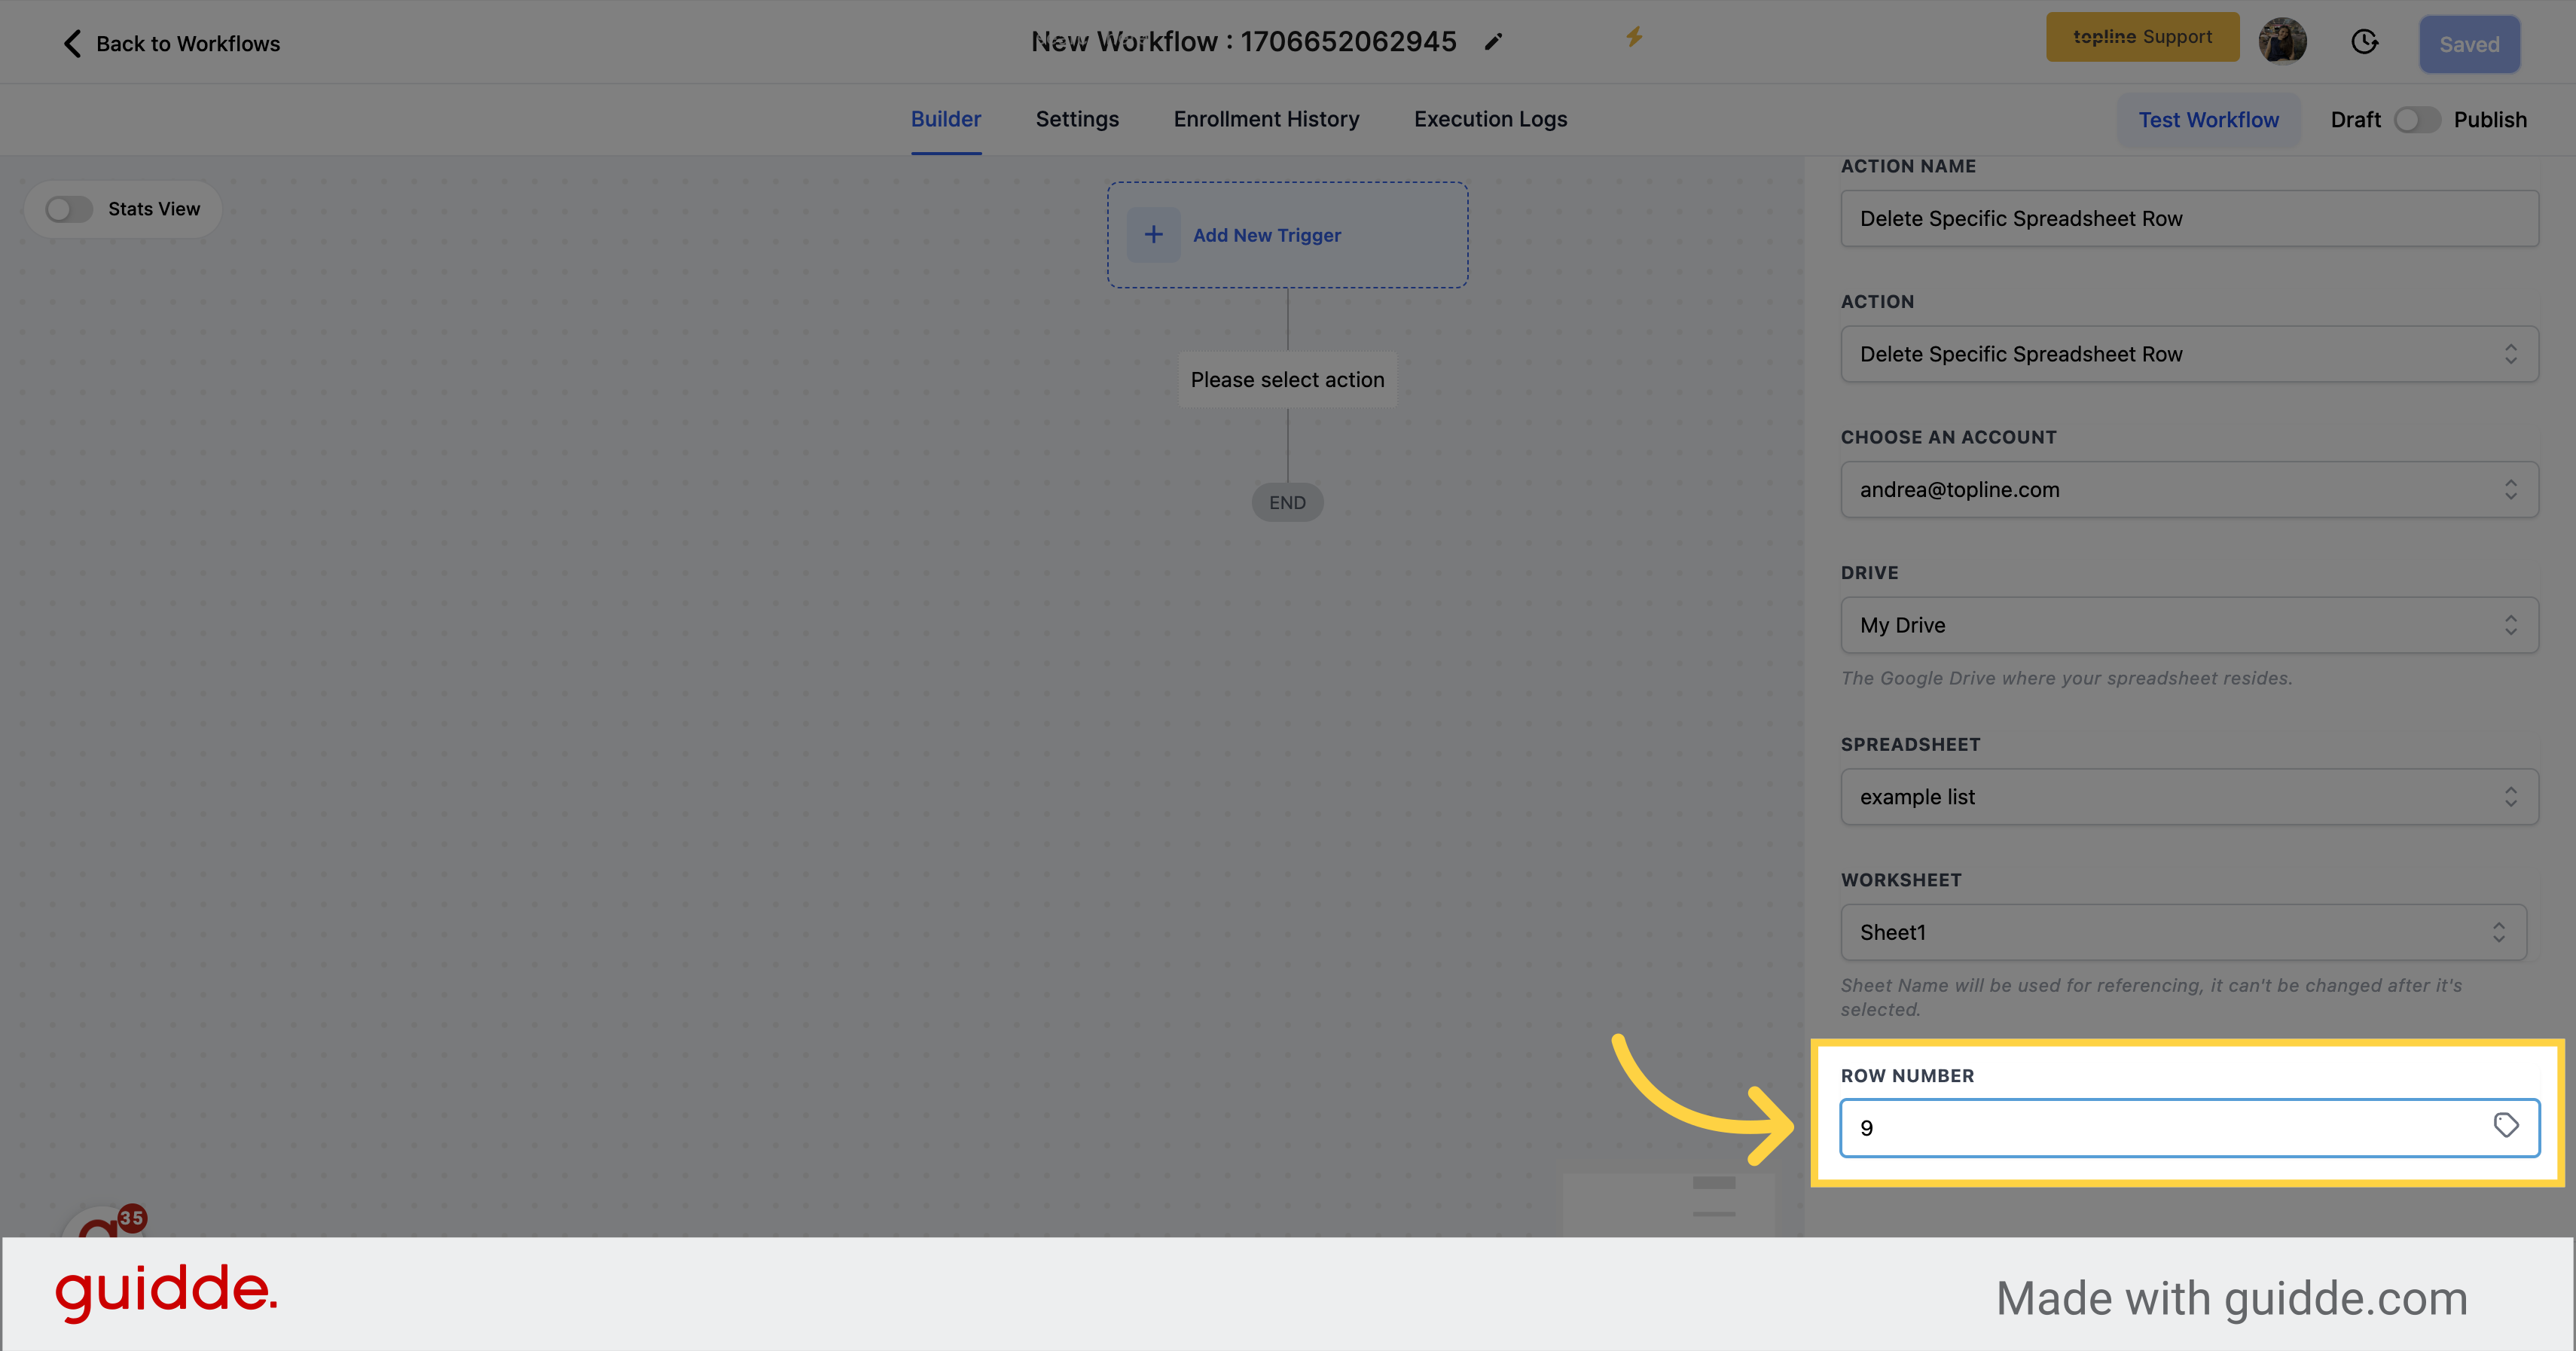
Specify the row number that you wish to delete in the spreadsheet.
Points to Remember:
When you use the "Delete Specific Spreadsheet" action, it clears the contents of the row, but it does not permanently remove the row itself.
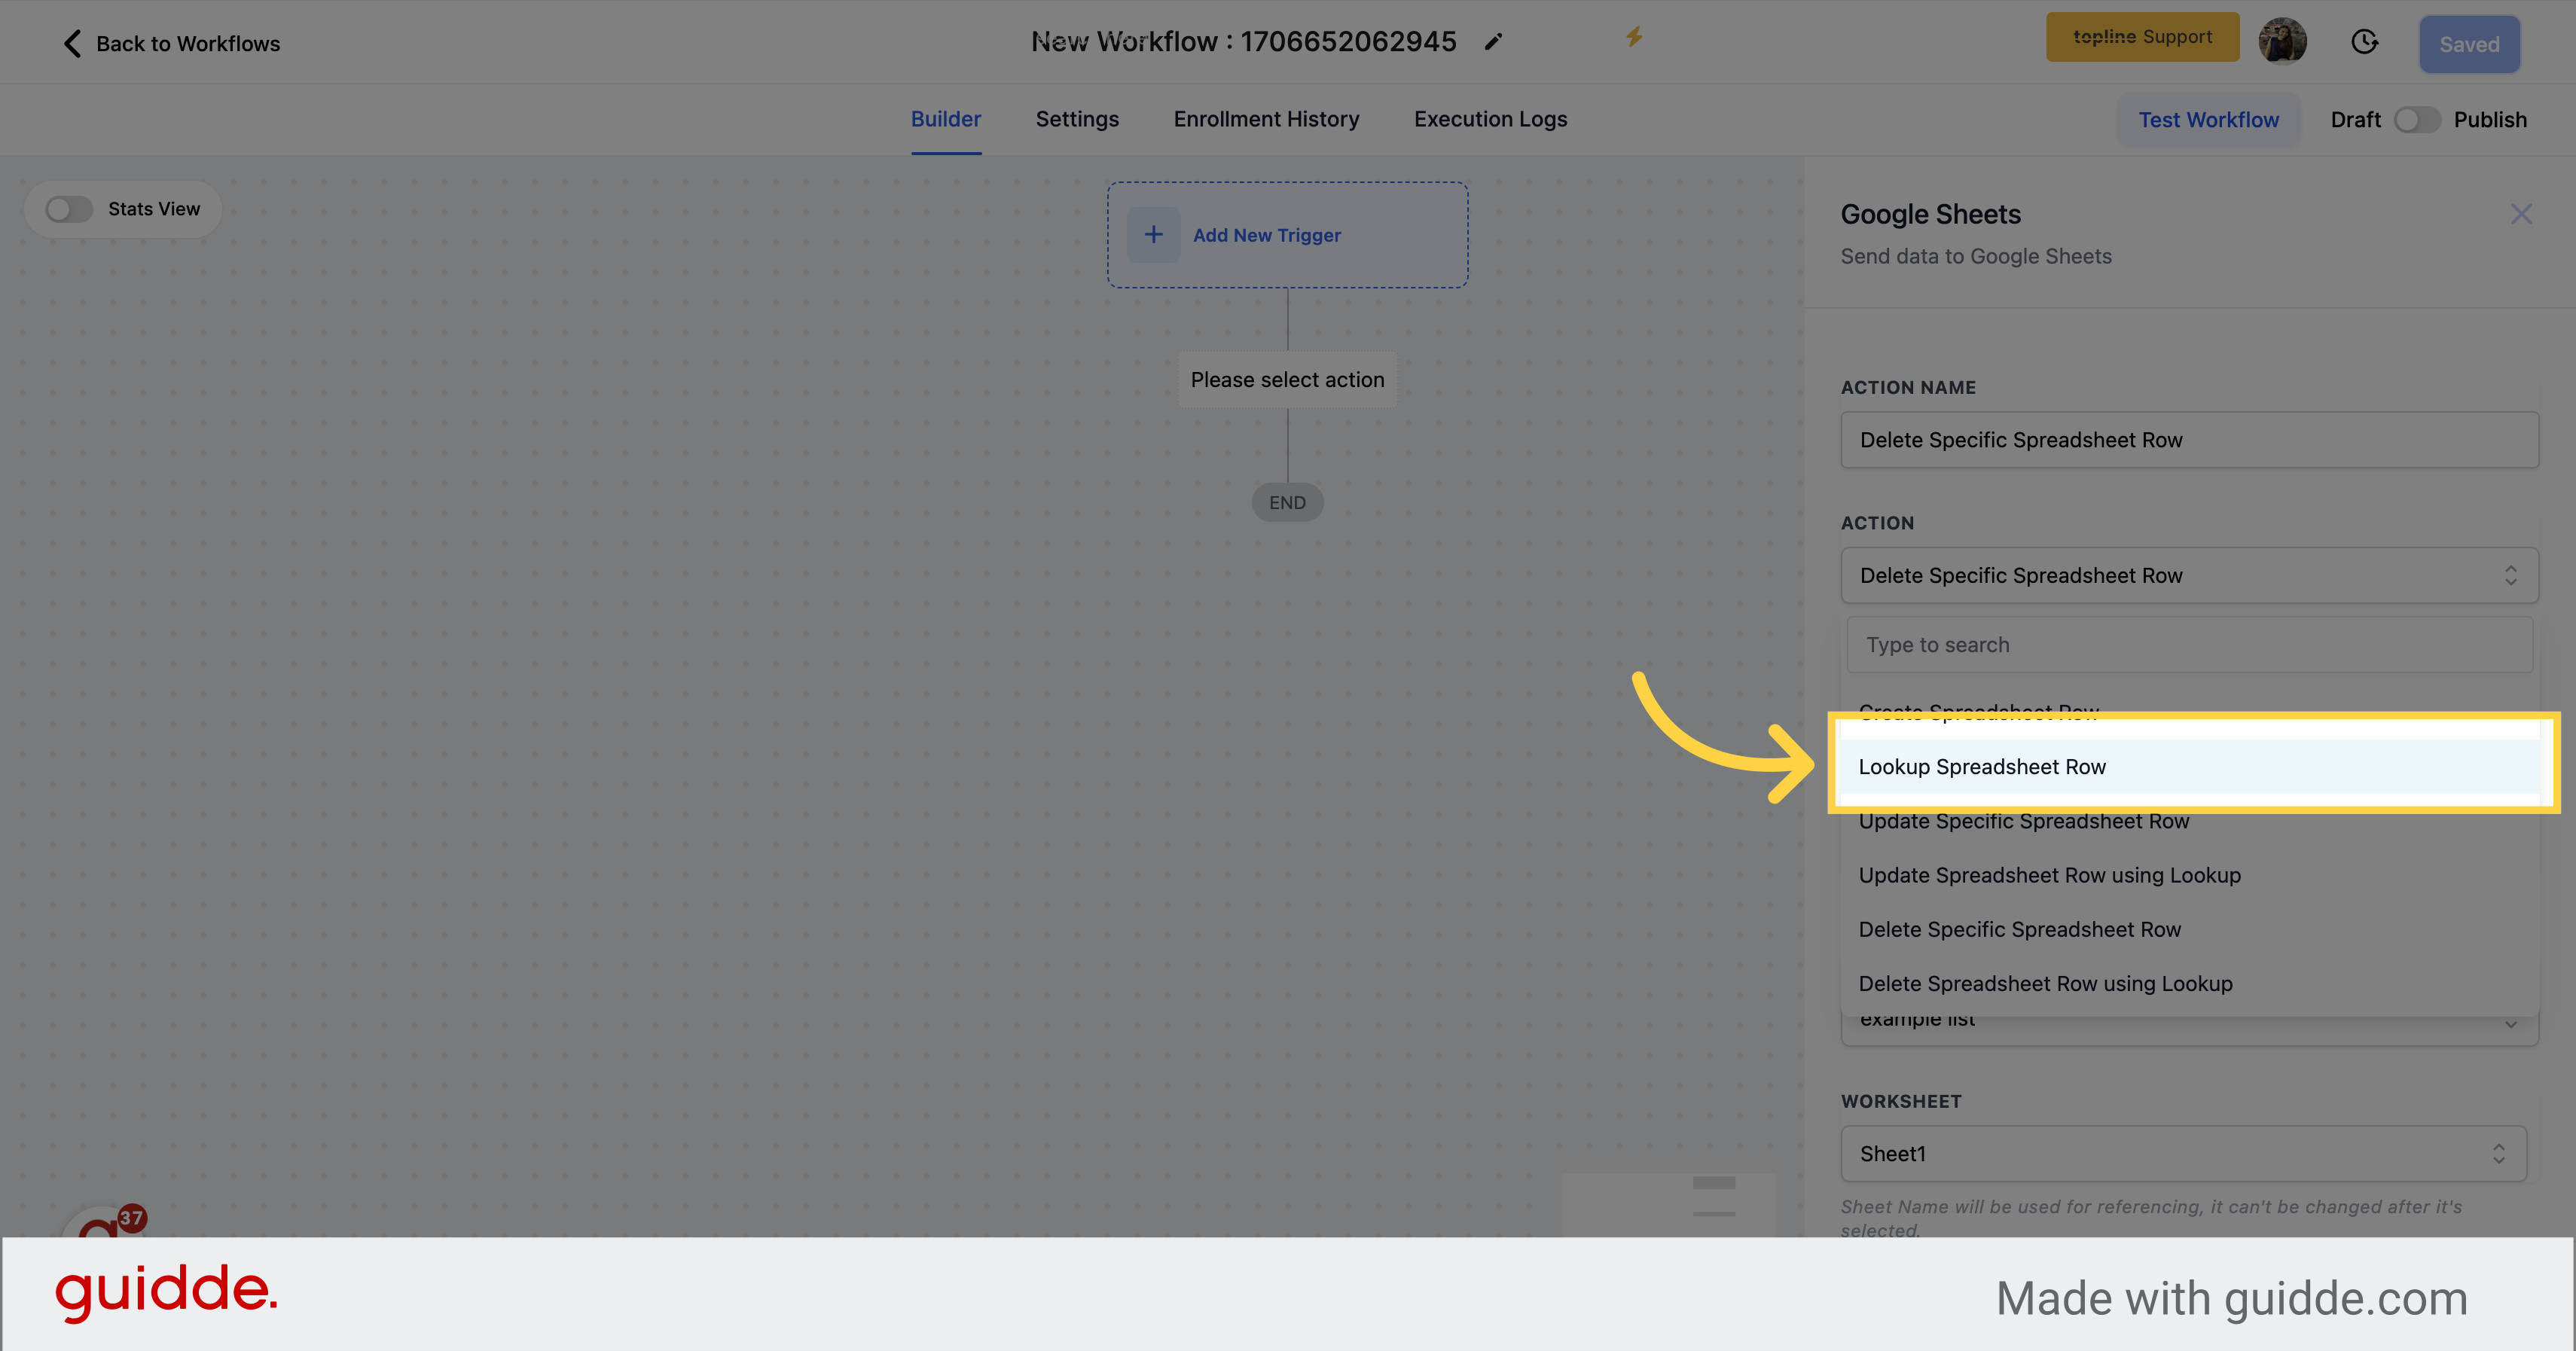
Our Google Sheet Lookup action, allows you to lookup data within your Google Sheets documents, providing you with a powerful tool for managing your data workflows.
Using our system, you can easily lookup any row in your sheet, and use the custom values associated with that row within your workflow.
This functionality allows you to automate complex data management processes, such as cross-referencing data from multiple sheets or databases.
By leveraging the power of our workflow system, you can reduce errors, increase efficiency, and save time, all while ensuring the accuracy and completeness of your data.
With our lookup functionality, you can easily integrate your Google Sheets documents into your workflow processes, creating powerful data management workflows that help you to drive better outcomes.
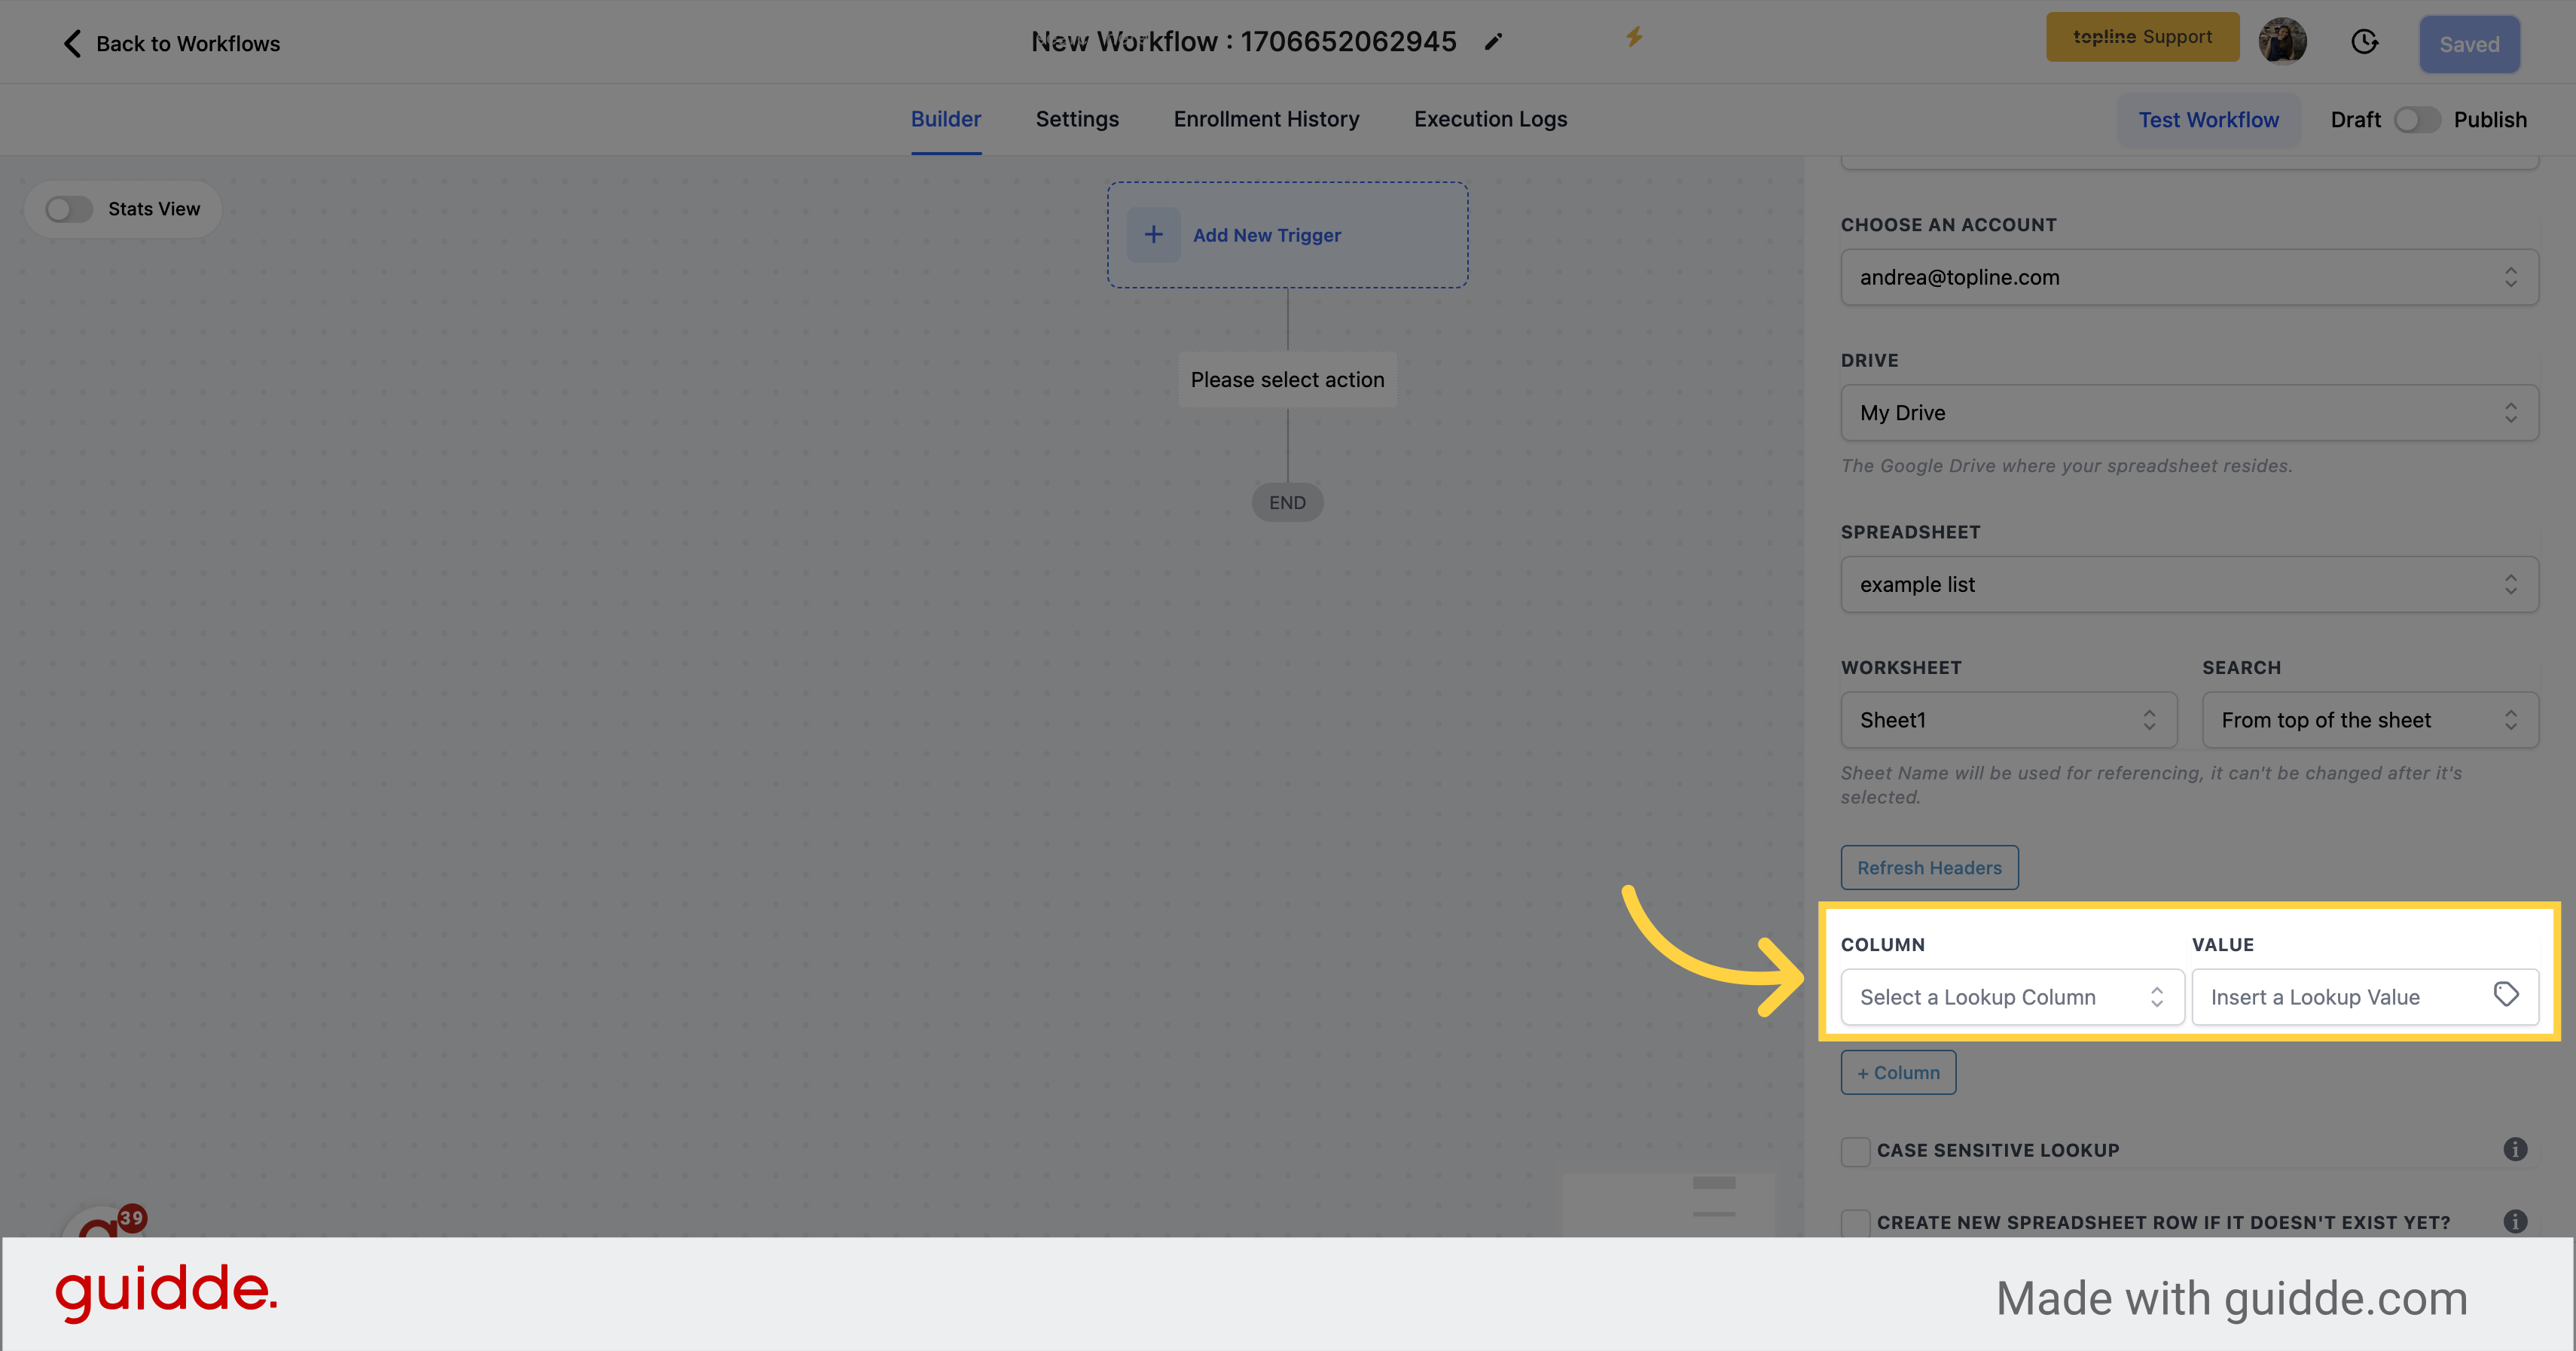
Select a worksheet within your spreadsheet that you wish to use for Looking up and retrieving data.
The first row is considered as Headers and the same is shown as labels for each columns.
You can fetch the latest headers from the sheet by clicking "Refresh Headers".
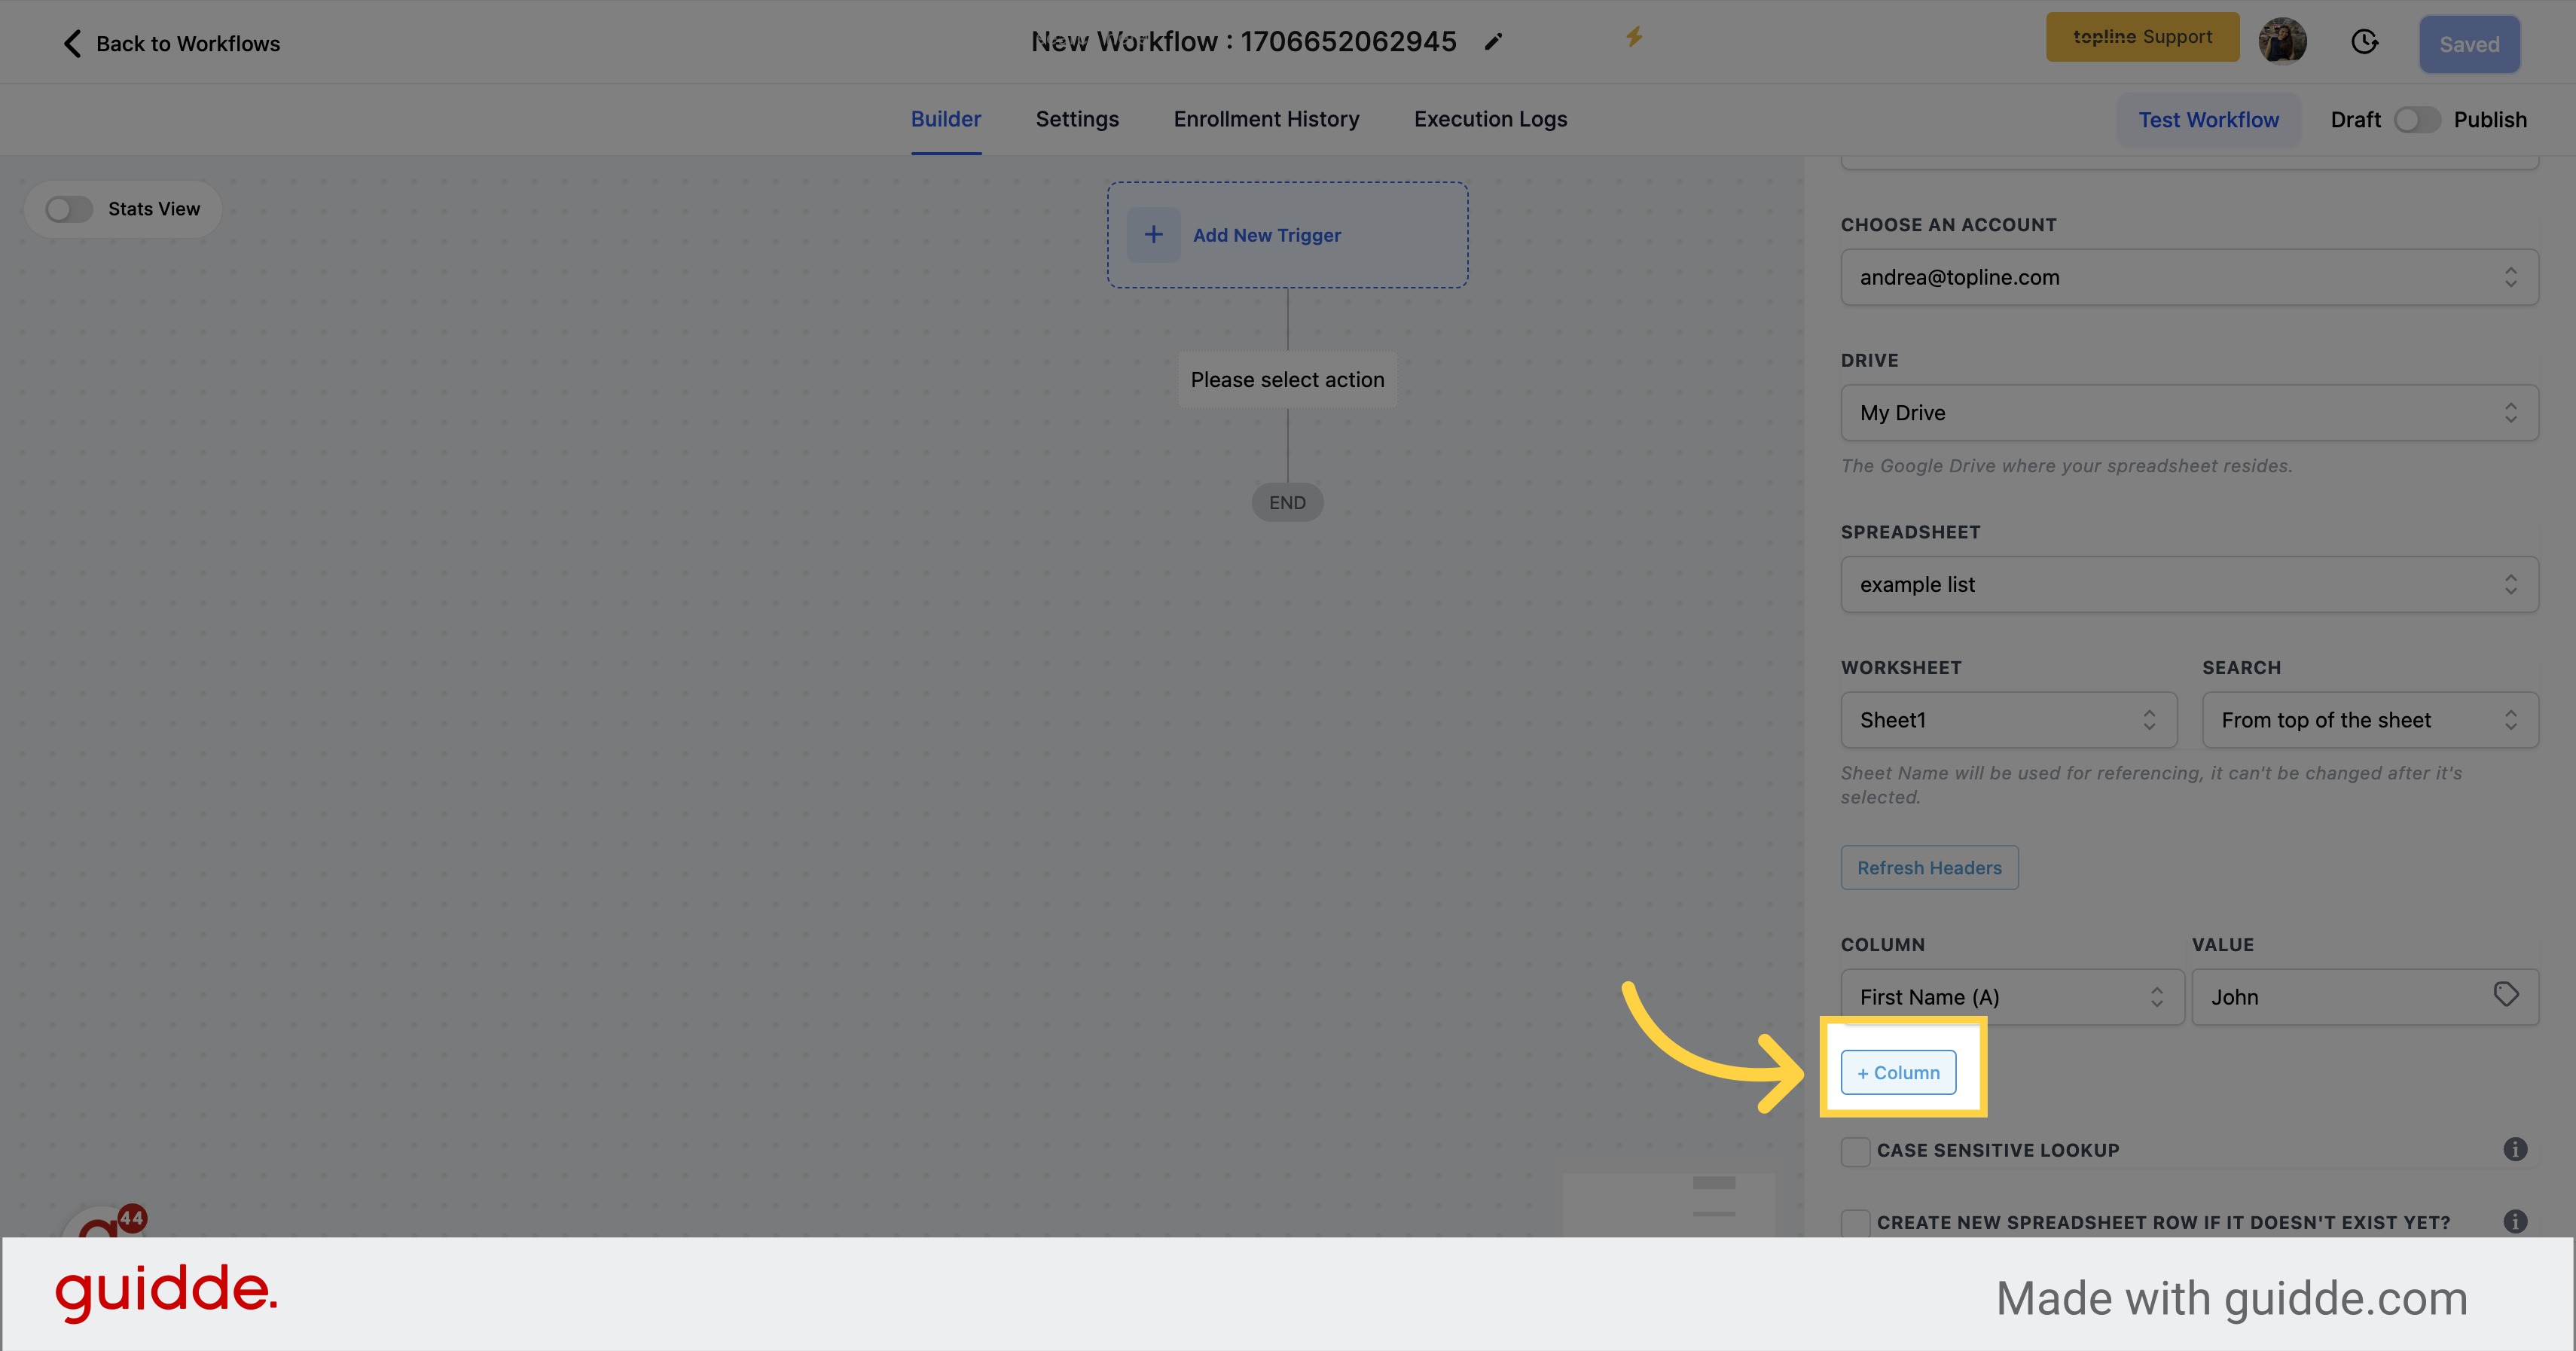
If an extra column is added, then both the column's value should match to determine the matching row.
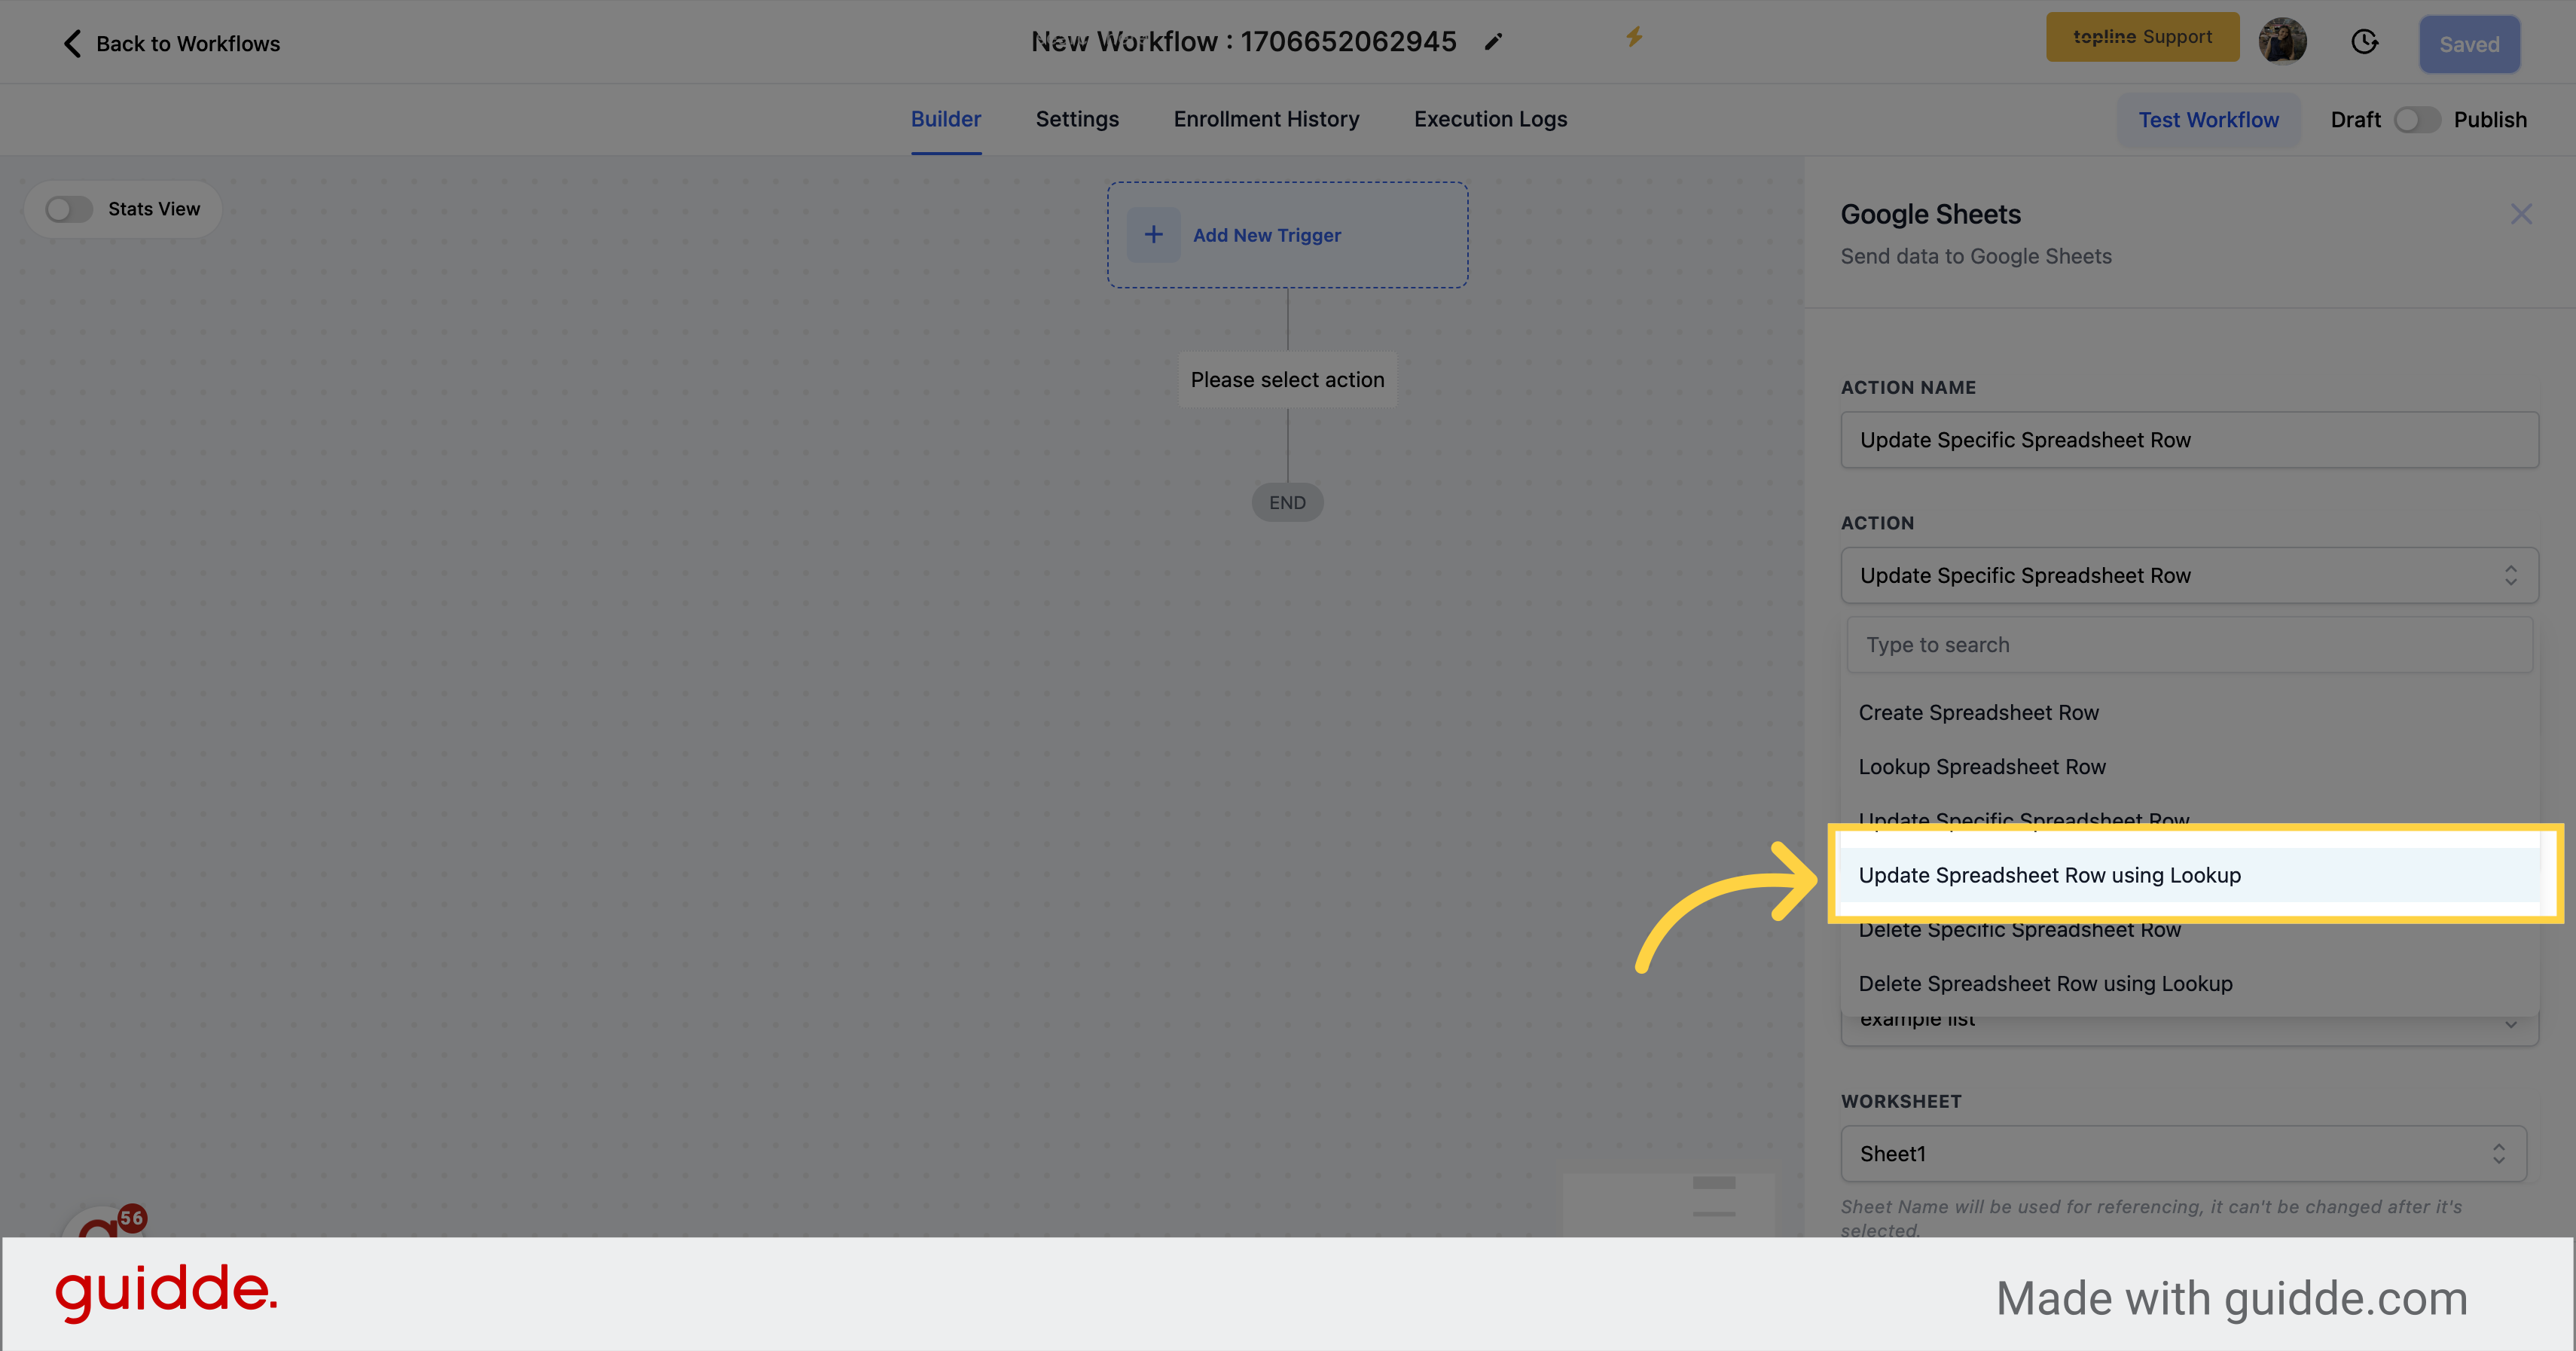
Updating a spreadsheet row using lookup involves searching for a specific row in your spreadsheet based on a particular value using Lookup, and then updating the values in that row with new data.
To update a specific row in a spreadsheet, you Should use Lookup Action to search for a column value in the data, which will return the corresponding row. Once you have located the desired row, you can then use the "Update sheet using Lookup" Action to modify the data within that row.
If you want to use the "Update using lookup" action, it is necessary to first use the "Lookup" action to search for a specific row in your spreadsheet based on a particular value. Once you have found the desired row using lookup, you can then use the "Update using lookup" action to modify the data within that row. Therefore, using the lookup action prior to updating using lookup is a necessary step in this process.
Before proceeding with any further steps involving lookup, it is recommended that you review the documentation related to lookup.
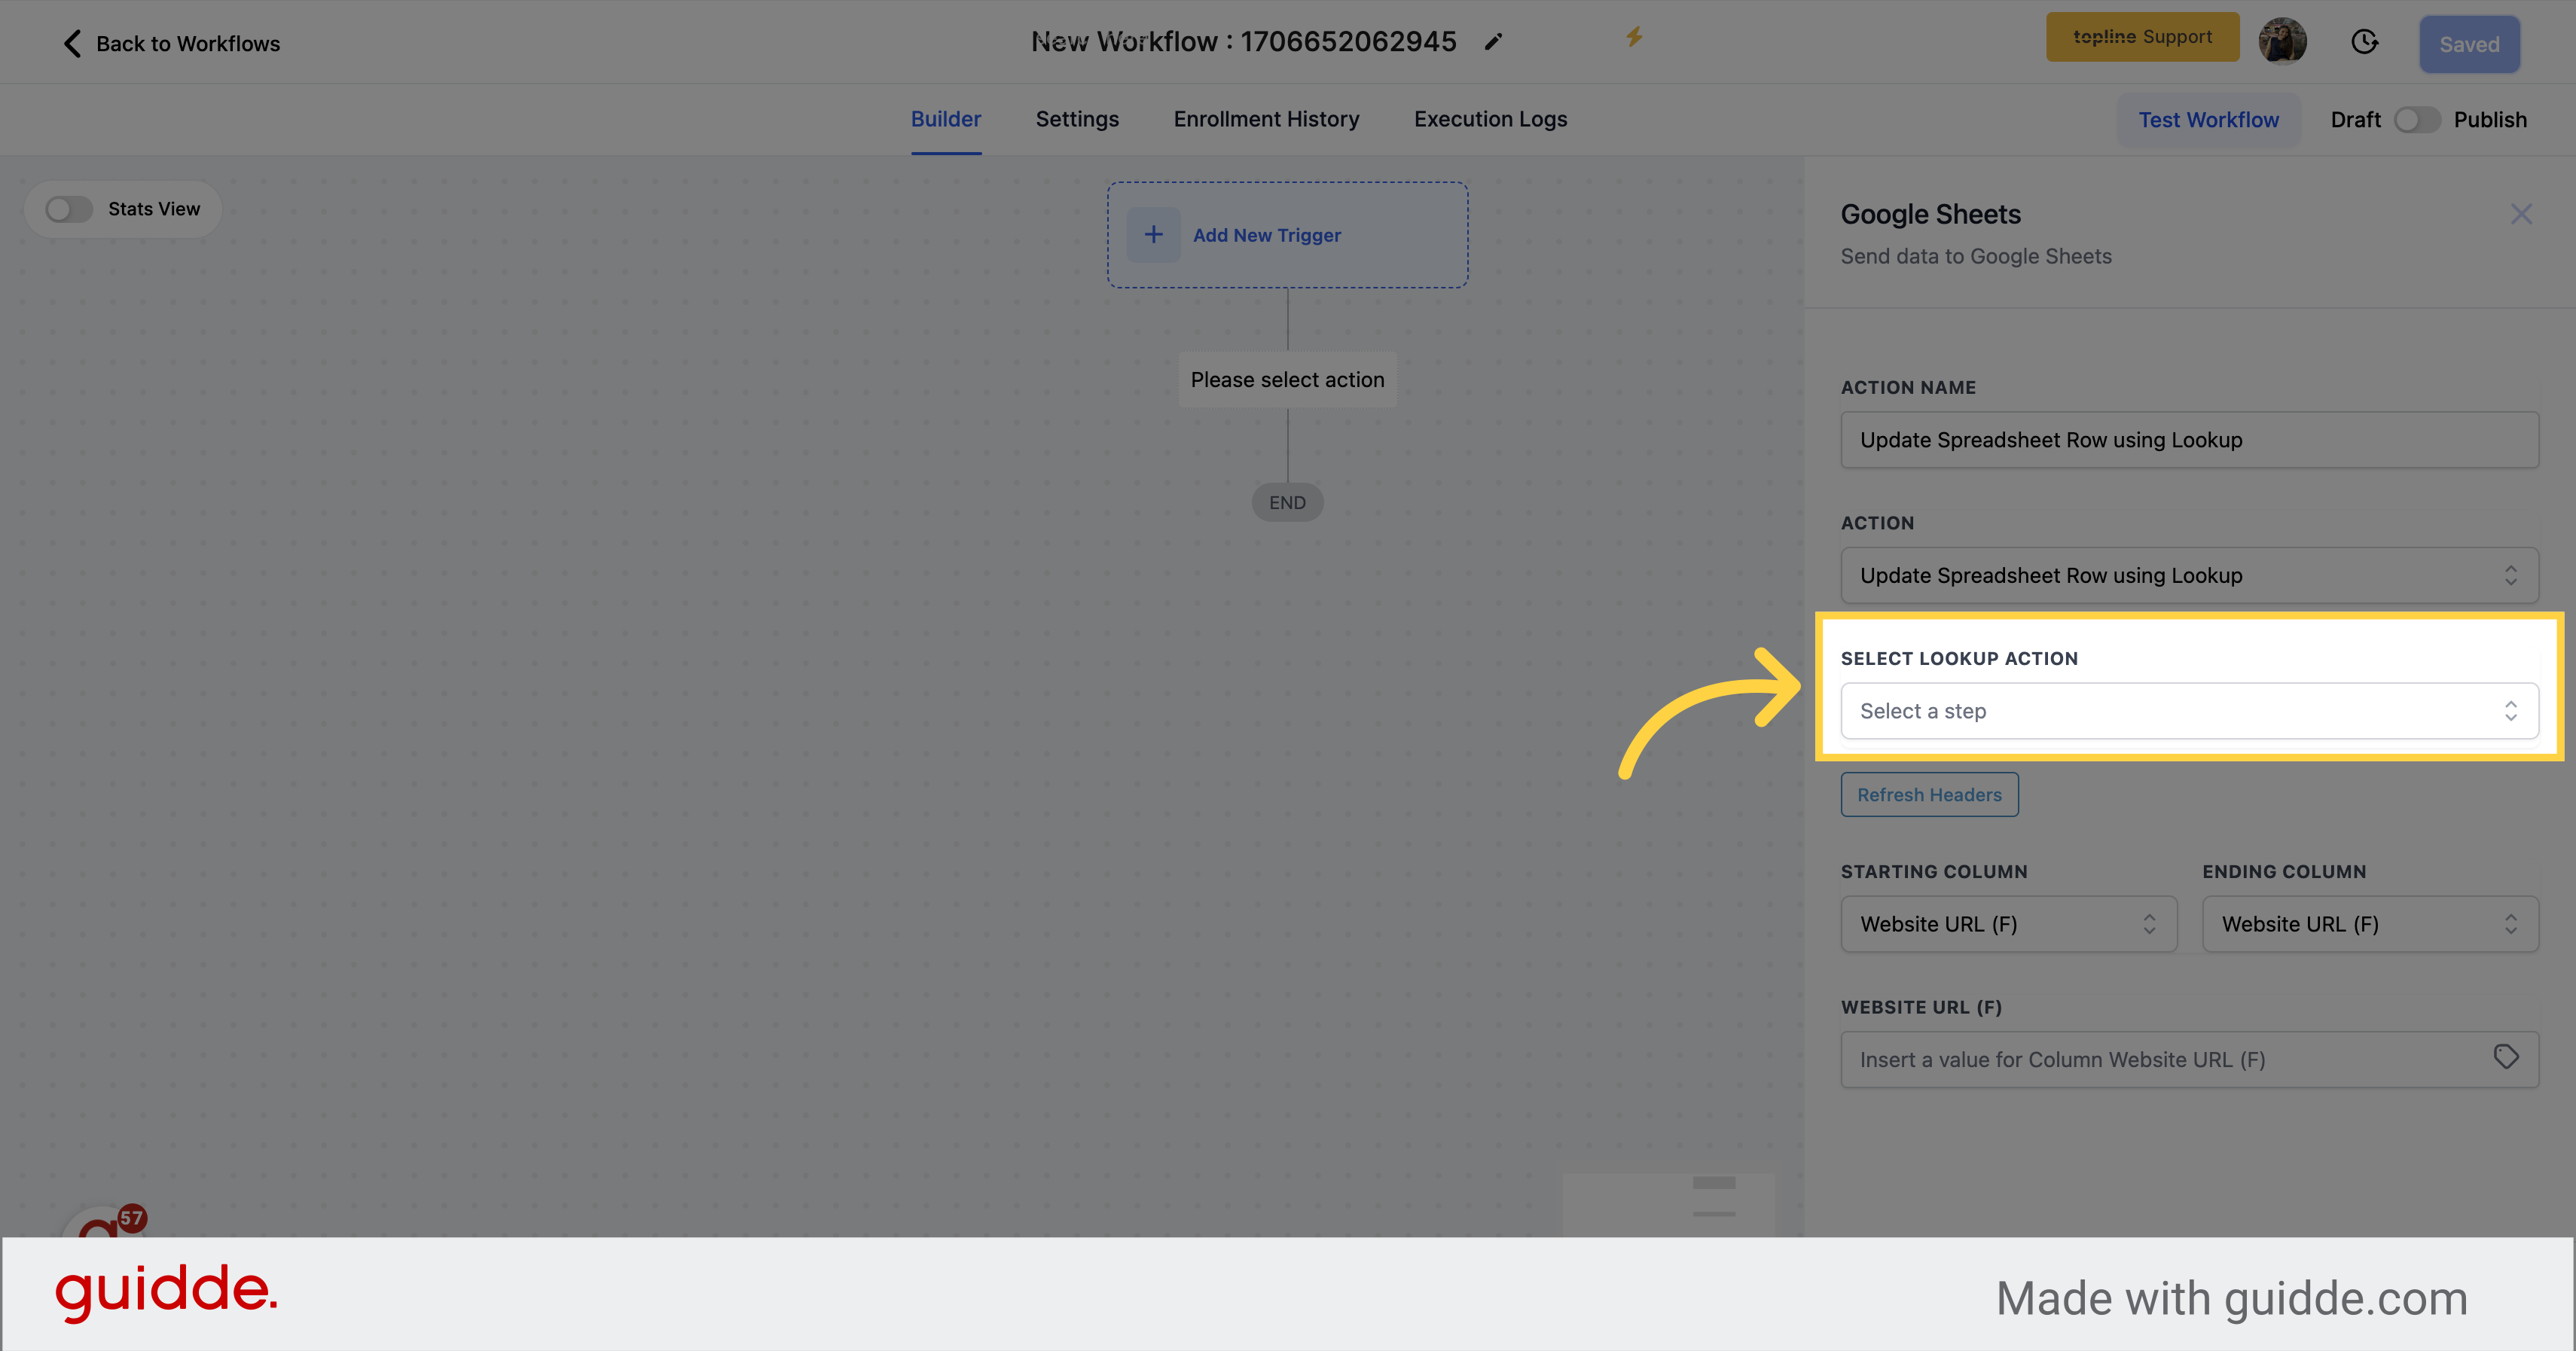
This action will only display the Lookup actions that have been added above it for selection.
To update the desired columns, select the starting and ending columns.
If you do not wish to update a particular column, you can leave it blank.
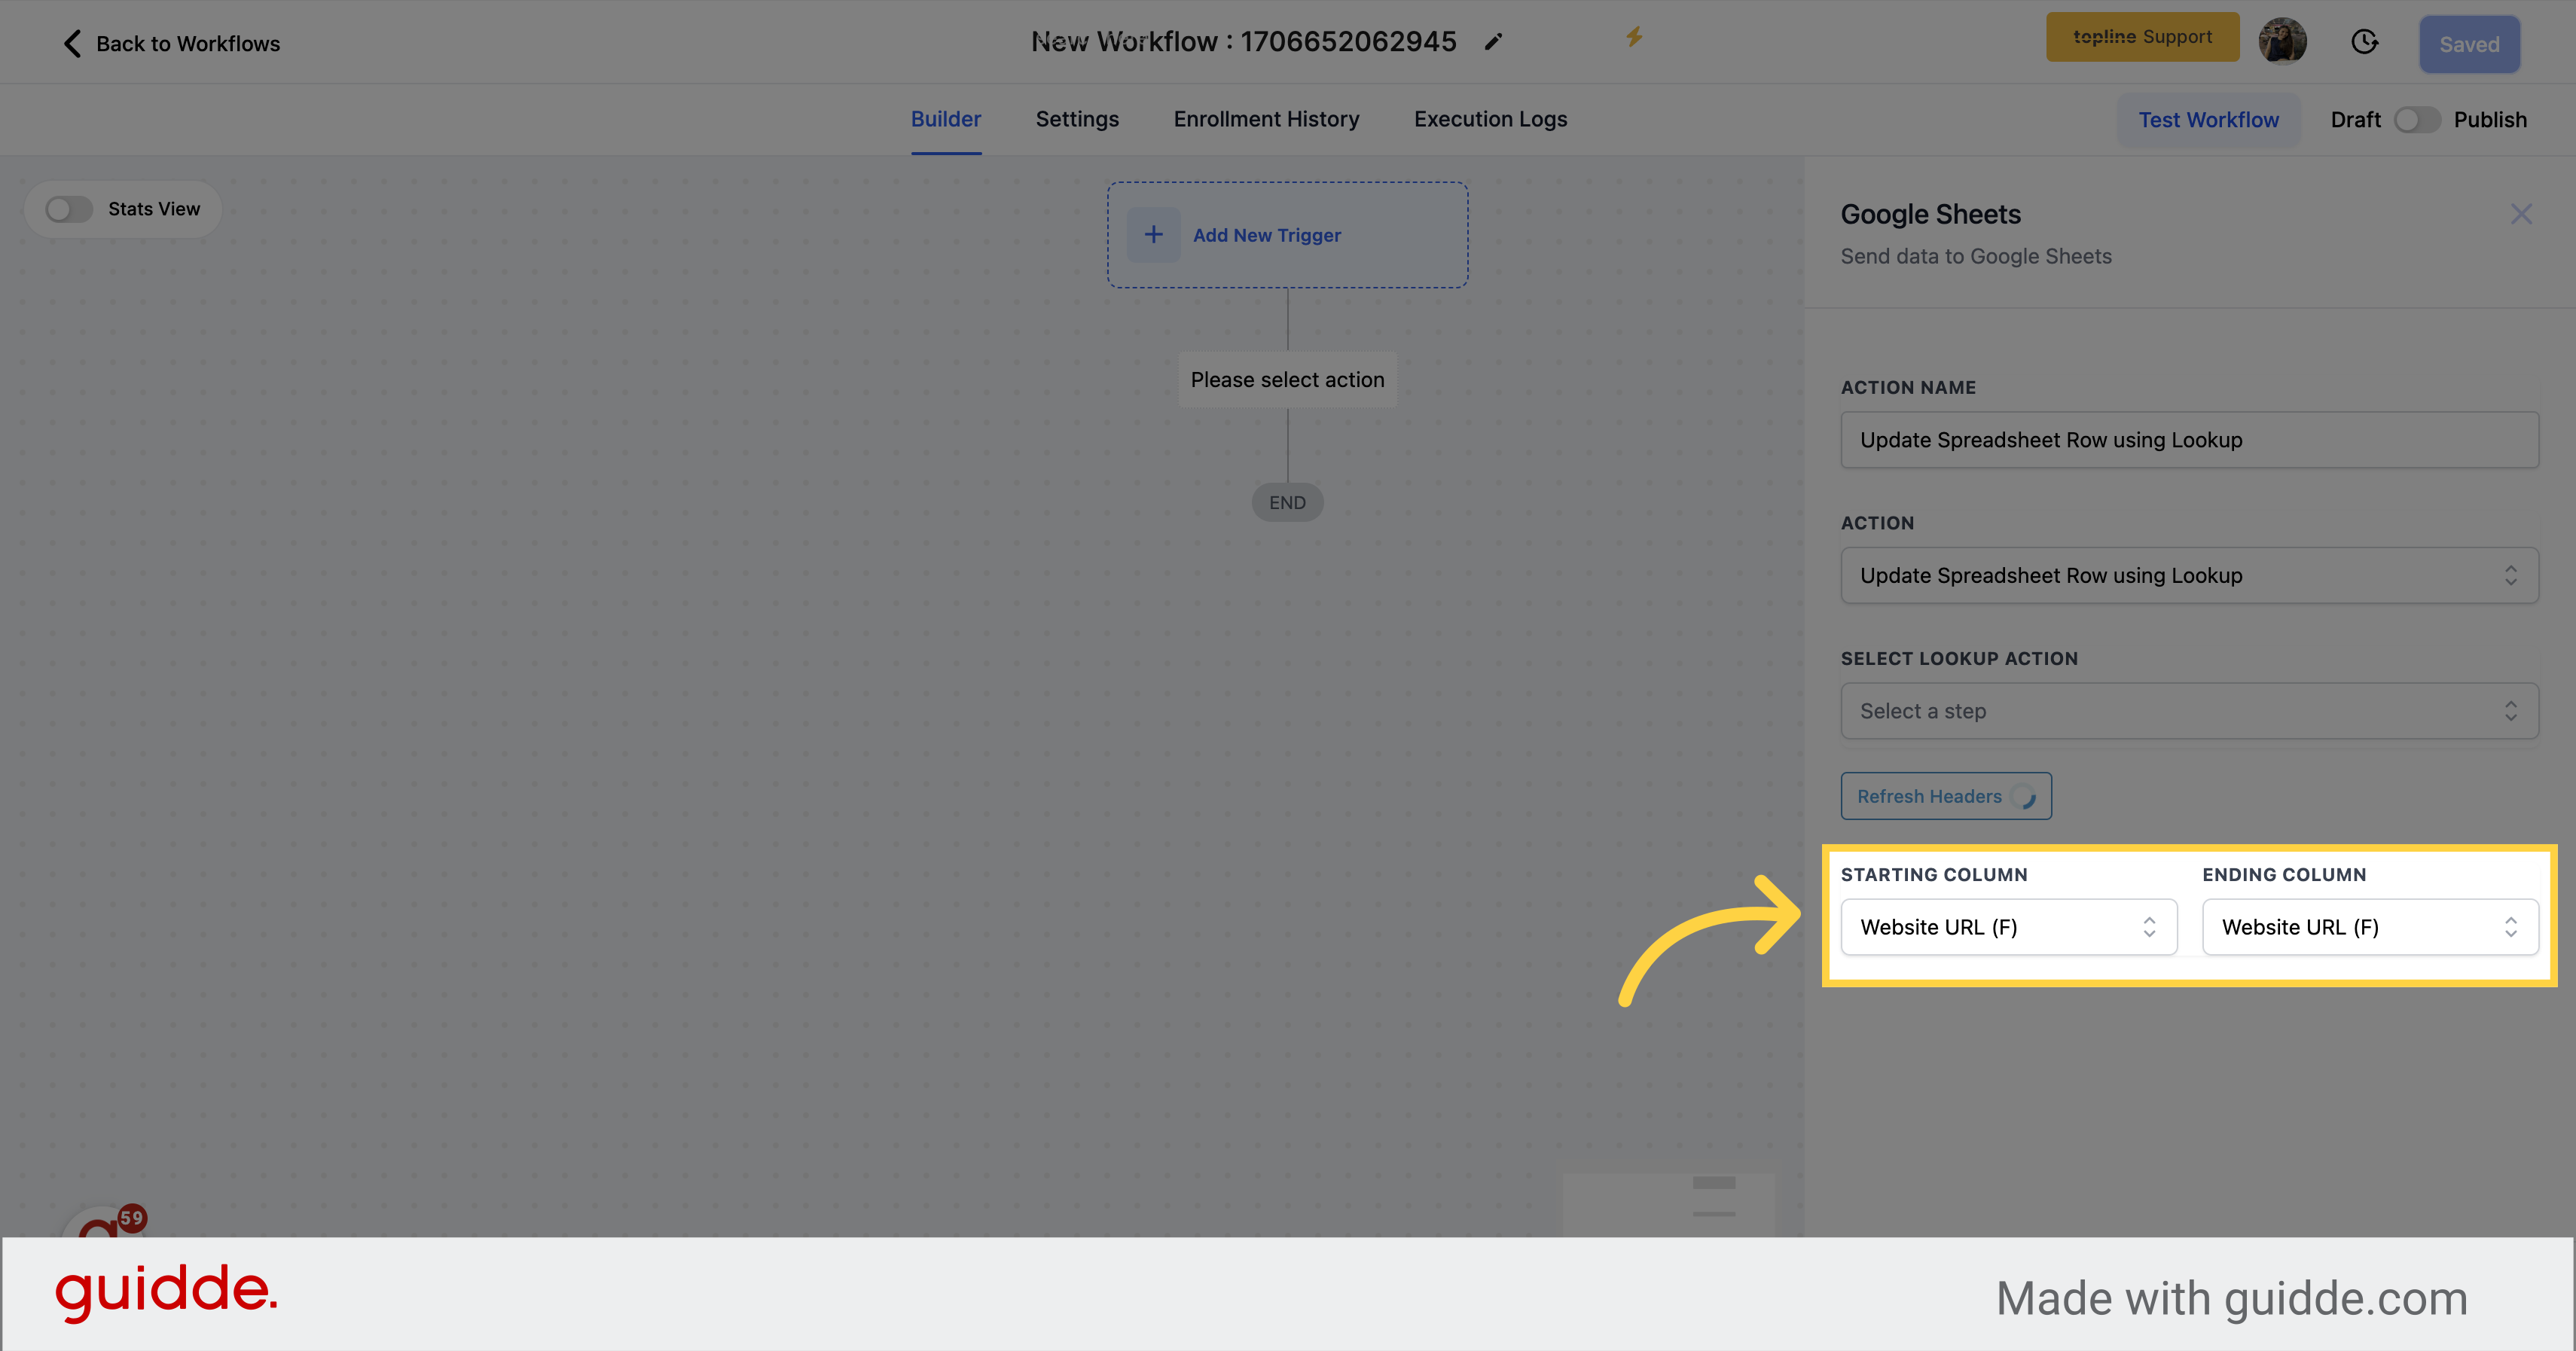
In the "Update Specific Sheet Row" action, you are limited to selecting only one Lookup Action at a time.
If you do not wish to update a particular column, you can leave it blank.
If the Lookup Action does not return any rows, the workflow will skip this step and proceed to the next one.
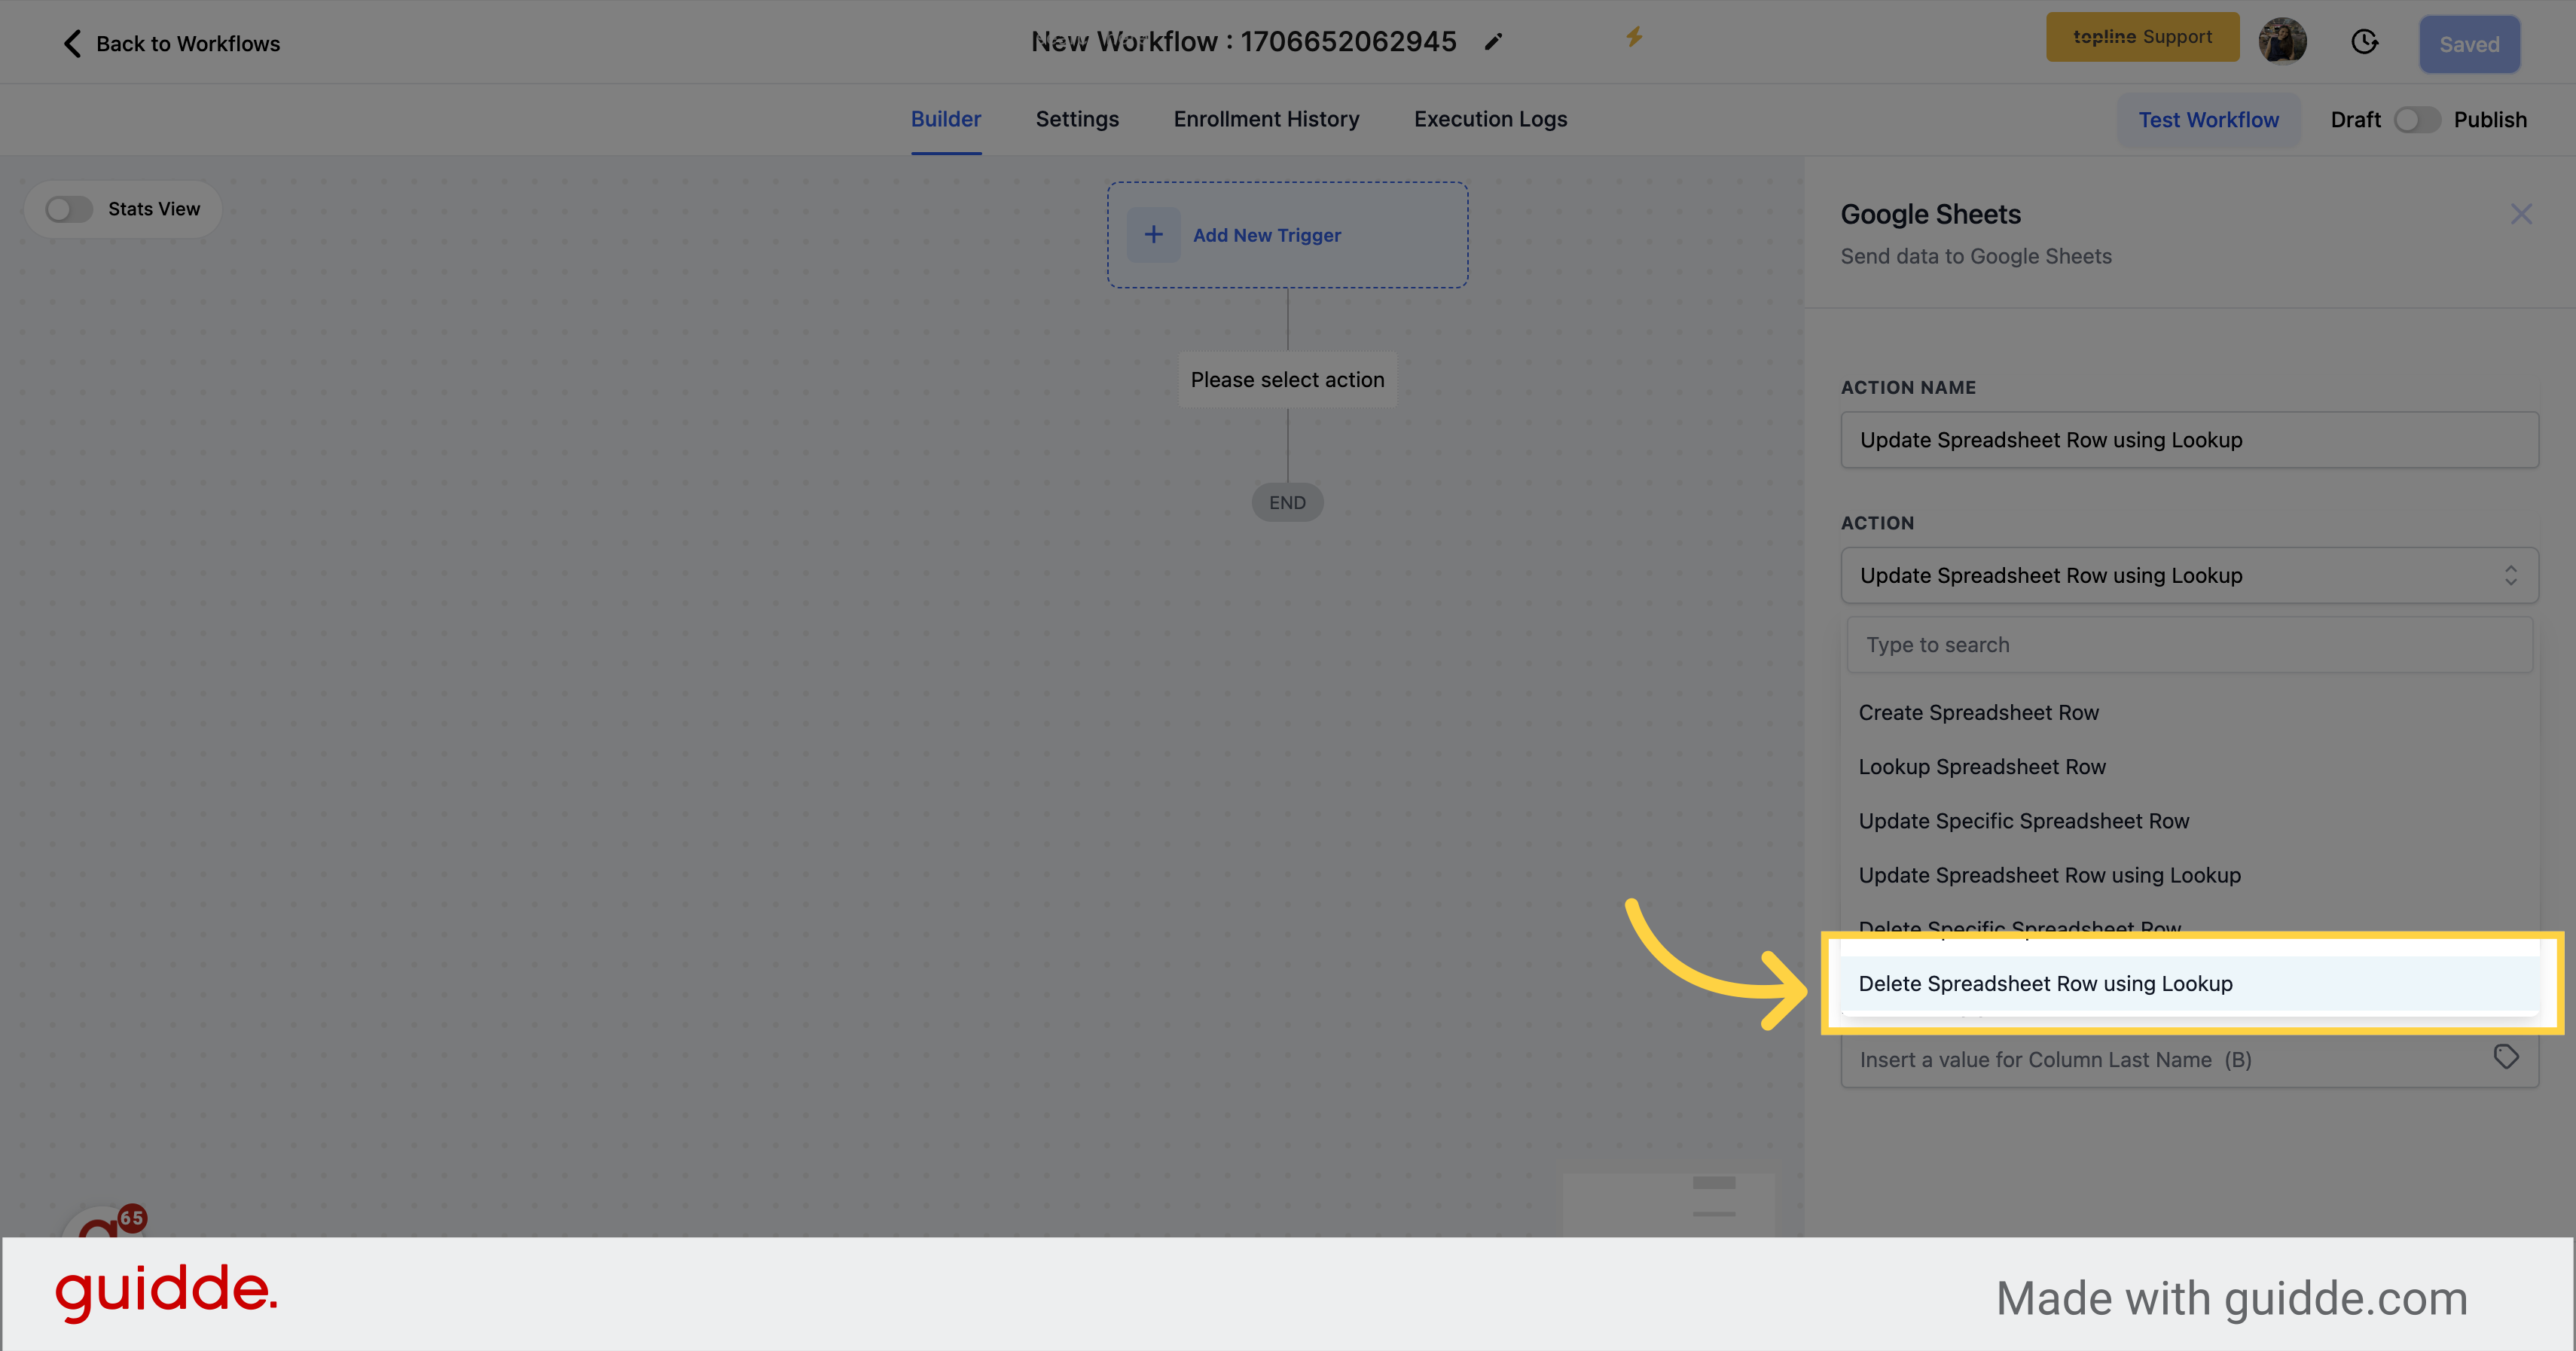
Deleting a spreadsheet row using lookup involves searching for a specific row in your spreadsheet based on a particular value using Lookup, and then deleting all the values in that row.
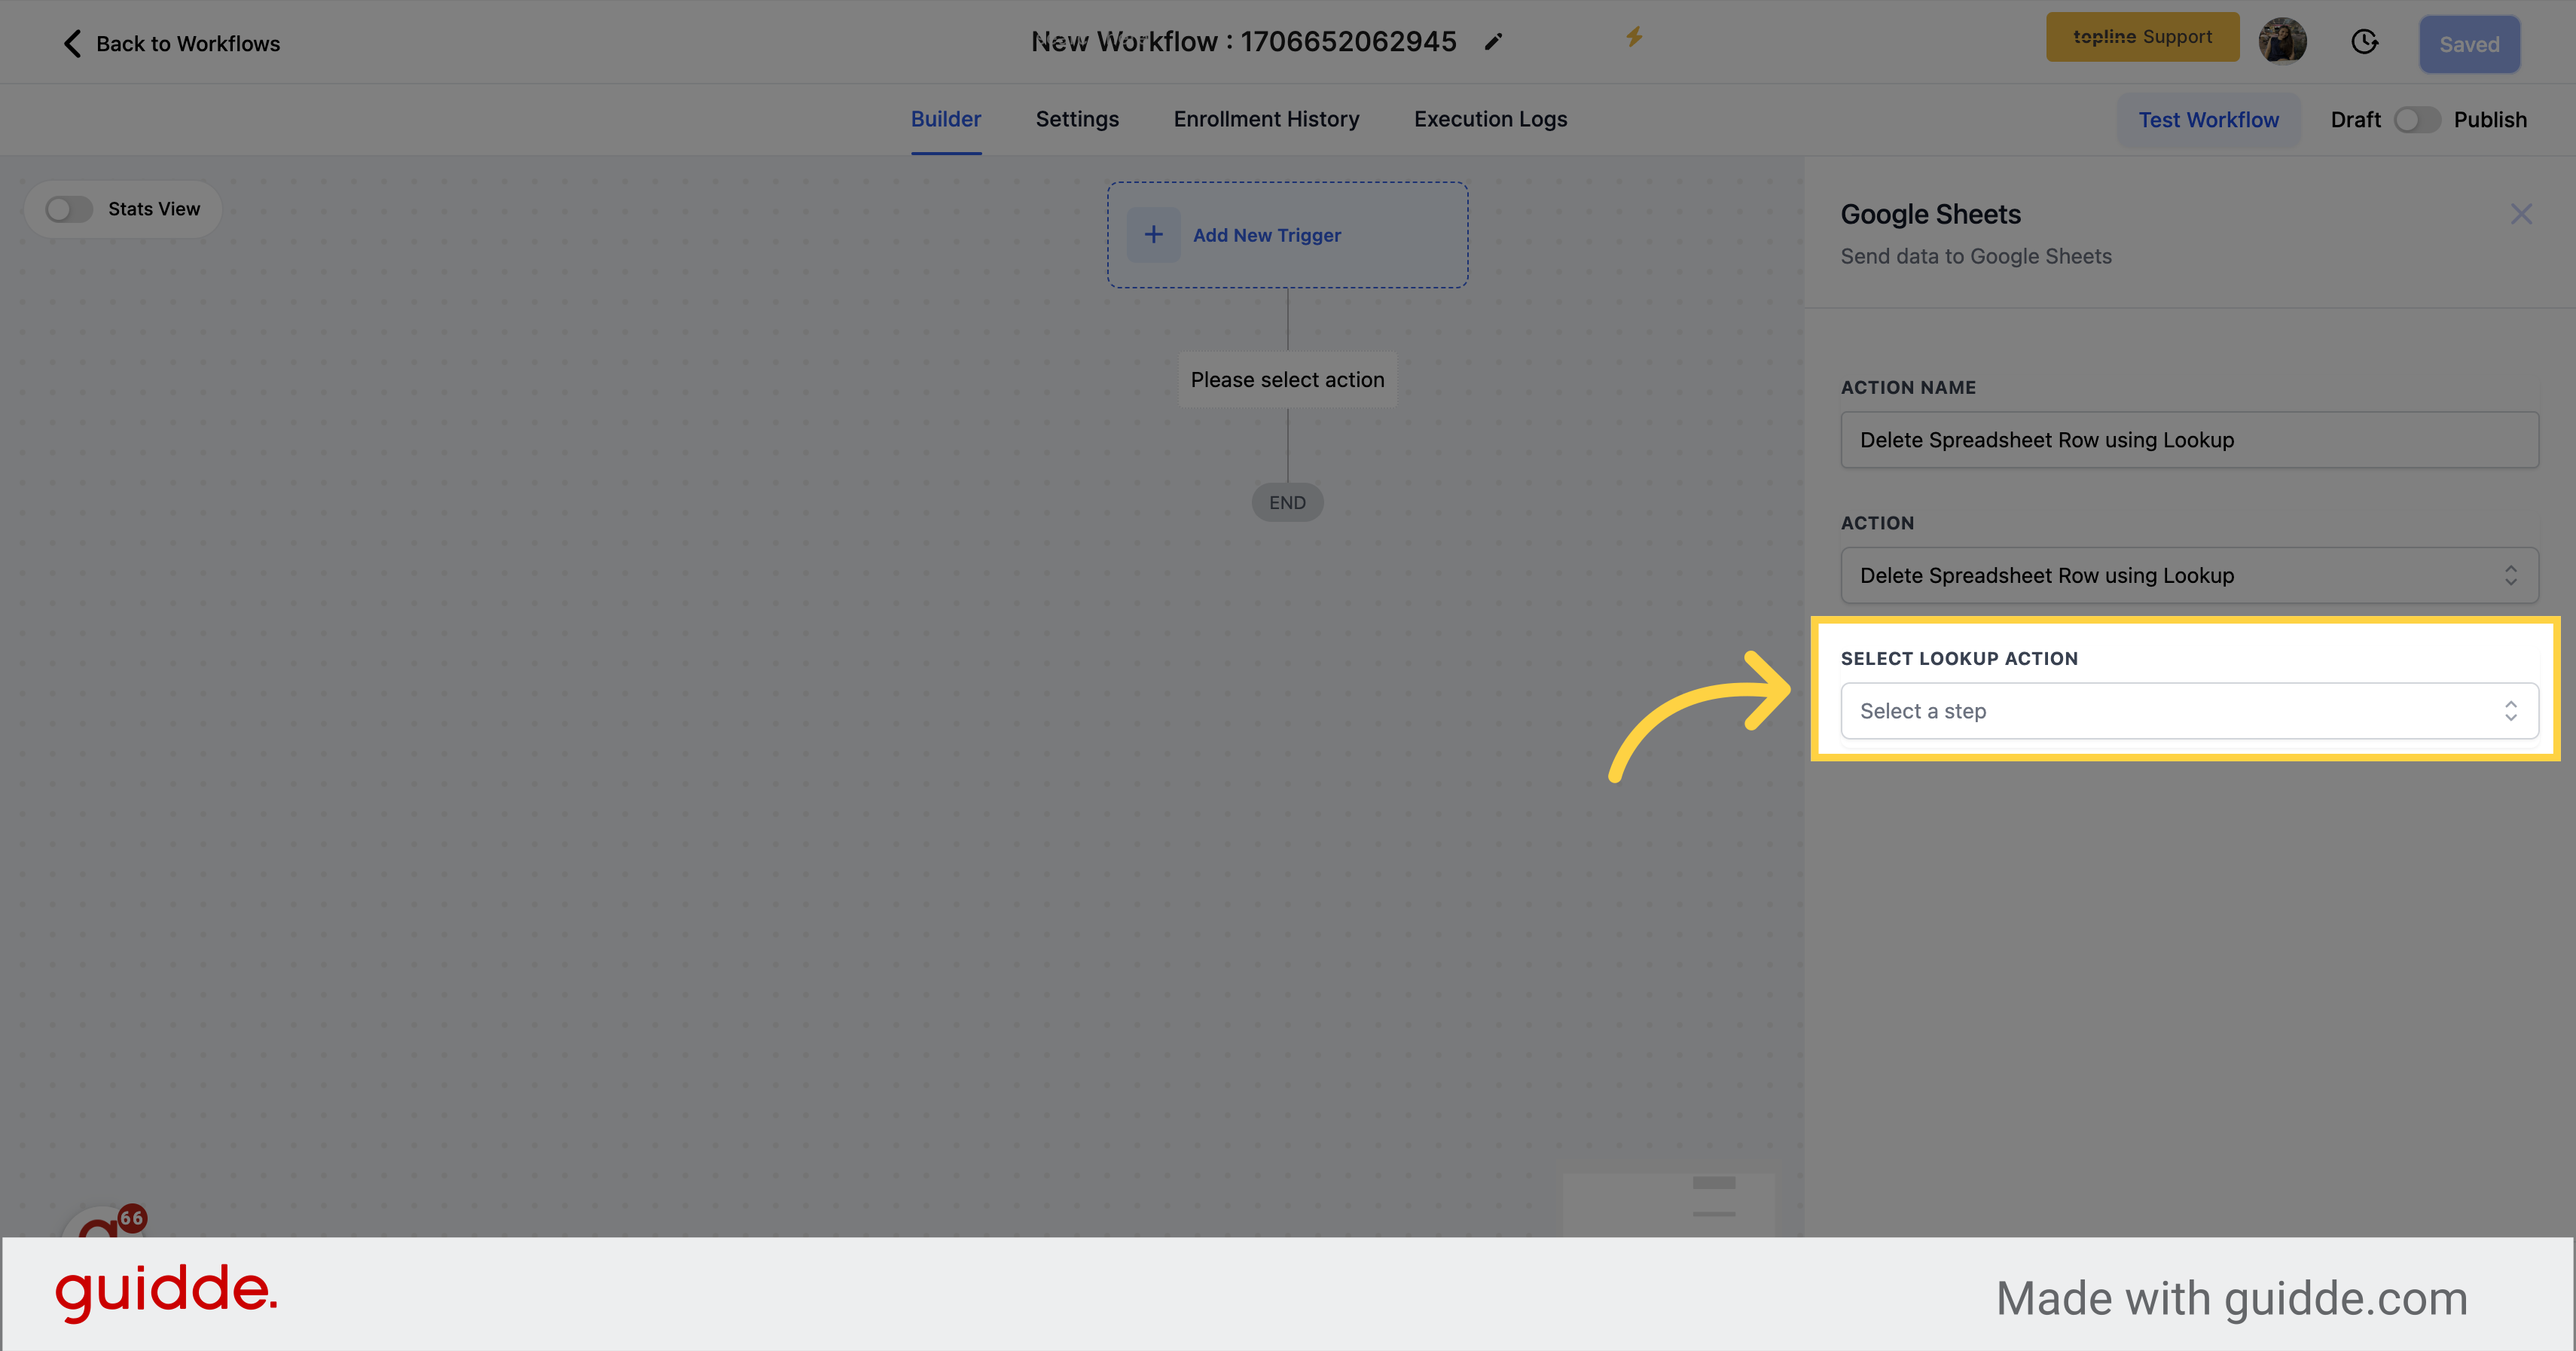
To delete a specific row in a spreadsheet, you Should use Lookup Action to search for a column value in the data, which will return the corresponding row. Once you have located the desired row, you can then use the "Delete Spreadsheet Row using Lookup" Action to clear the data in the row.
If you want to use the "Delete using lookup" action, it is necessary to first use the "Lookup" action to search for a specific row in your spreadsheet based on a particular value. Once you have found the desired row using lookup, you can then use the "Delete using lookup" action to clear the row data. Therefore, using the lookup action prior to delete using lookup is a necessary step in this process.
Before proceeding with any further steps involving lookup, it is recommended that you review the documentation related to lookup.
Only the Lookup Actions added above this action will be listed for selection.
If a row is returned during a lookup, then all the values associated with that row will be cleared.
Points to Remember:
When you use the "Delete Spreadsheet Row" action, it clears the contents of the row, but it does not permanently remove the row itself.
If the Lookup Action does not return any rows, the workflow will skip this step and proceed to the next one.
To ensure that your data flow to your Google Sheets document is not disrupted, it is crucial that you do not change the sheet name or worksheet name associated with the document. This is because any changes to the name could break the connection between our workflow system and the document, potentially resulting in errors or data loss.
However, you are able to change the column names within the sheet as needed. If you do so, it is important to update the column names in your workflow to ensure that data is properly mapped to the correct columns. Failure to do so could result in errors or data loss, as data may be mapped to the wrong columns or not mapped at all.
You can even use FORMULAS, and spreadsheet functions to insert rows.
This can help you calculate SUM, AVG, or any metric that you wanna run down.
