Access the settings option on the left menu.
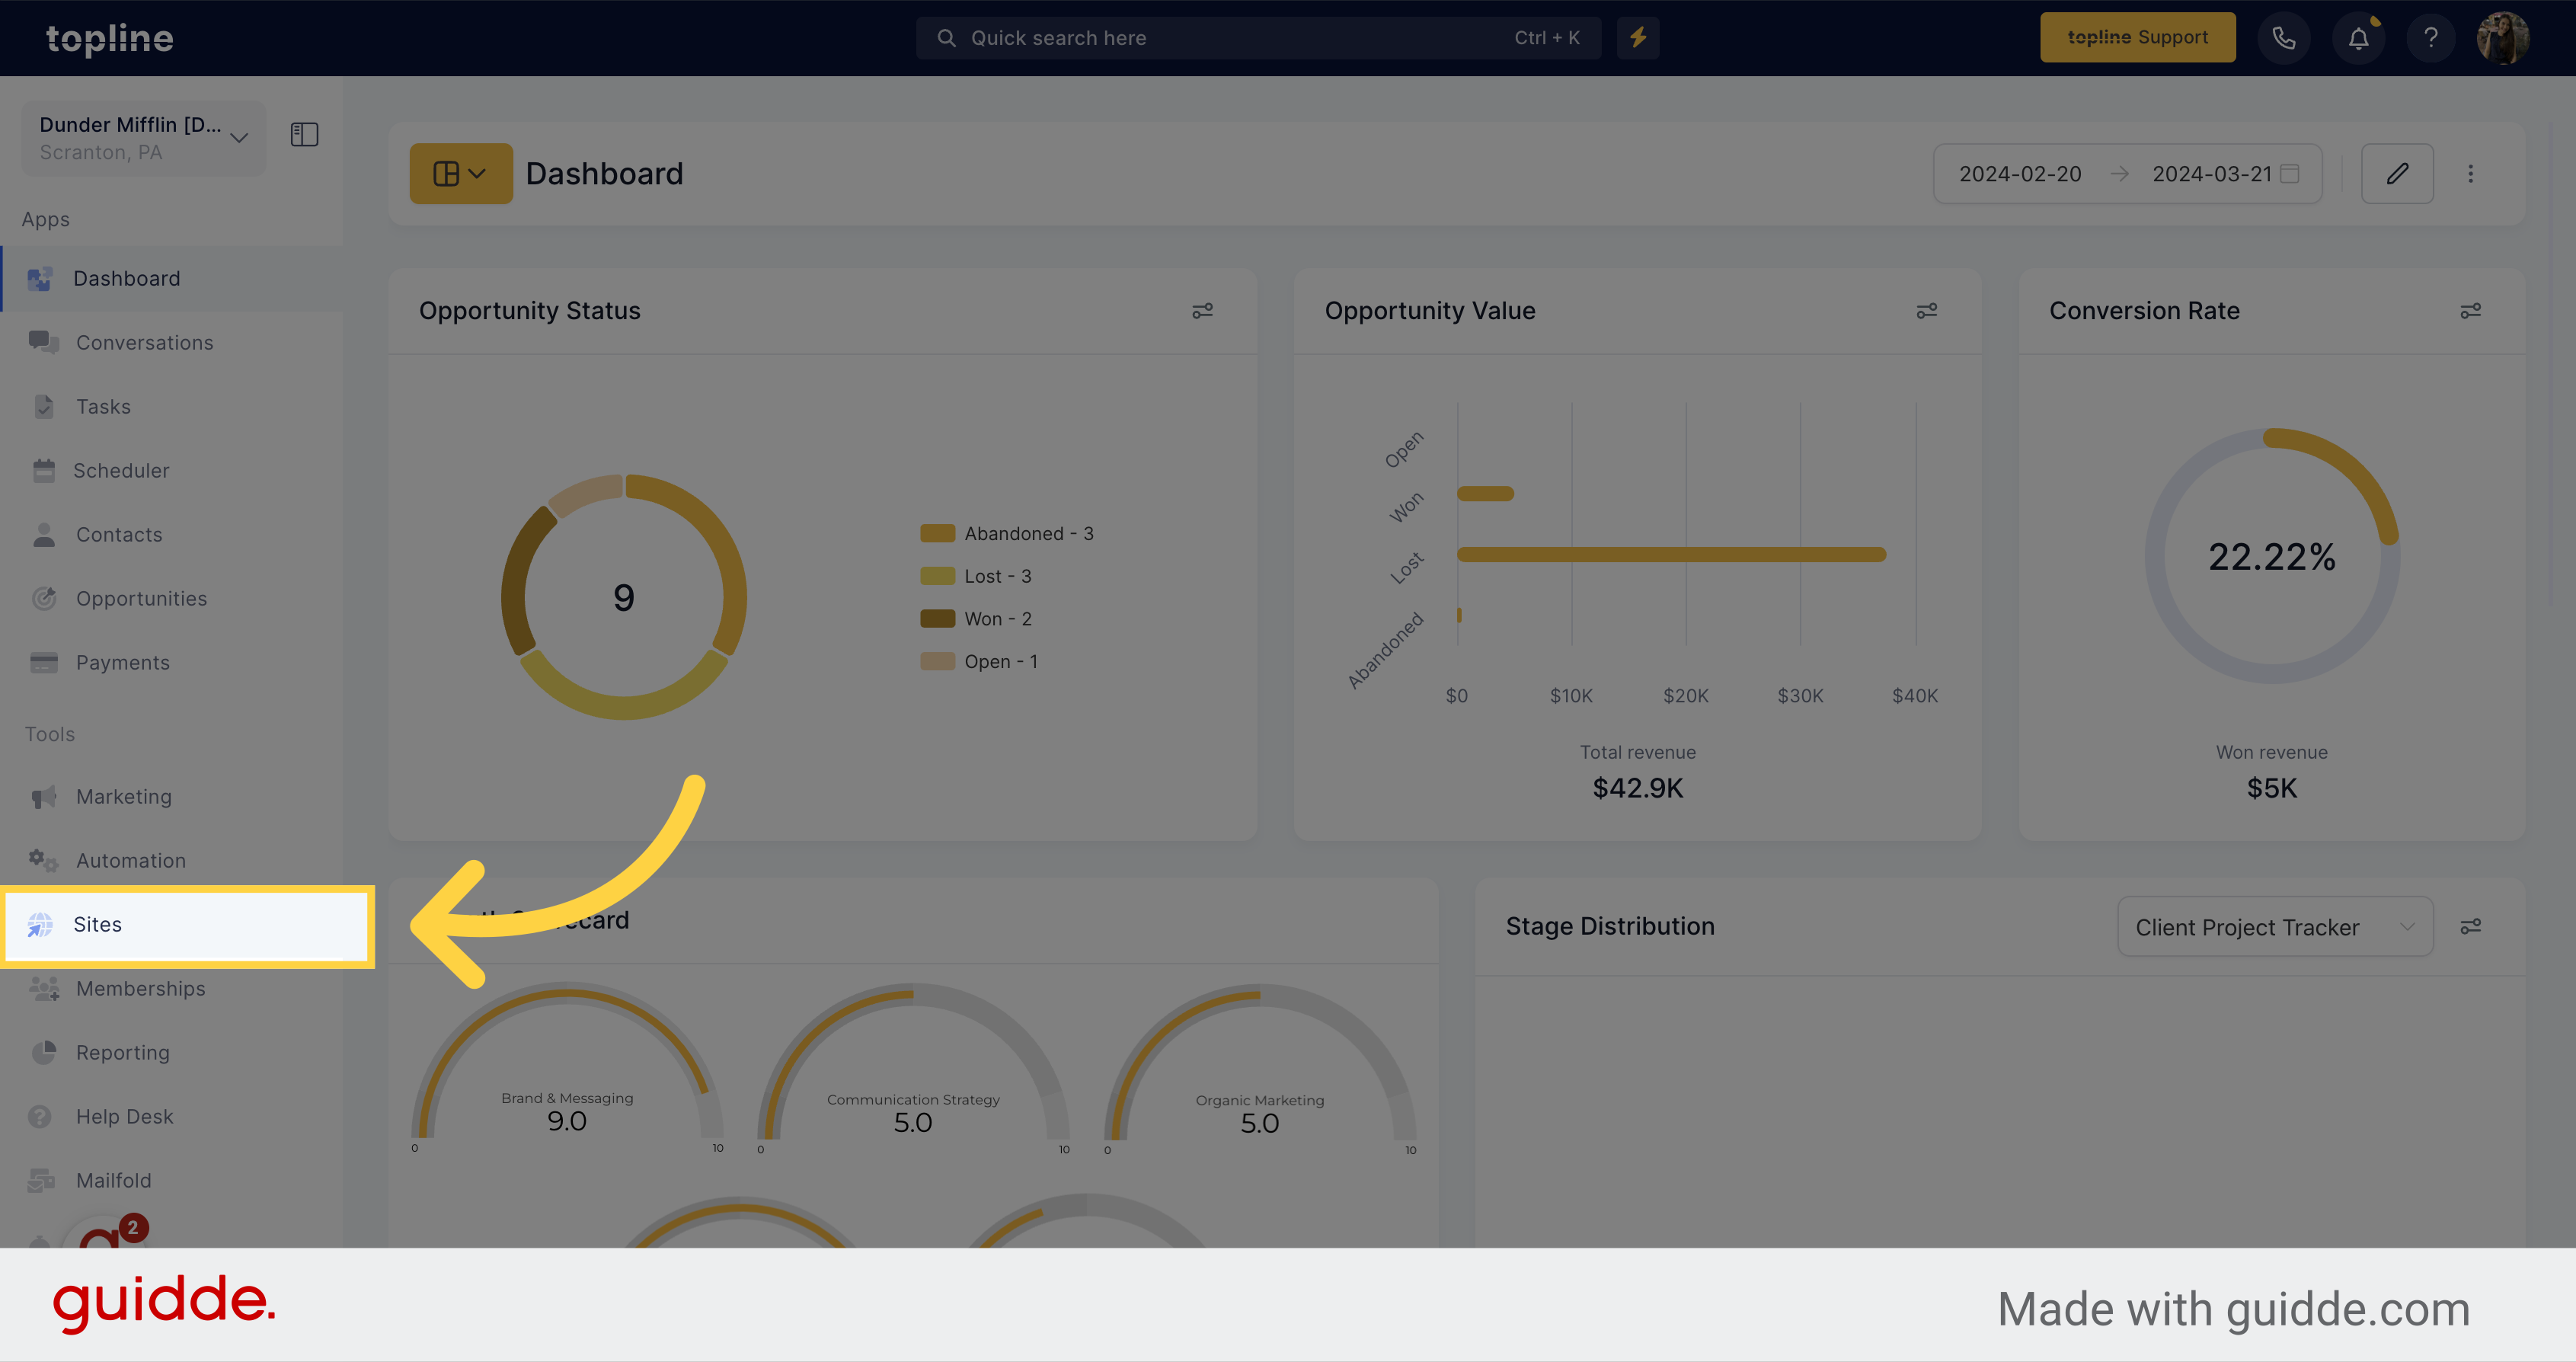
Select the "Sites" option from the menu.
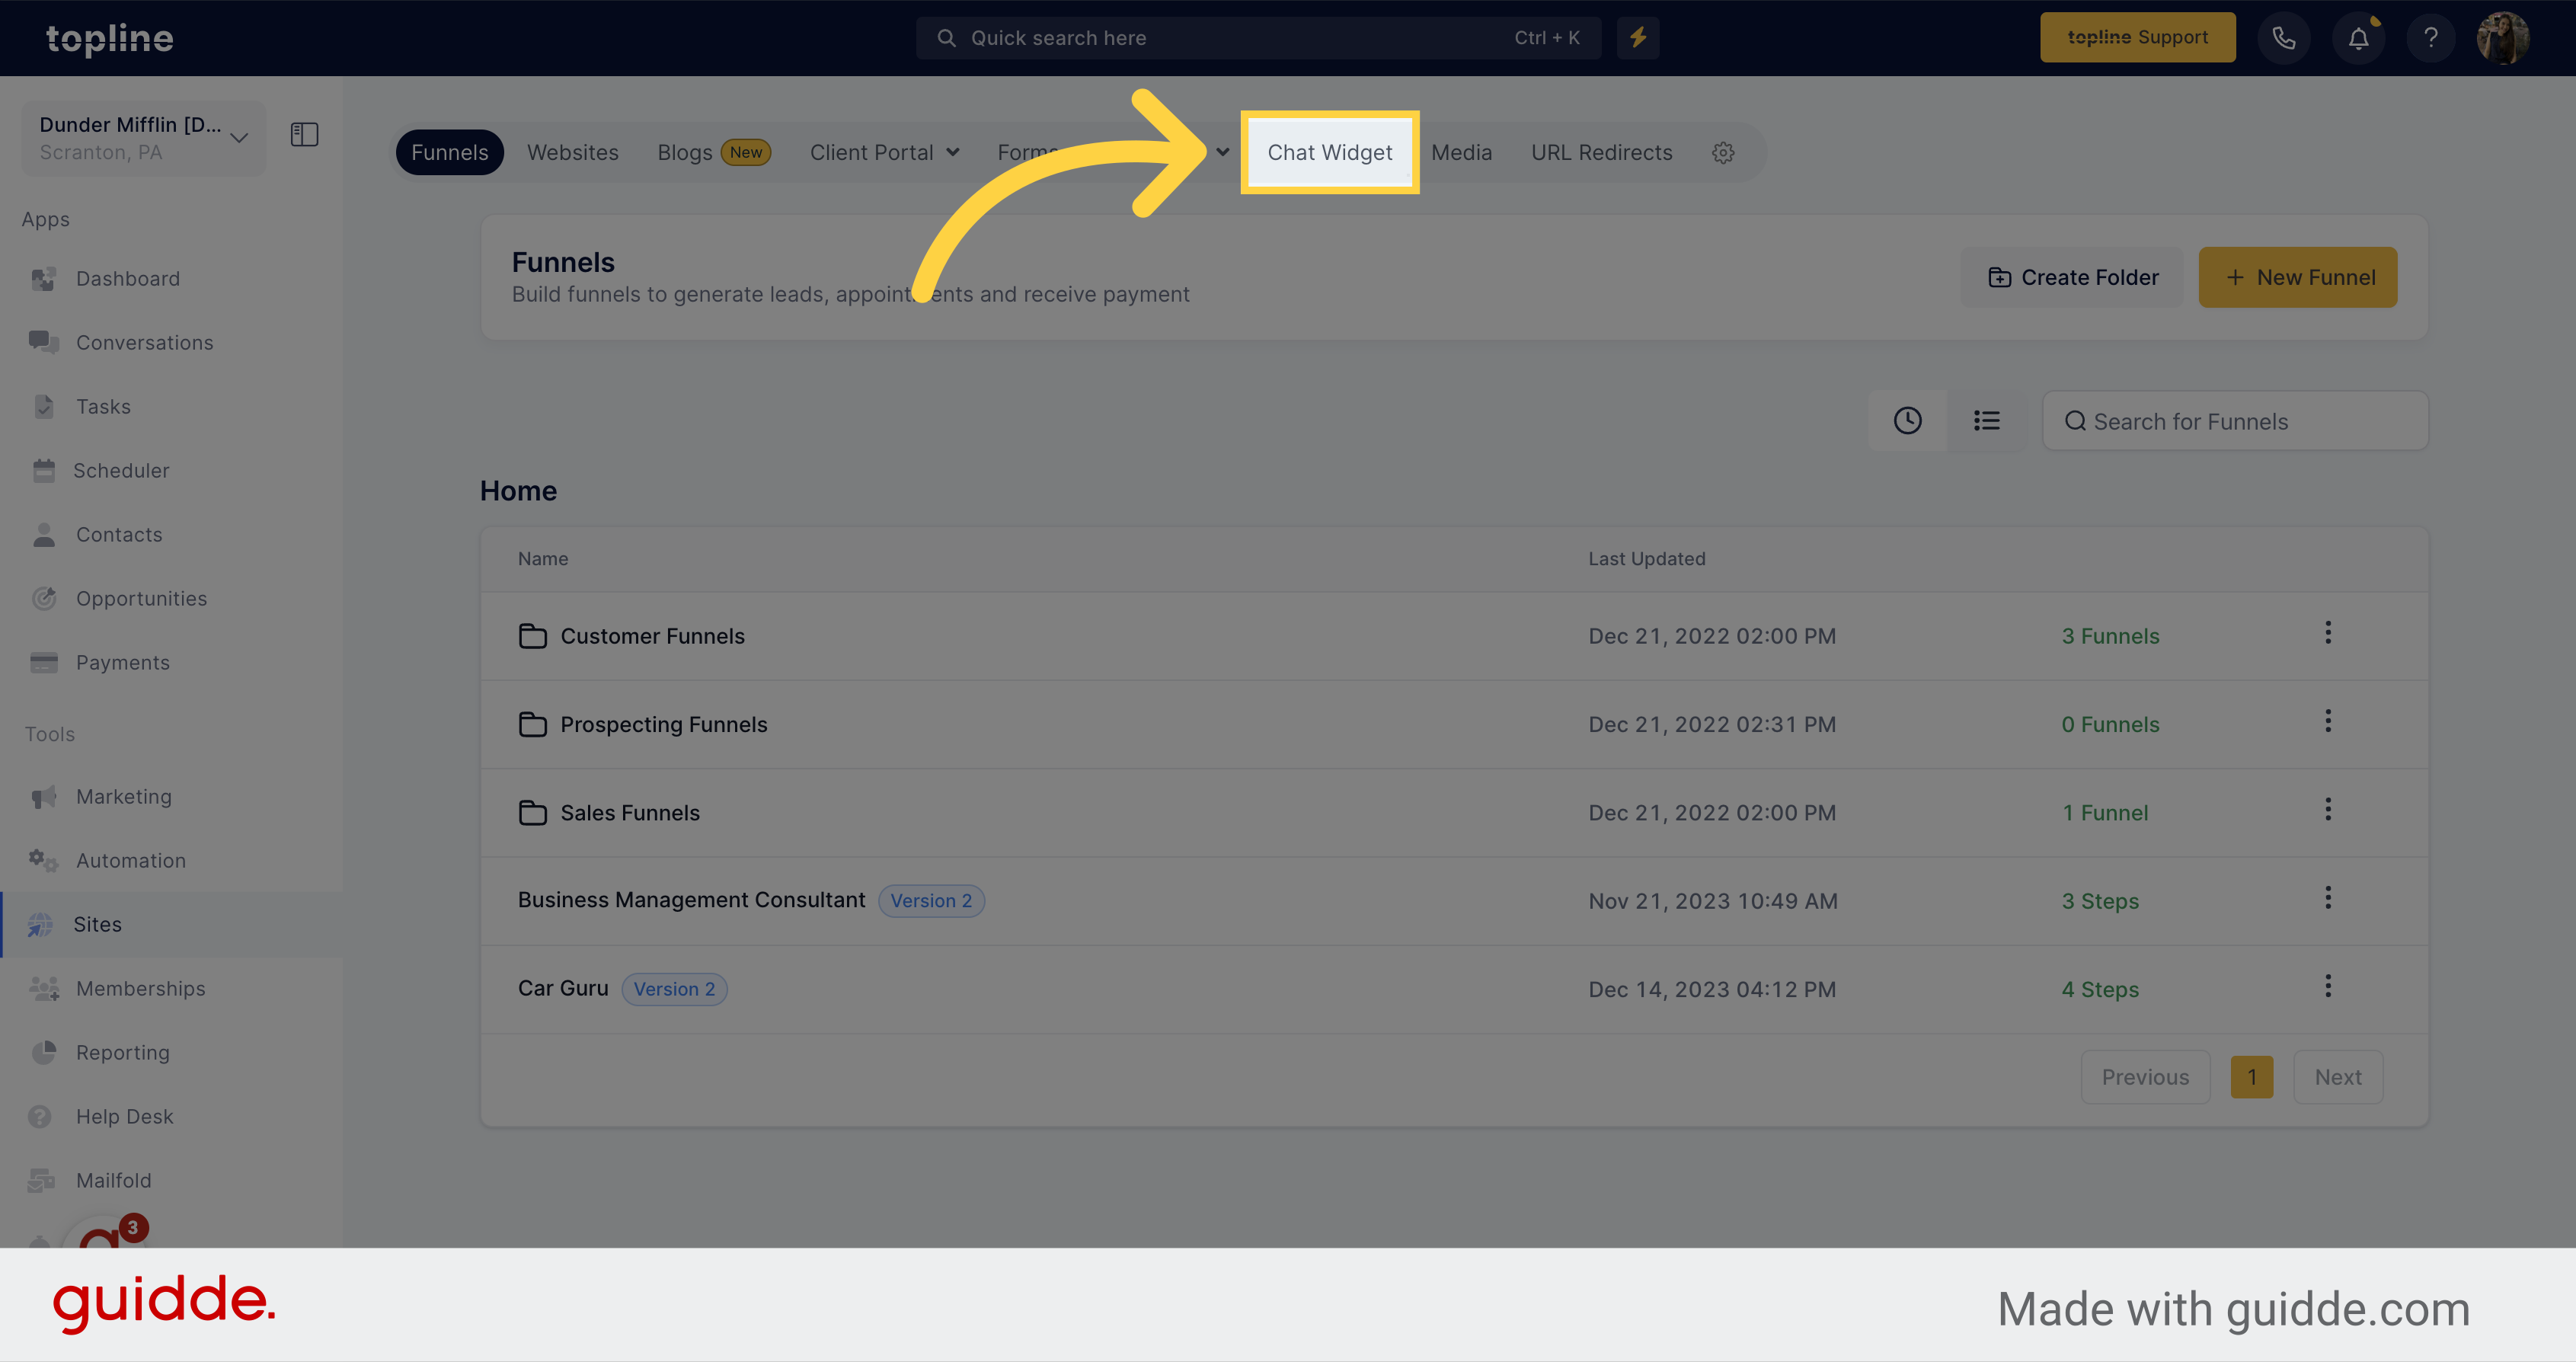
Choose the "Chat Widget" section on the upper menu.
In this option you can enable the chat bubble, add intro message, customize the avatar image, and more.
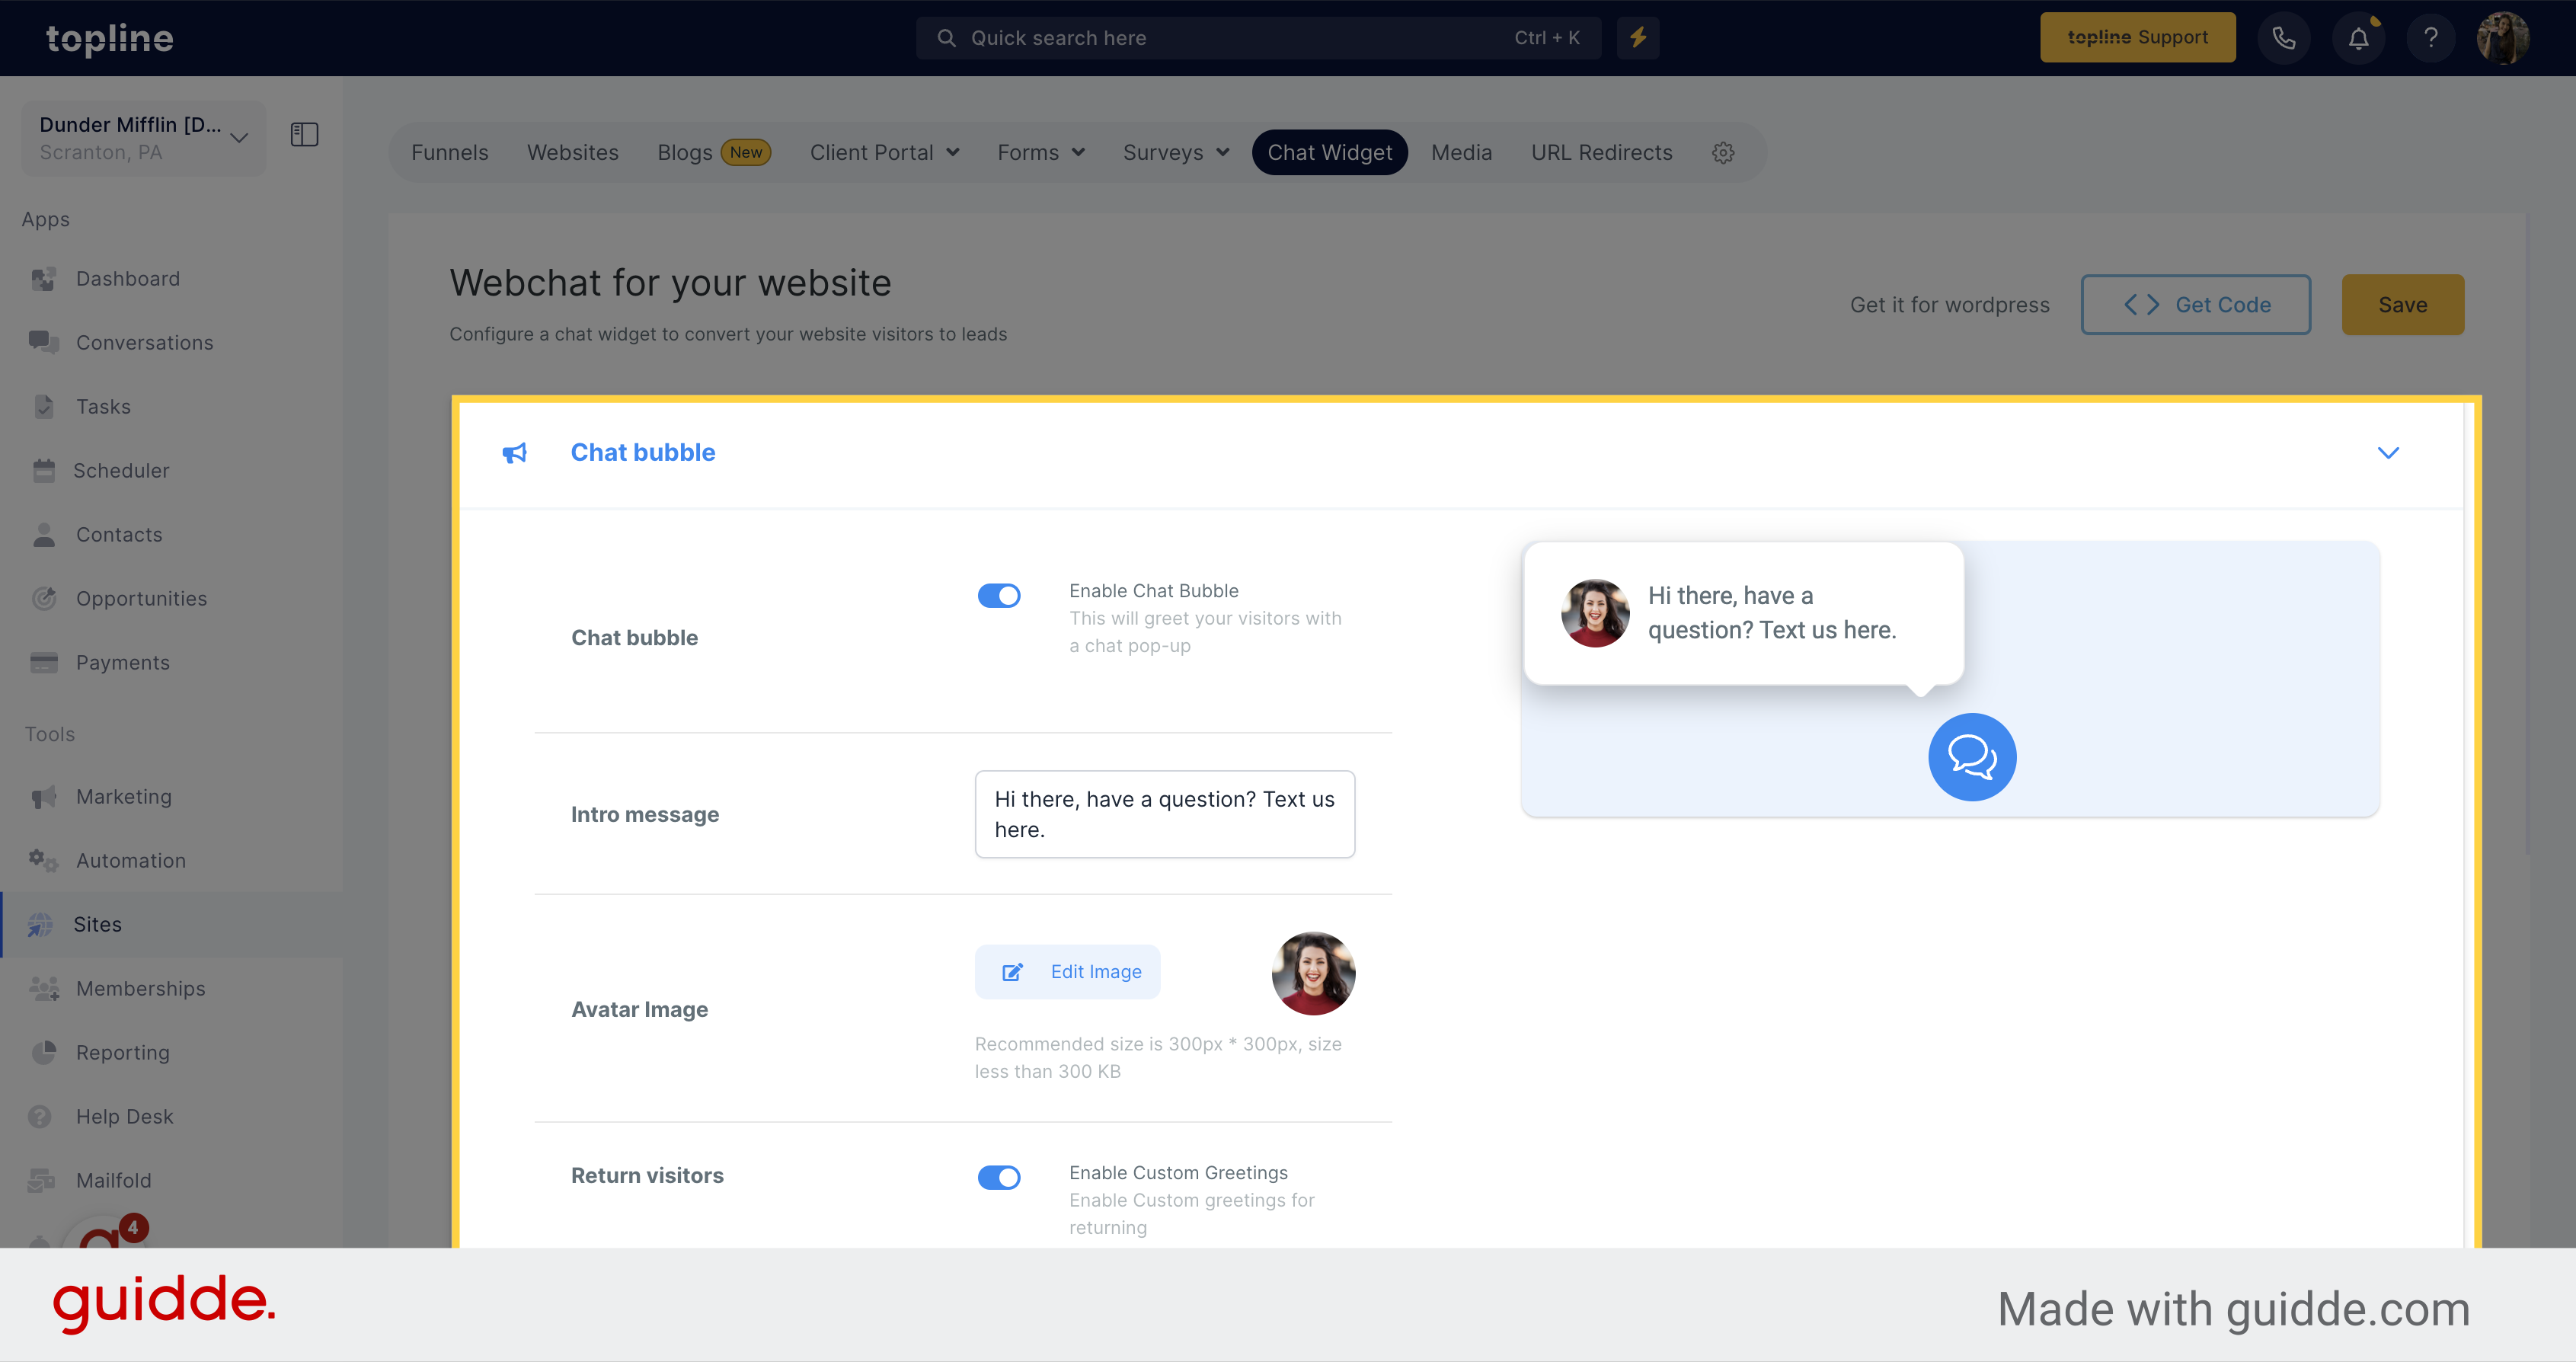
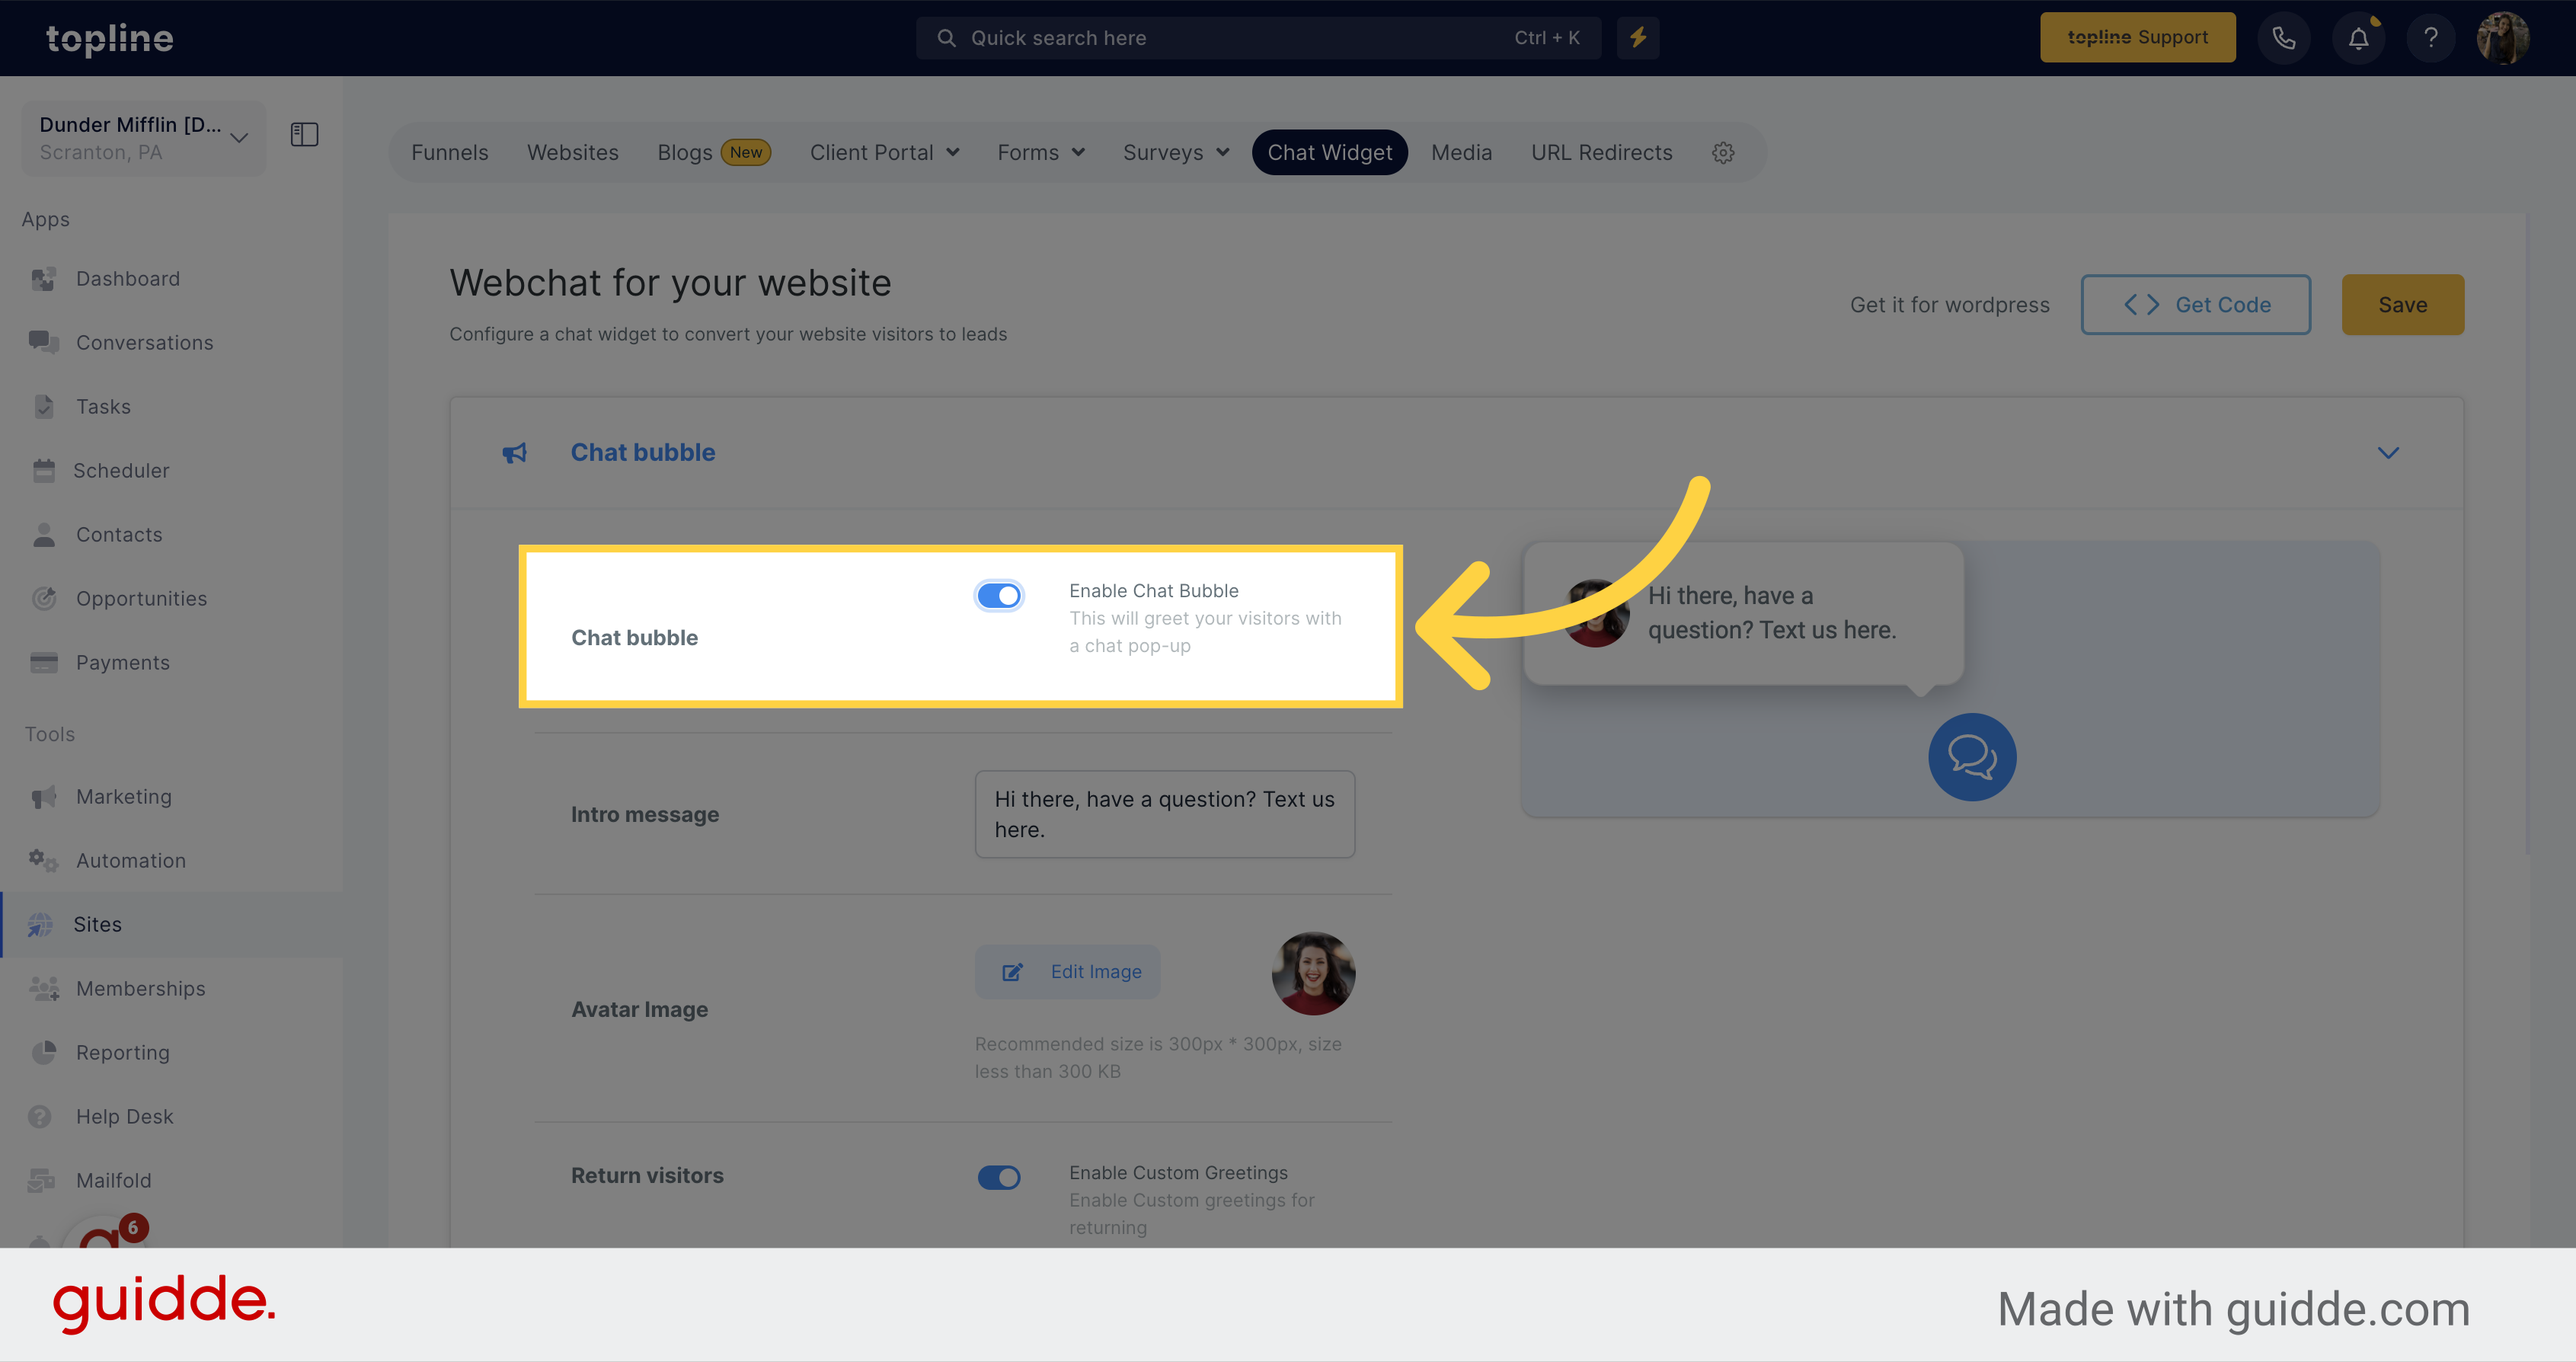
In this option you can enable the chat bubble to greet visitors.
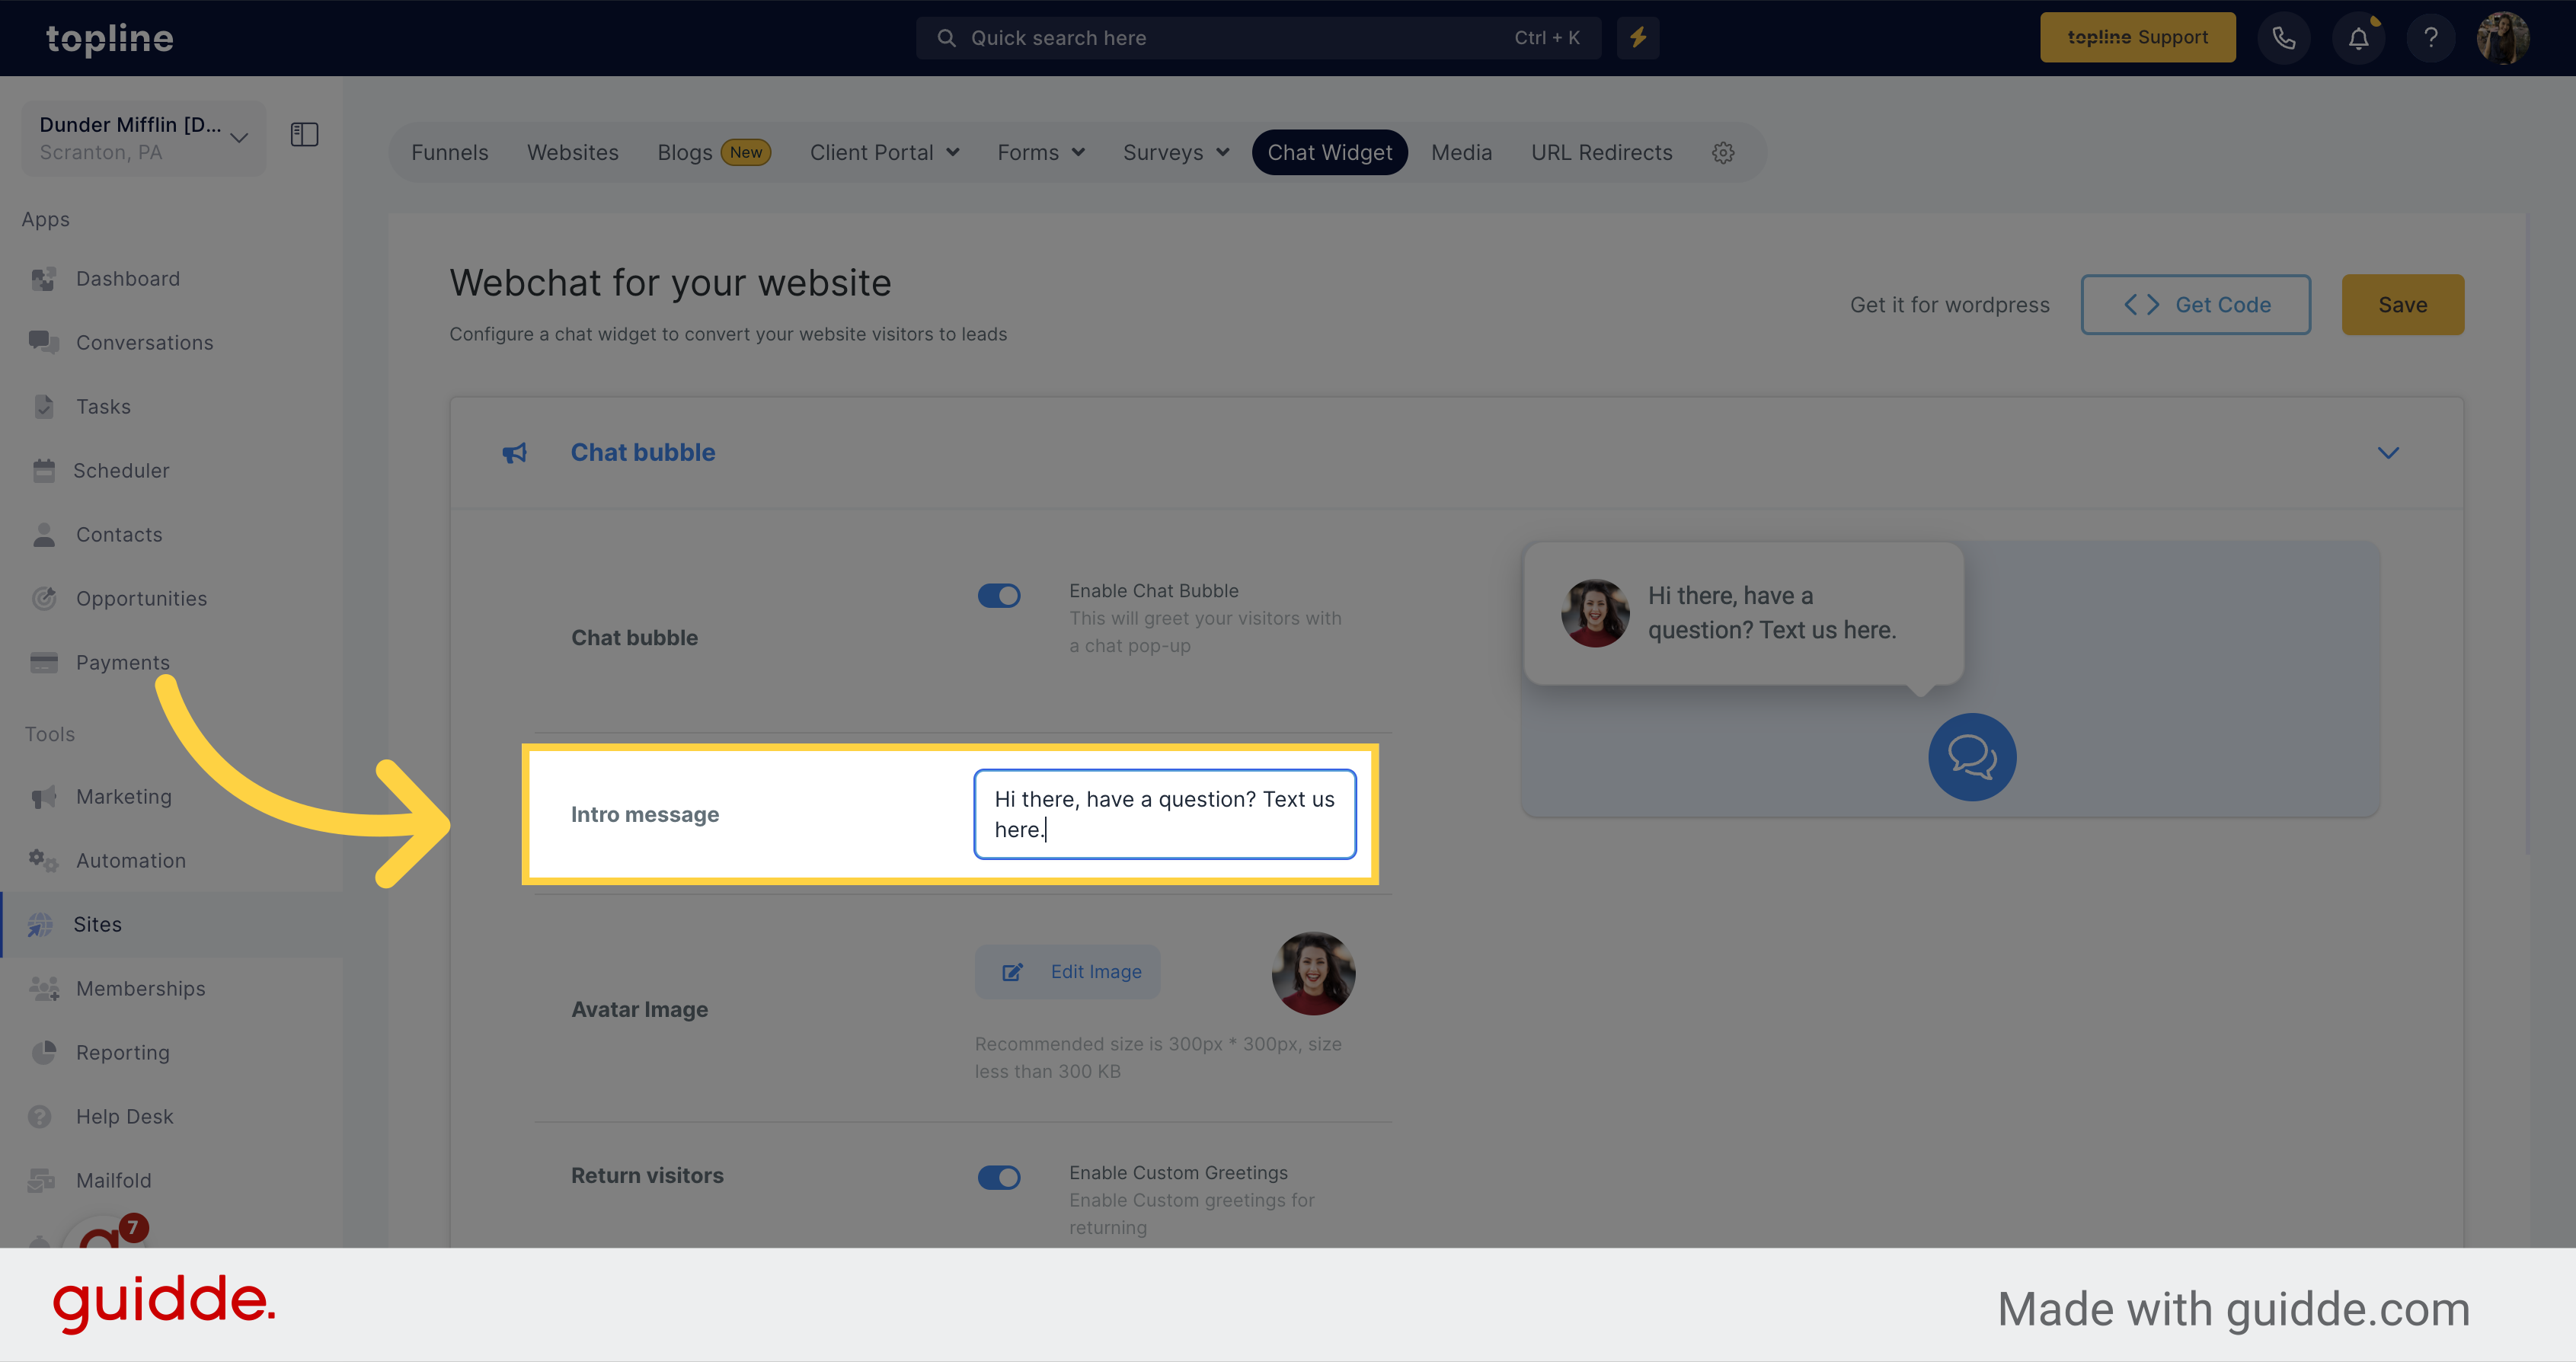
Add the message you want to be displayed on the pop up.
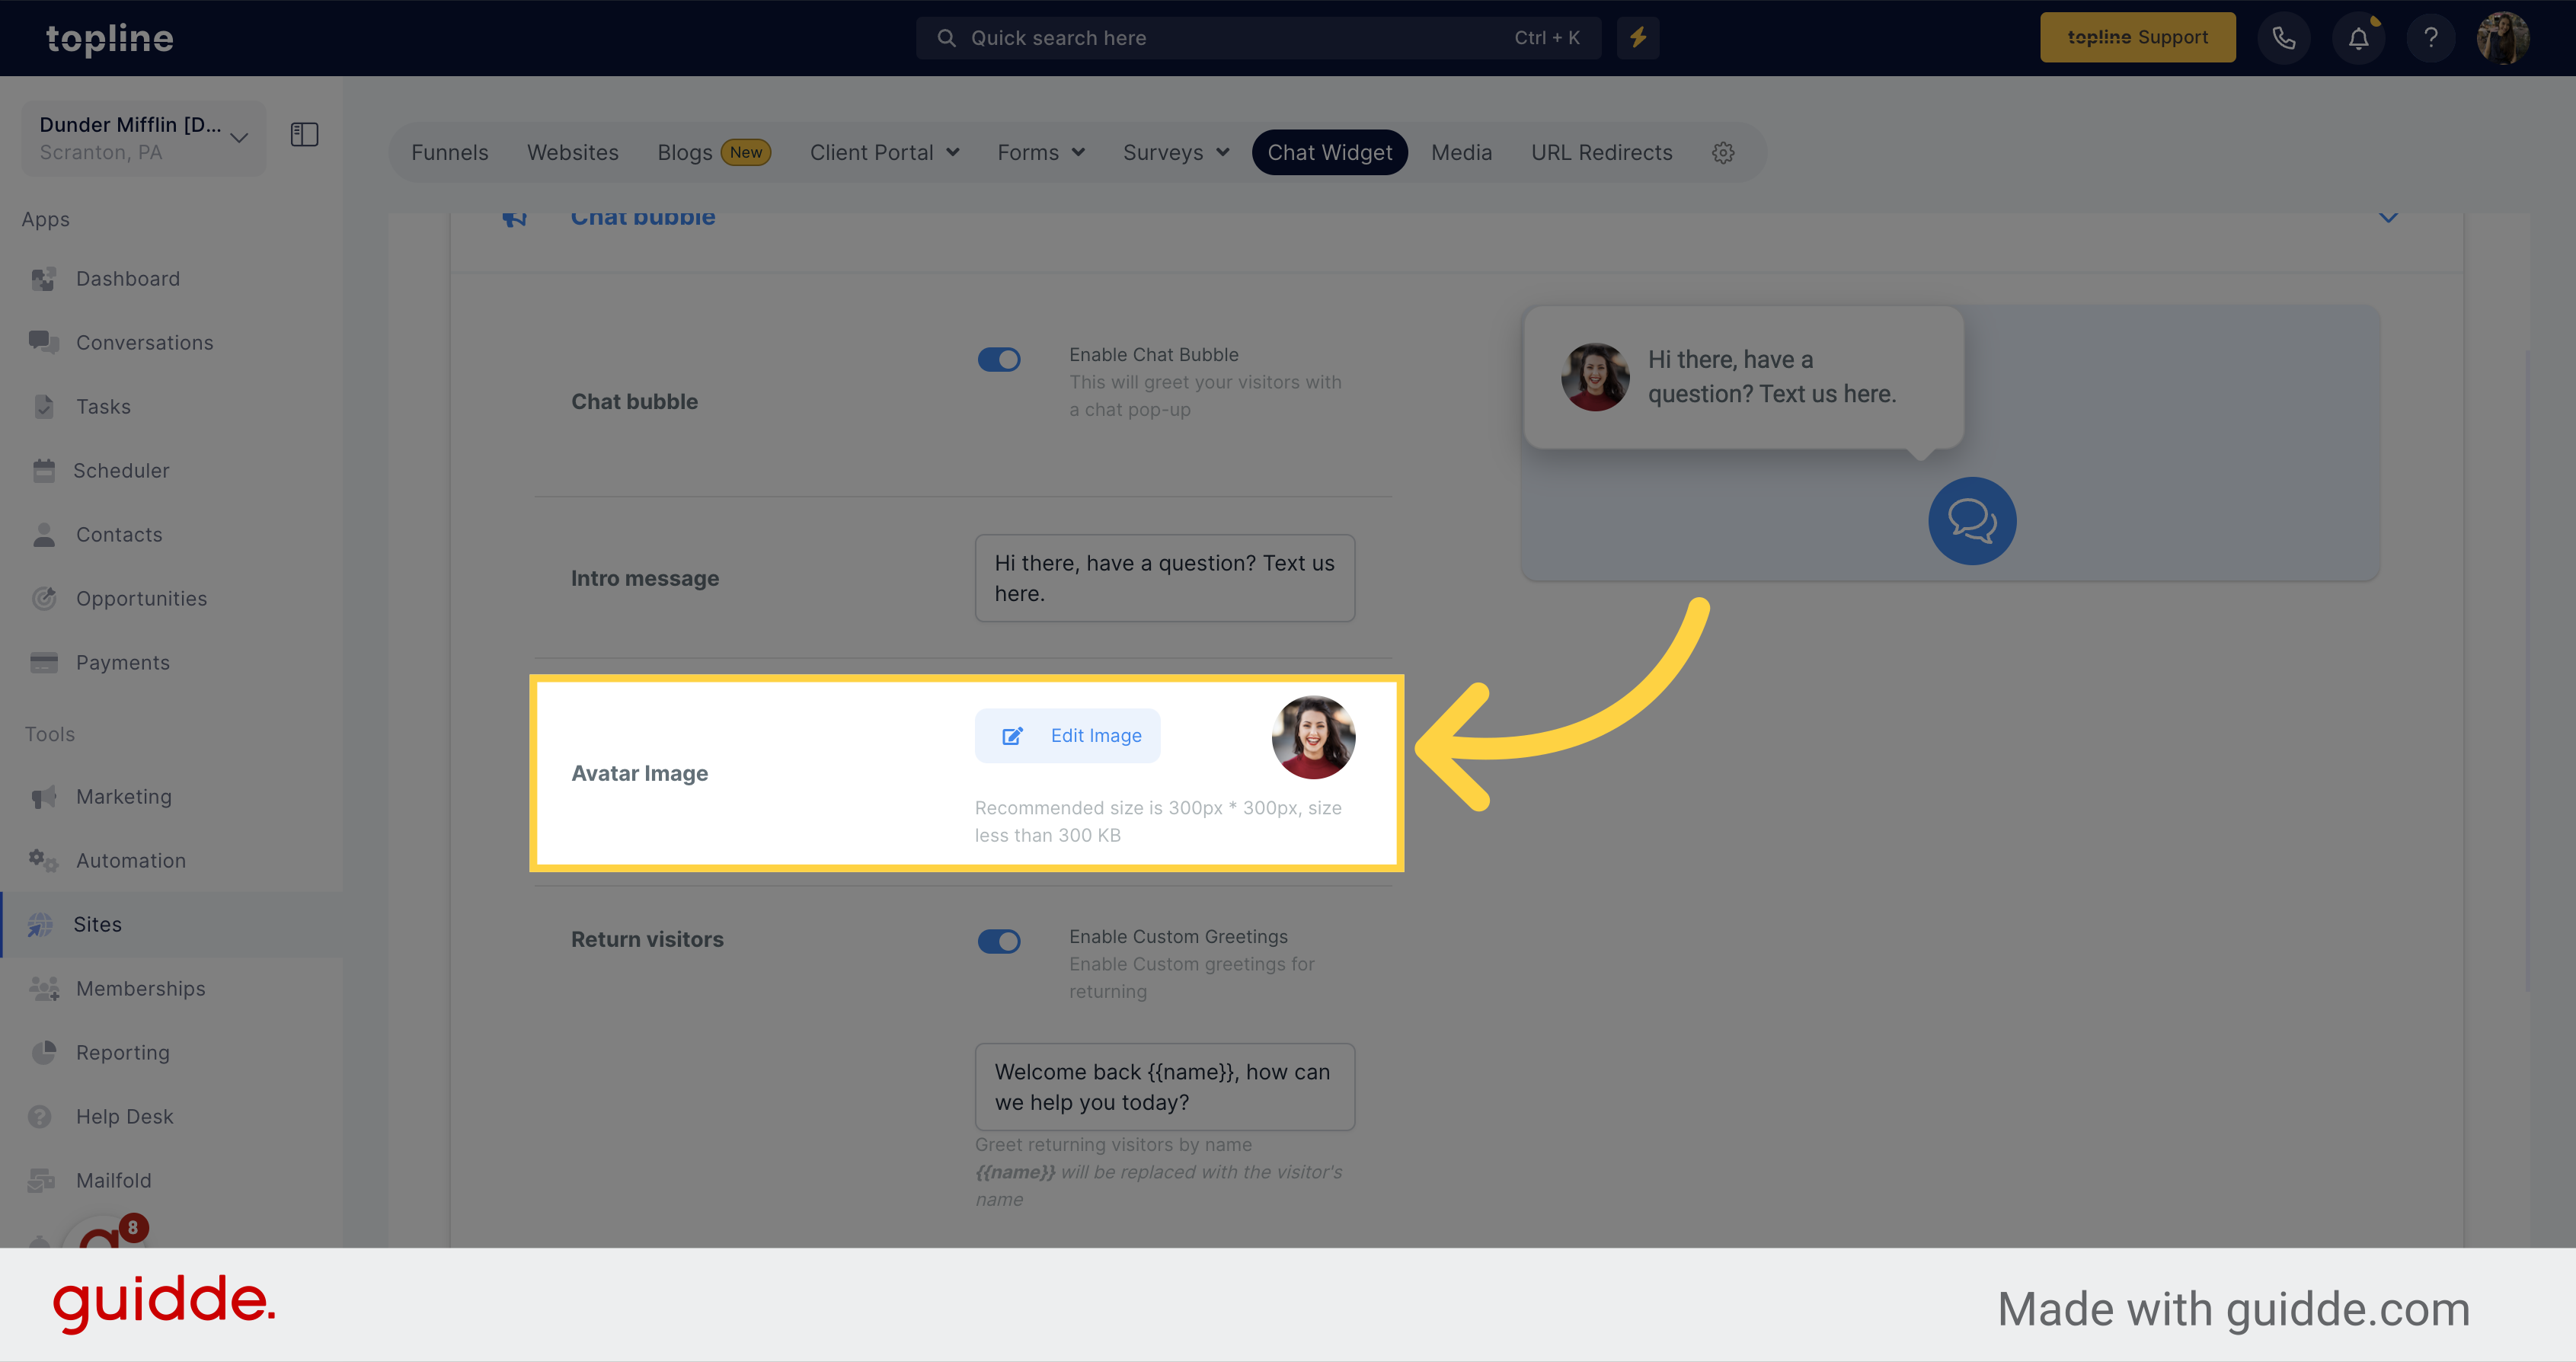
Click here to edit the avatar image.
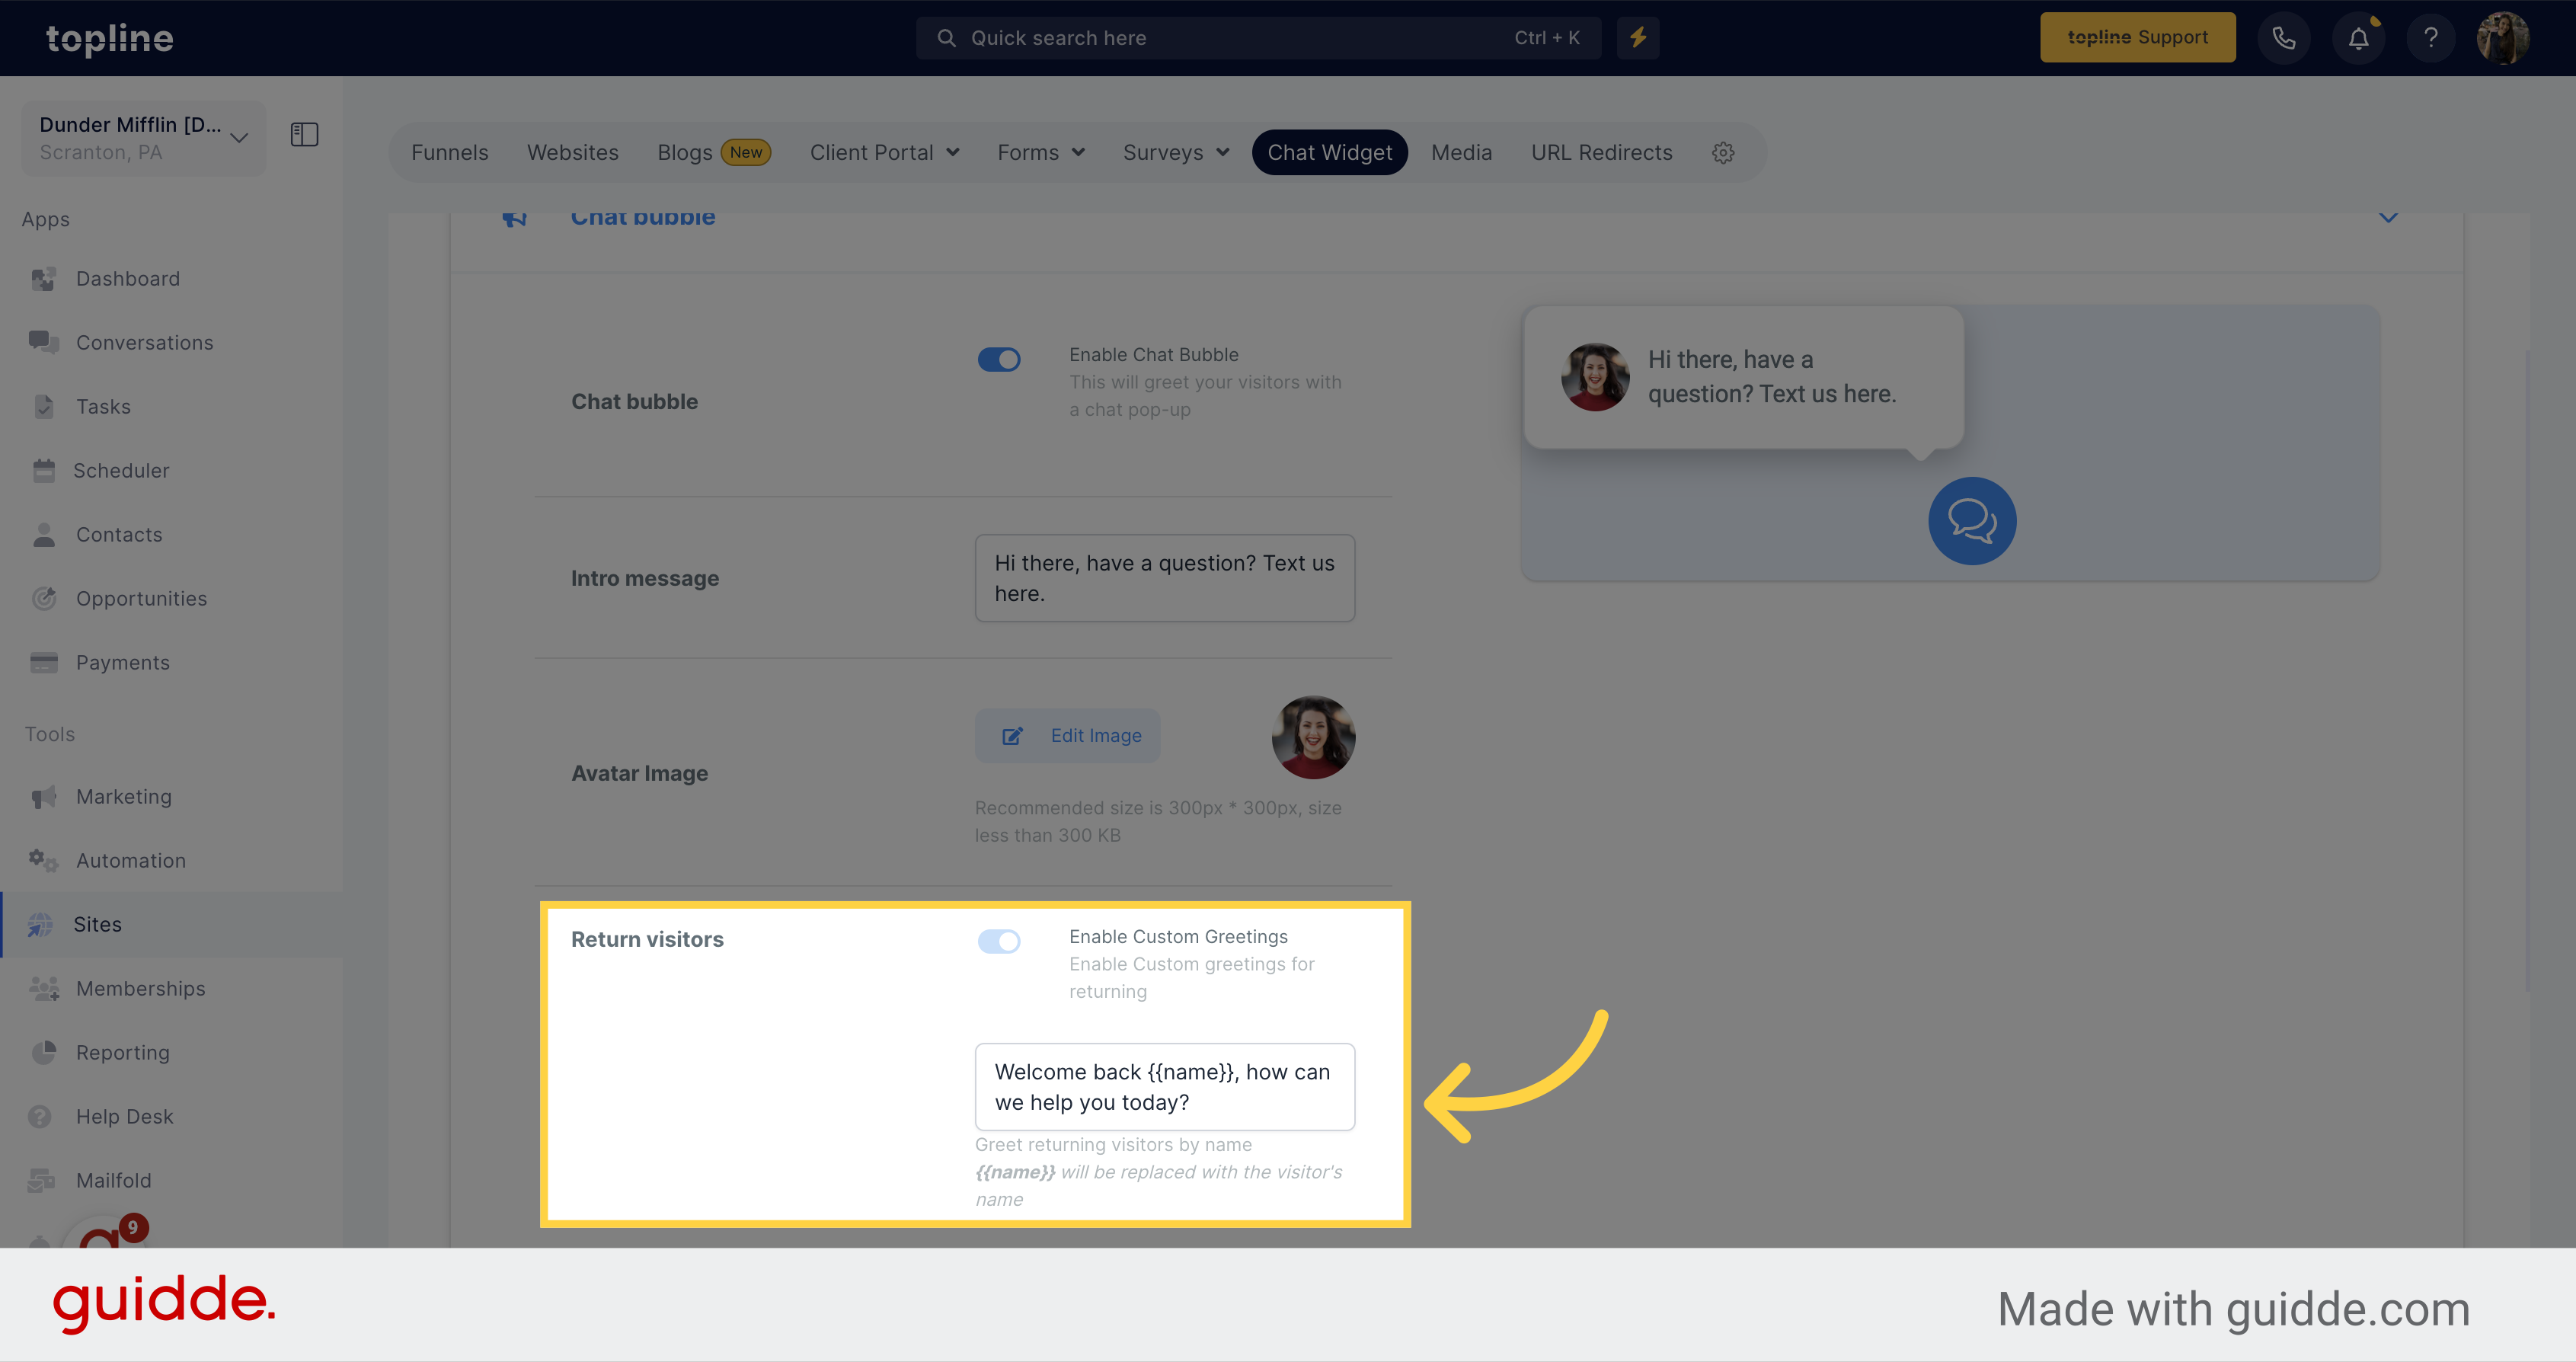
Activate this option if you want to enable custom greetings for users returning to the page.
Select the SMS or Email Chat to collect the visitor's information and respond to them through this channels.
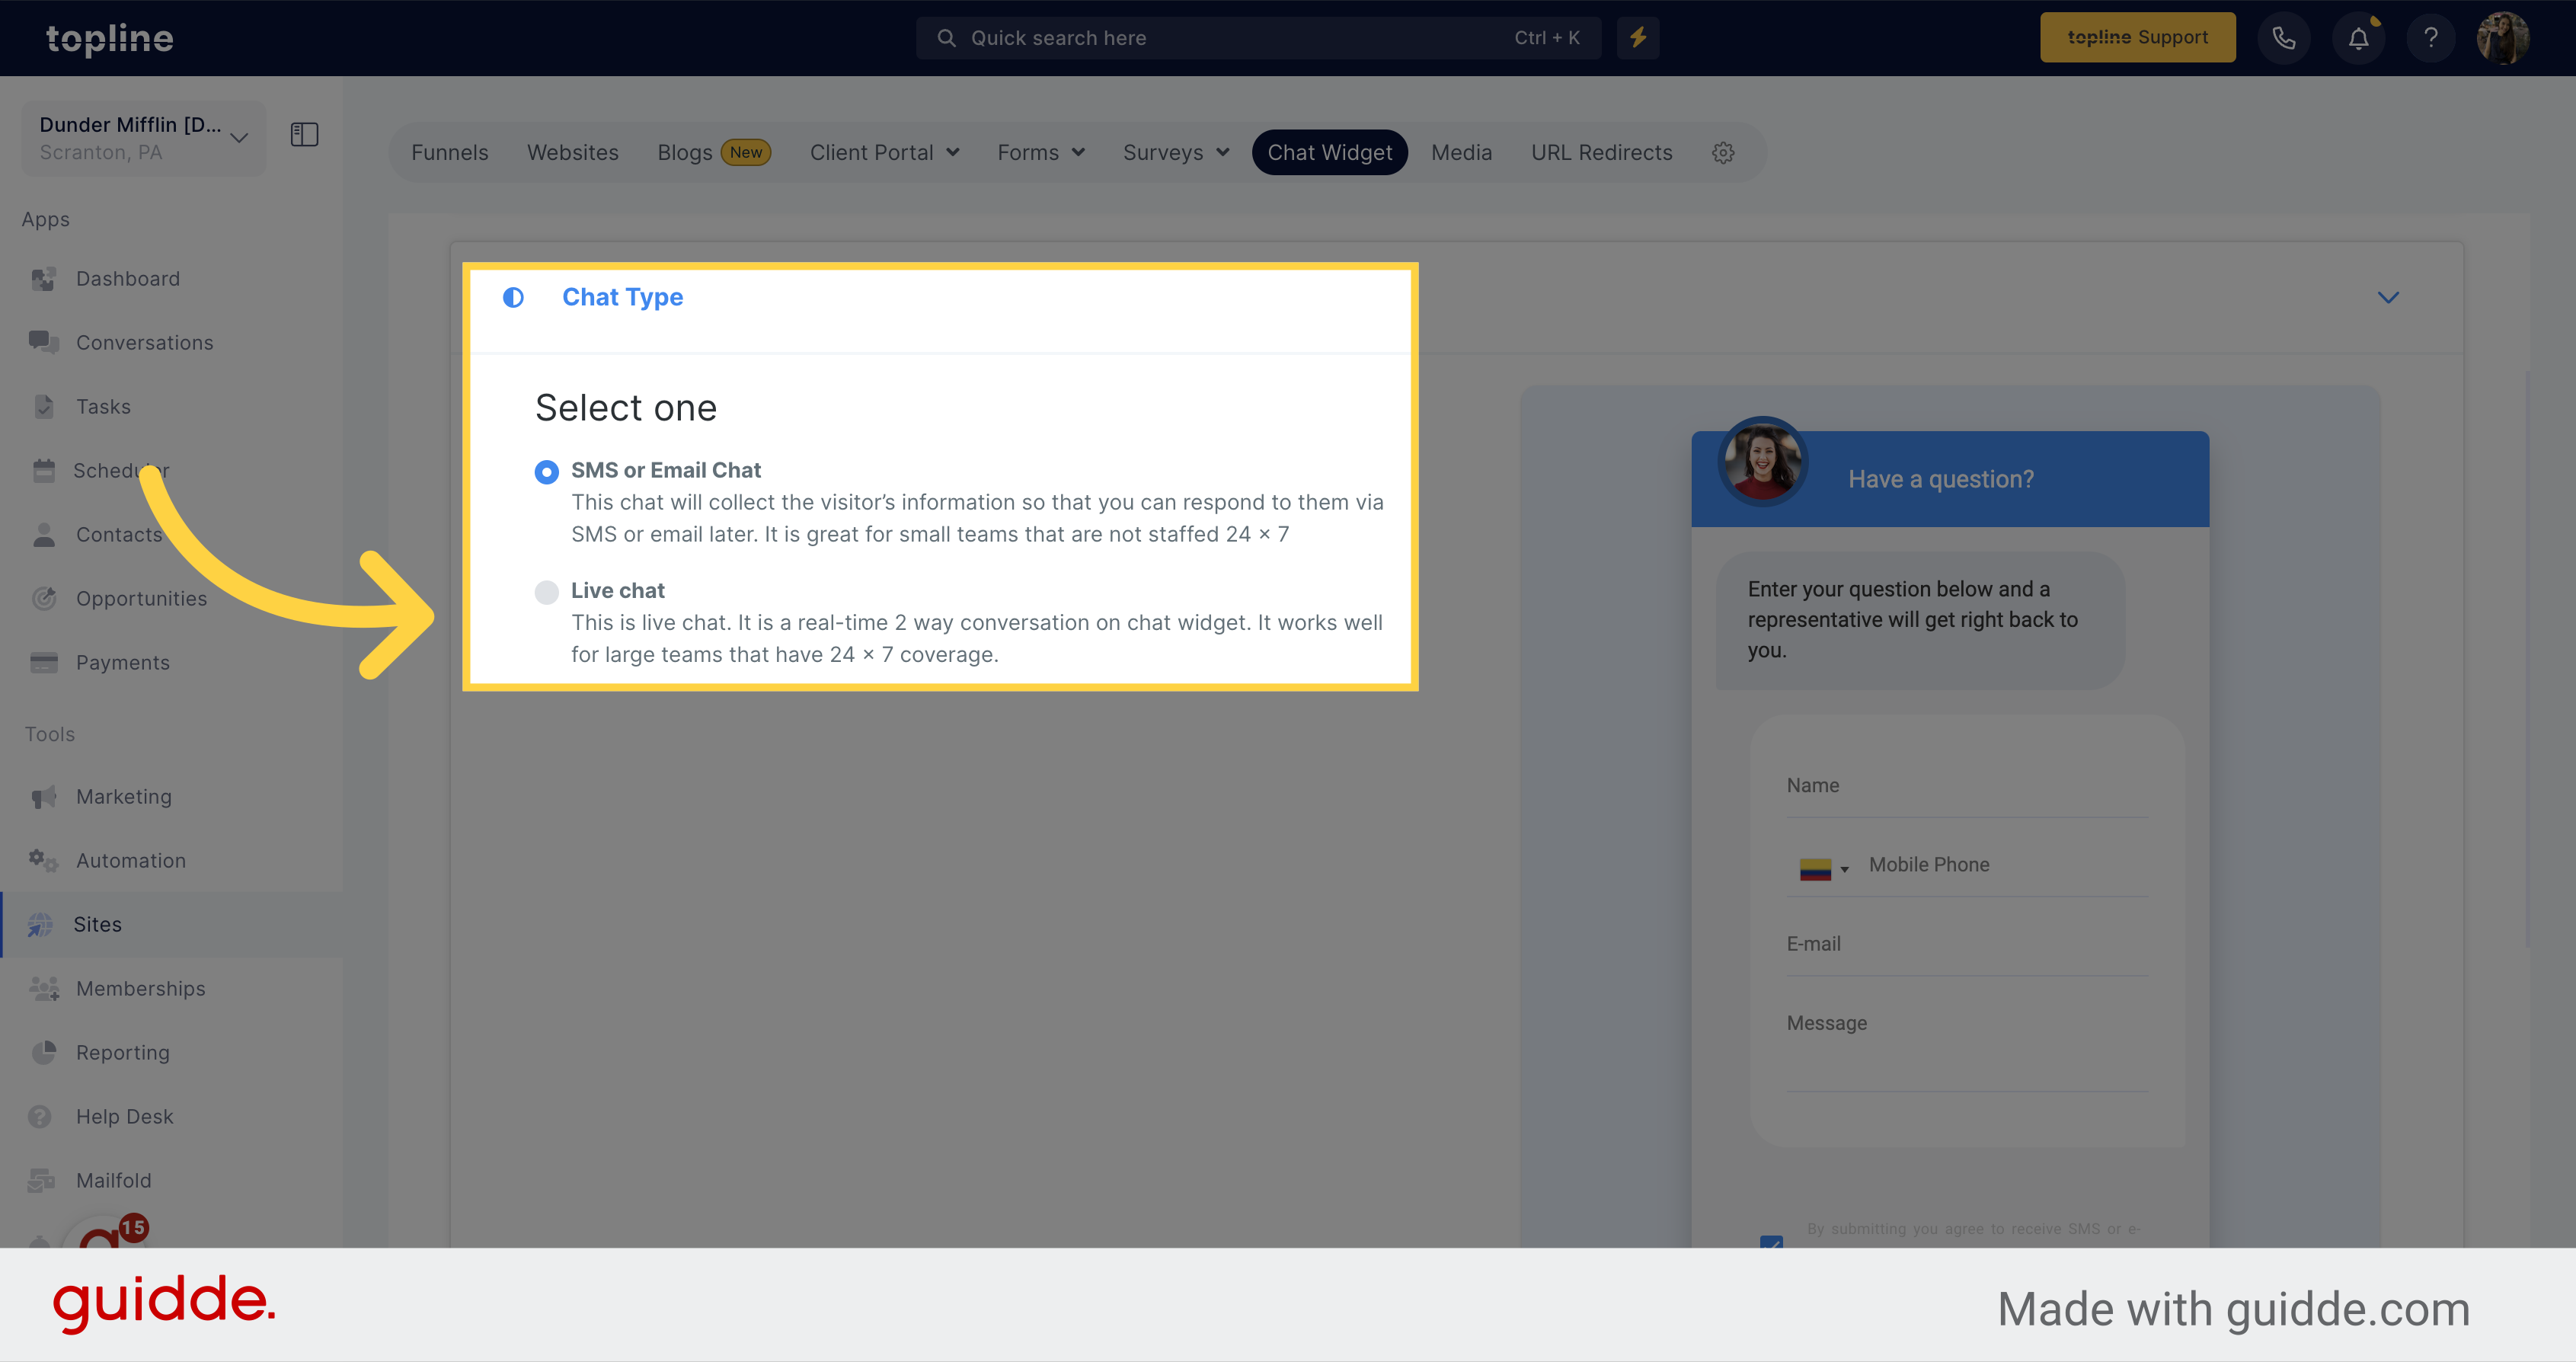
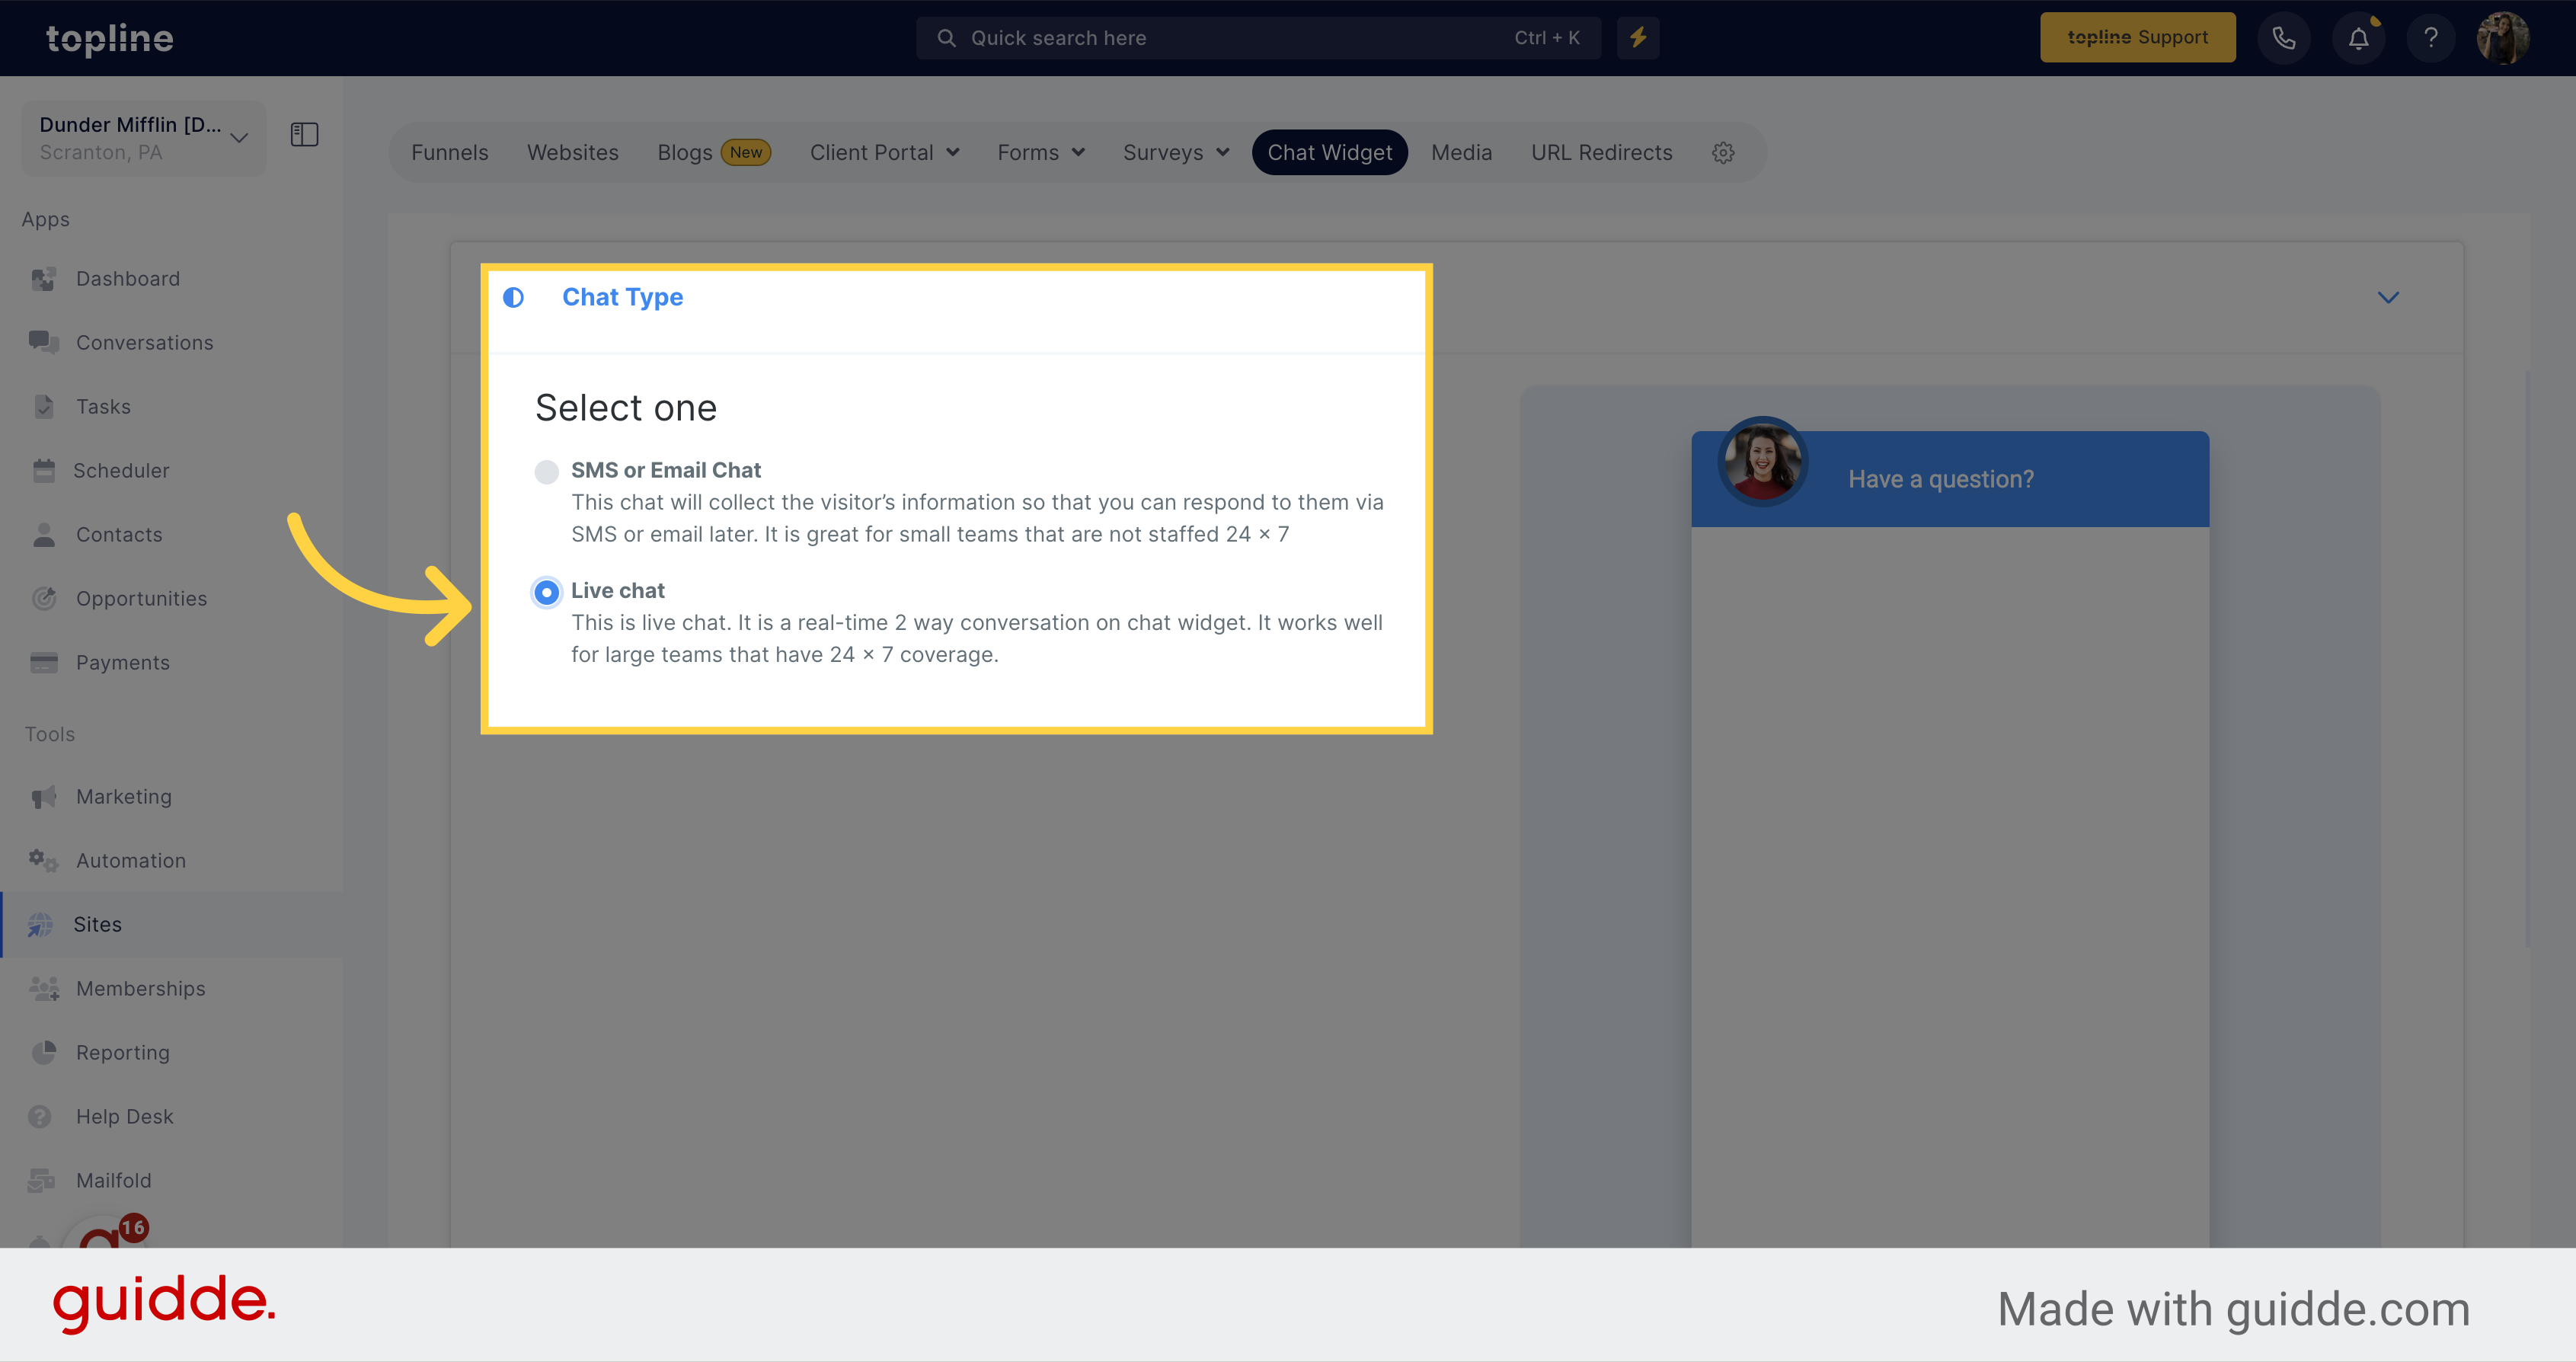
Select this option to allow visitors to have real time conversations.
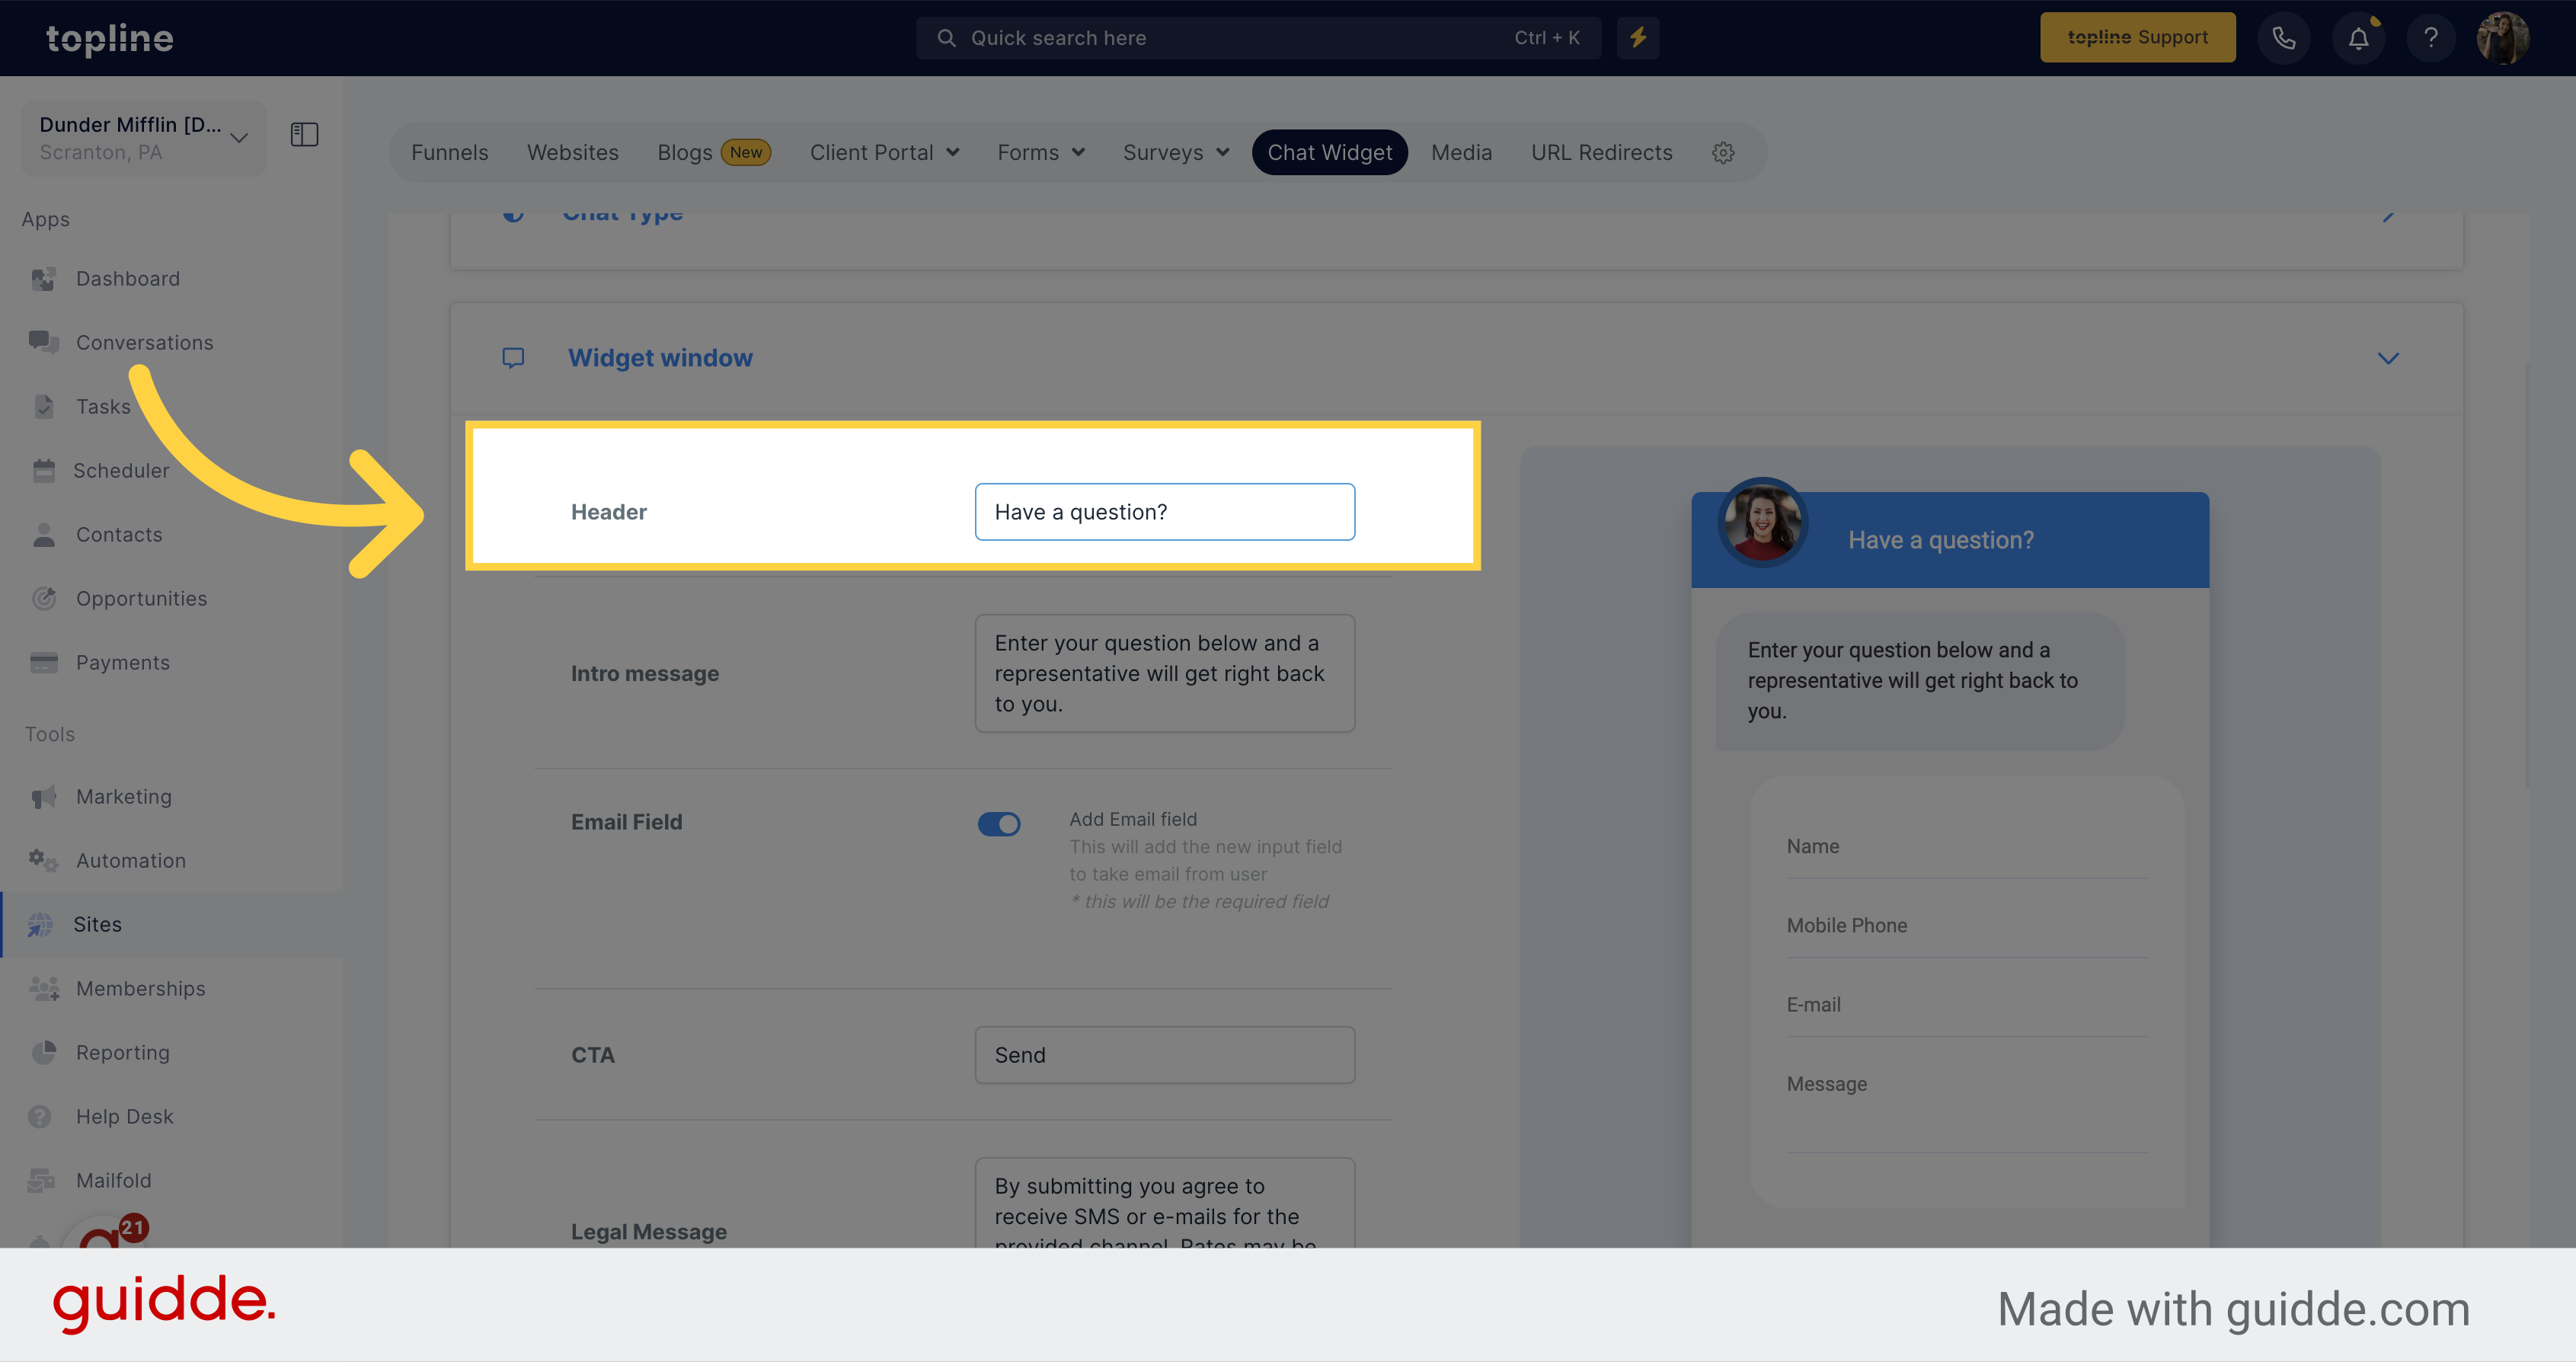
In this window you can customize the header, intro message, email field, CTA, and legal message.
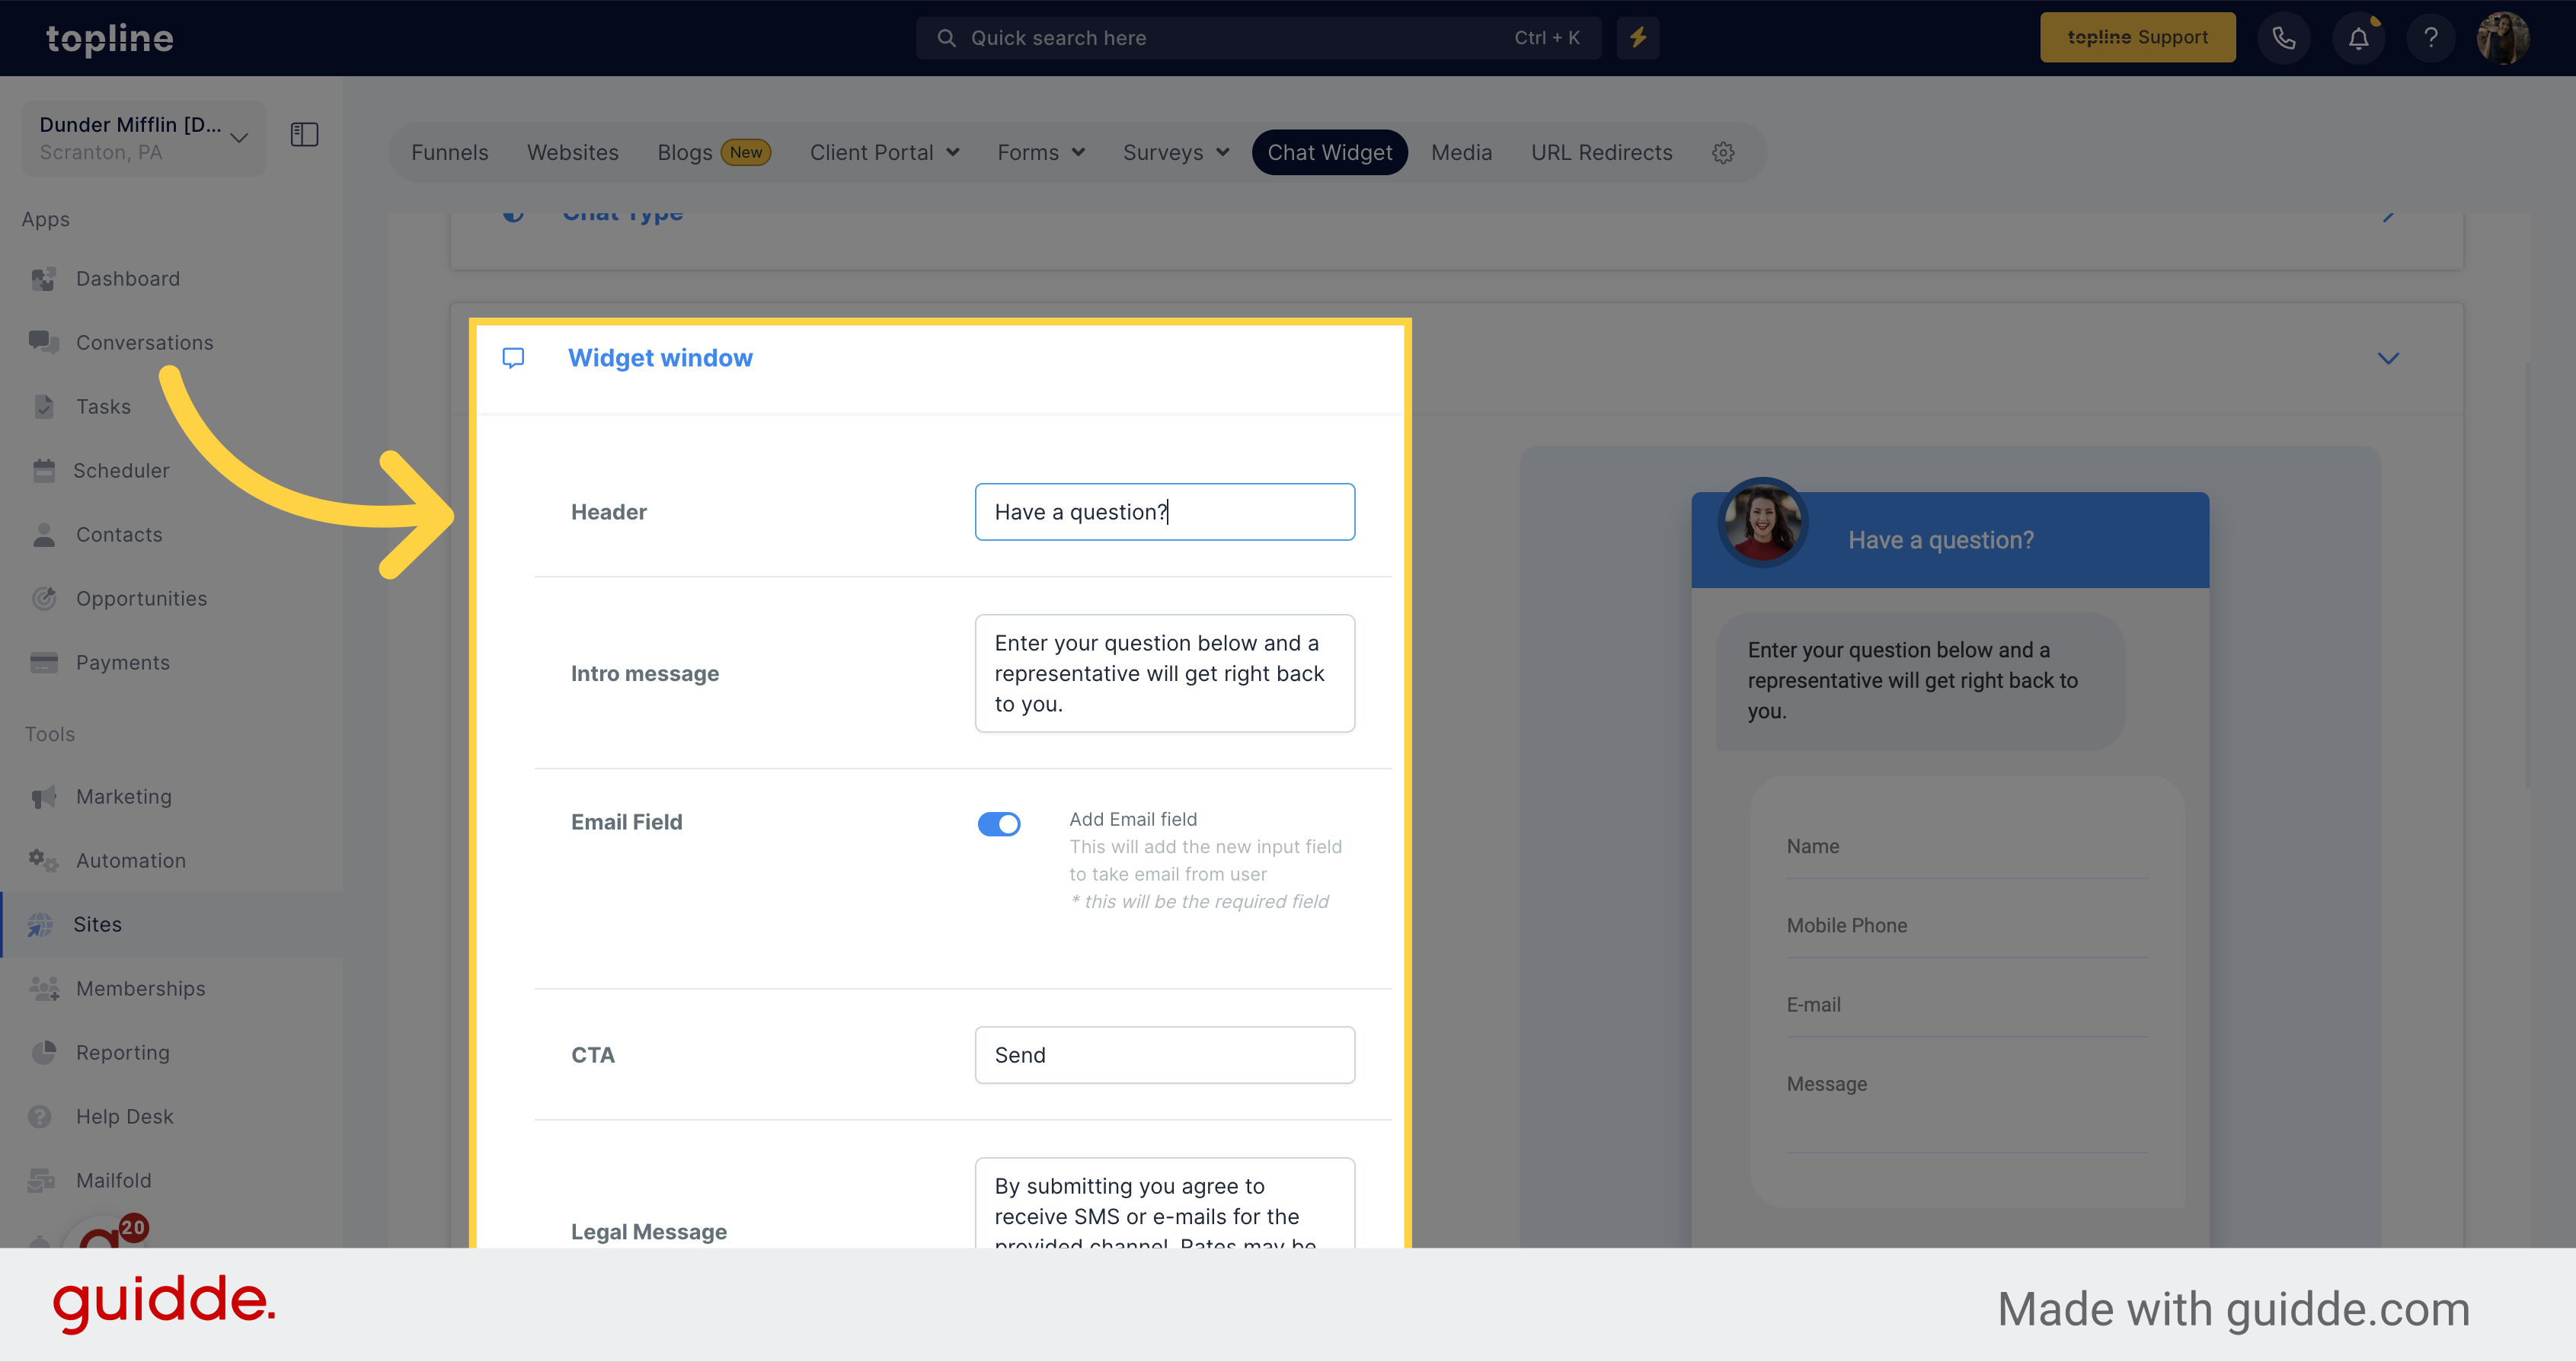
Add the text you want to be display on the pop up header.
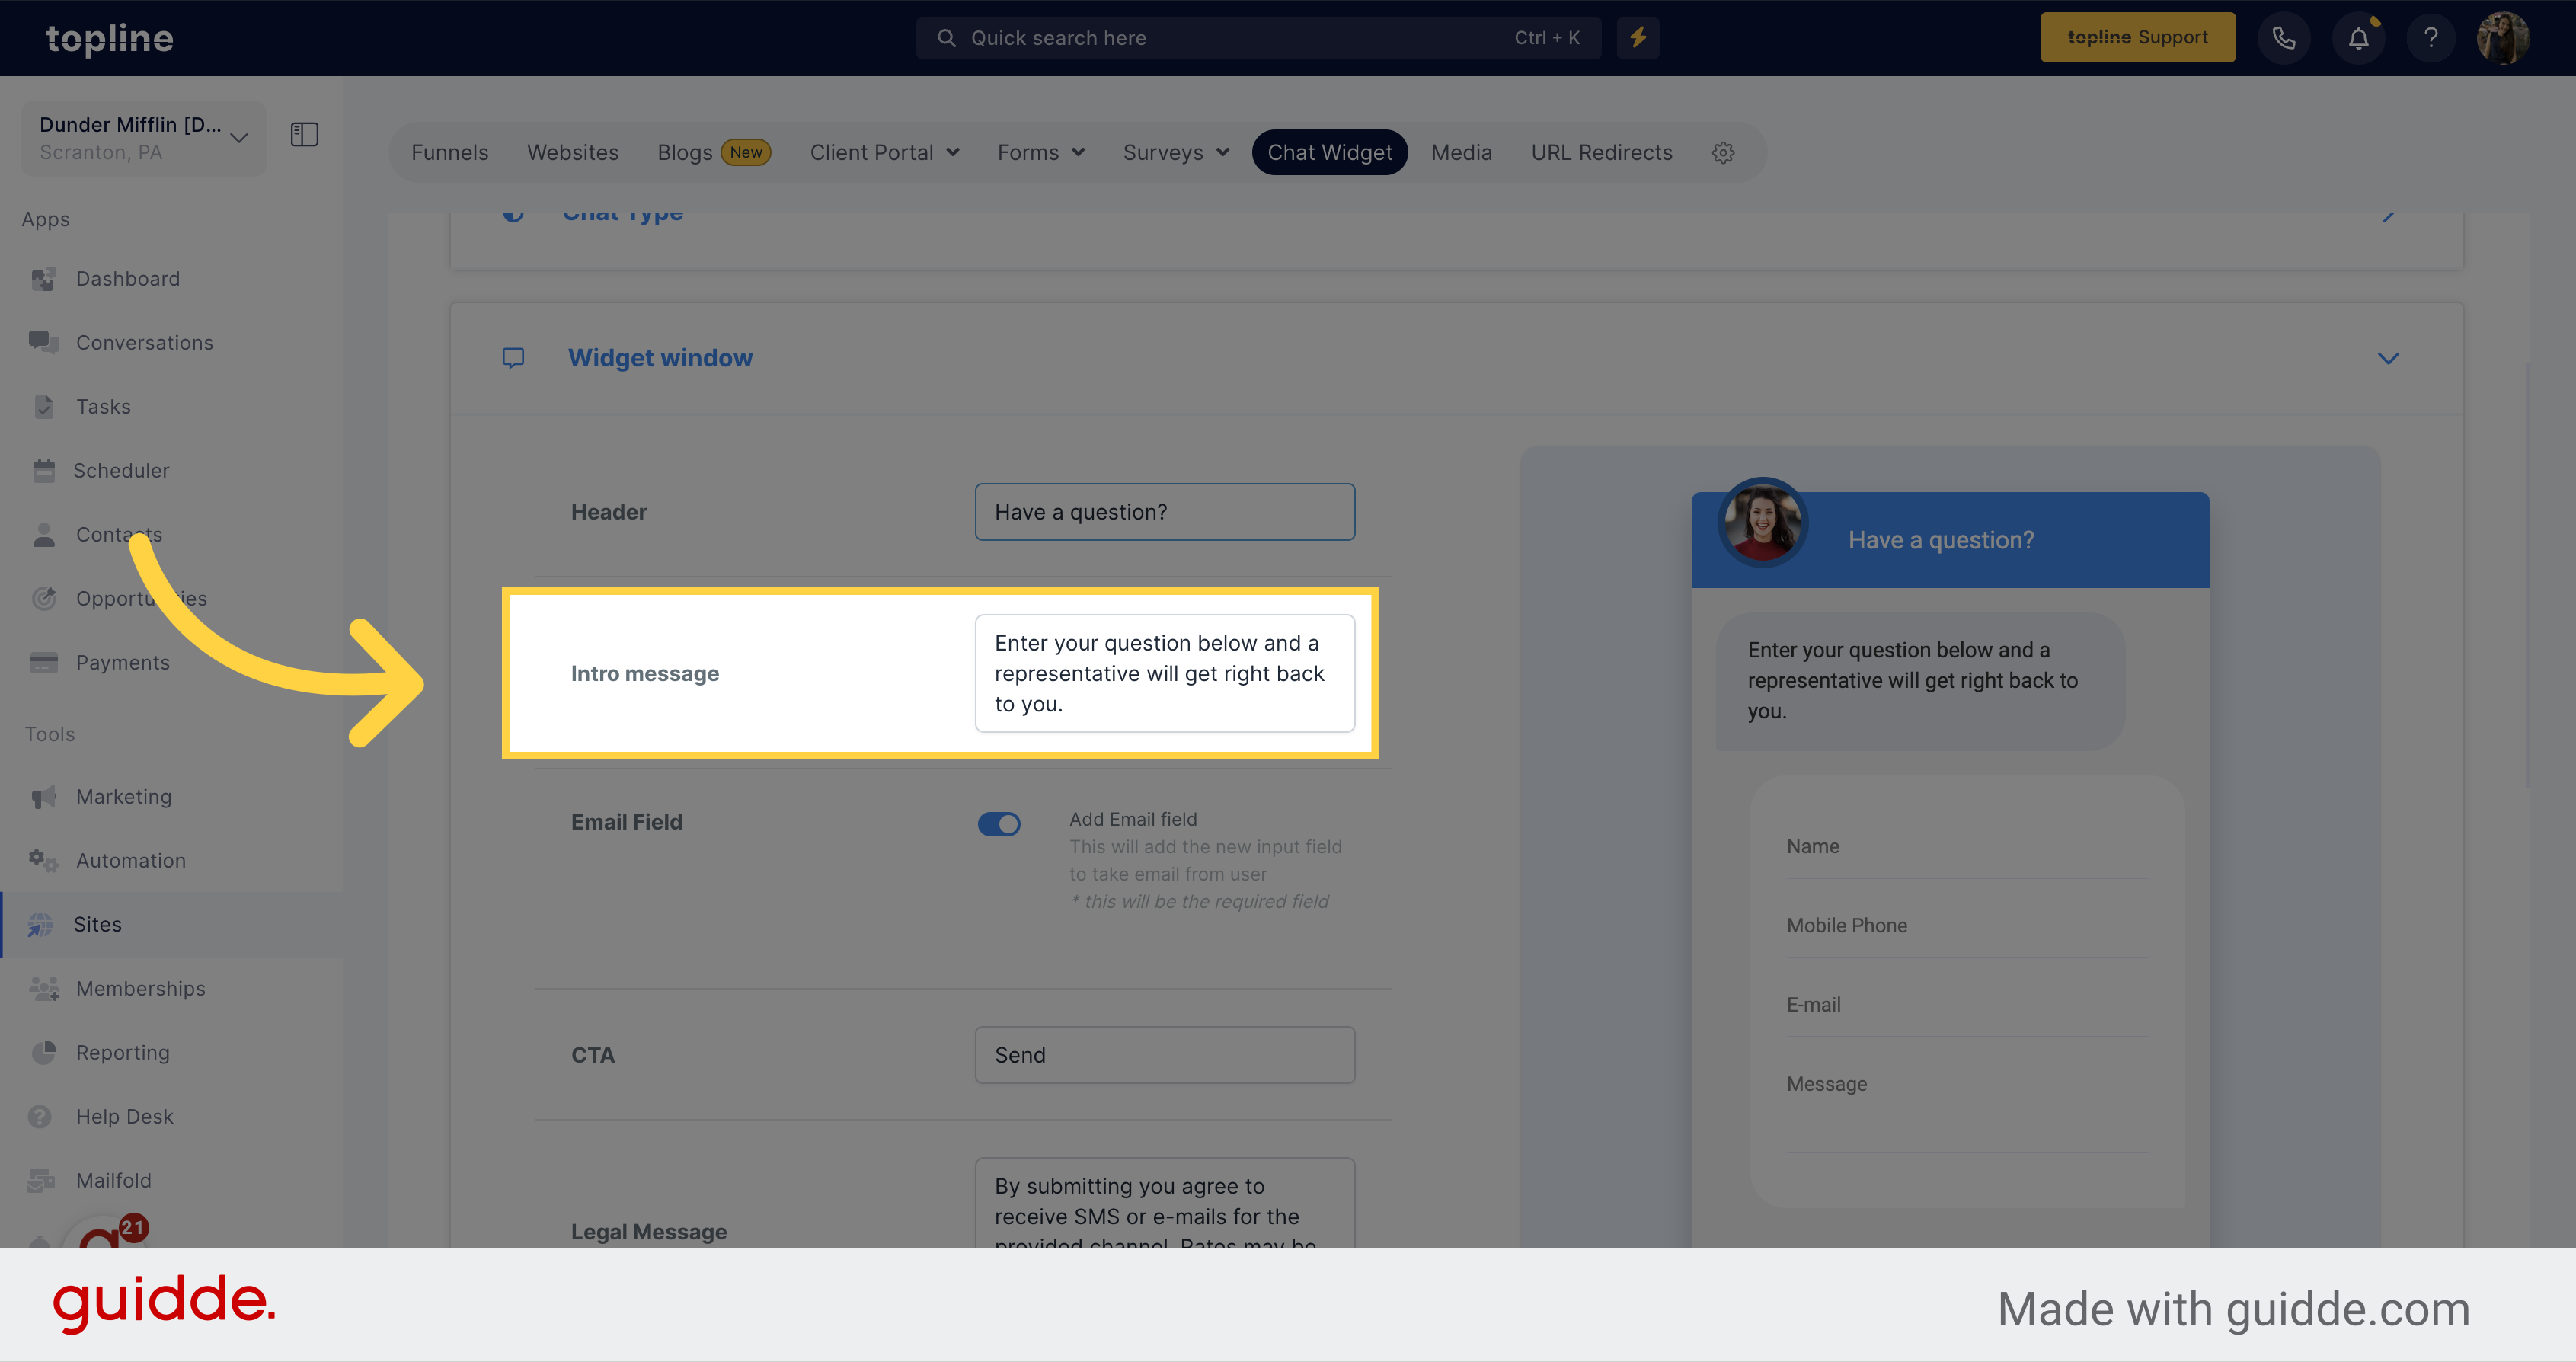
Write the message you want to be display for the visitors.
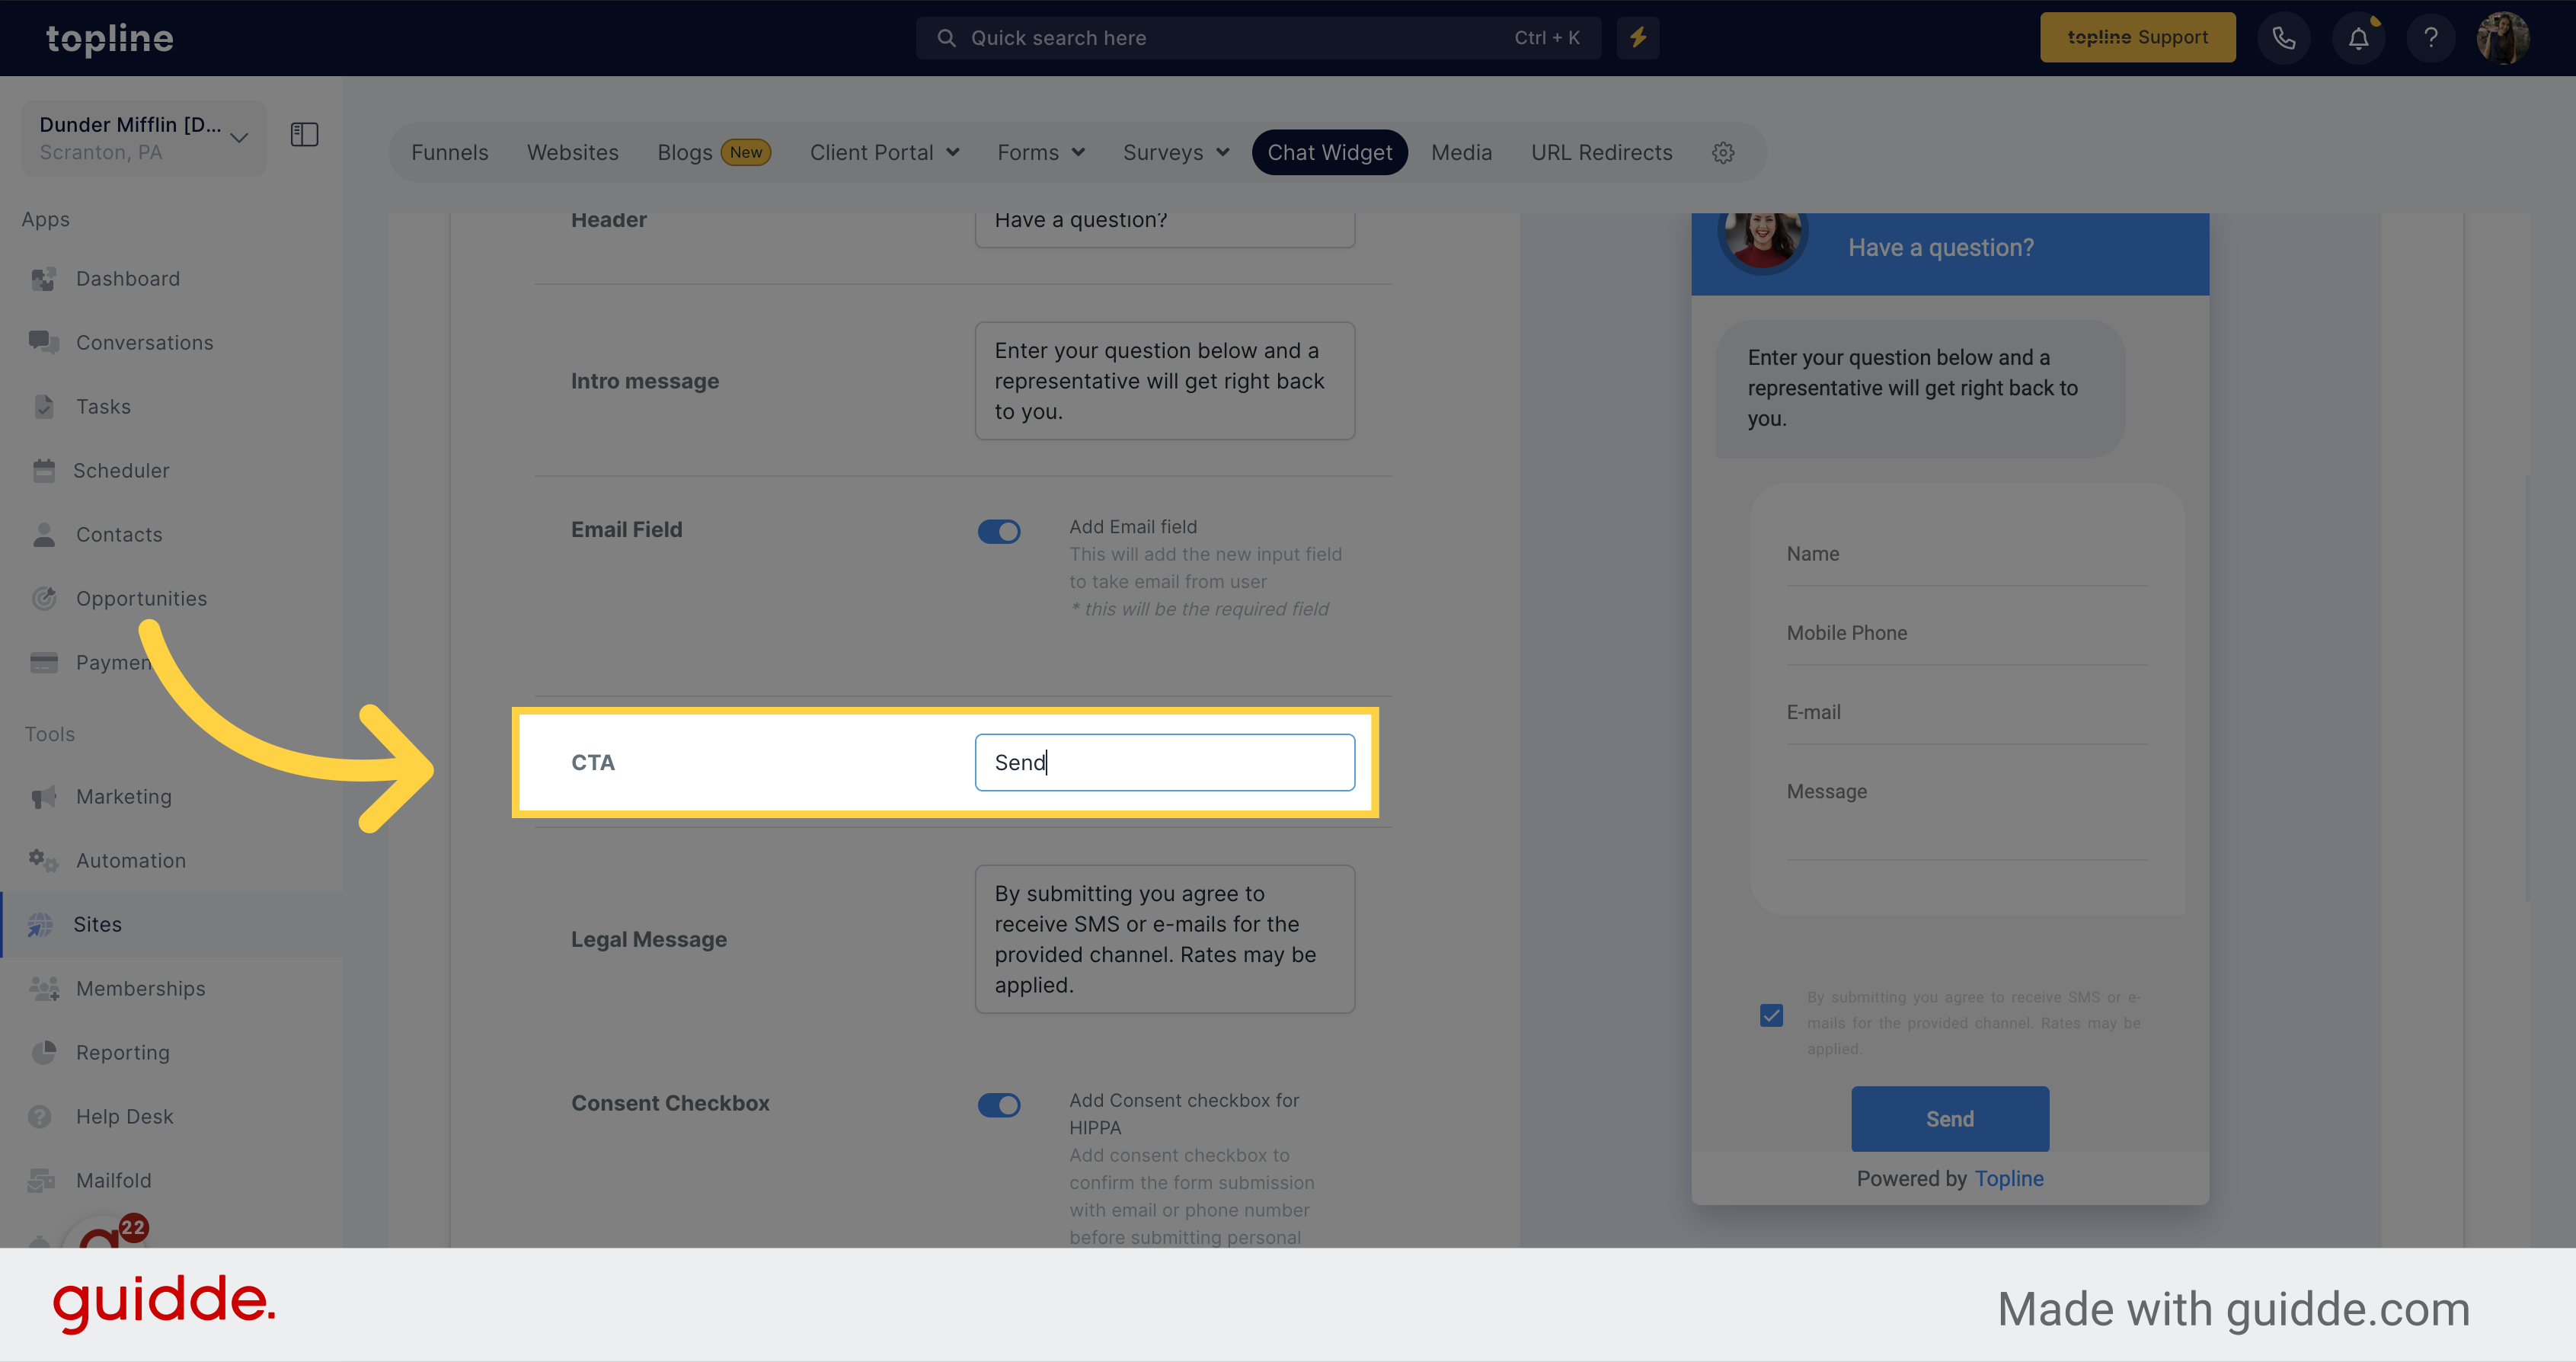
Add the CTA you want for your chat.
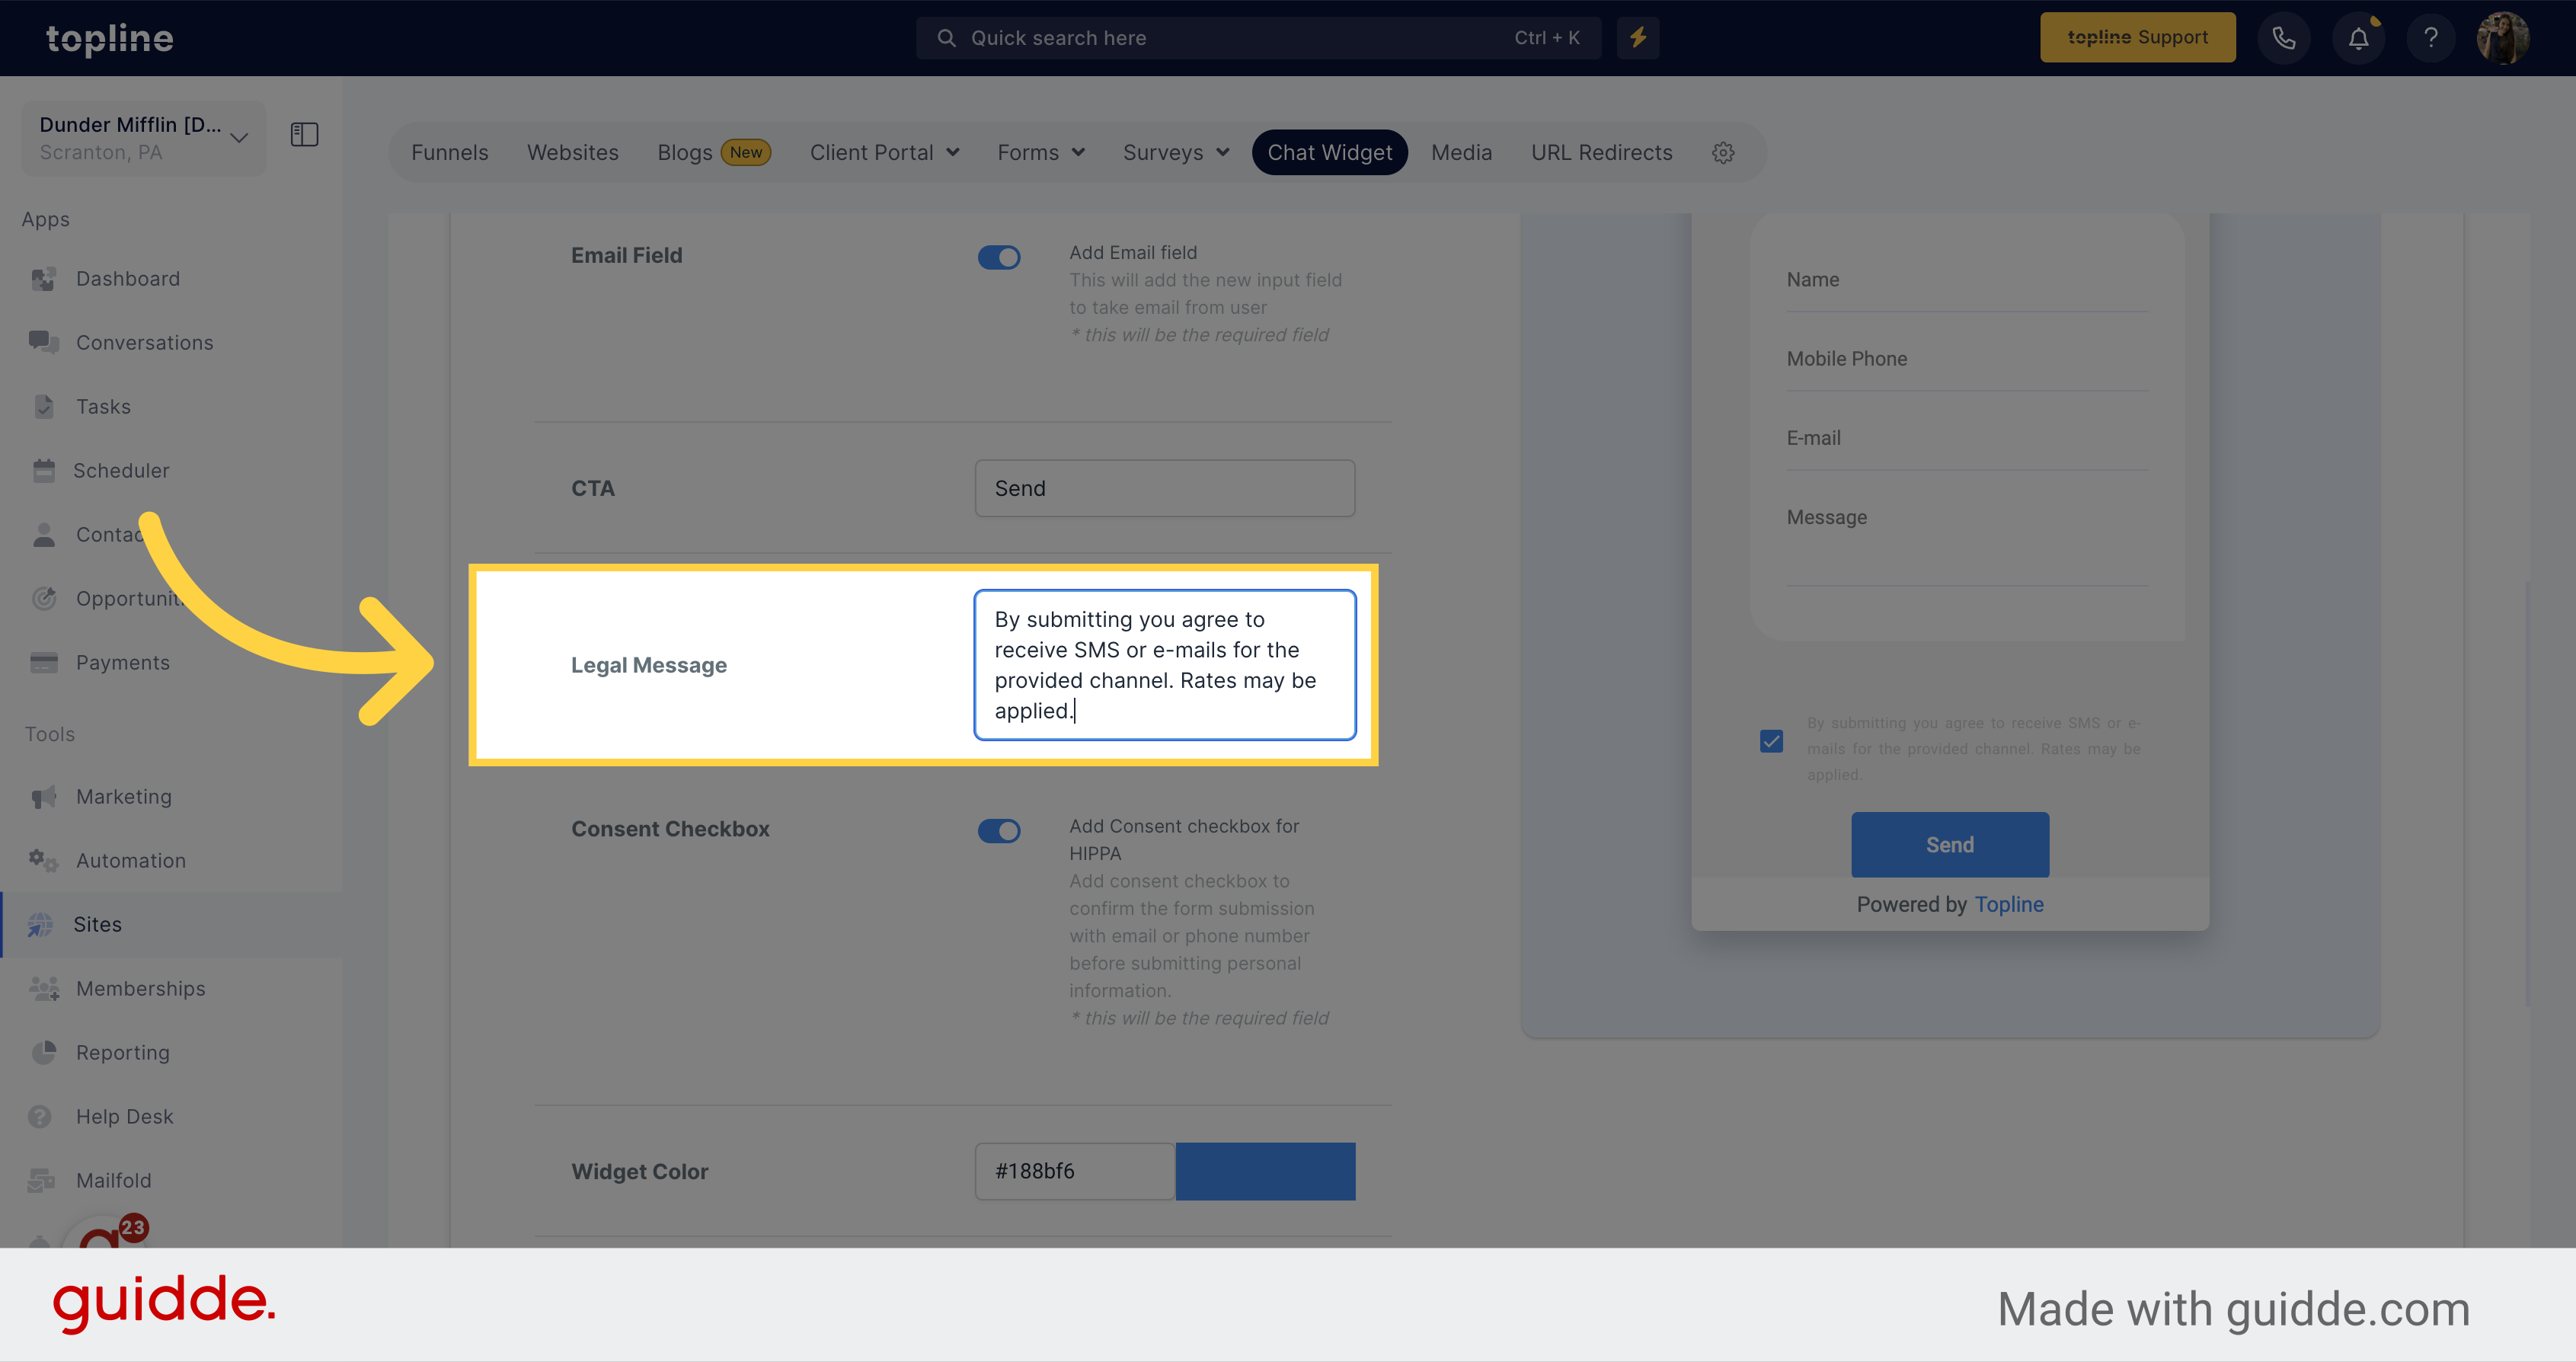
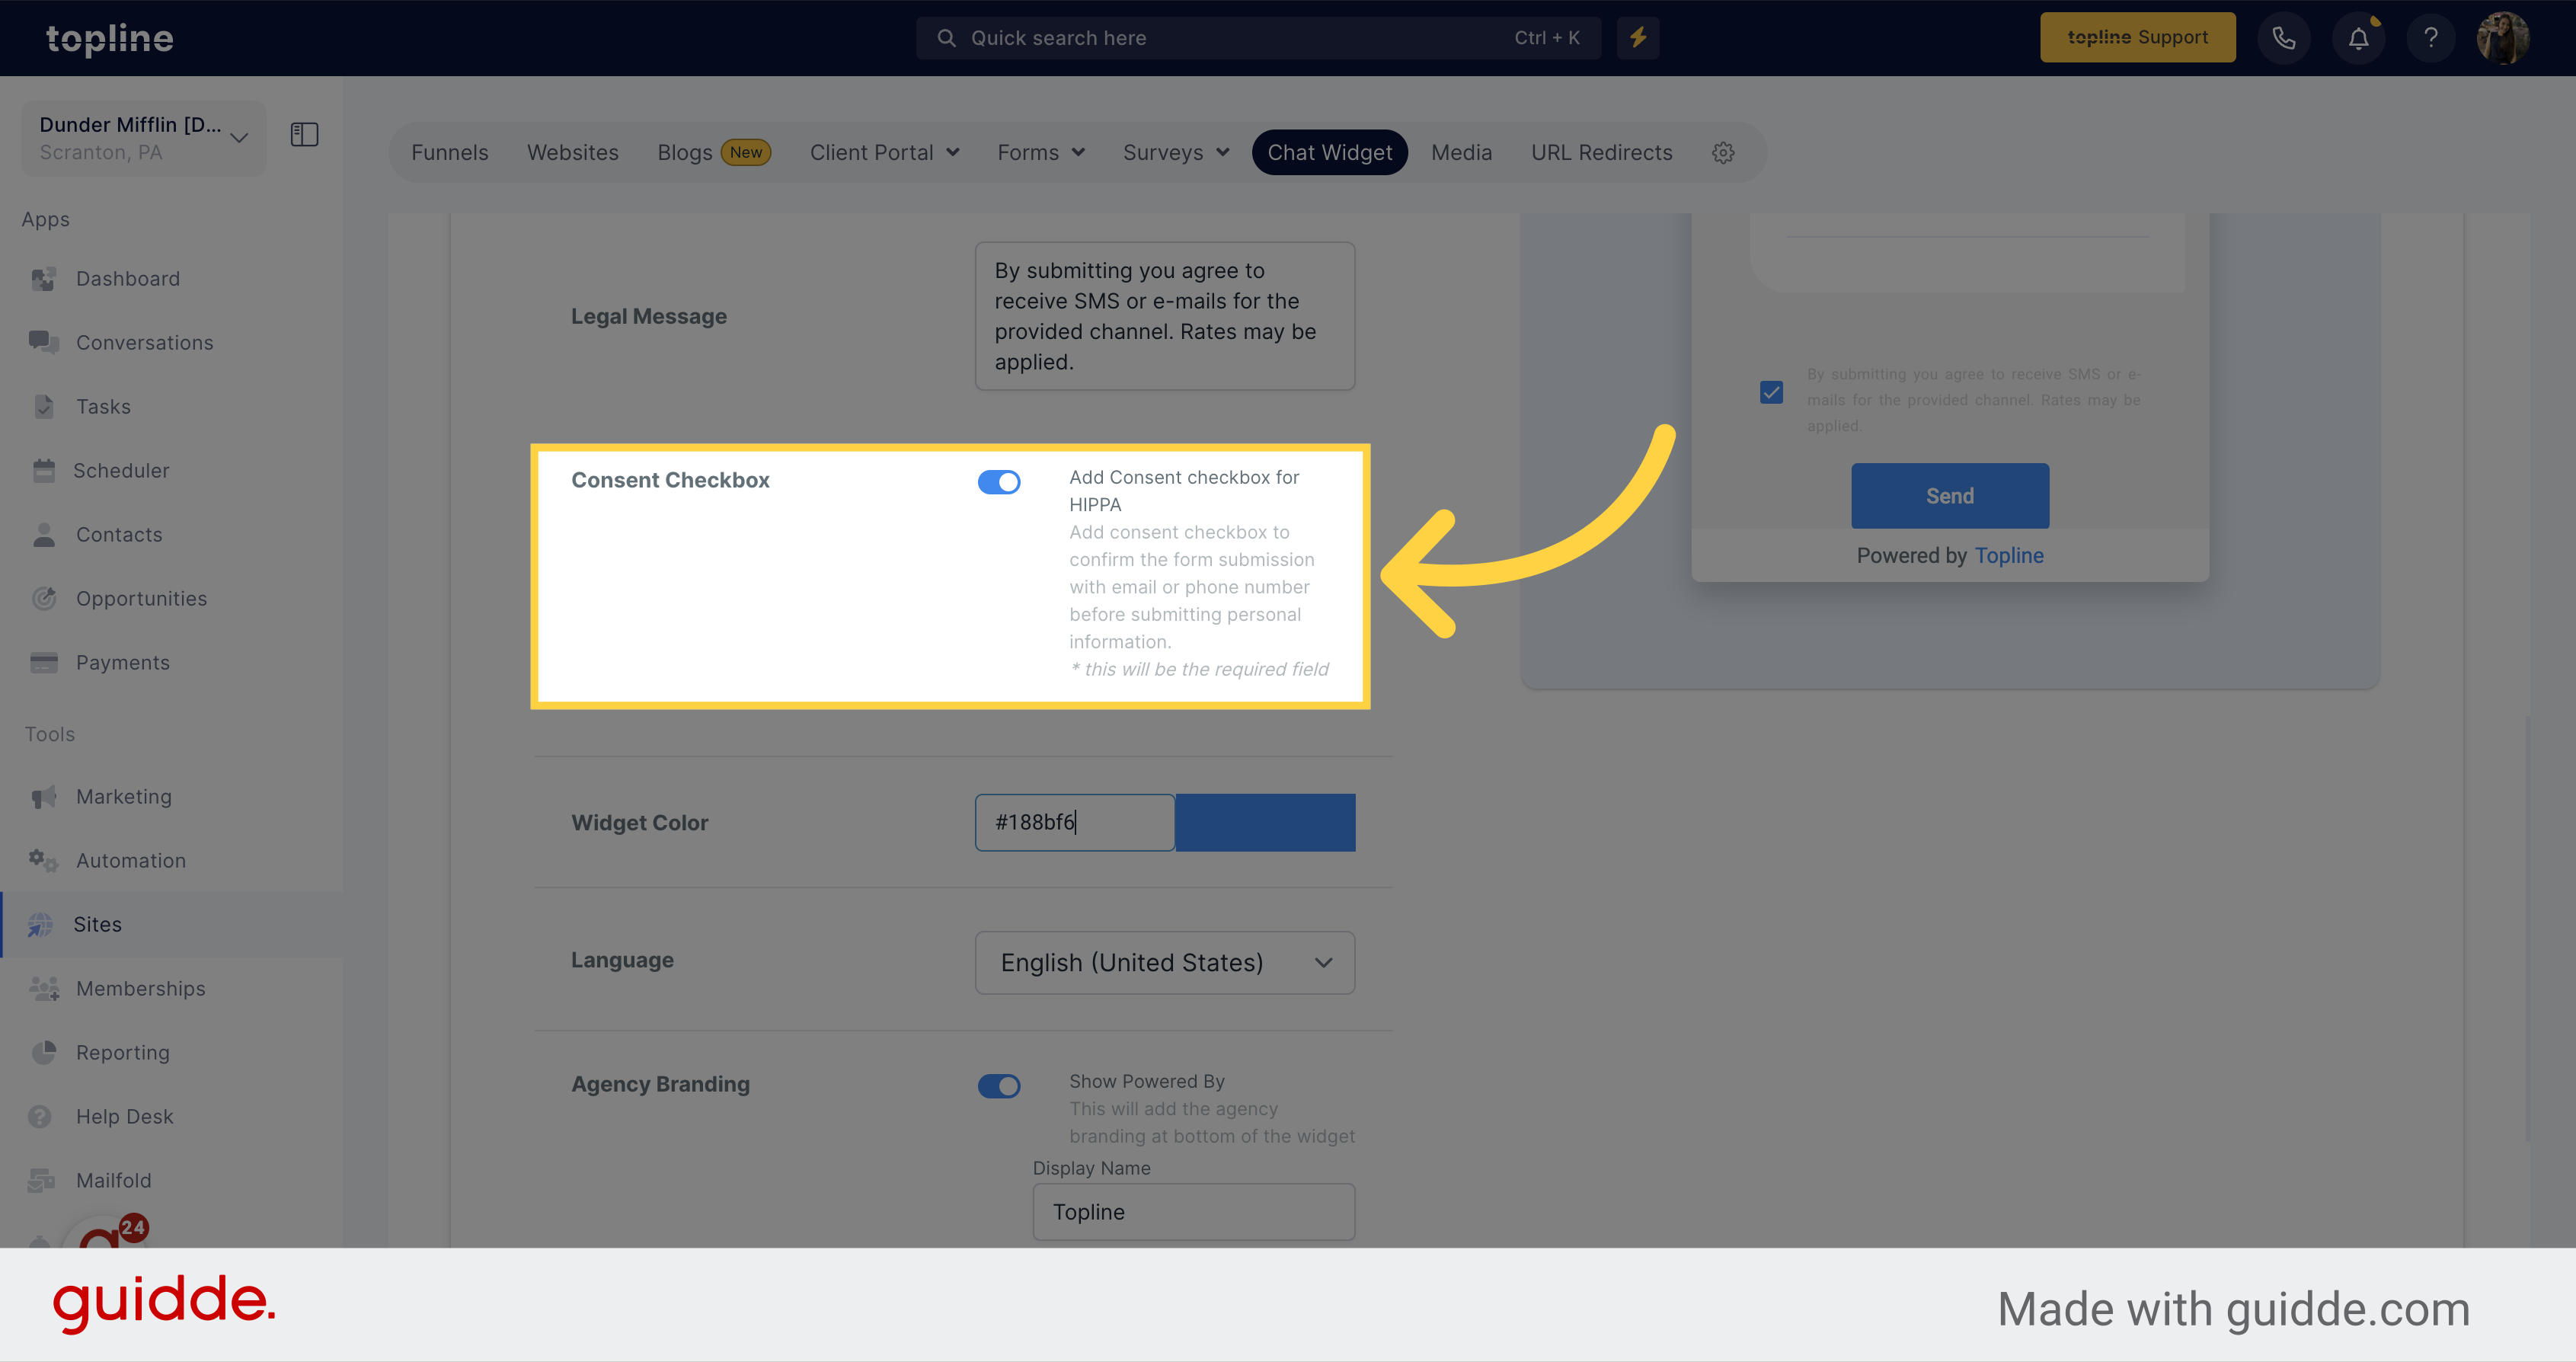
Add the legal information needed for the consent box.
Activate this option to add a content checkbox for HIPPA.
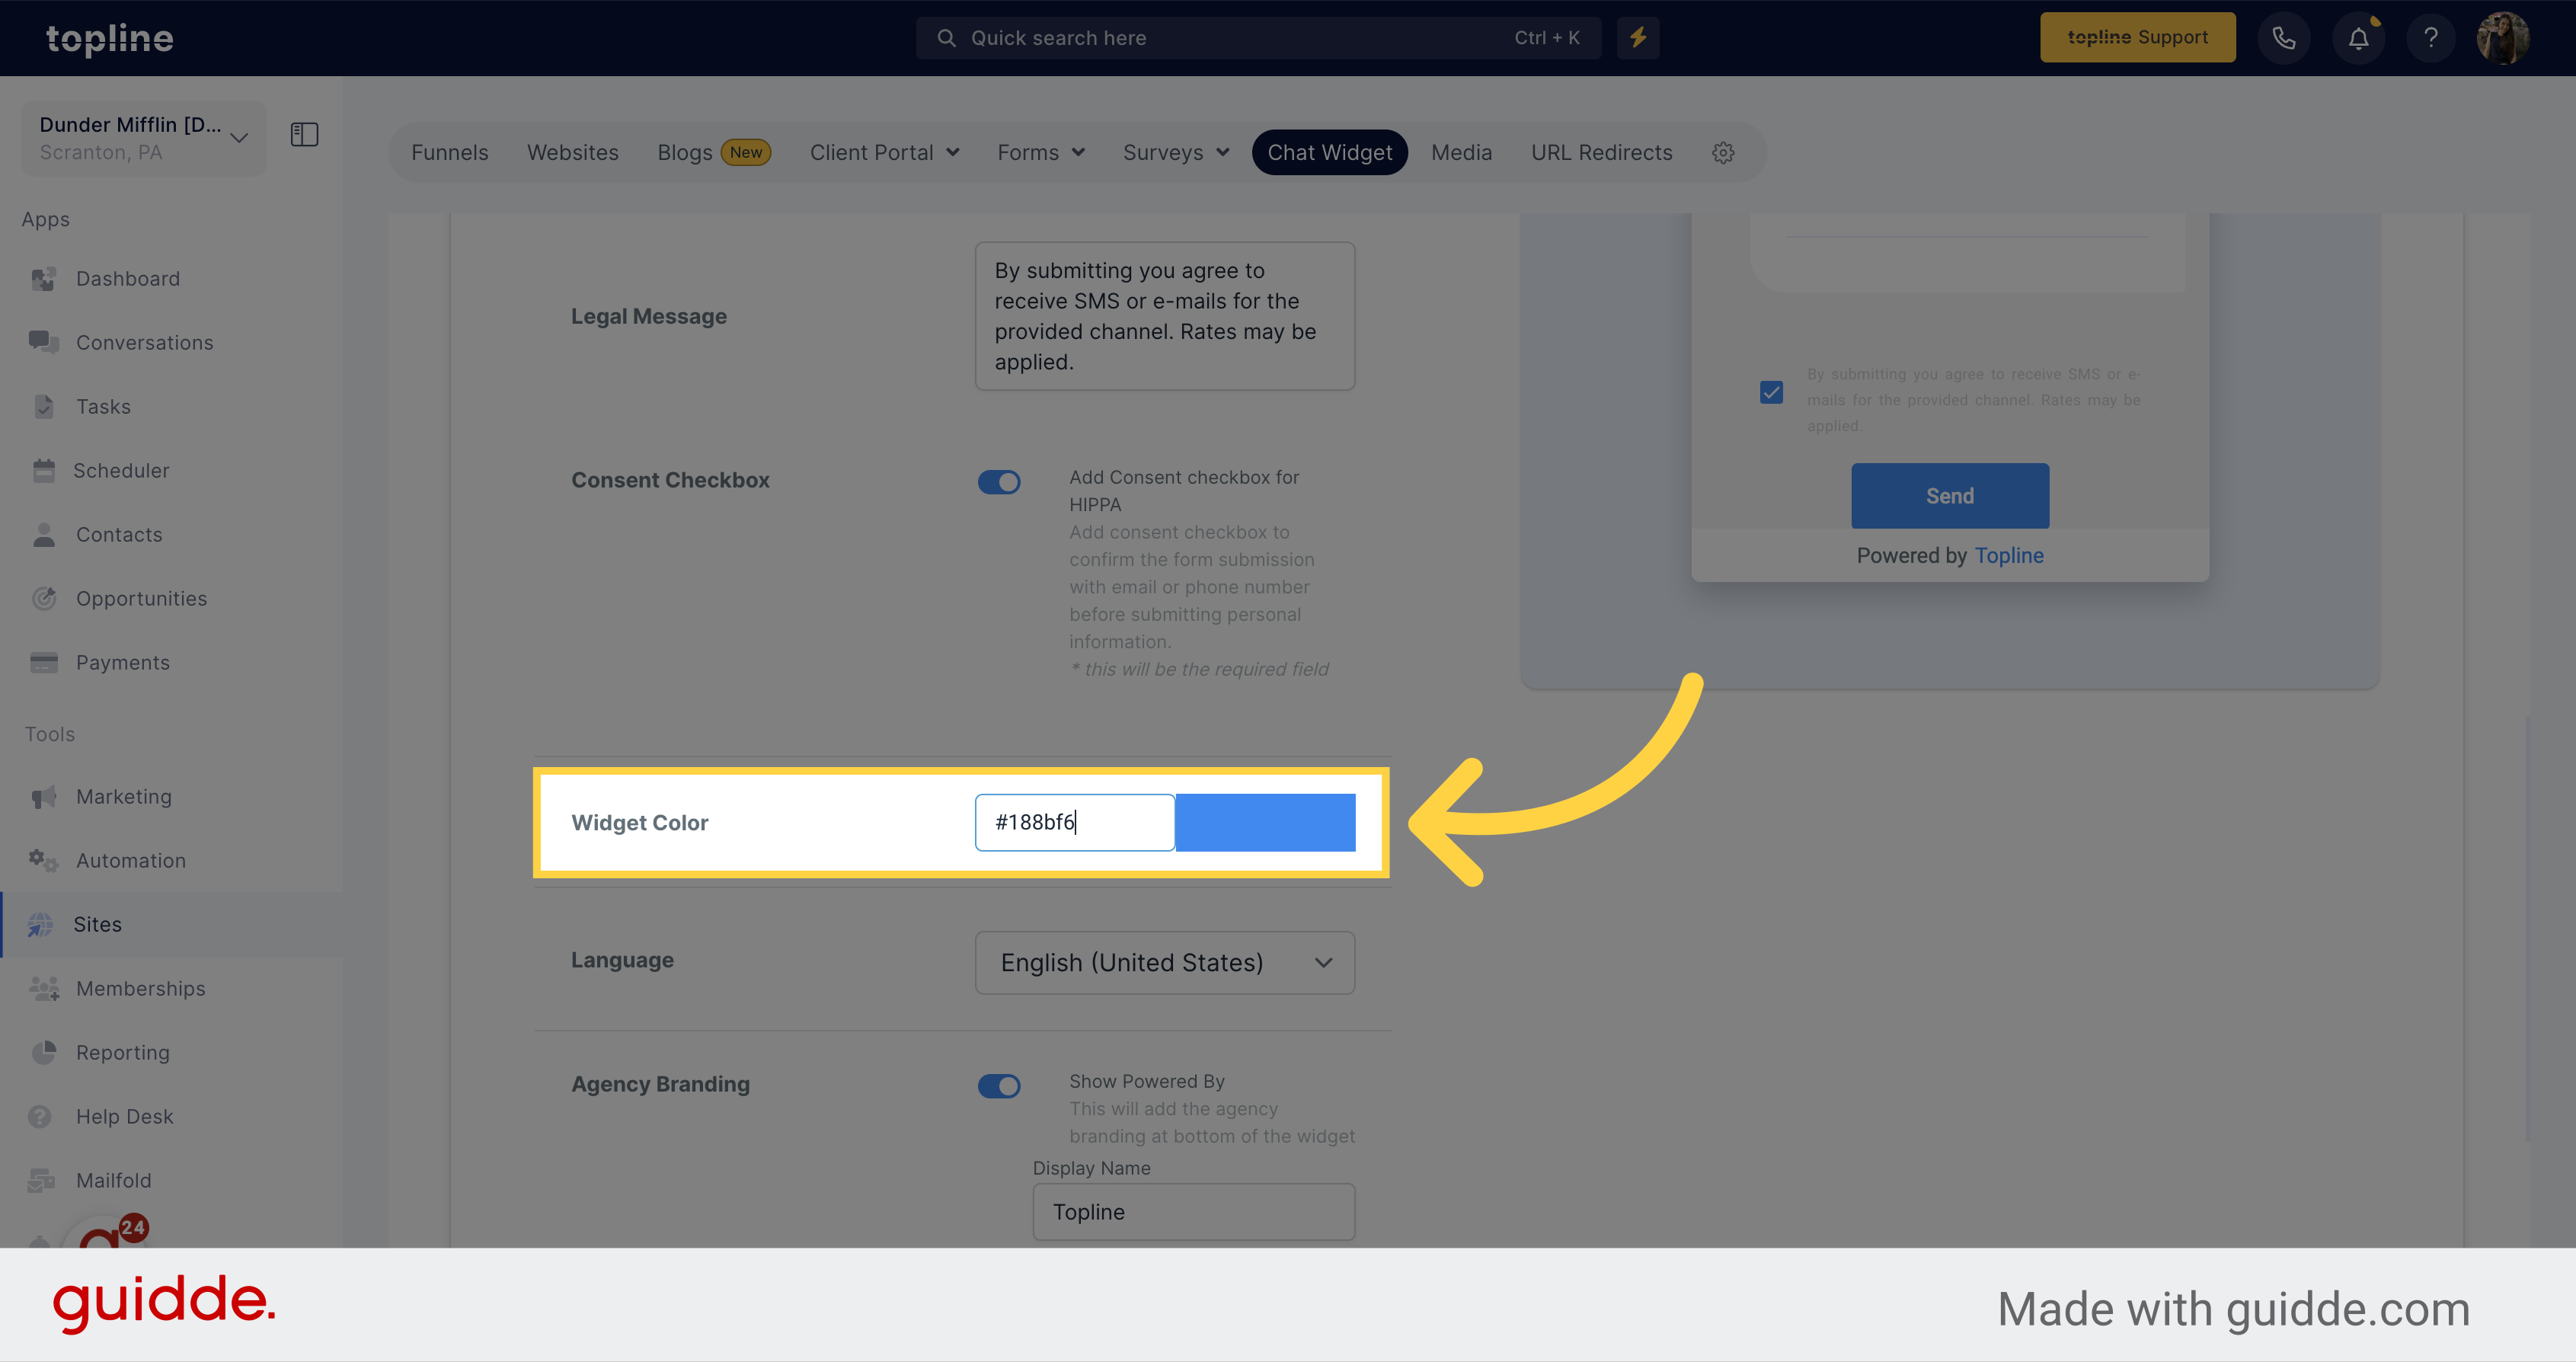
Customize the widget color with an hex code.
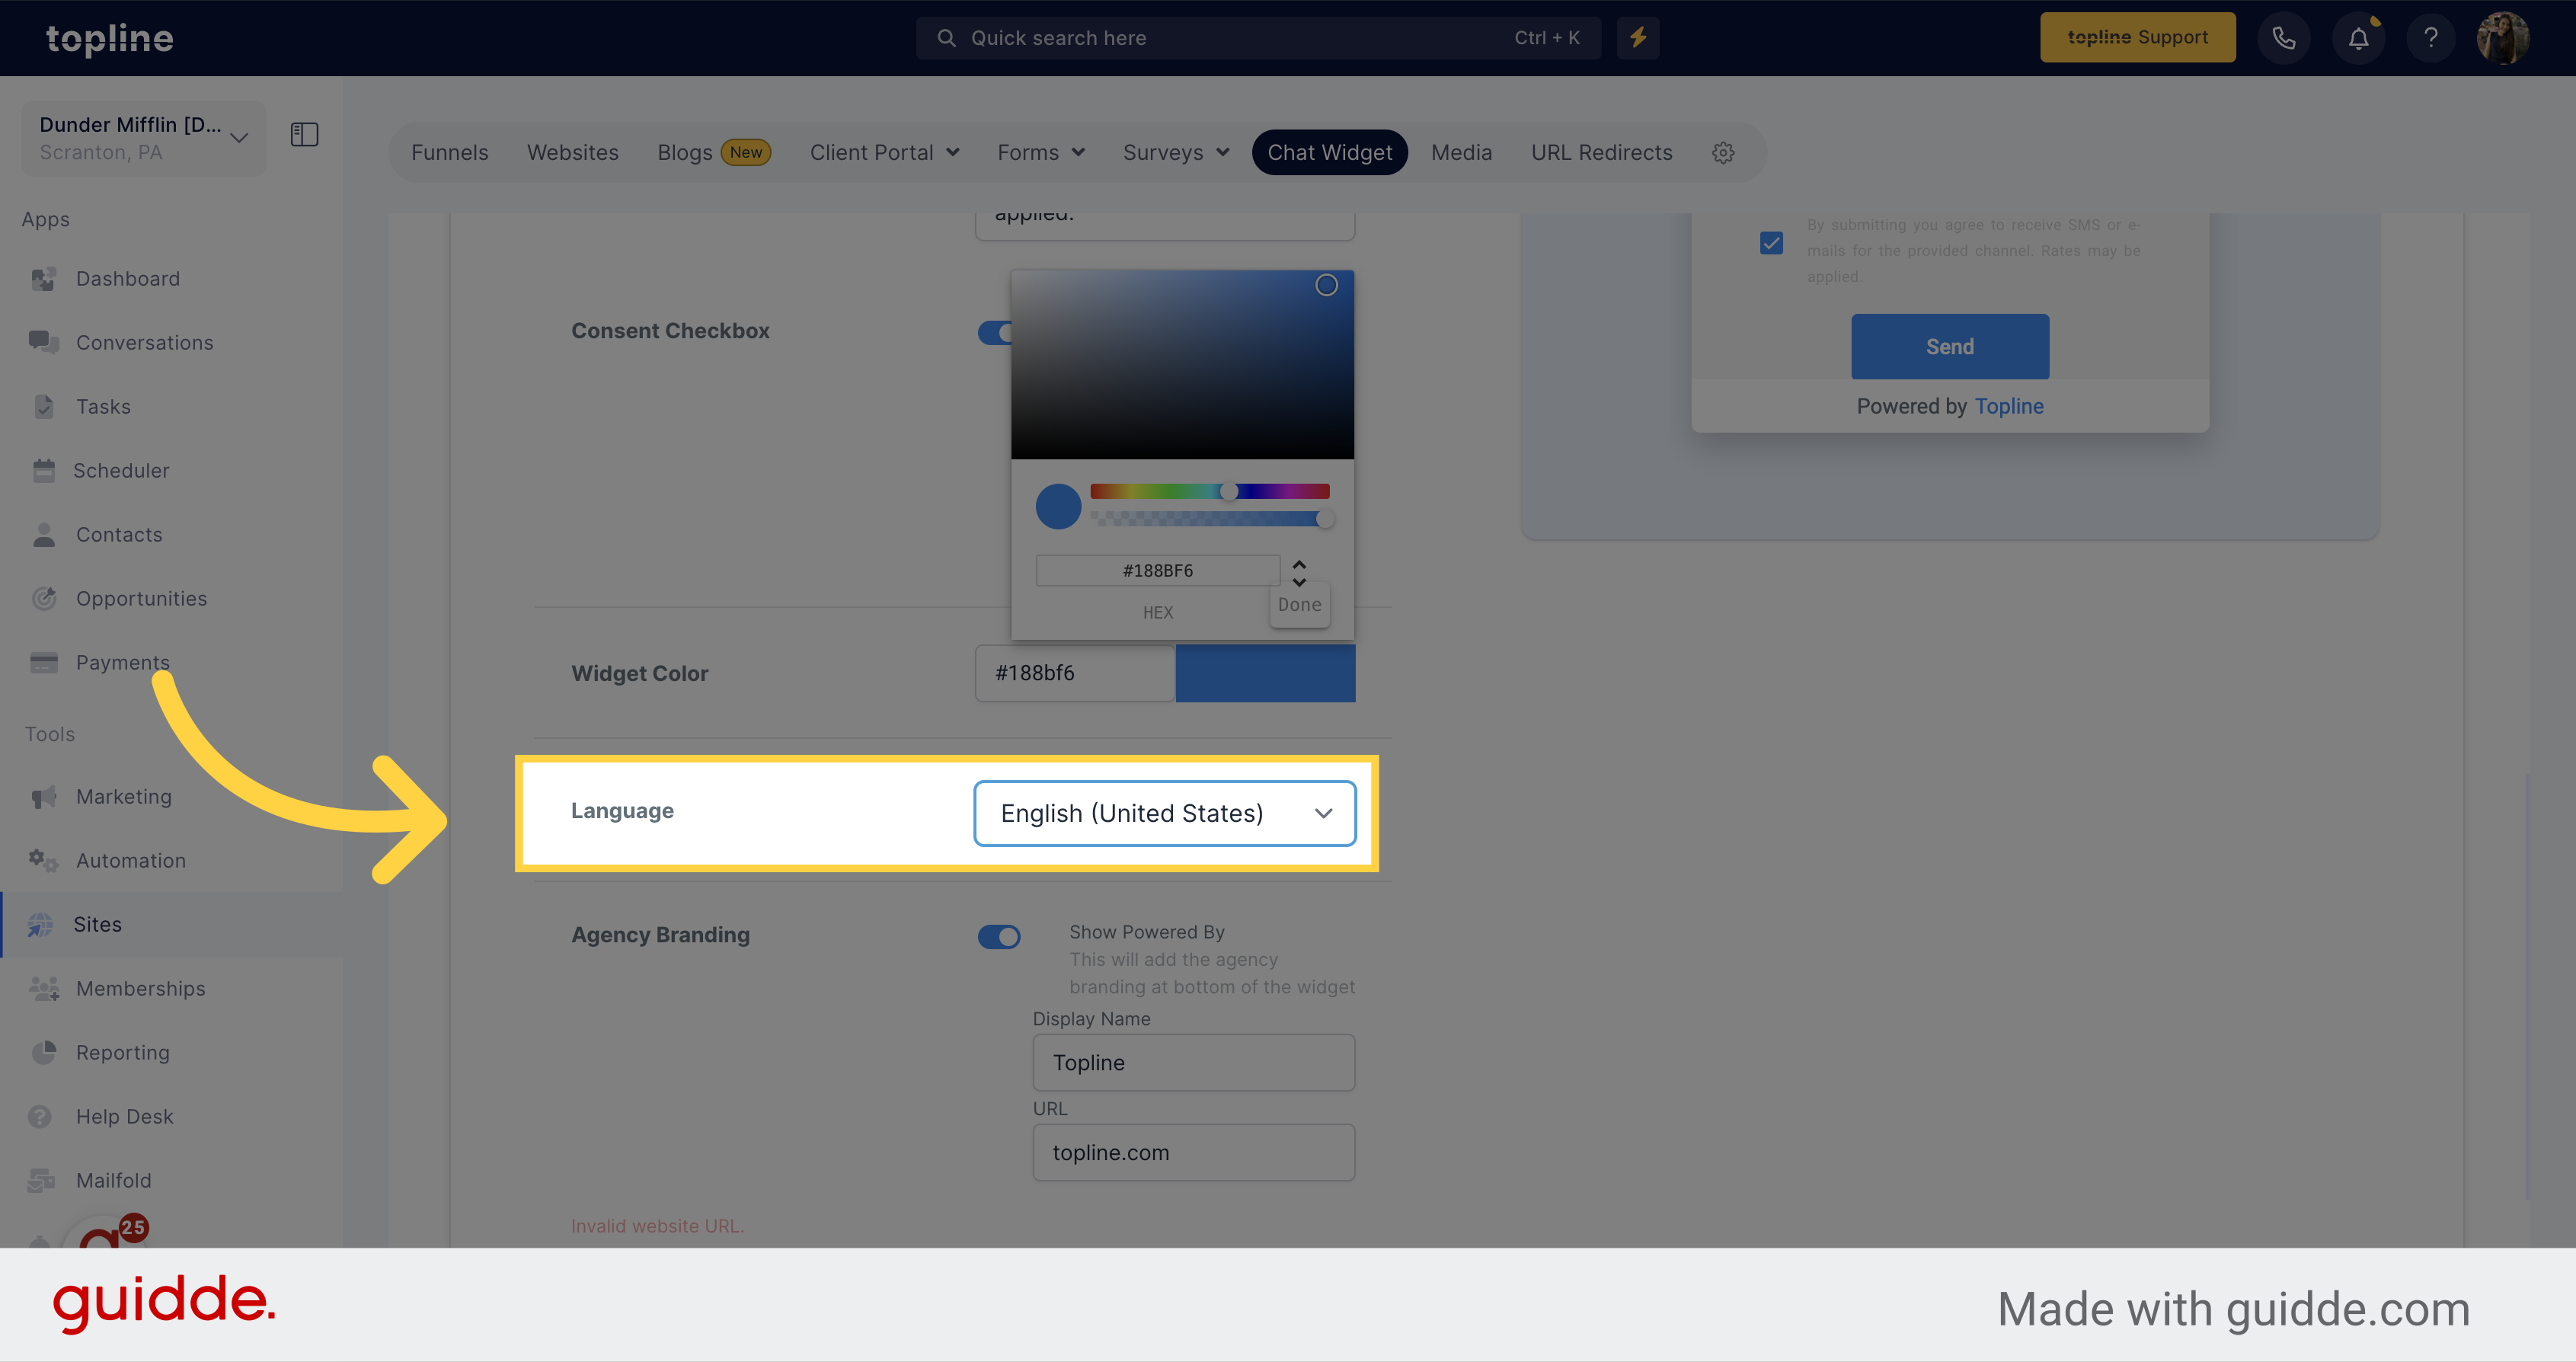
Choose the language settings for the widget.
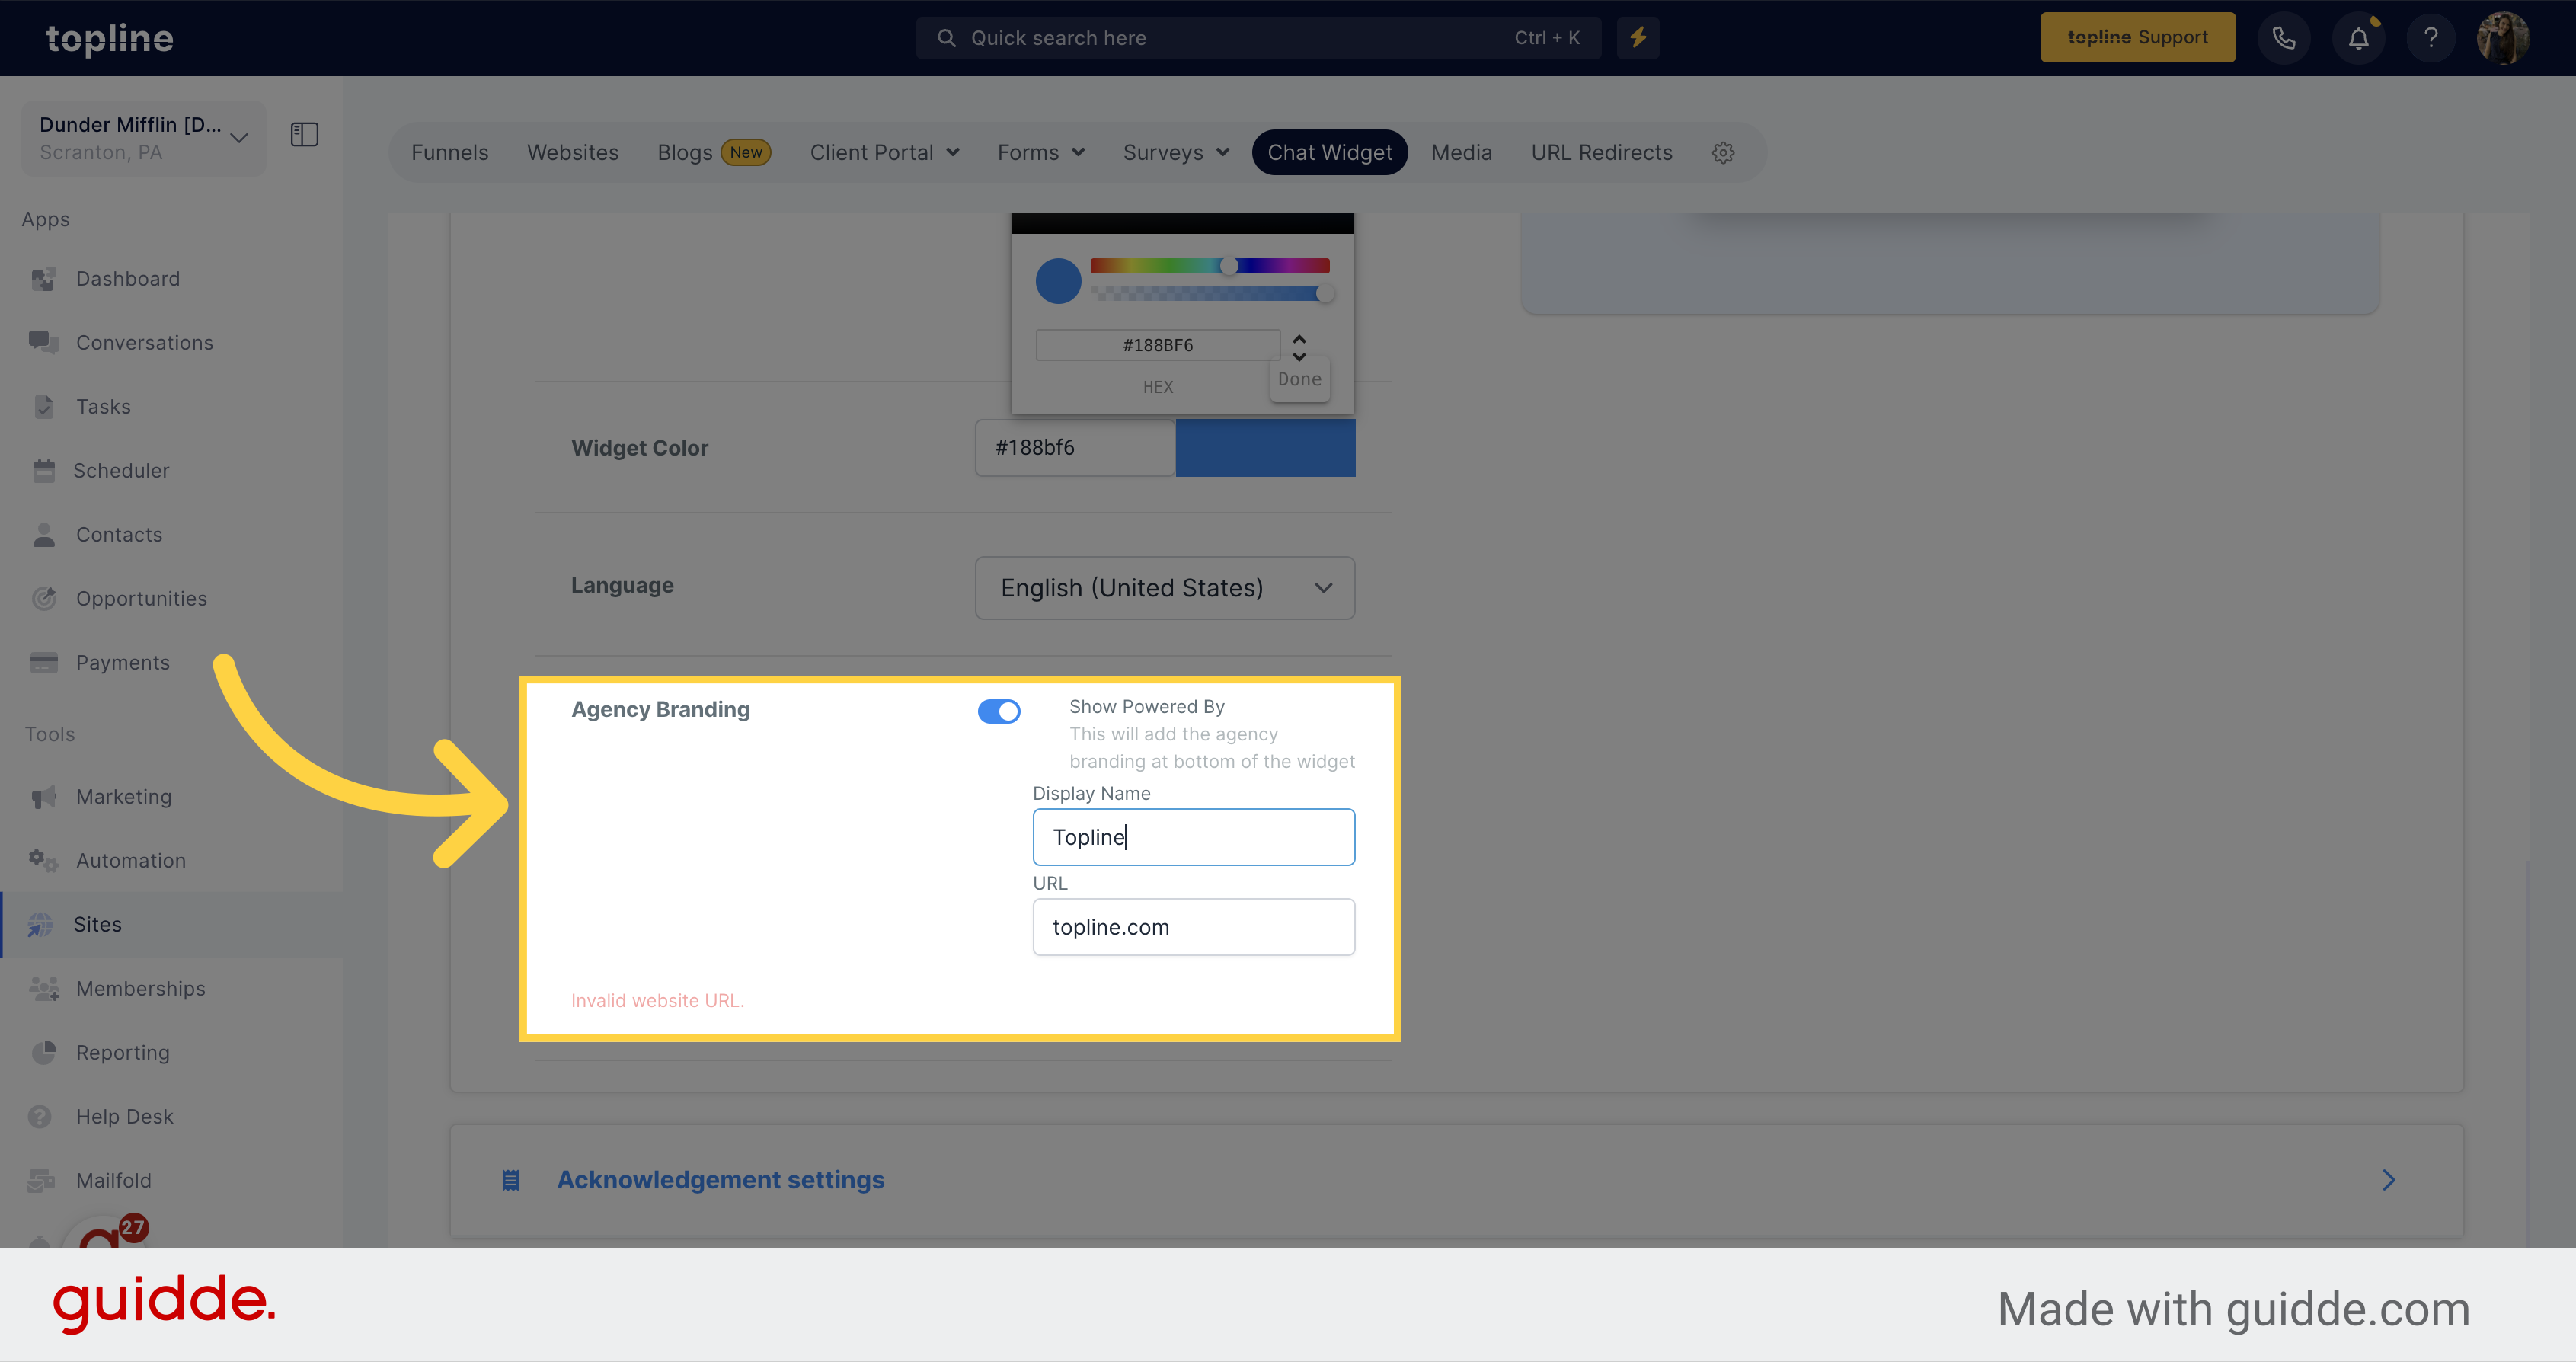
Add the display name and URL.
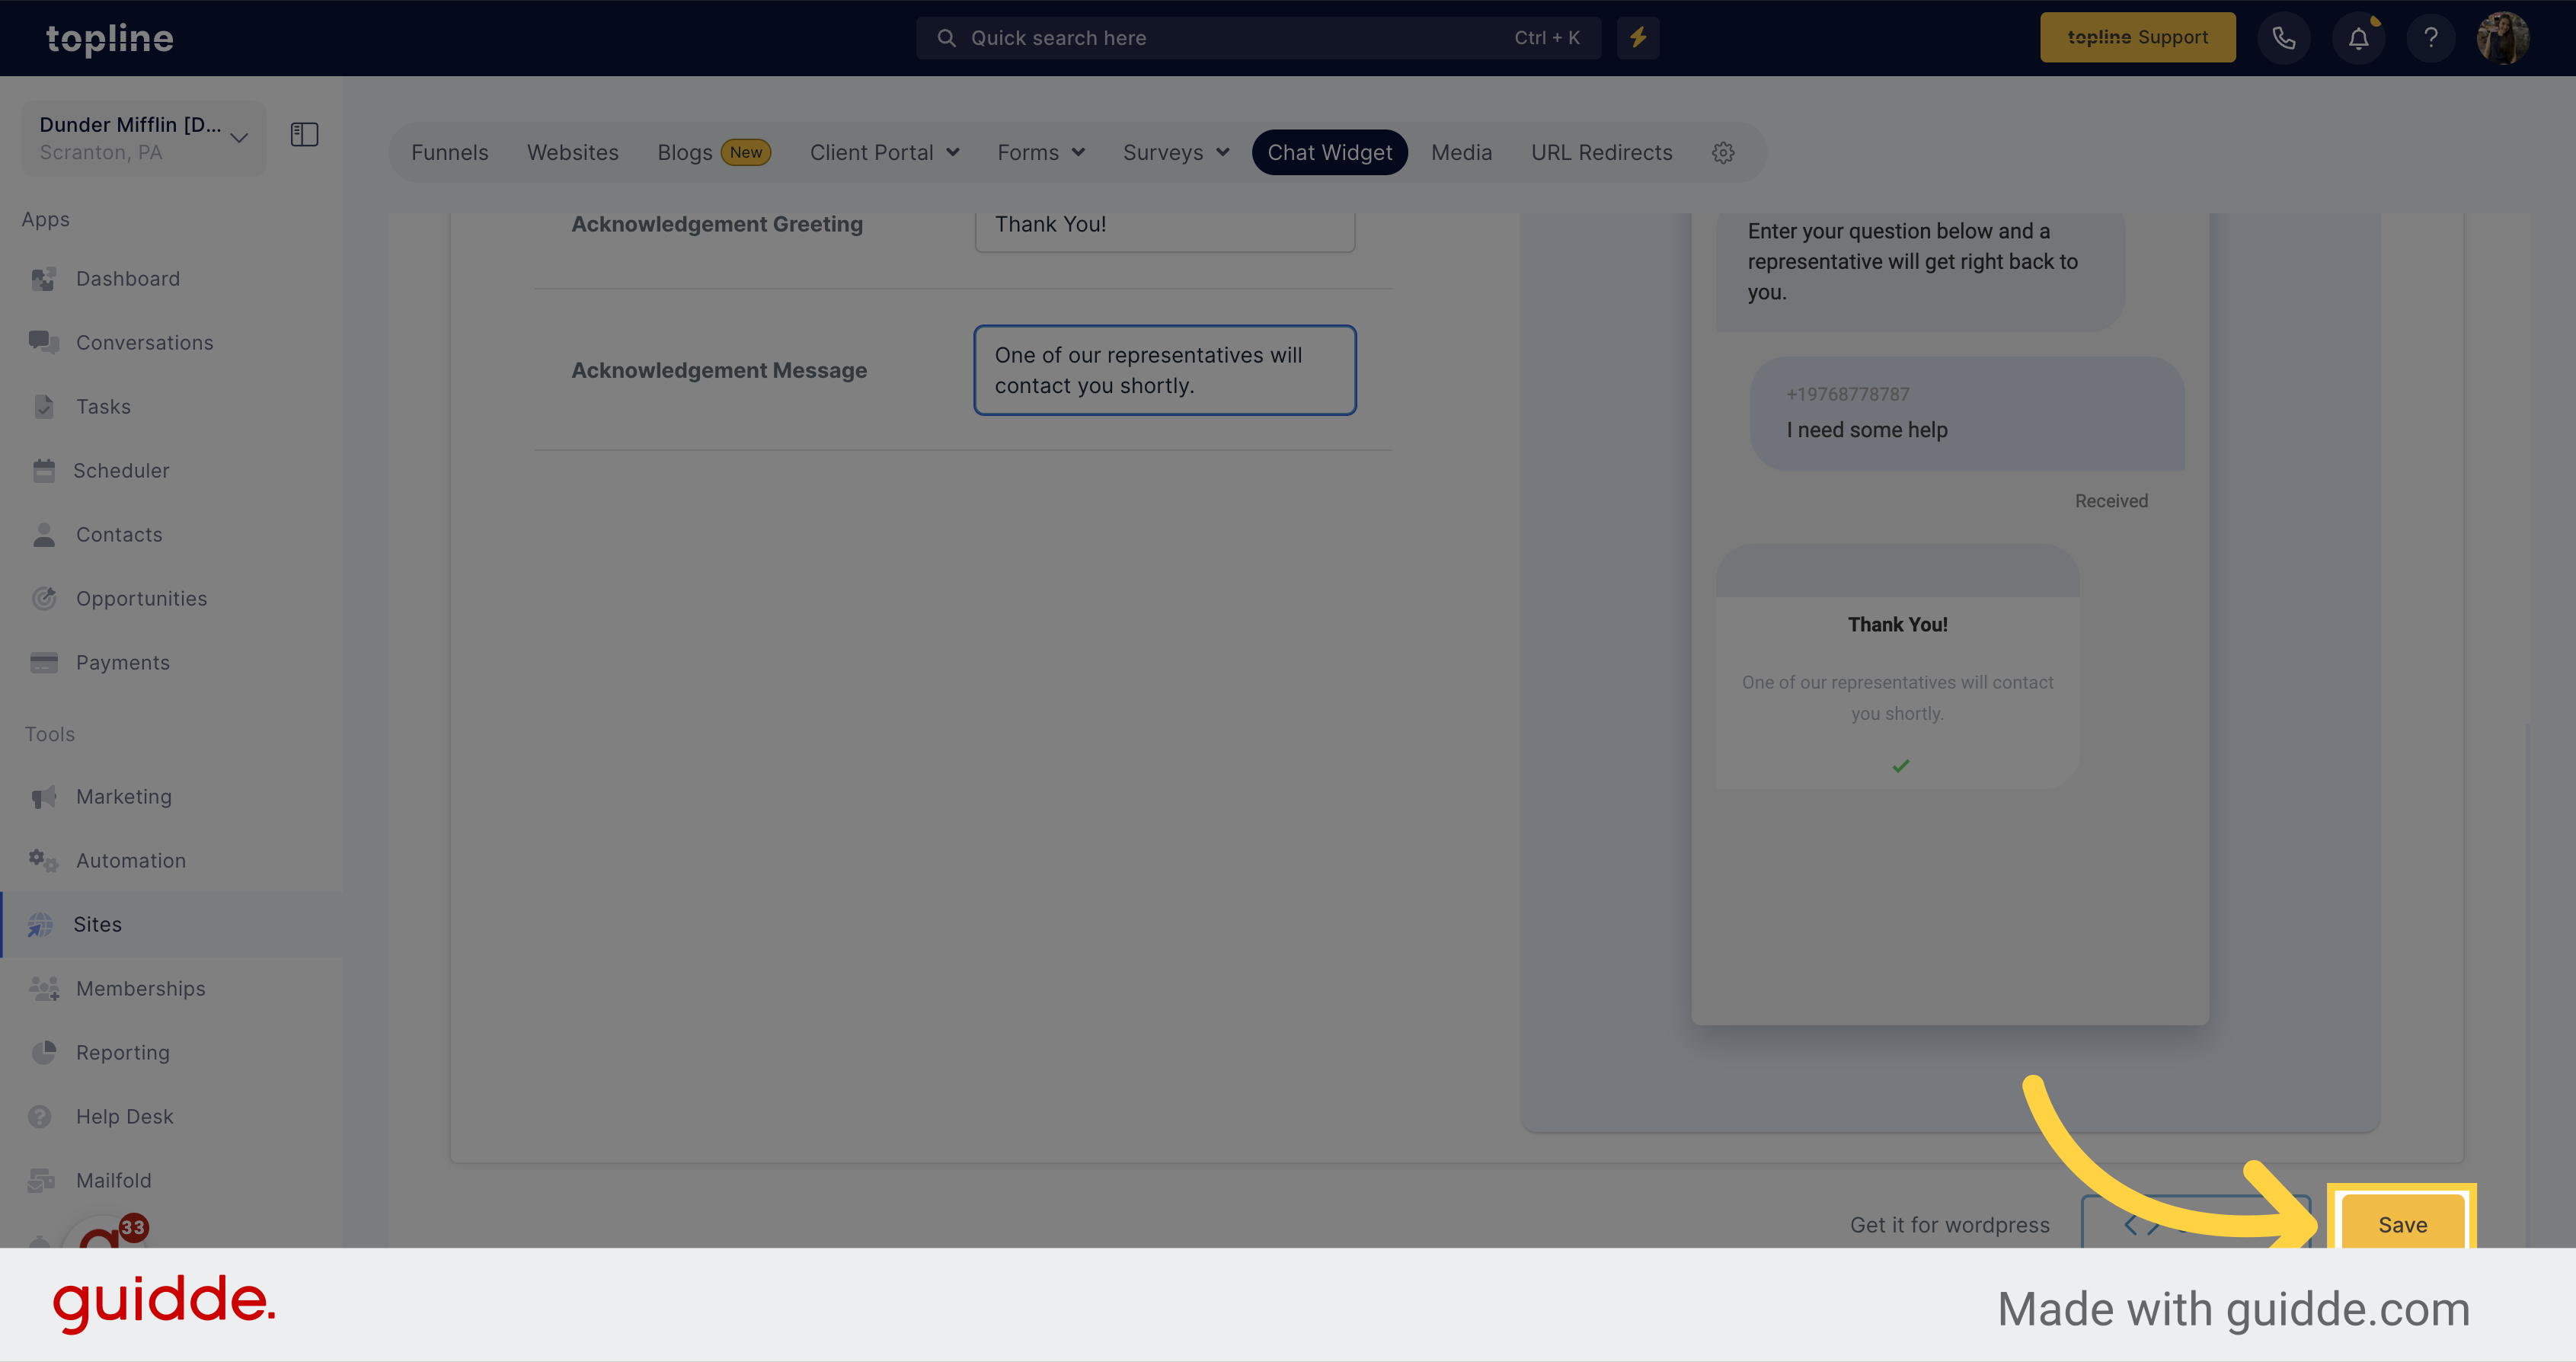
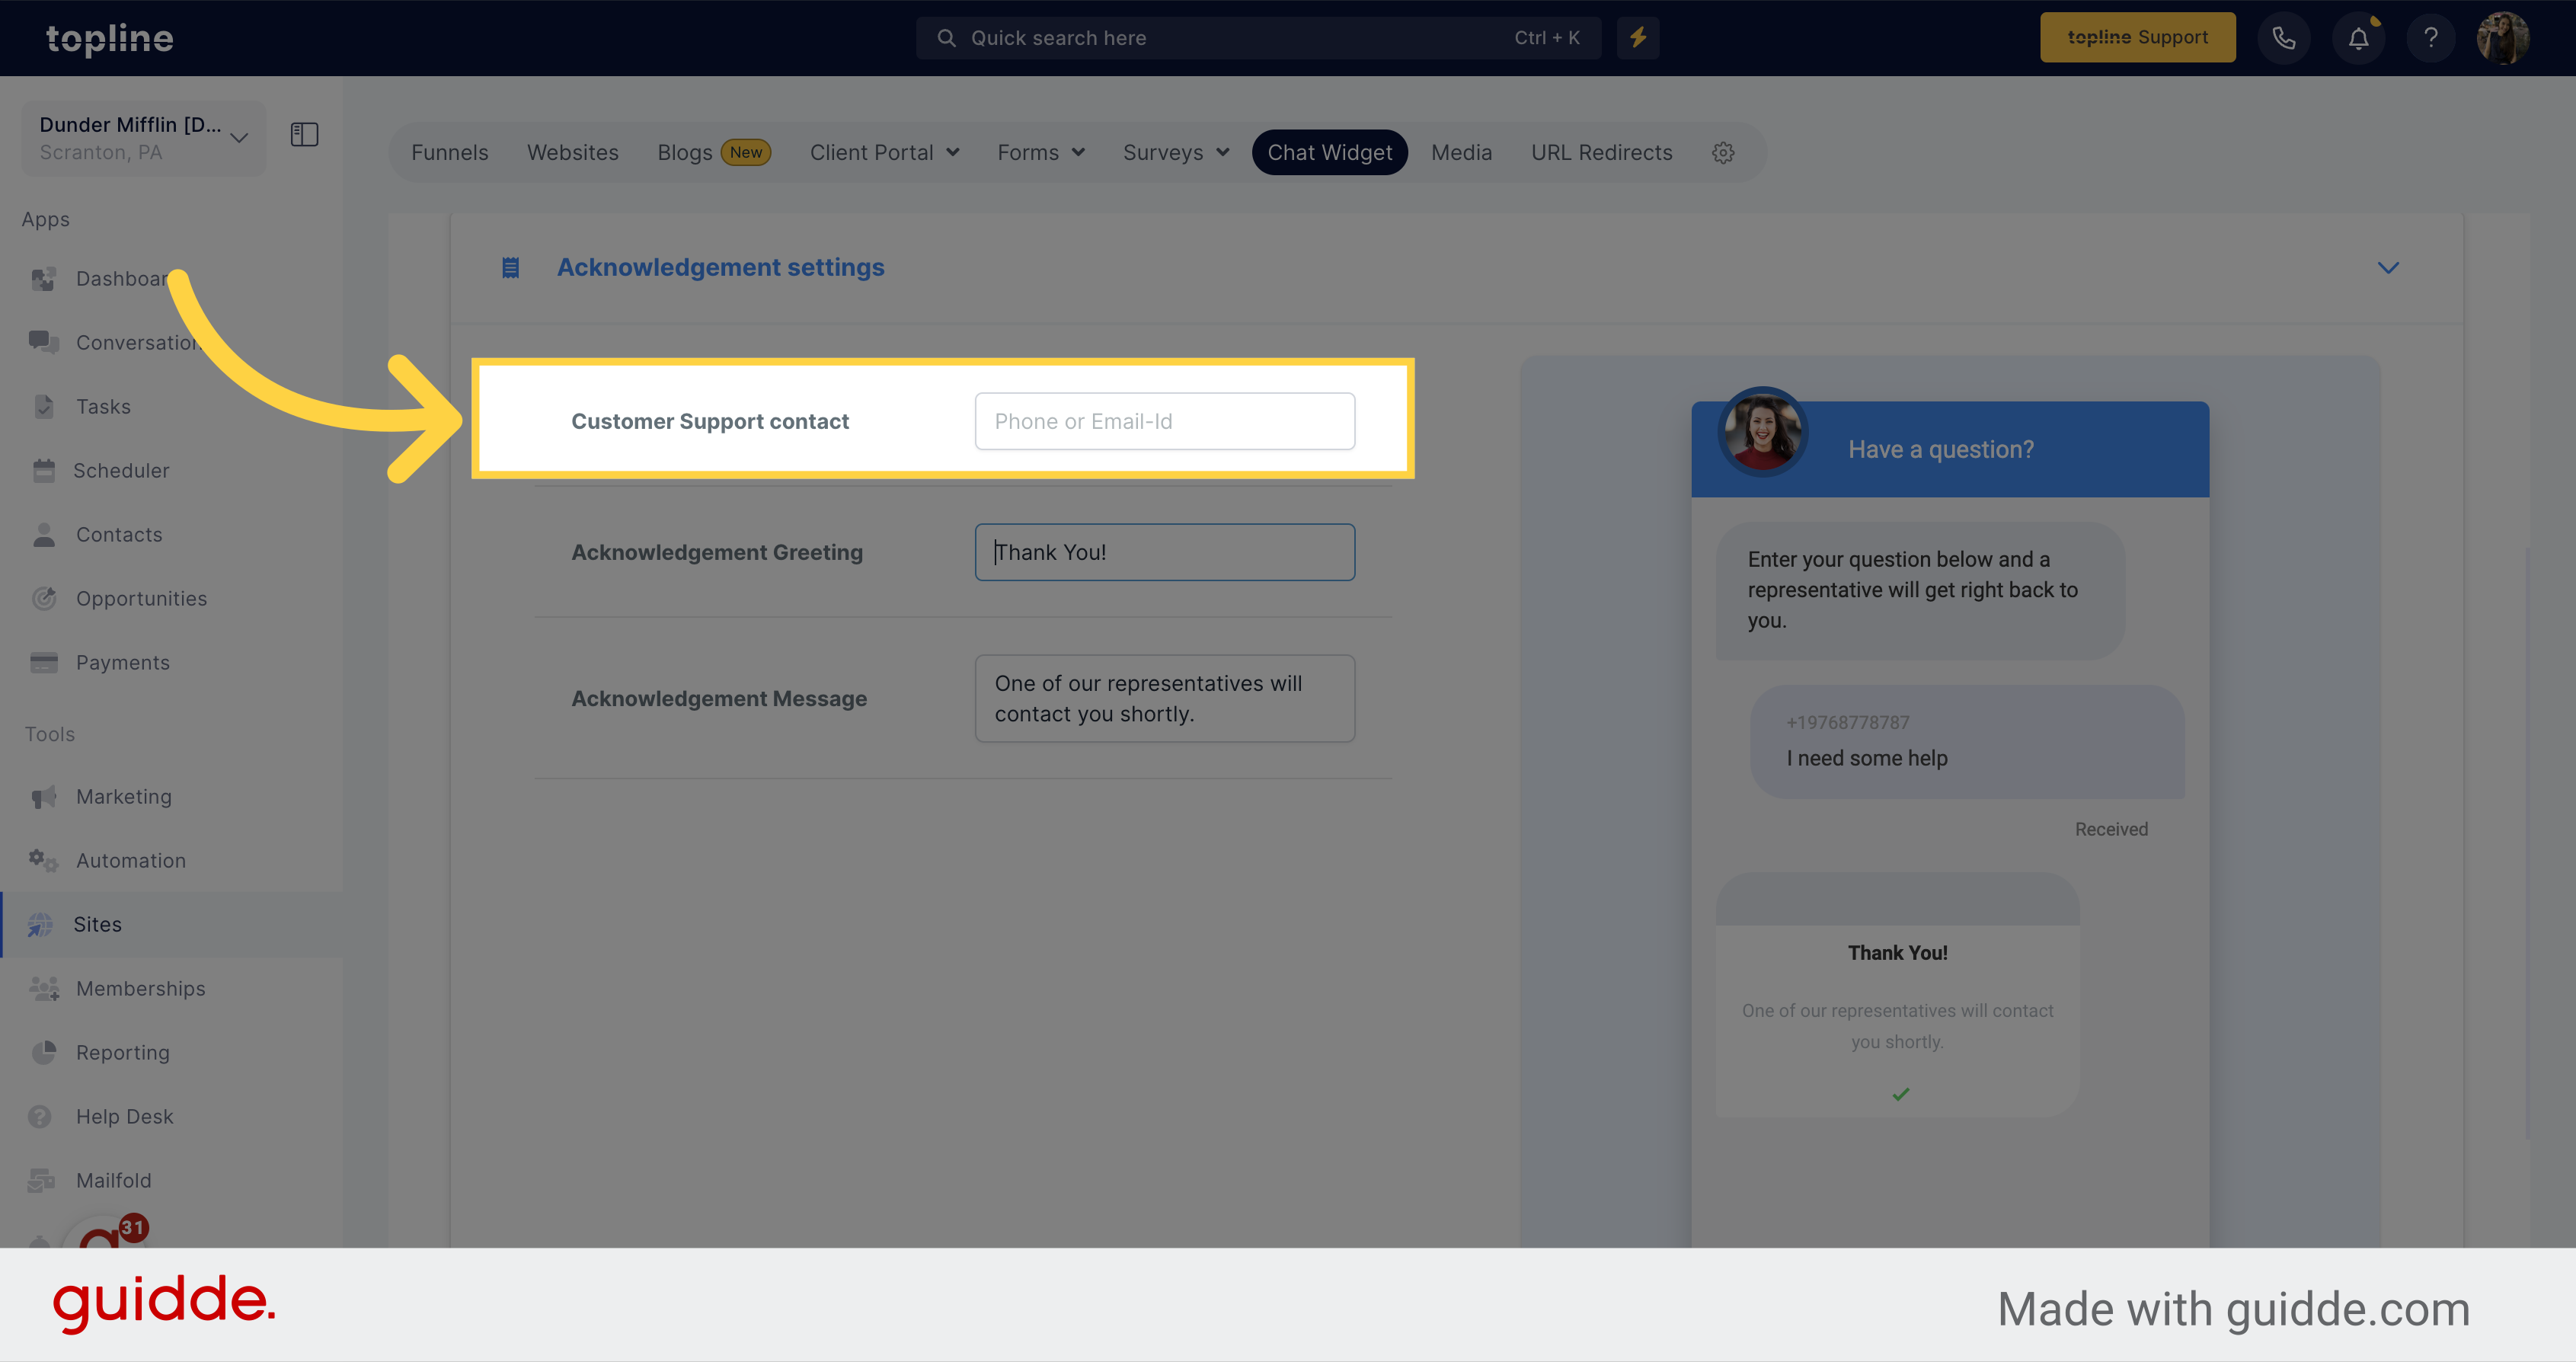
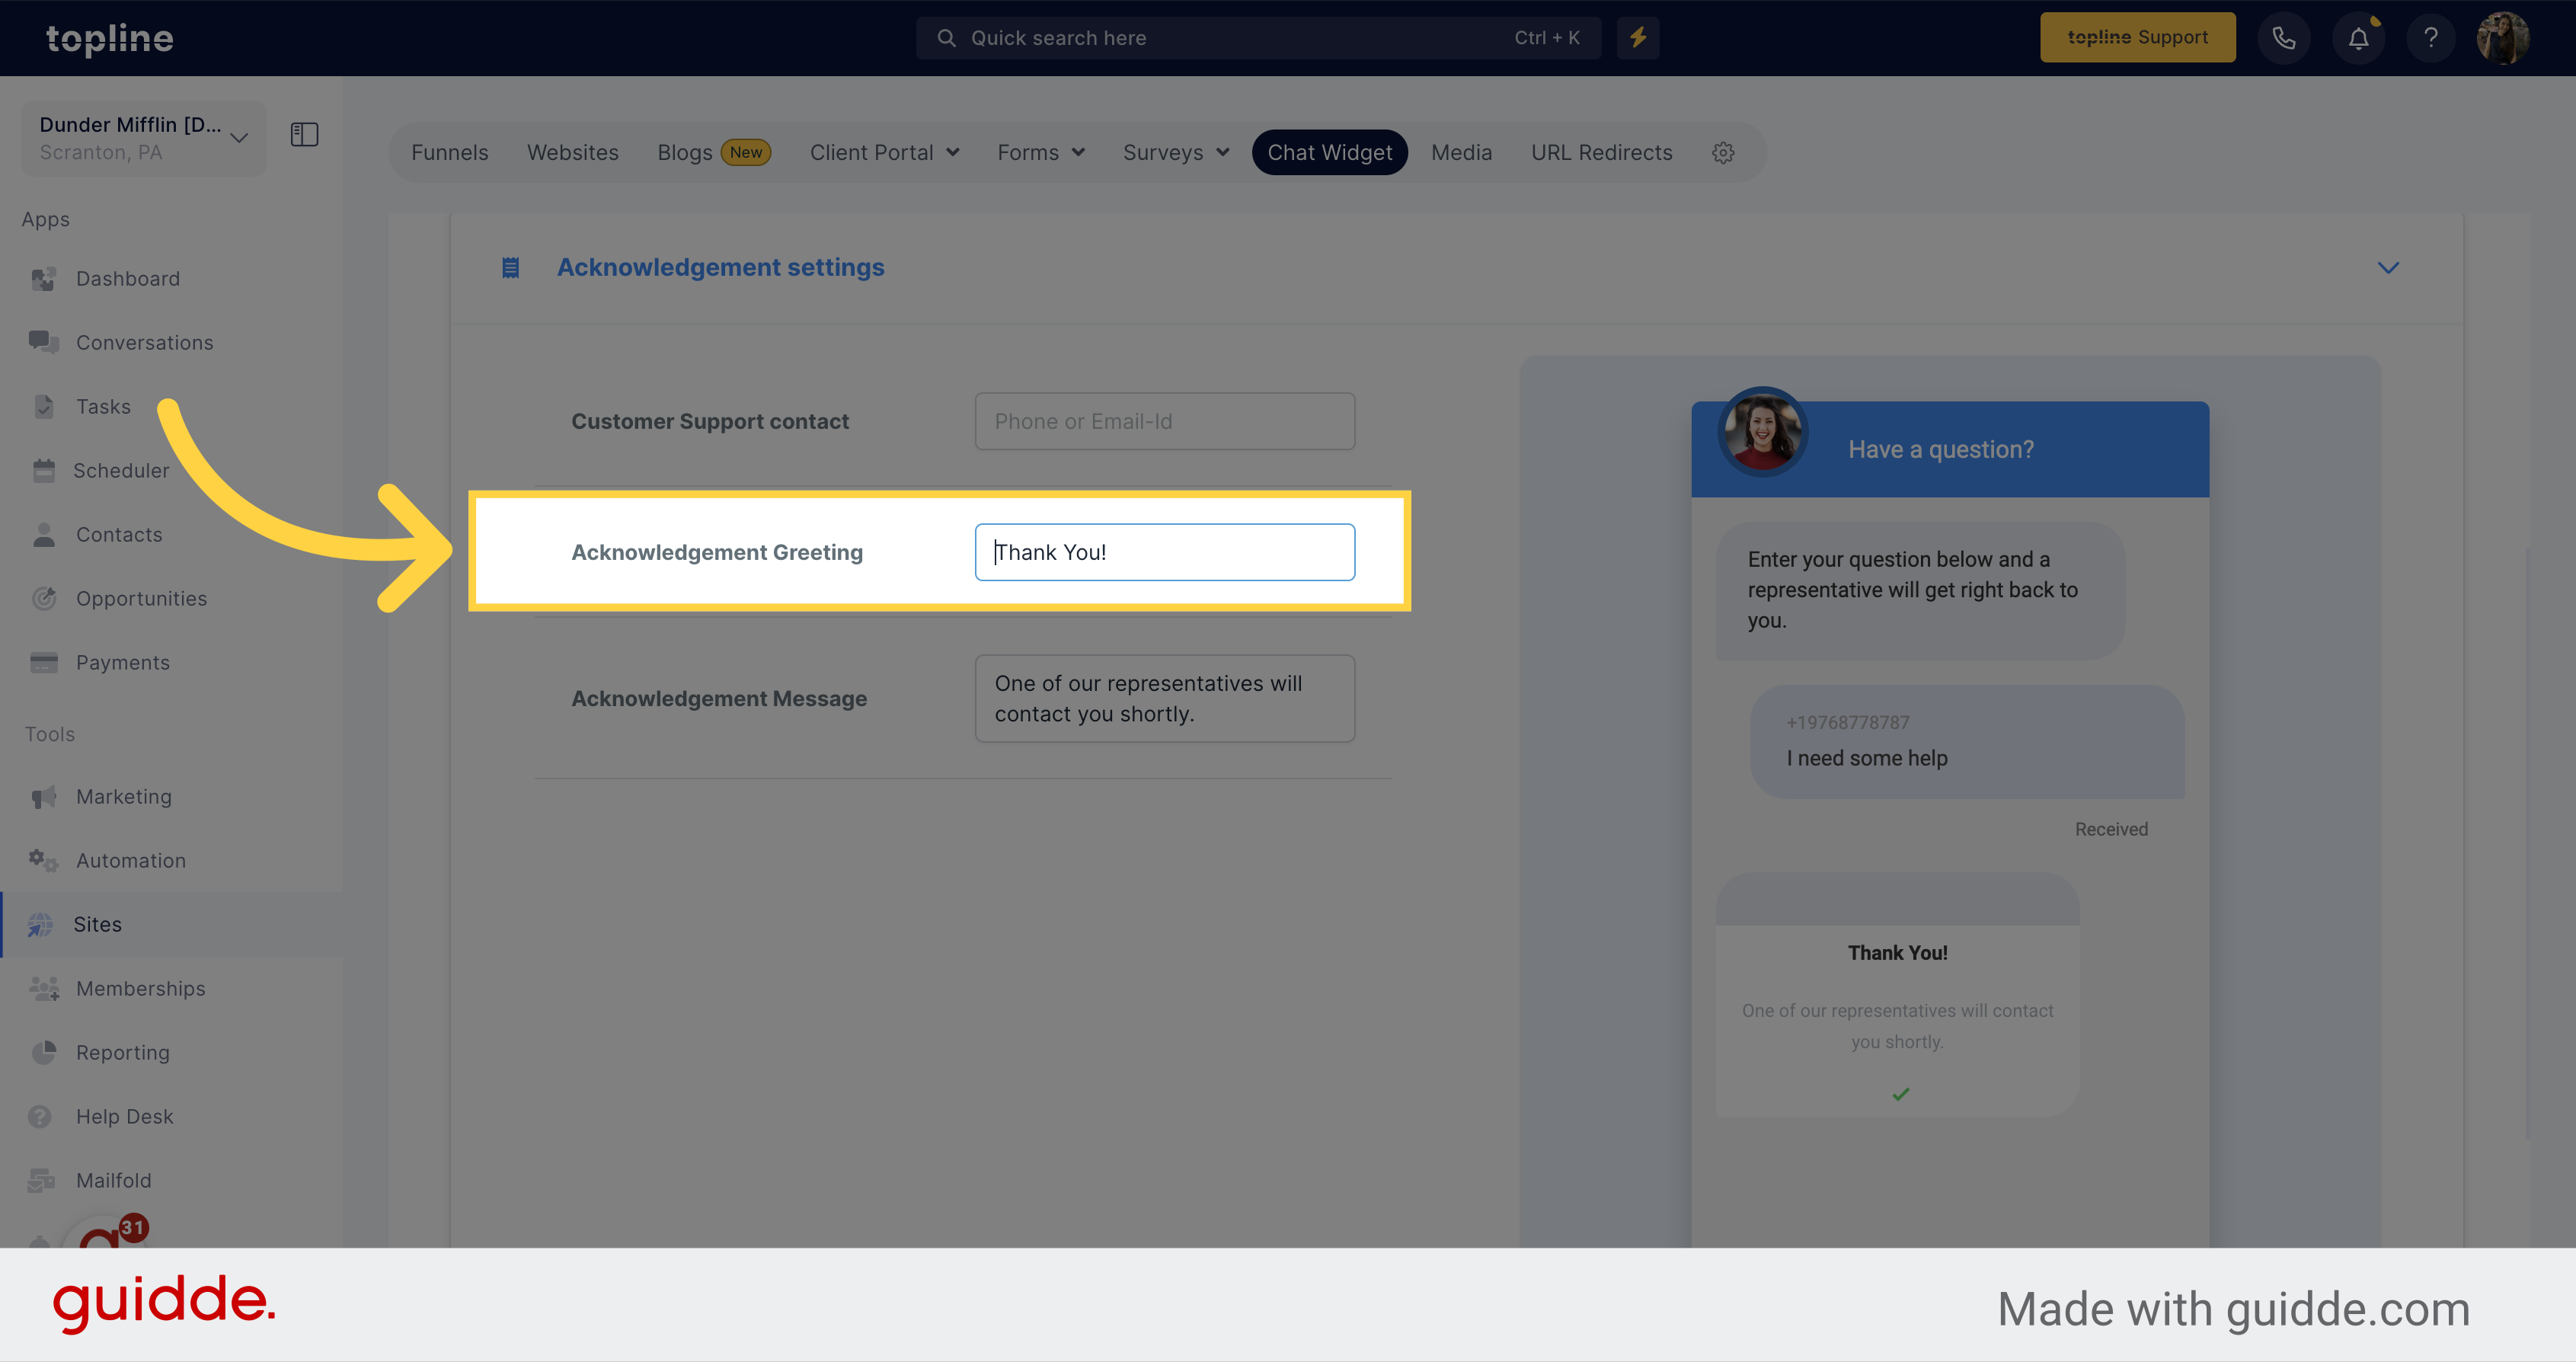
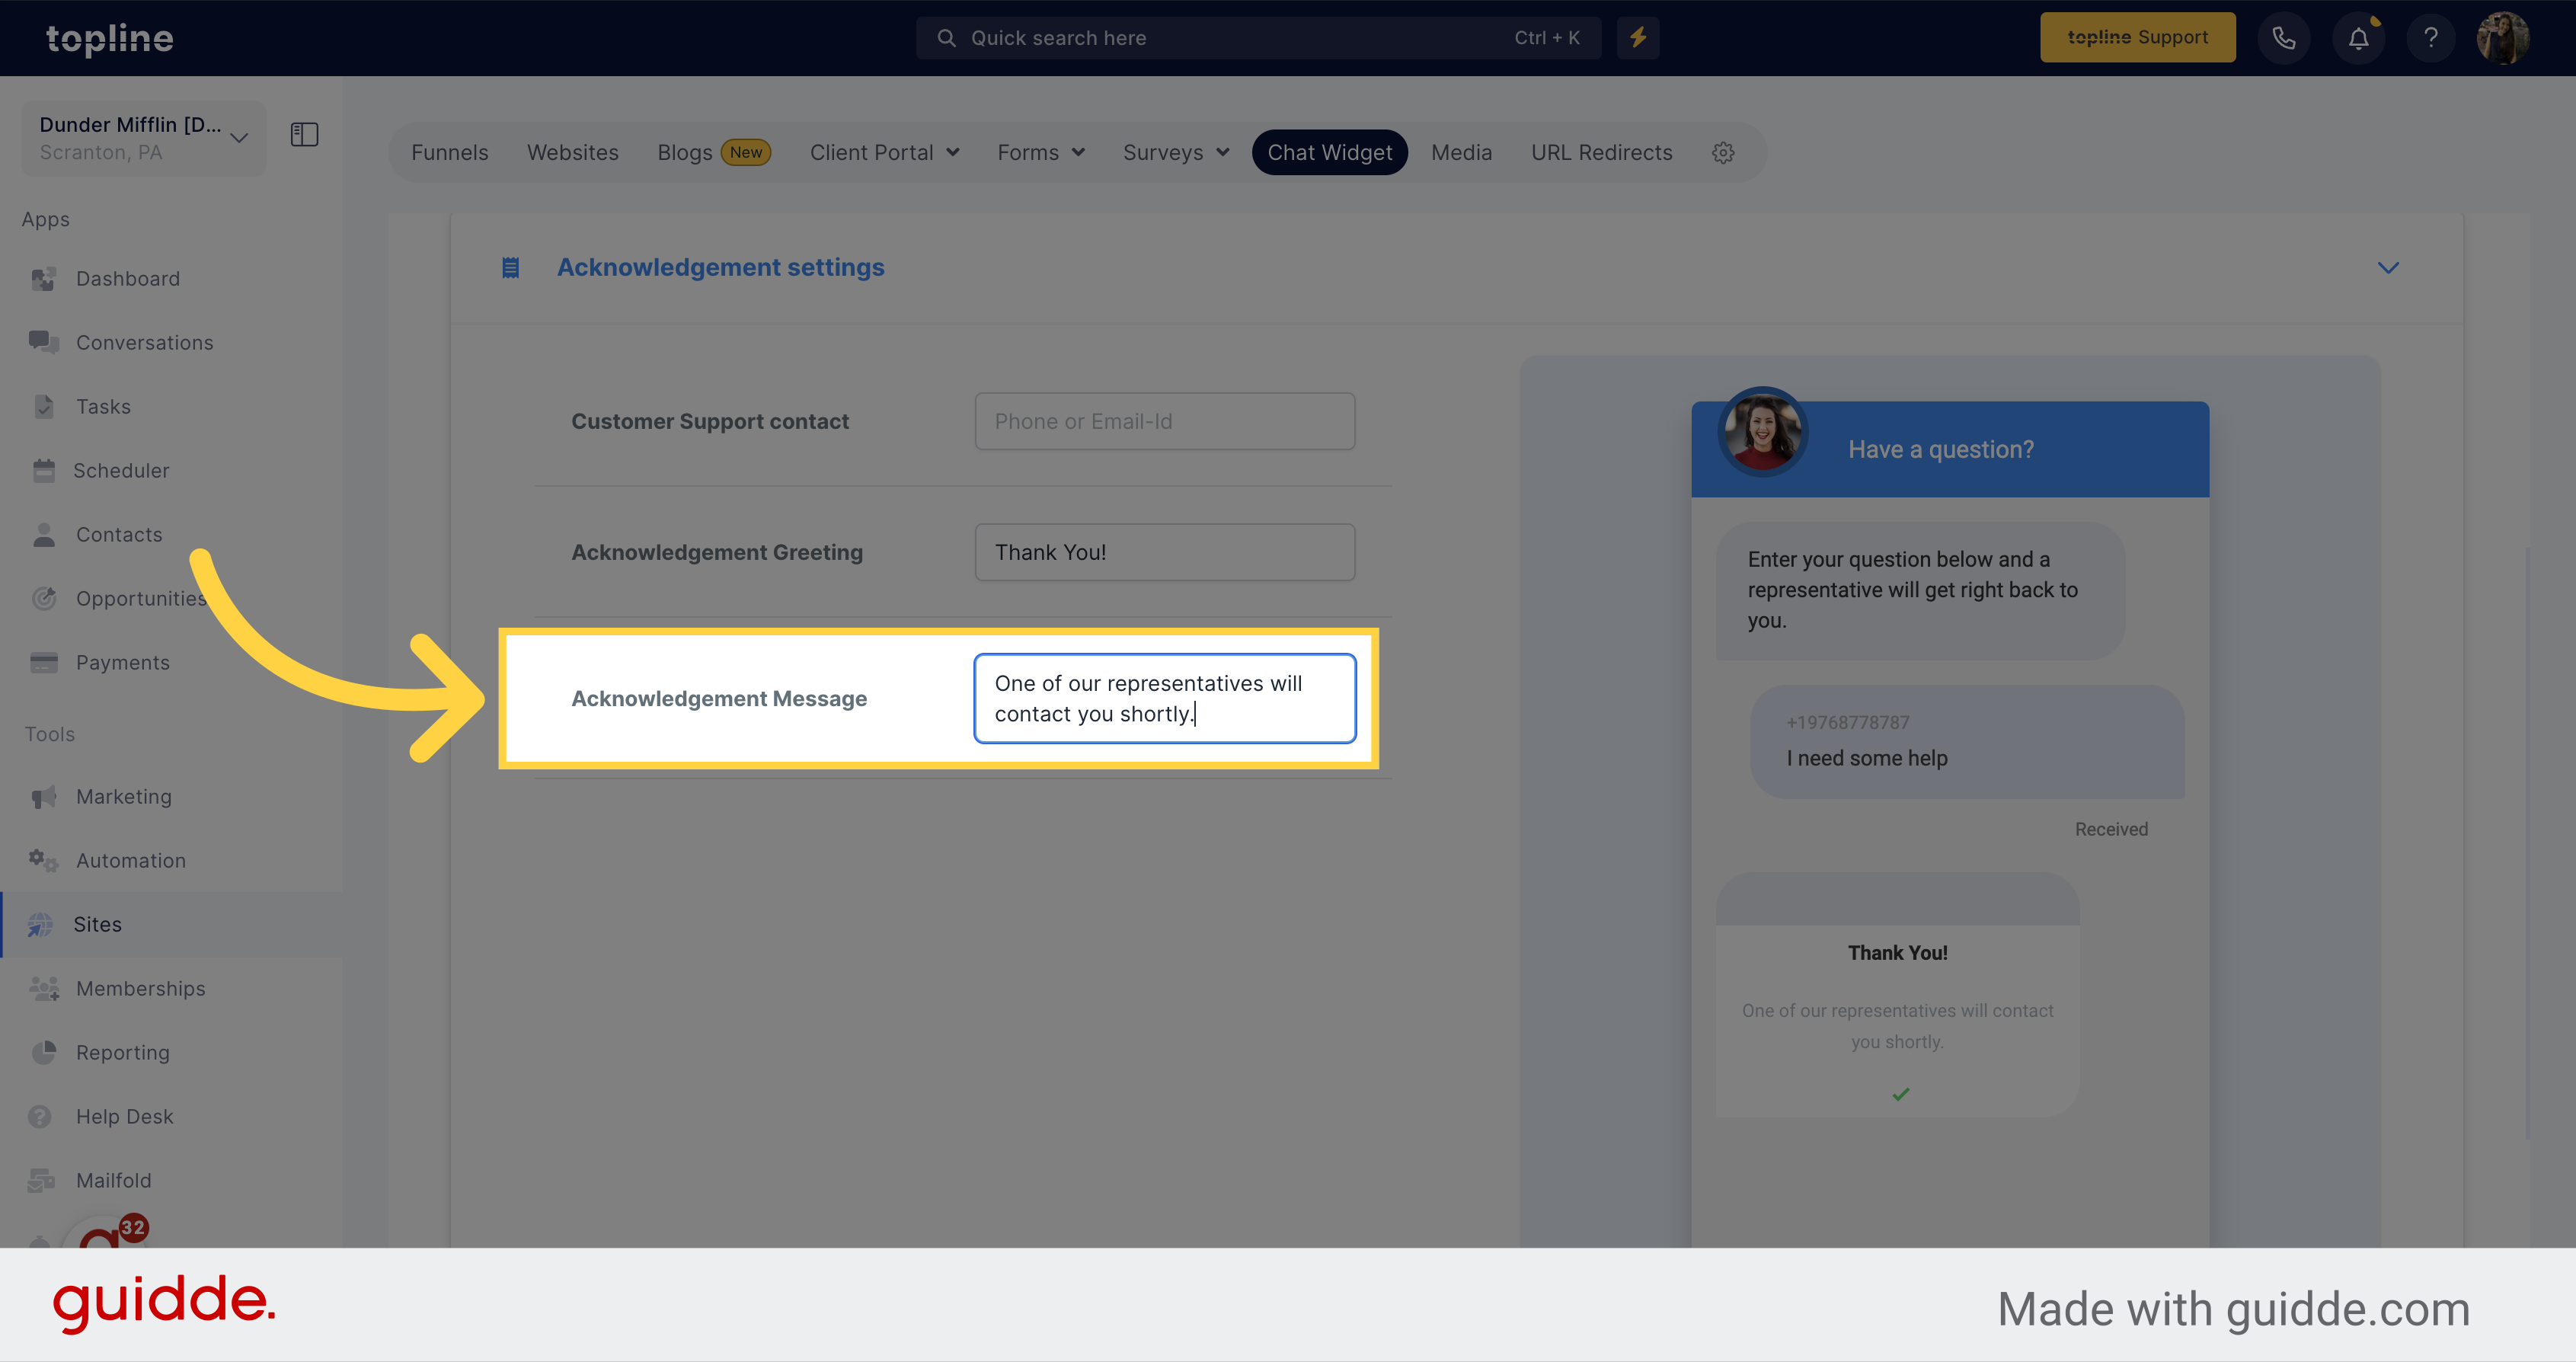
Here you can add customer support contact, acknowledgement greeting and message.
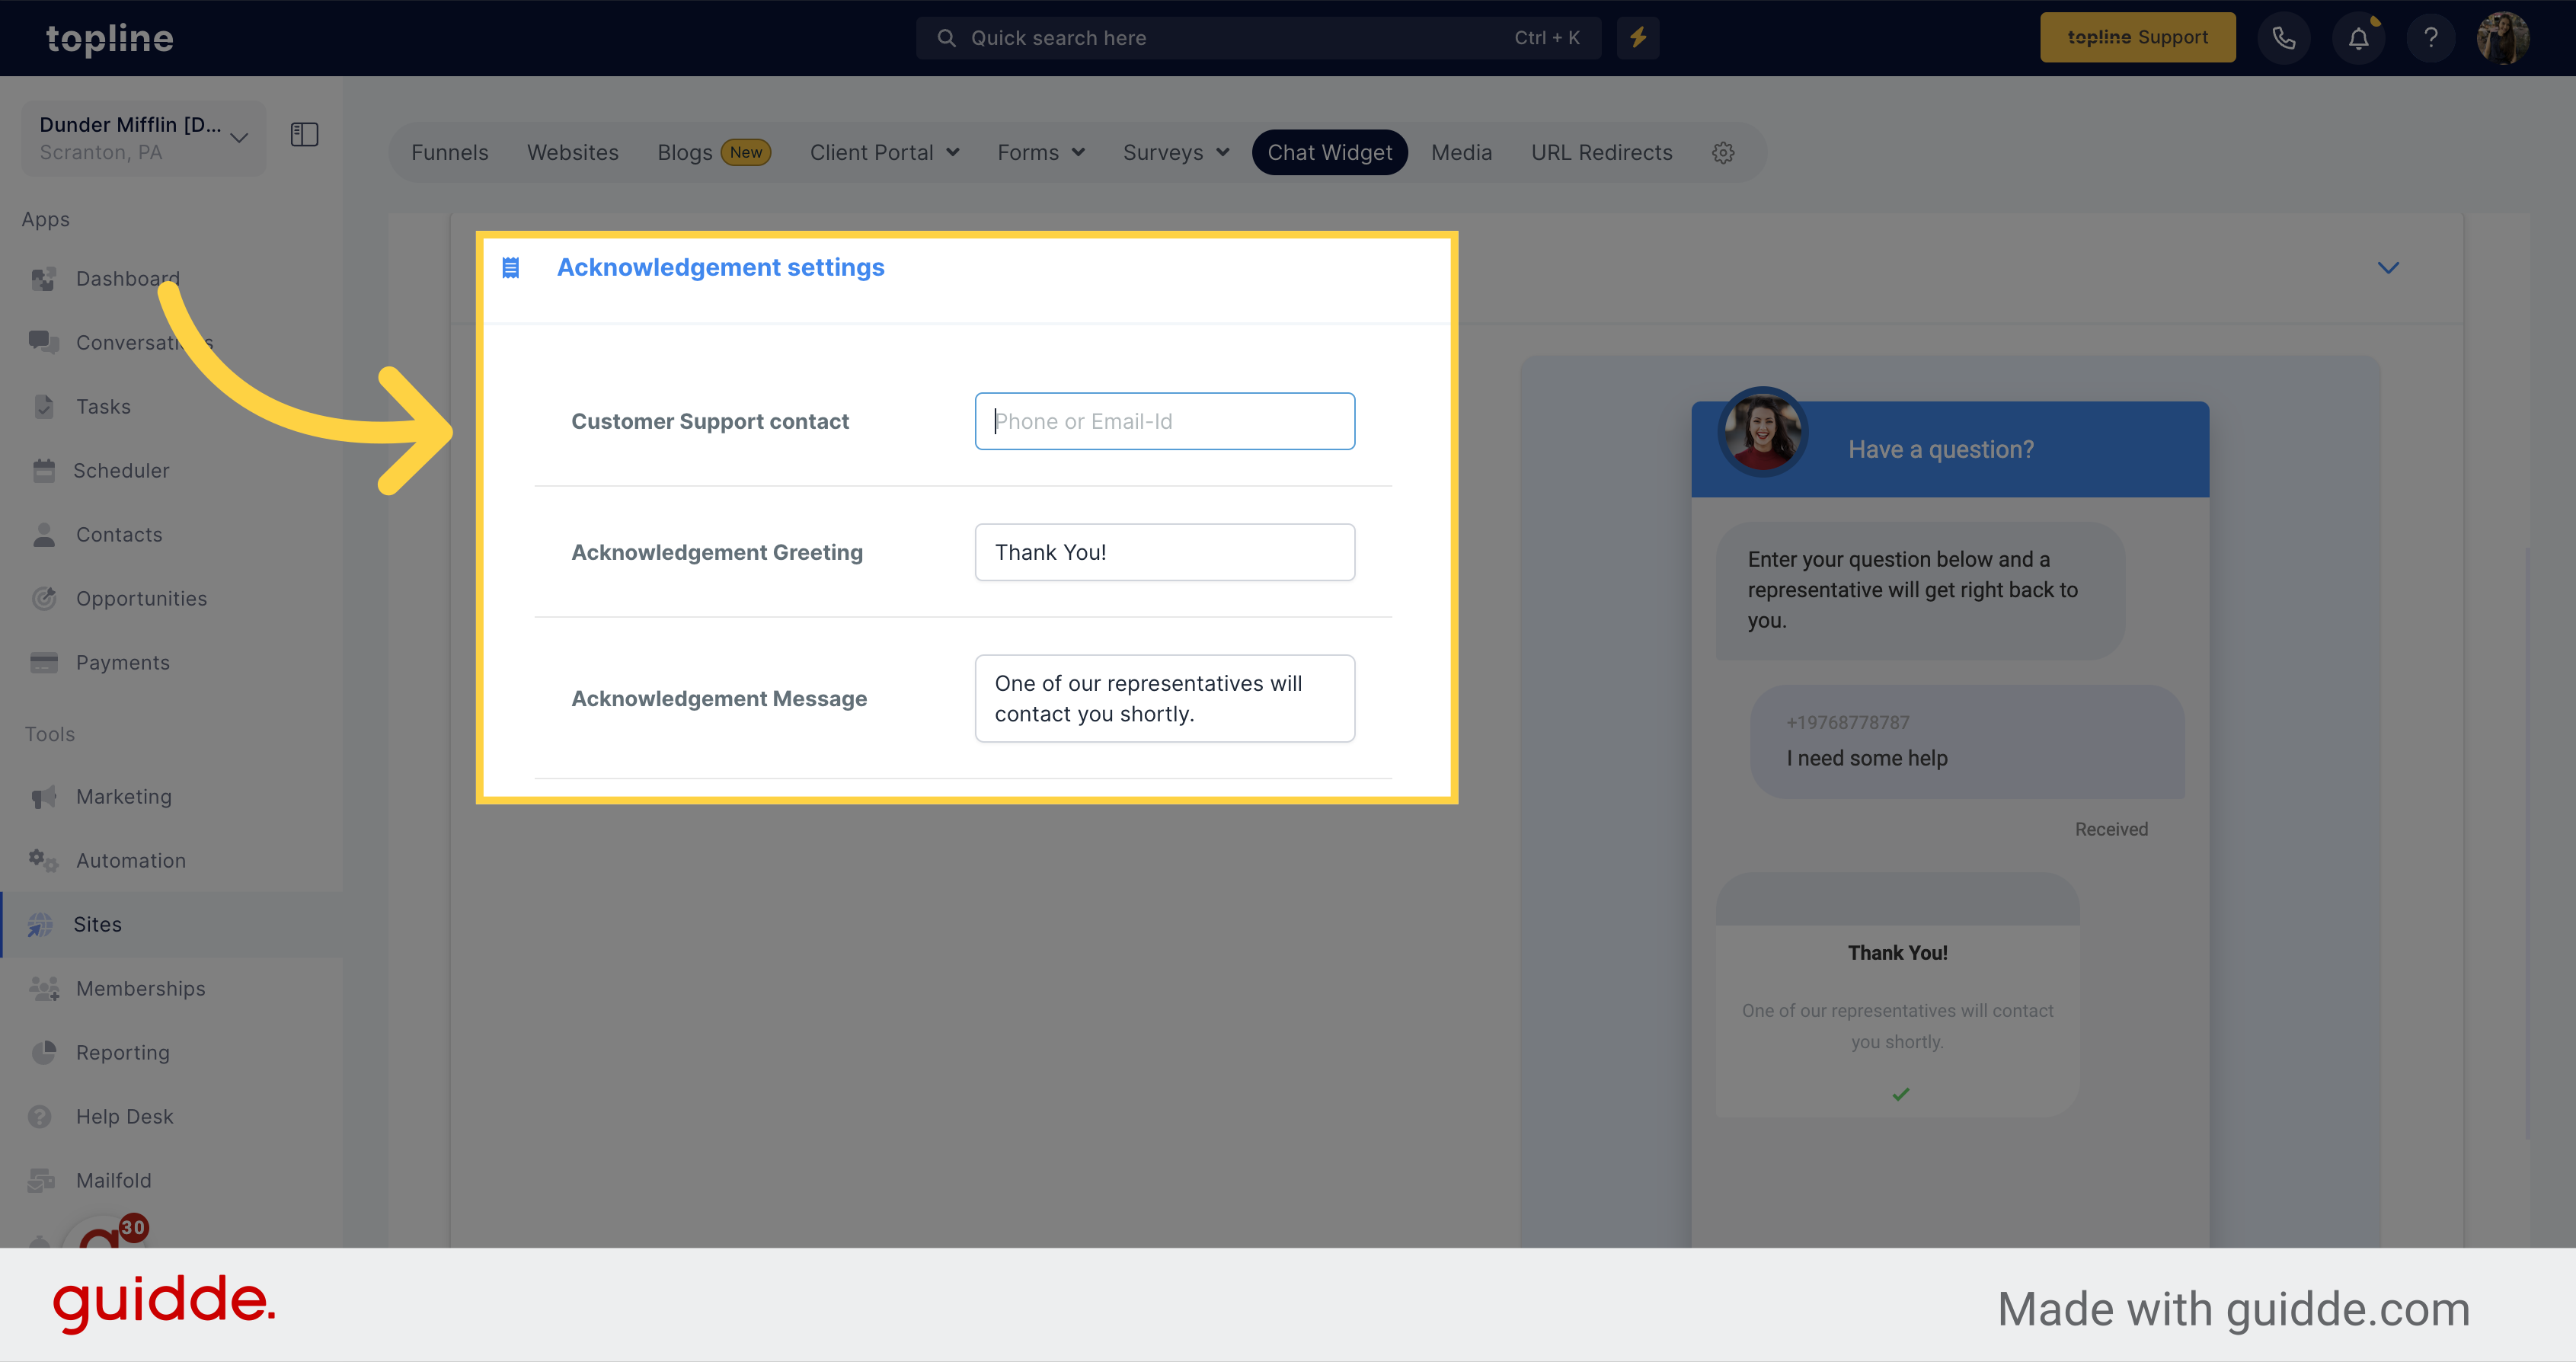
Add the phone or email id in this field.
Insert the greeting for your visitors.
Insert the message information in this field.
Once you have finished click on the save button.