Only users with an 'Admin' role will have the option to import and export contacts.
The import file needs to be a .csv file
Have only one sheet/tab within the spreadsheet
Be smaller than 50MB
(Note: a typical .csv file with 4 columns and 10,000 records will be ~500kb in size)
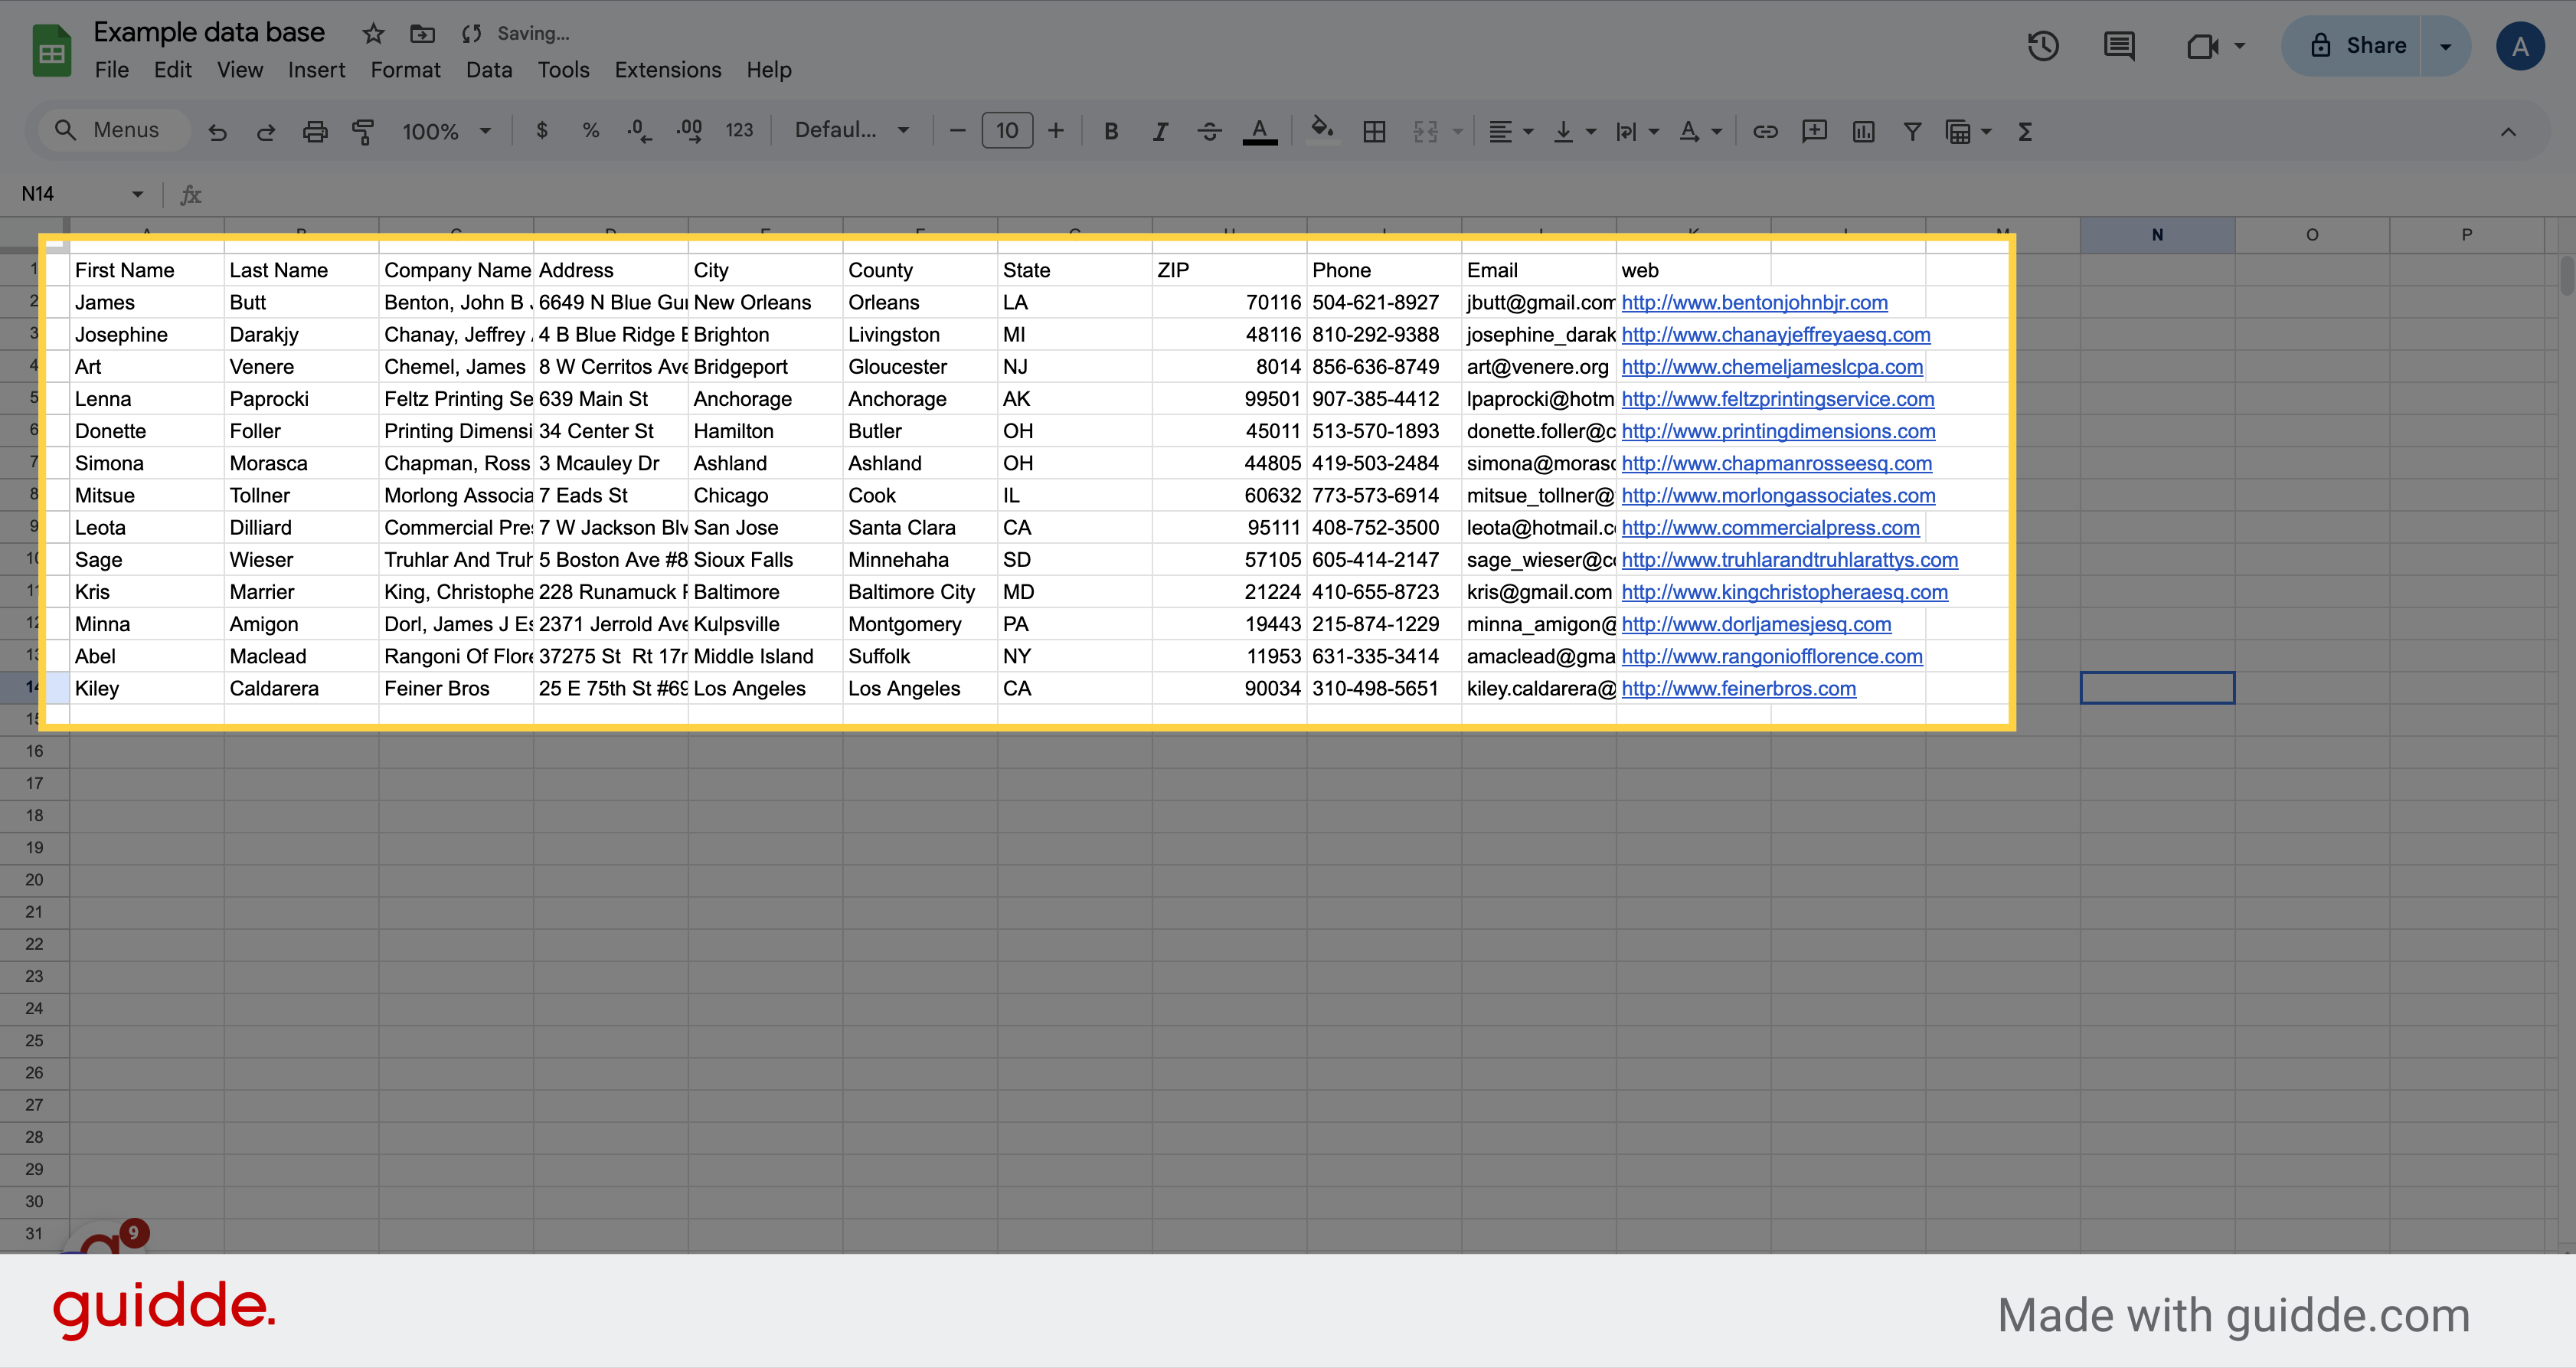
The first row should NOT be blank. Include a header row in which at least one column header corresponds to a field in the system.
Check all the information fields you have from your contacts.
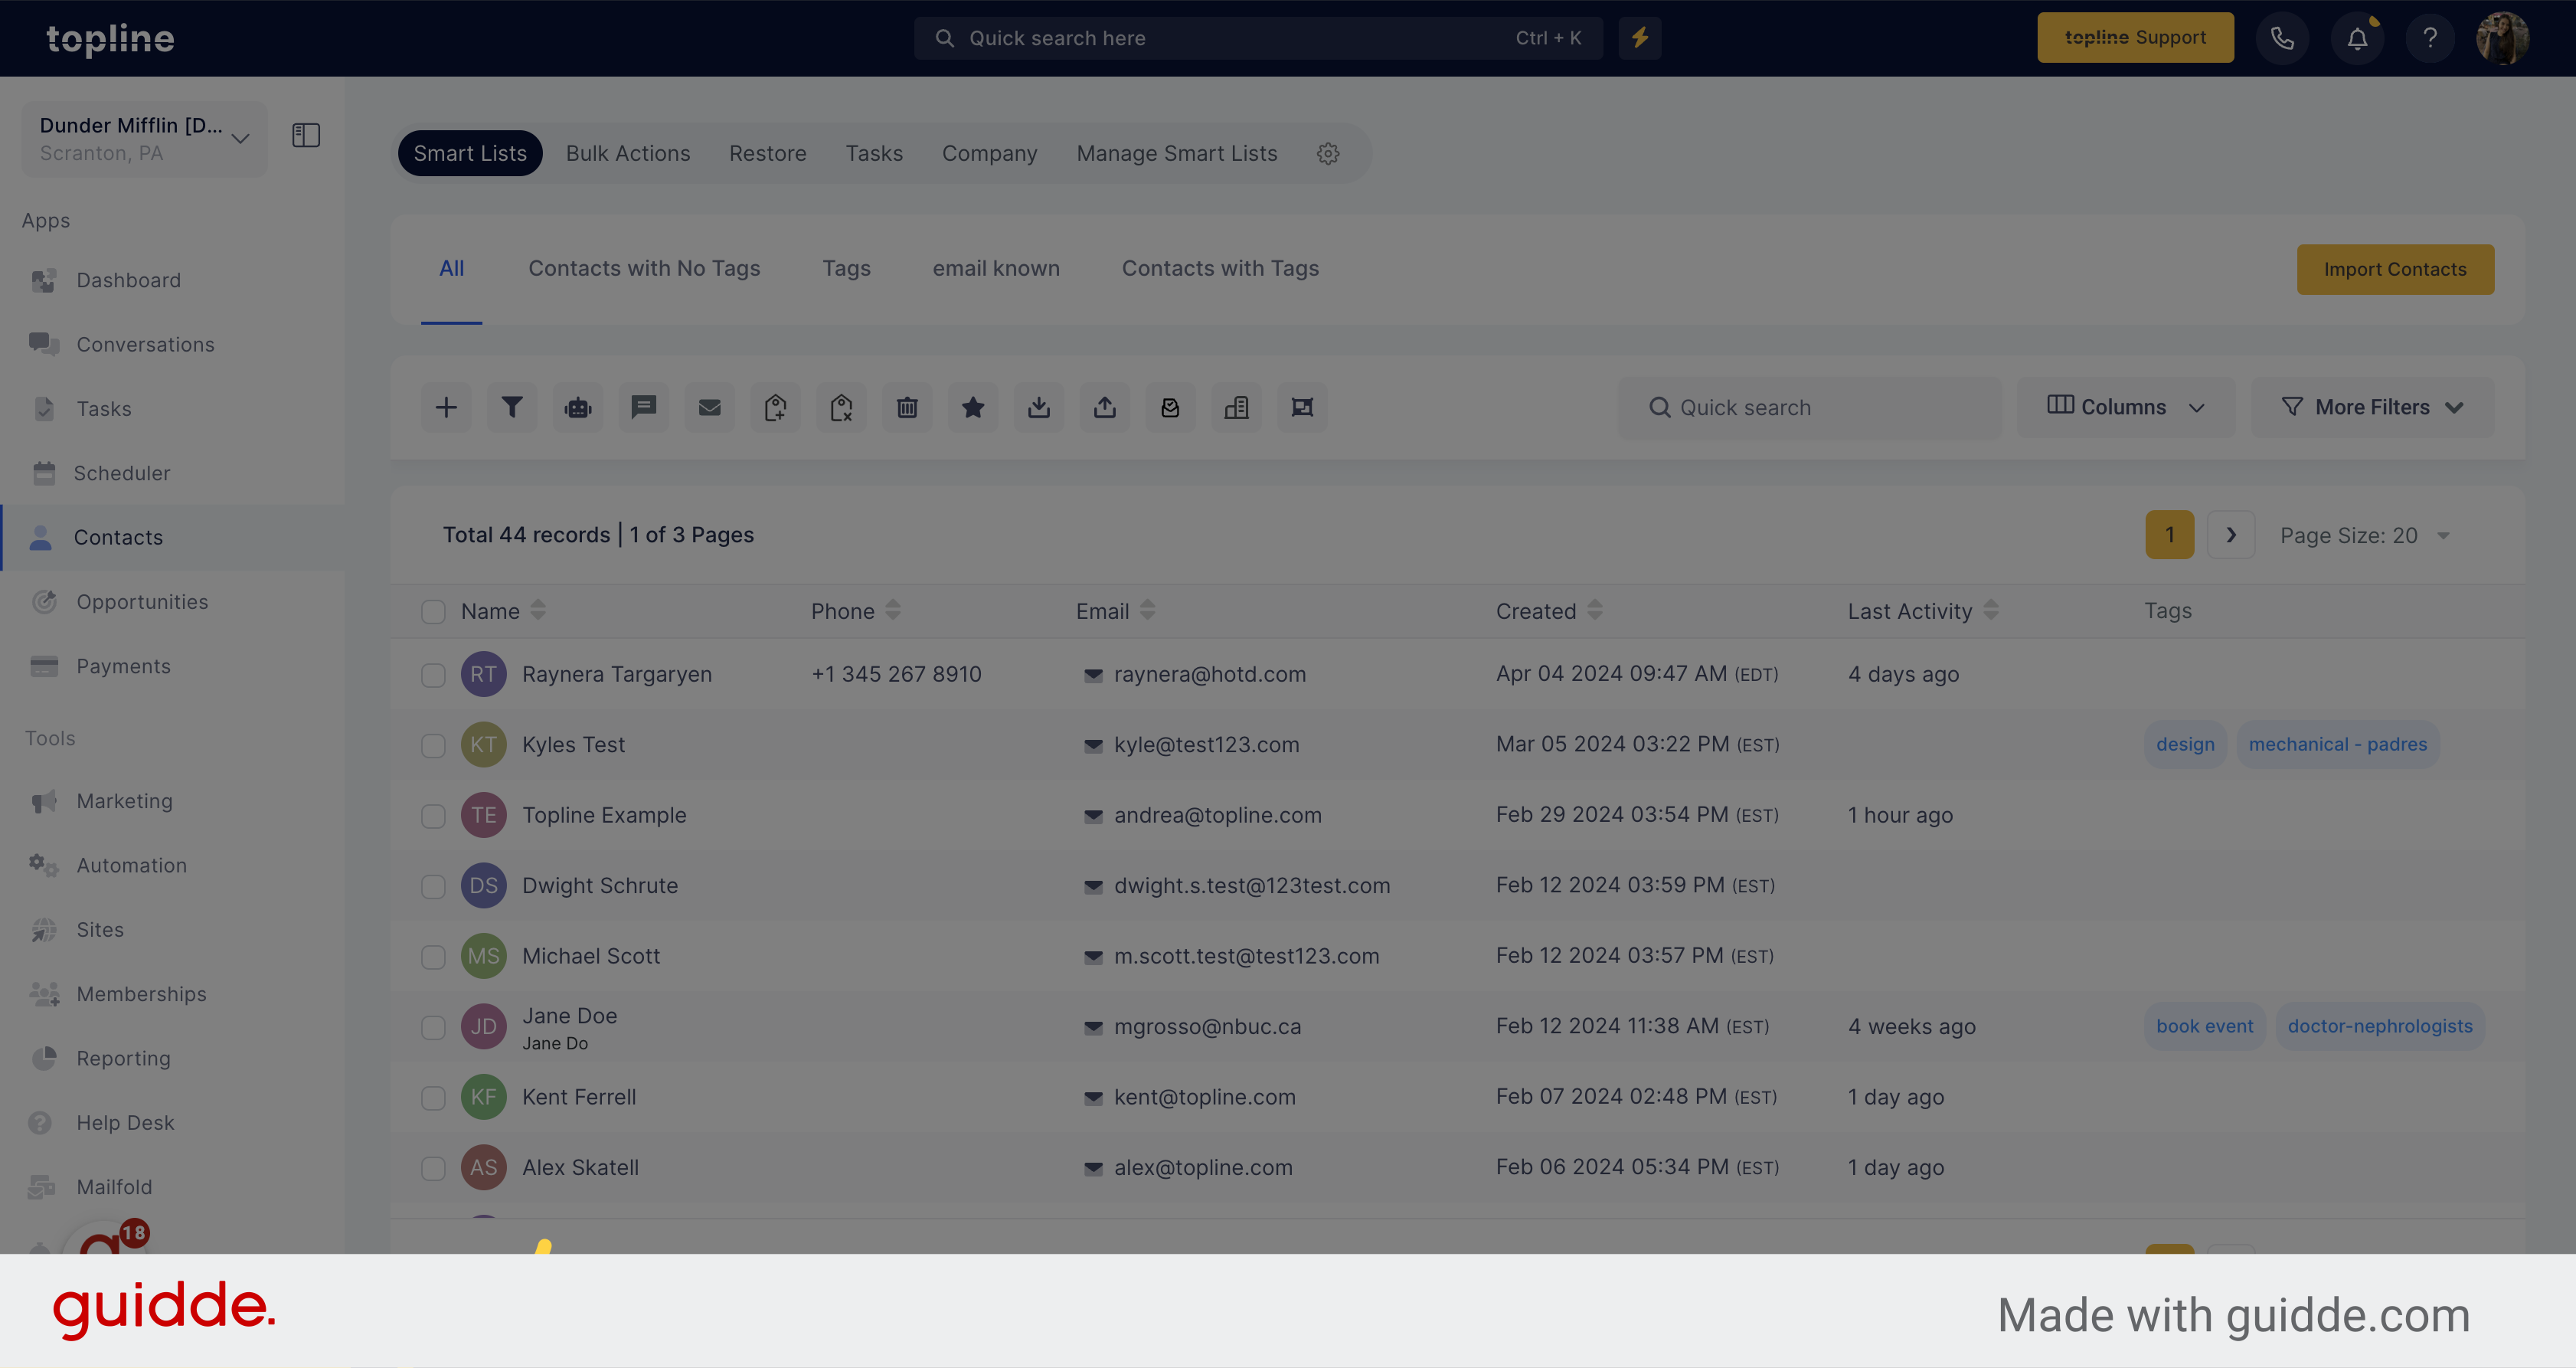
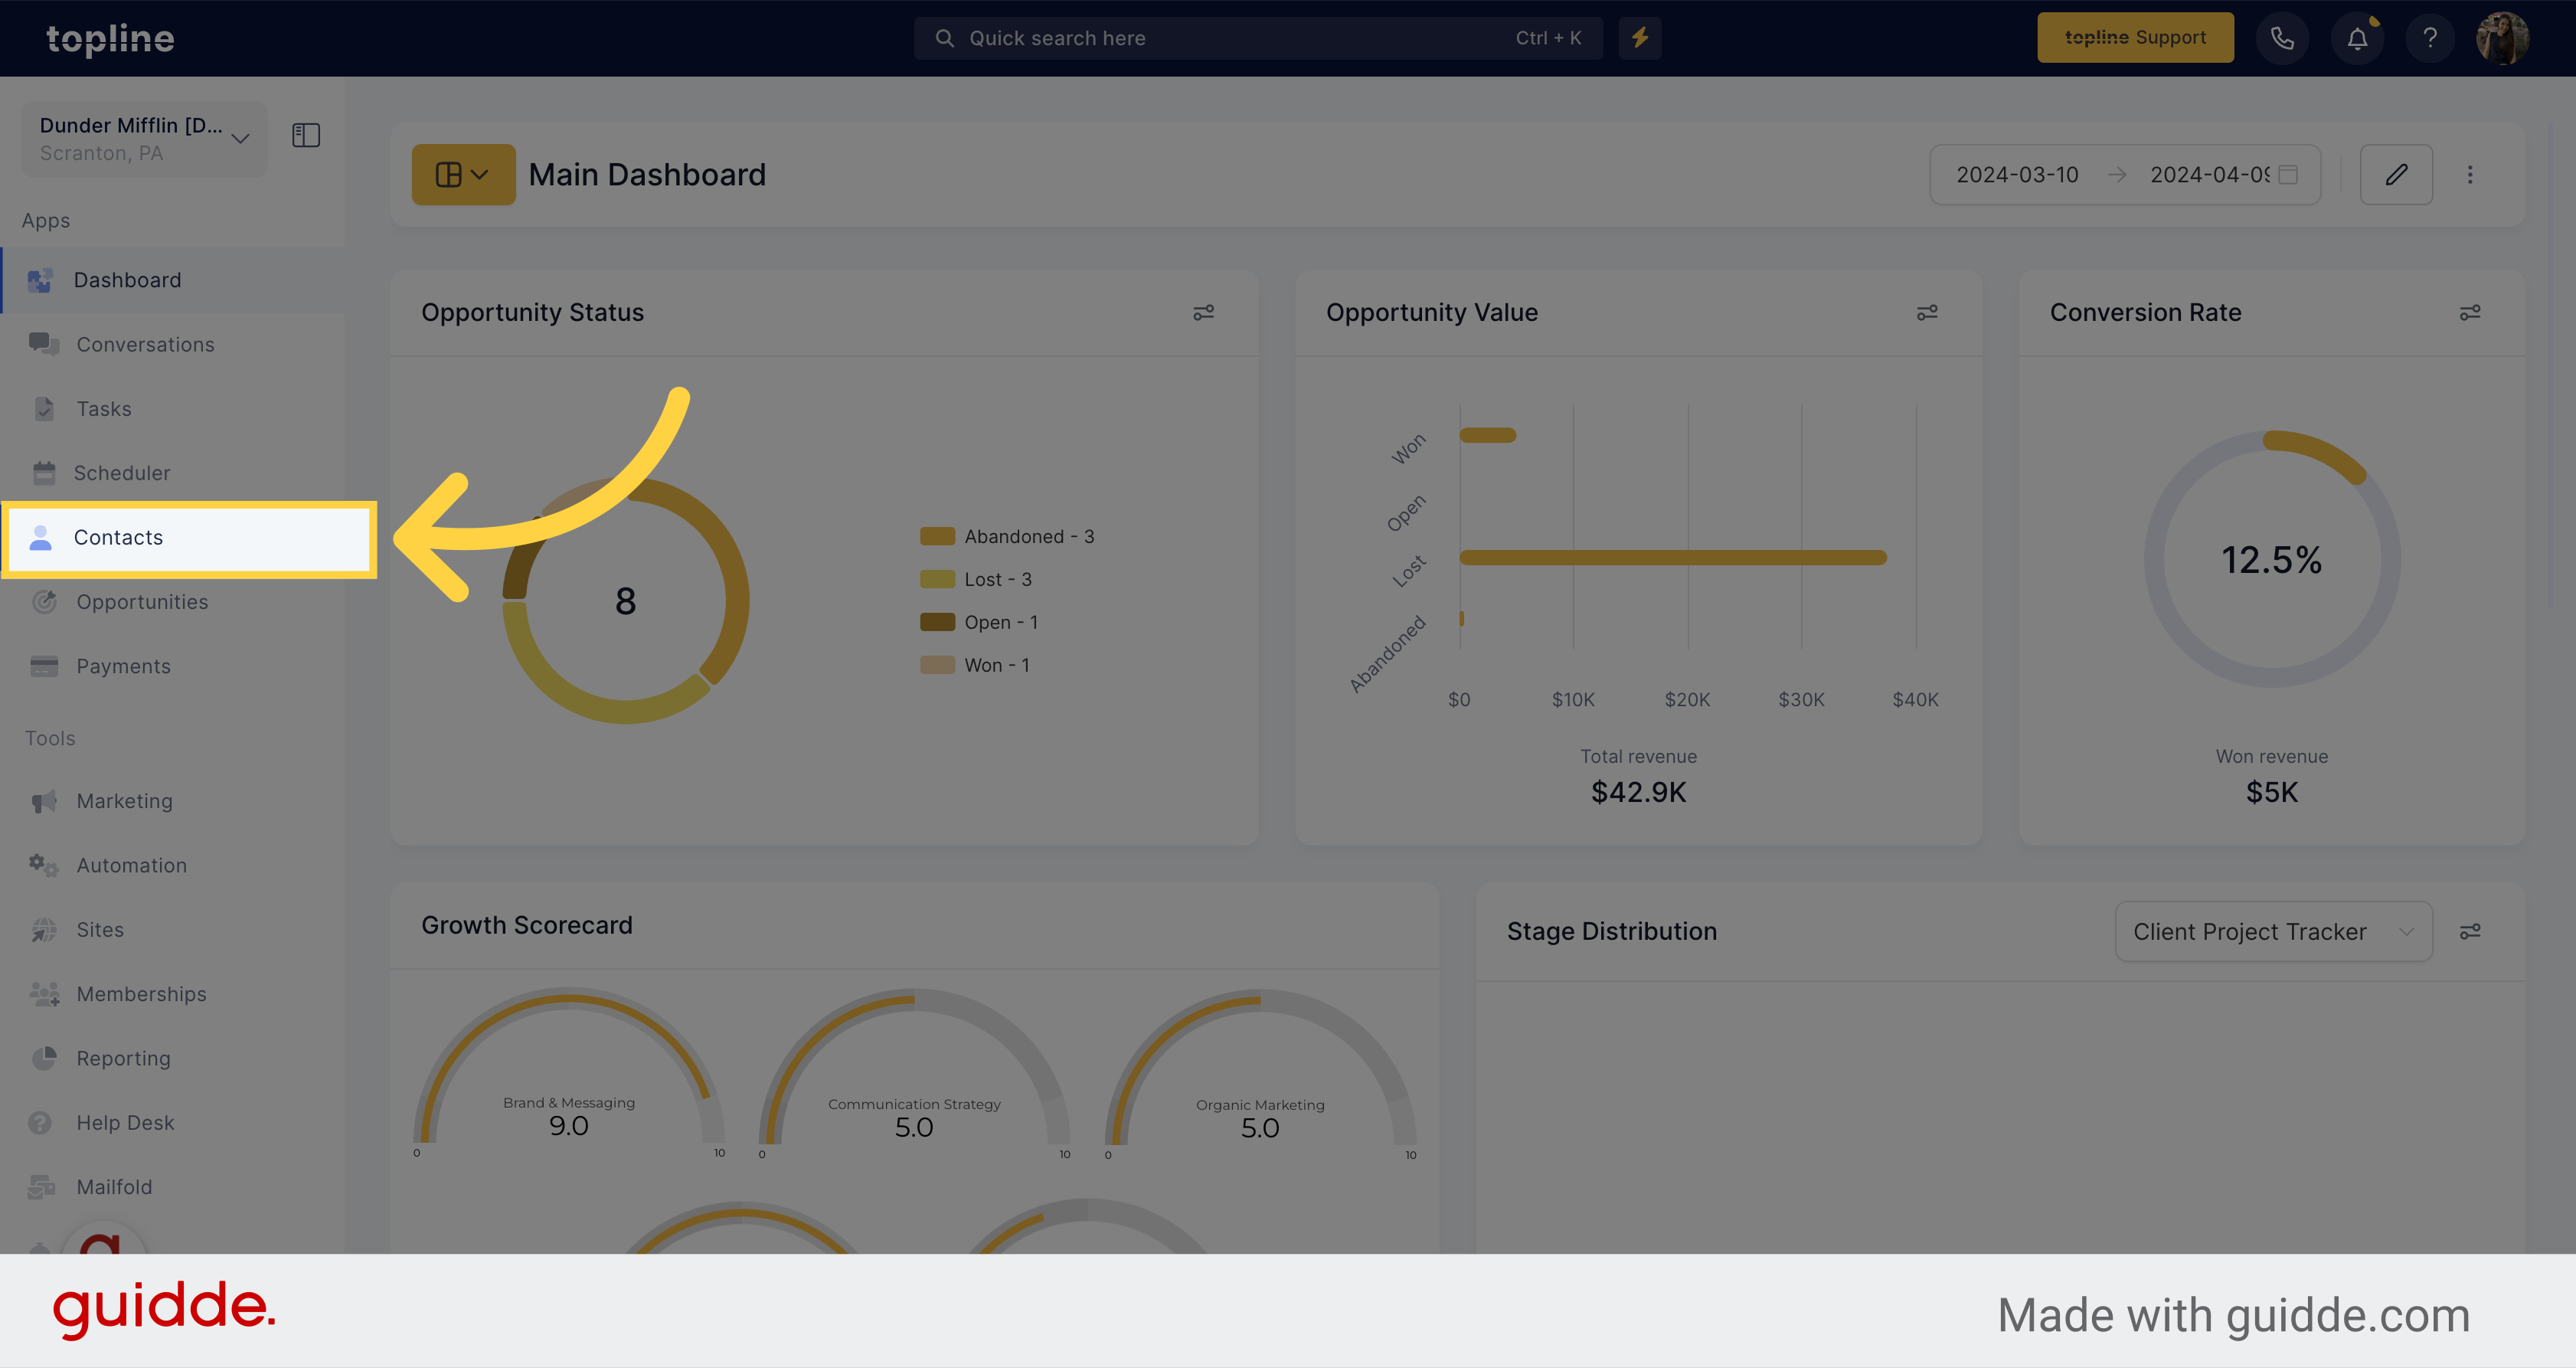
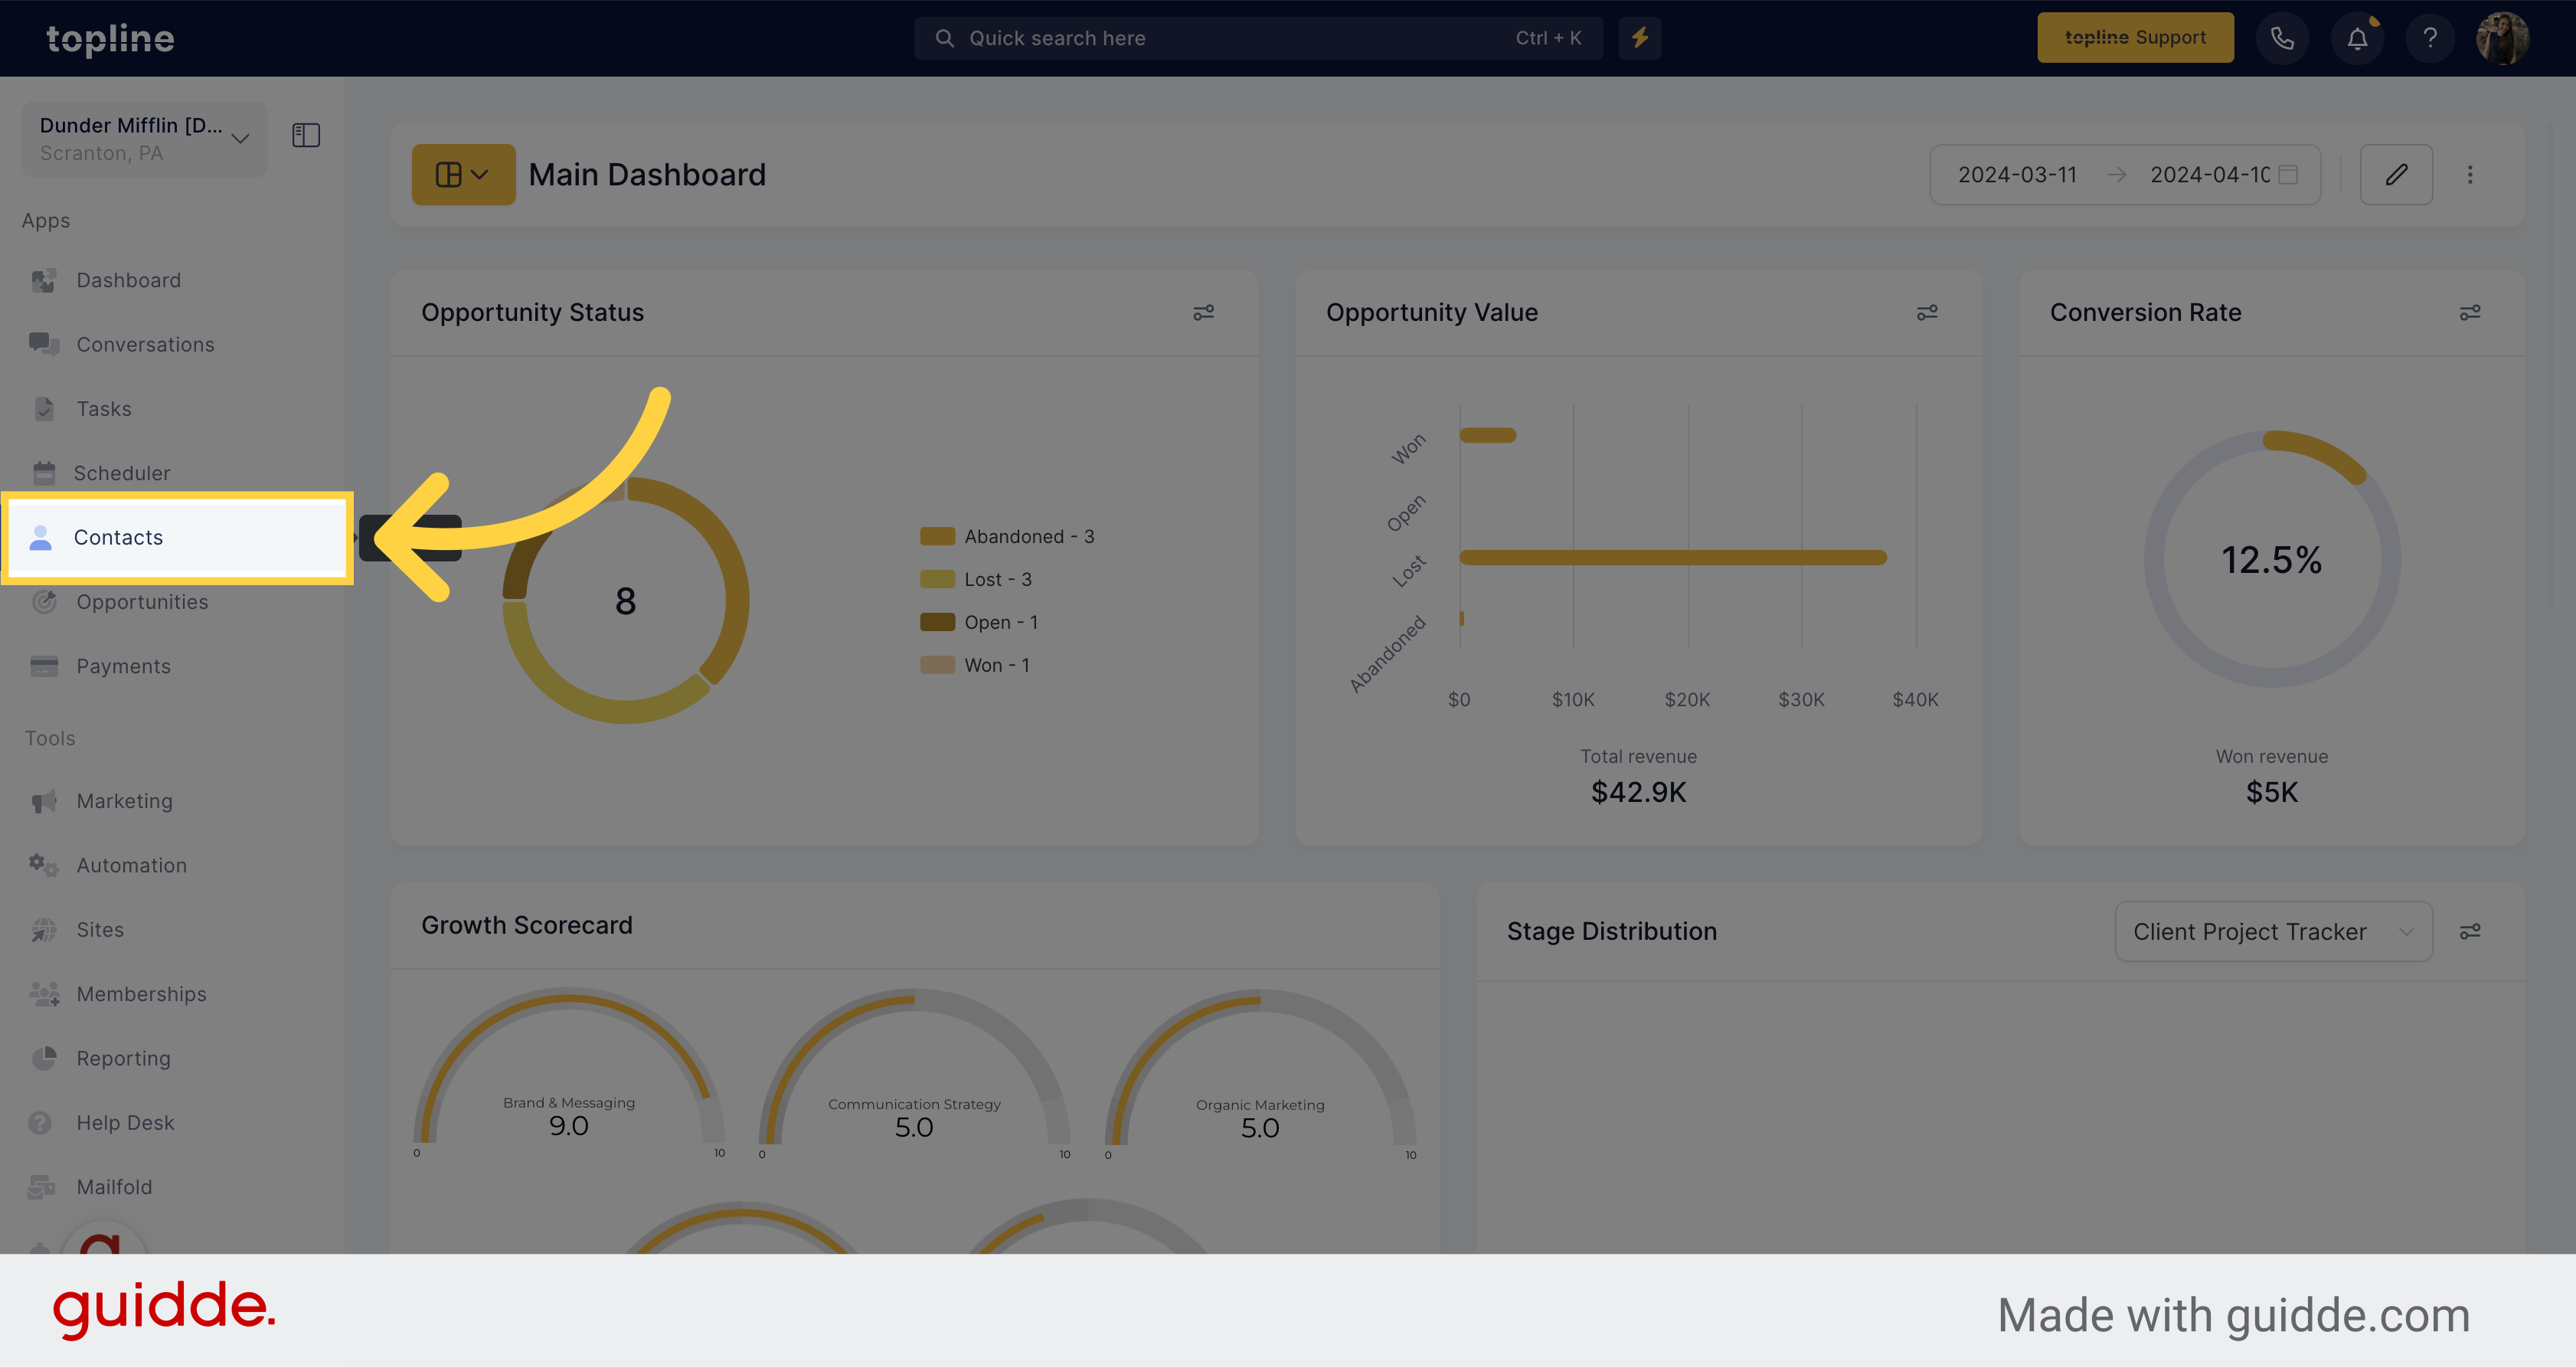
Select the contacts option on the left side menu.
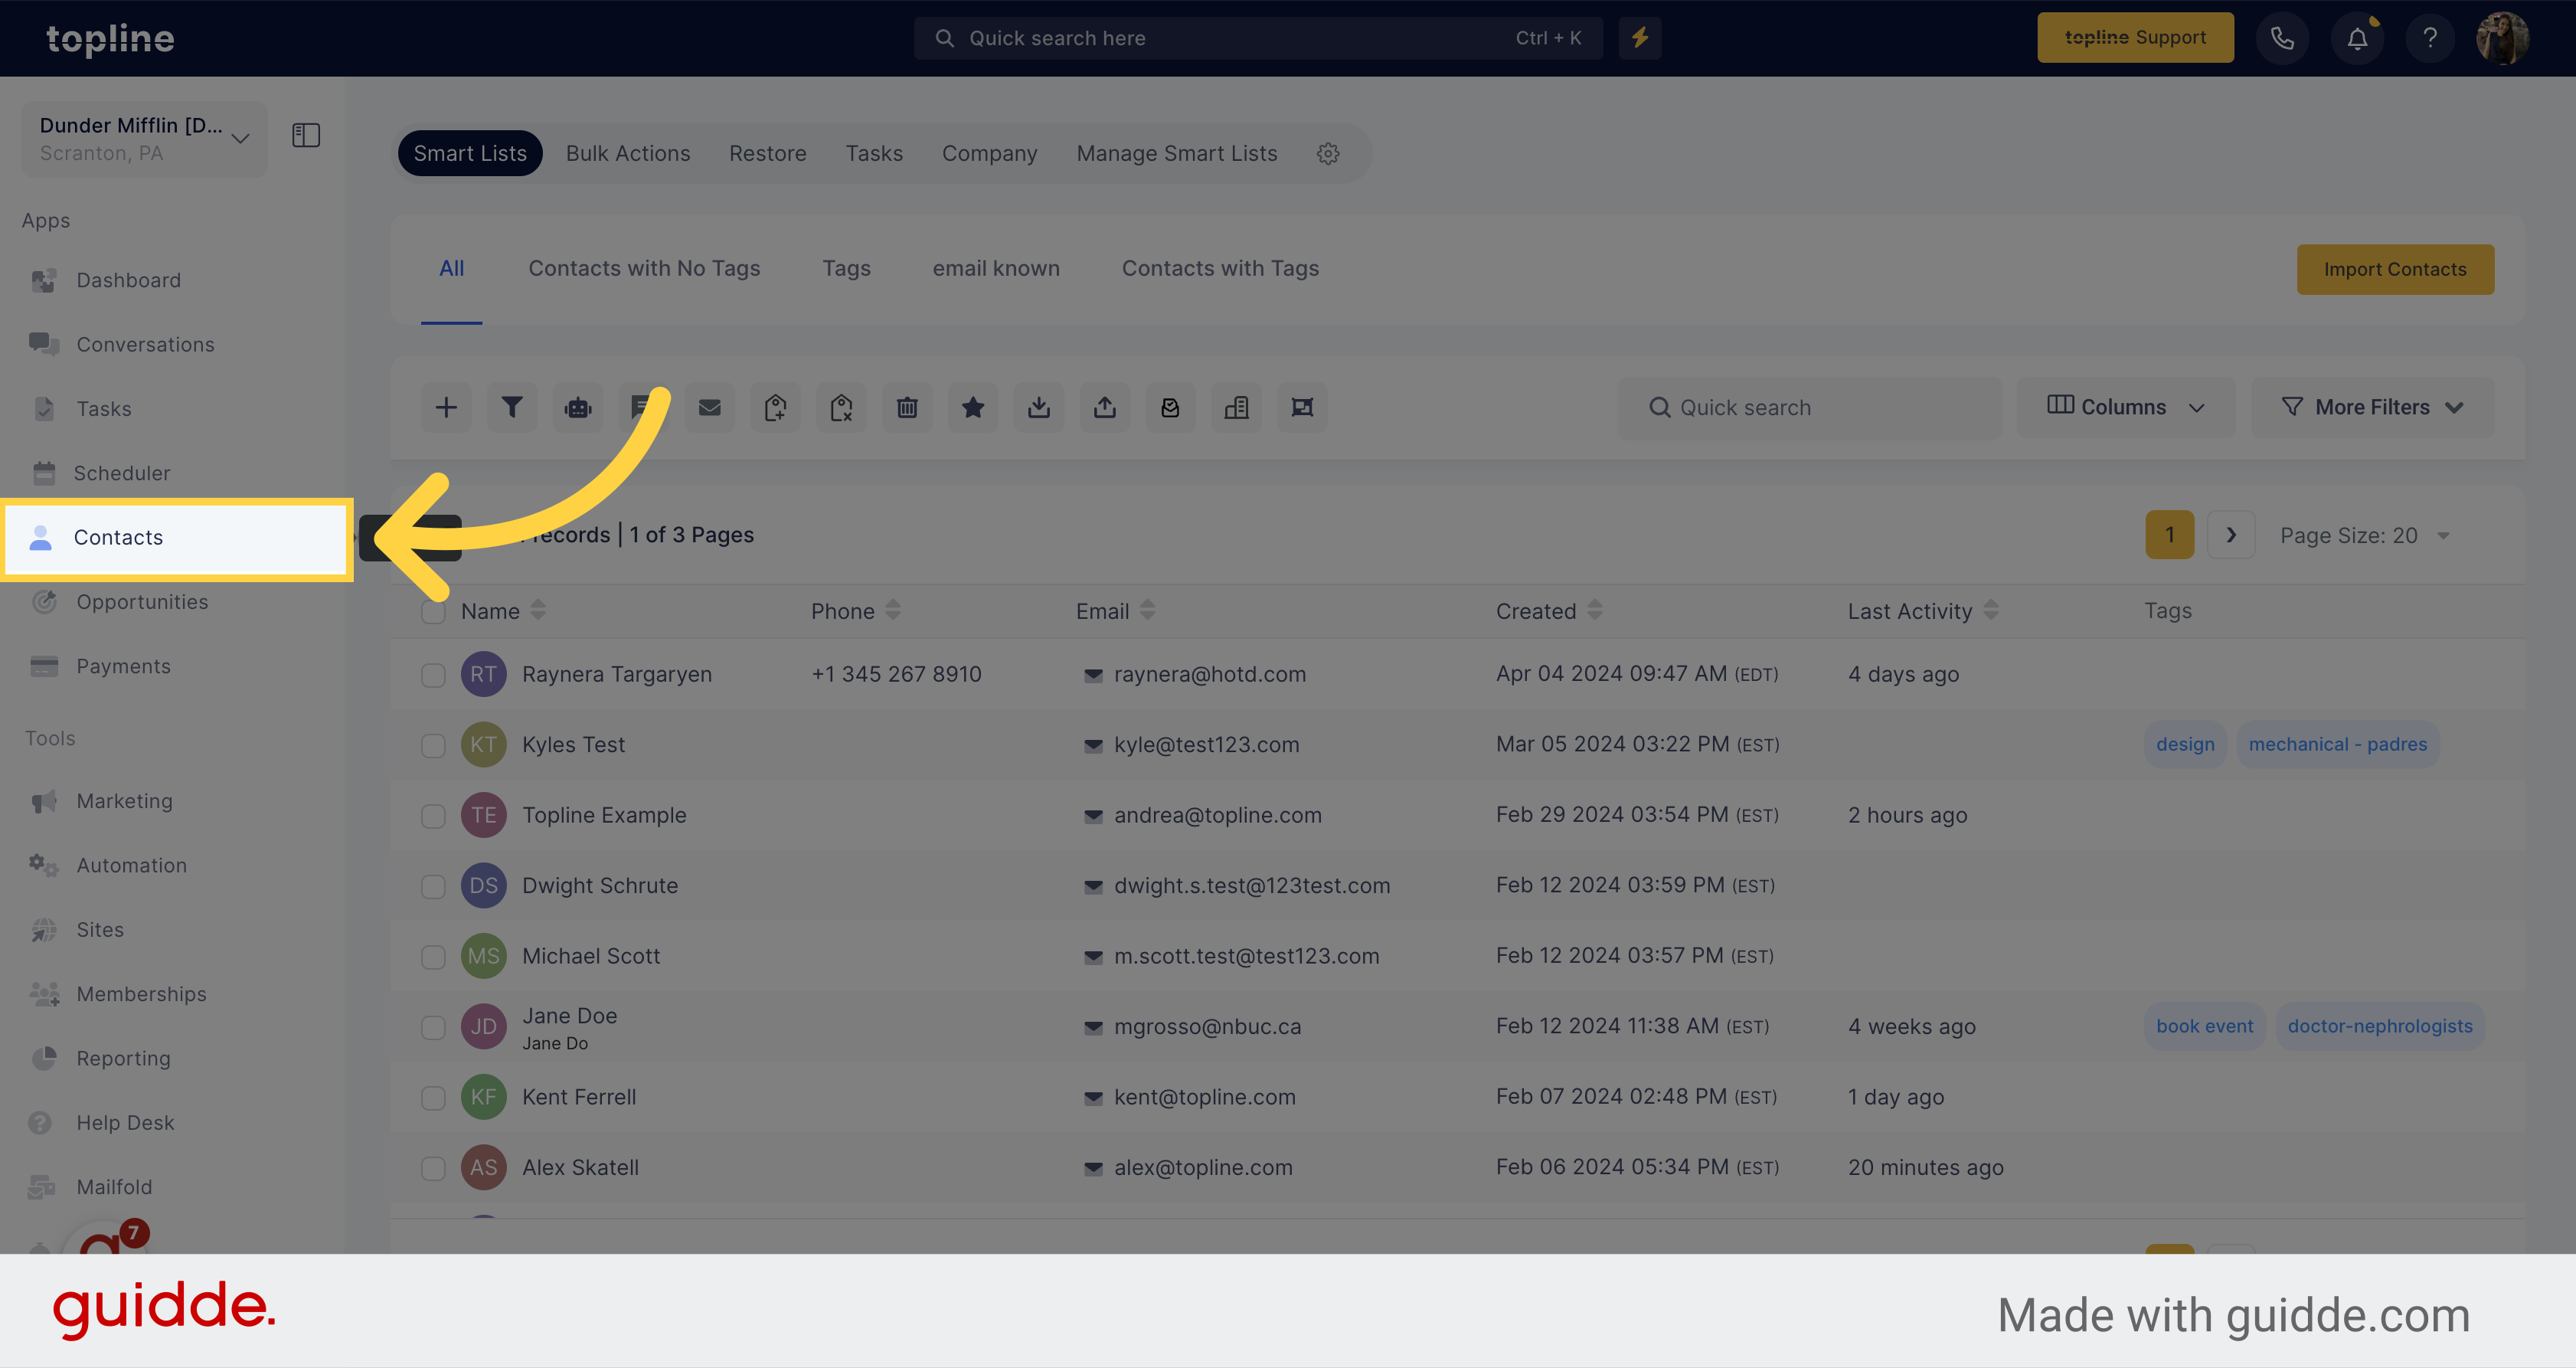
Visualize the contact fields that are shown on the contacts cards.
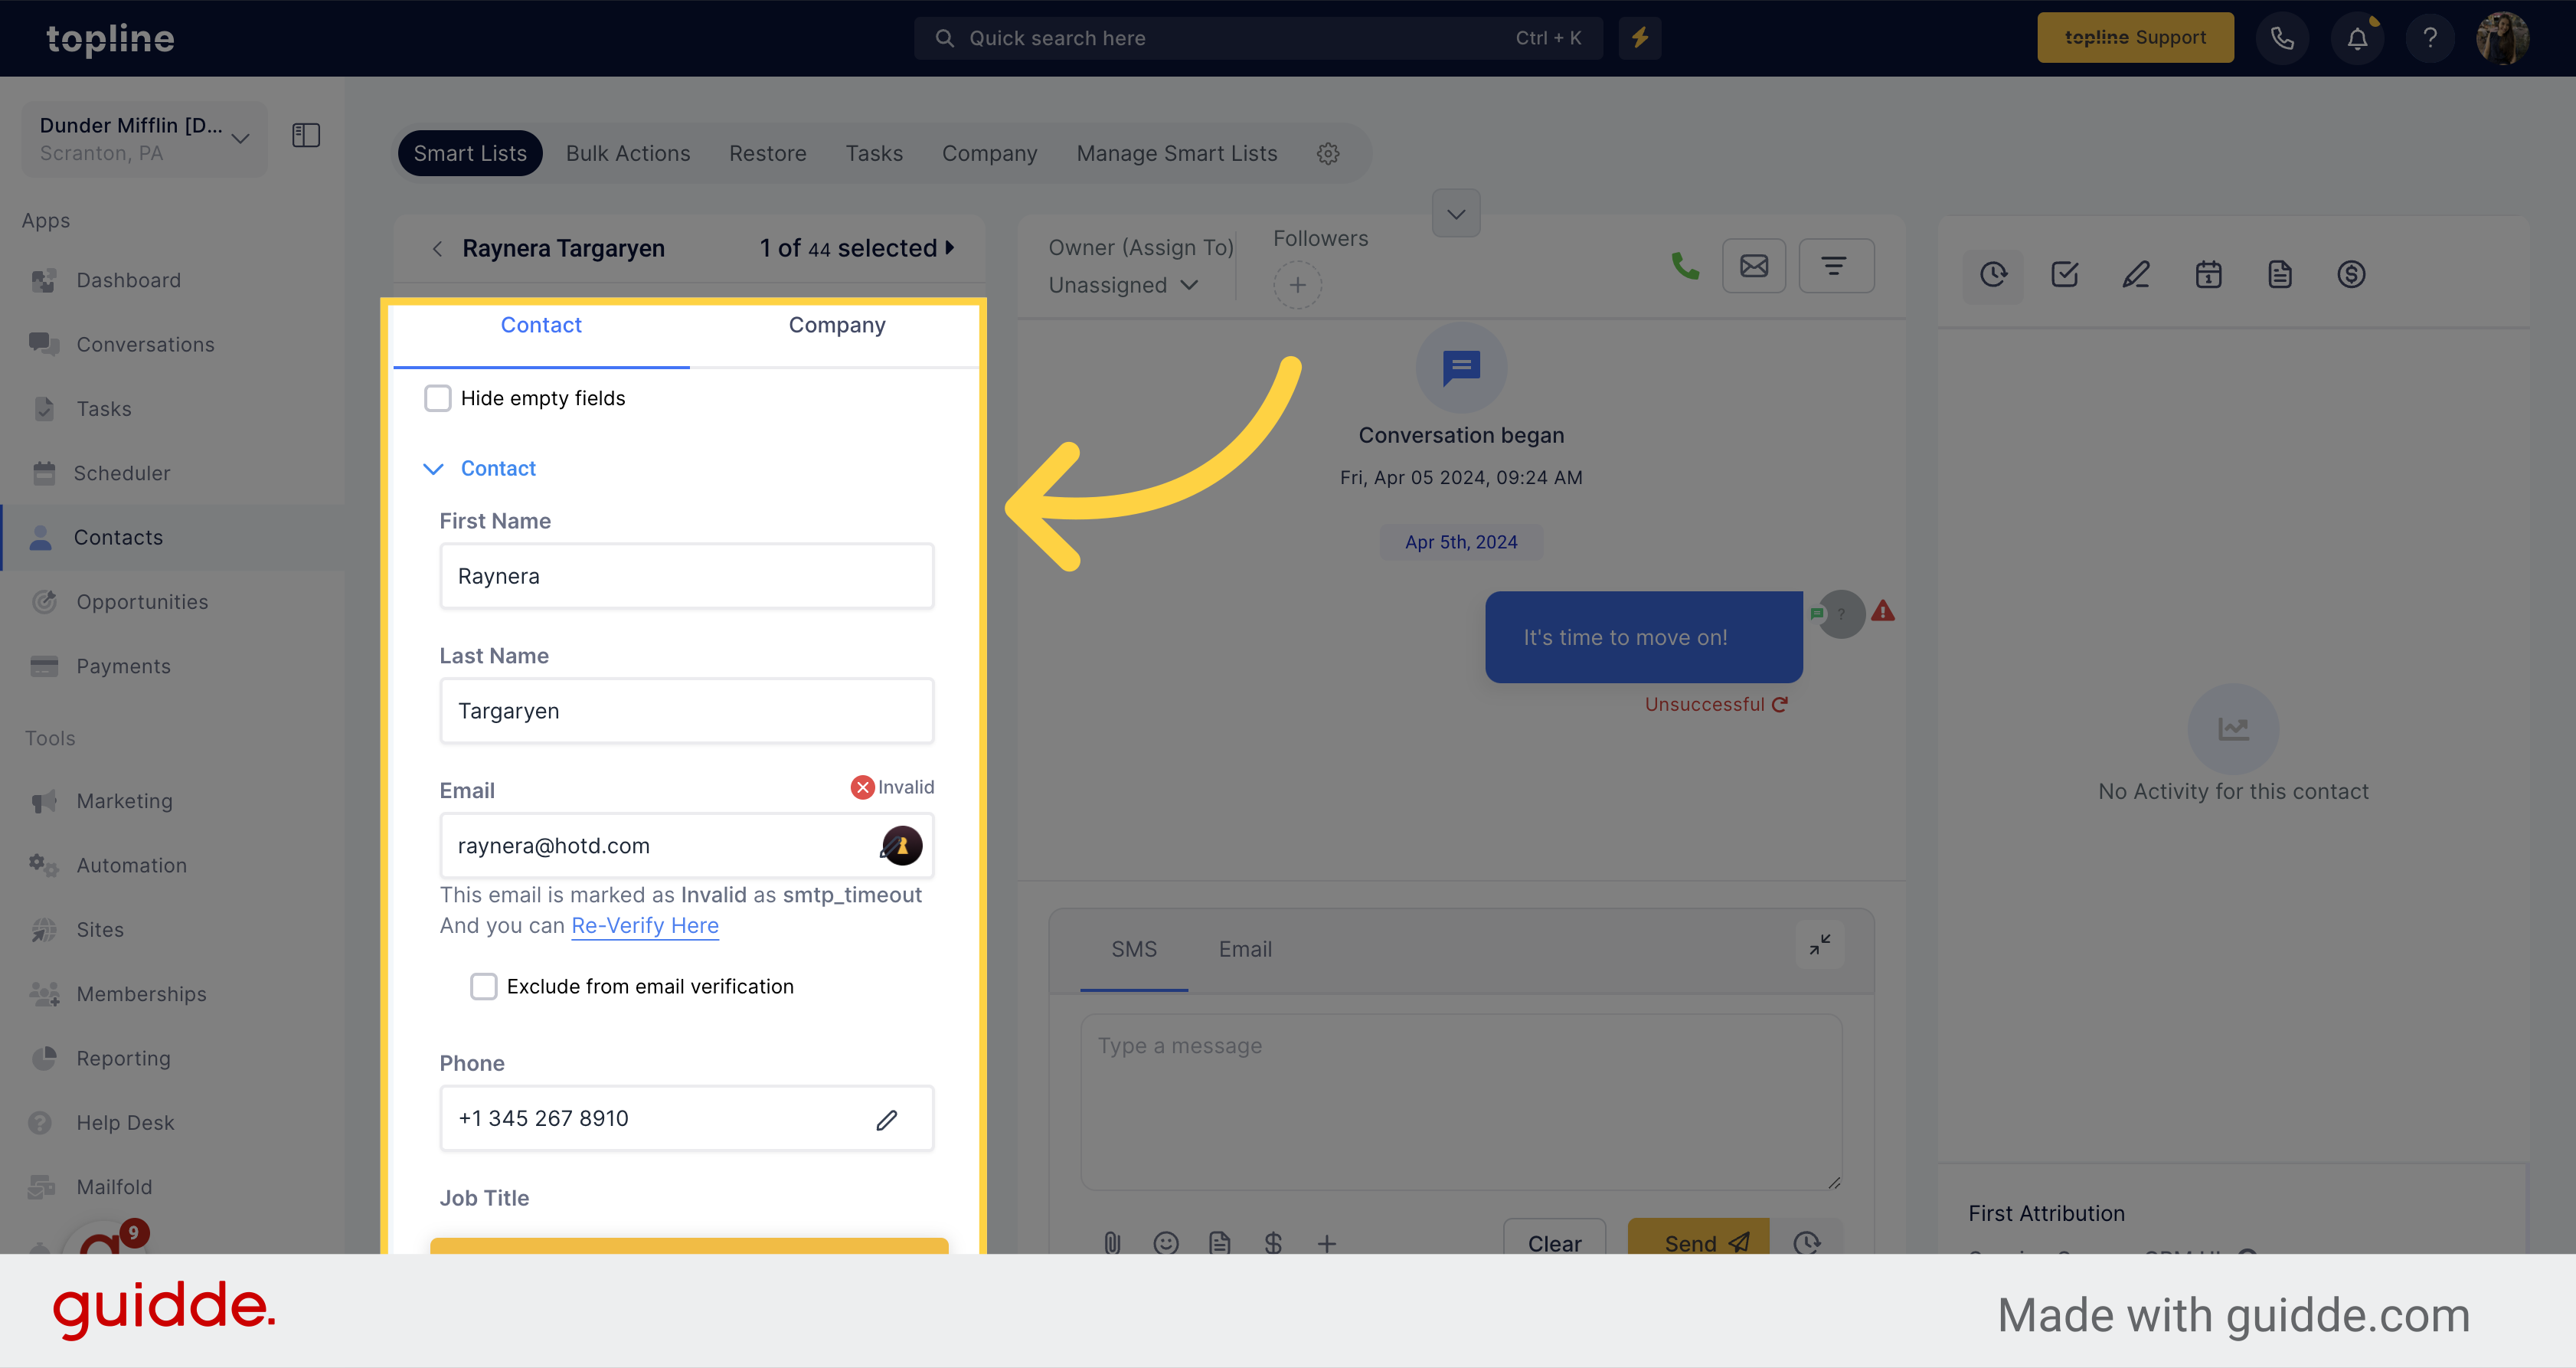
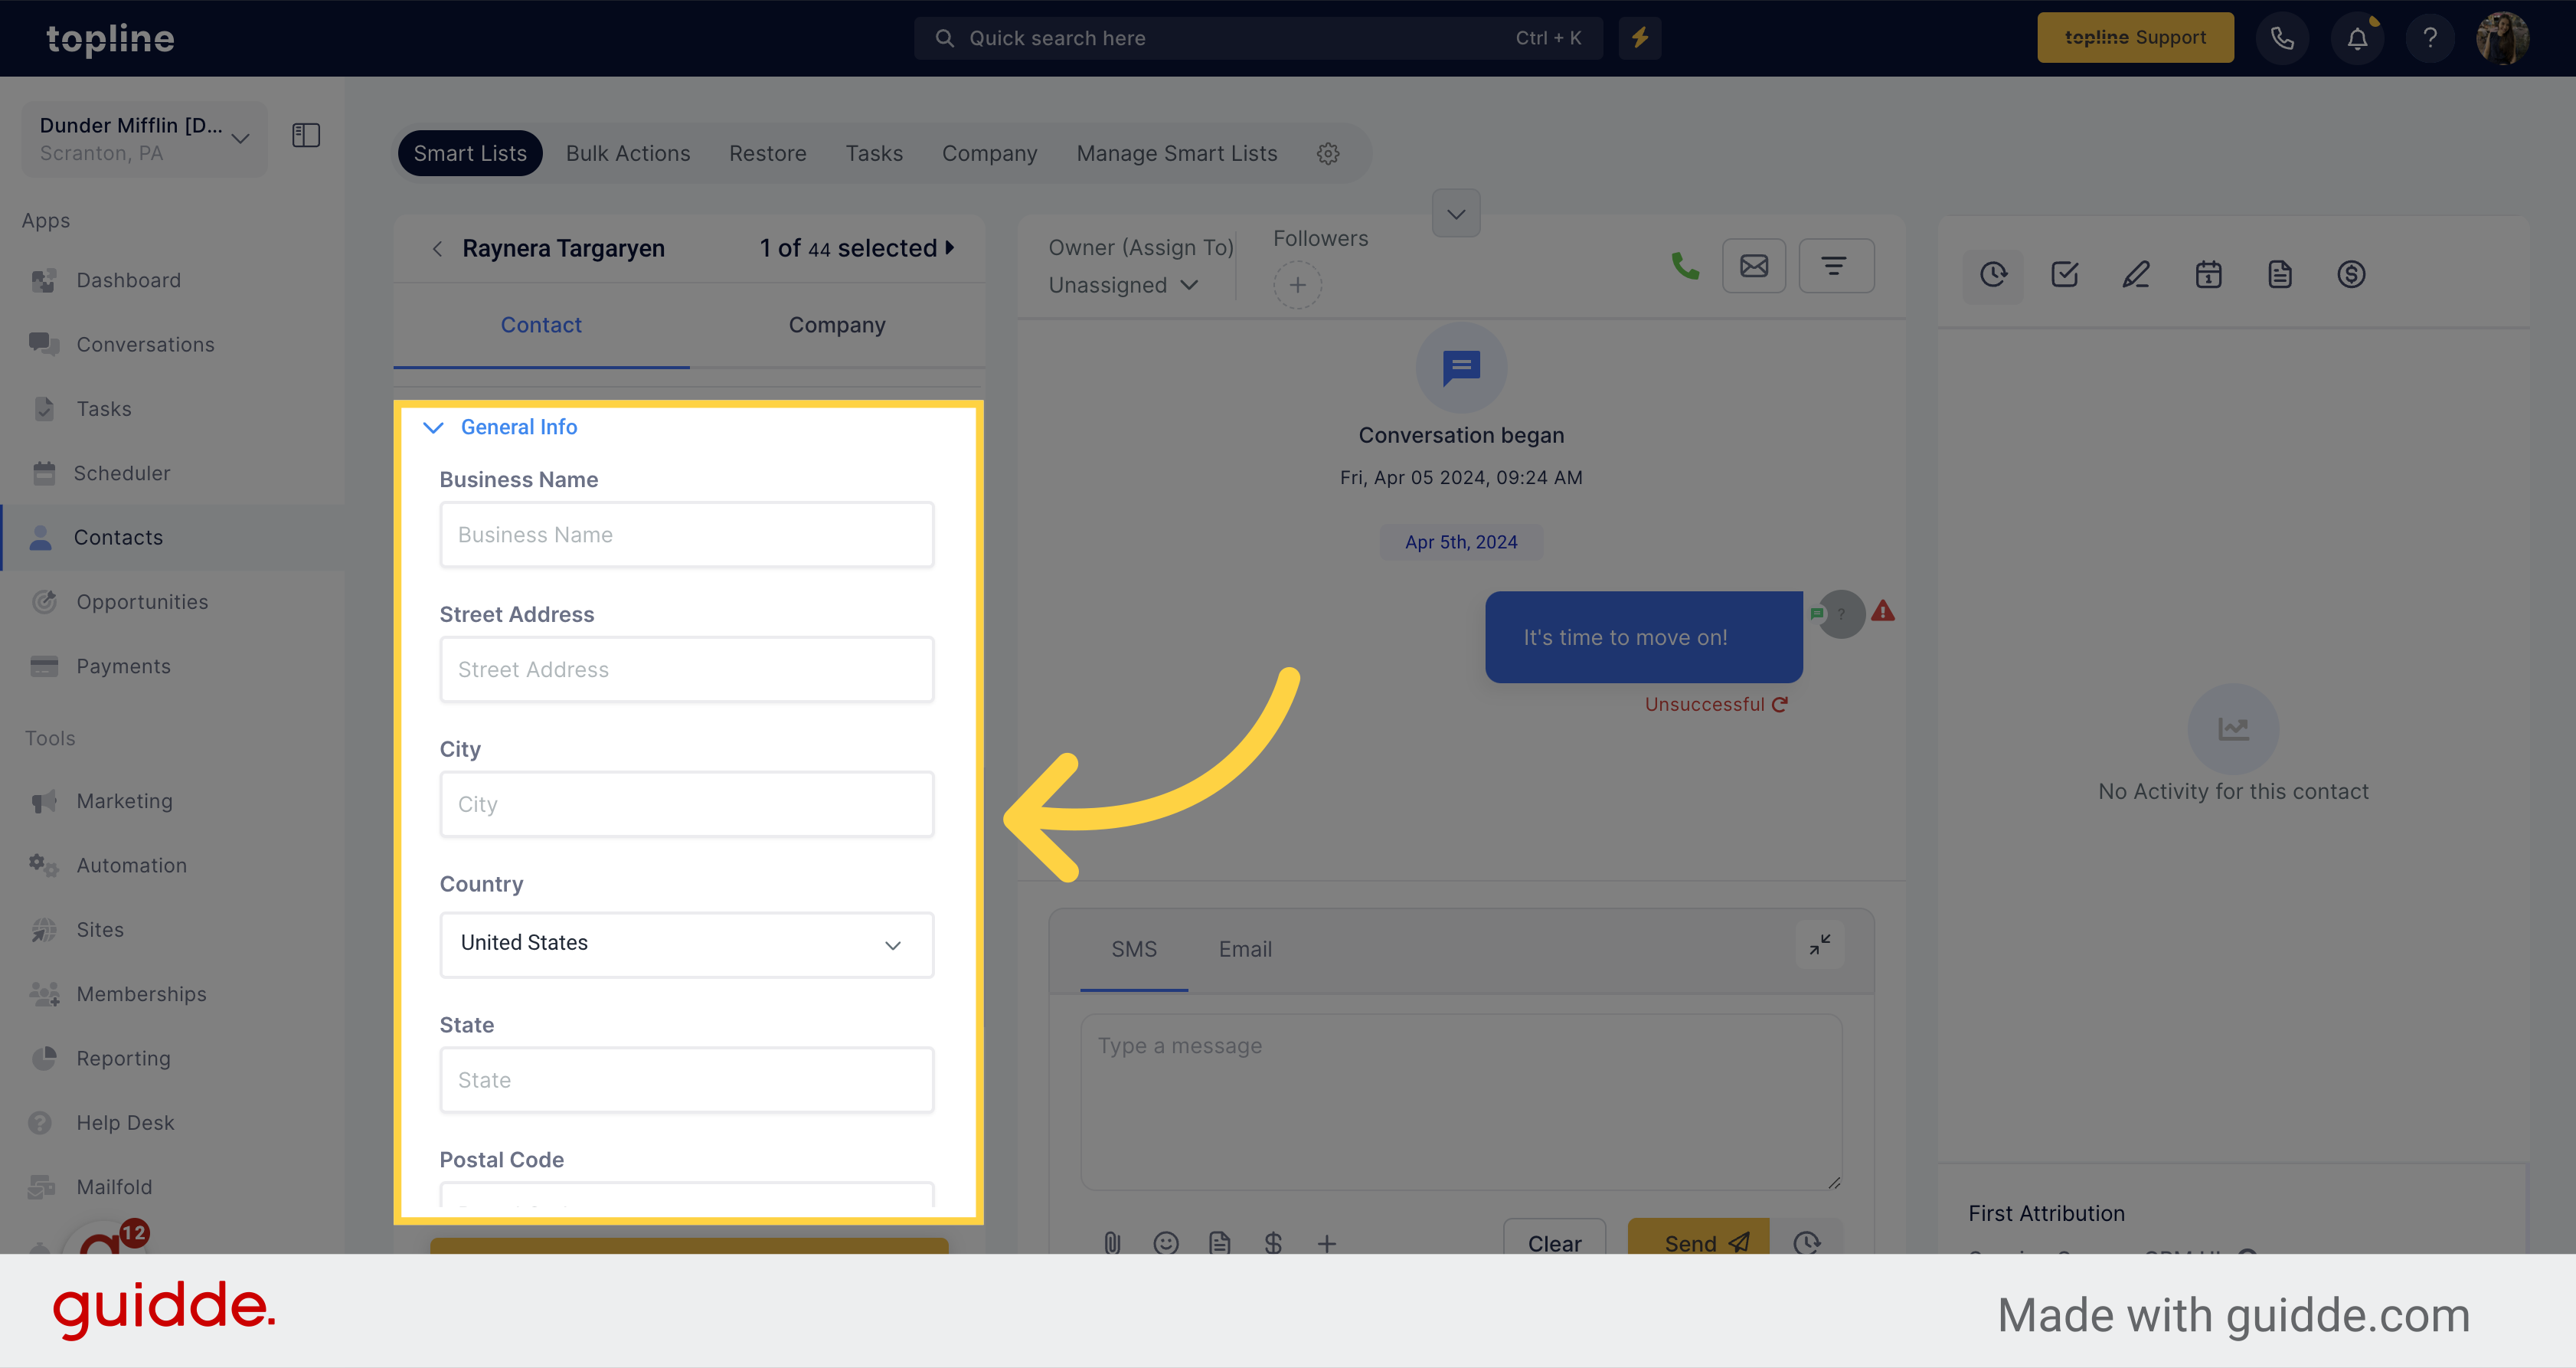
Make sure all the fields you have in your database, match with the ones on the contact cards. If you need a specific one create it.
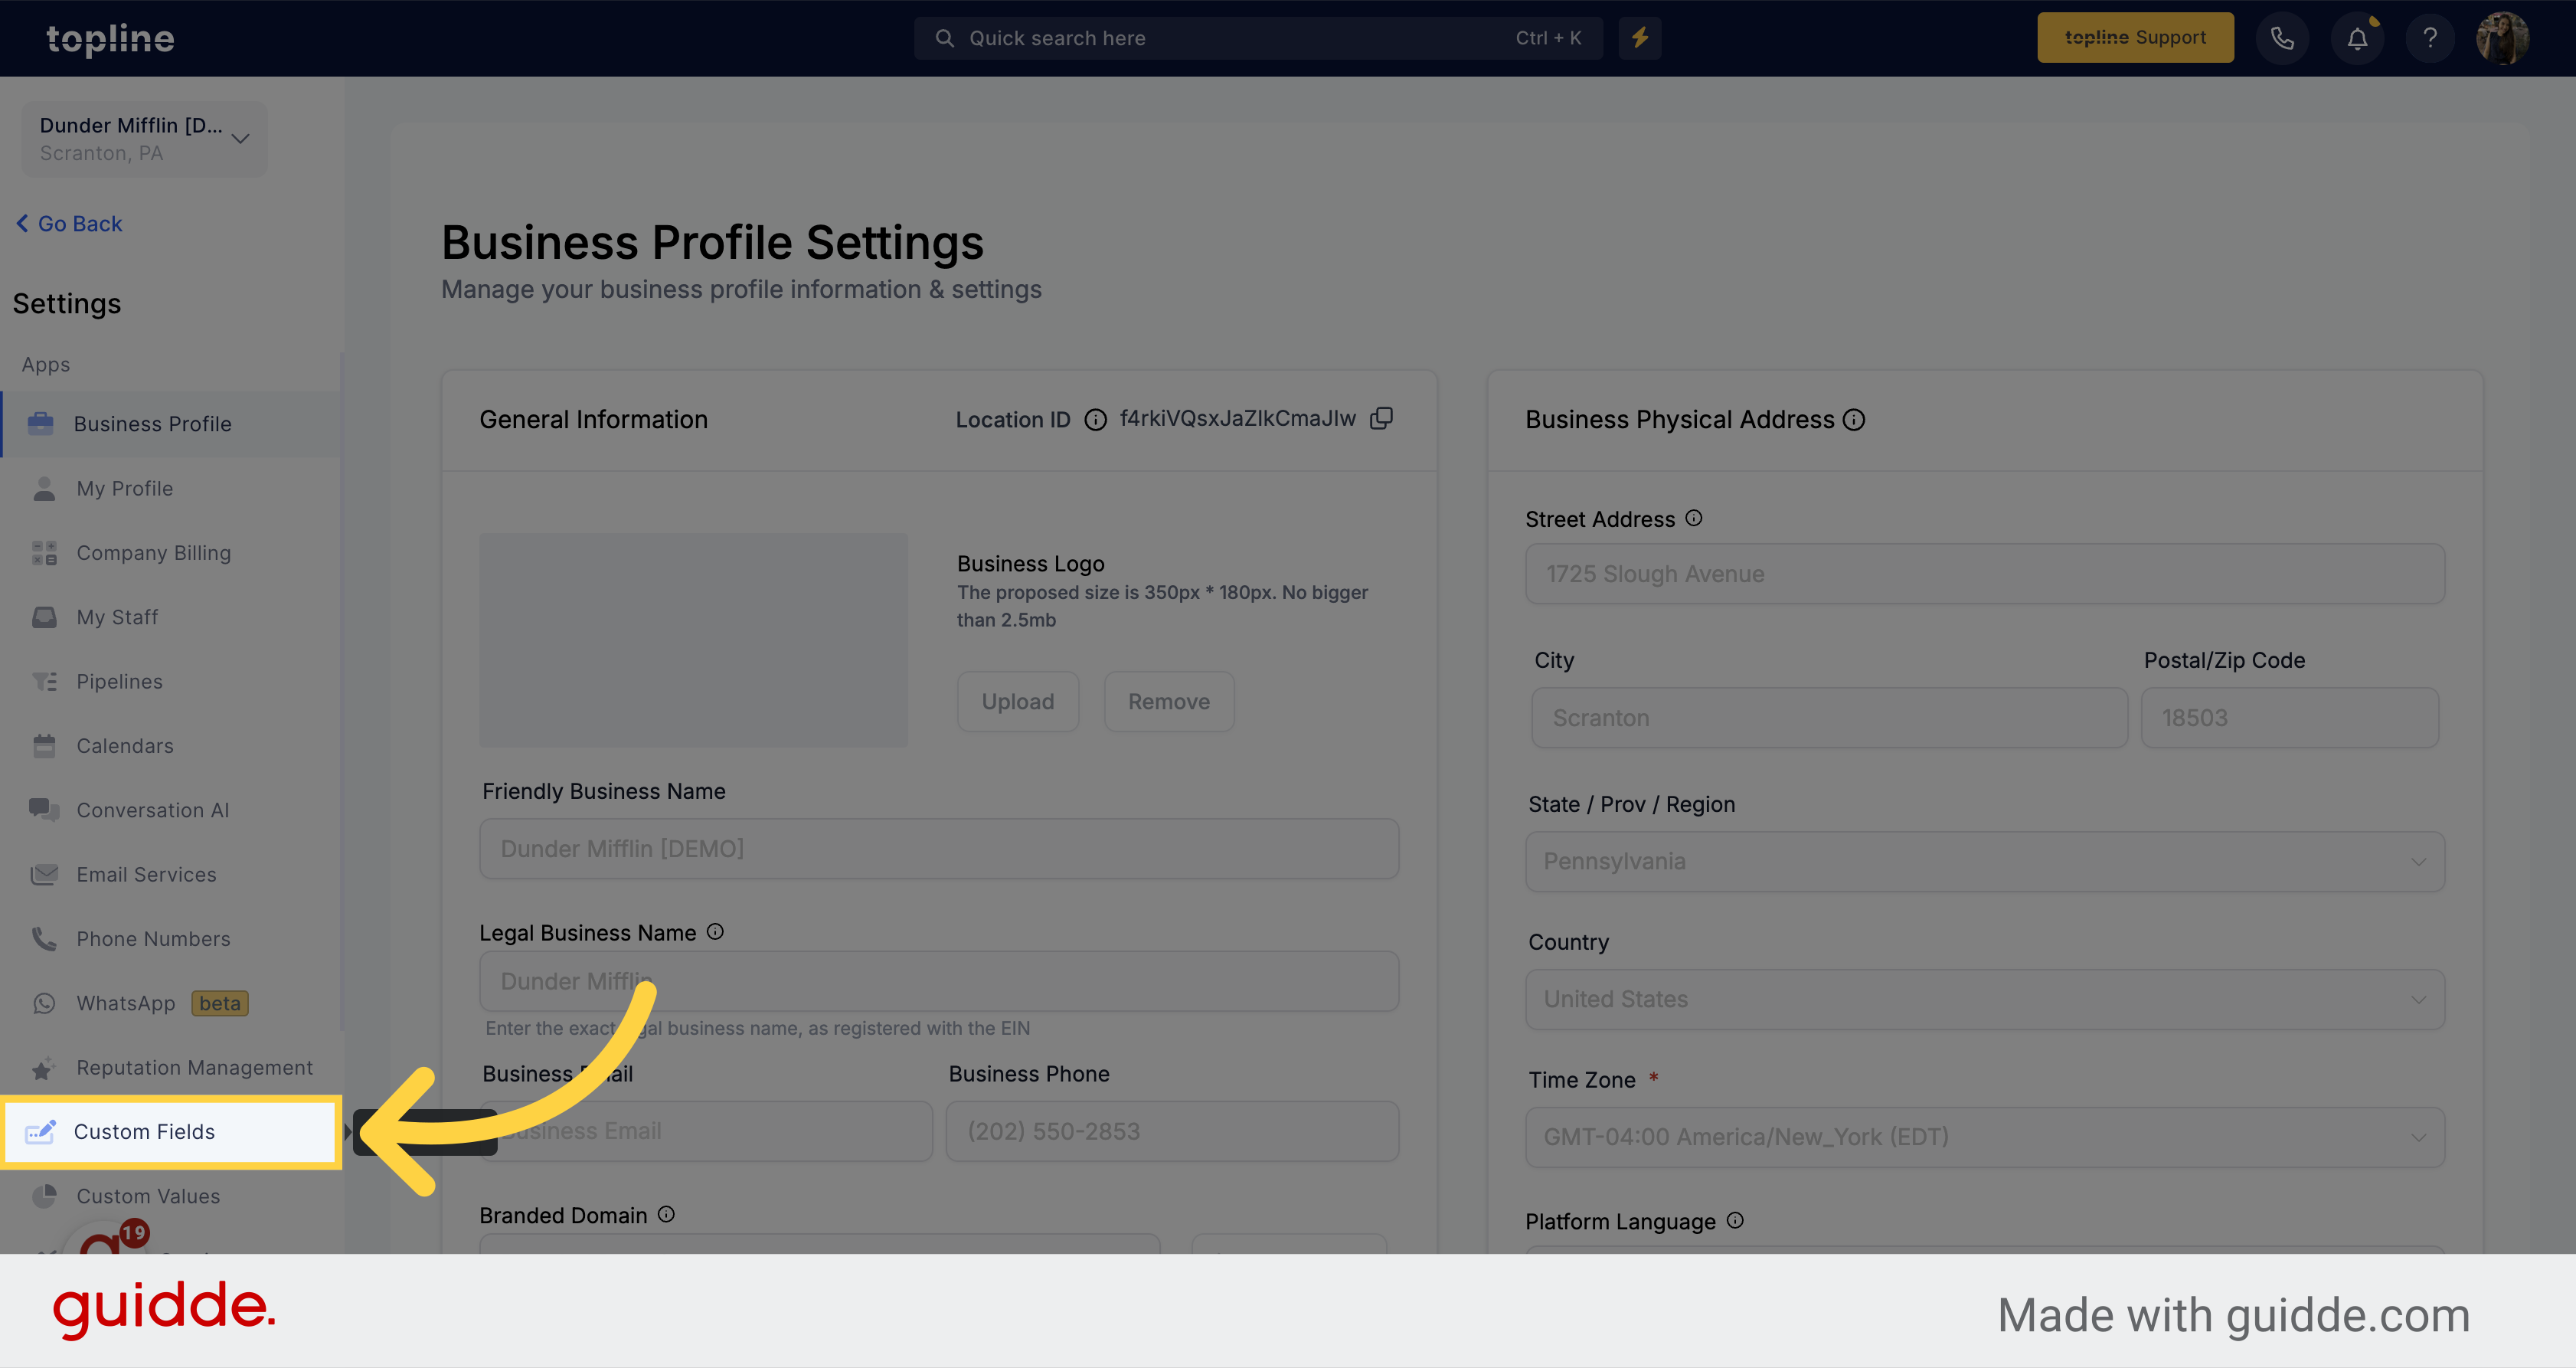
To create a custom field, access the application settings by clicking on the Settings option.
Navigate to the Custom Fields section by selecting the specified option from the Settings menu.
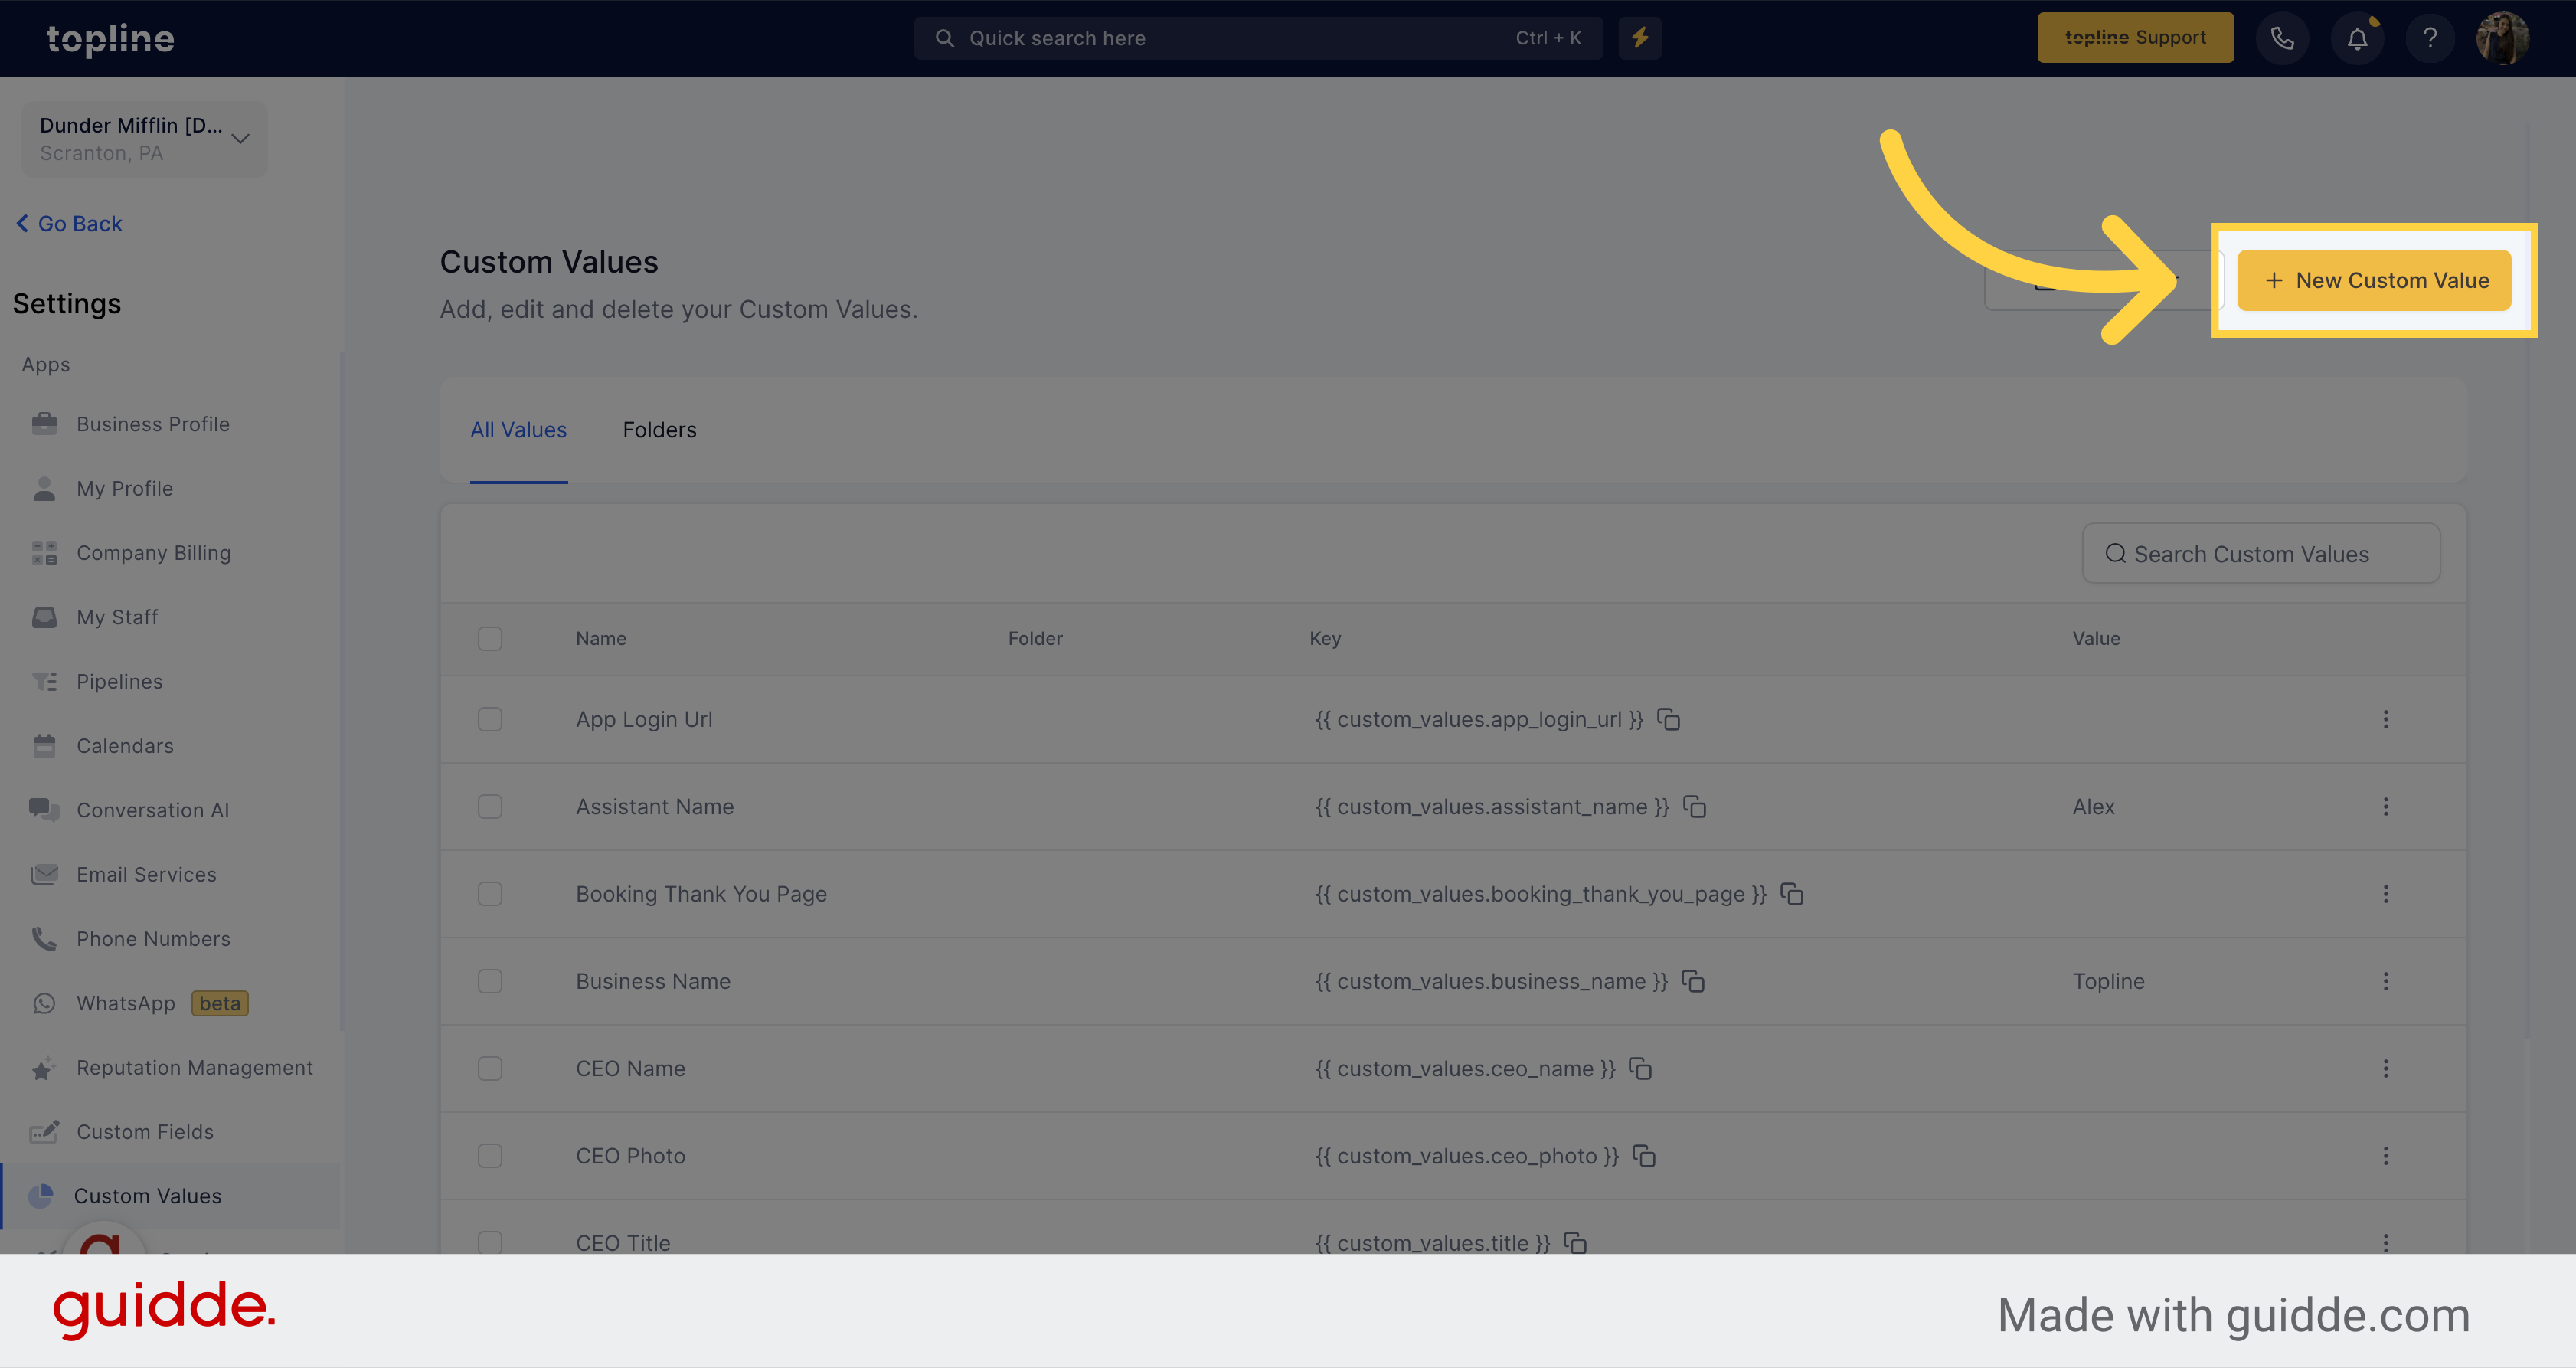
Create a new custom value to personalize your data by clicking on the New Custom Value button located on the upper right side of the view.
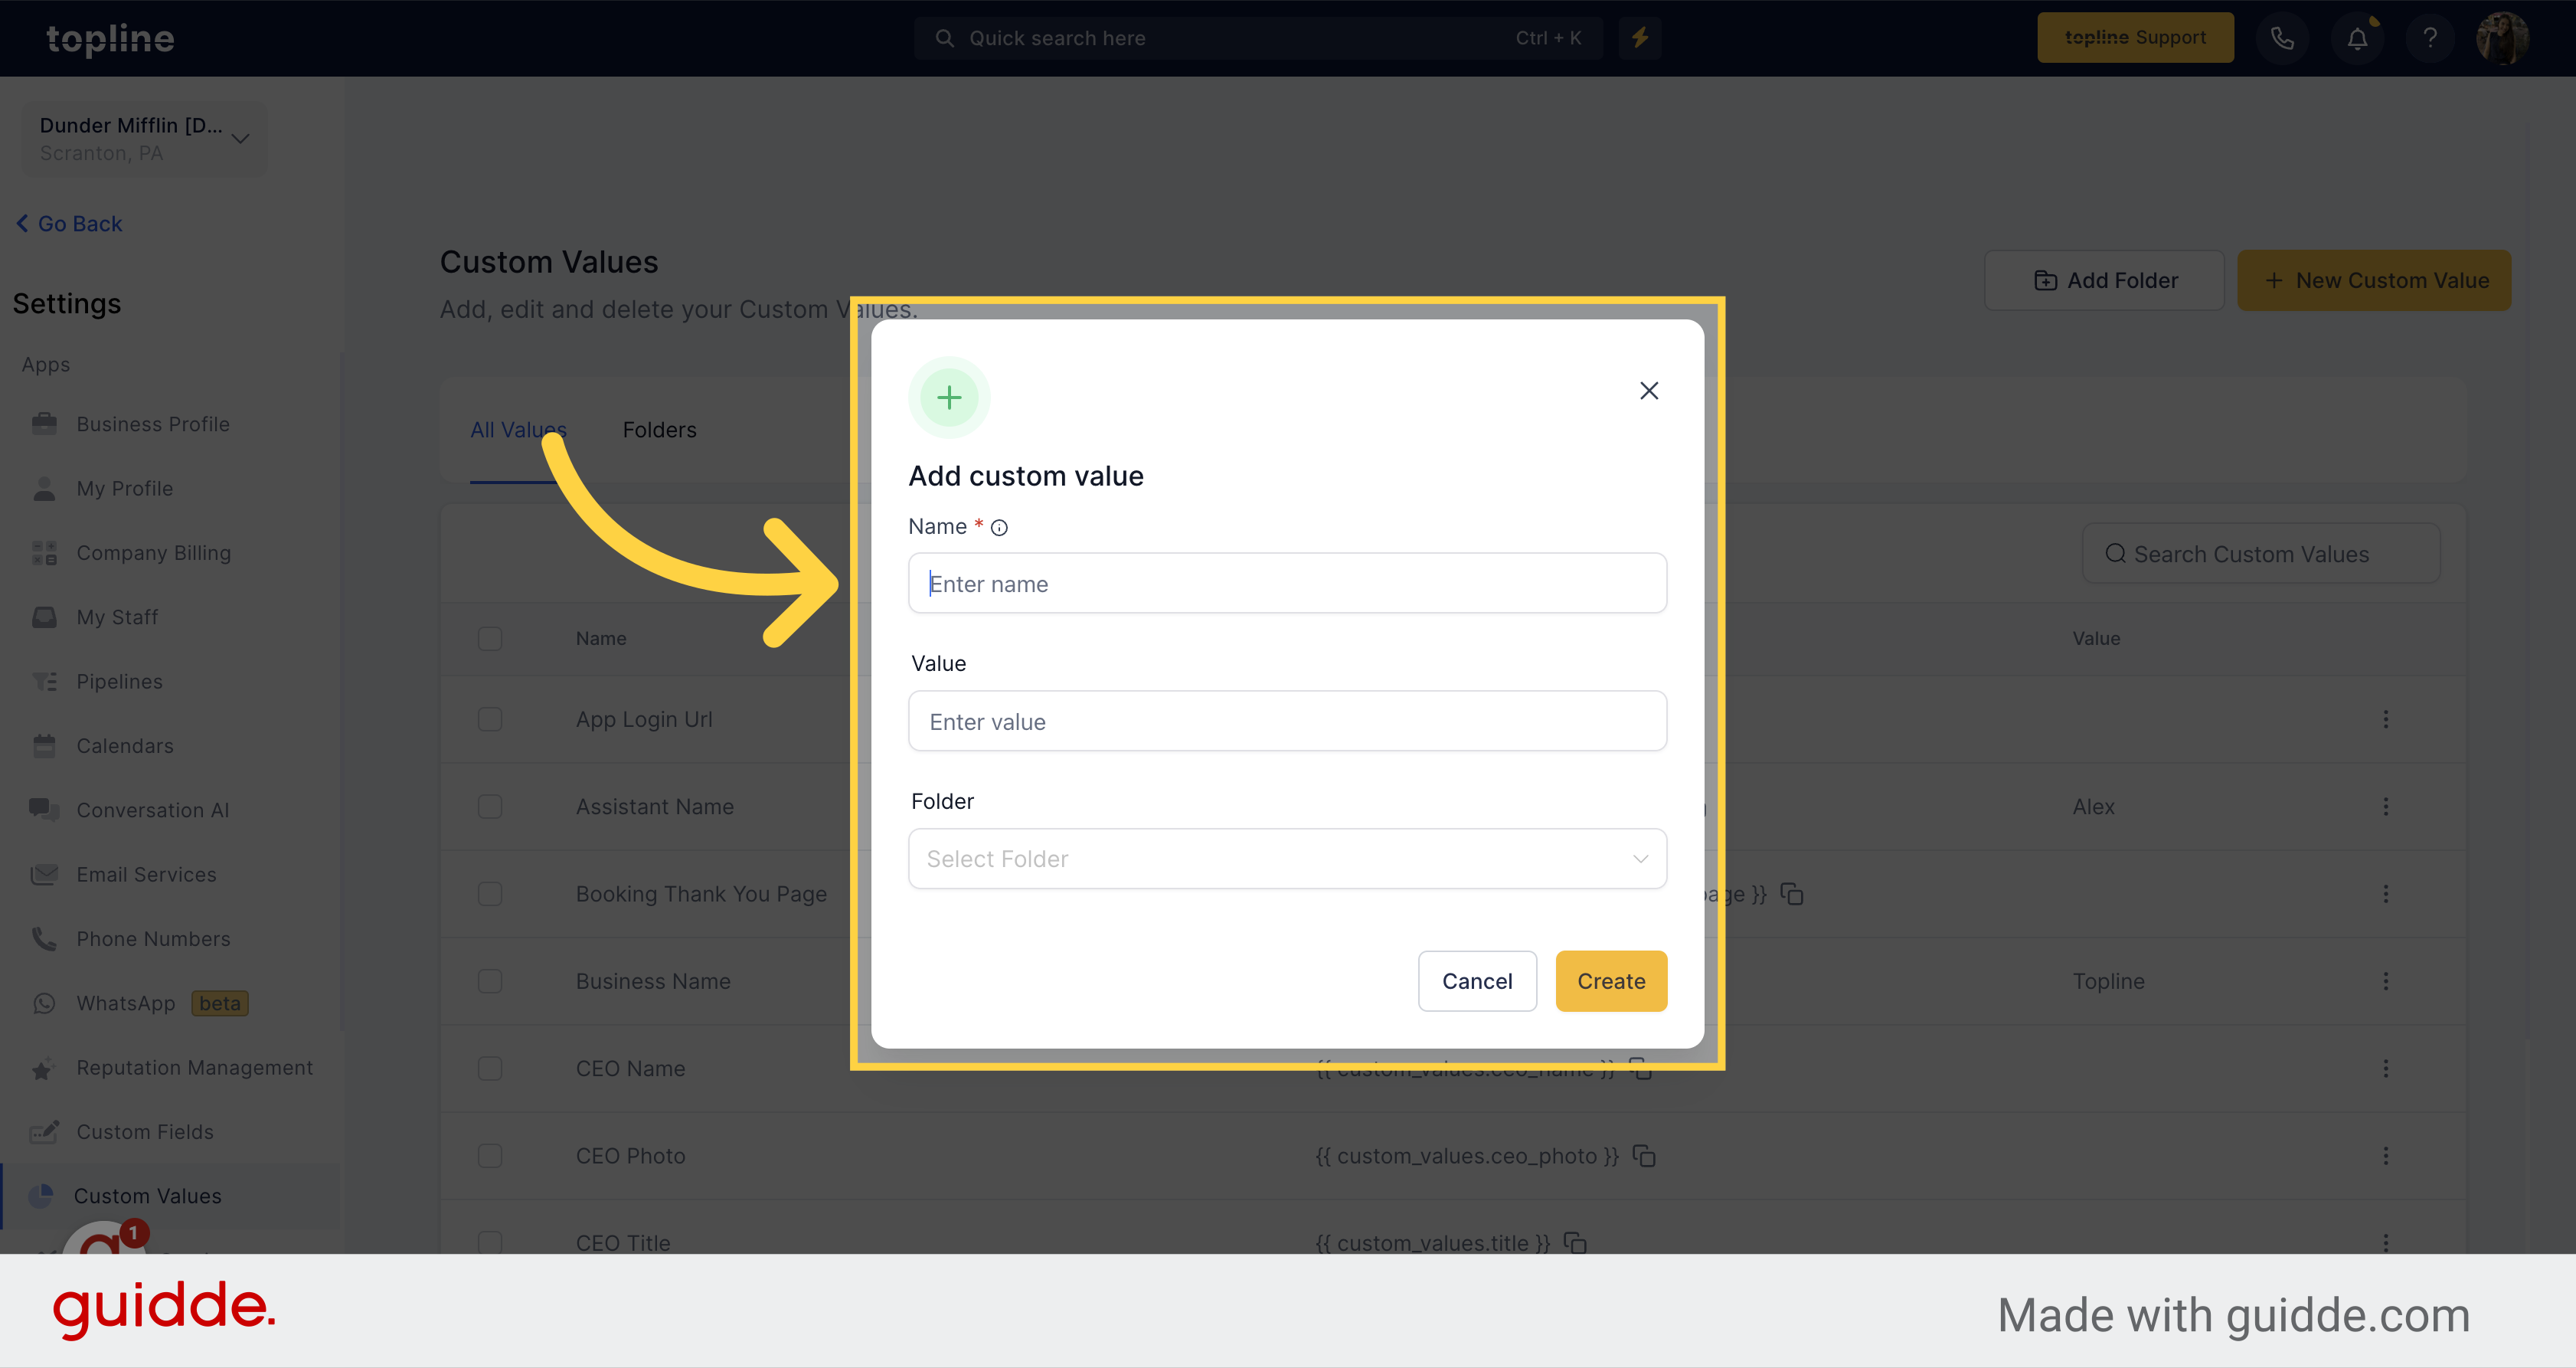
Input a unique name for the custom field you want to create.
- When adding a phone number that requires a "+" sign, please add an apostrophe at the beginning of the number, like this: '+191668128779 (Correct format).

- File Upload and Signature Fields are NOT supported when importing

- When important contacts are with a DND column within your CSV, please note that the contact will be DND for ALL the channels. If you would like to DND for specific channels, please set up a workflow first and use tags.There are two methods to import contacts depending on your CSV data:
1st Method: If your CSV has a phone # and or email please follow the 1st method below.
Access the Contacts section located on the left side menu.
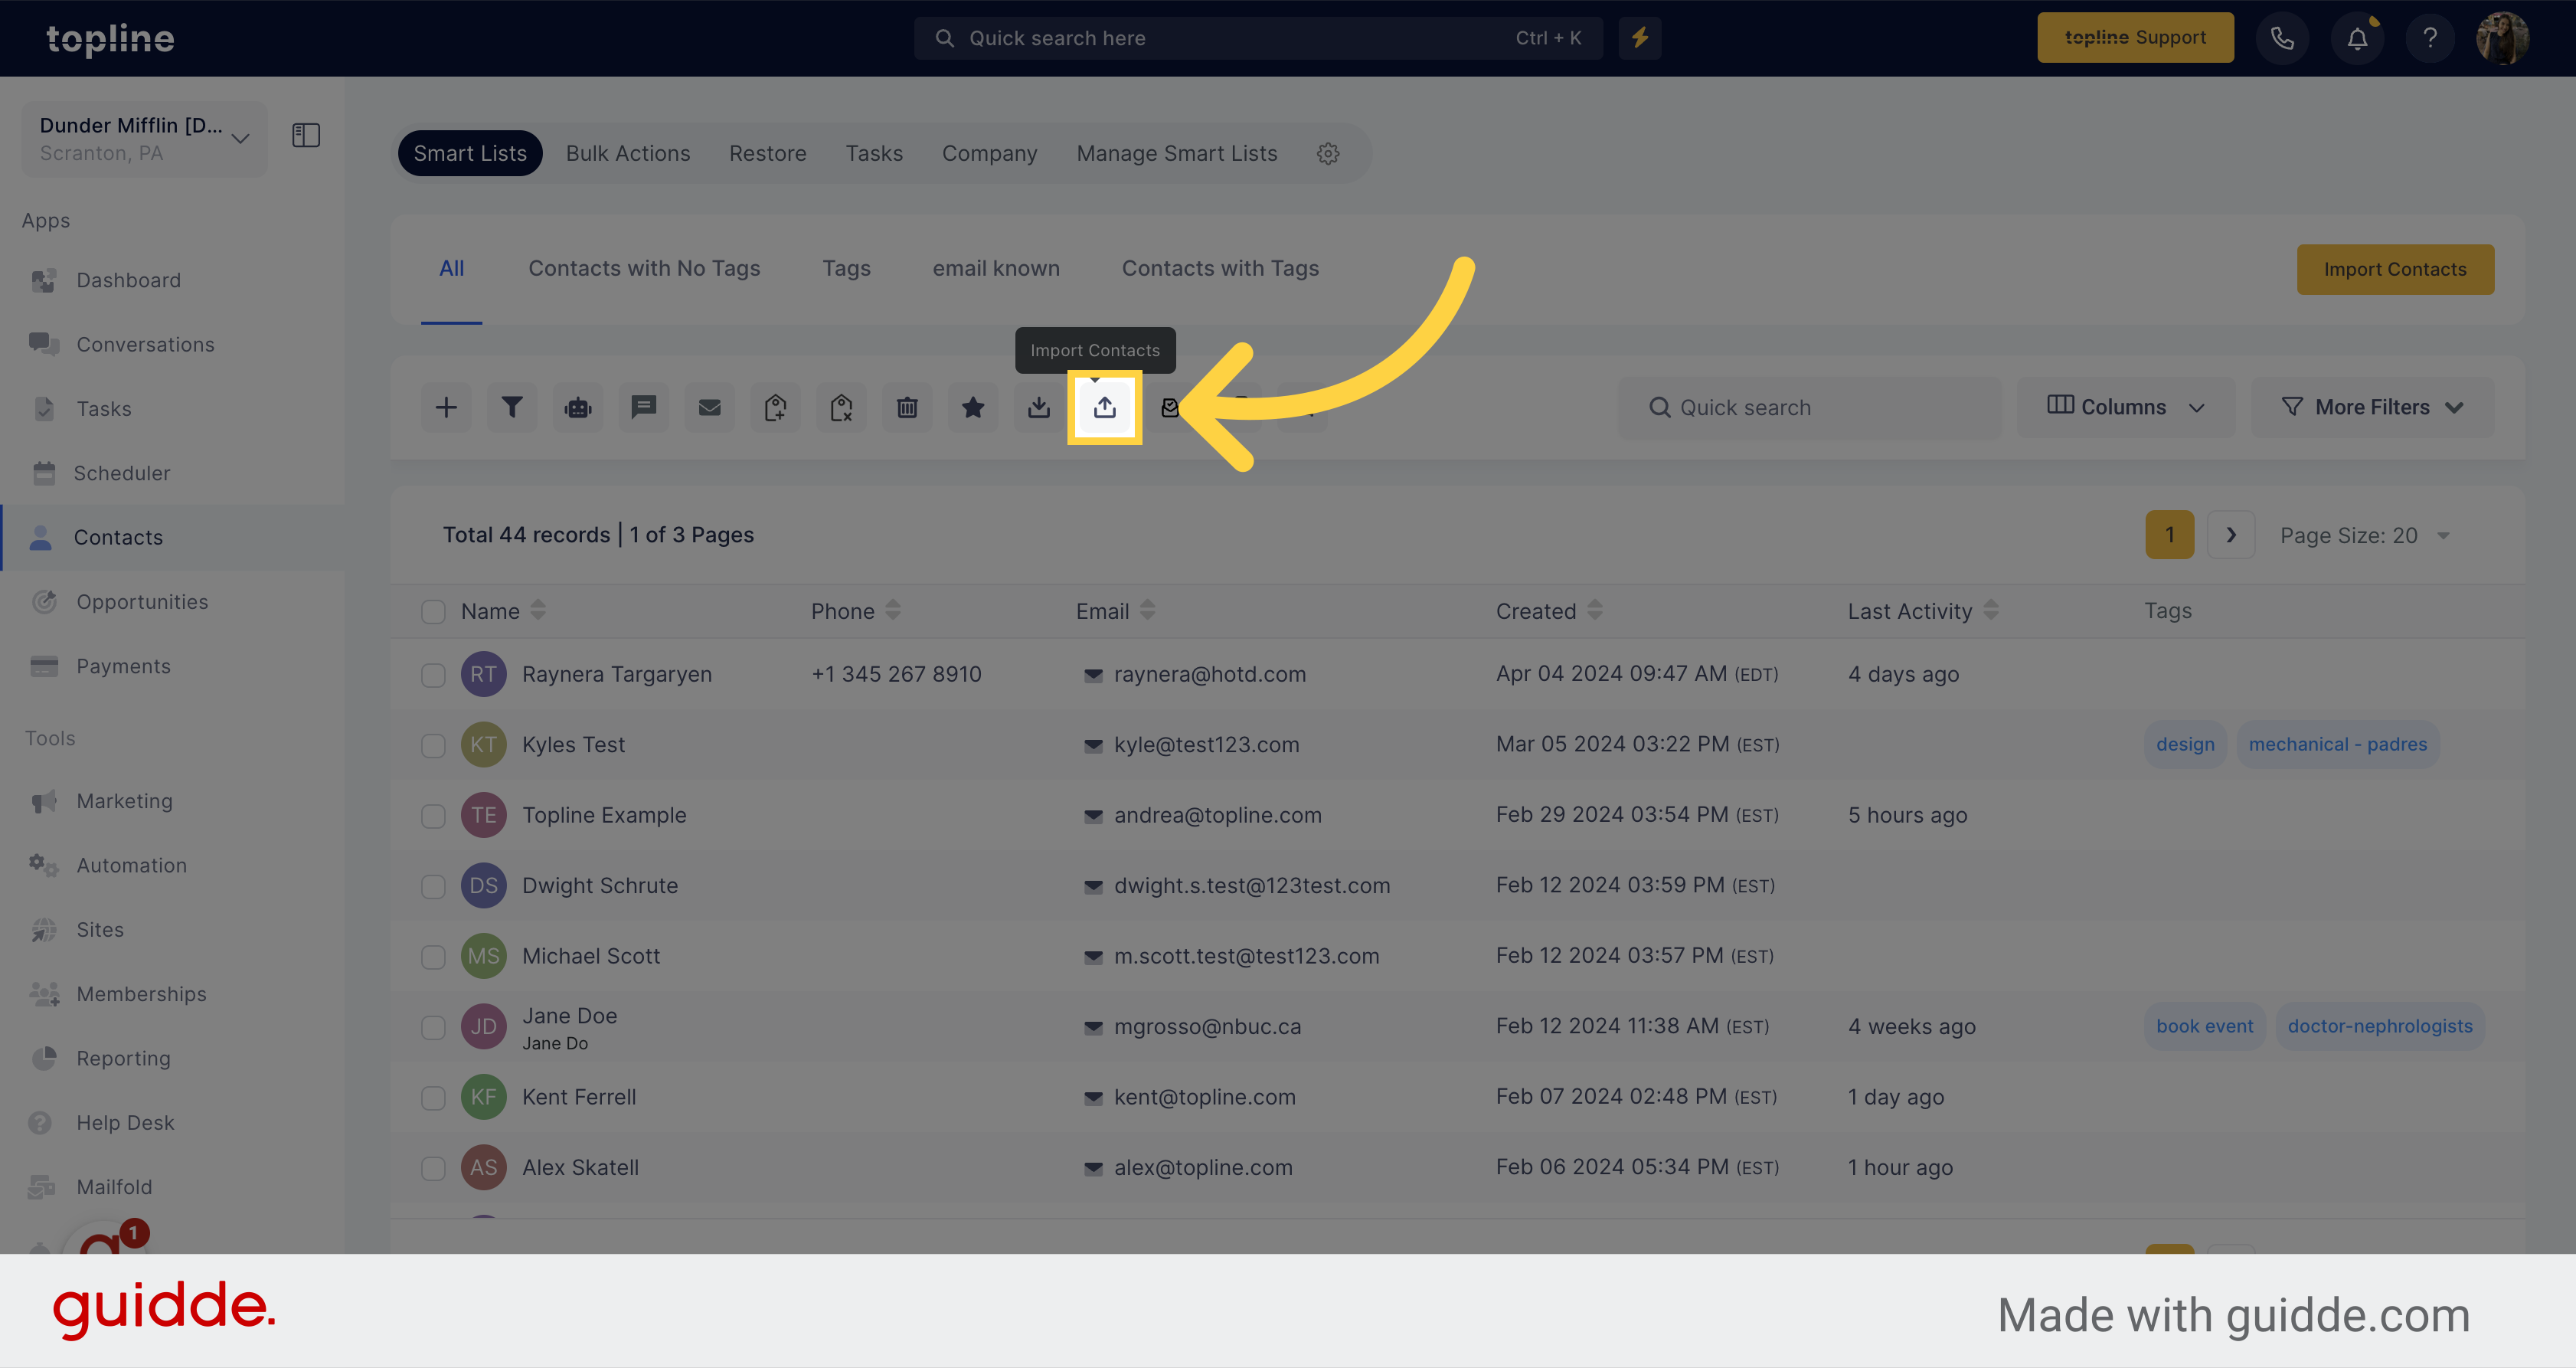
Click on the import contacts located on the actions menu.
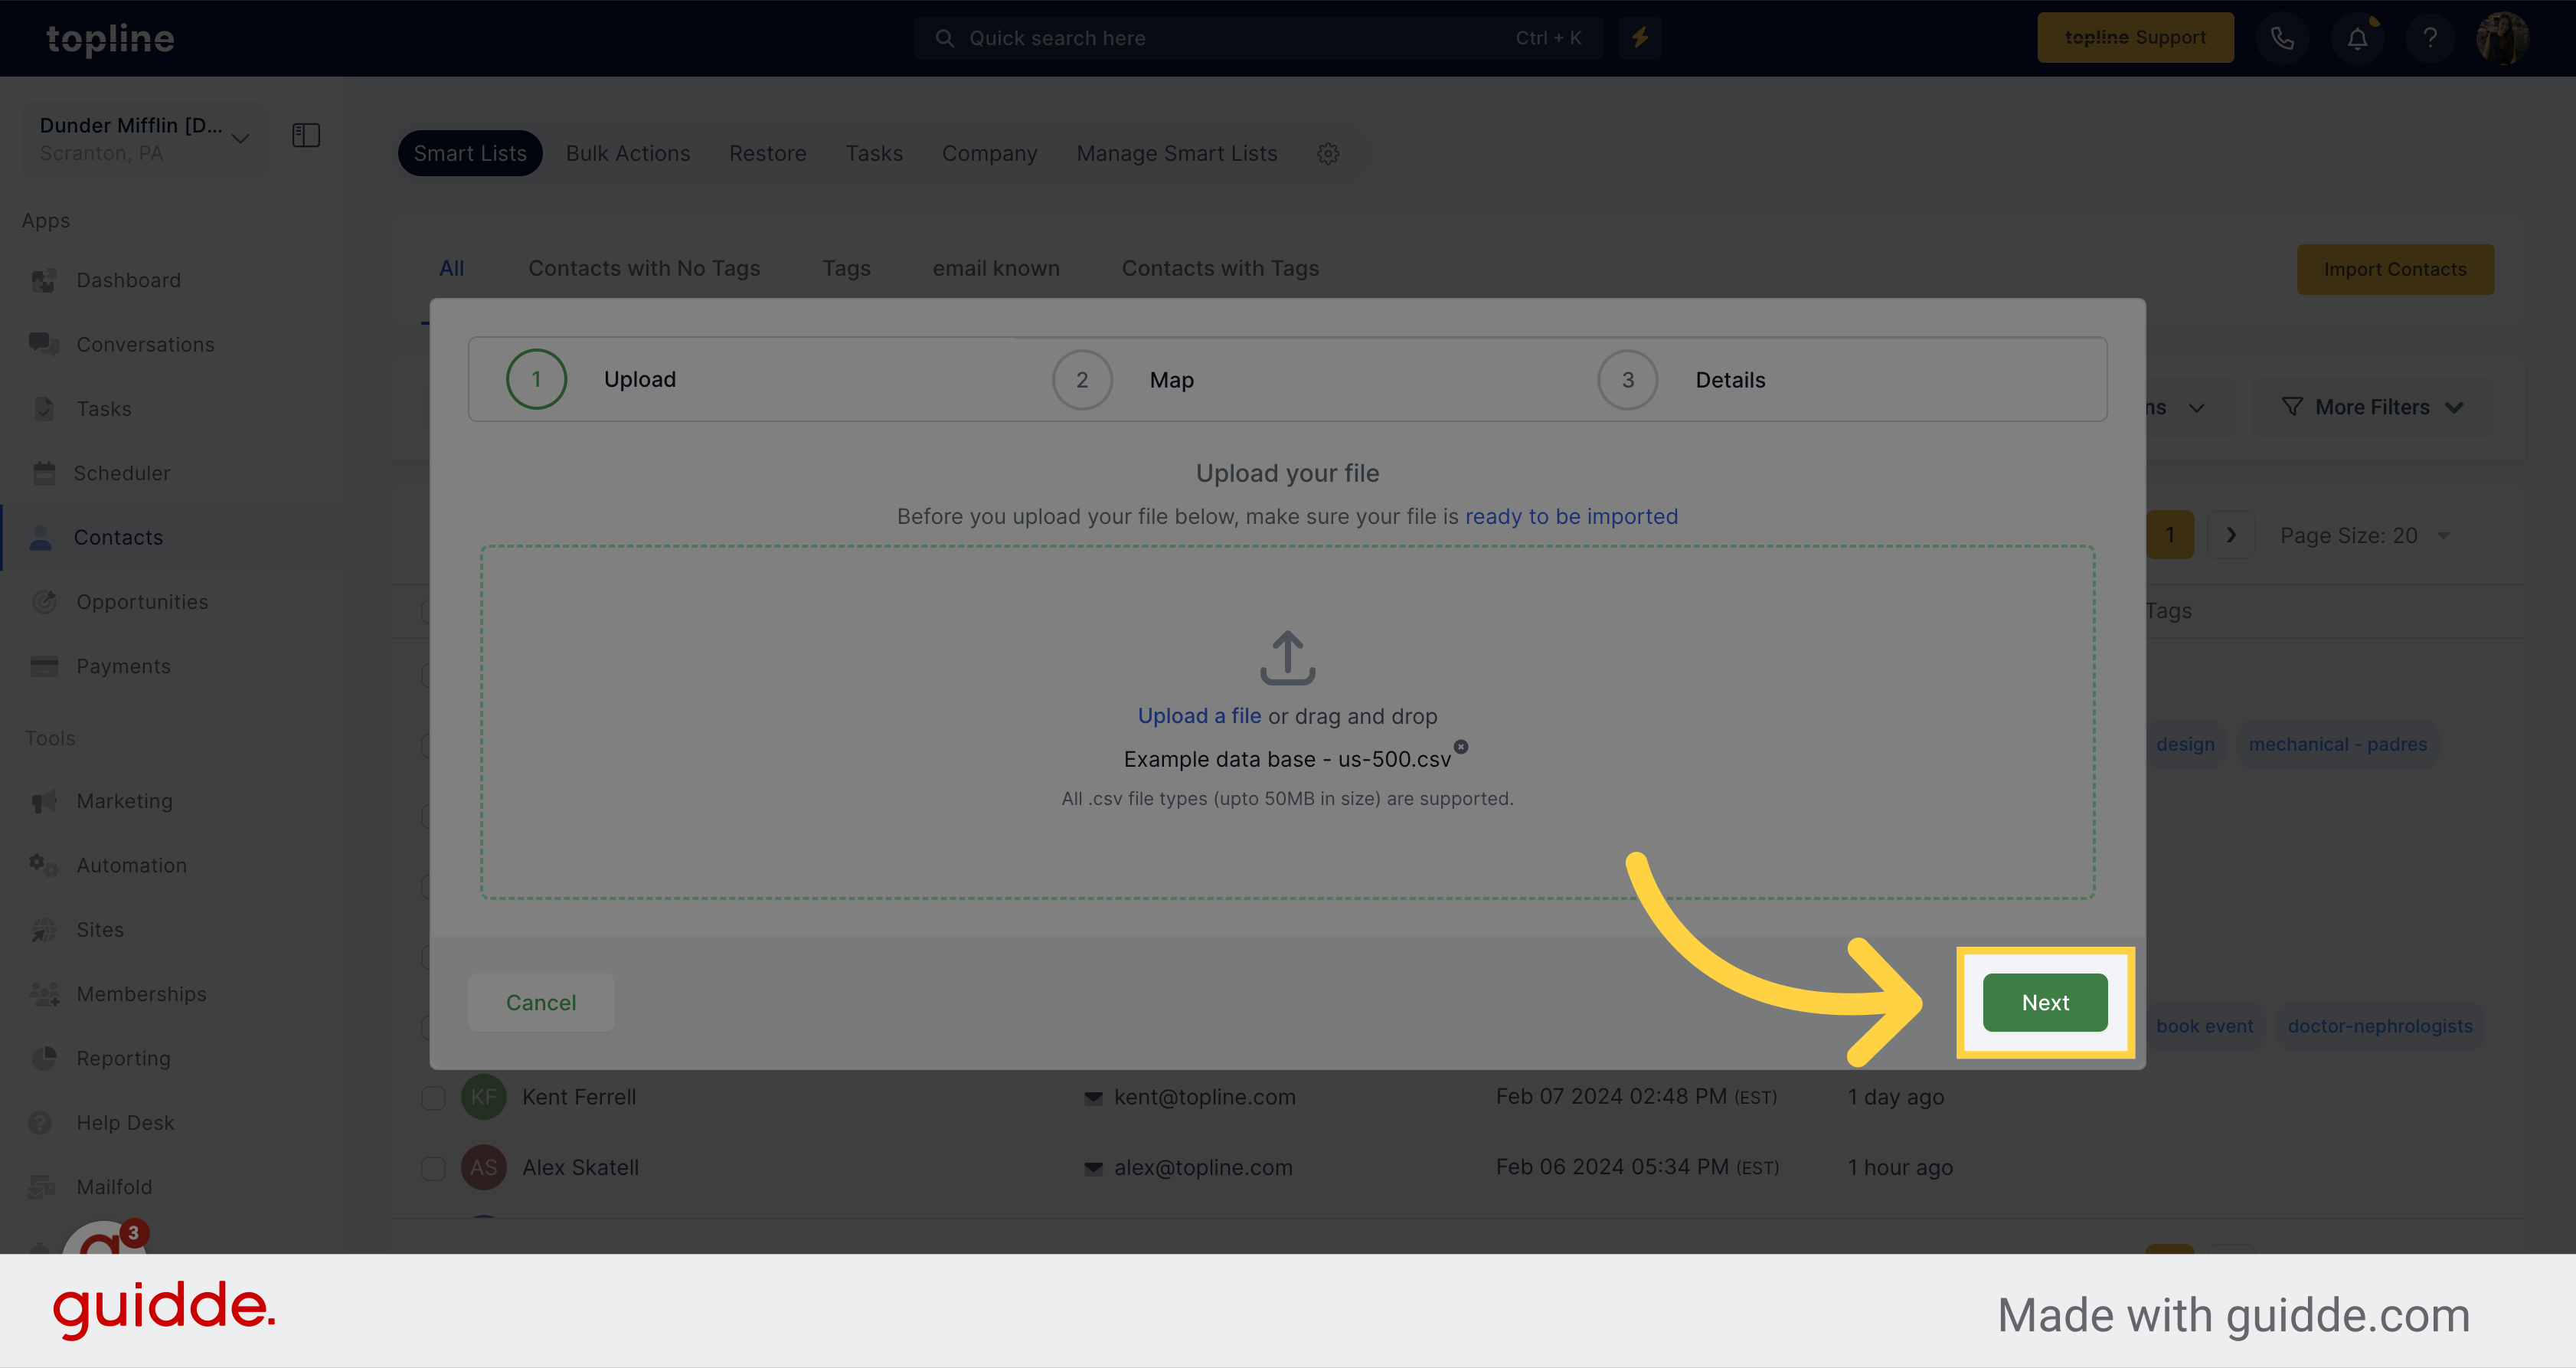
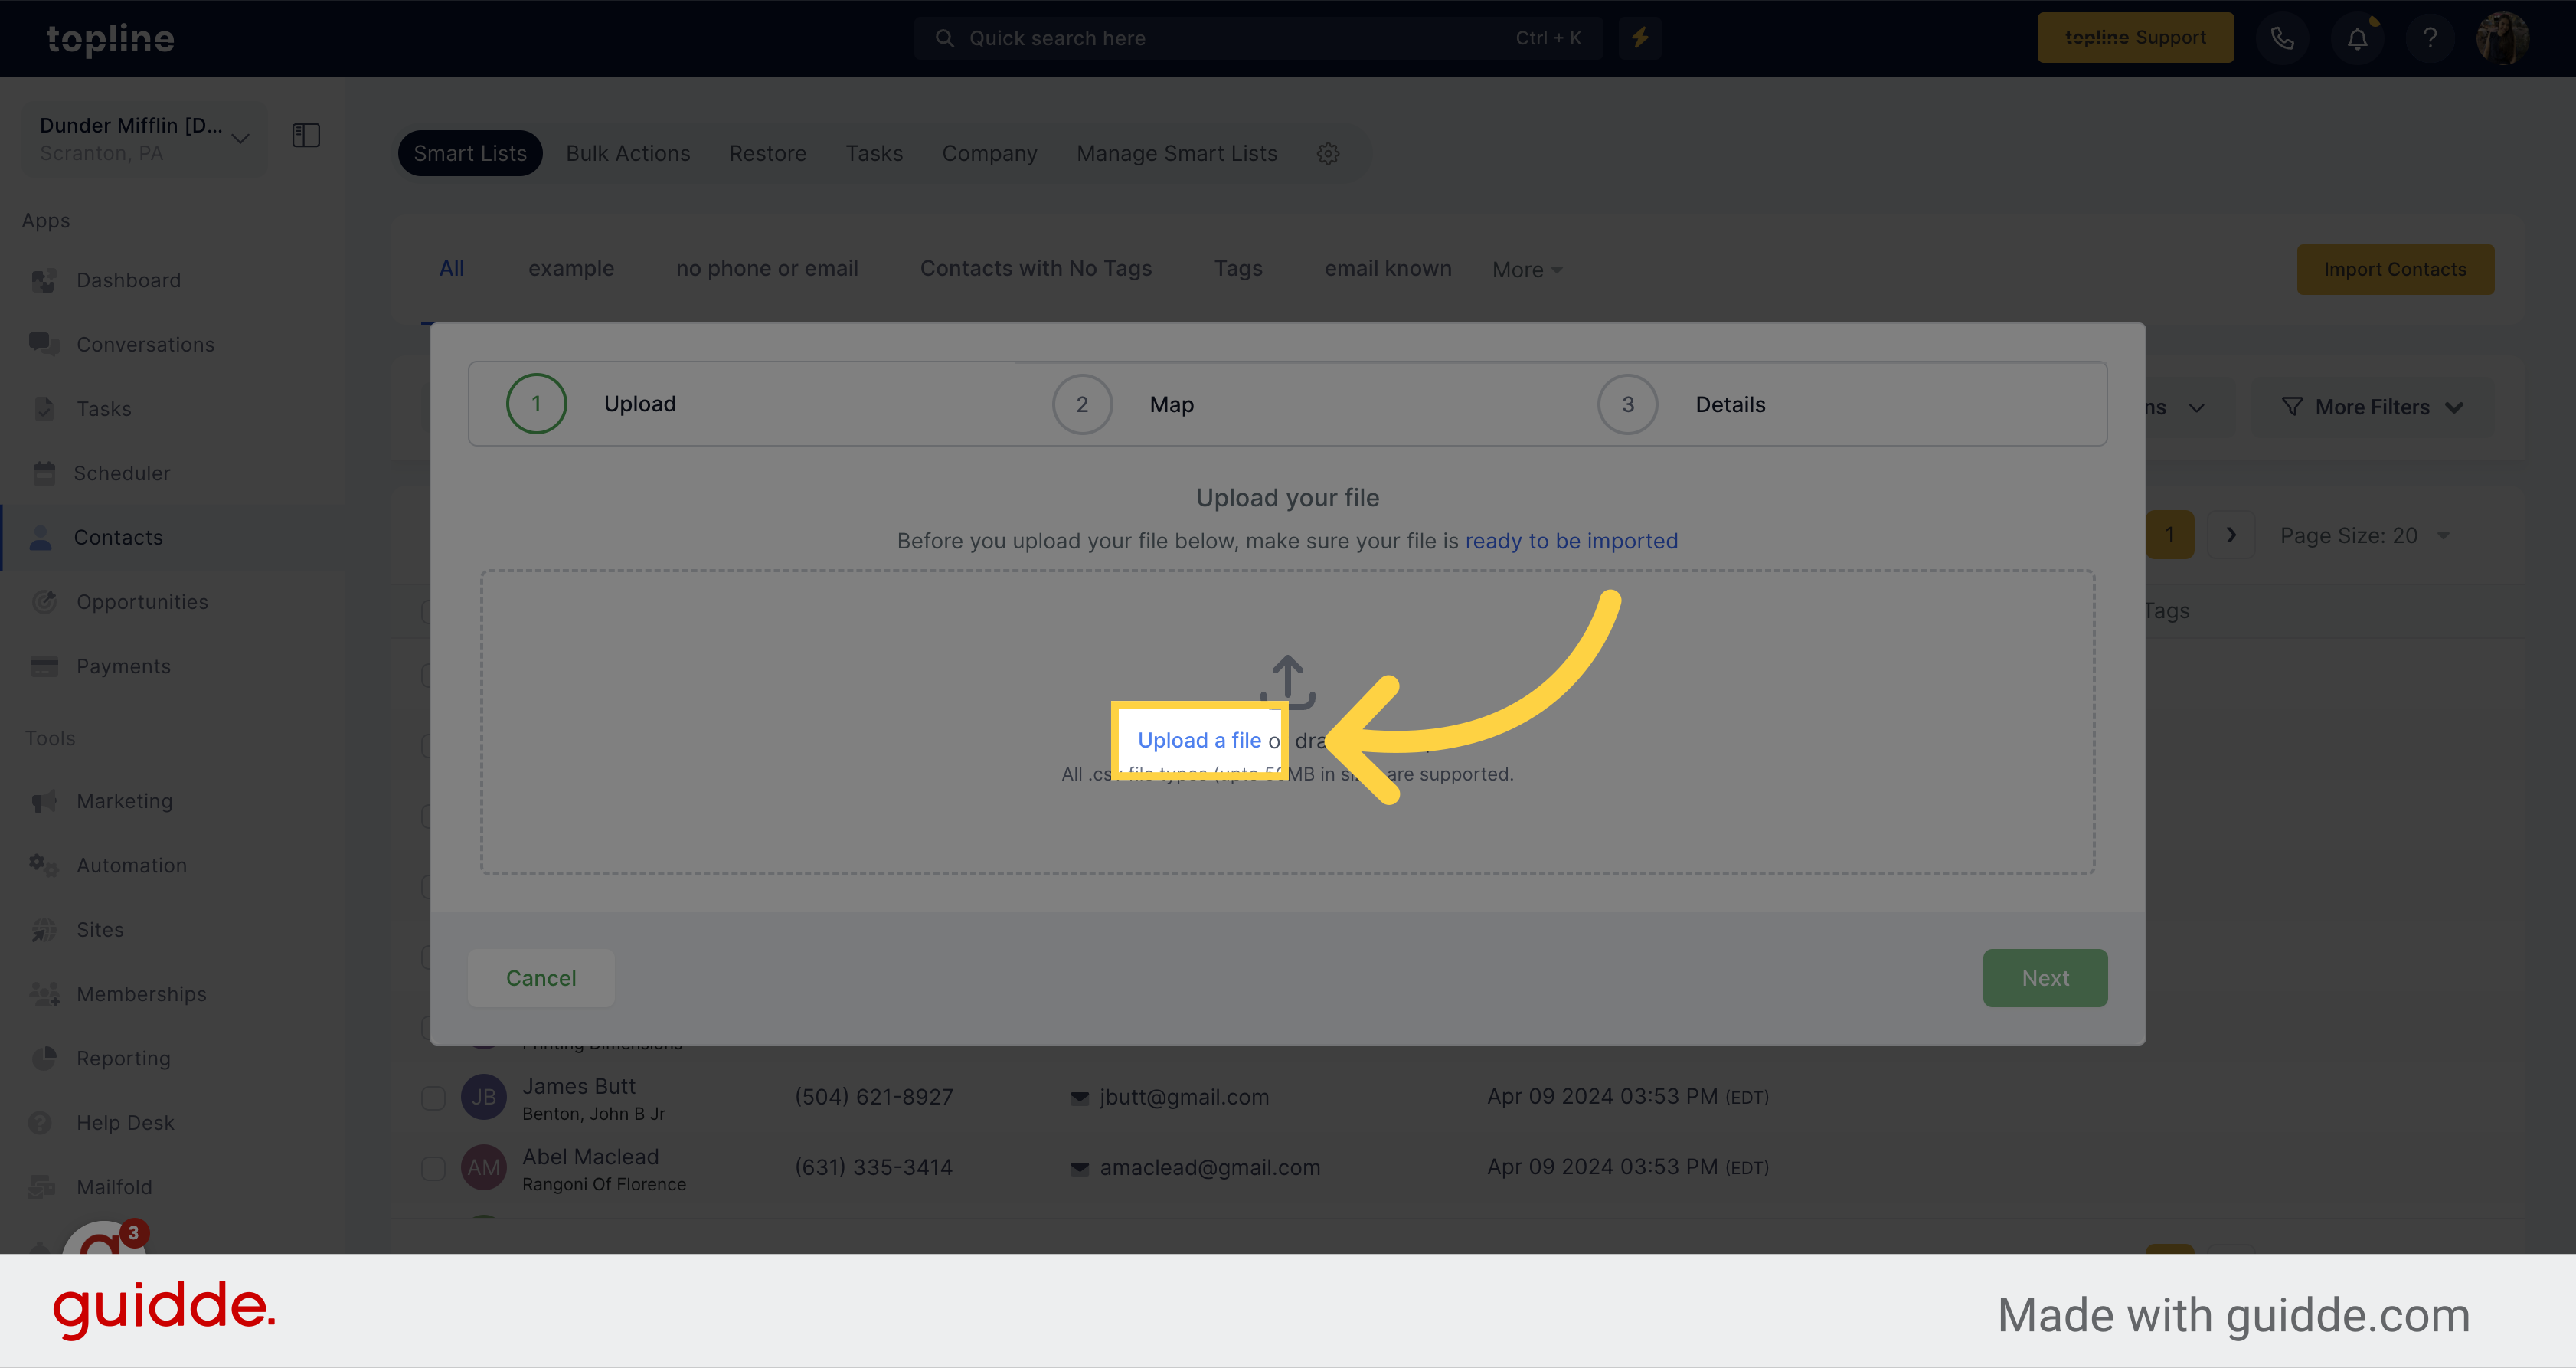
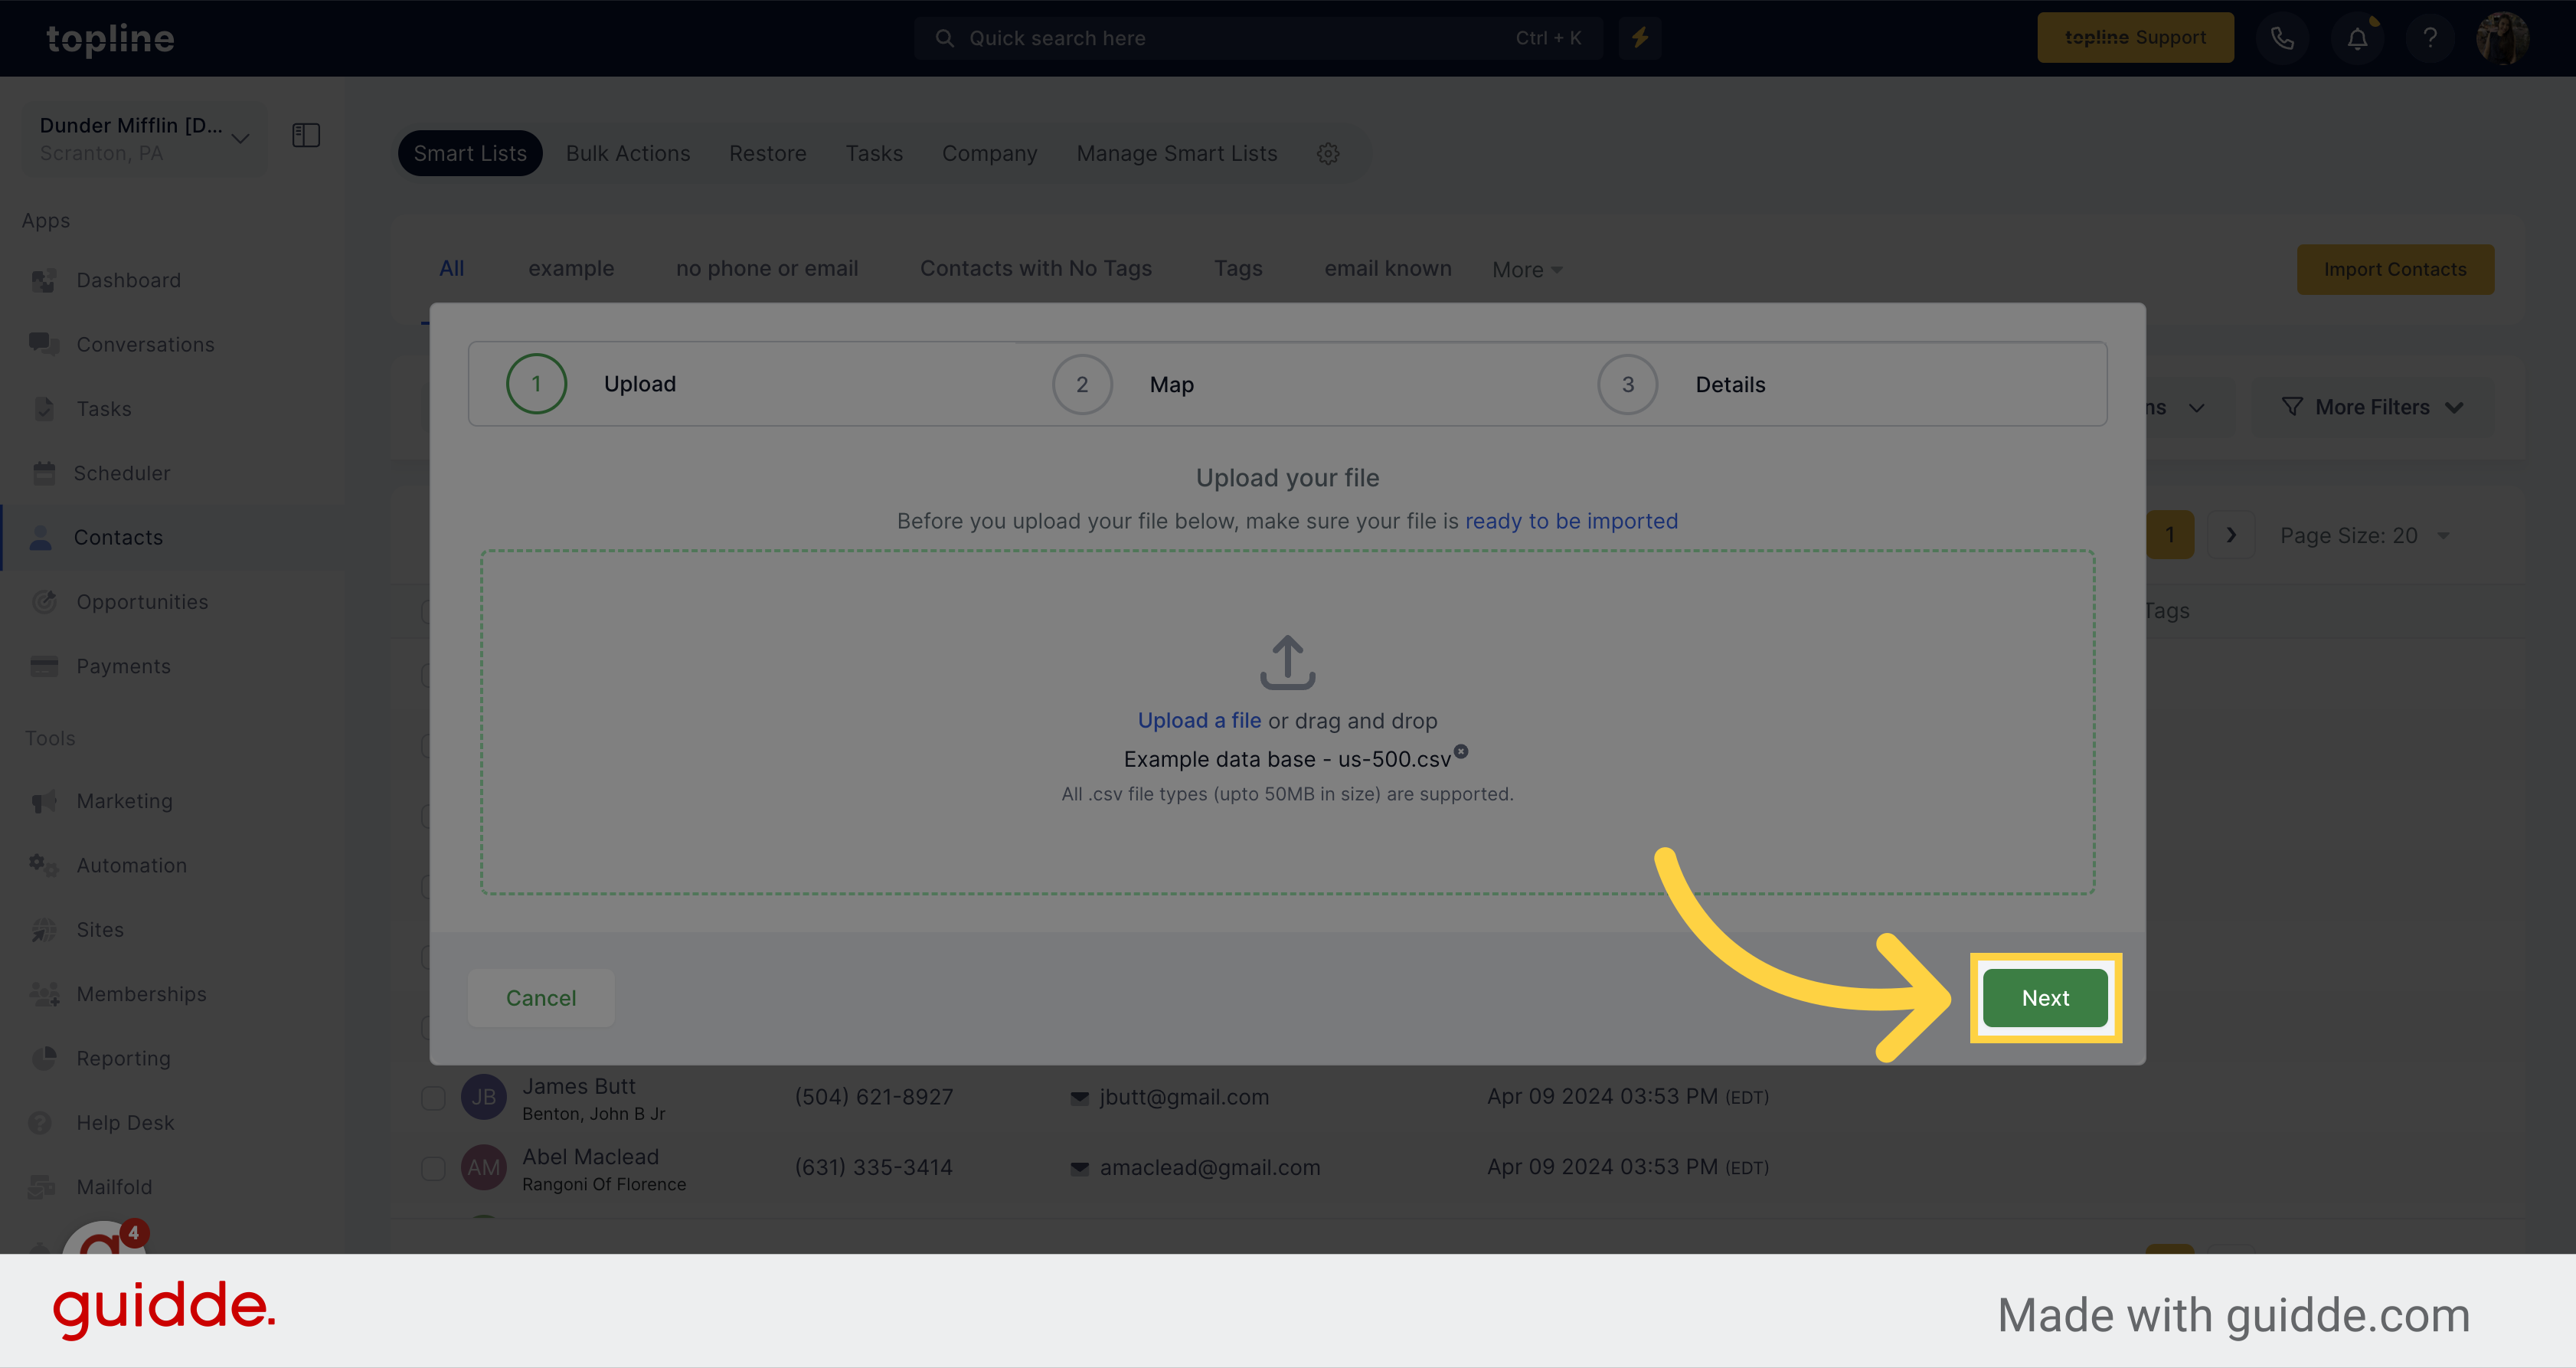
A pop up window will appear. Click on Upload a file or drag your file in the space.

Once you have uploaded your file, click on Next.
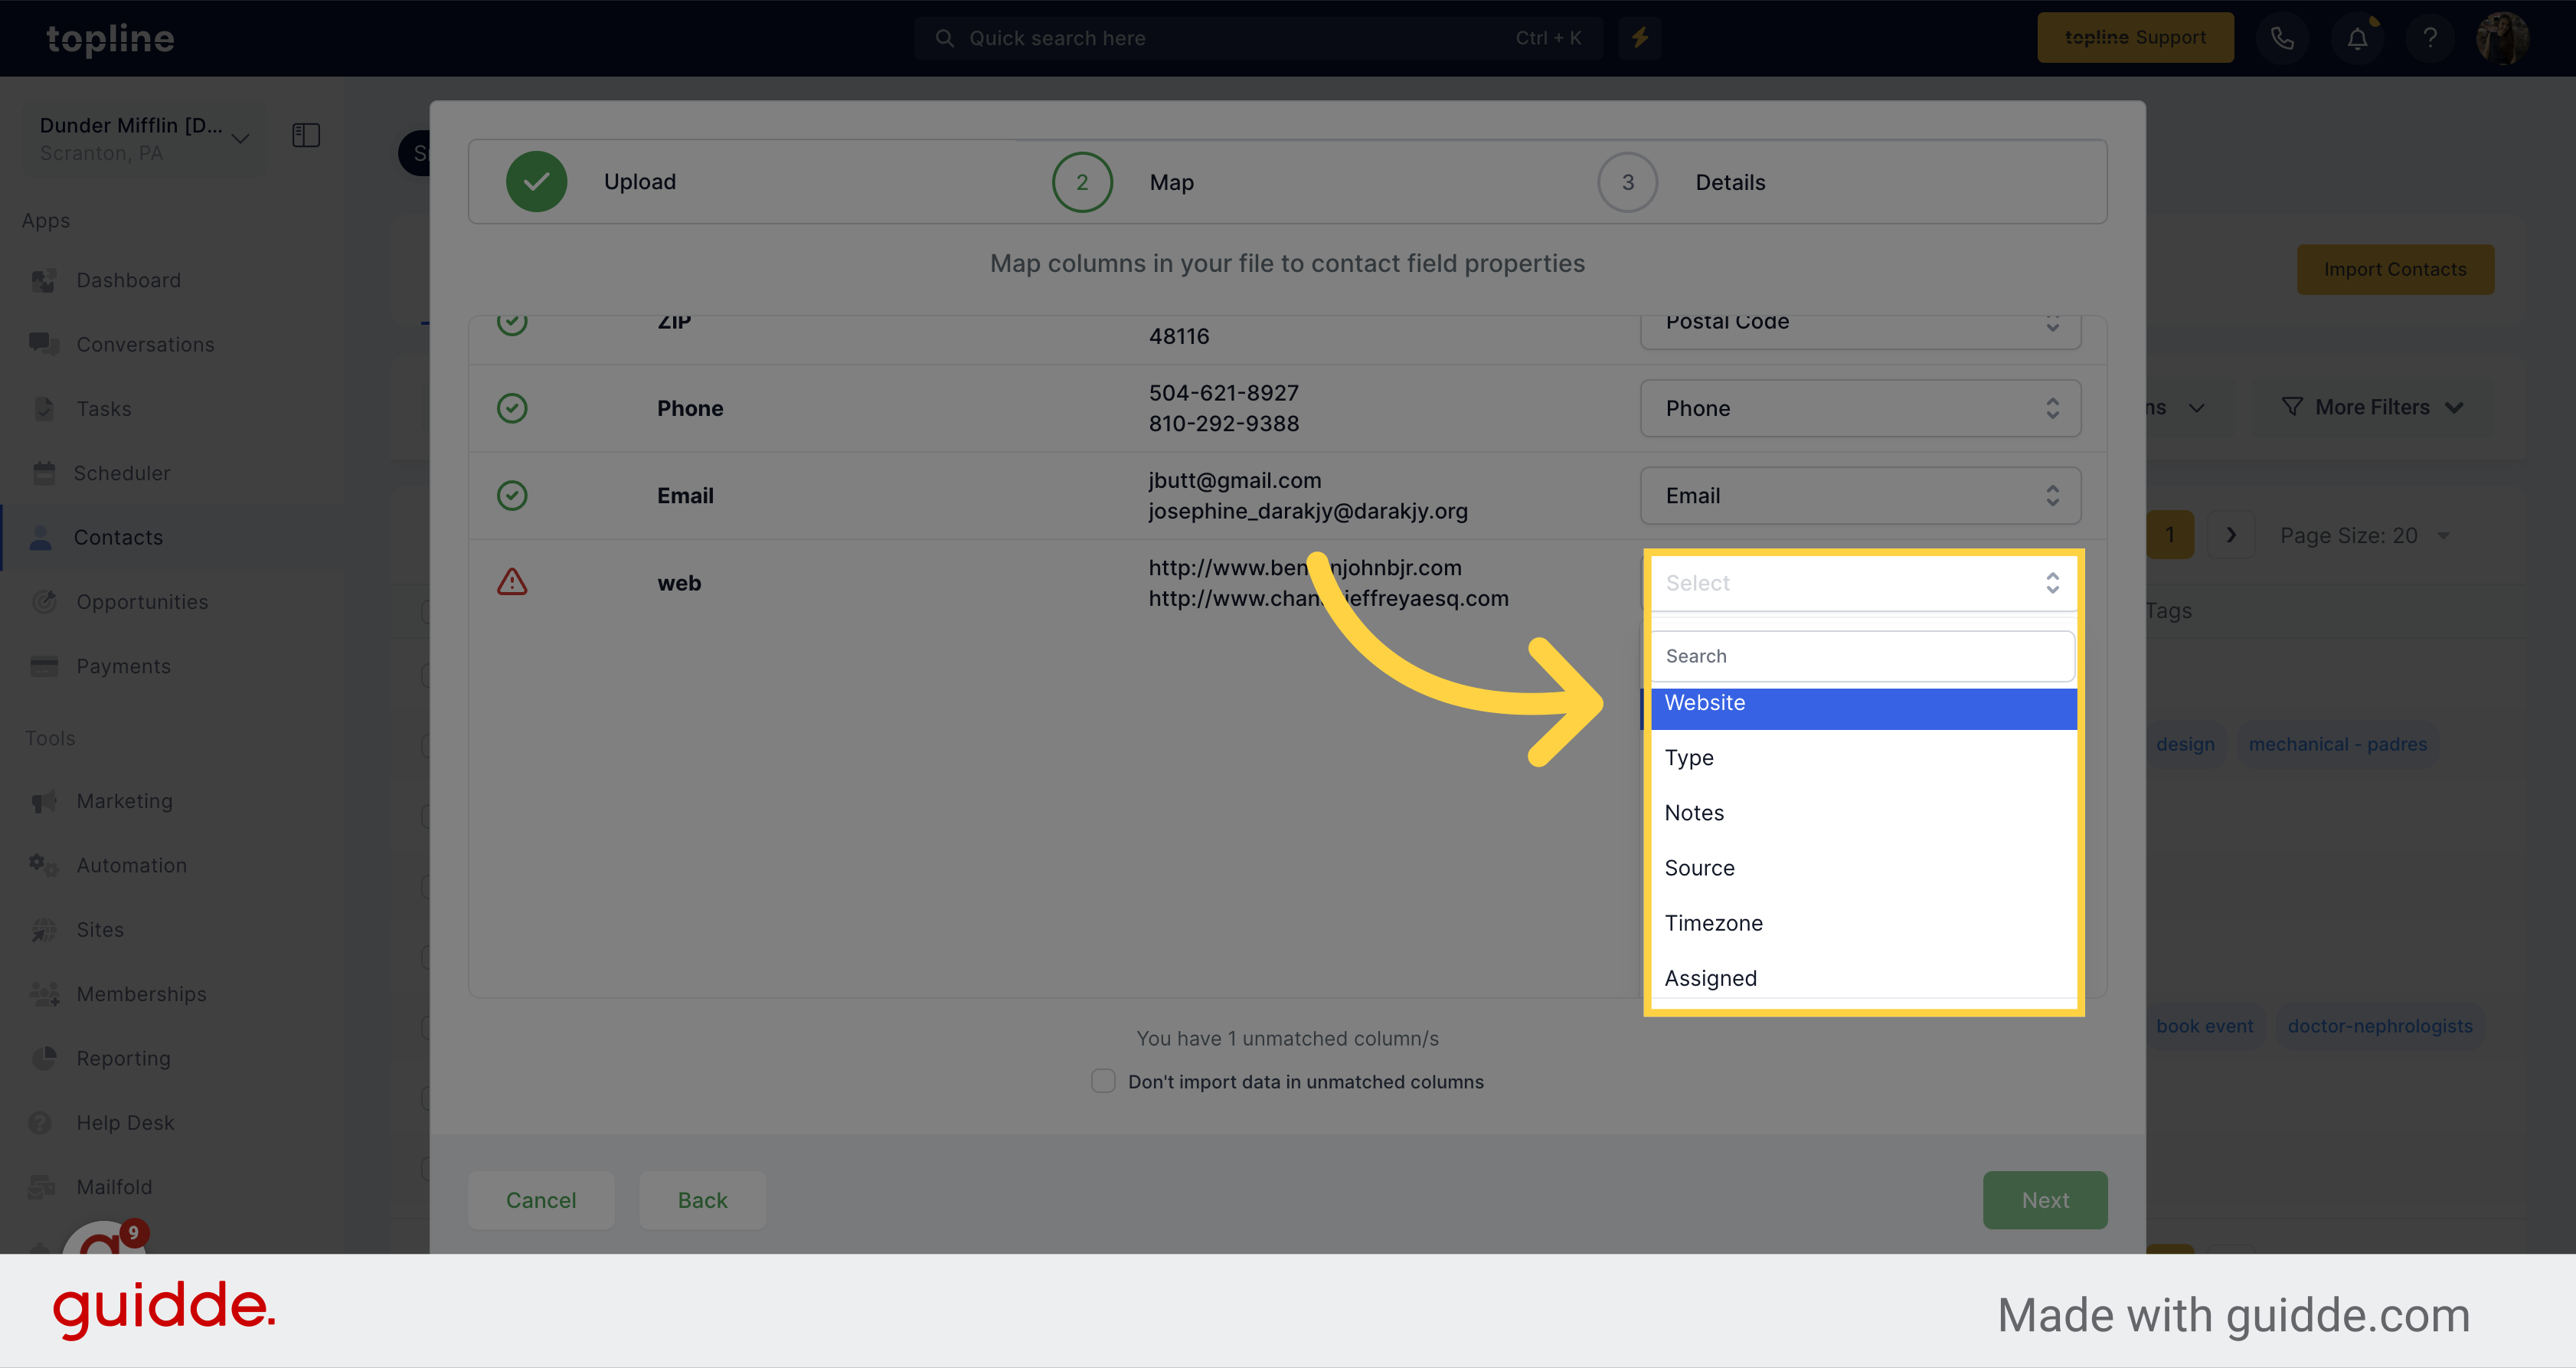
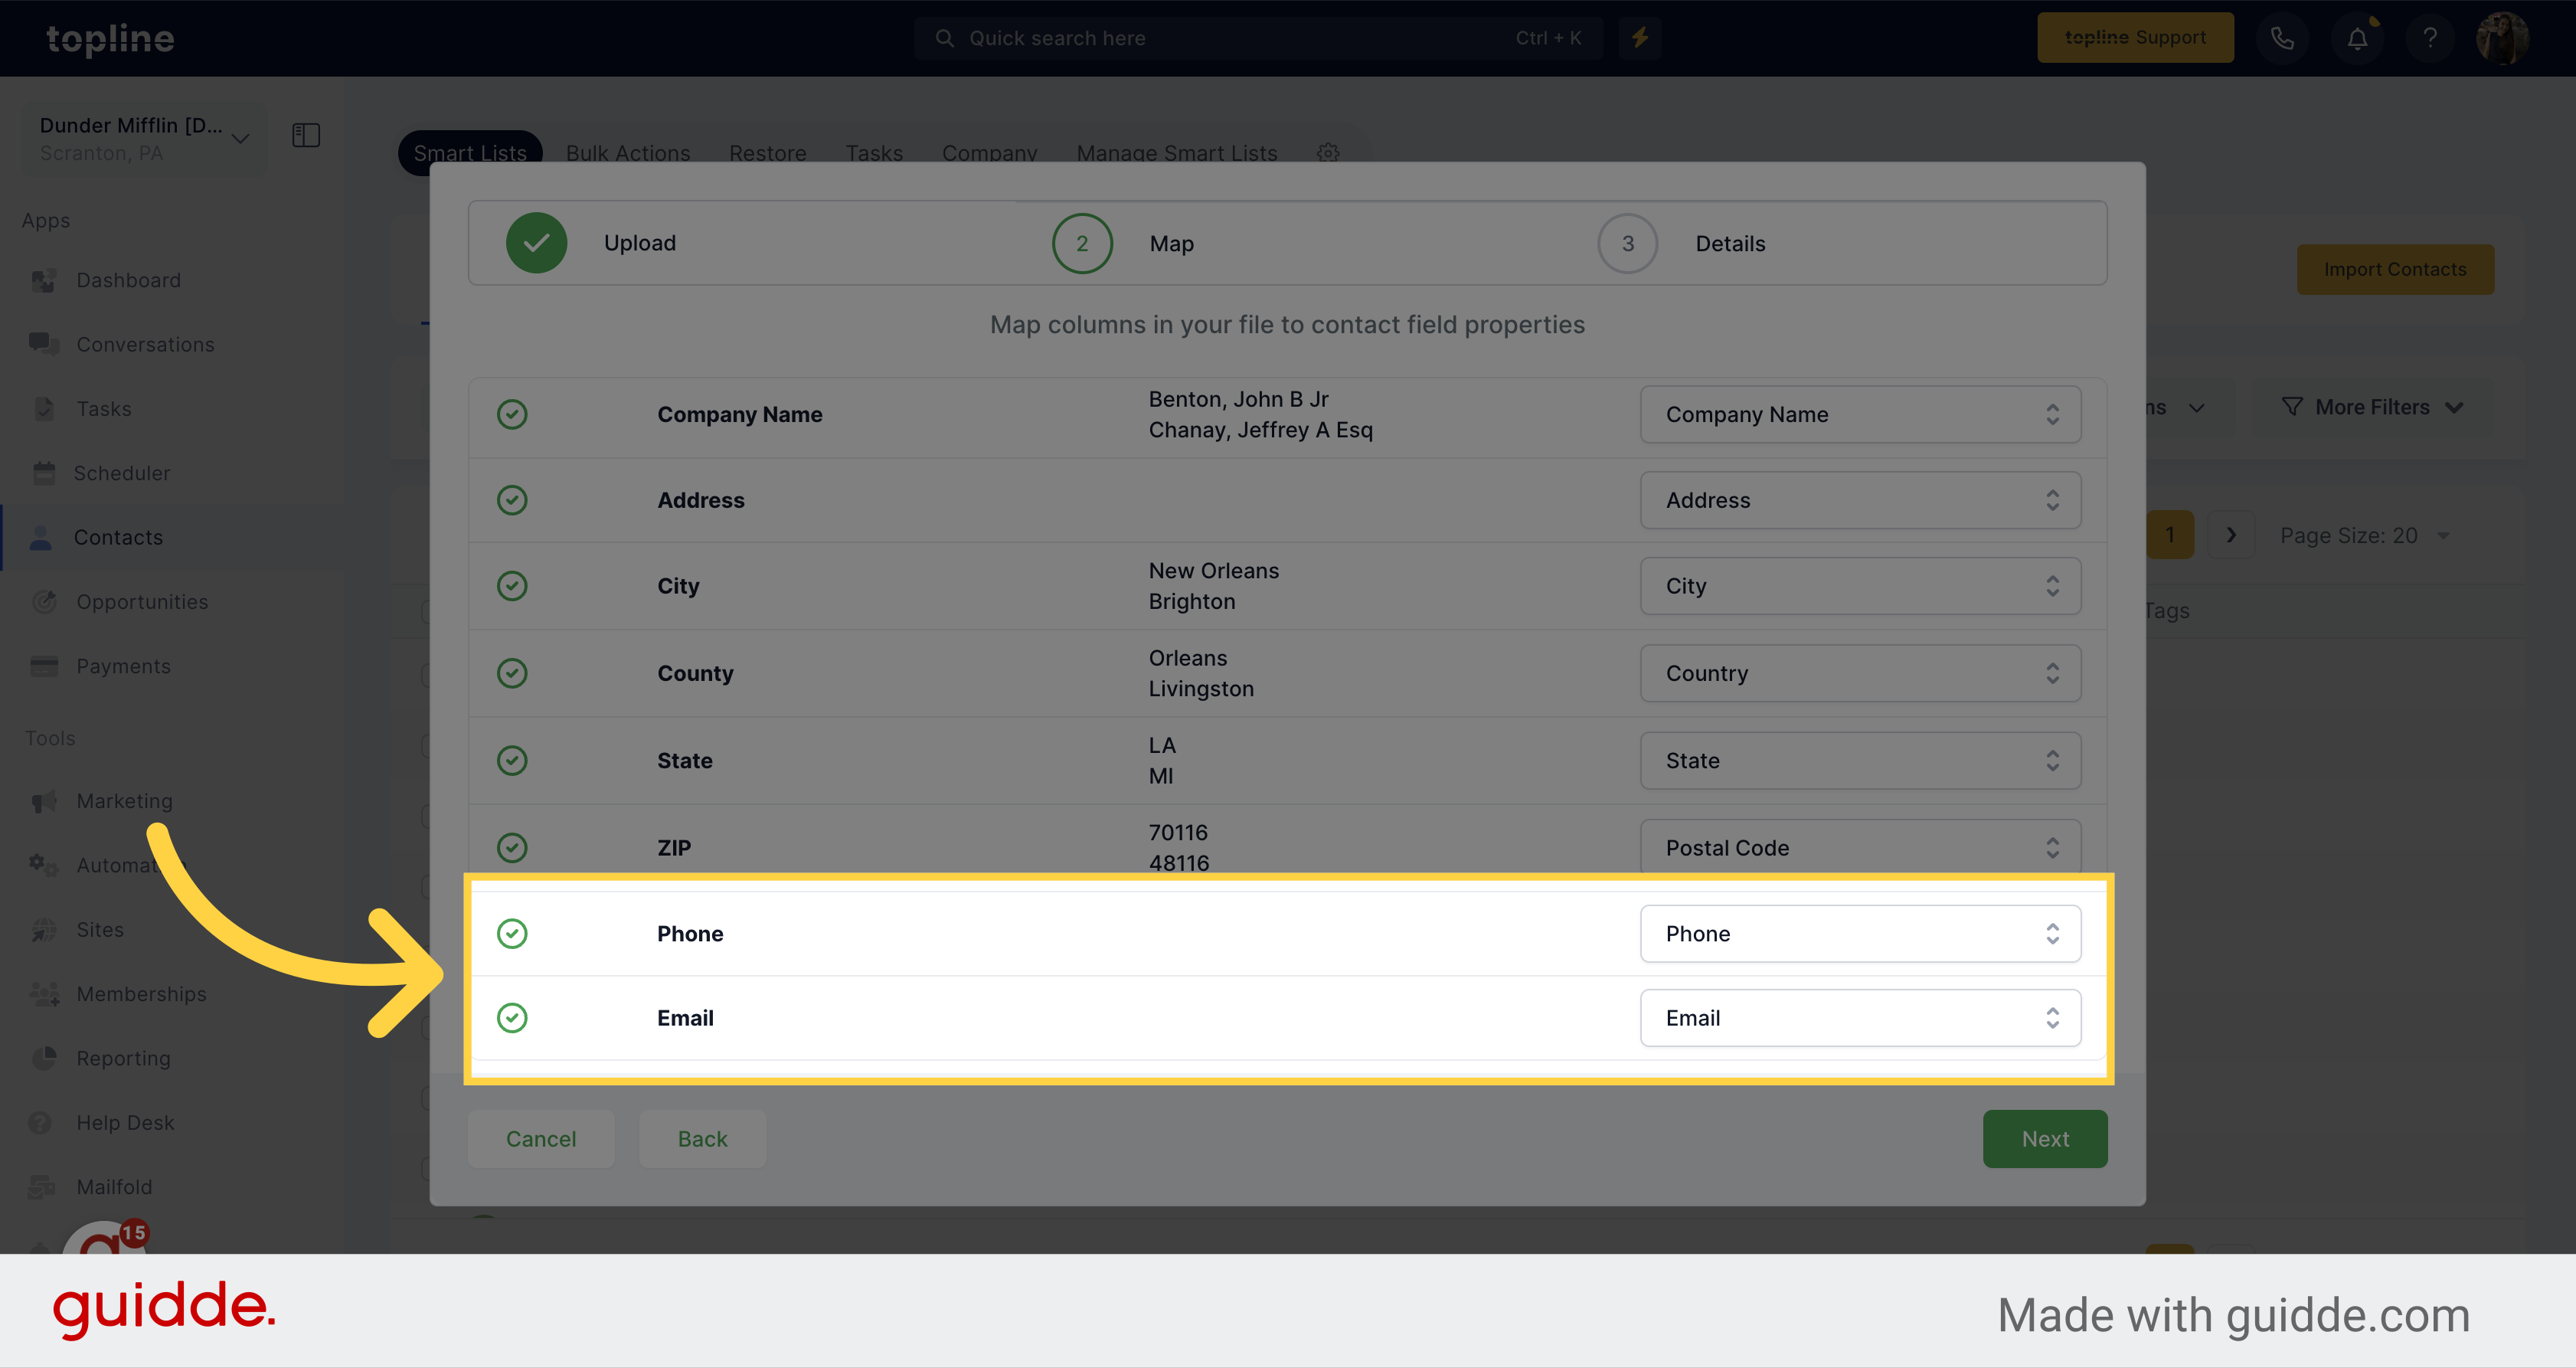
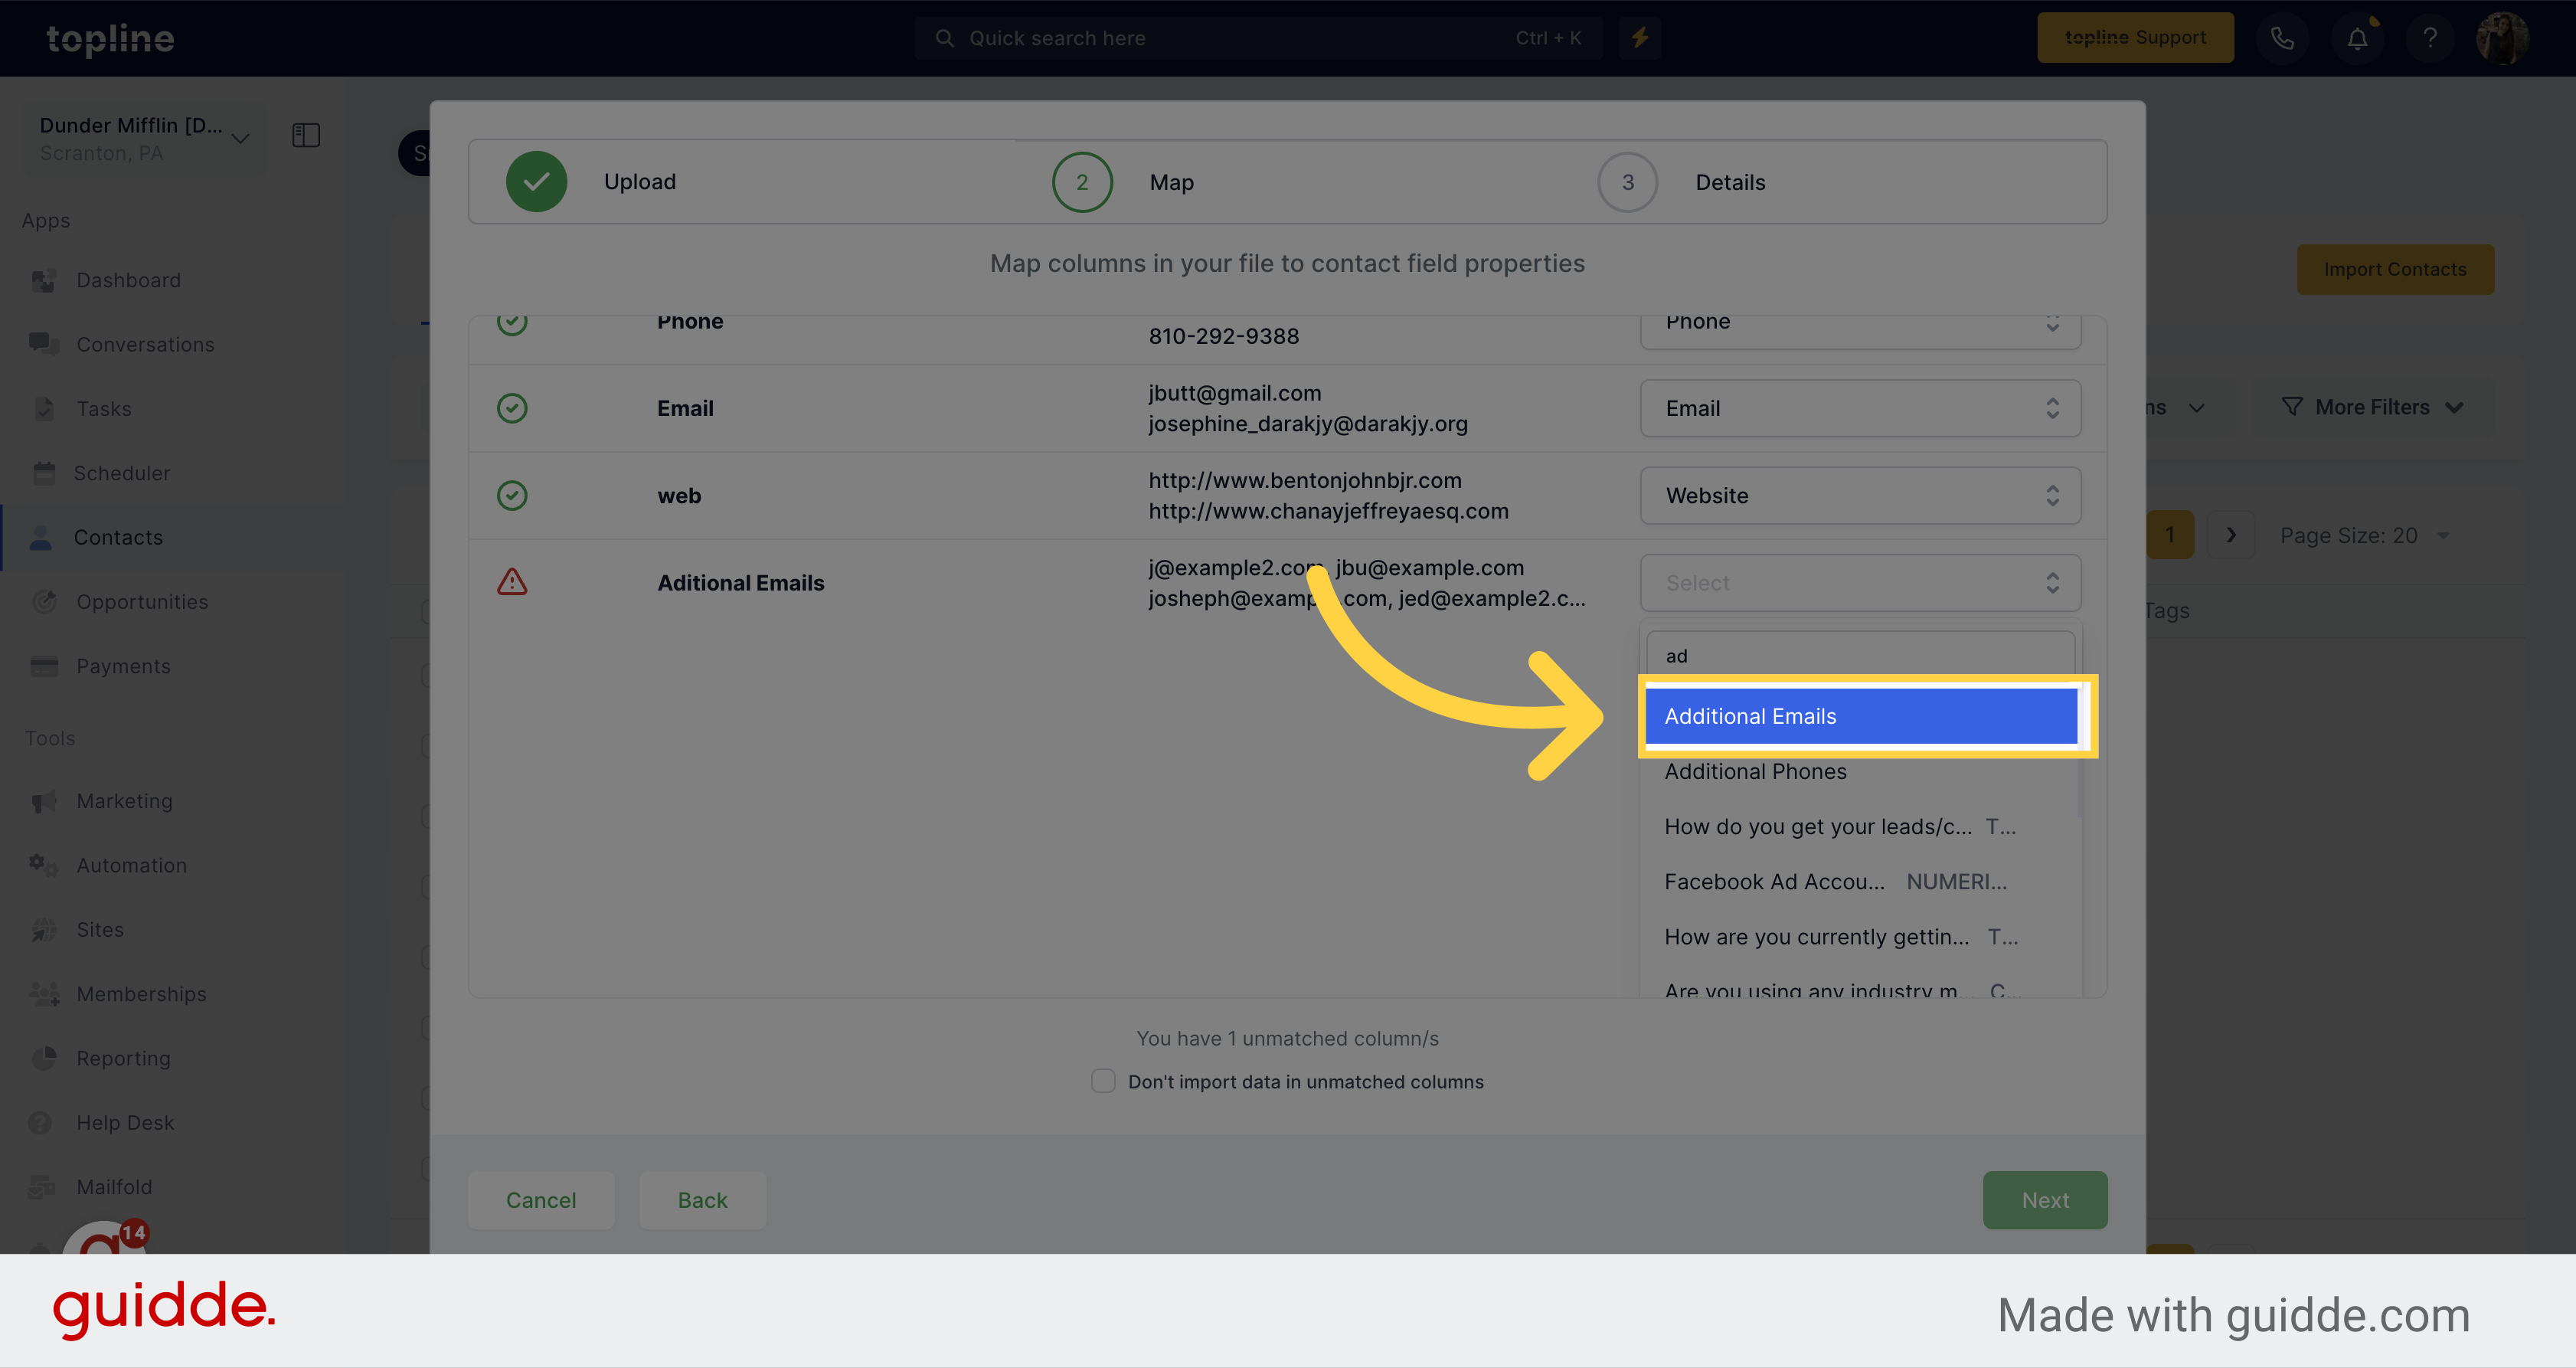
Next to the columns a check or attention icon will appear. When the red one appear, make sure to map them to the correct field property.
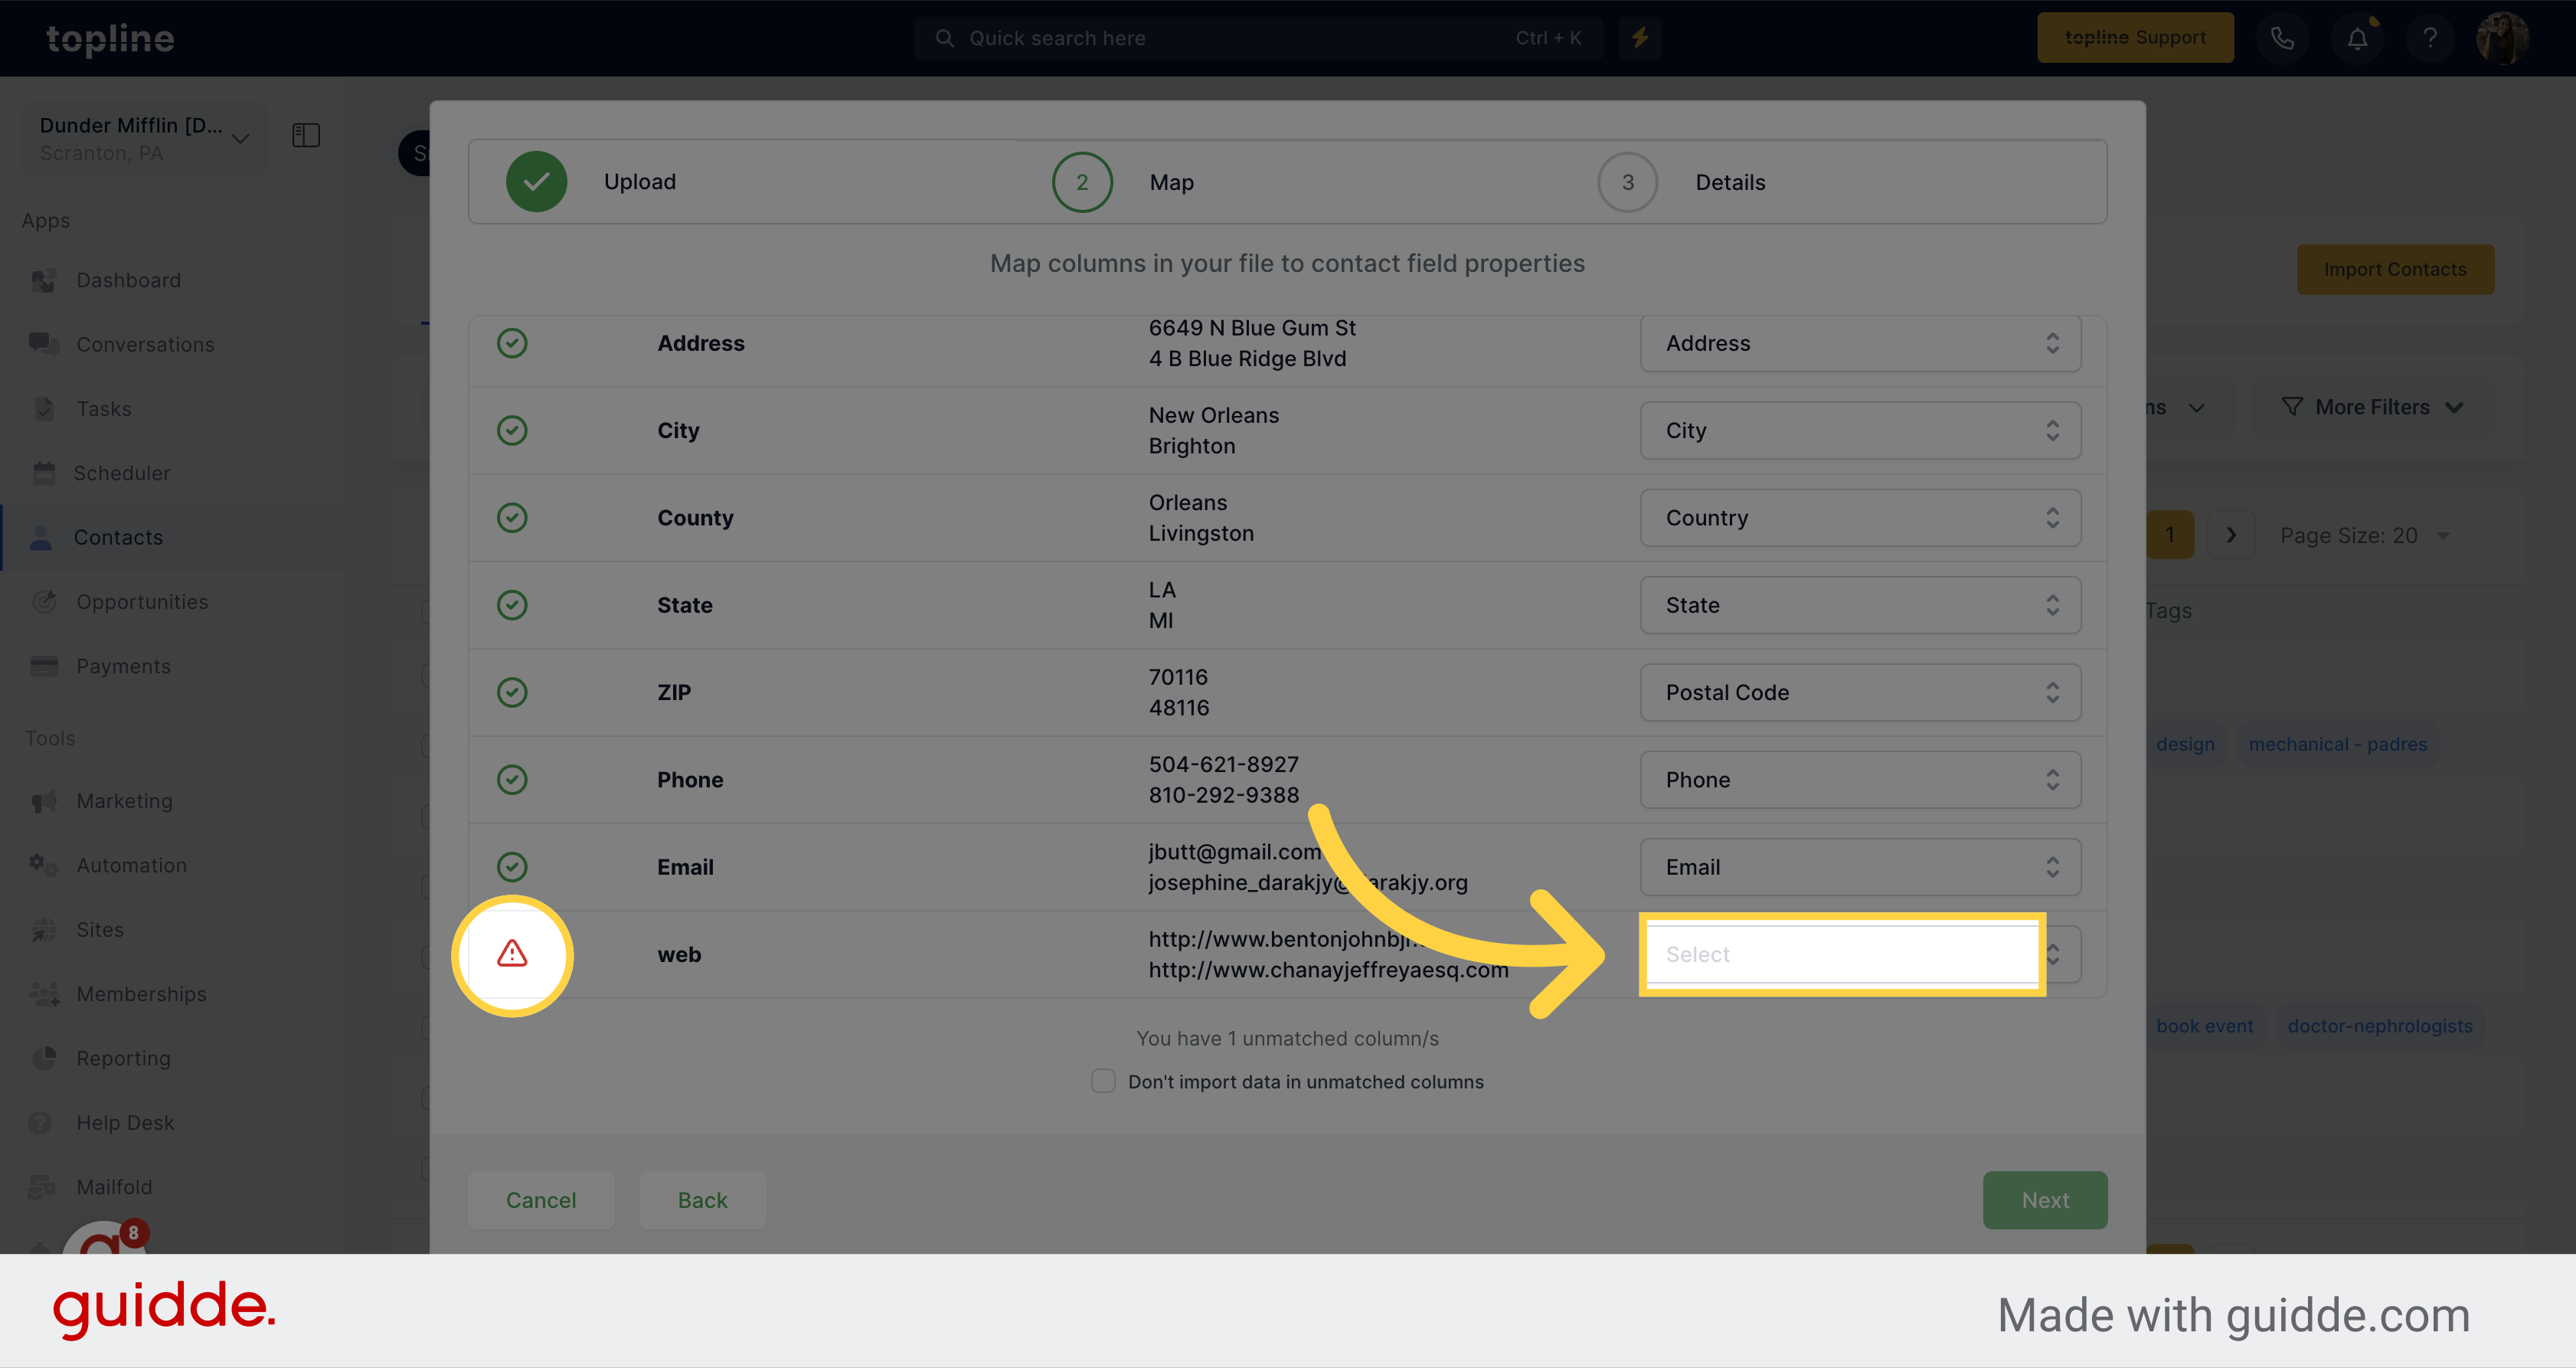
To categorize the fields, click on select and pick the right field for the information on the file.
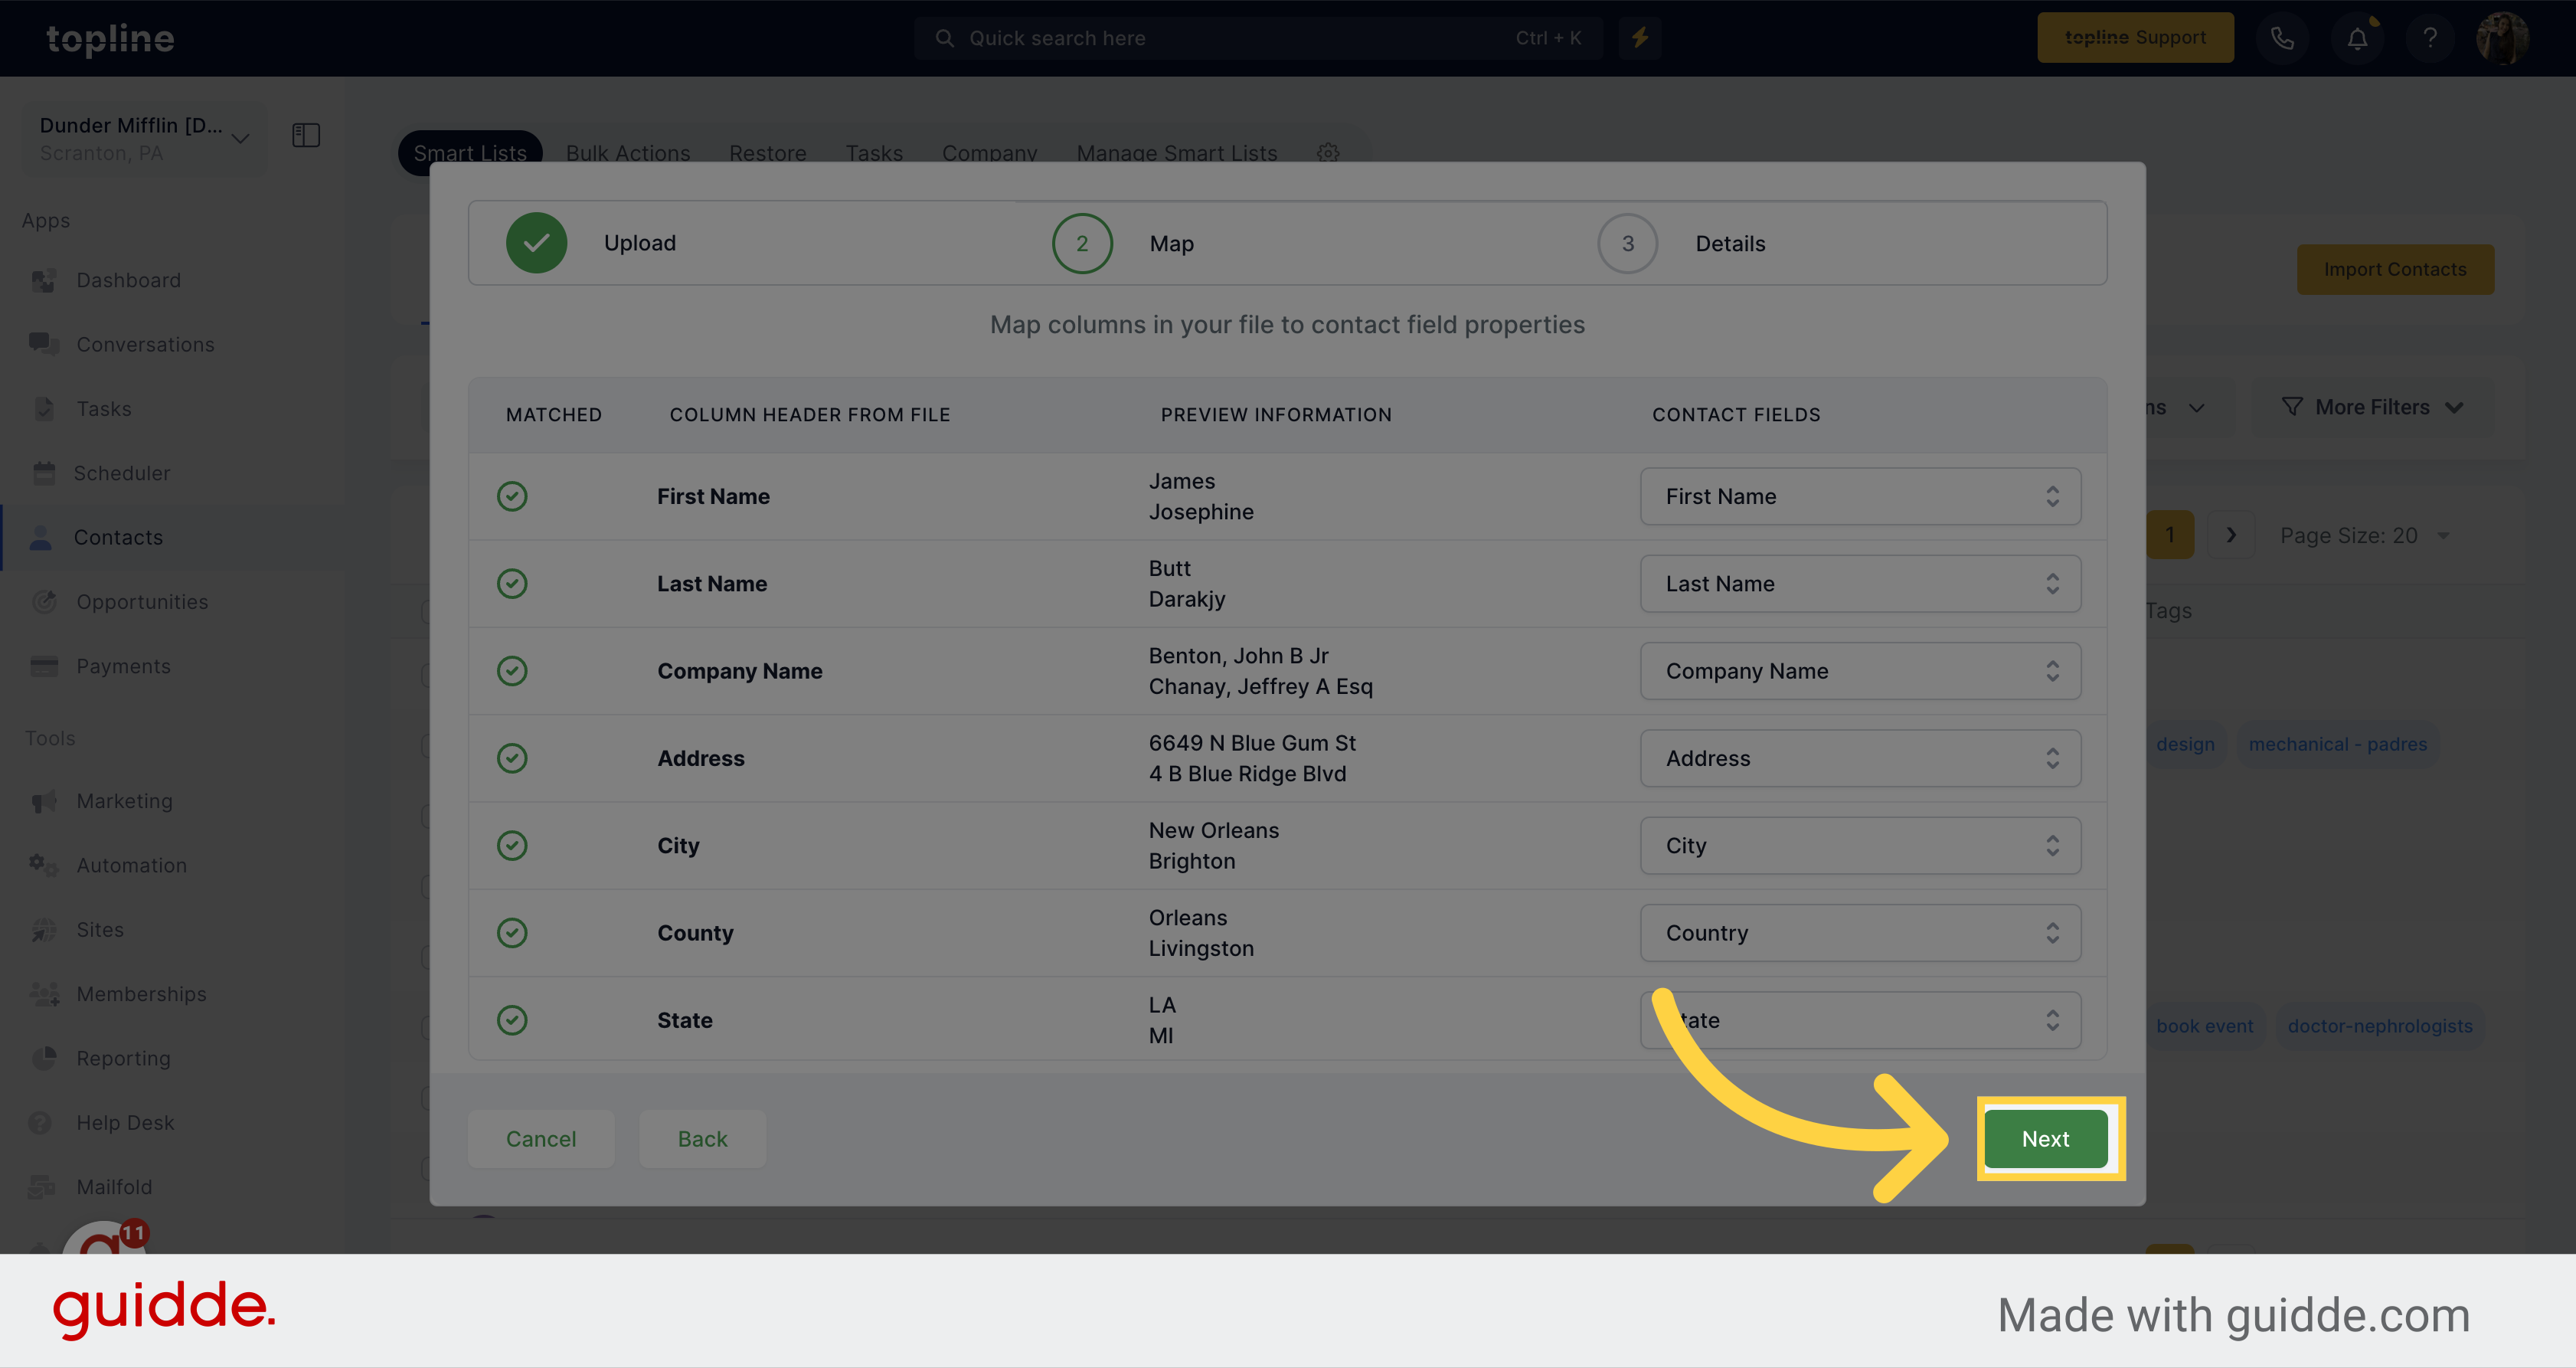
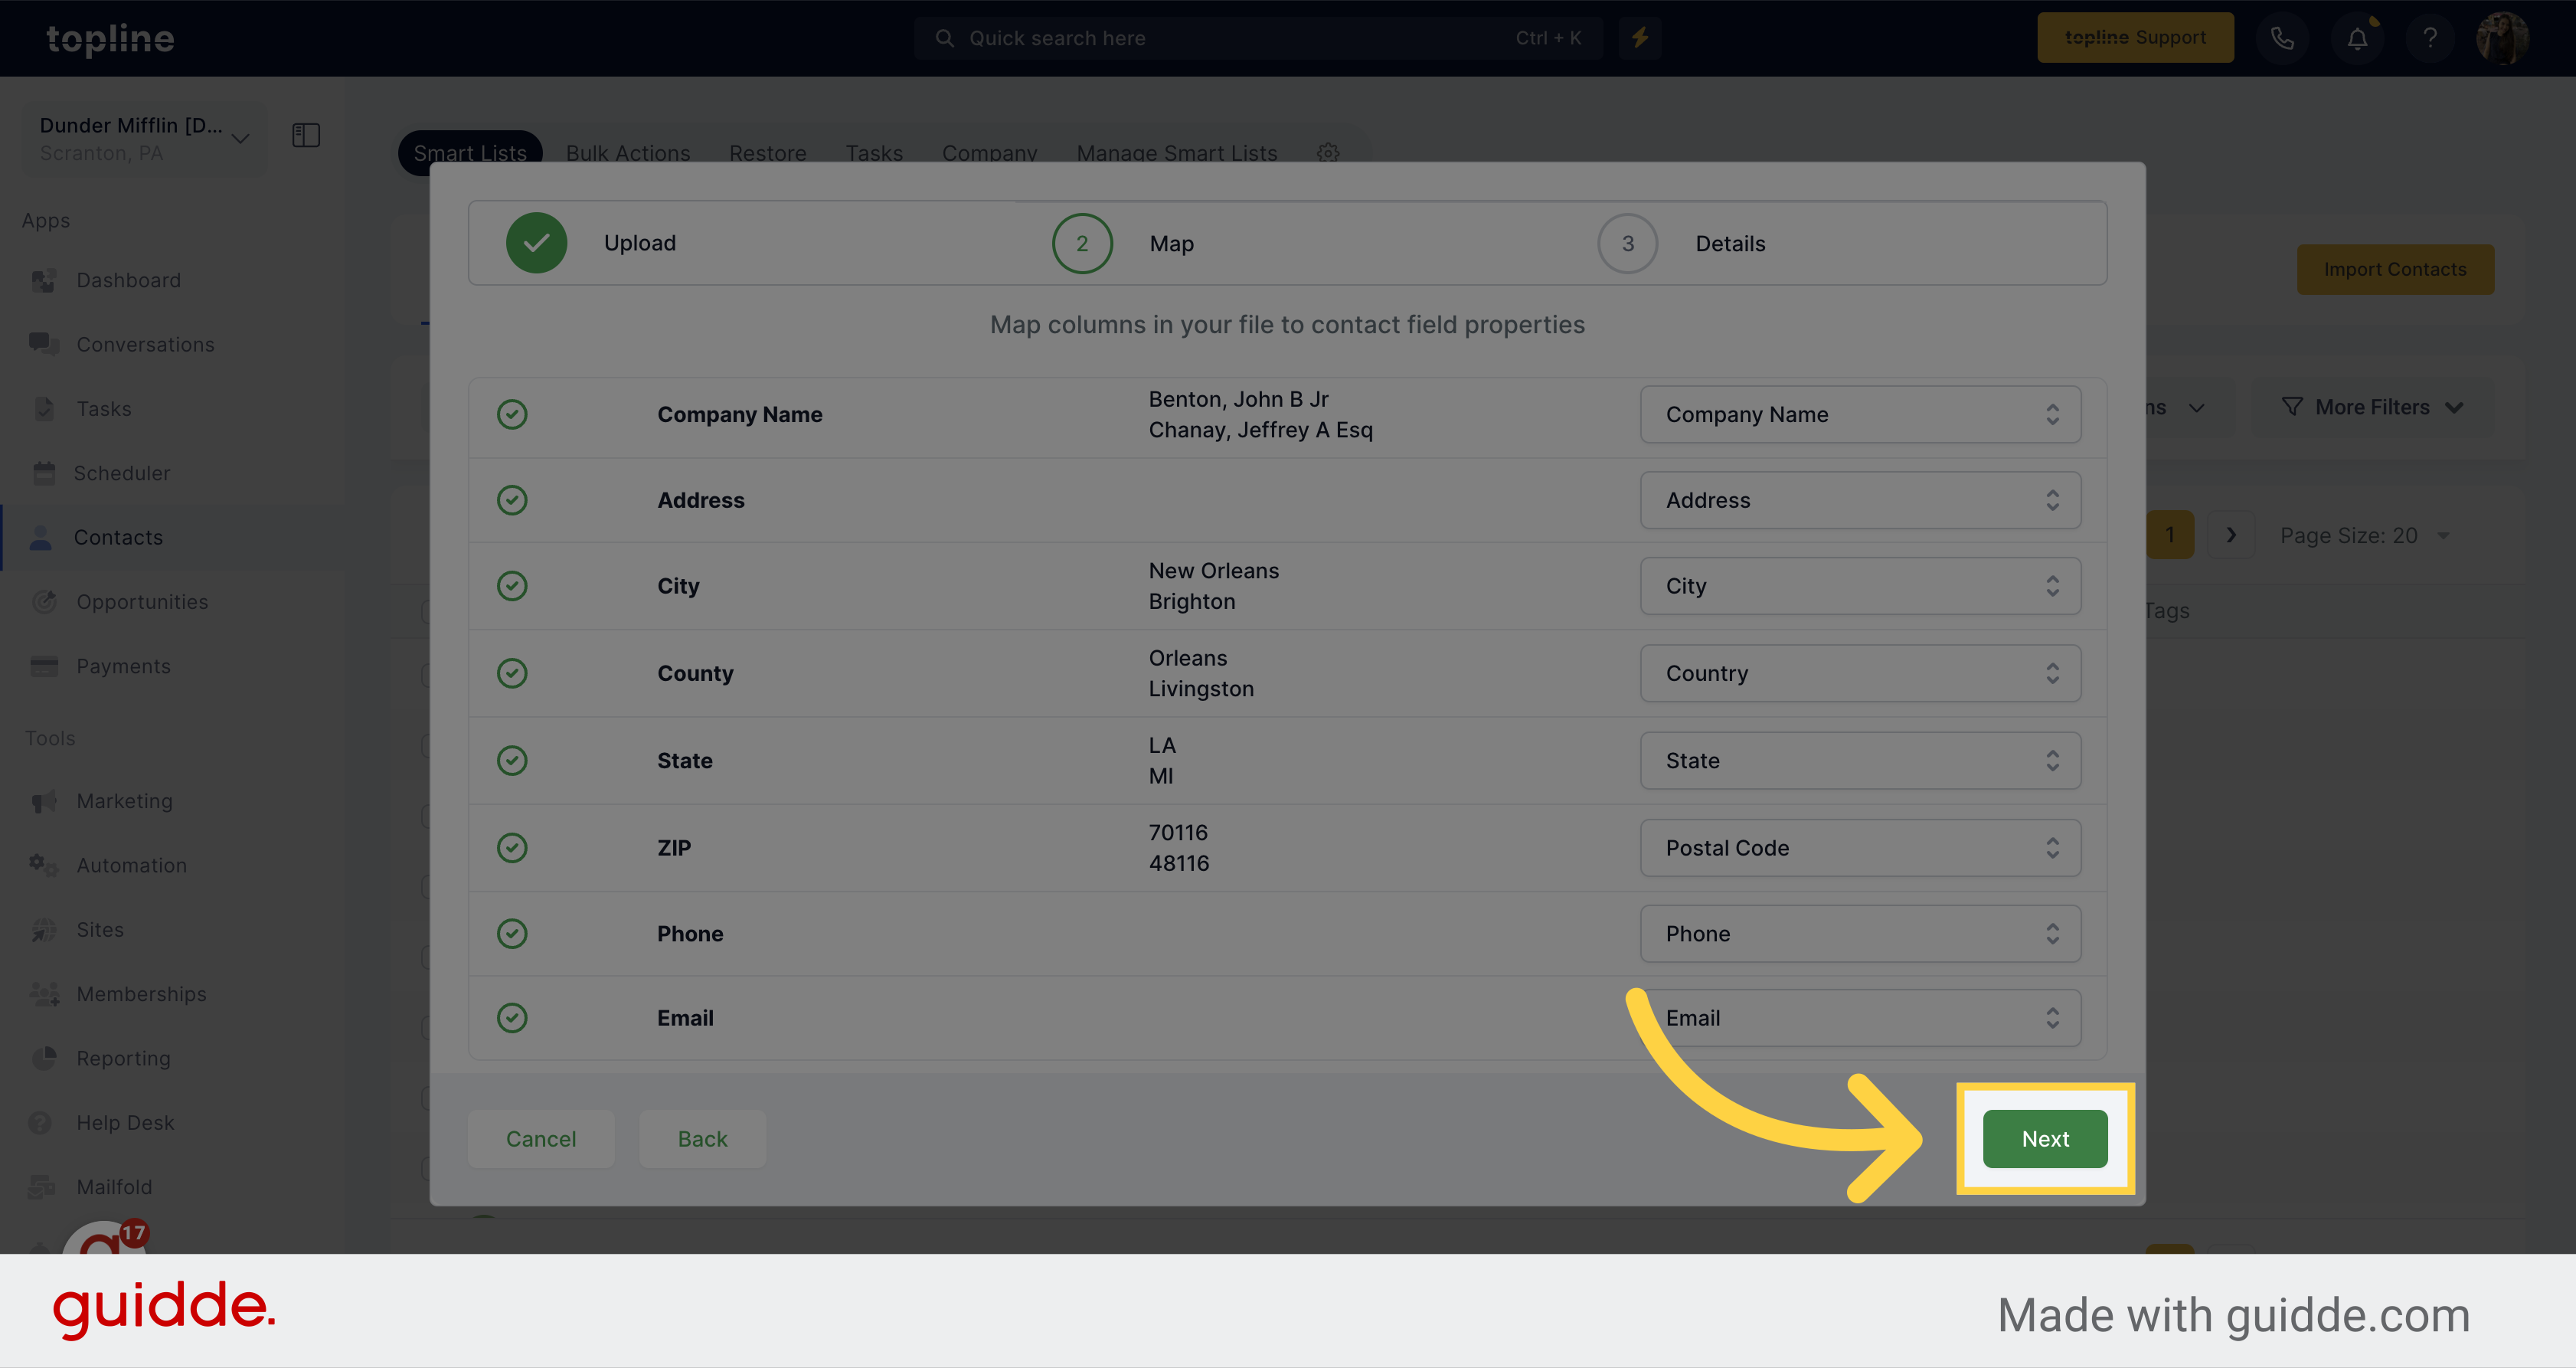
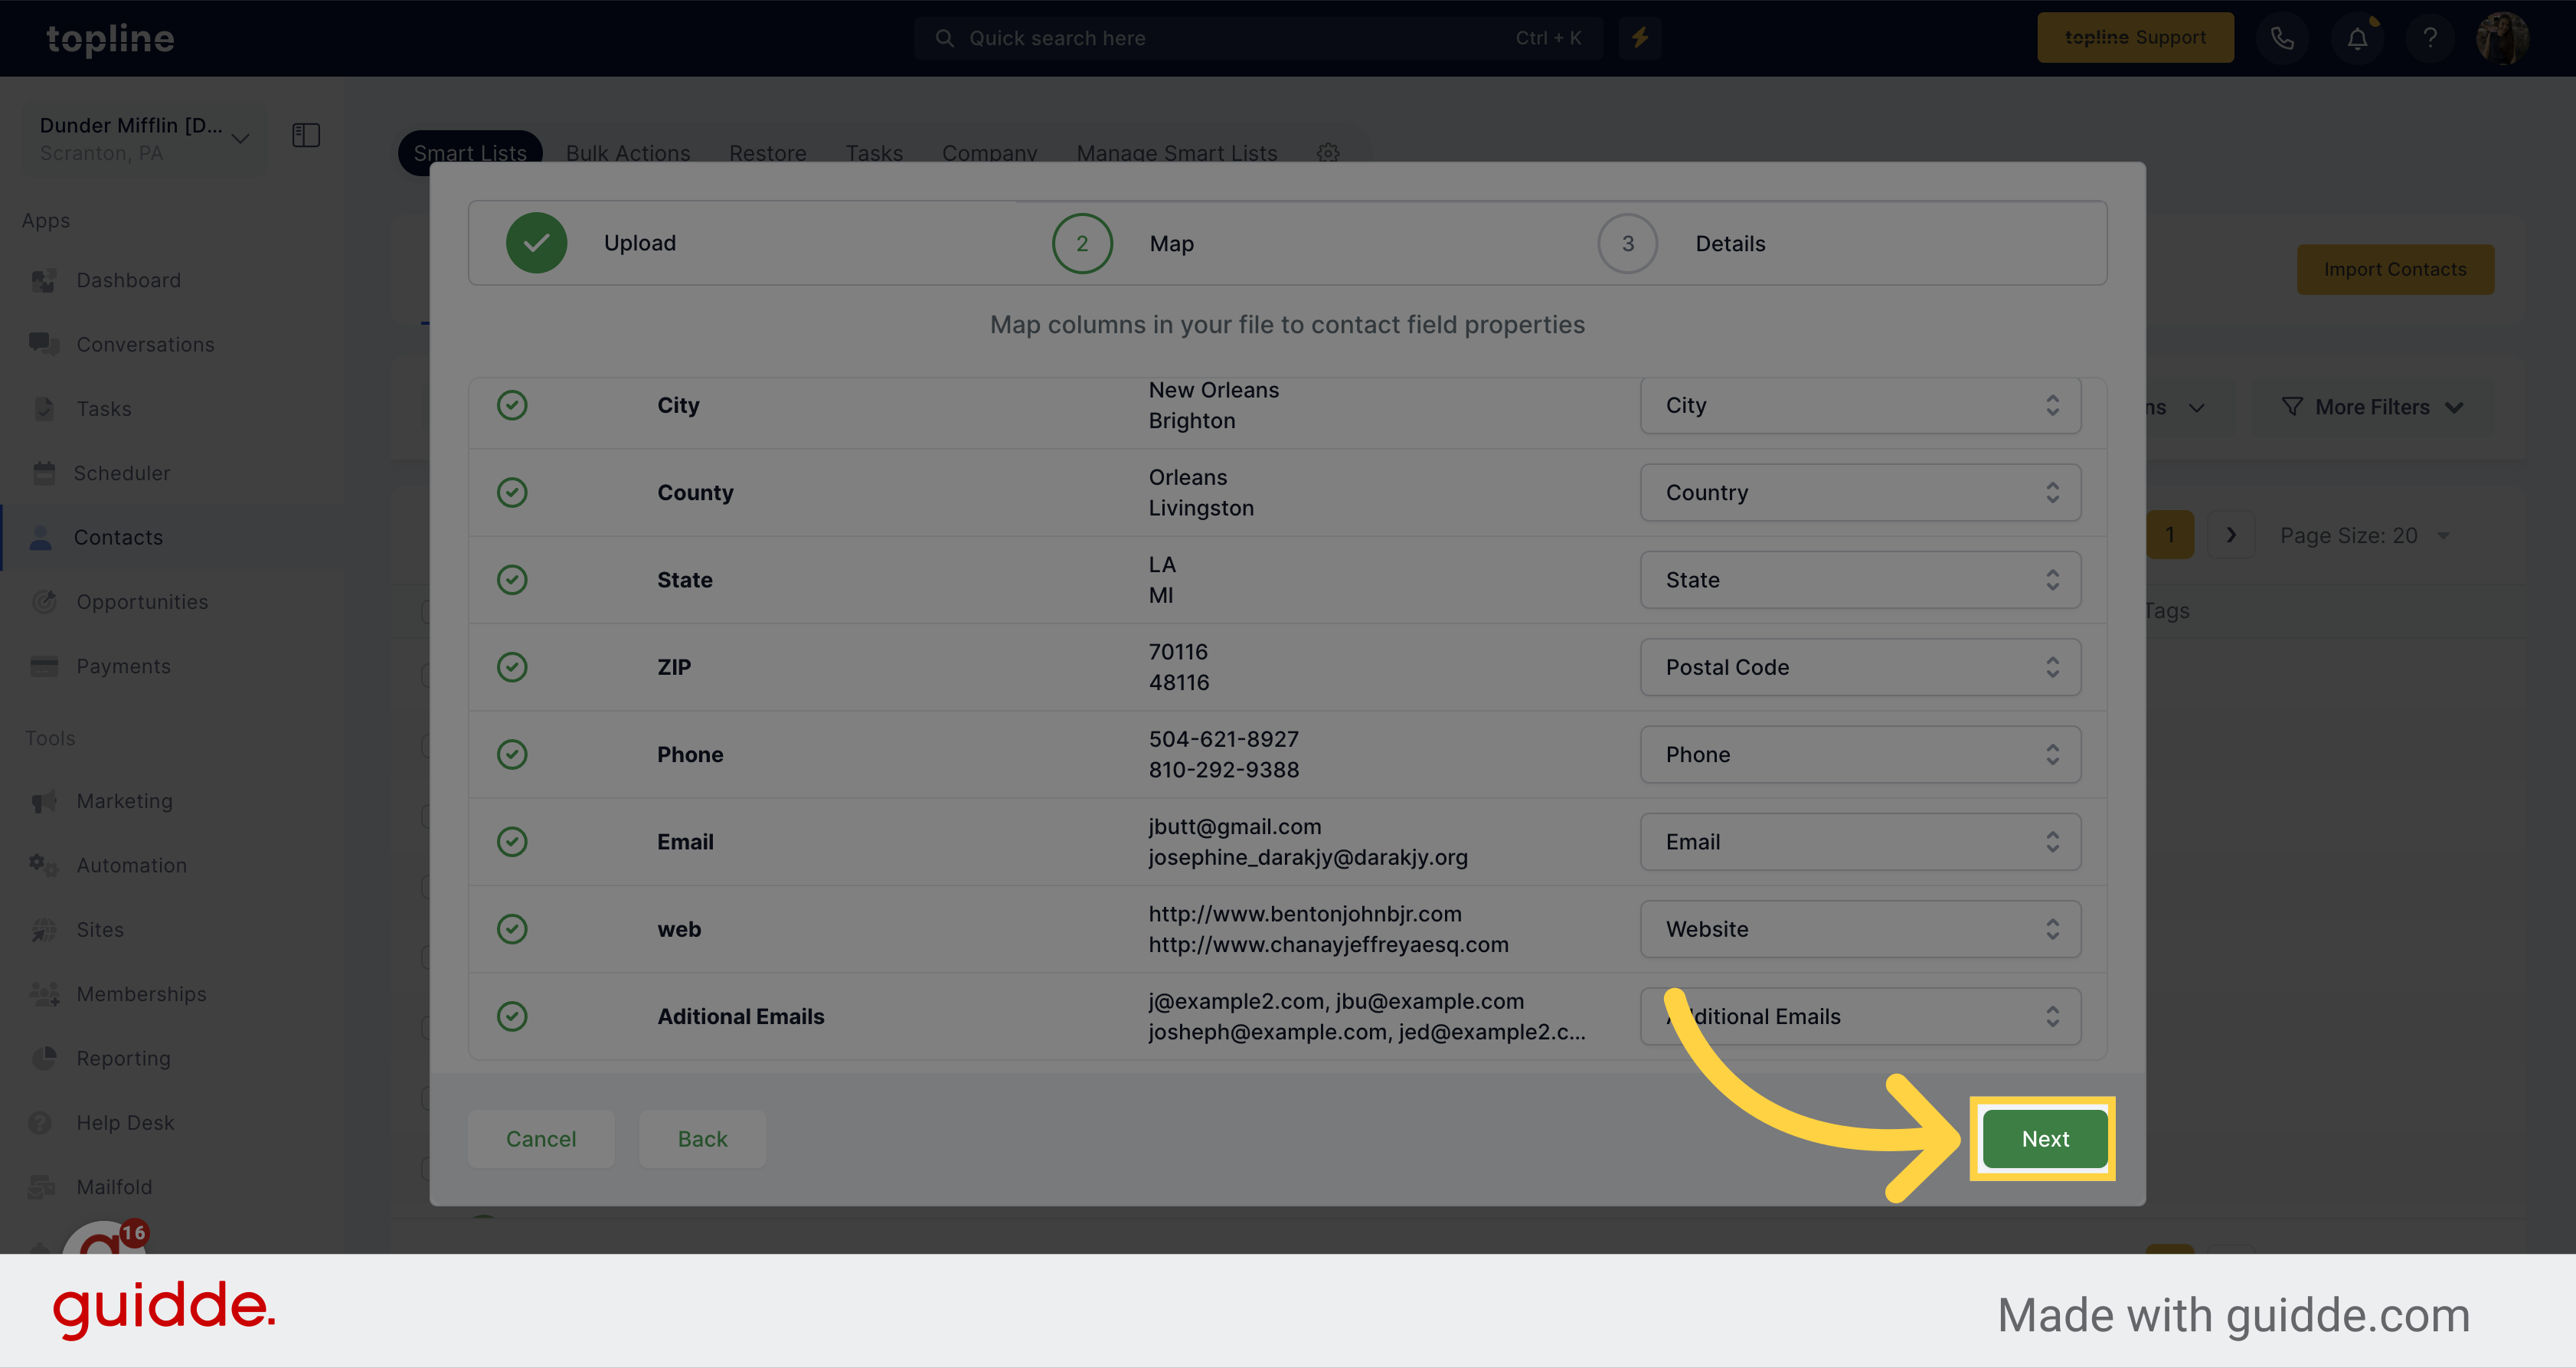
Once all the columns have been matched, click on Next to move on to the next step.
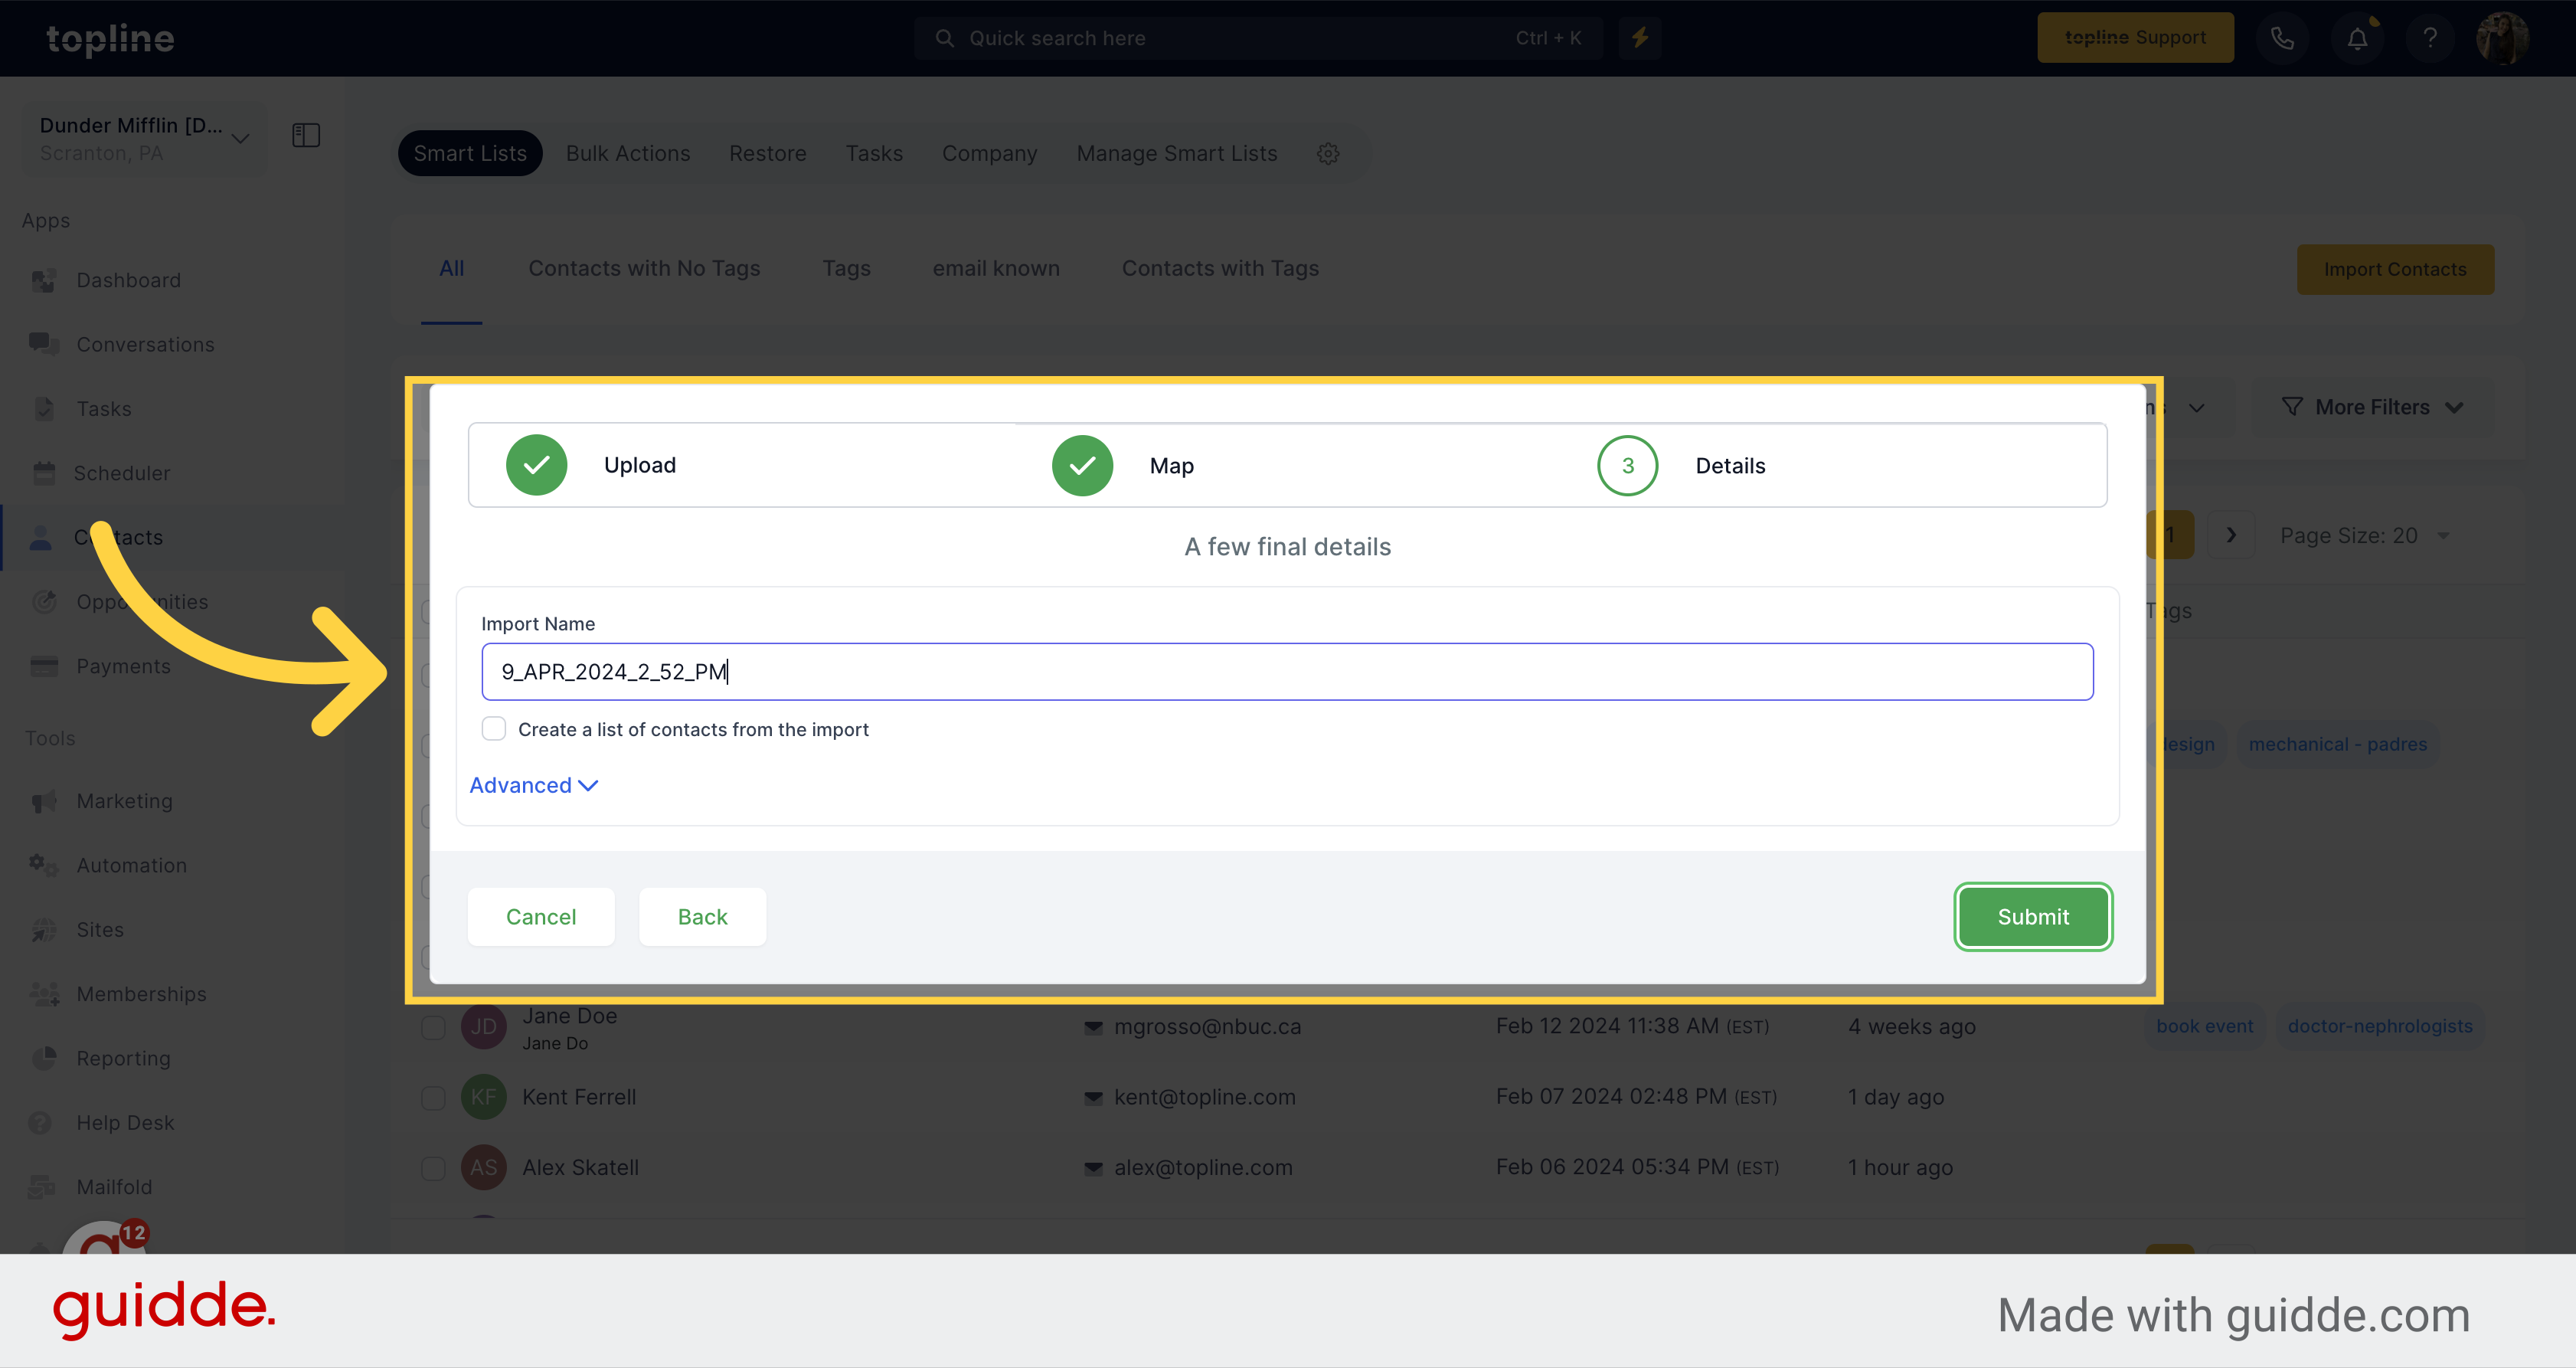
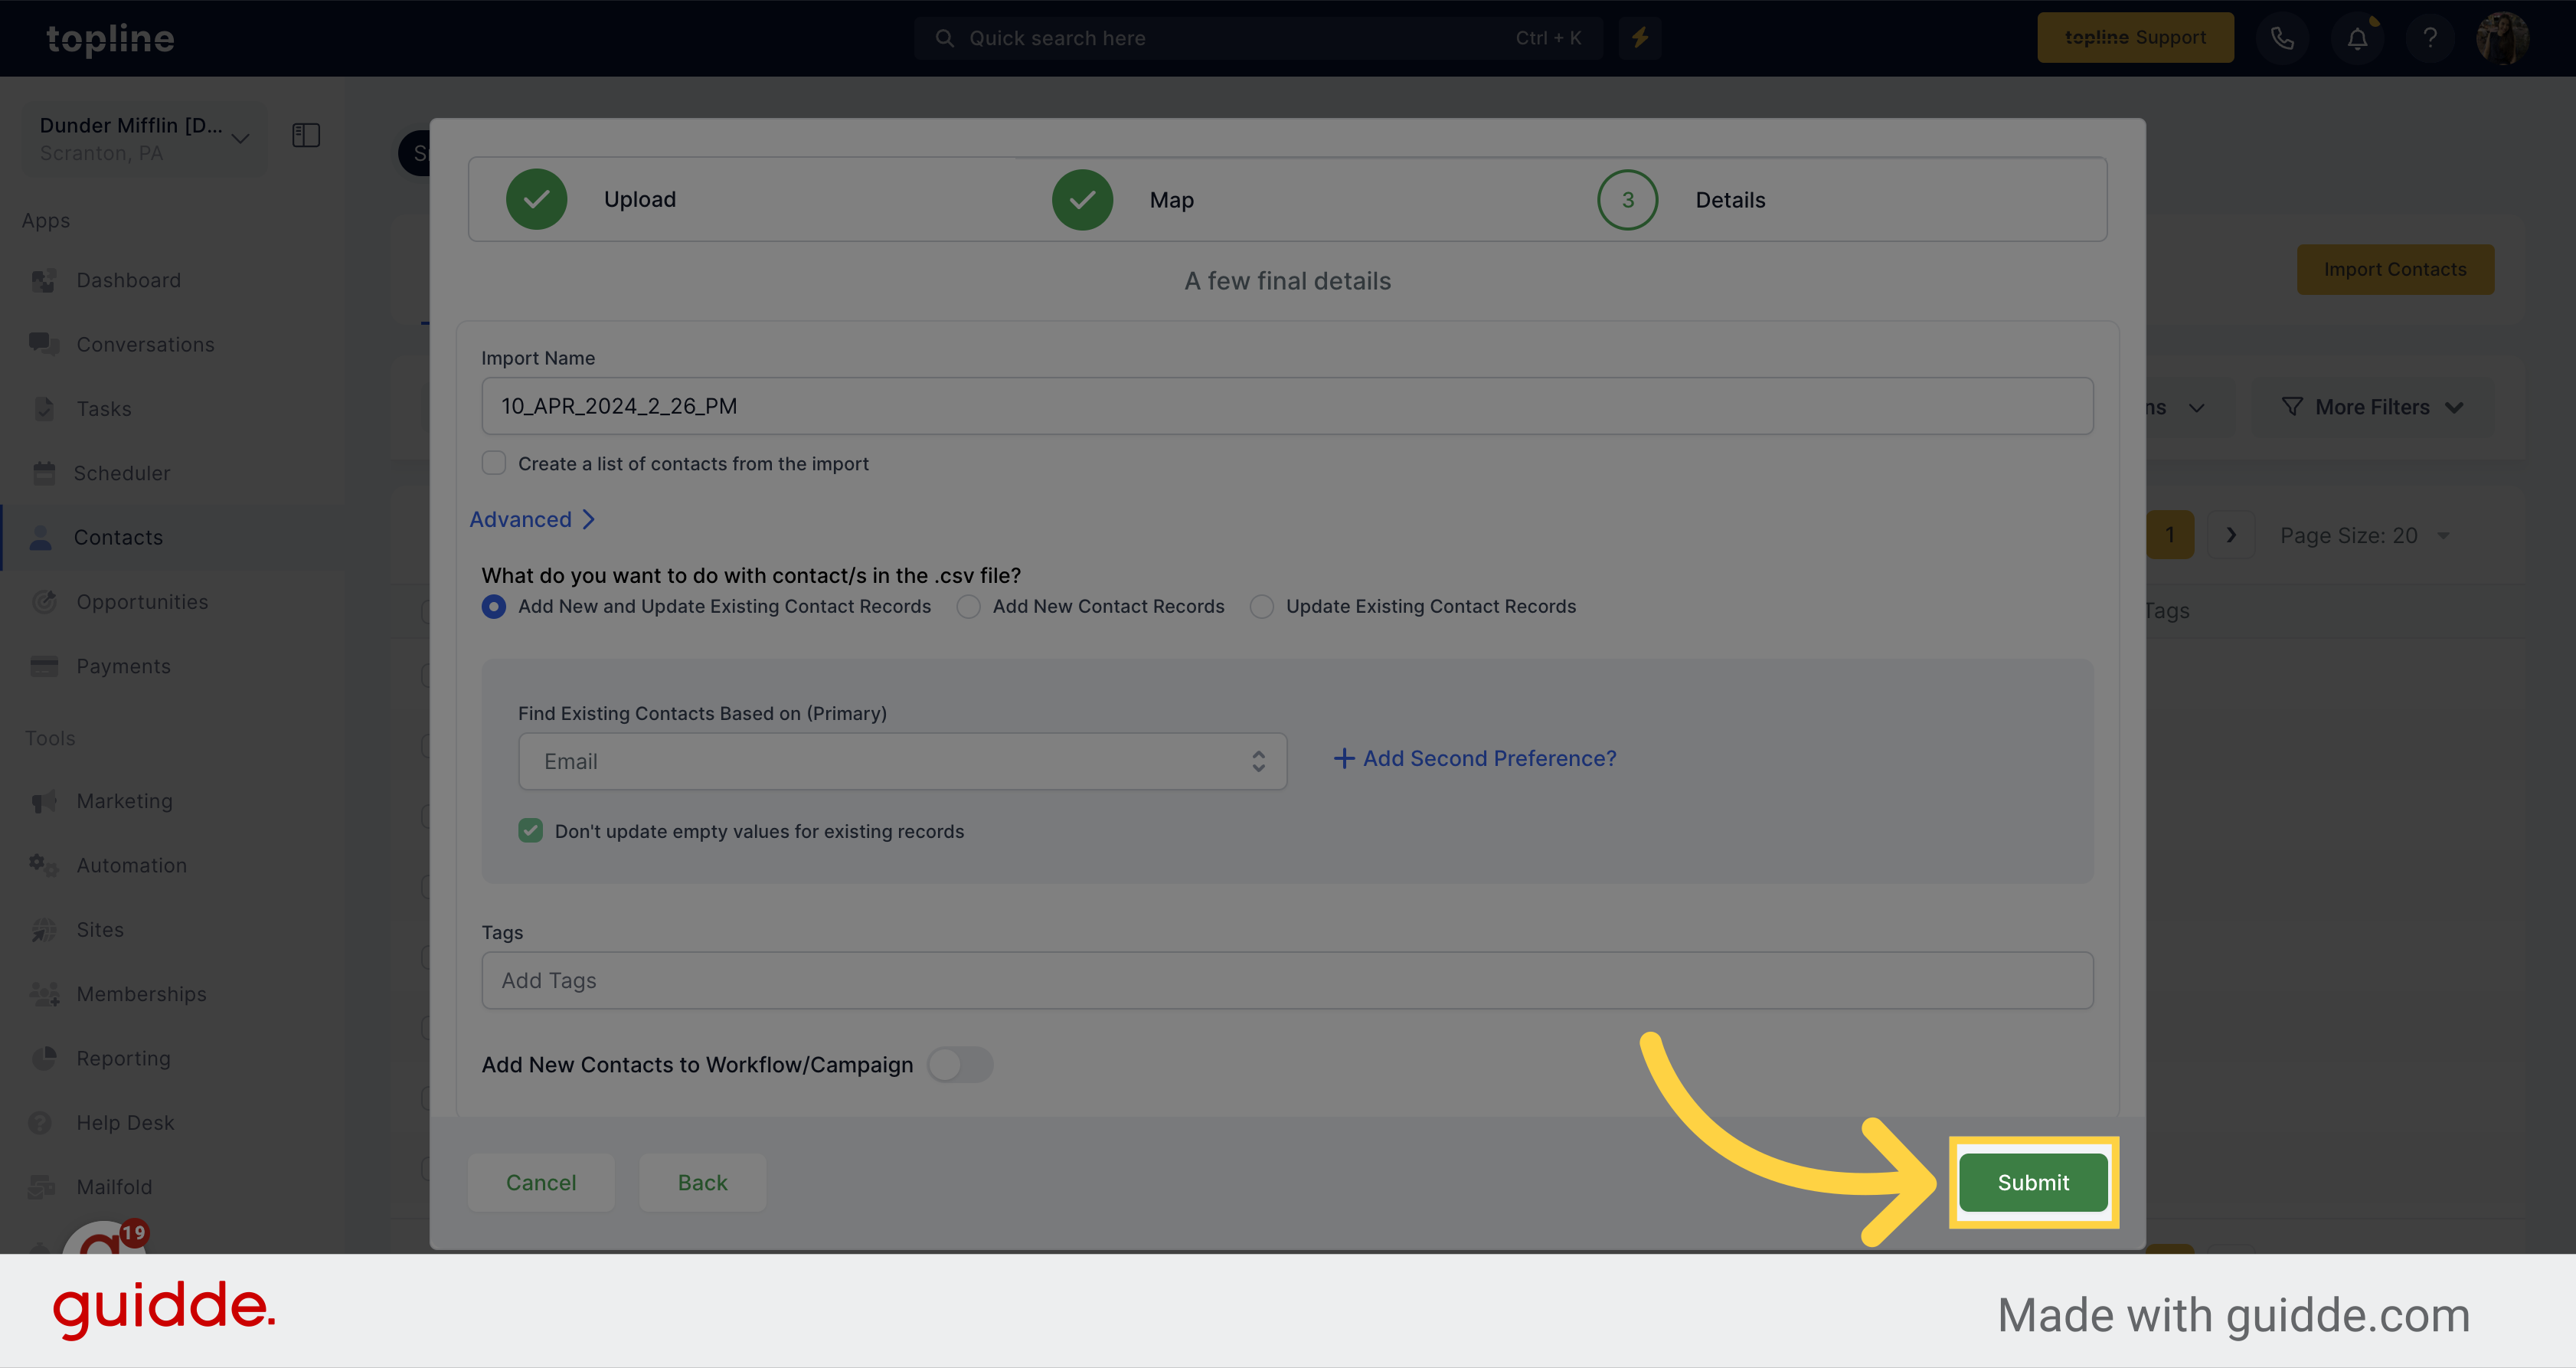
This step allows you to customize the import name and create different actions from it.
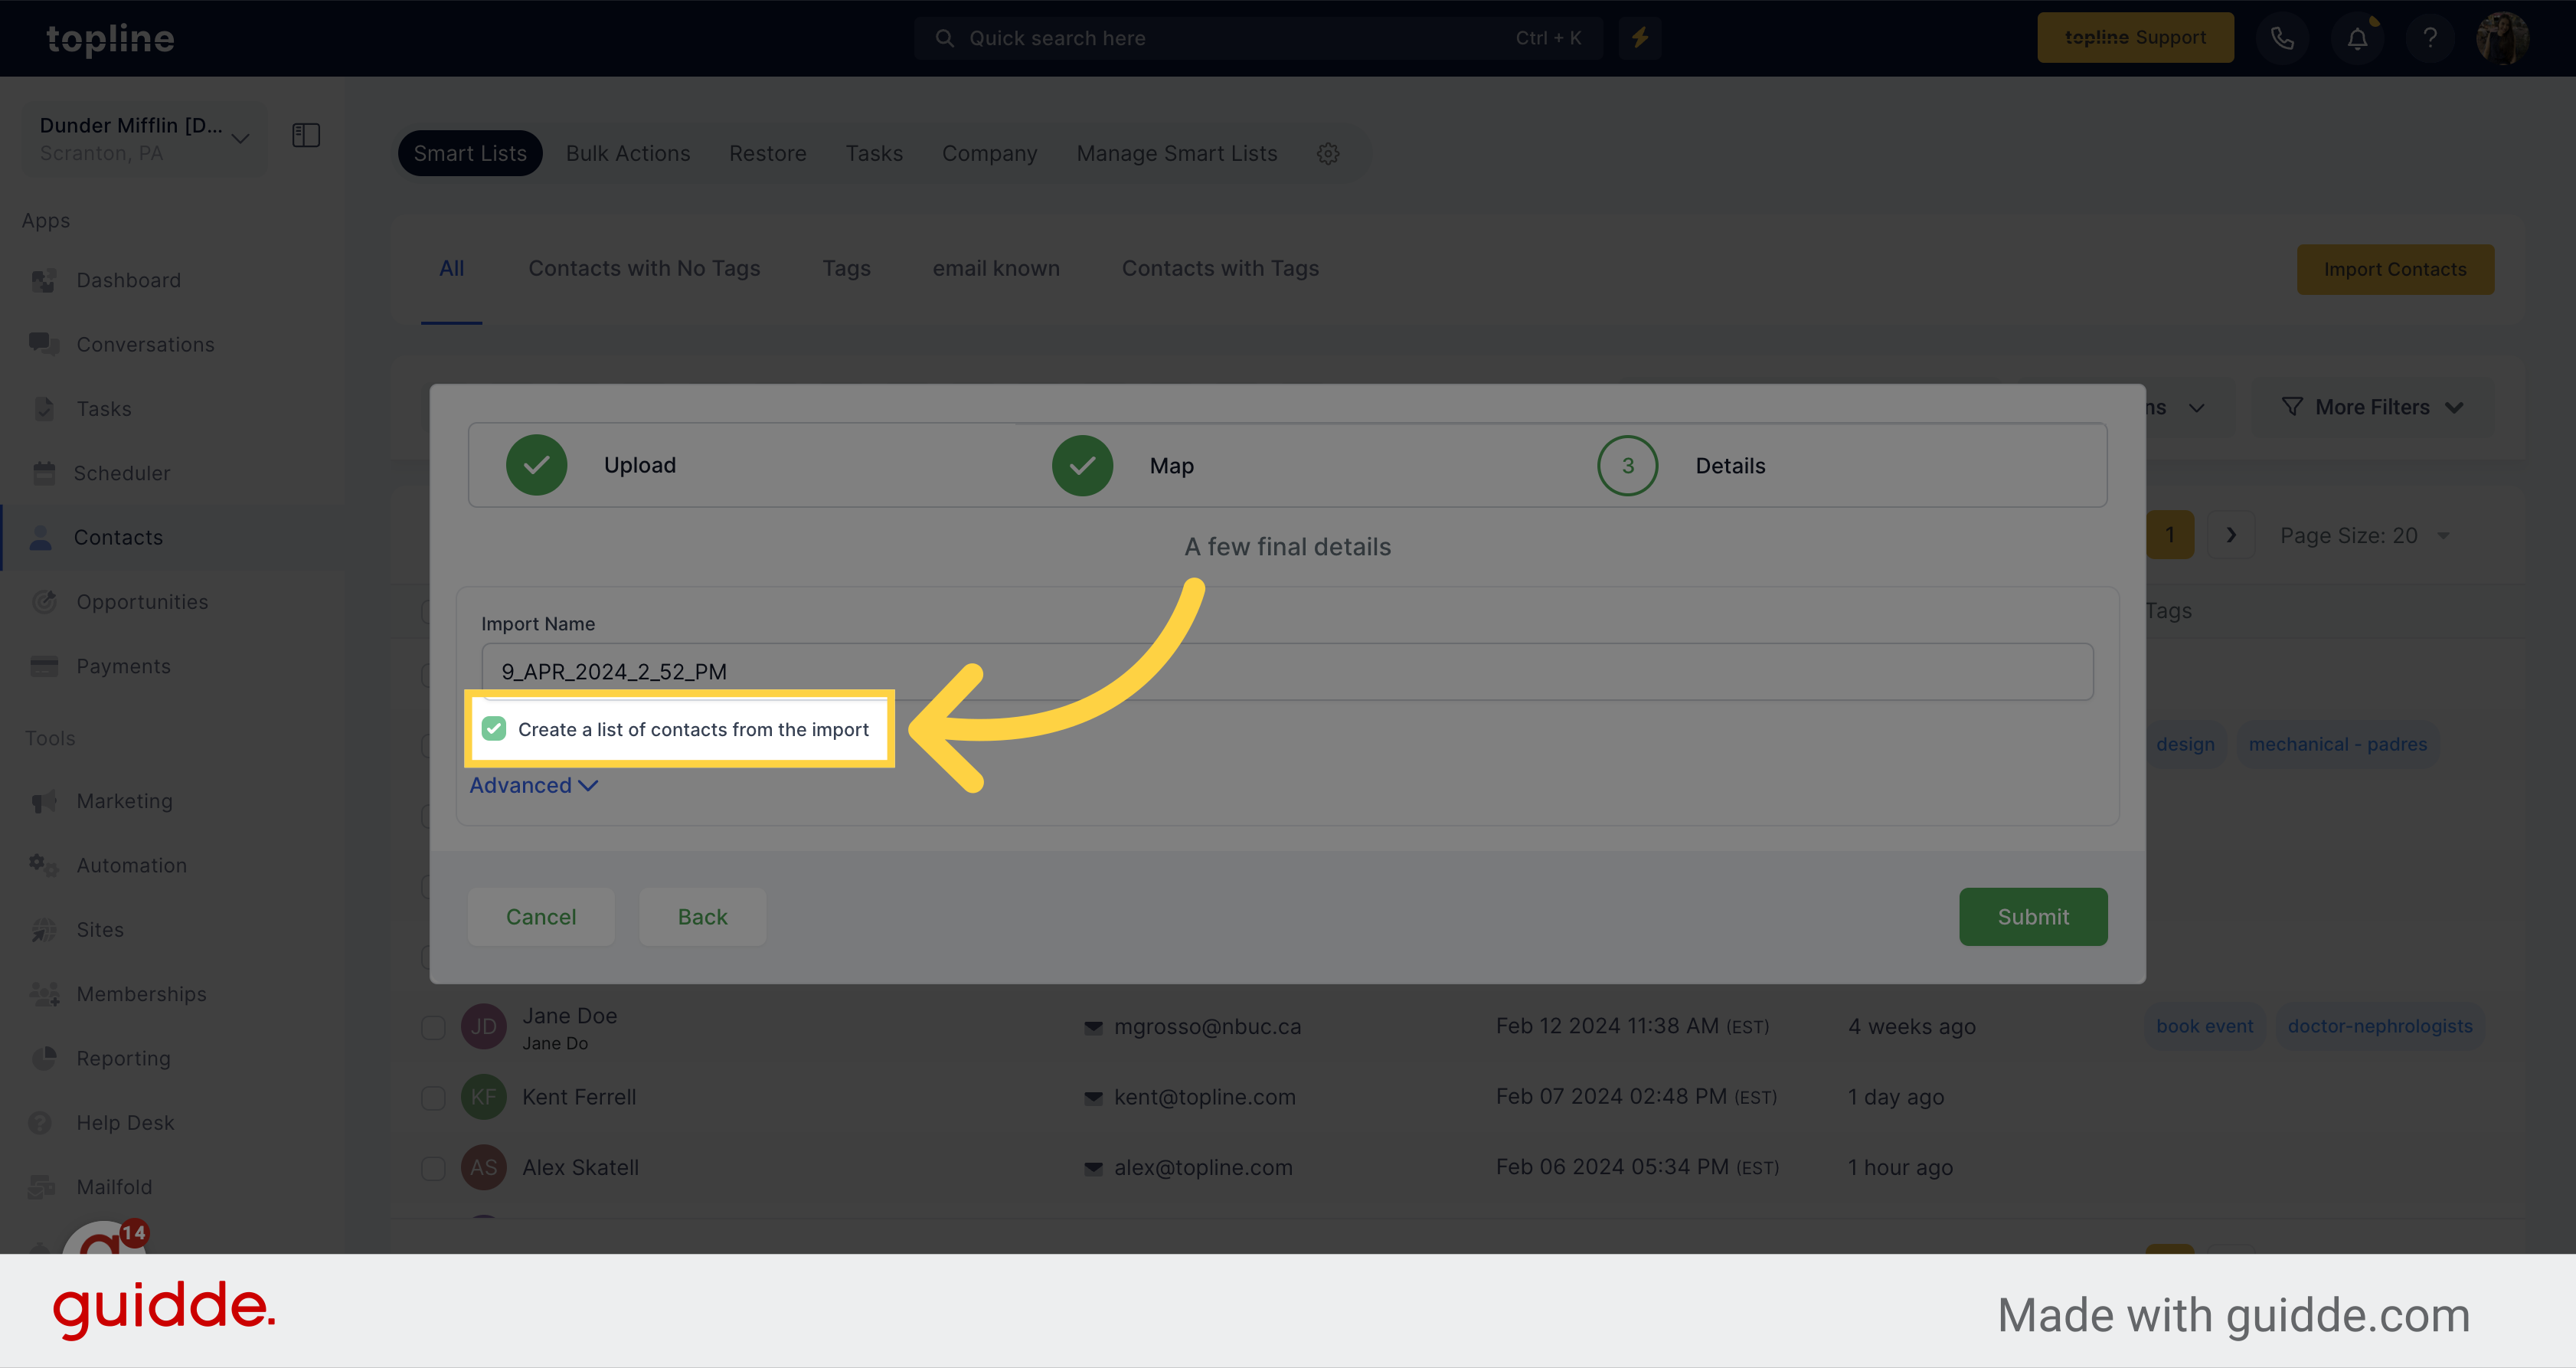
Click on the checkbox to create a list of contacts from the import.
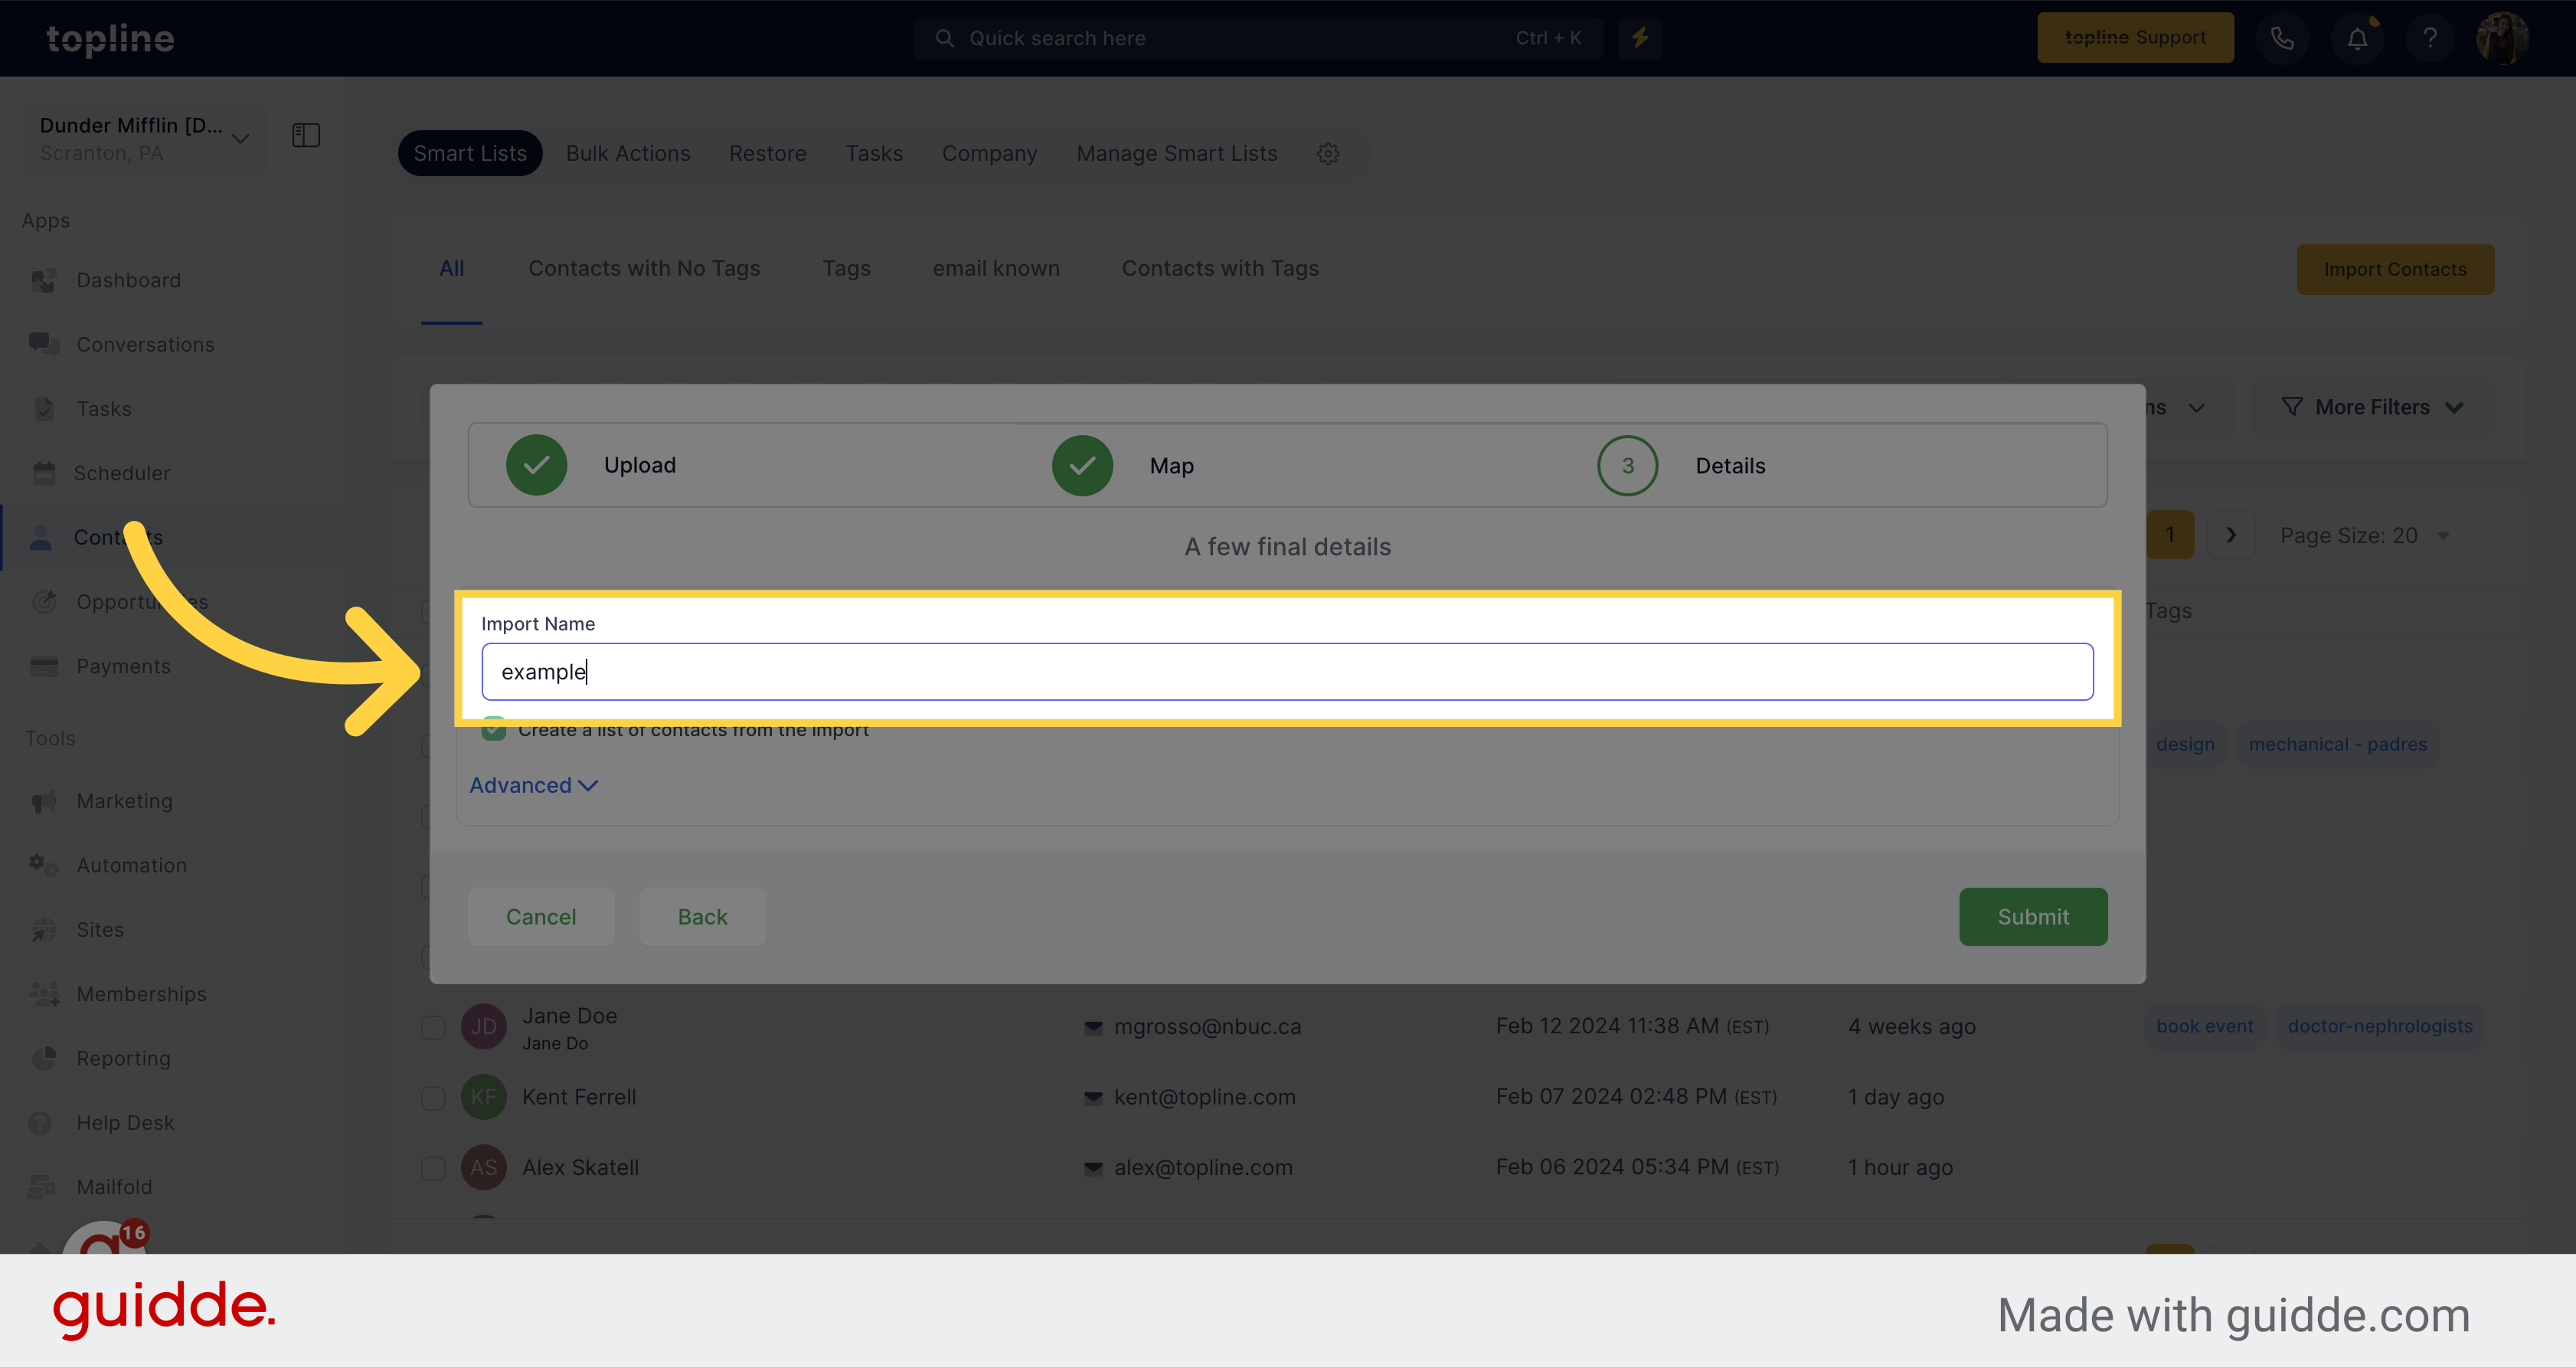
Add a name for the import in the field.
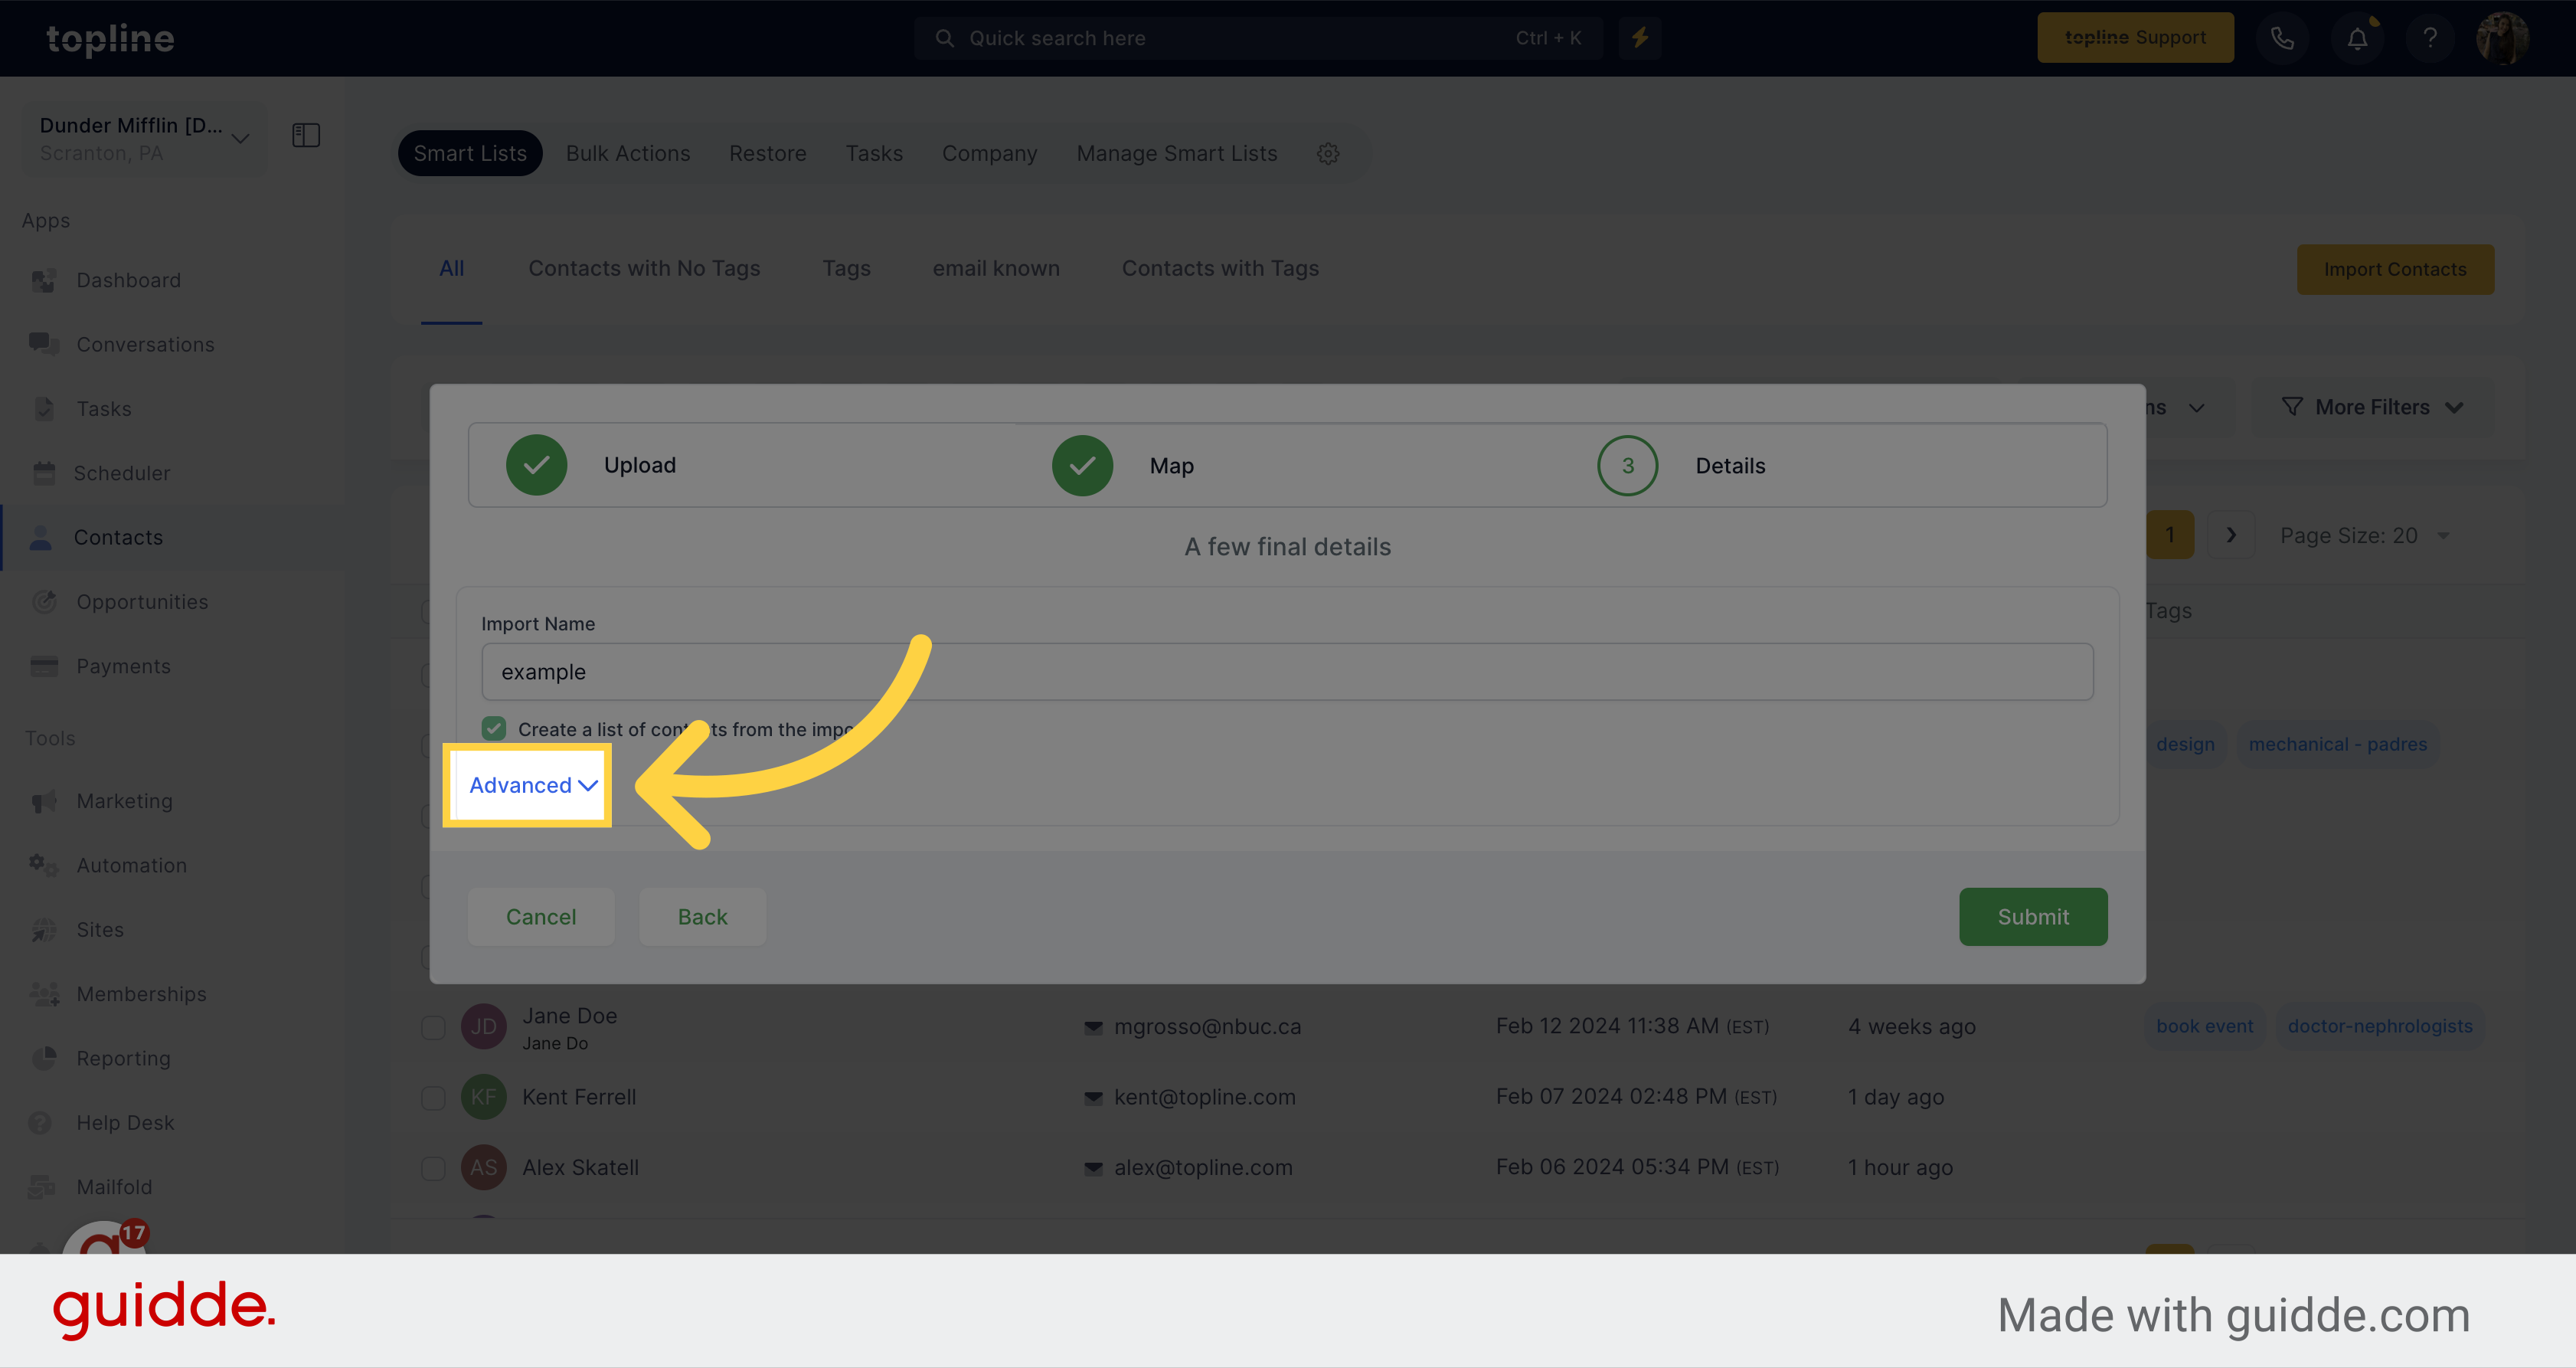
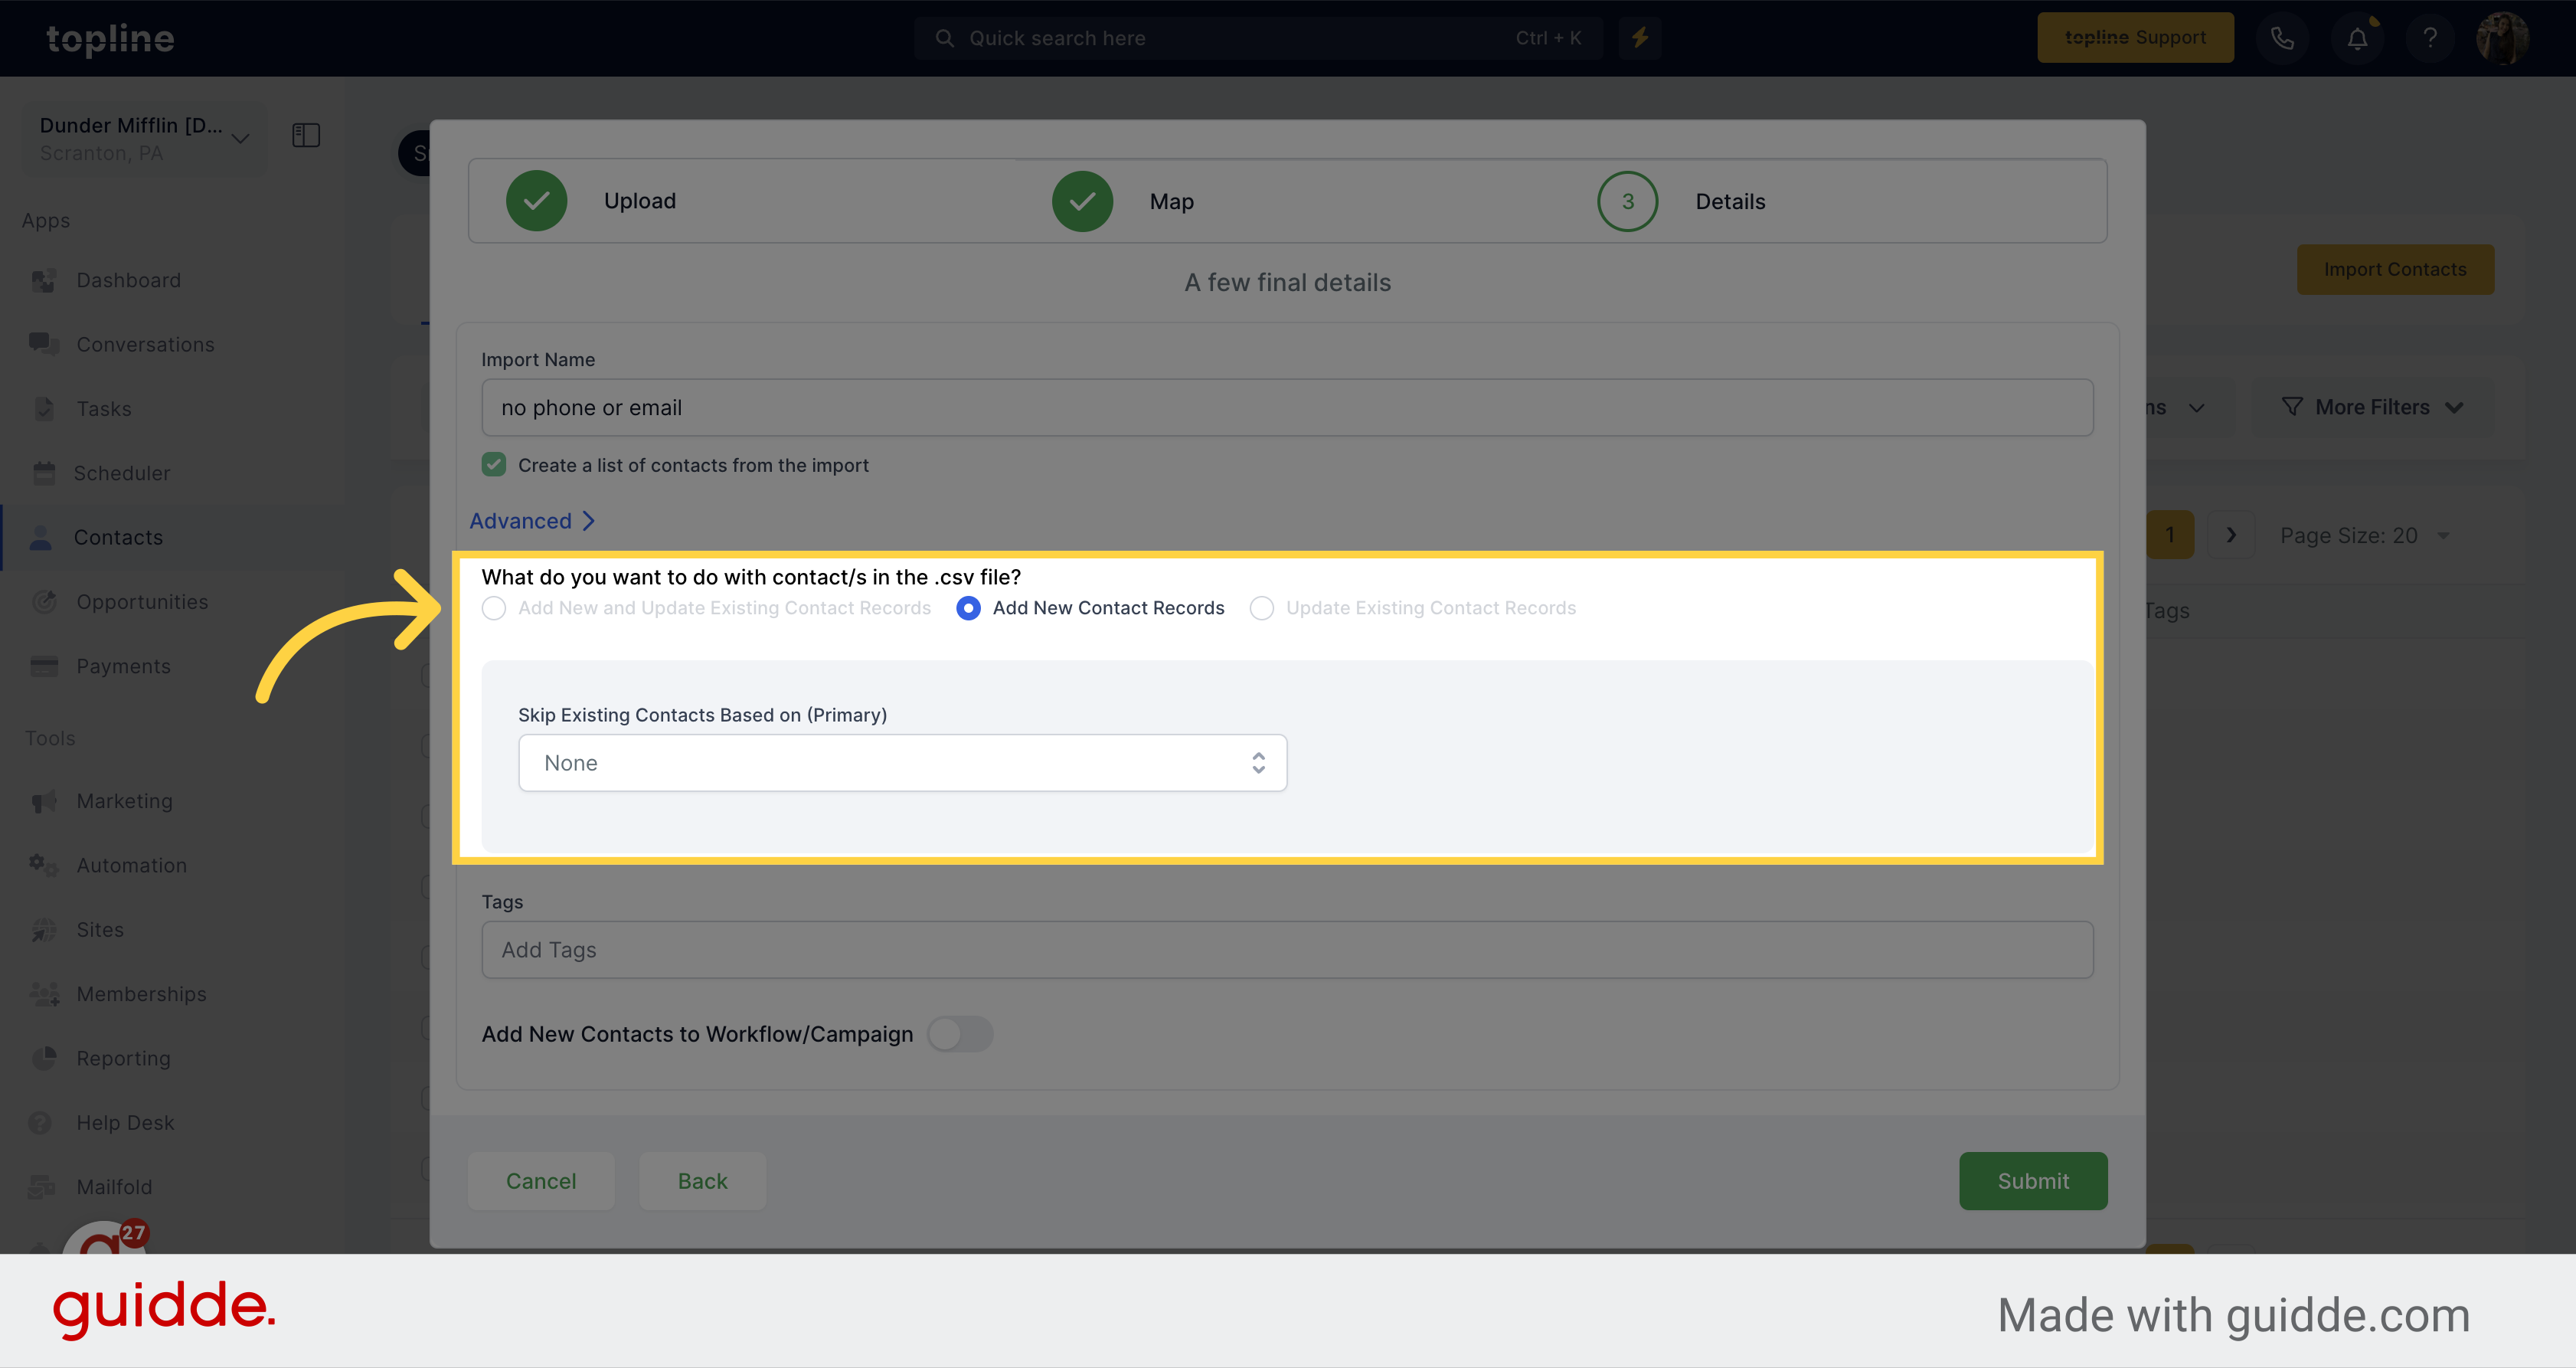
To access to more advanced settings, click on Advanced.
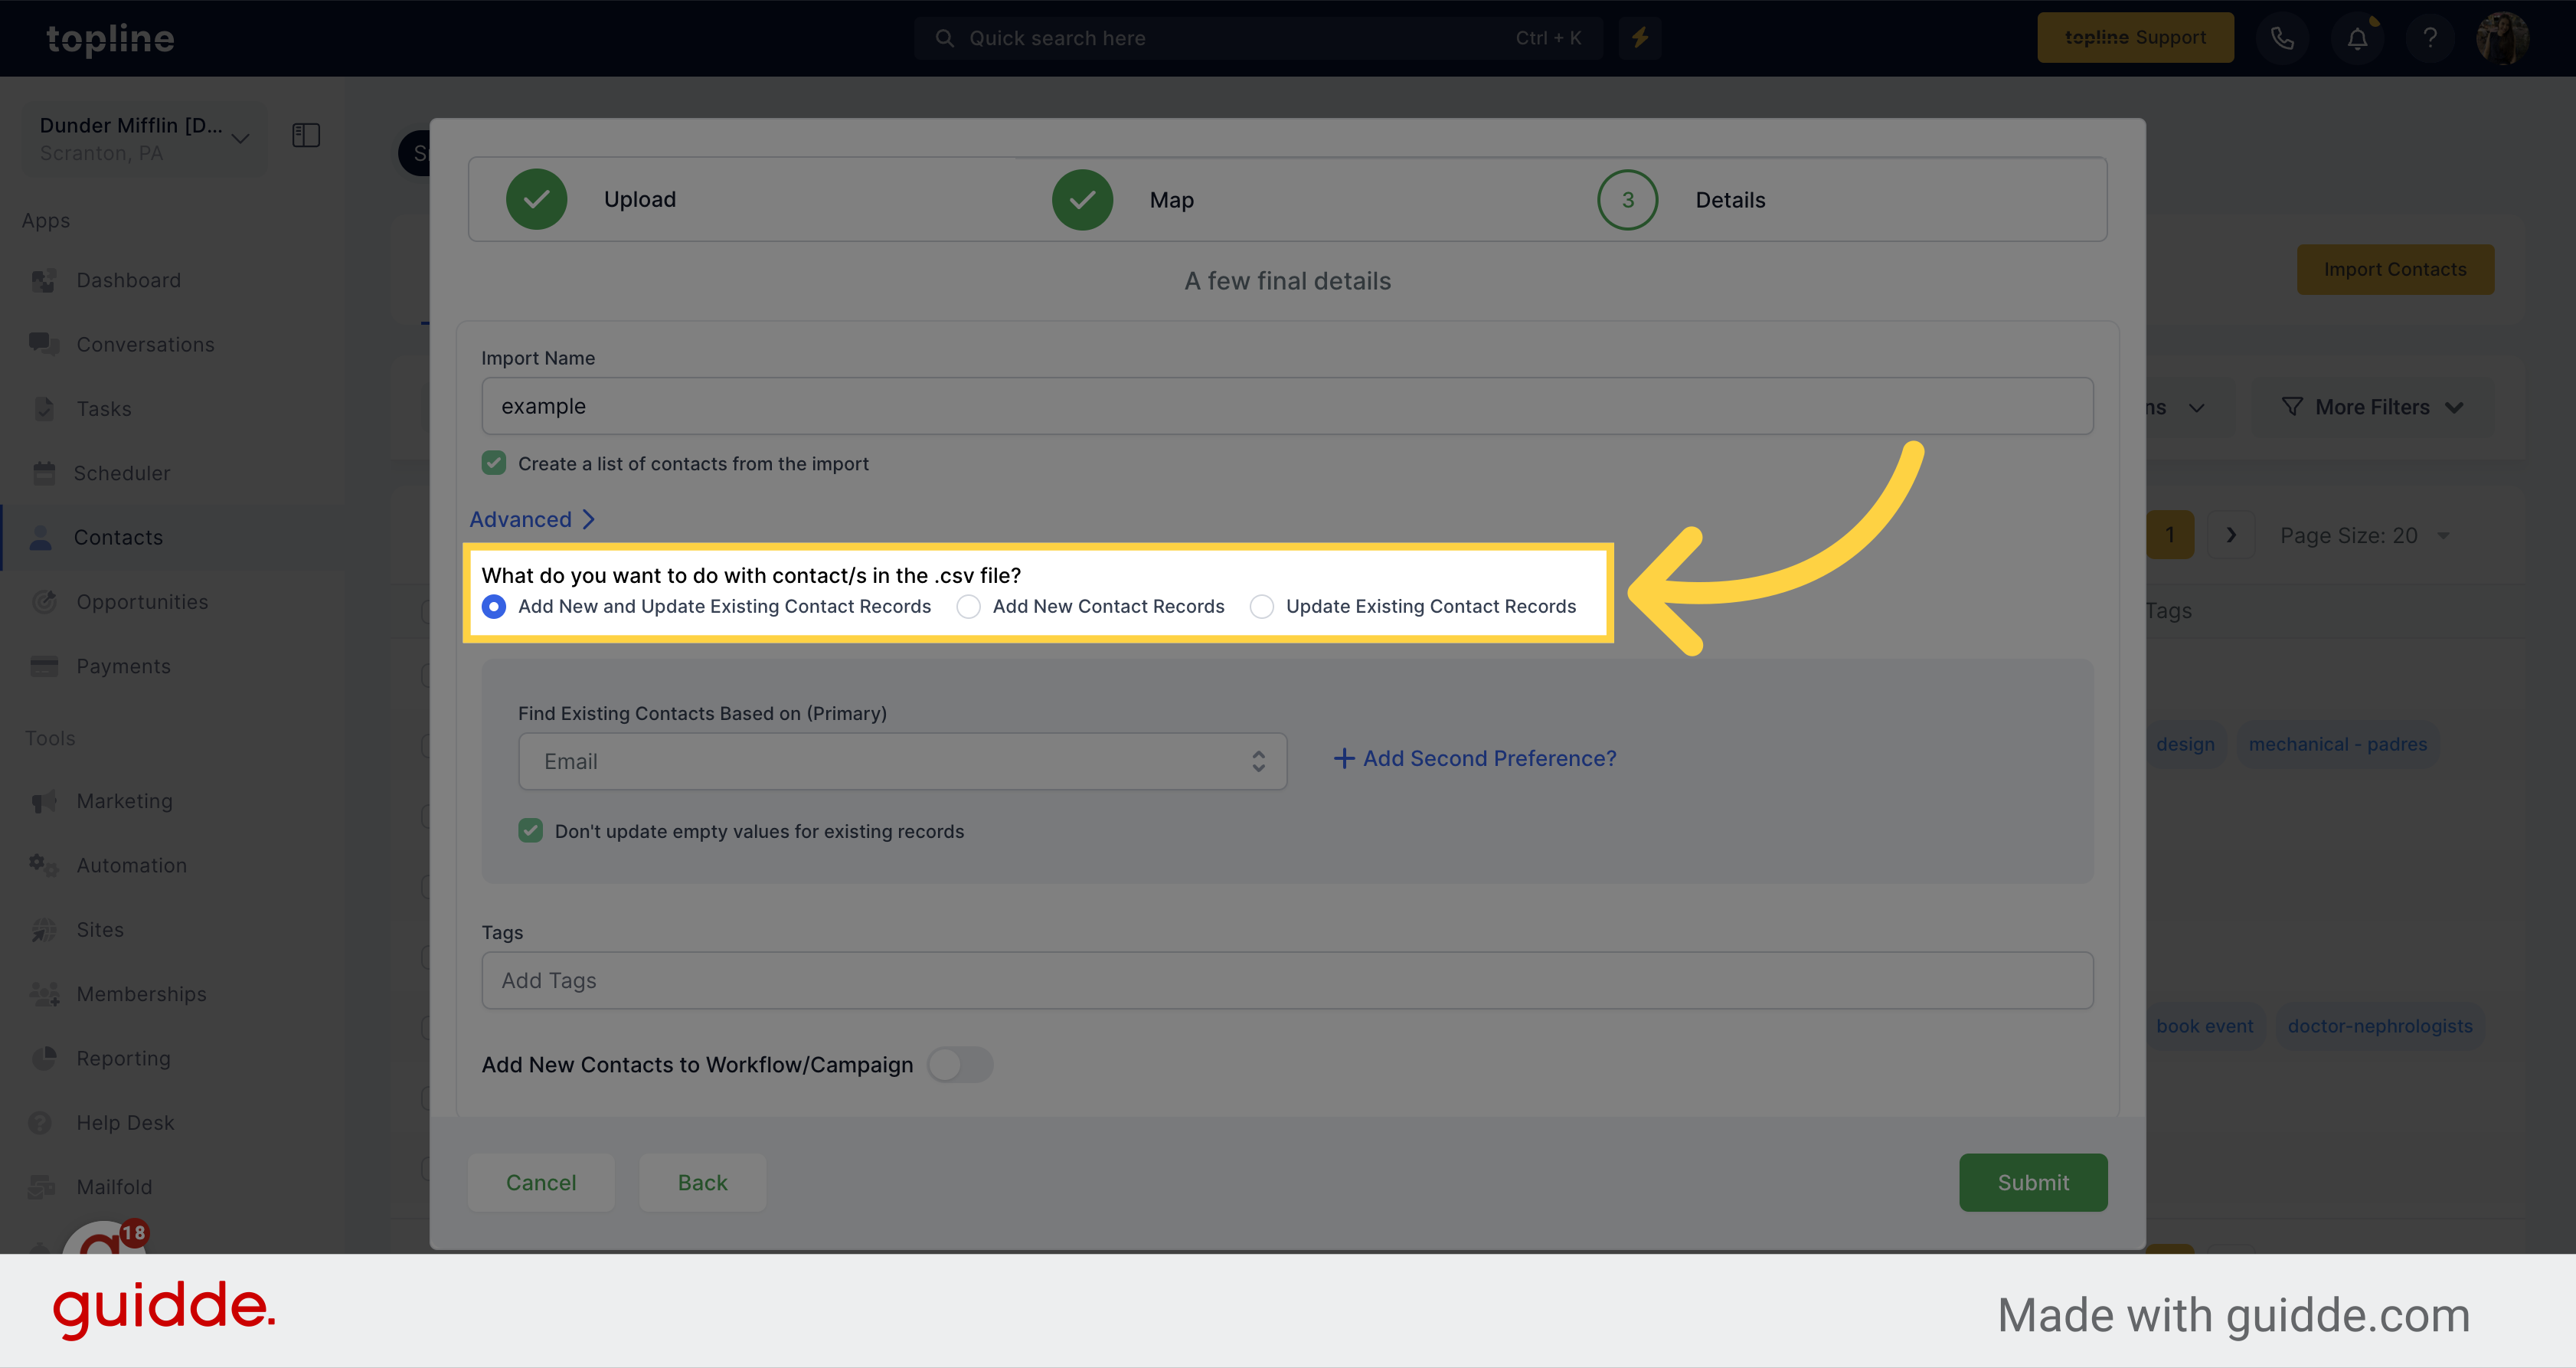
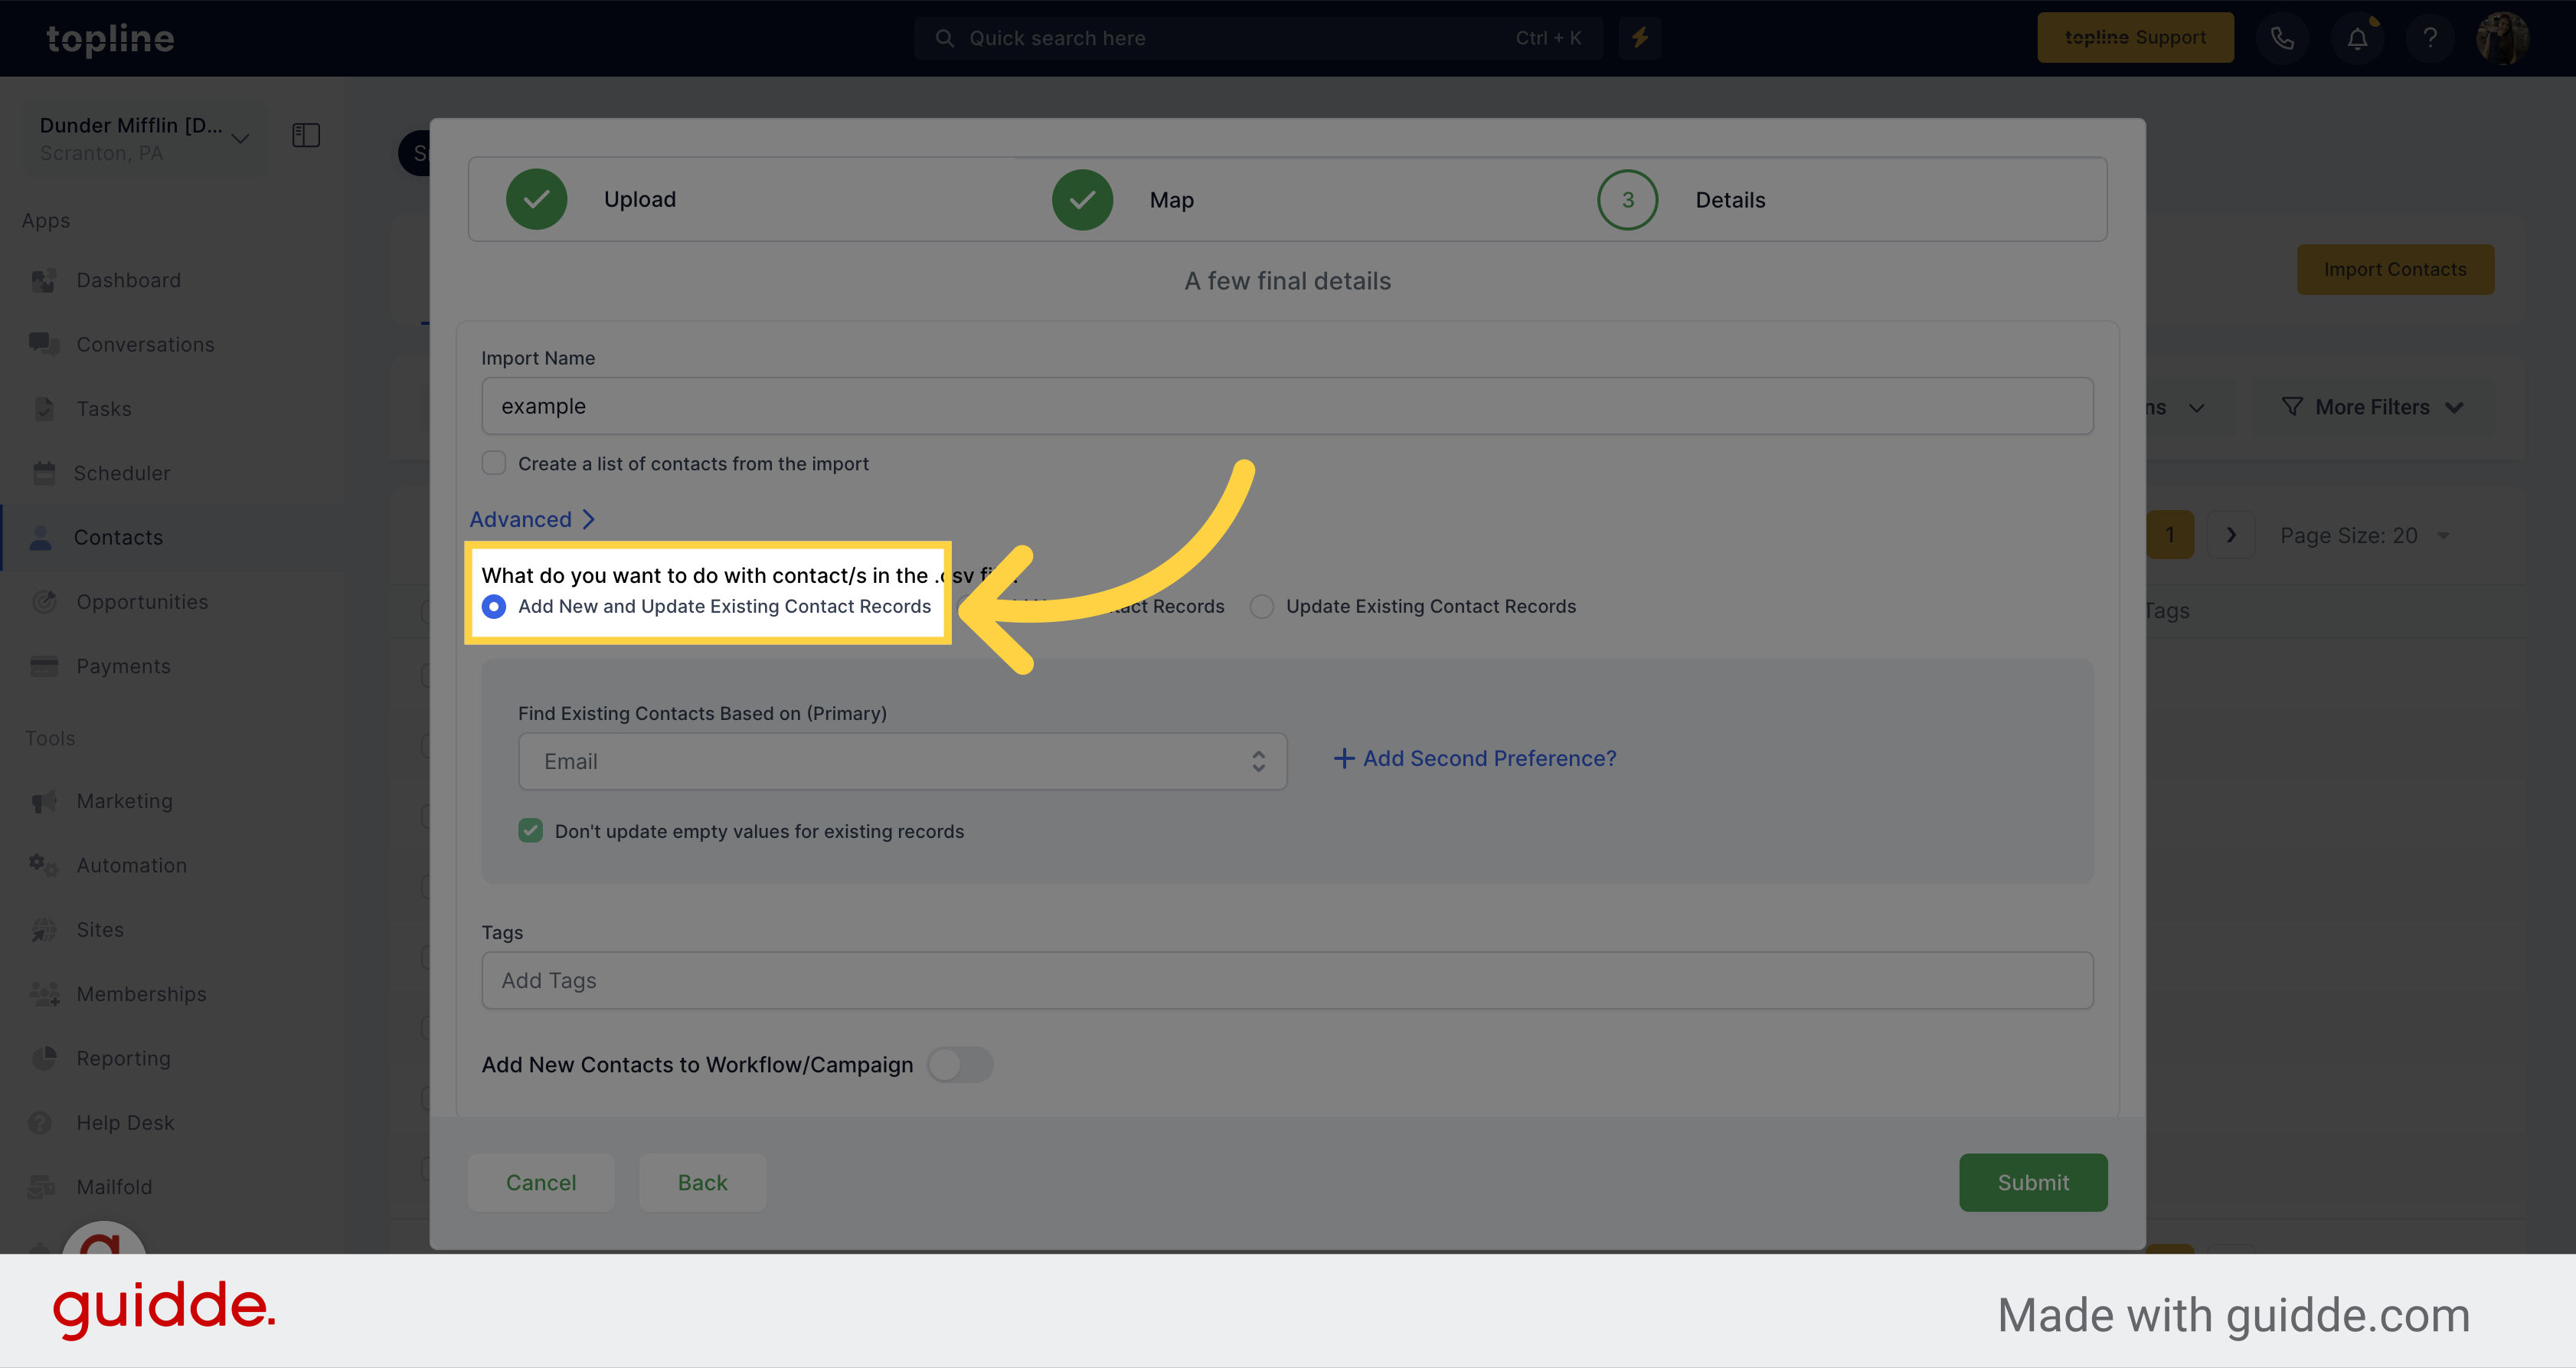
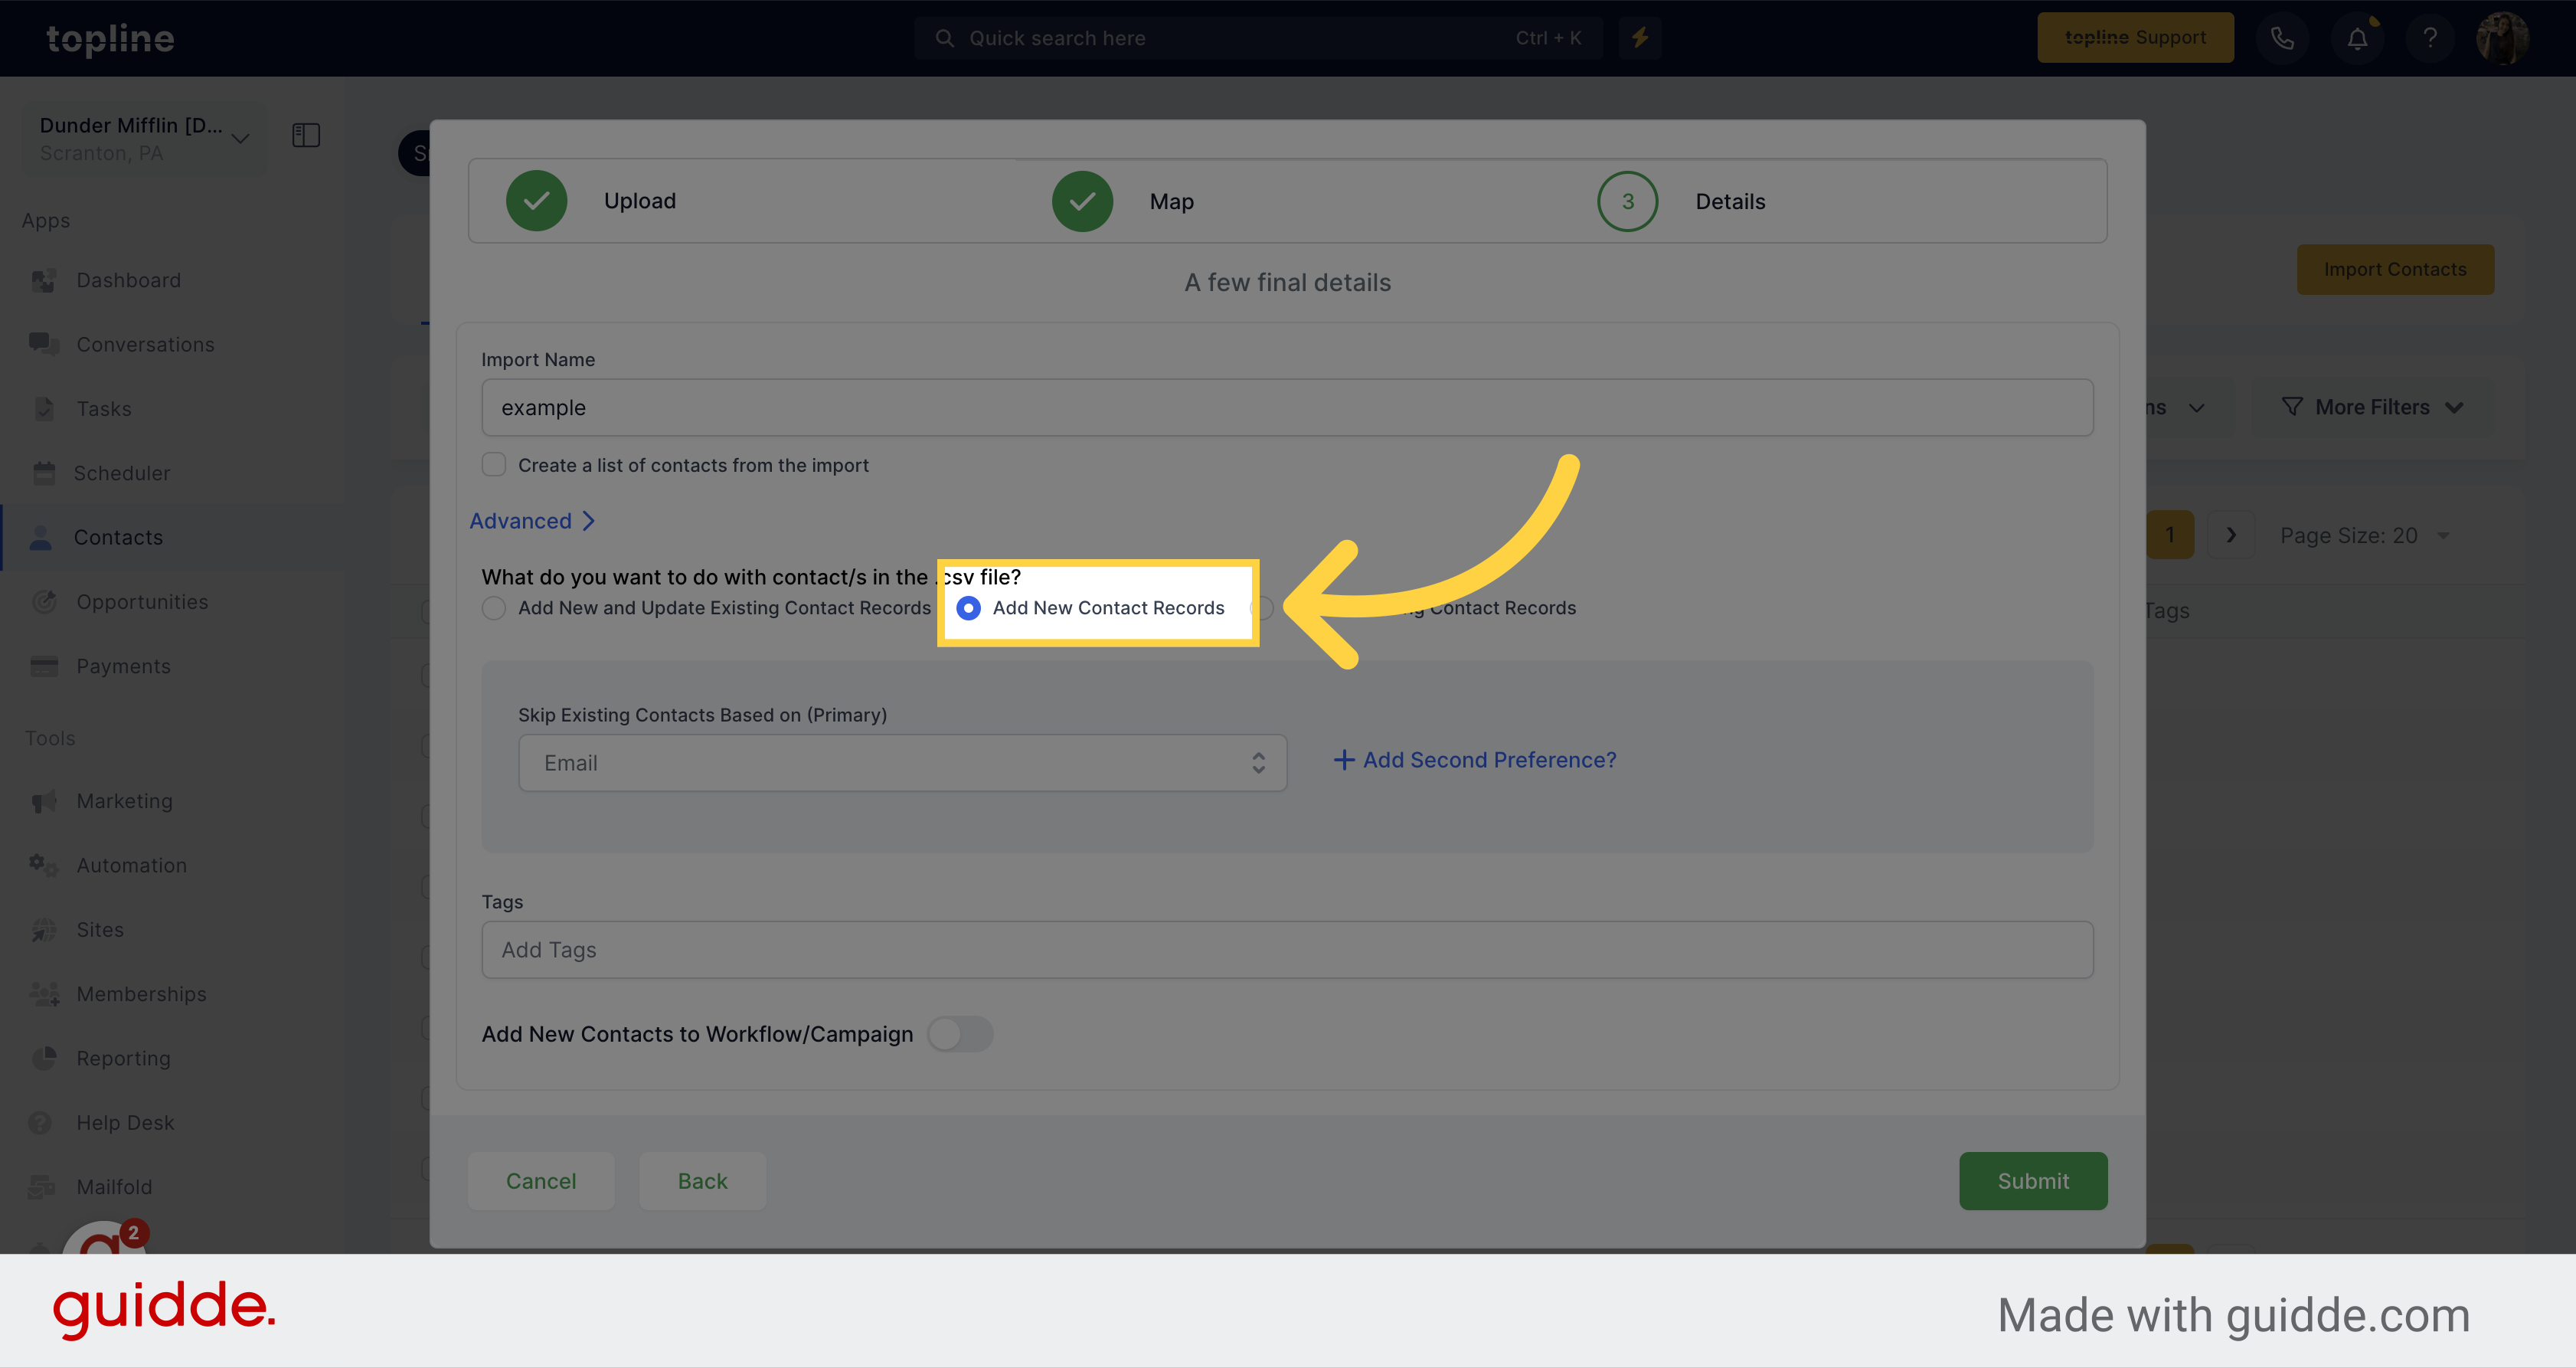
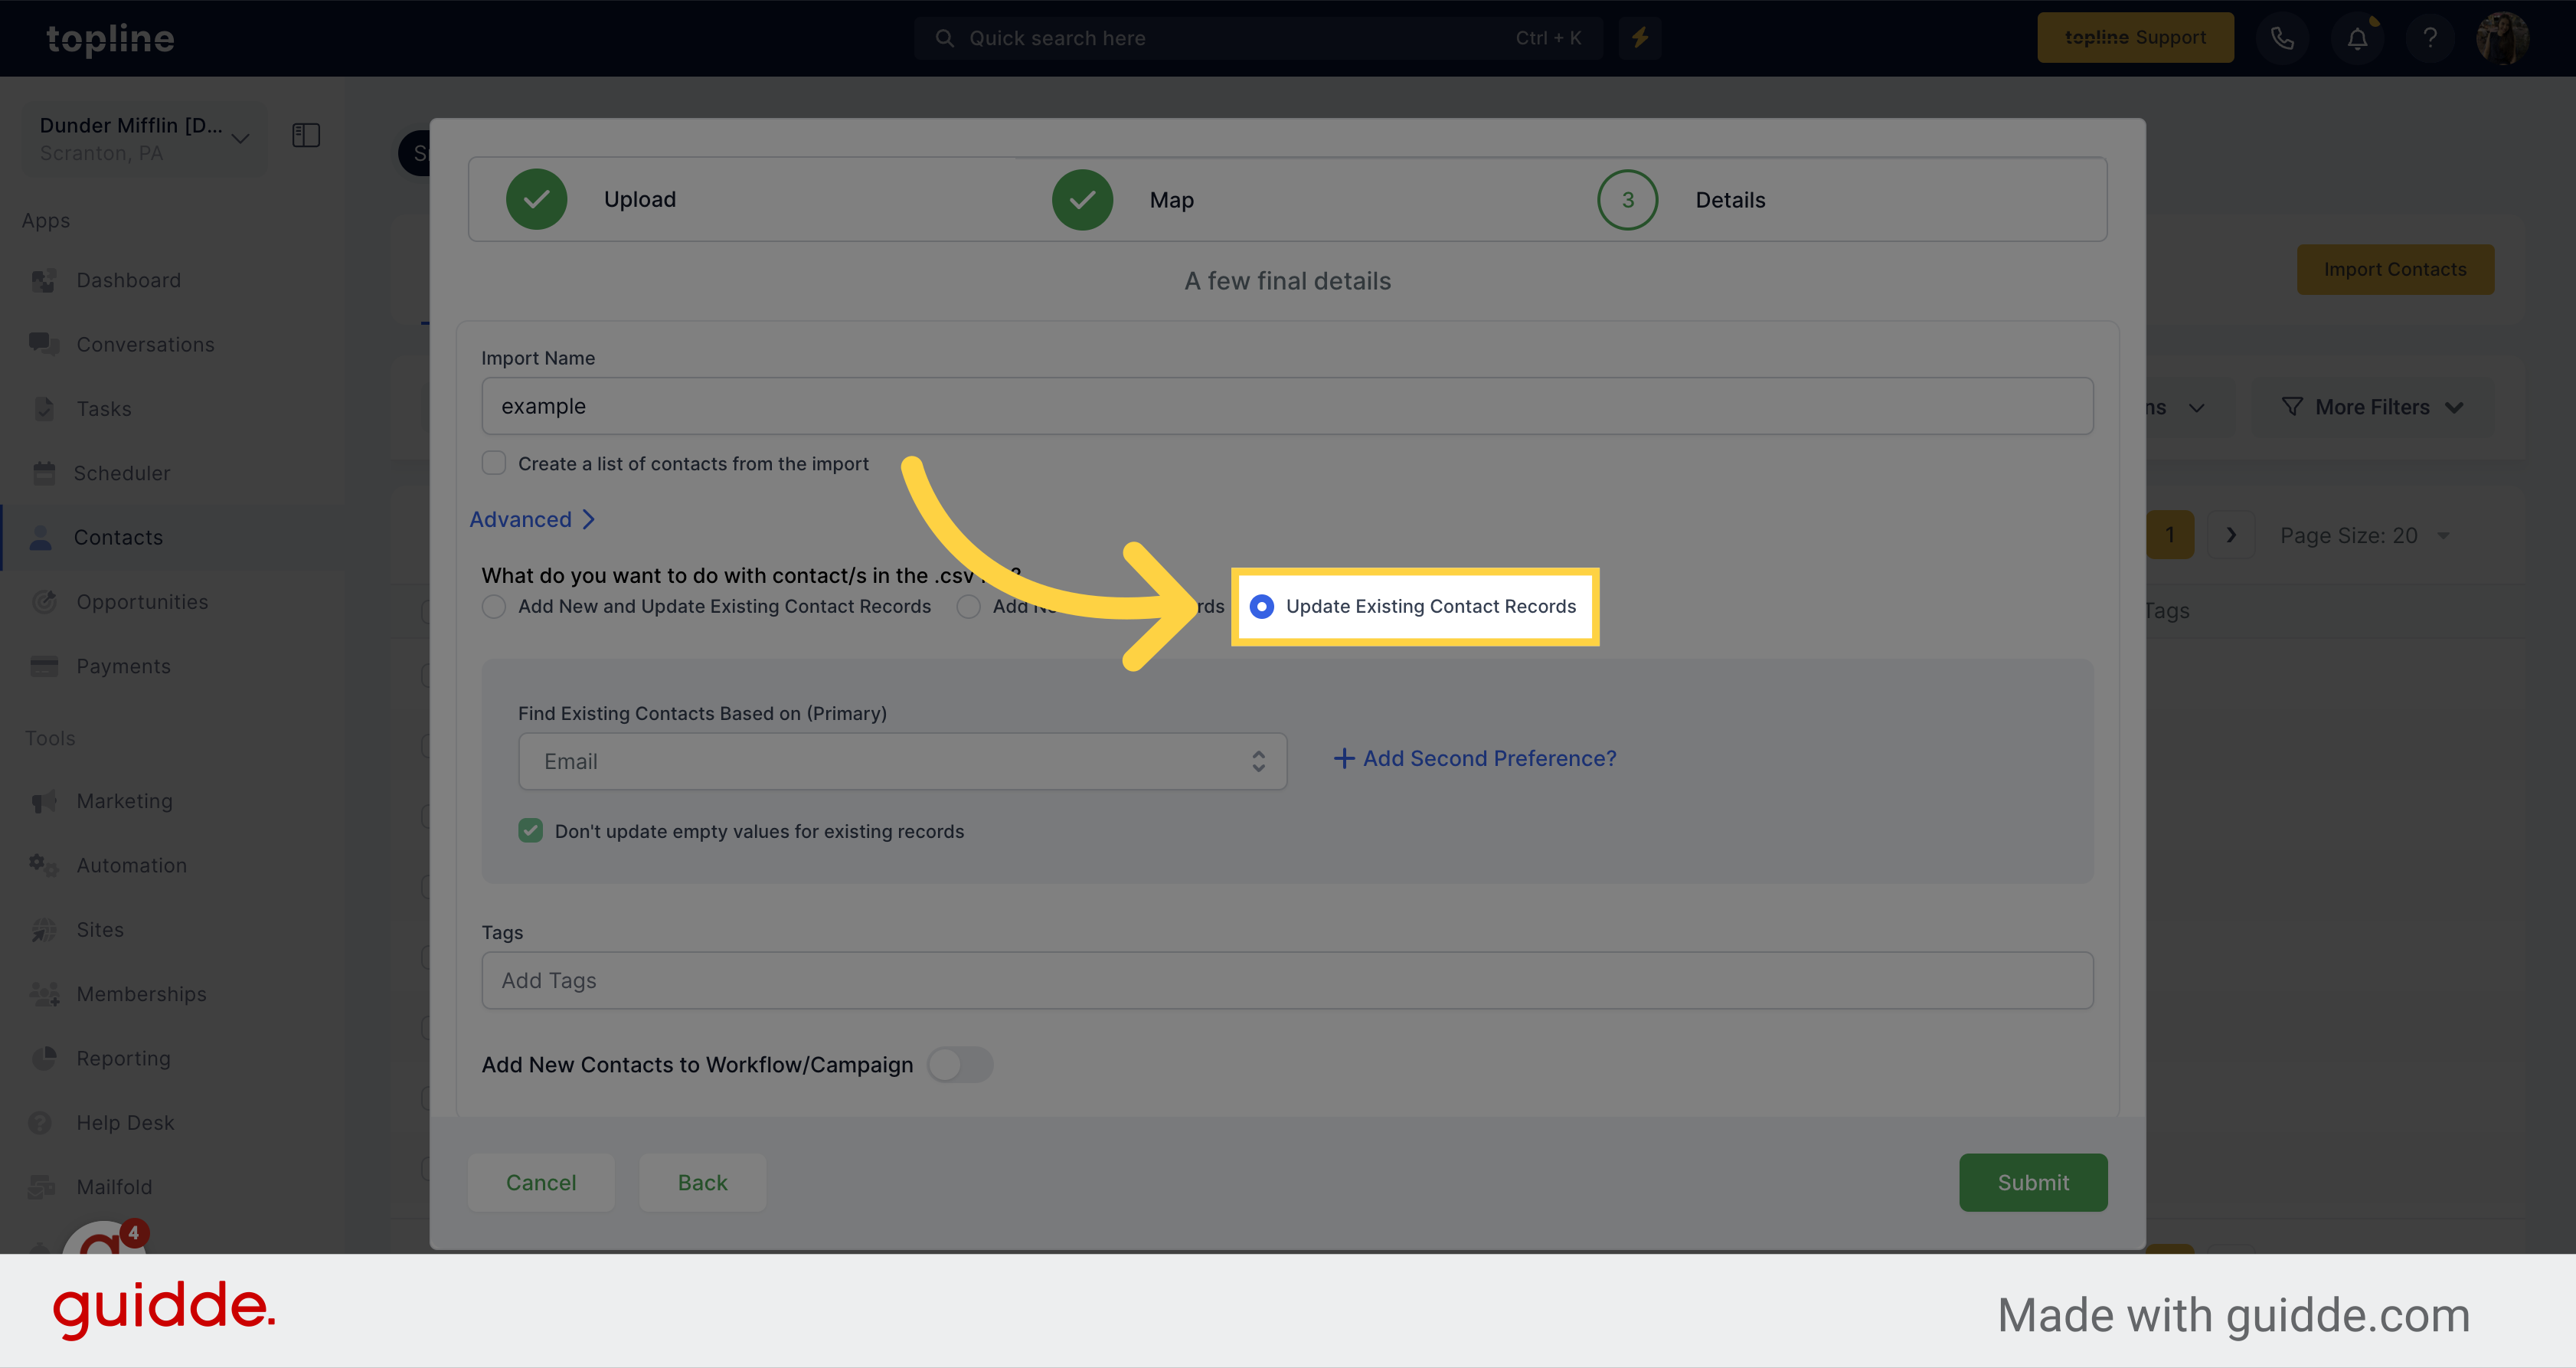
Pick one of the options of what do you want to do with contacts in the .csv file. You can pick from: - Add New and Update Existing Contact Records - Add New Contact Records - Update Existing Contact Records
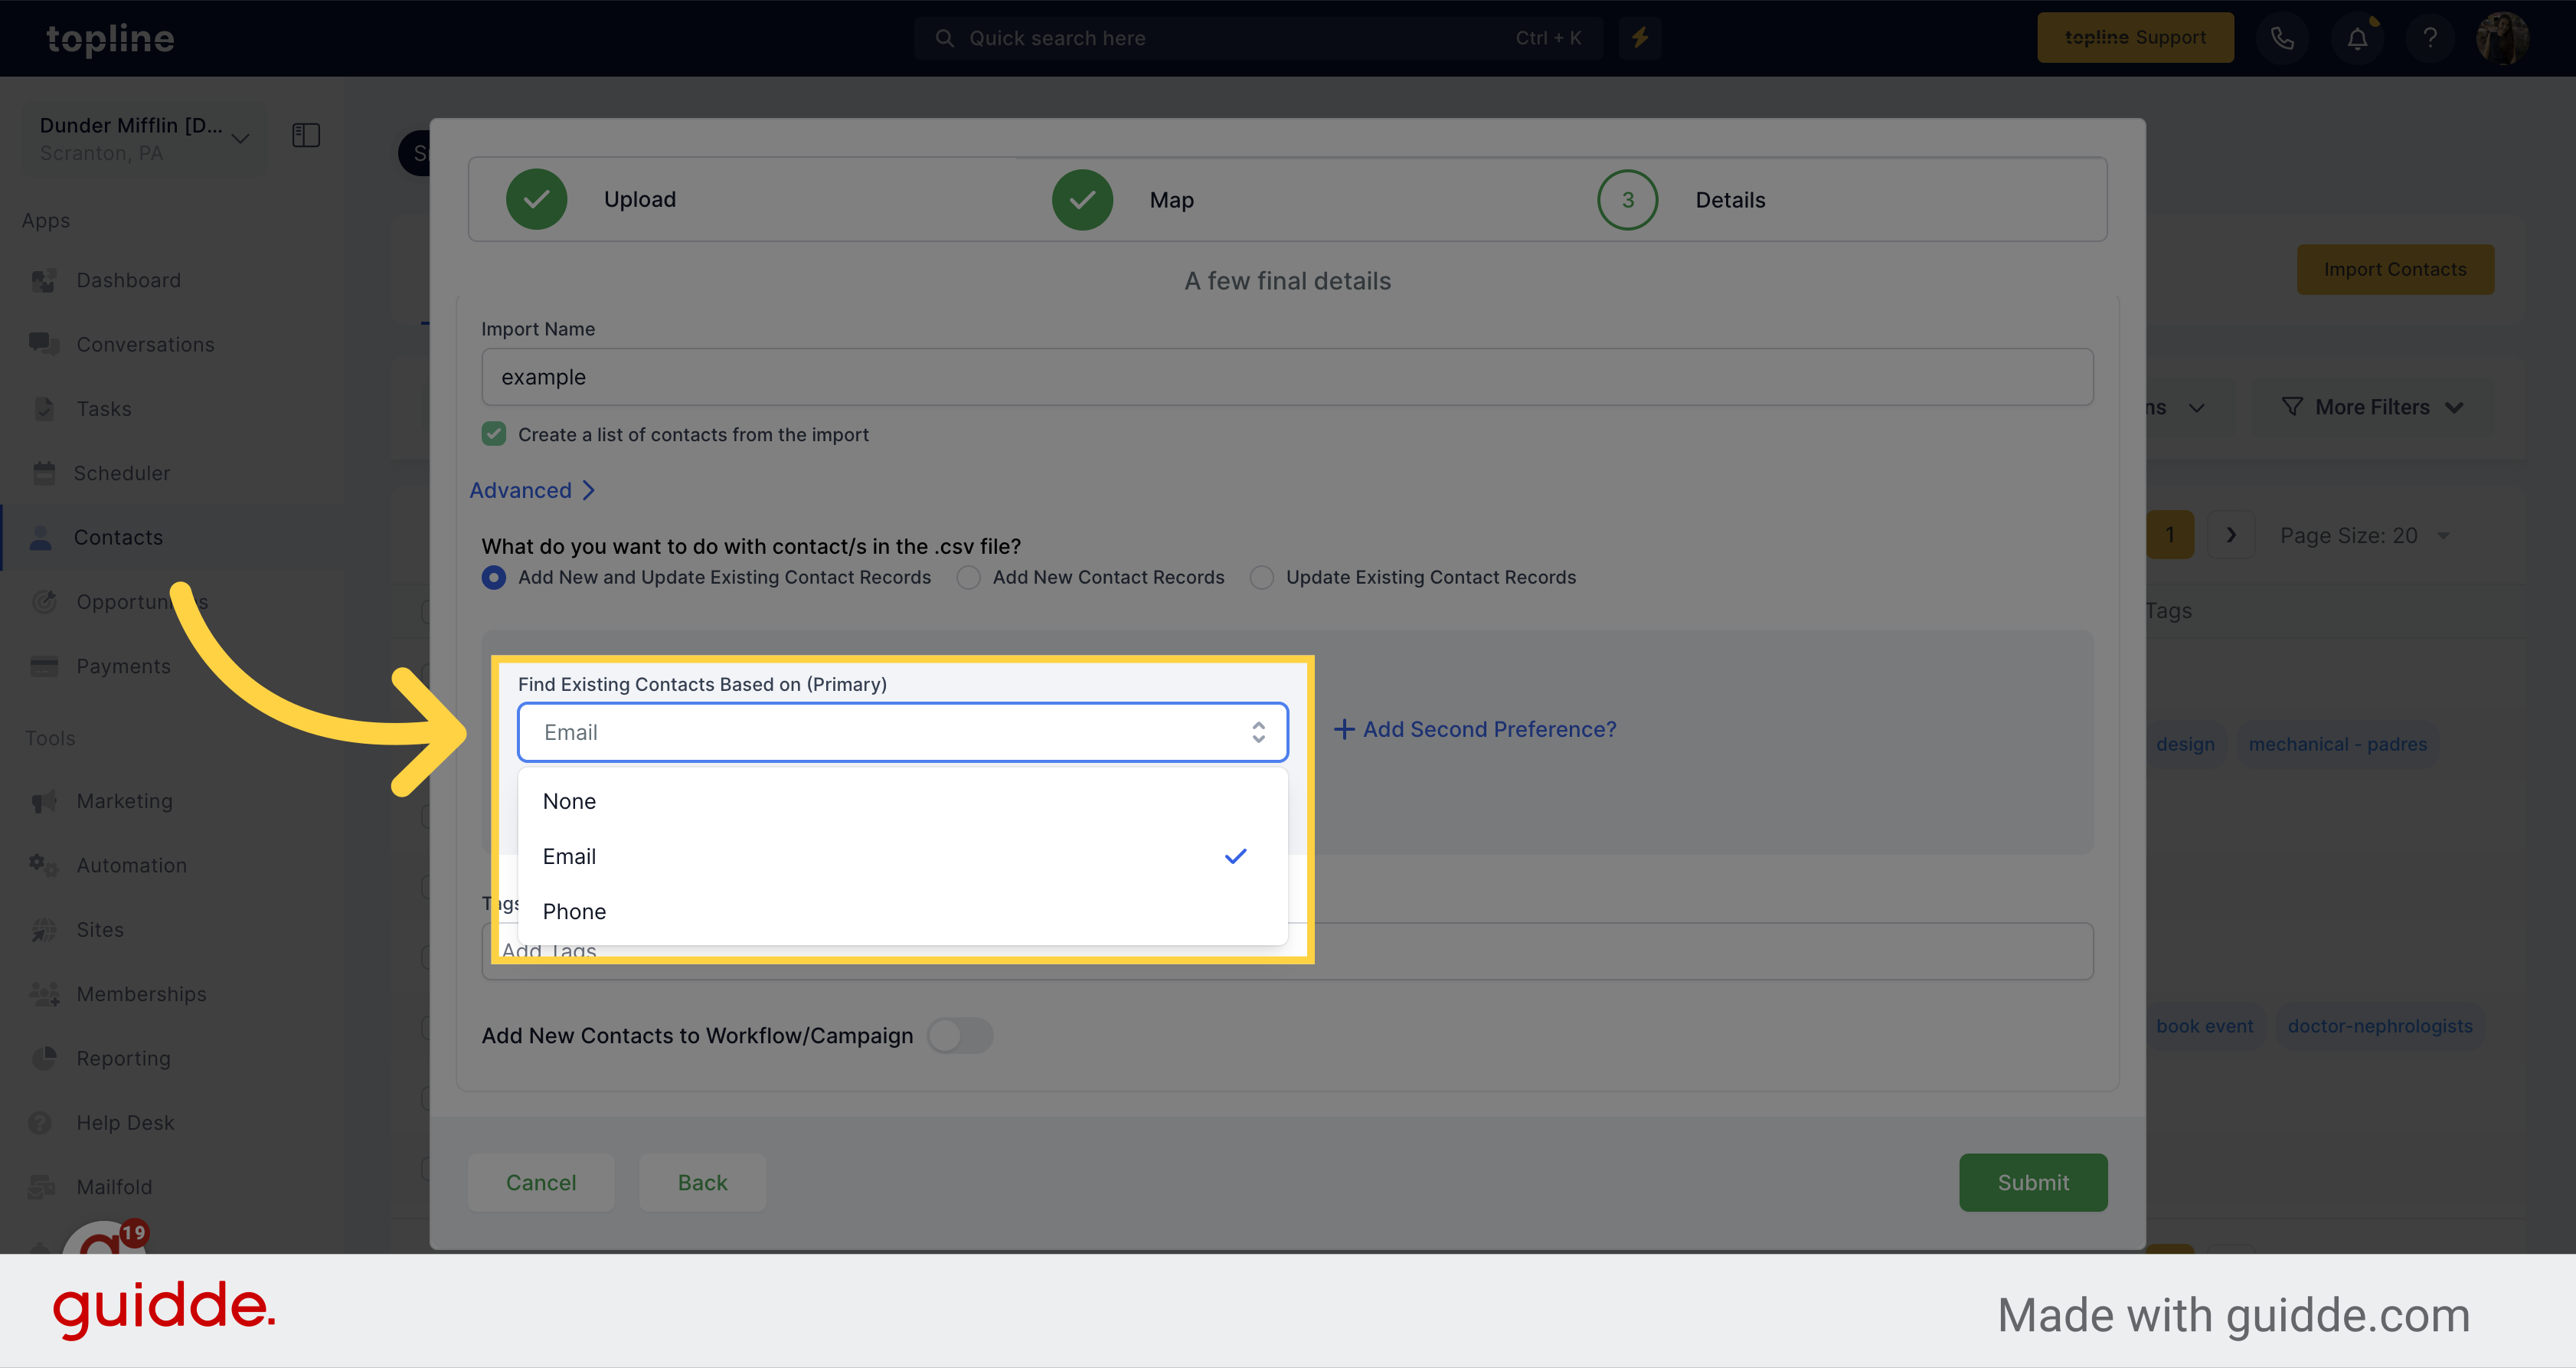
If you selected to update existing contacts, select the criteria you want to find contacts, it can be from their email or phone.
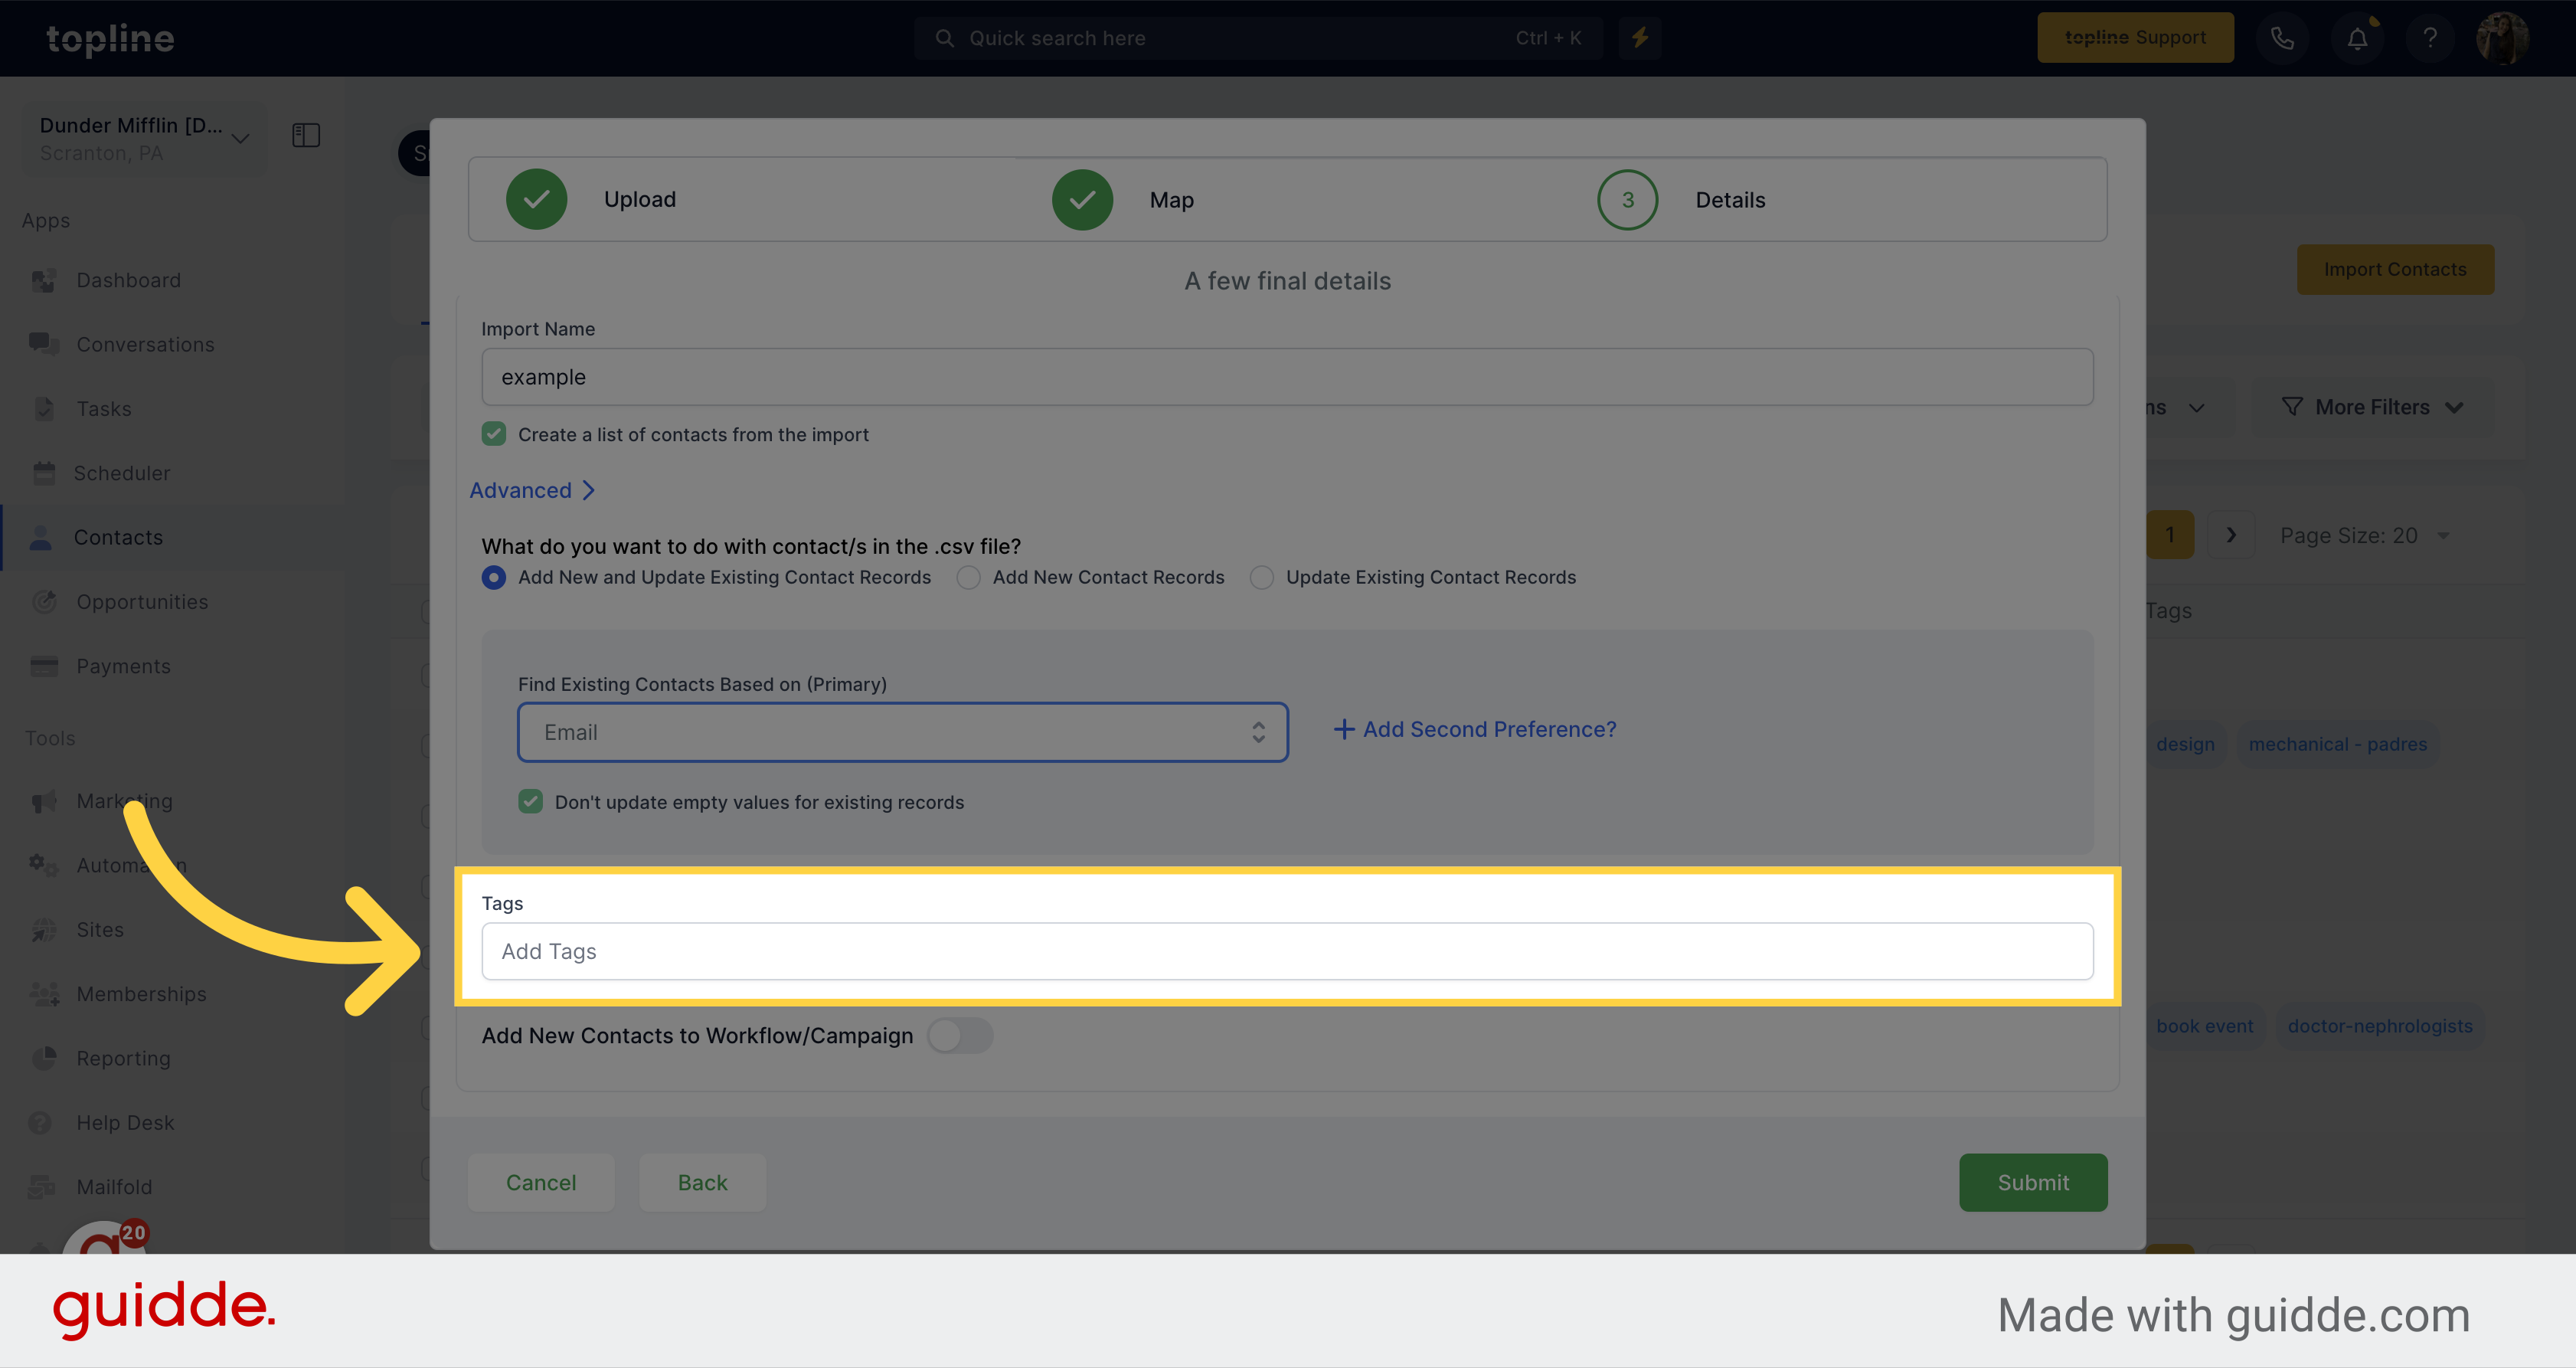
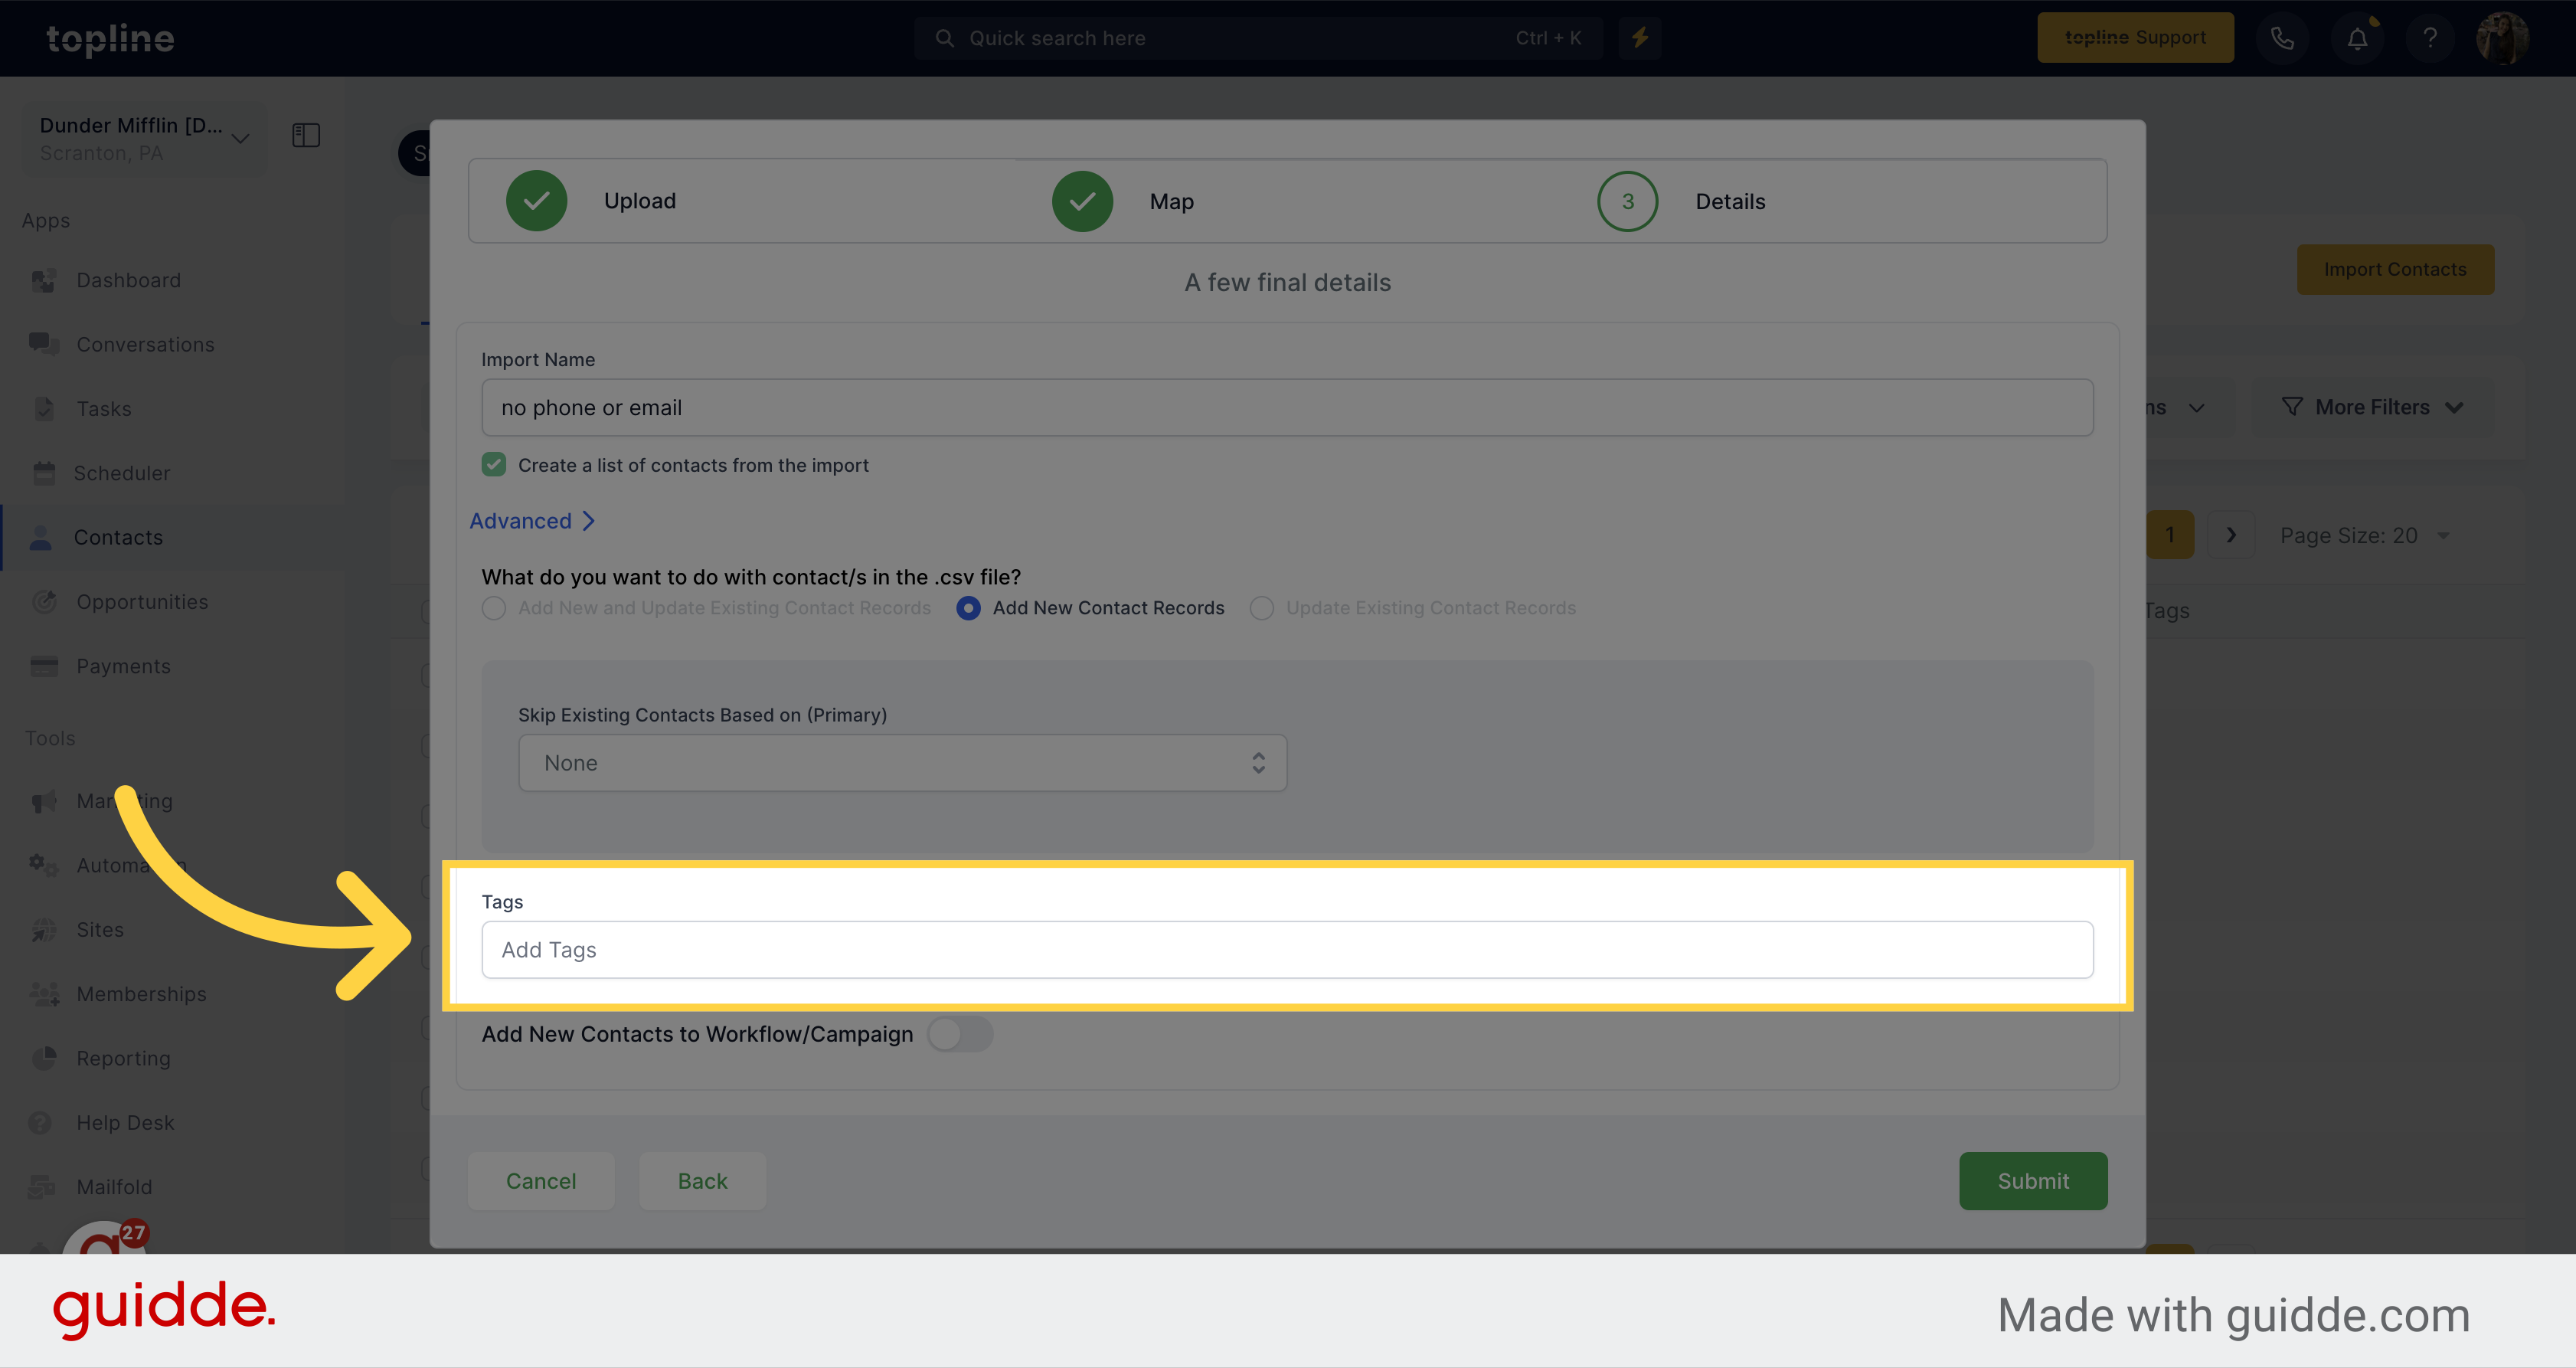
You can add tags to the contacts added by typing them on the empty field.
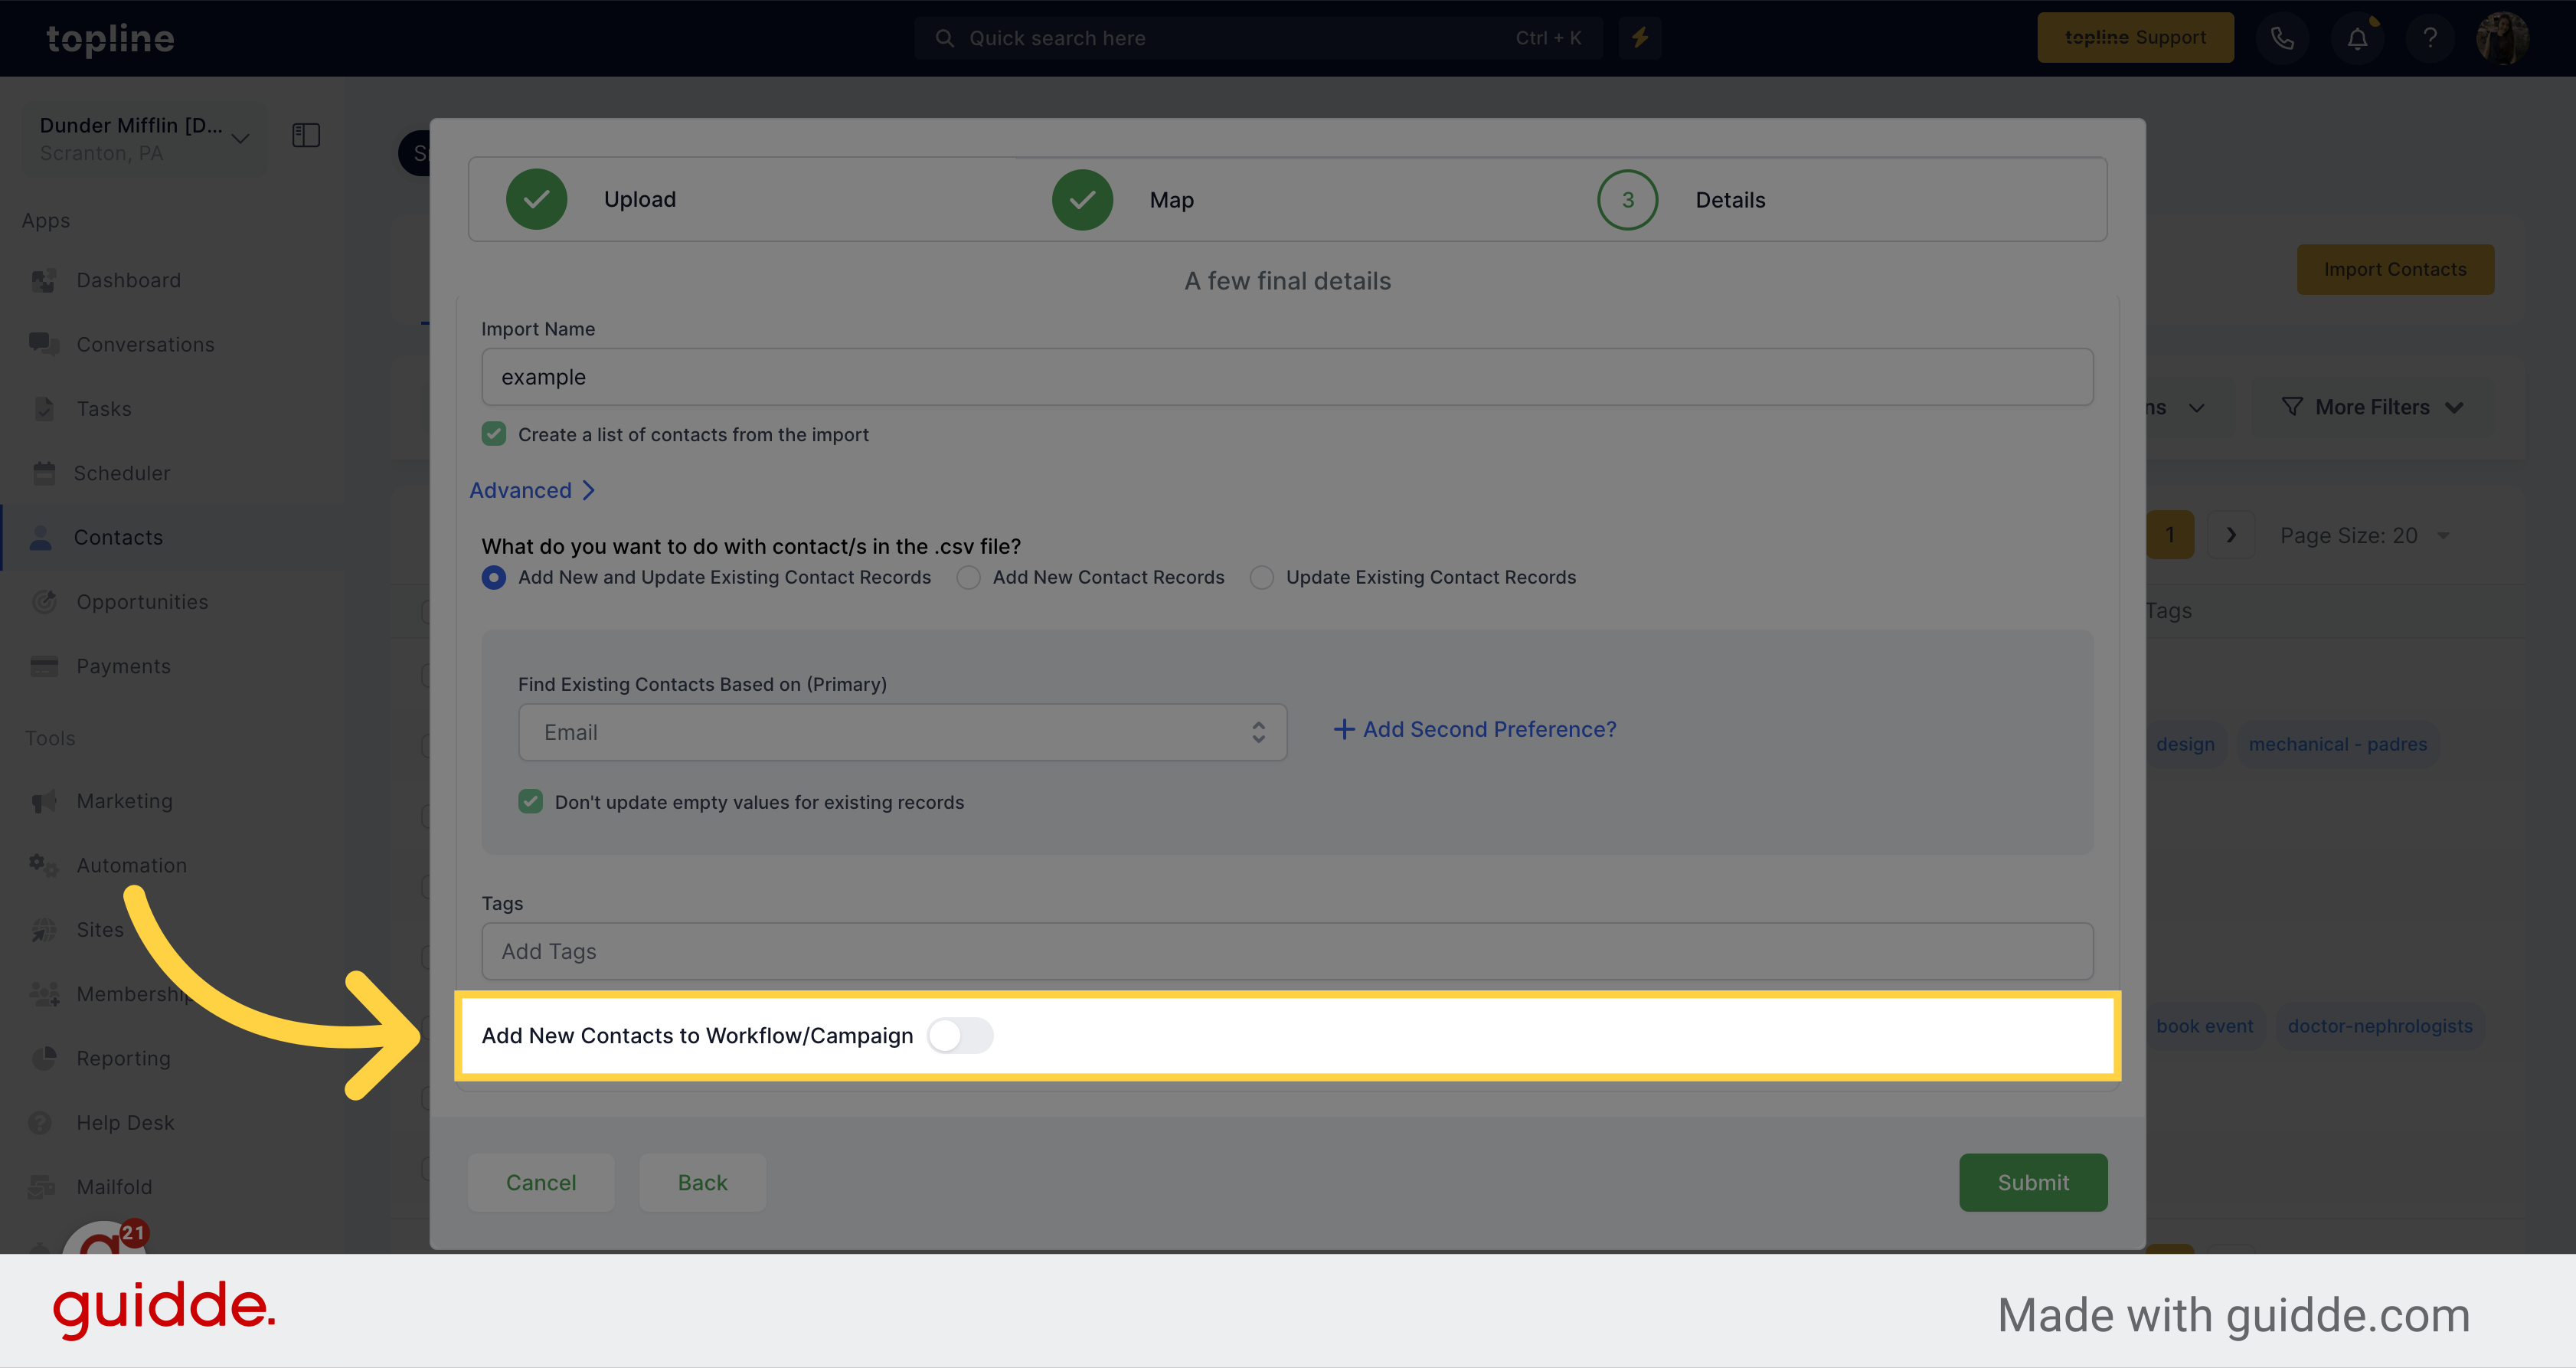
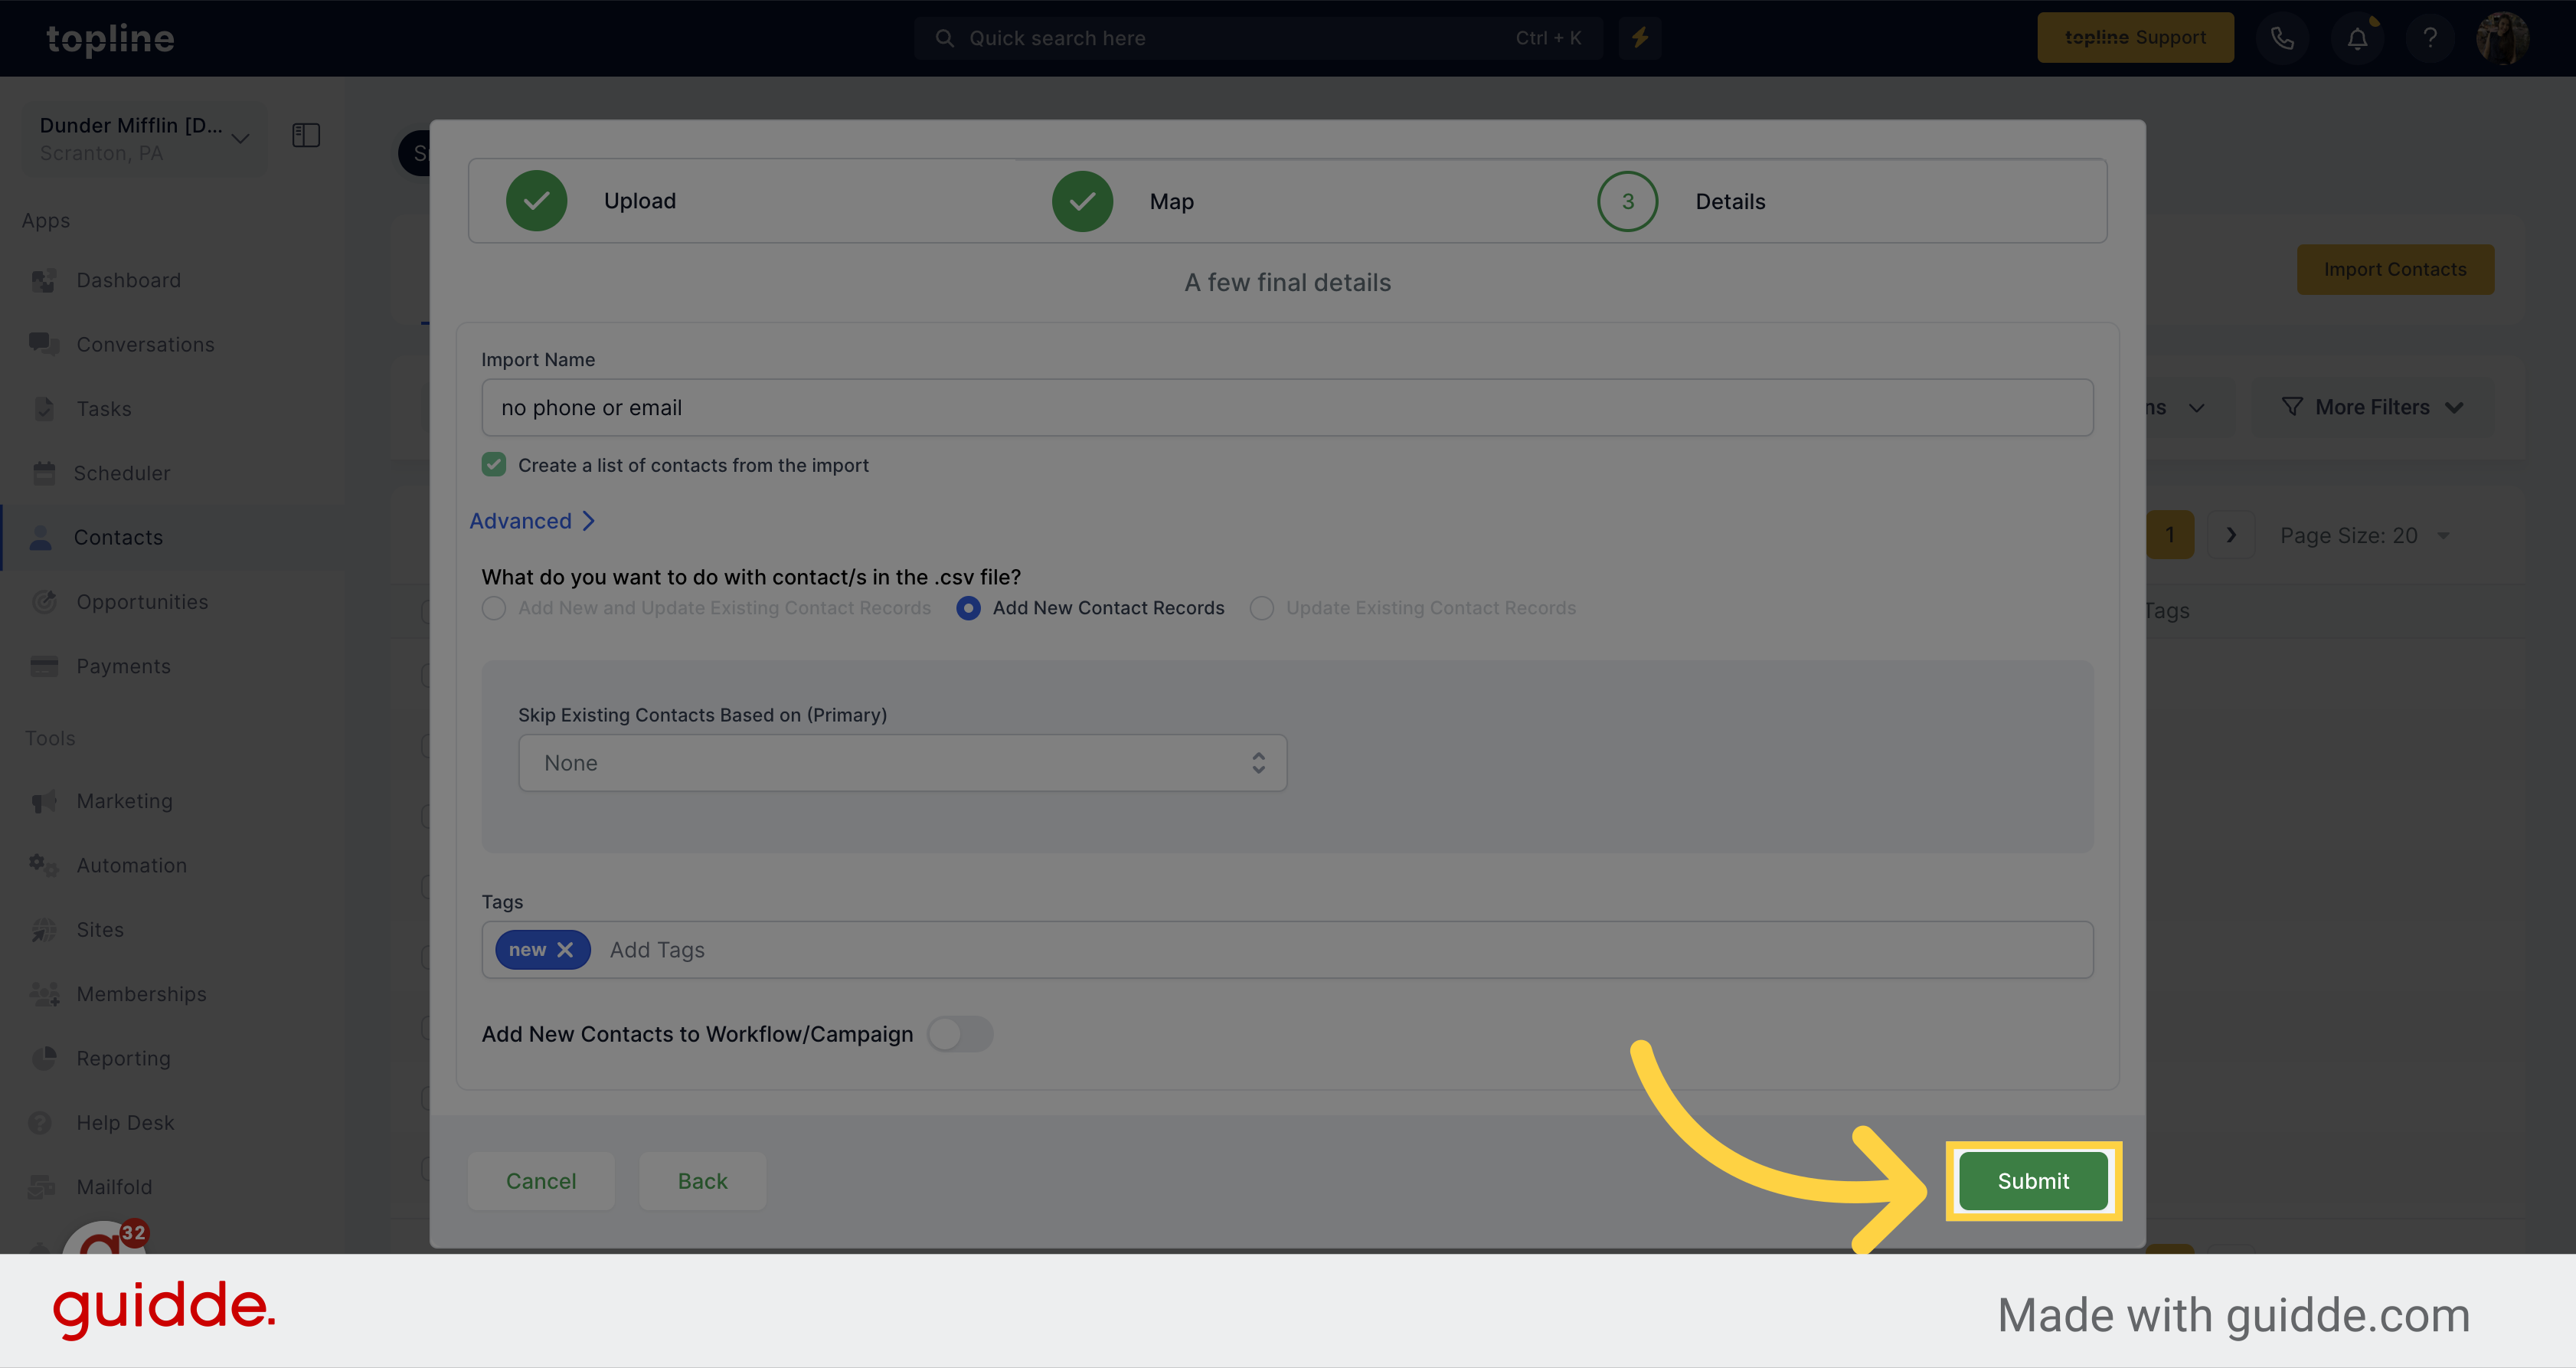
Include new contacts in a Workflow or Campaign by selecting this option.
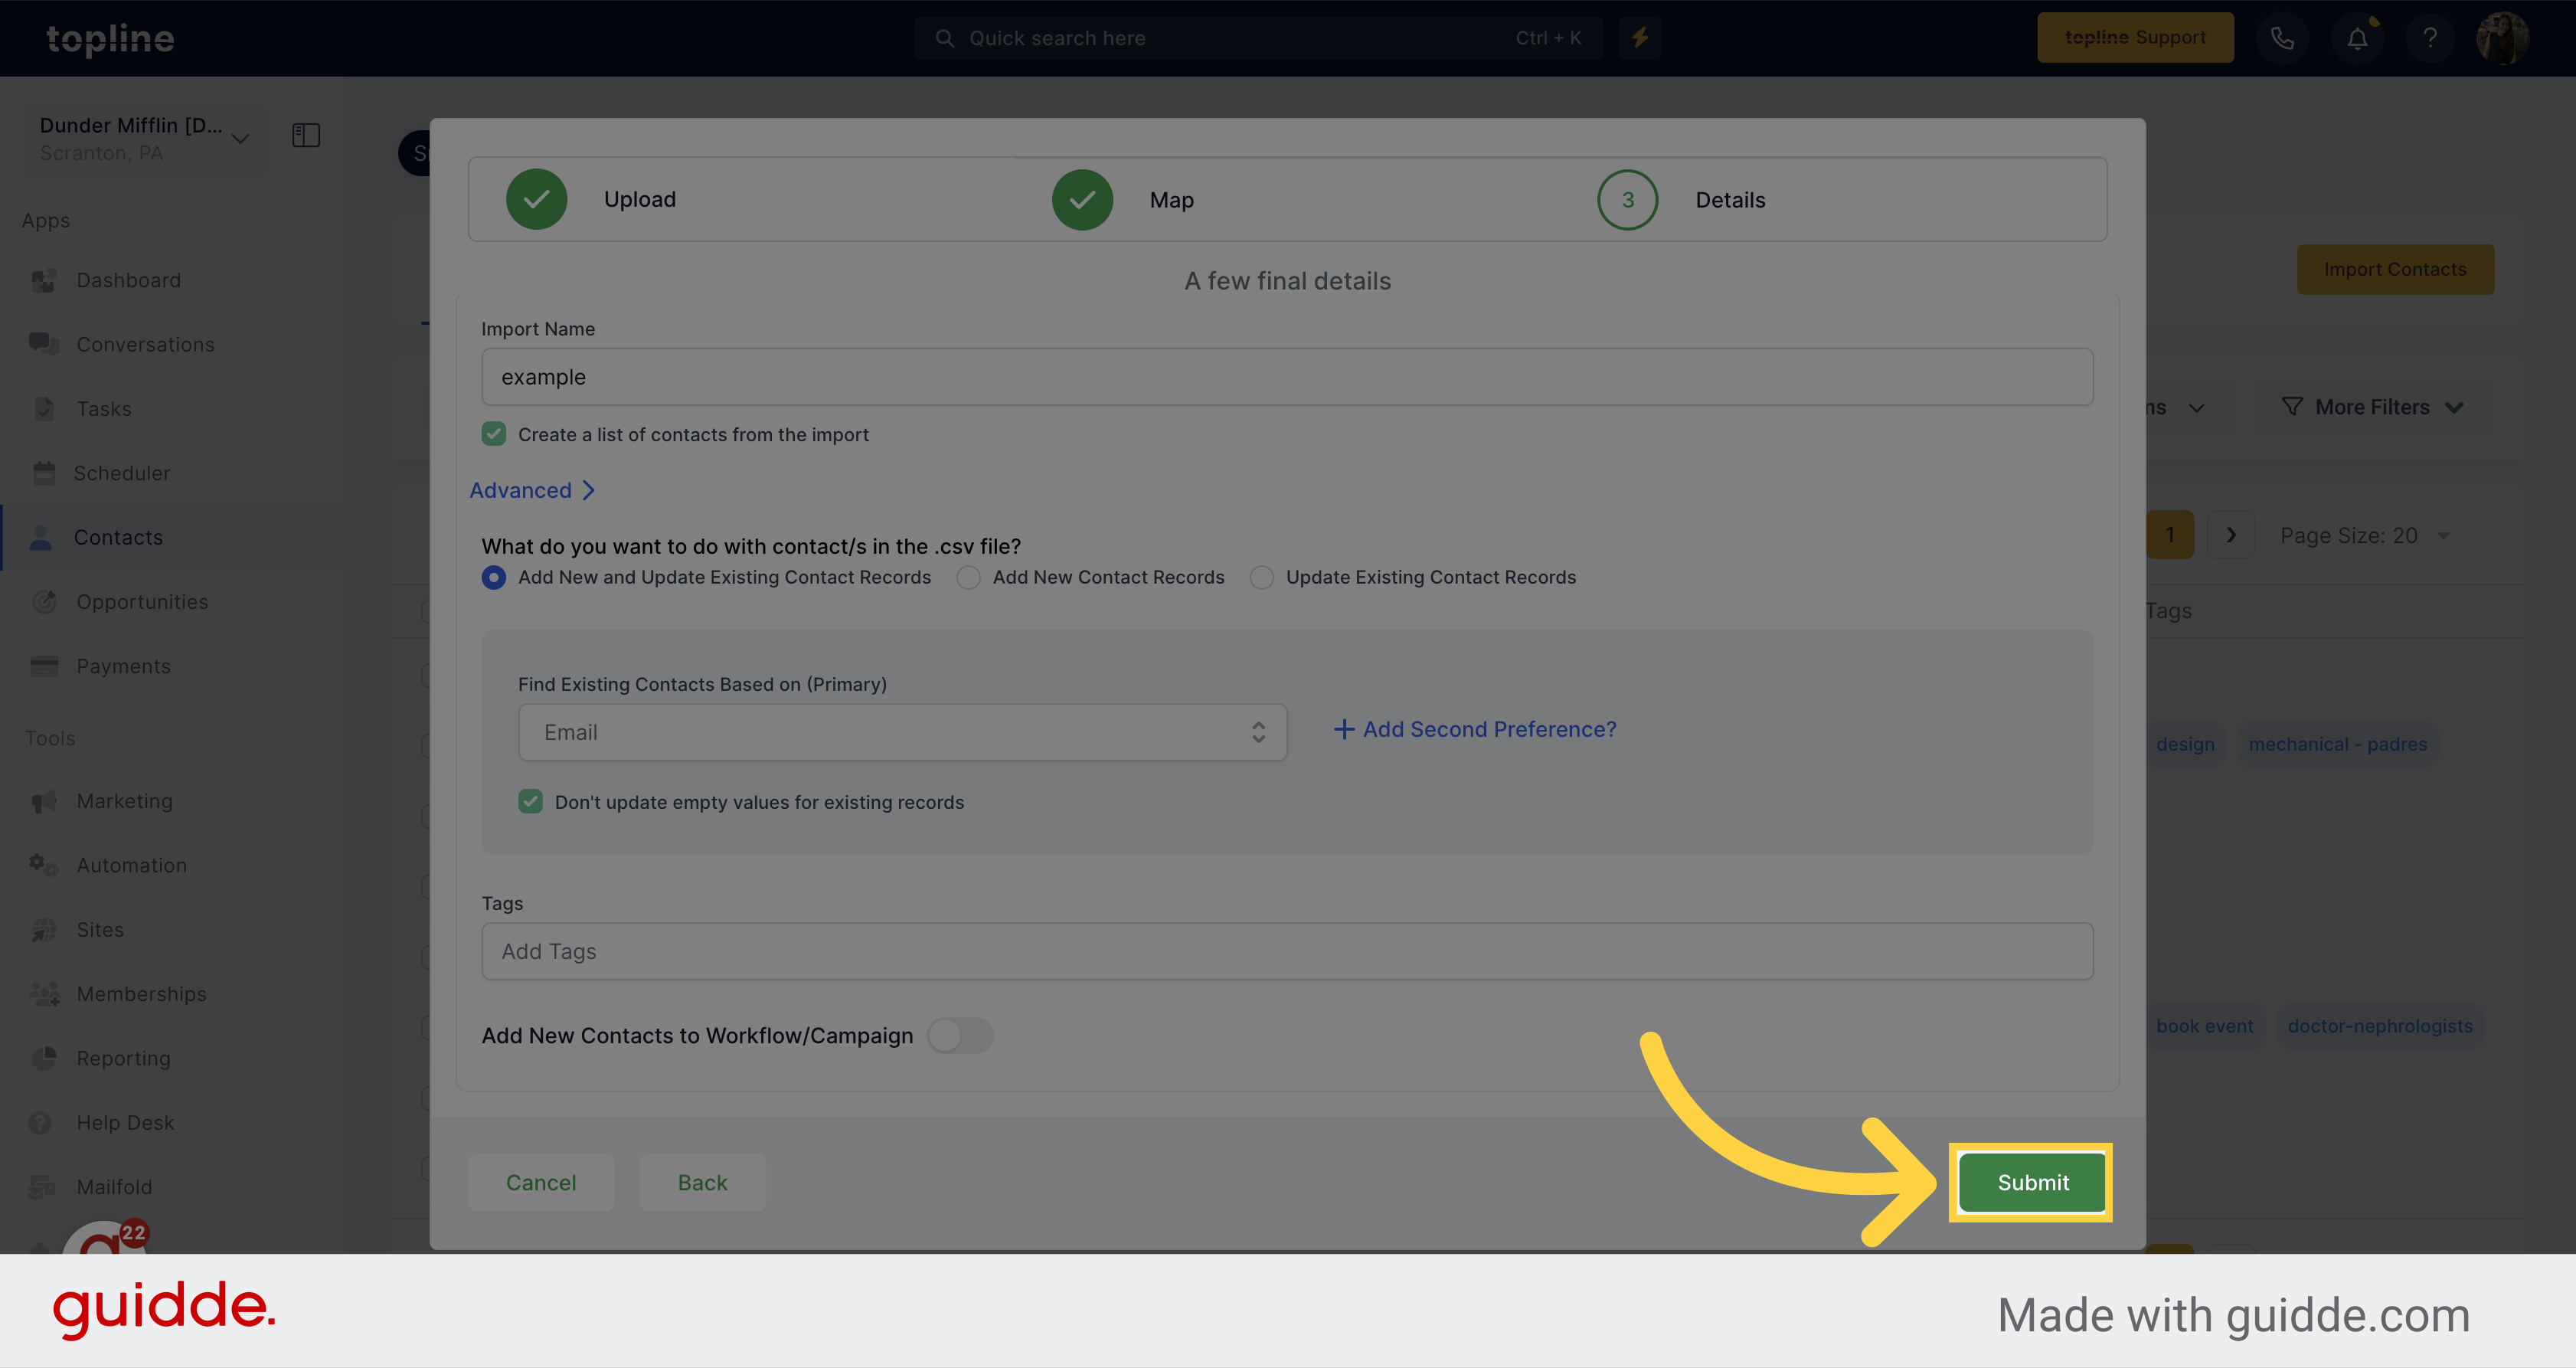
Once everything is ready, click on Submit.
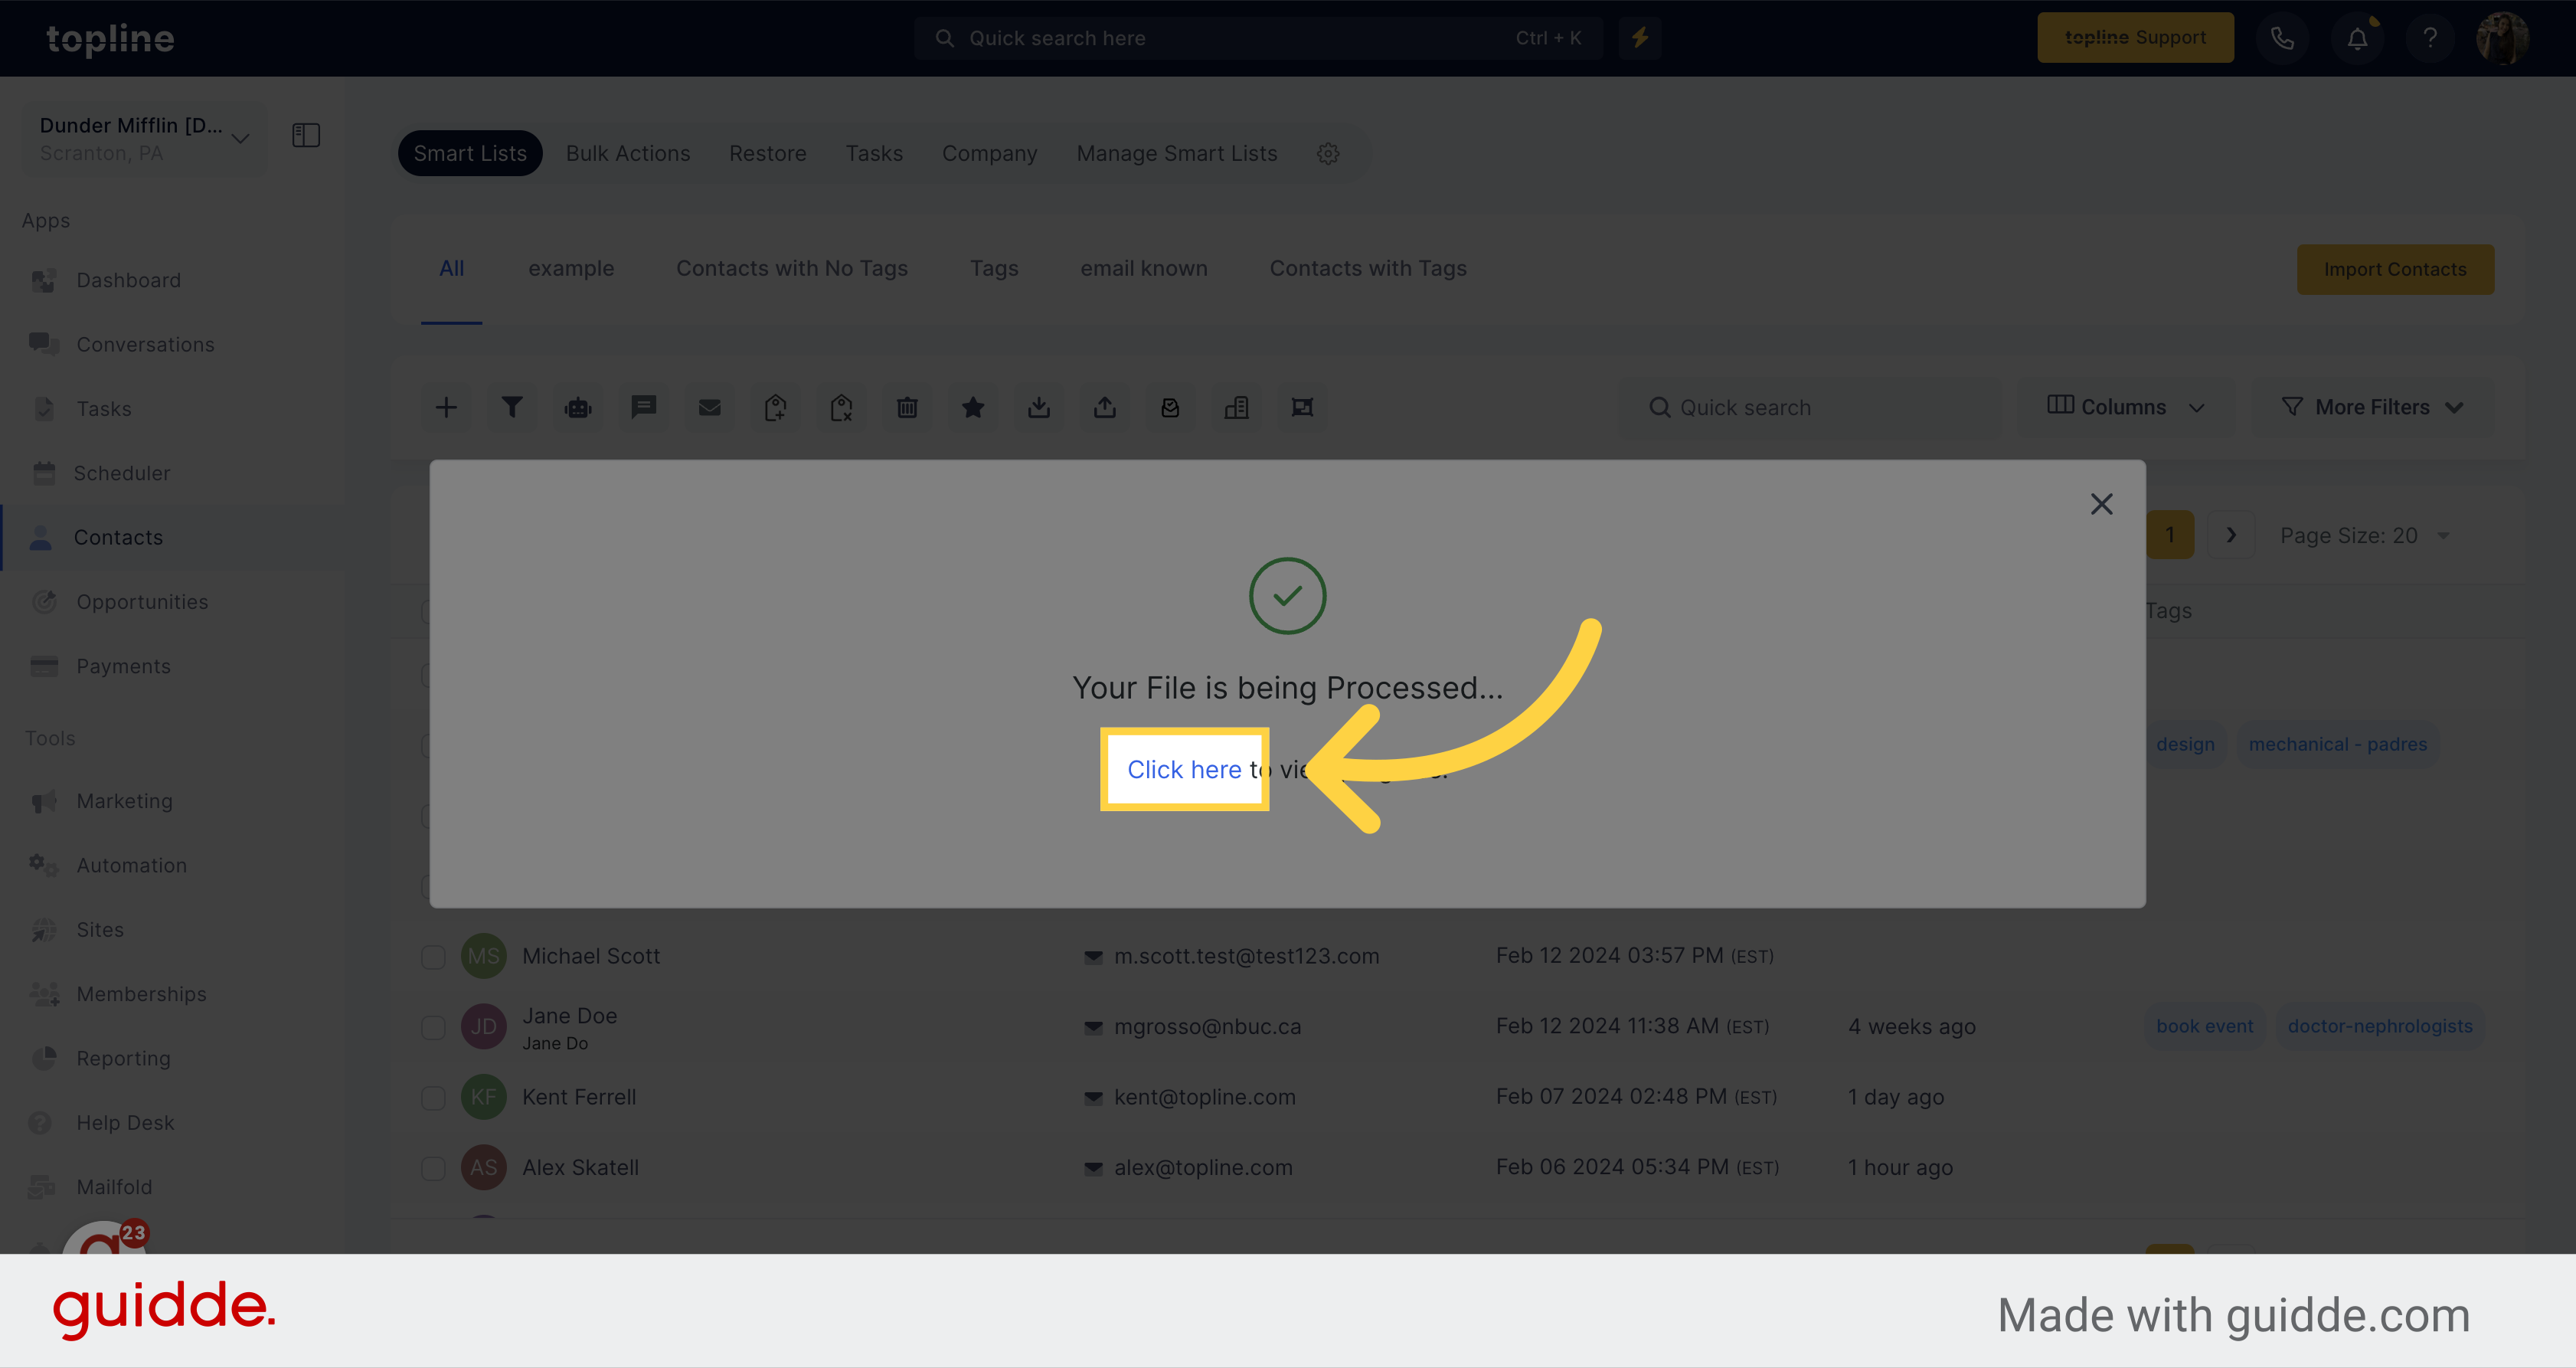
A pop up window will appear saying that your file is being processed. Click on Click here to check the progress.
Check your import status on this view.
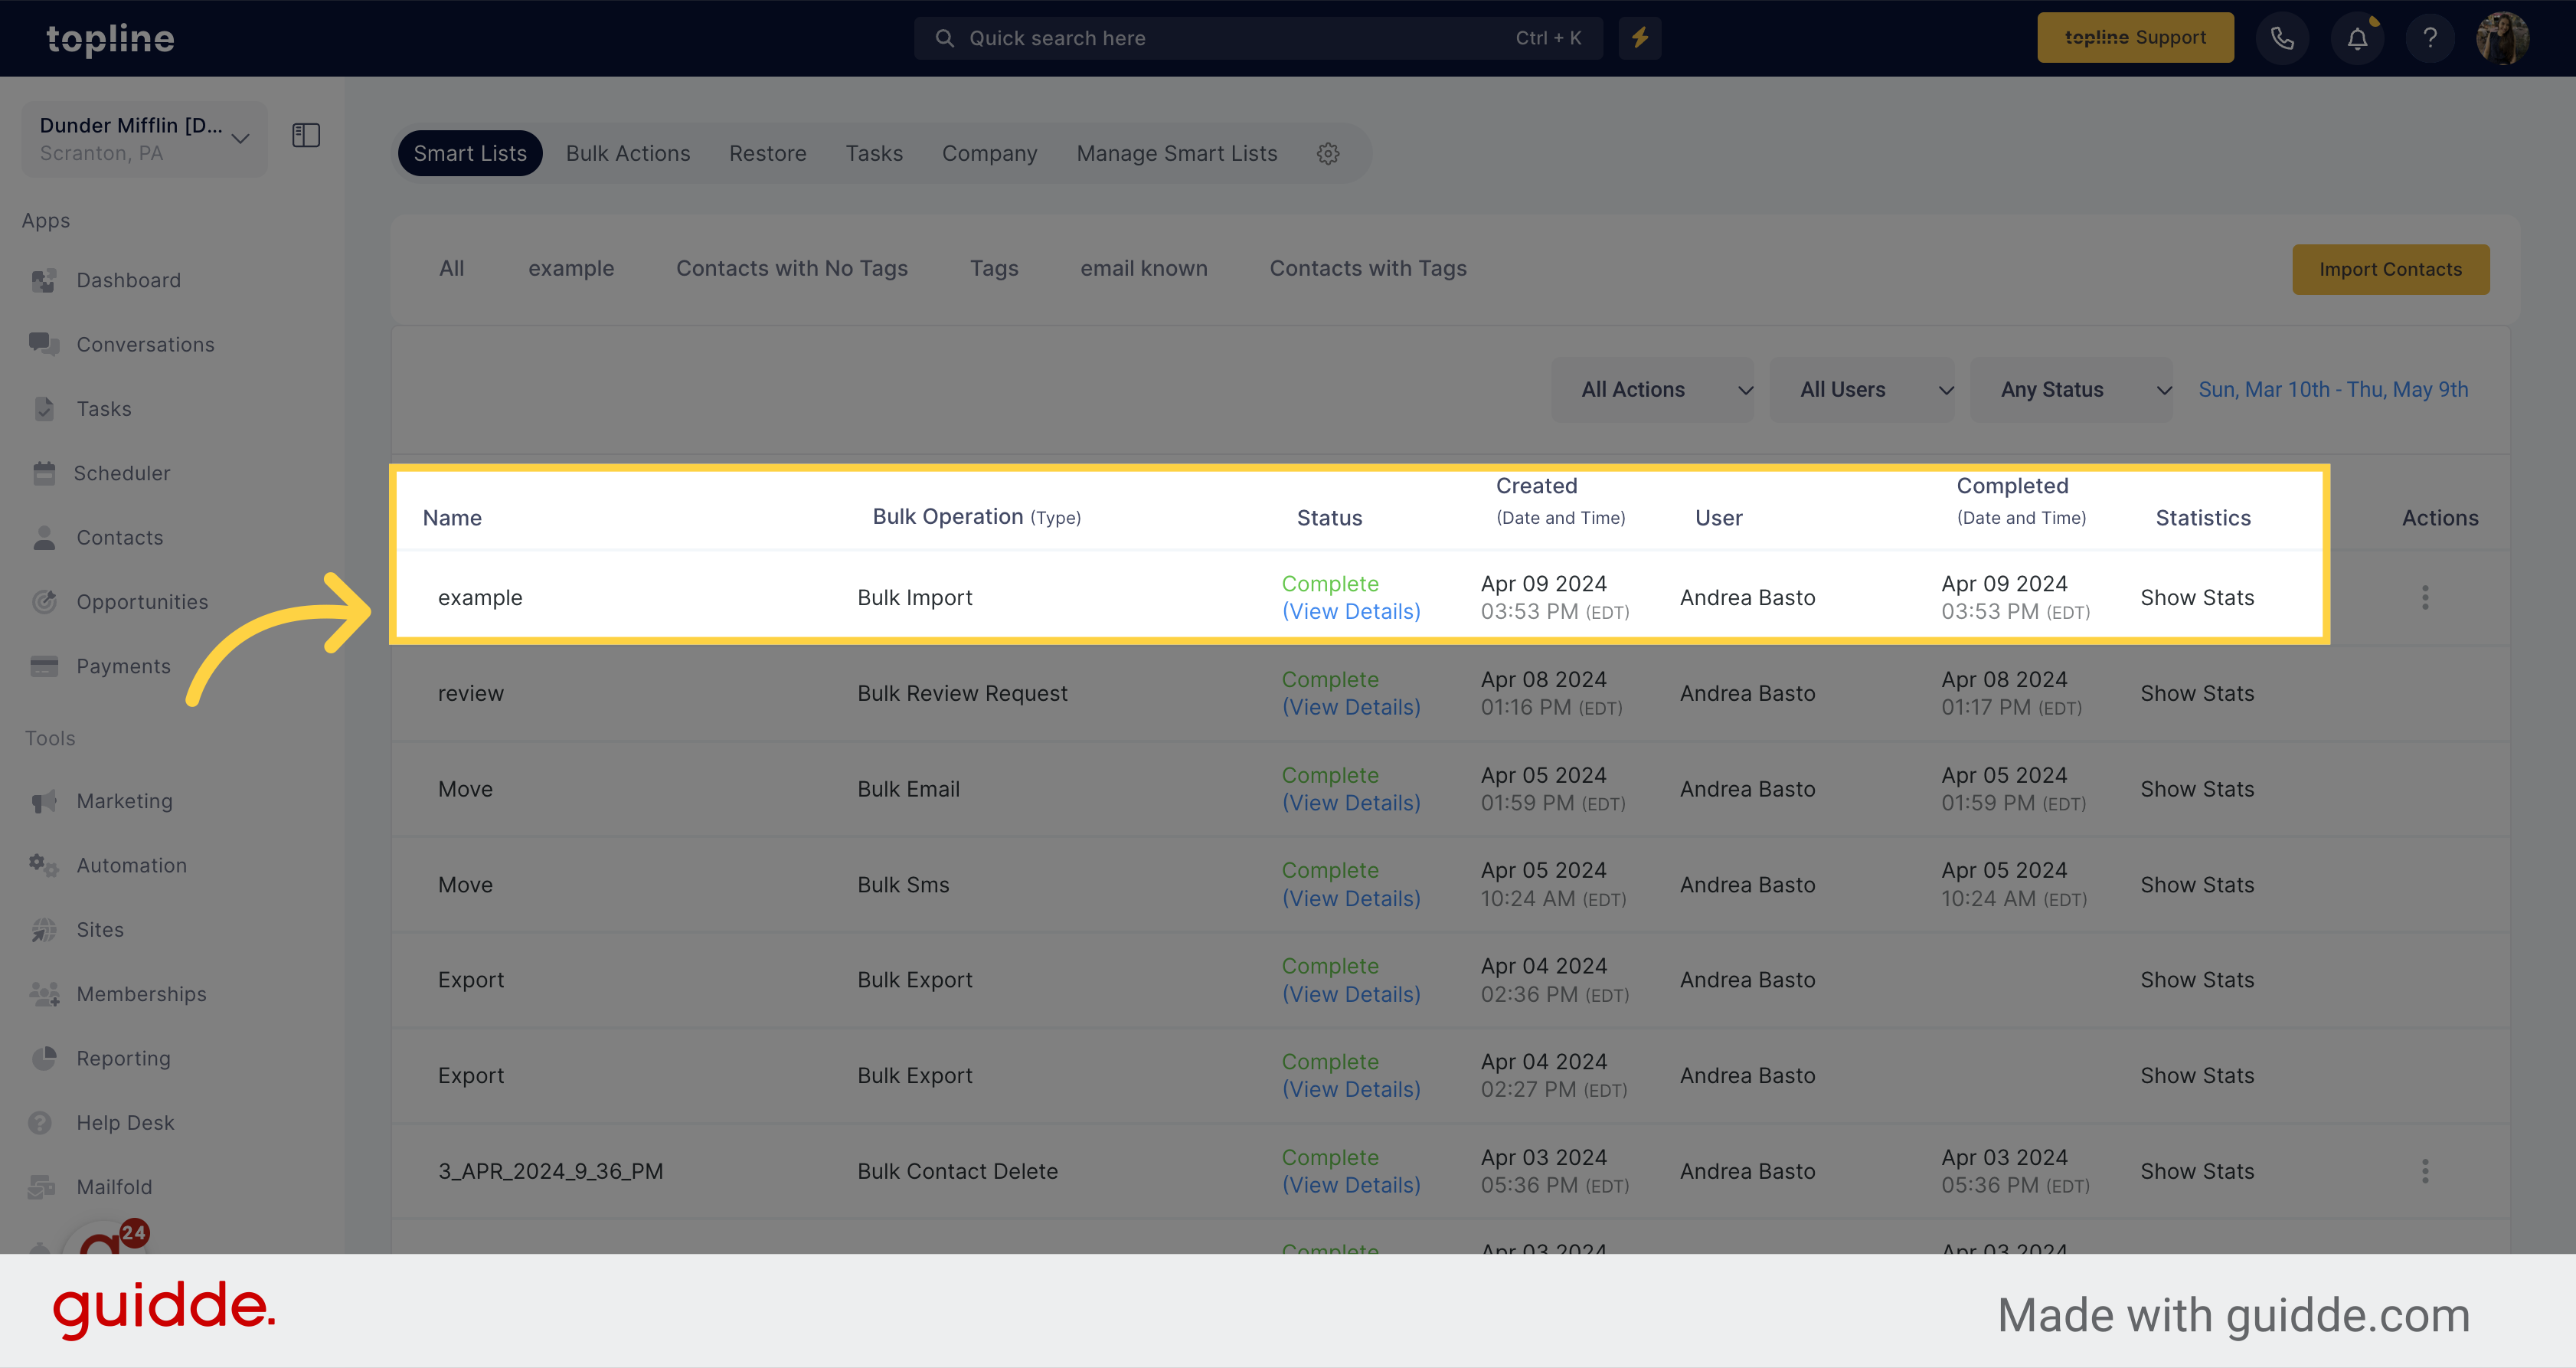
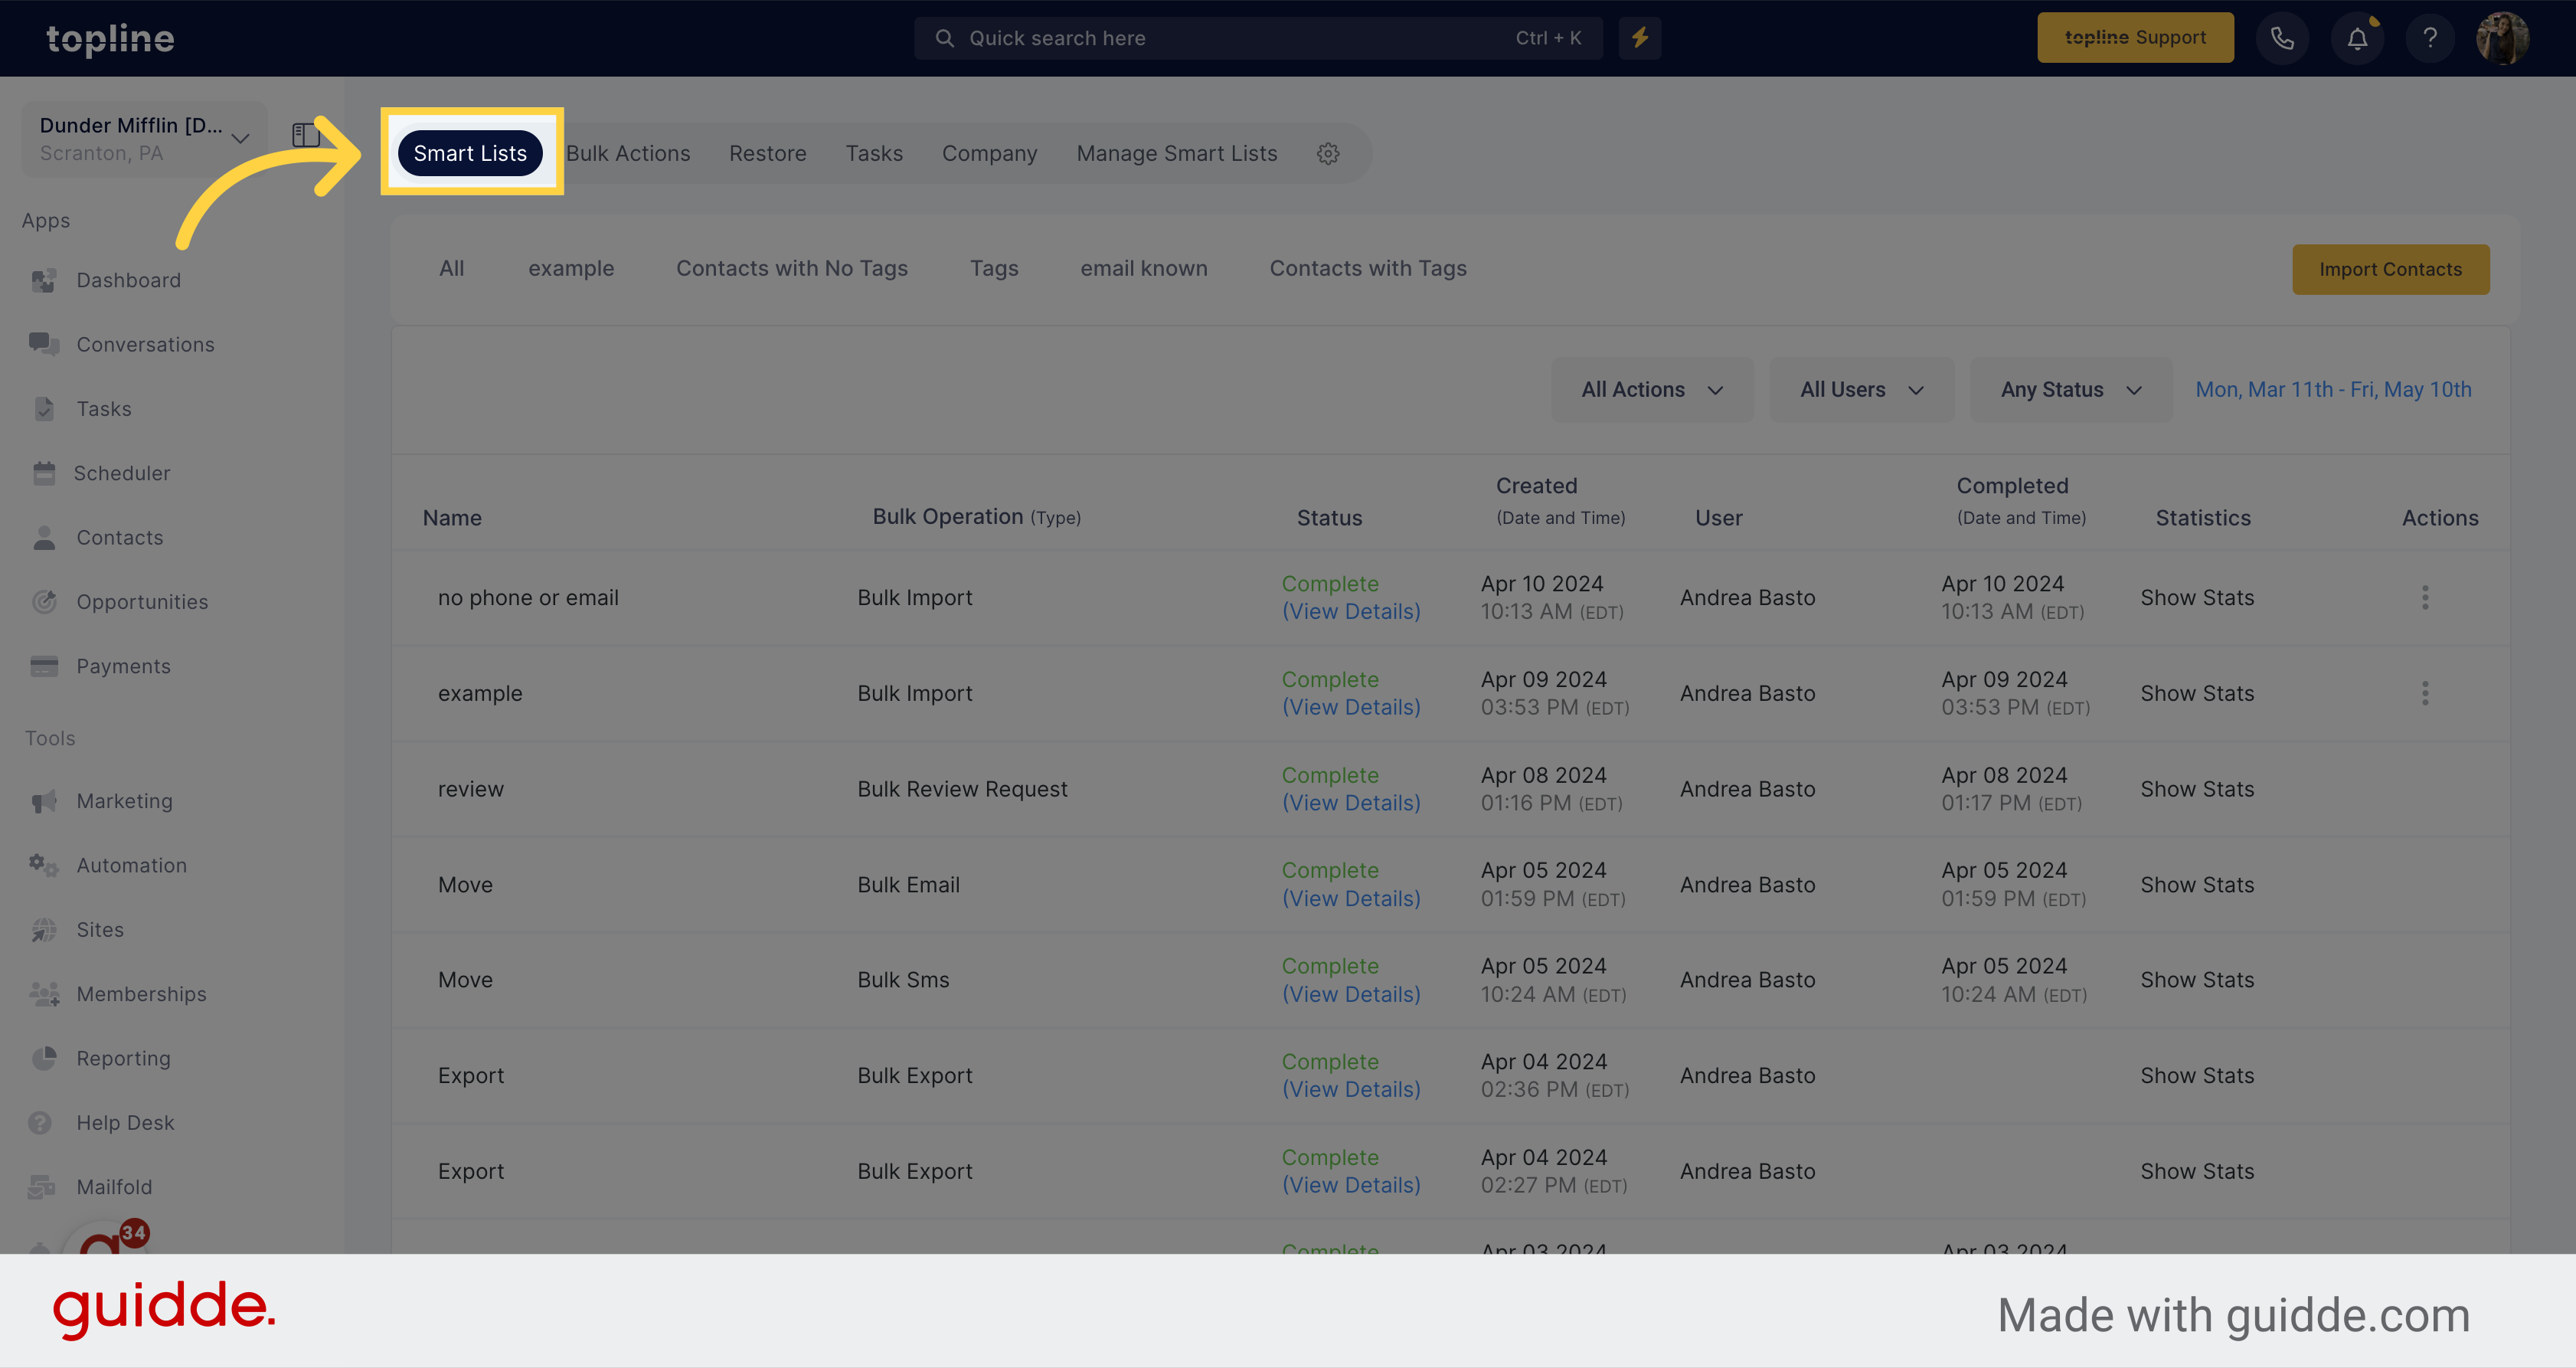
Look for the Contacts menu on the upper side and click on Smart Lists to access to this feature.
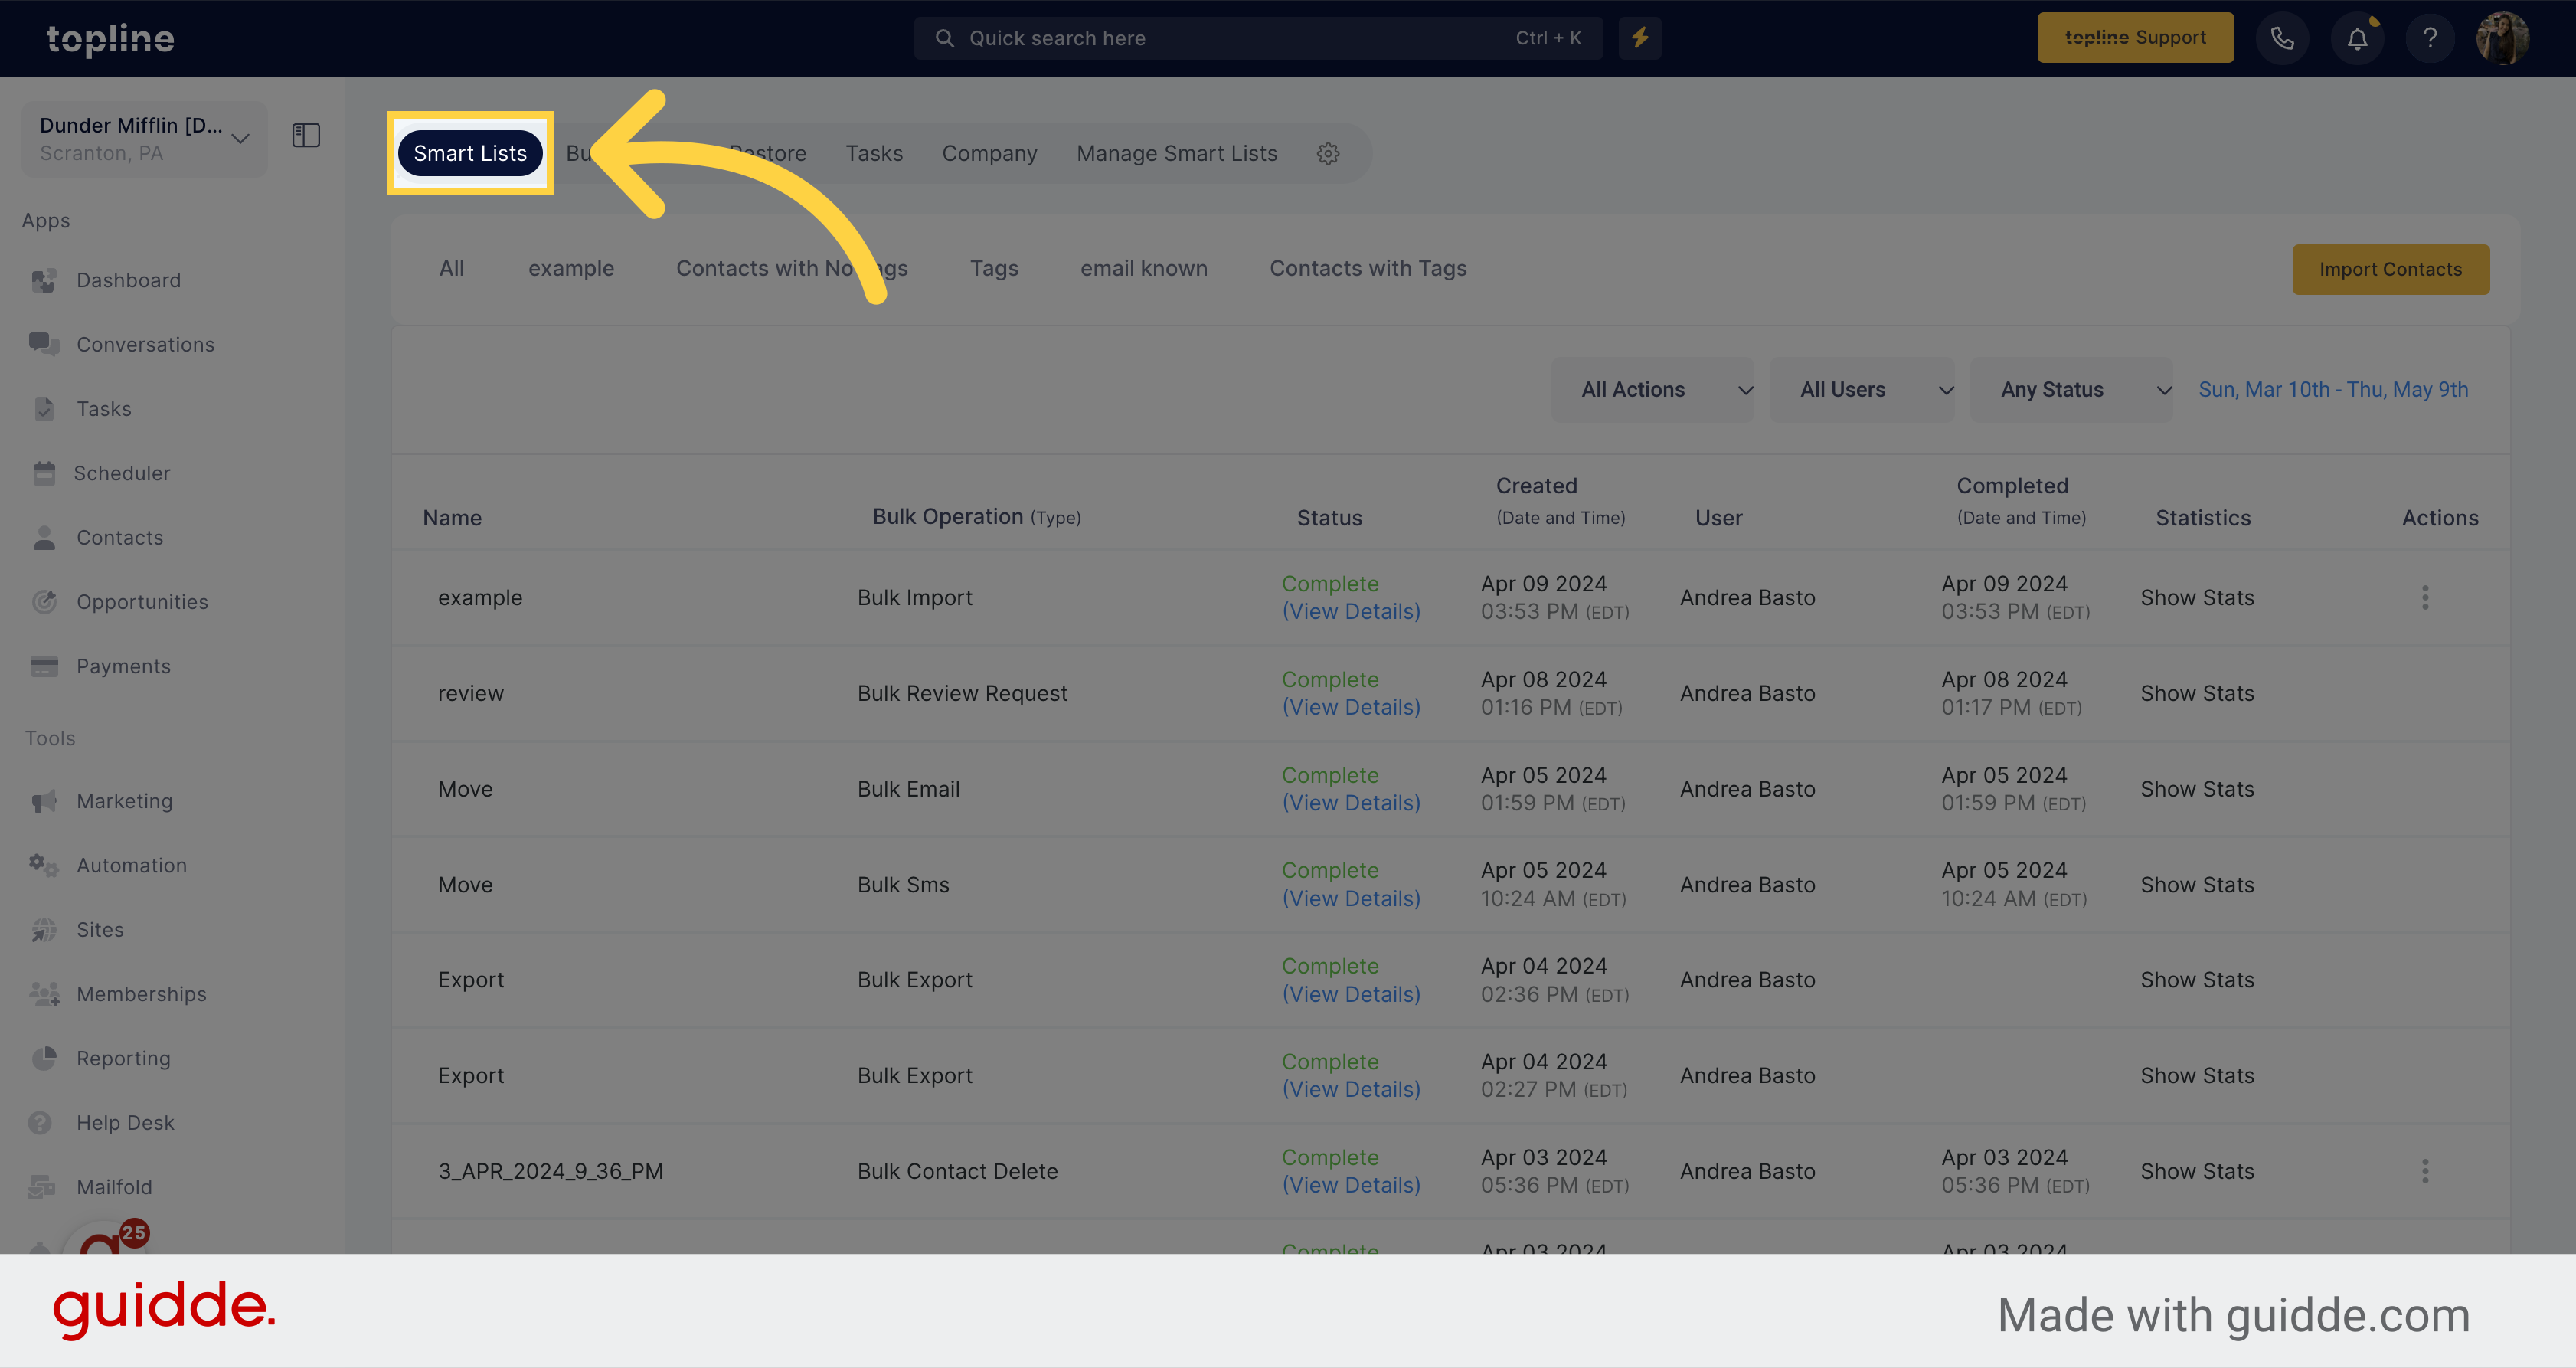
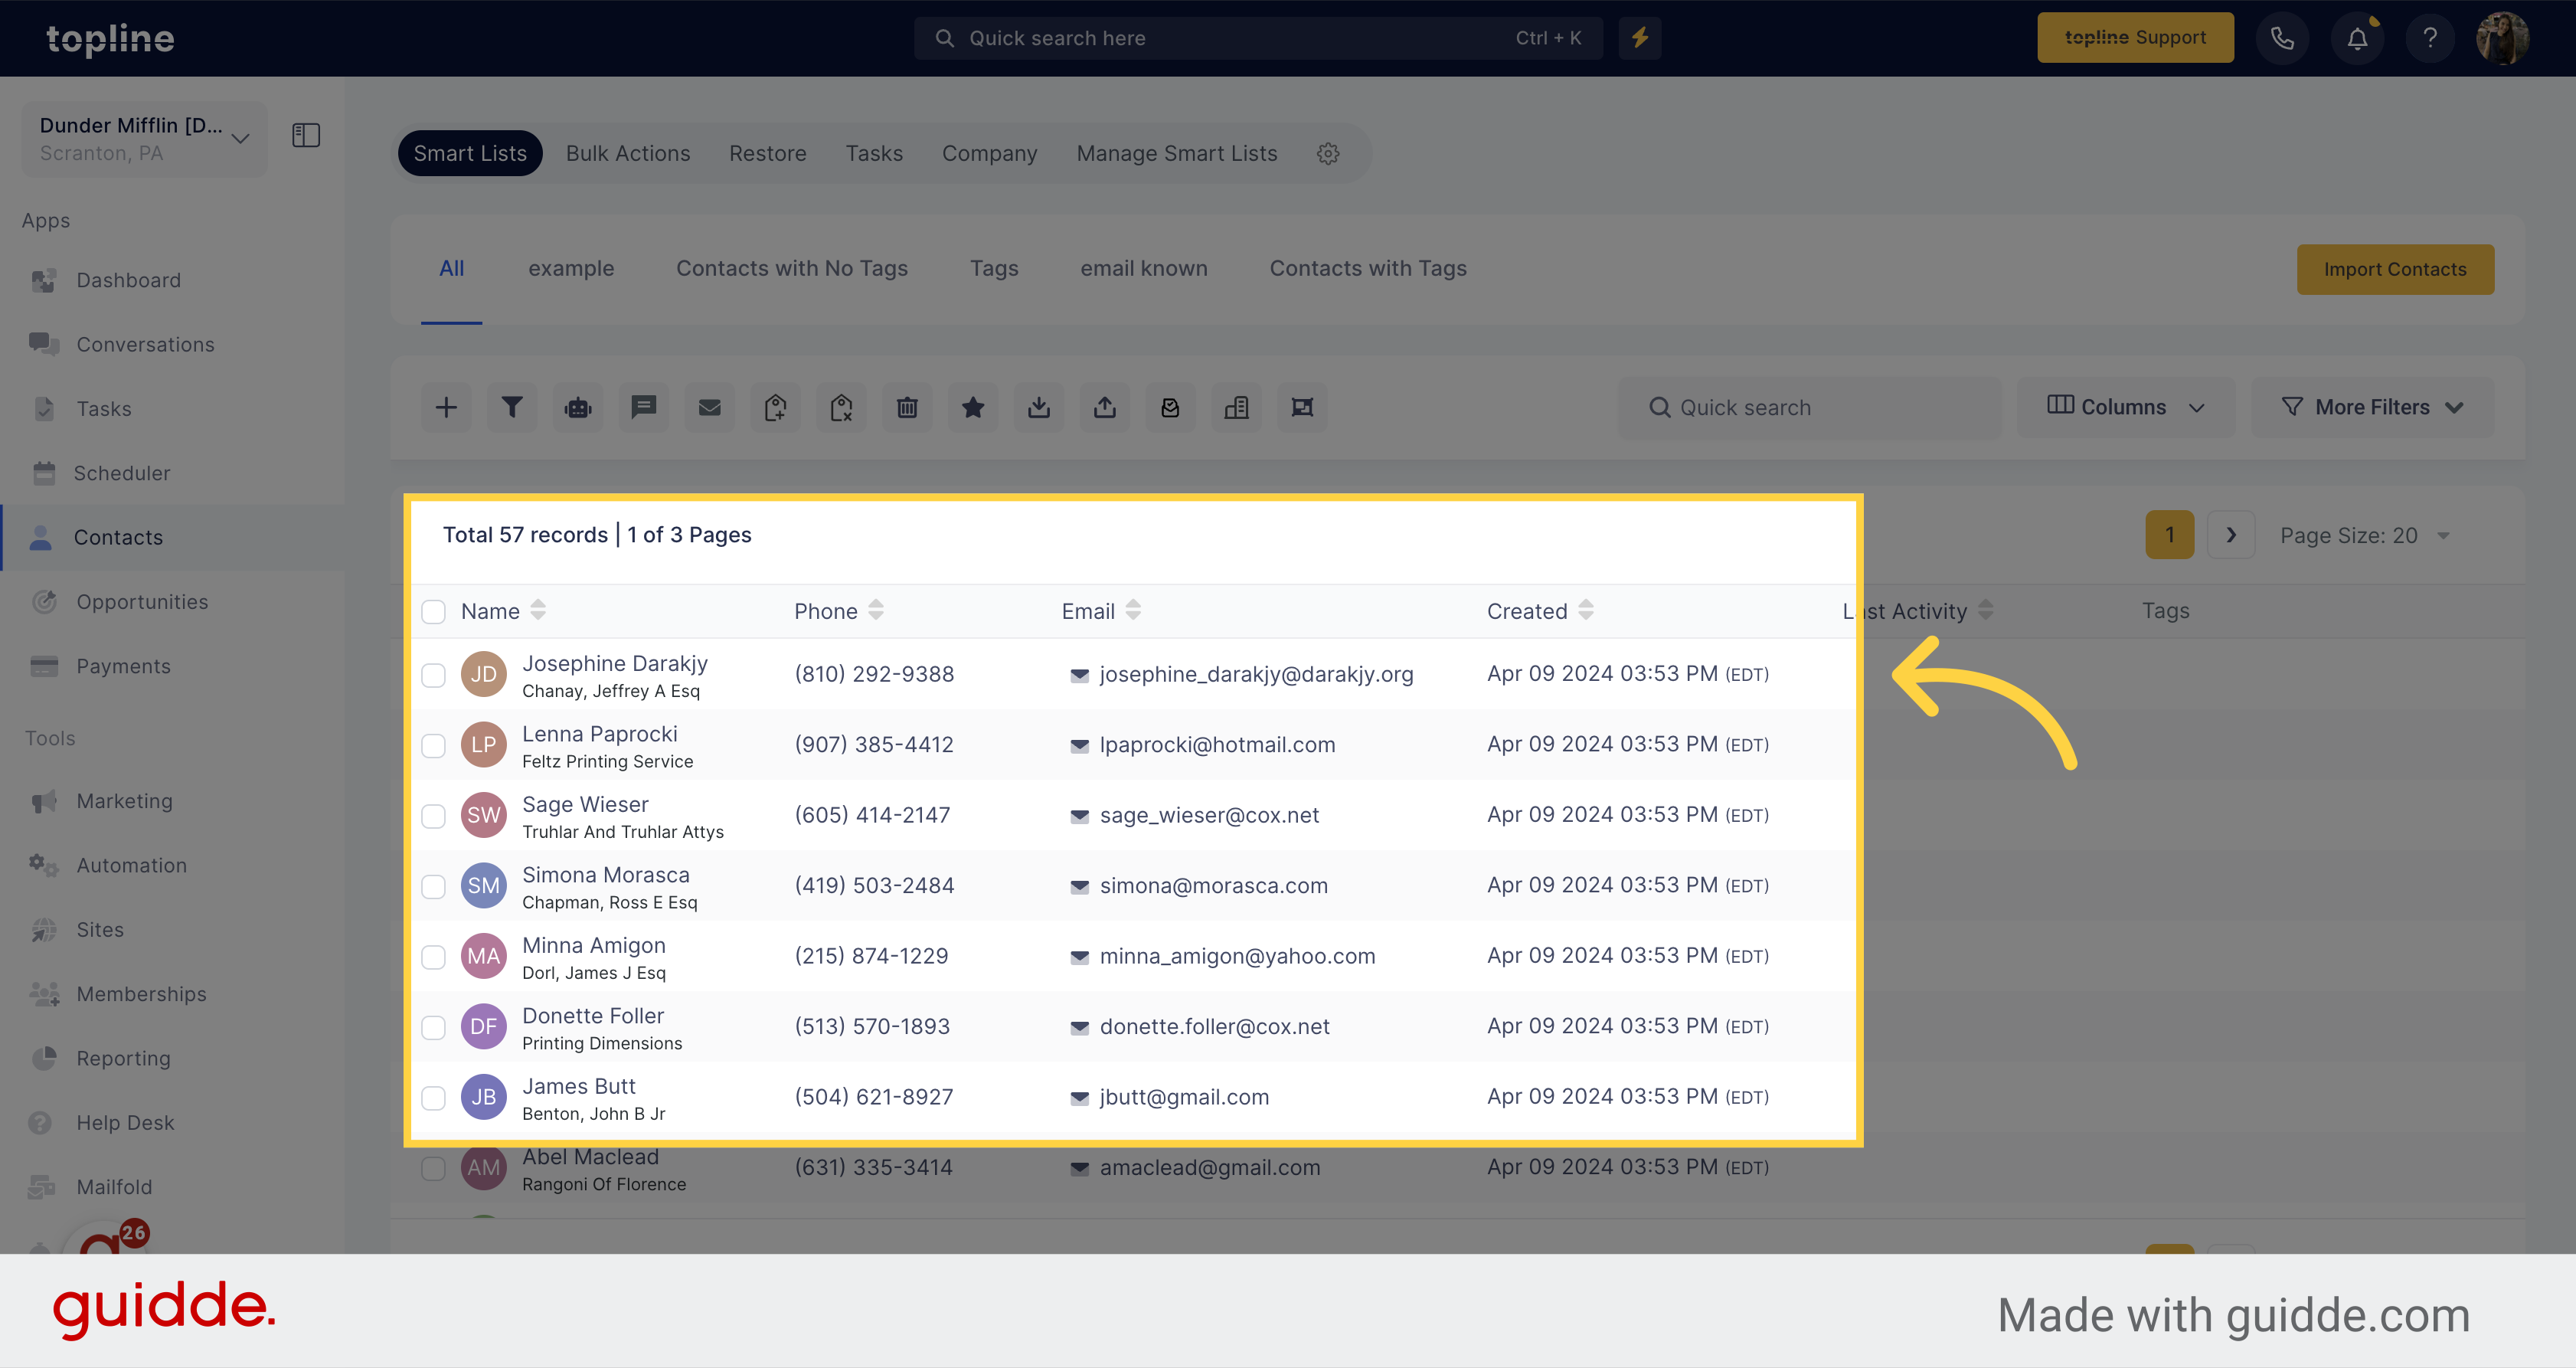
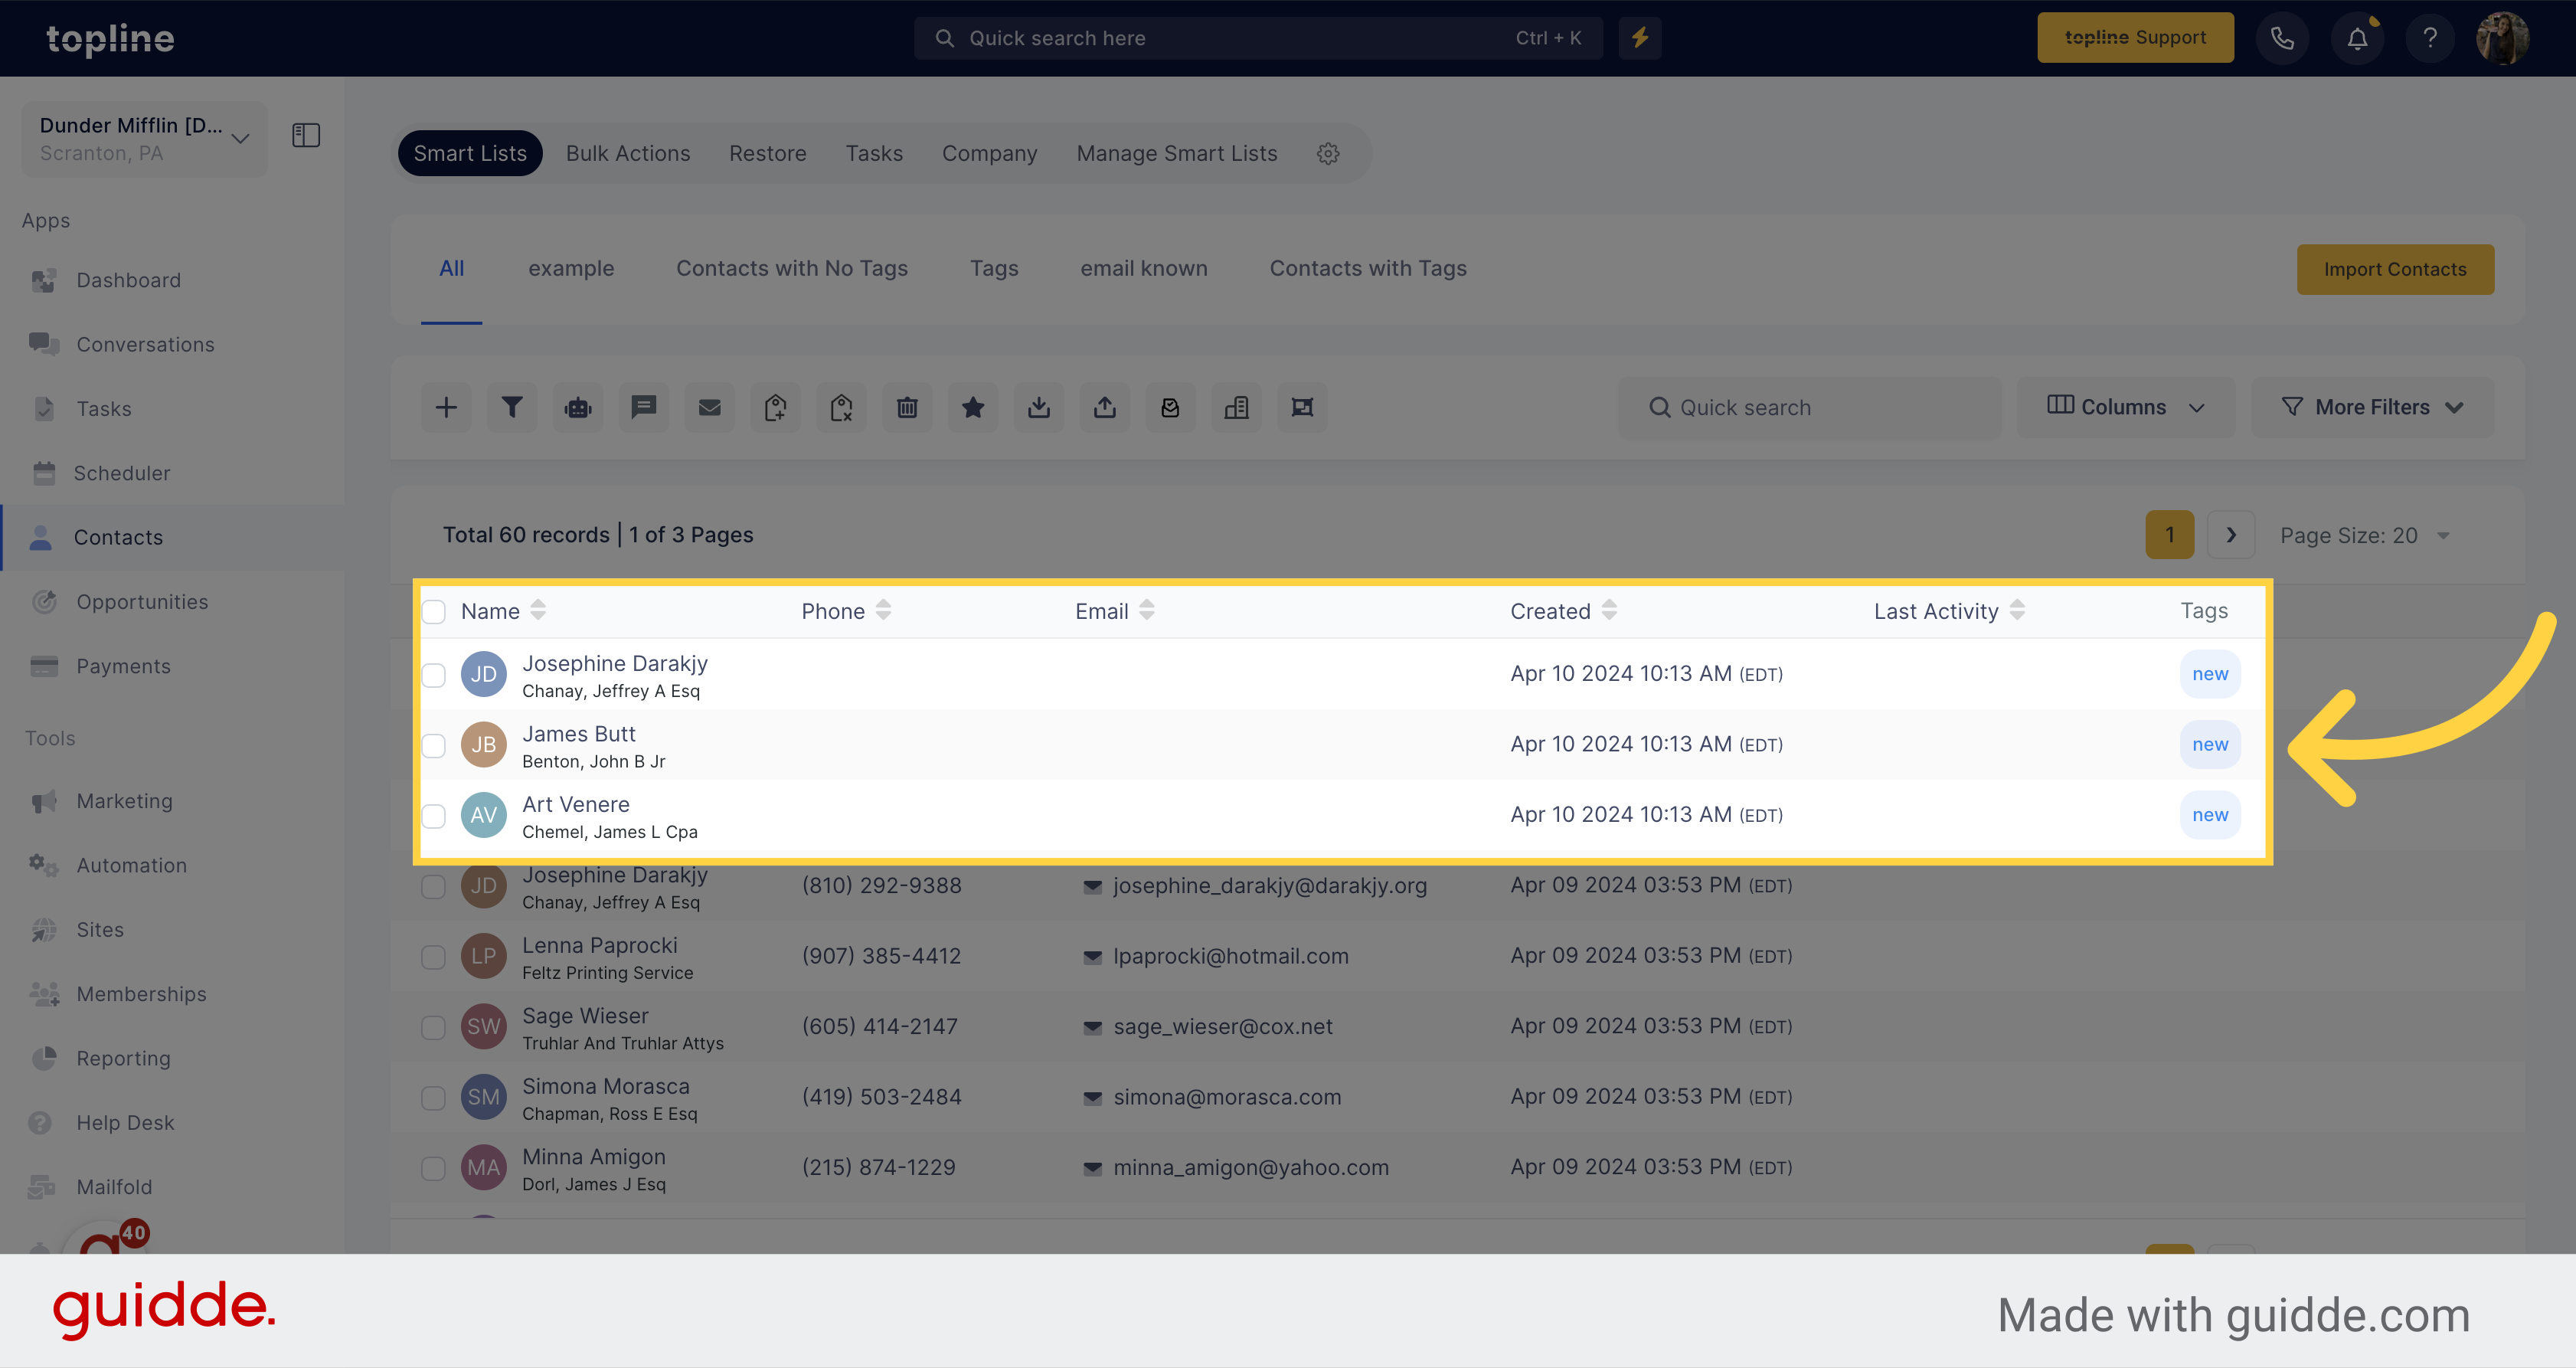
On the Smart Lists view you can visualize all the contacts you just added from your .csv file.
2nd Method: If your CSV does NOT have an email and or phone #, please follow the 2nd method below (Getting contact ID).
In this way, the document doesn't have the information complete. But you can also add it to the system.

Access the Contacts section located on the left side menu.
Look for the Import Contacts icon on the actions menu and click on it.

Initiate the file upload process by clicking on upload a file or drag and drop your file in the box.

Once you have uploaded your .csv file, proceed to the next step by clicking on Next.

As you can visualize, there's no email or phone information and the system allows to upload the file.
Proceed to the next step in the process.
Add a name to your imported contacts in the field.

Check the box to create a list of contacts from the import.

By selecting this option you will add contacts as new records.
Type the tags you want to add to the contacts.
Finalize and submit the import process by clicking Submit.
A pop up will appear informing your file is being processed. Click on the Click here option to check the process.

You can visualize your contacts upload status on this view.

Choose the Smart Lists option from the contacts menu located on the upper side of the view.
On the contacts view, you can visualize the contacts added.
Please Note:
Contact ID unique identifier only shows up if you have a column header with Contact ID written as the header title.

When selecting the unique identifier (Email, Phone or Contact ID) The system will only use identifier selected. It will not use the phone number during the import.

Example: My CSV has mixed emails and phone numbers, some contacts share emails like.This means that it will create new contacts, and if you have any leads already in the system, it will update them with the information from your CSV file. The system will check for existing contacts in the sub-account based on the unique identifier (Email, phone, or contact id) you selected.
This will create new contact records and will not update existing contacts in the location.
This option will only update existing contact records and not create new contacts in the location.
Please Note:
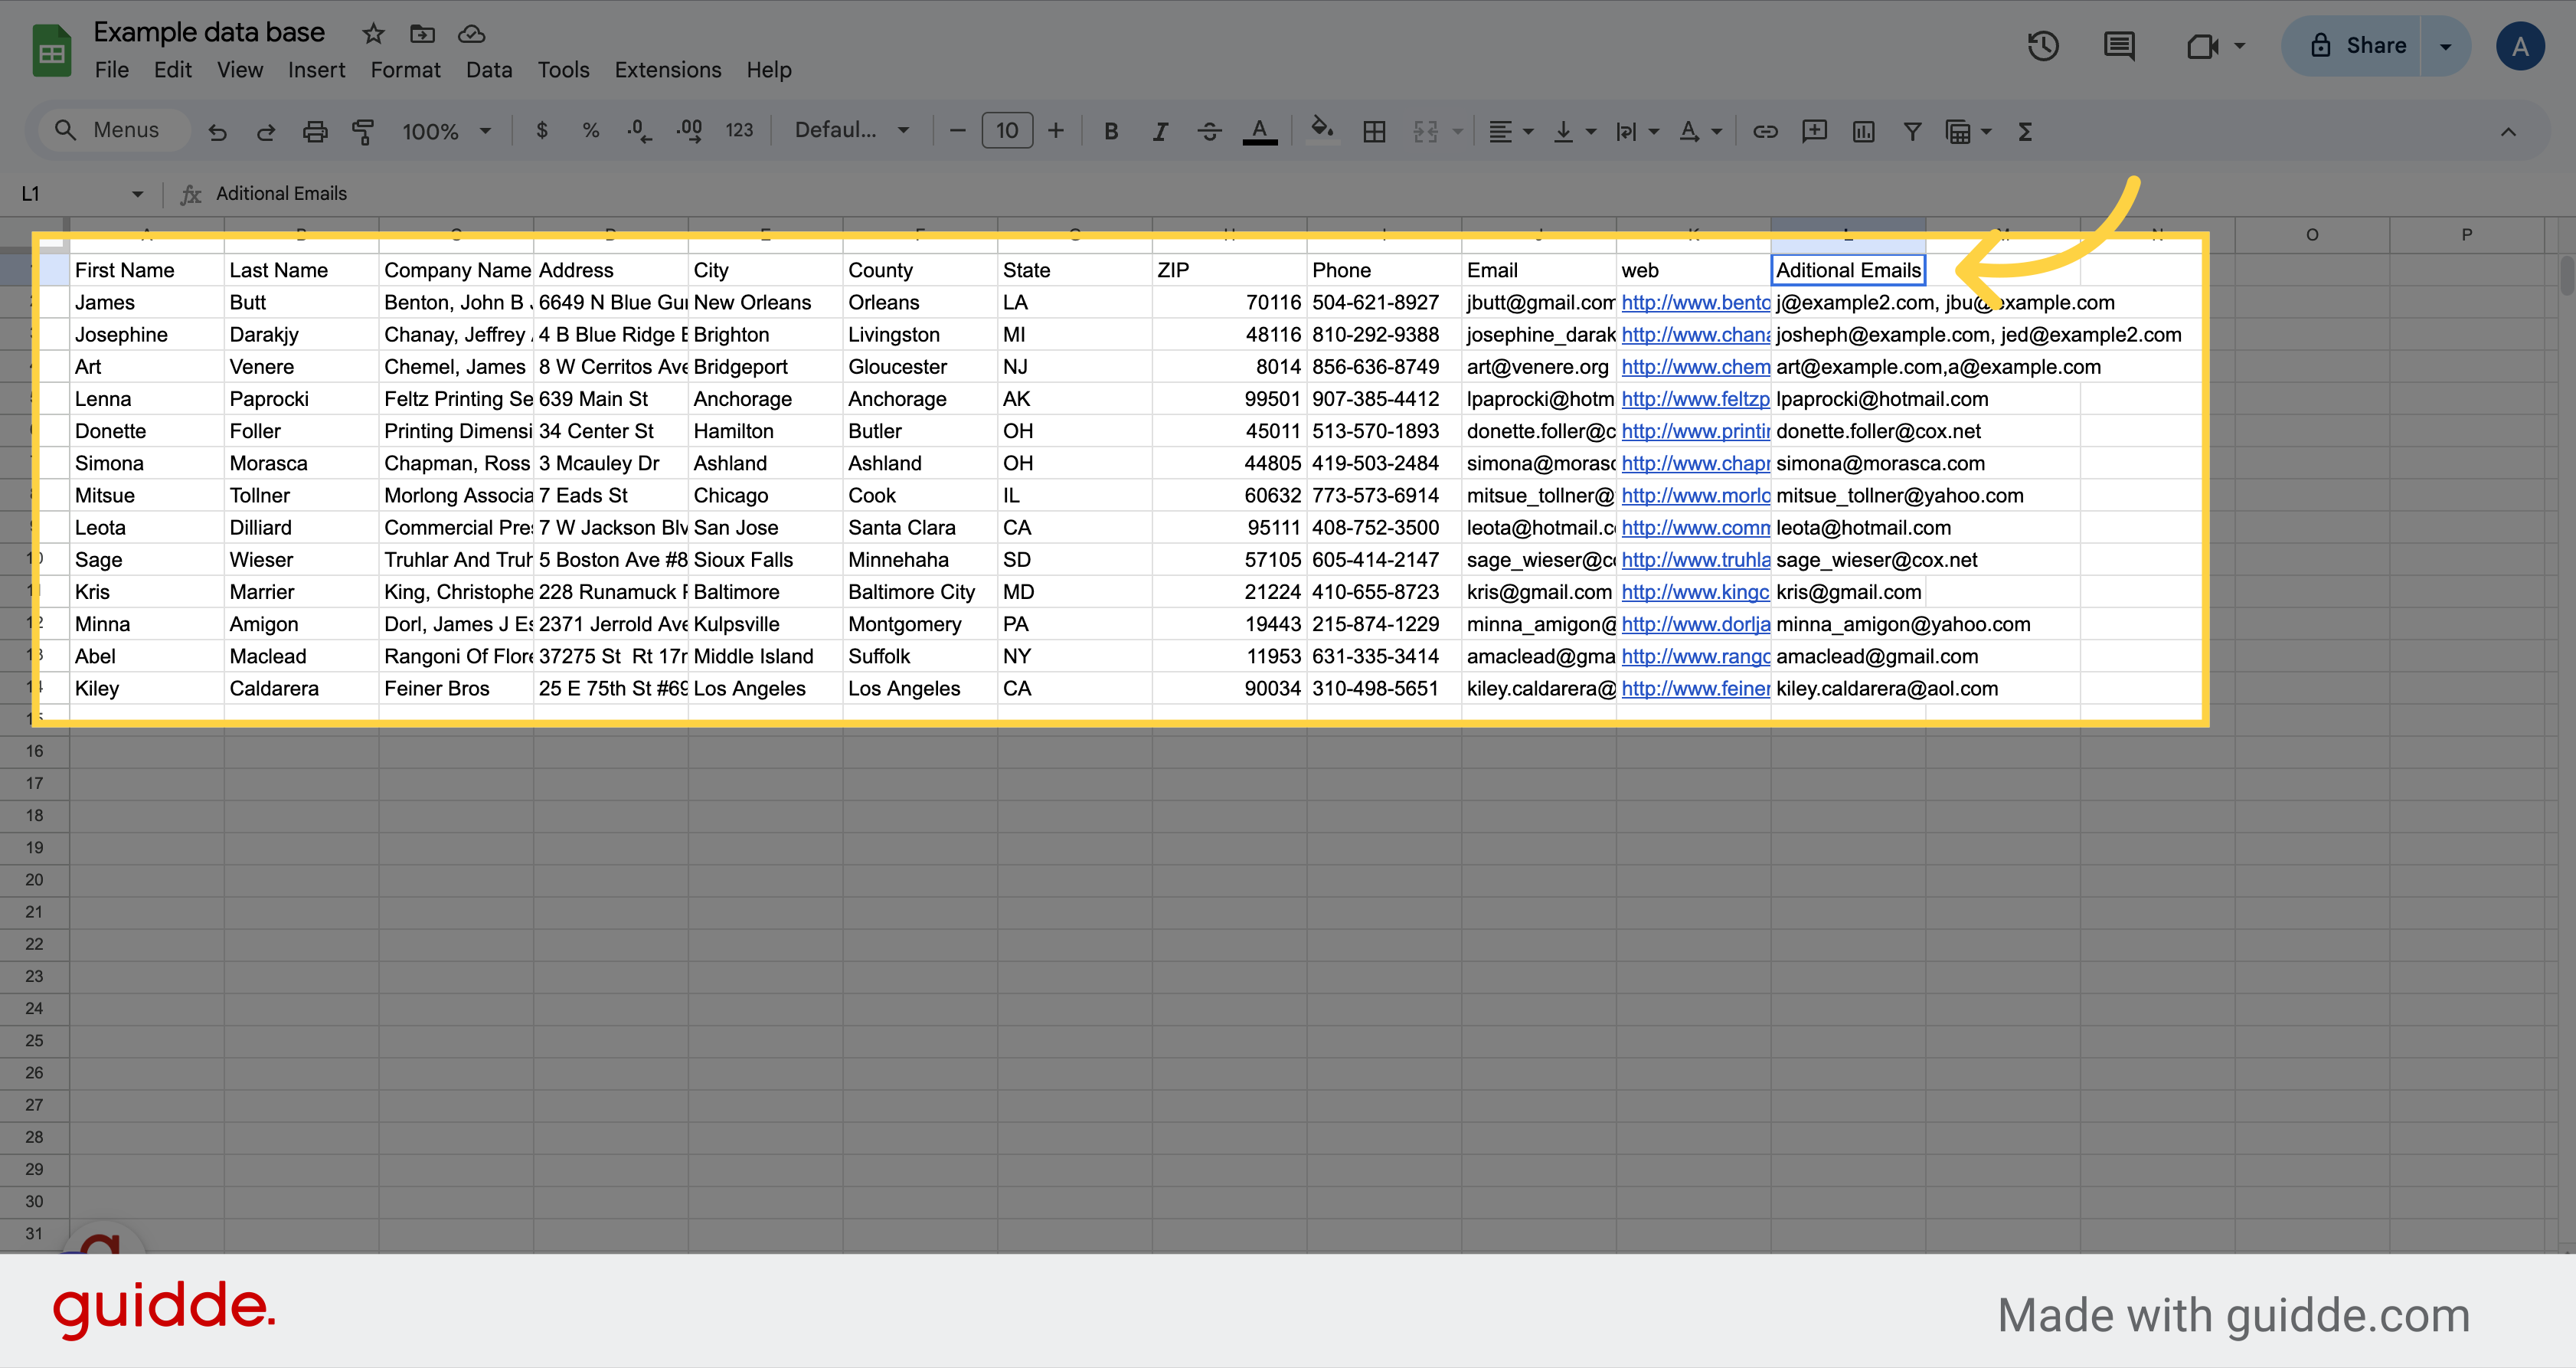
While the default unique identifier is Email, our system allows you to choose fields other than Email for de-duplication purposes during the Bulk CSV UploadOn your document, make sure the additional emails are separated by a coma.
To add the additional emails to your contacts, look for the Import Contacts icon on the actions menu.

Initiate file upload process by clicking on upload a file or dropping it in the box.
Proceed to the next step by clicking on Next.
Map the additional emails column with the right field property.
Proceed to the next step by clicking Next.
Submit the imported data by clicking on Submit.
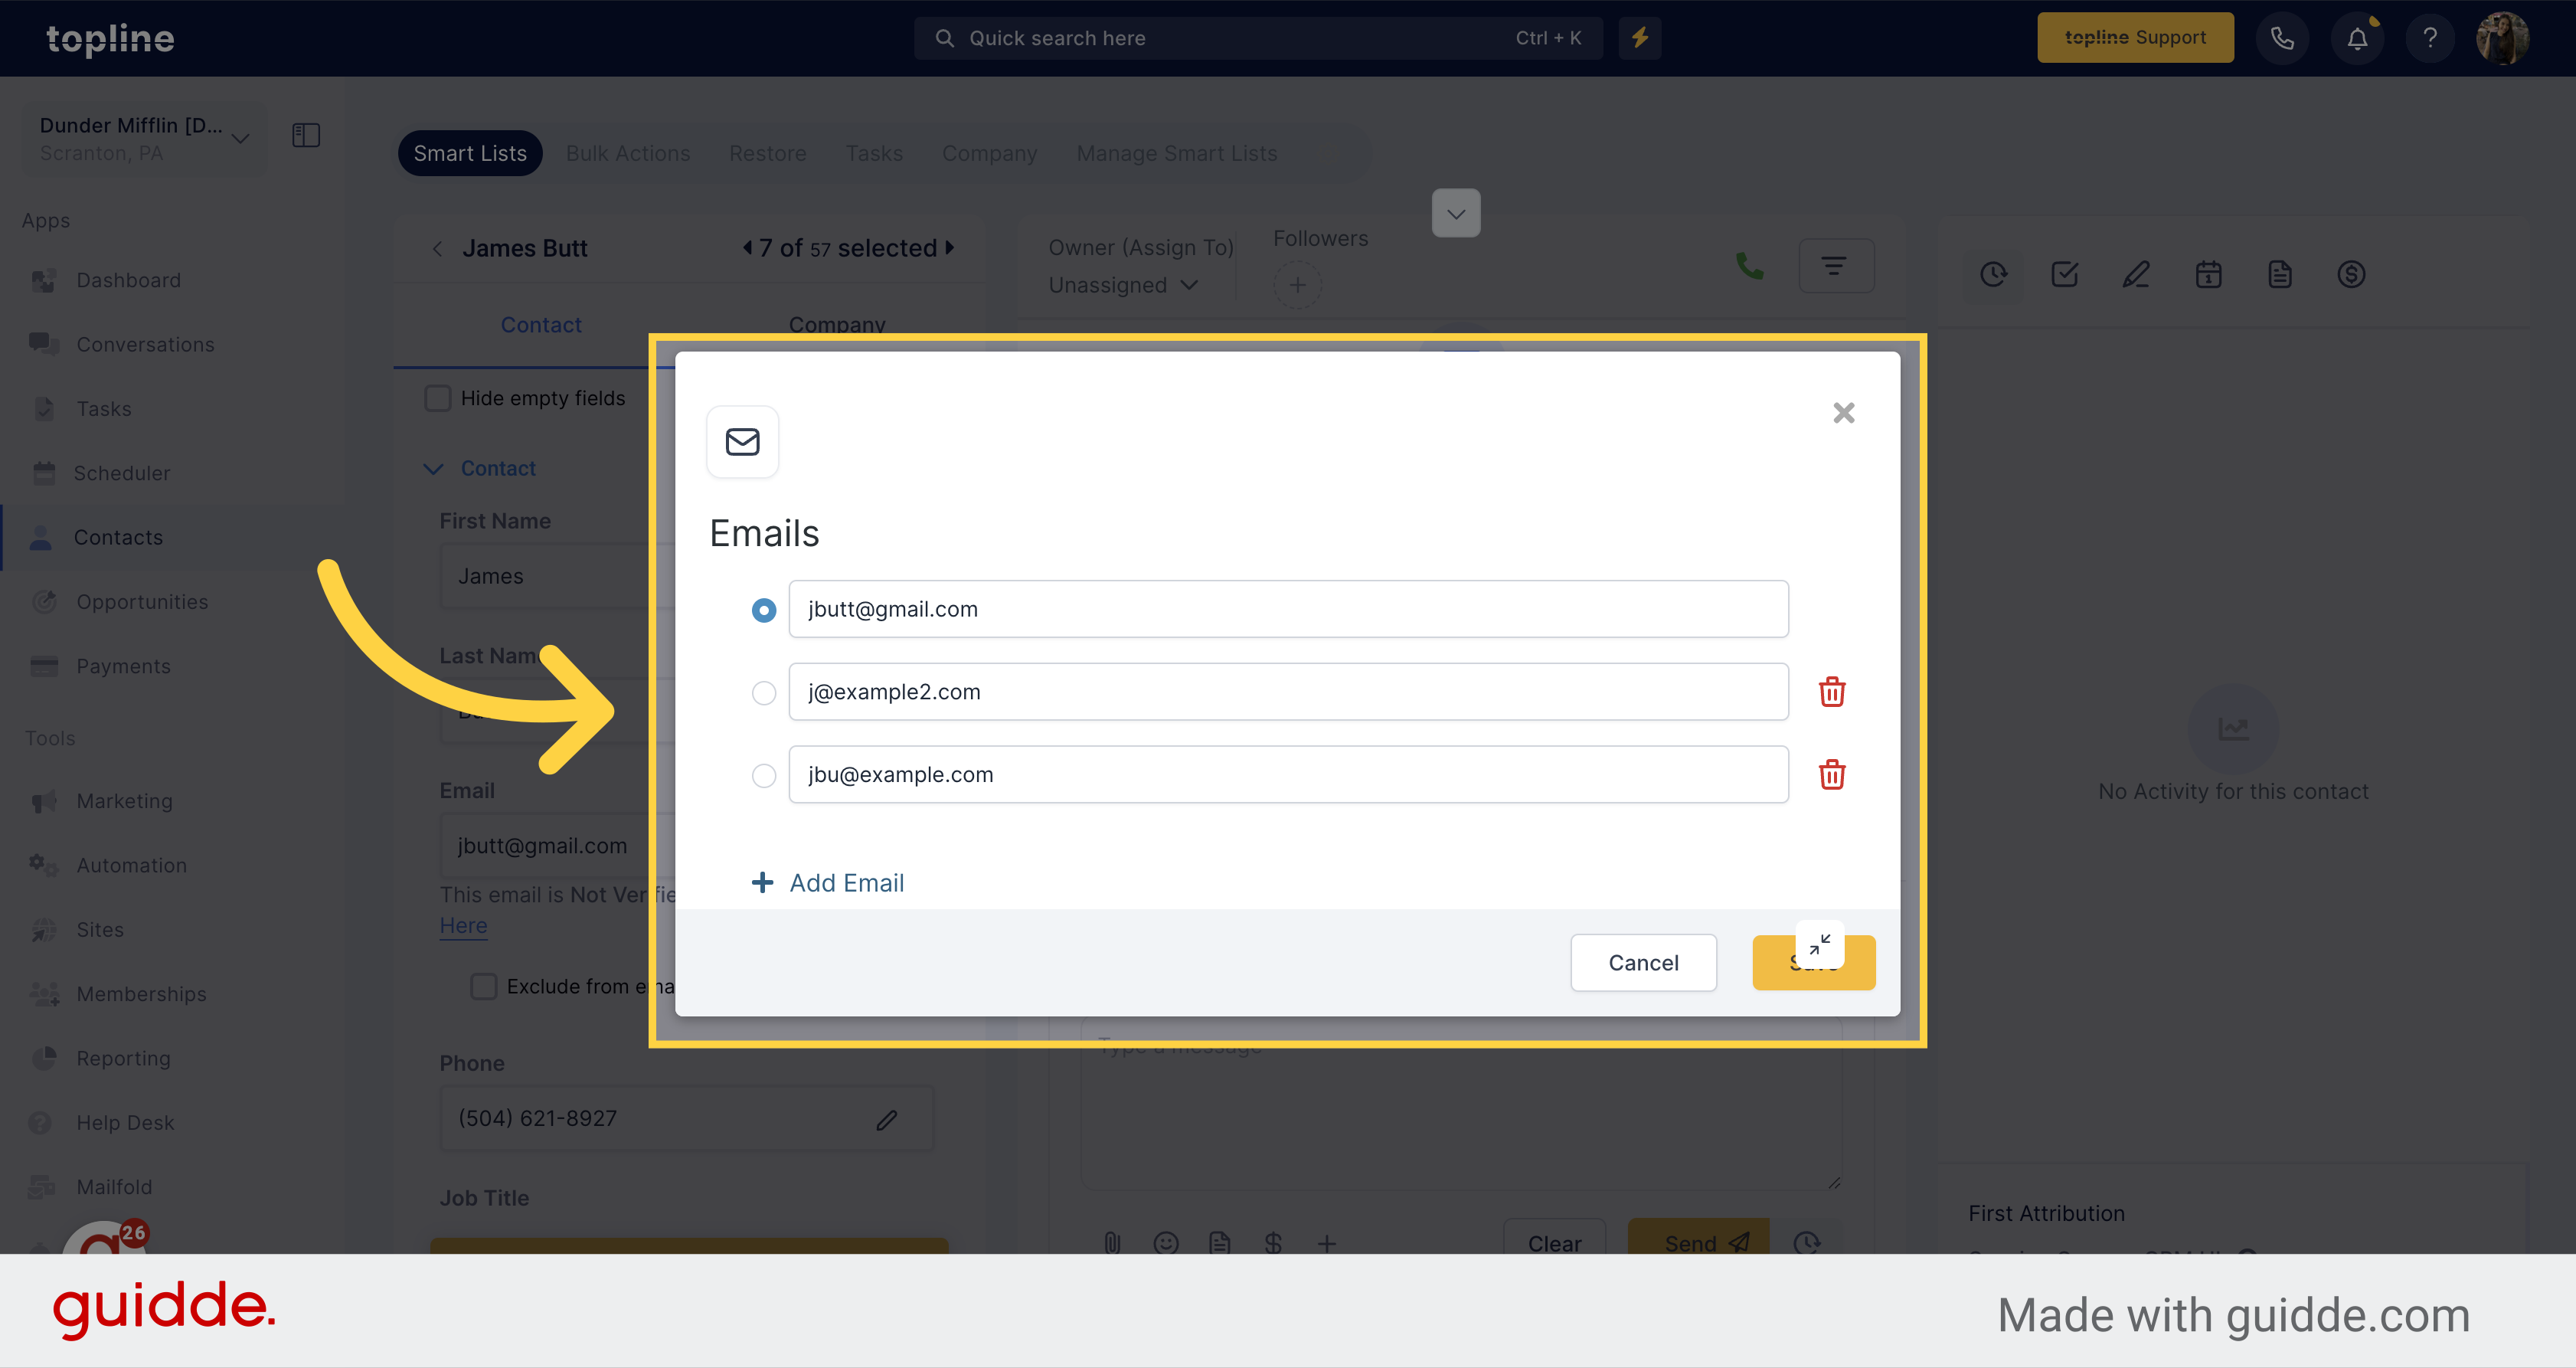
Click on the contact you want to check emails. Then look for the Email field and click on the + option to visualize the emails added.
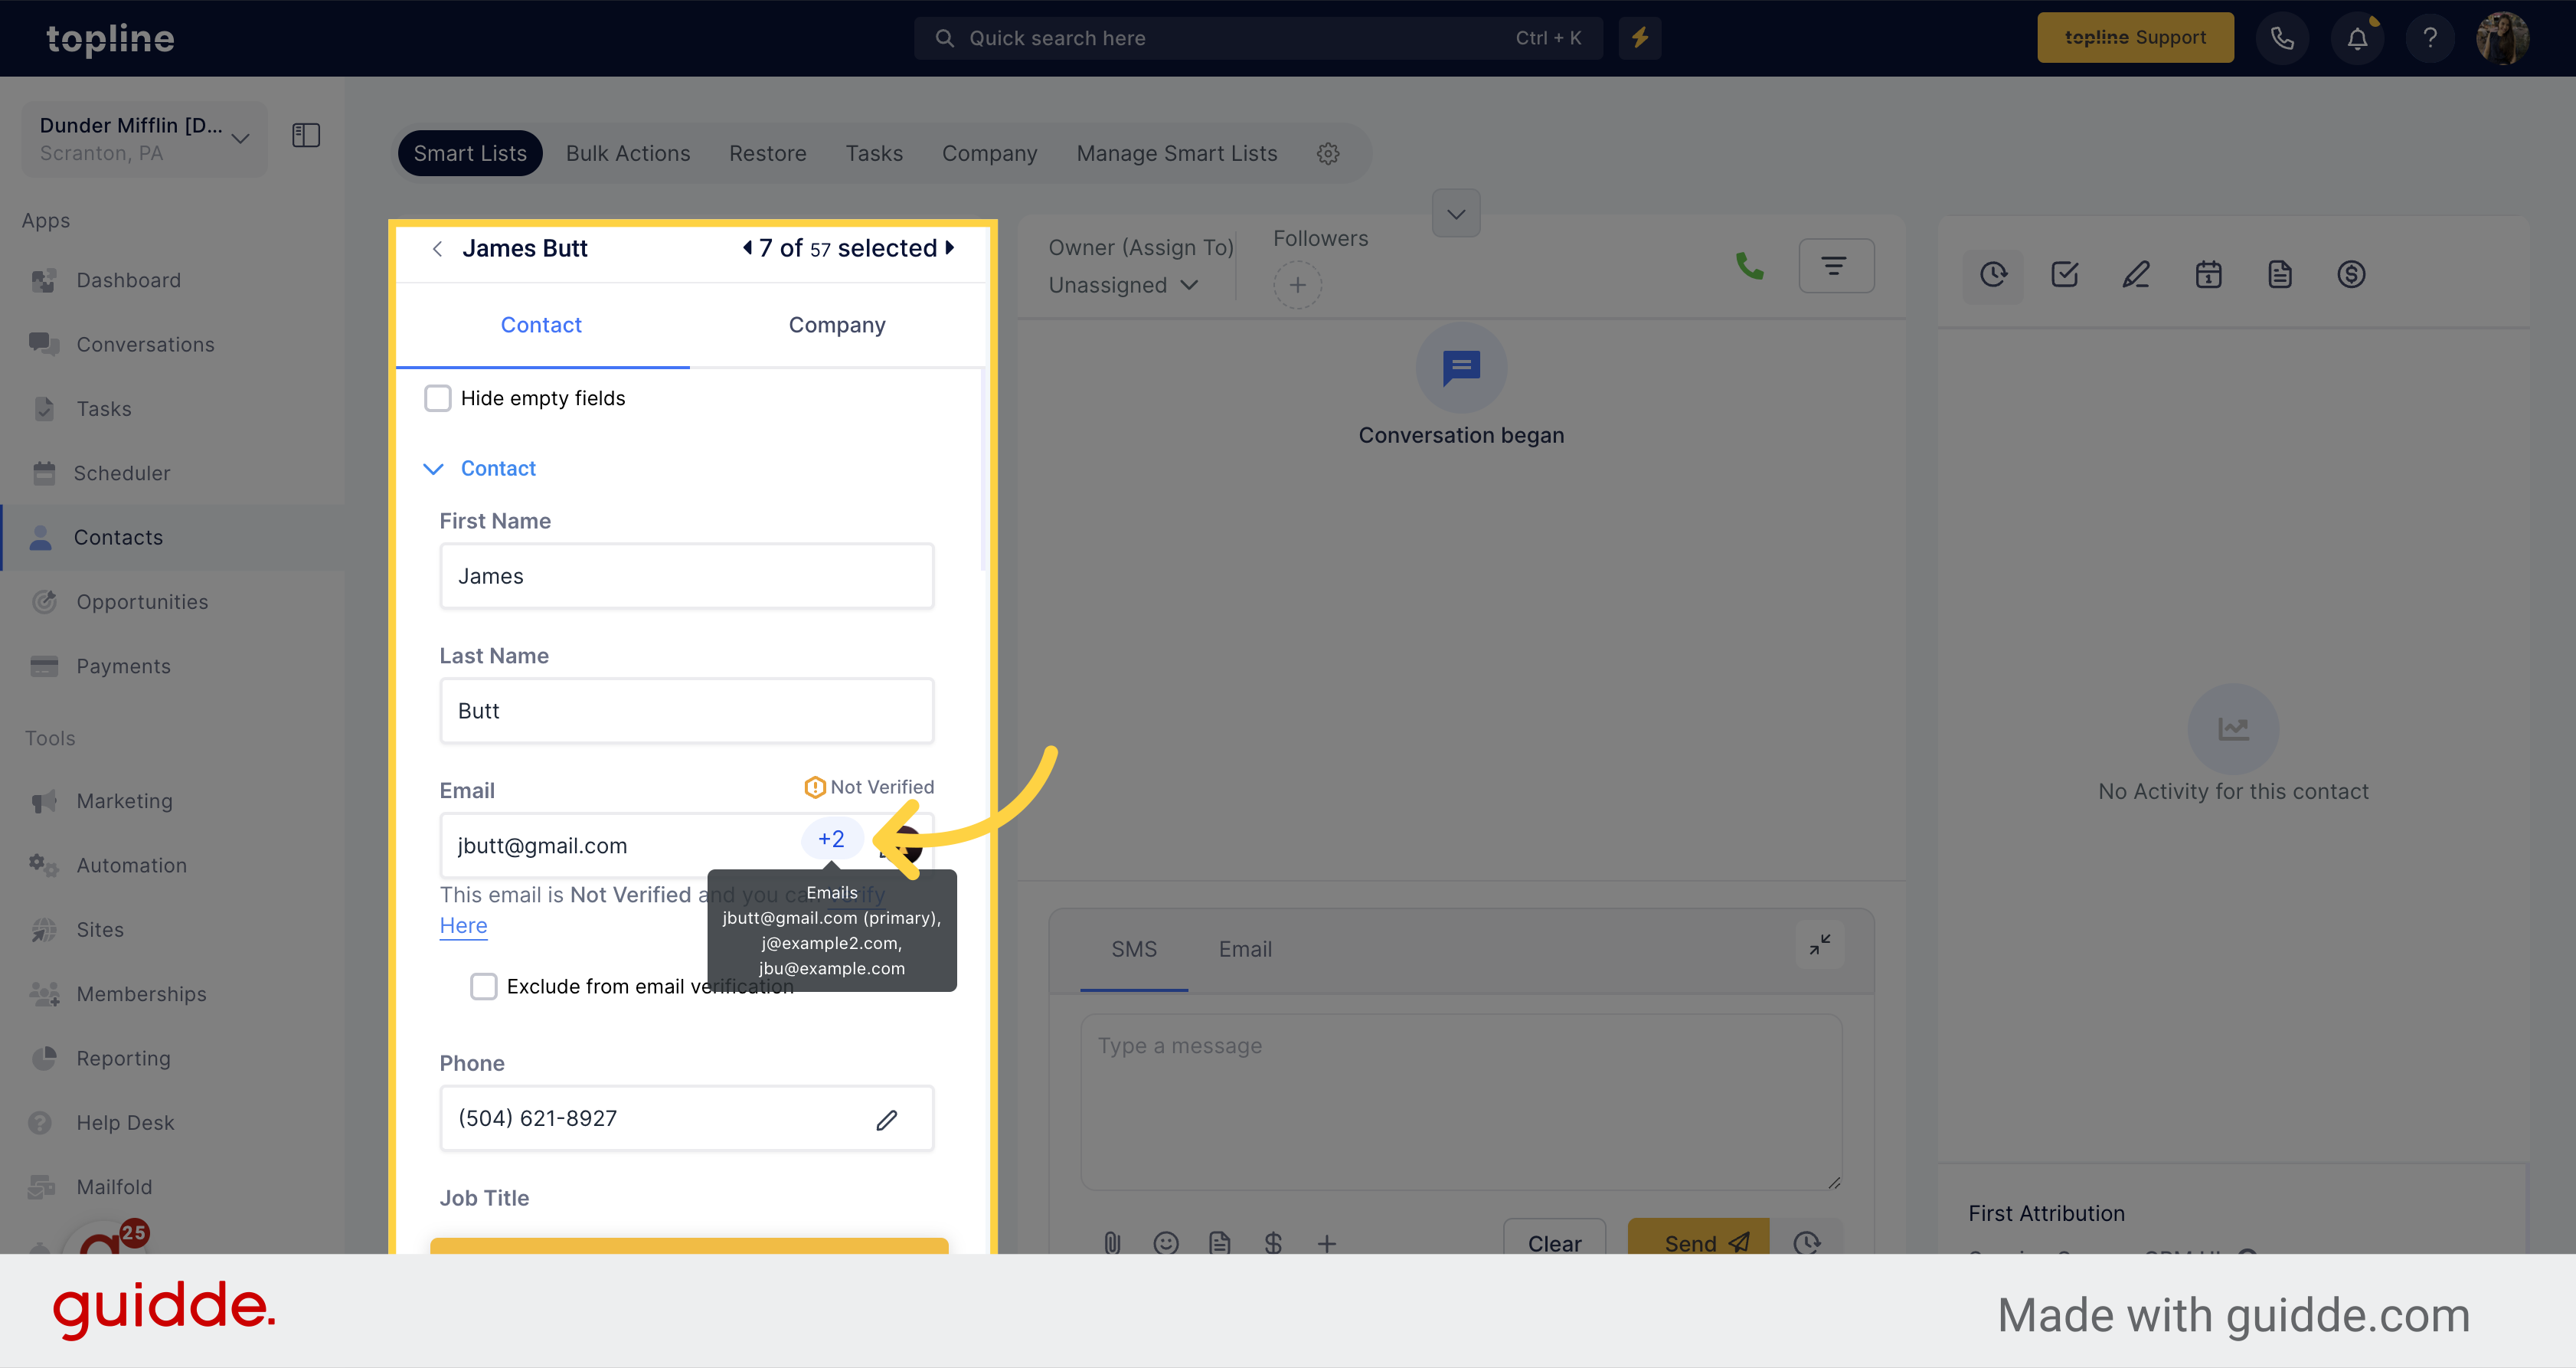
Here you can find the additional emails added in bulk.
To ensure contact uniqueness, both the primary and additional email (if selected as the first preference) will be used. In cases where multiple duplicate matches are found for an additional email, that specific email will be left out.
Any invalid emails in the additional fields will be removed, leaving only valid ones for a contact.
If the email column in the CSV is blank, but the additional email column has values, the first additional email will serve as the primary email.
When updating an existing contact, the specified emails in the CSV will be combined with the ones already associated with the contact.
The "Additional Email" column can hold a maximum of 10 email IDs, with only the first 10 being considered if more are included.
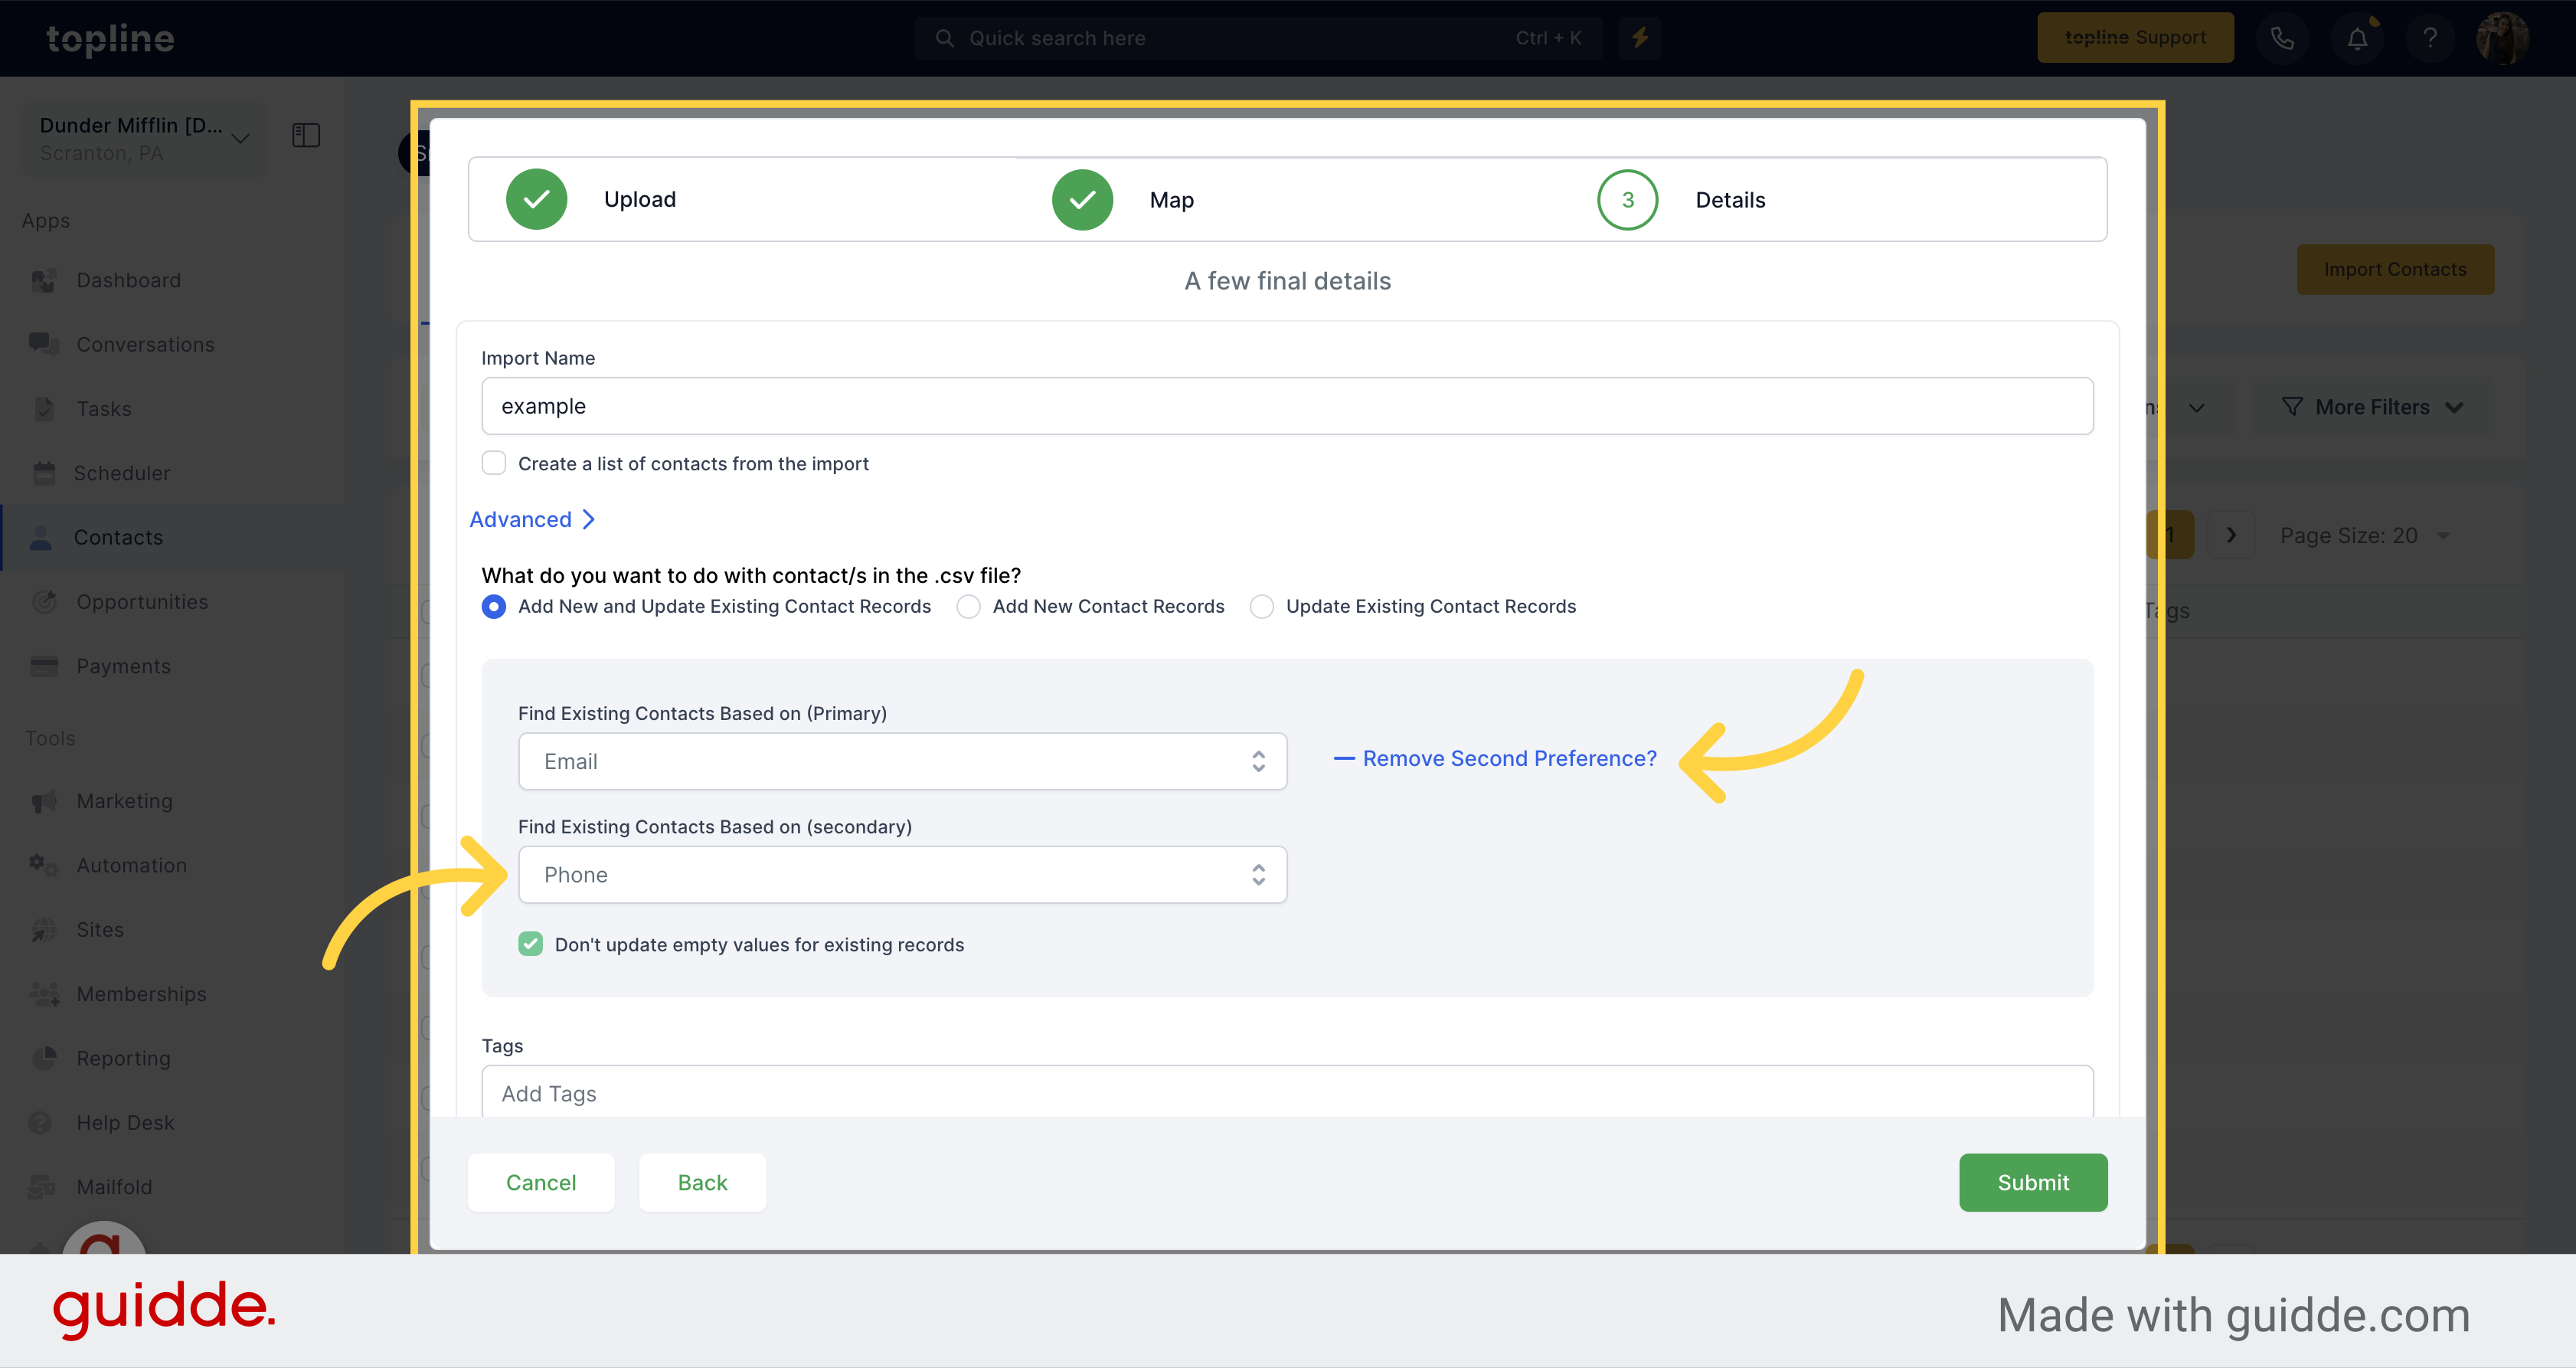
Please use the 'secondary preference' option for a mixed CSV. The system will search for the first preference and then the second if it cannot locate the first. In the example above the first preference is 'Email' and the second is 'Phone'.
Now we can find existing contact based on the secondary field, so if the contact record has only the phone number, we can also upload them!
If a contact has multiple phone numbers or emails, please split the contacts into multiple so they will be uploaded.
Example:
Original with two phone number columns:

Cleaned for upload version:

Keep the email blank for the second lead with a different phone number because it will create duplicates when we upload contacts with phone numbers as the unique field.
The phone field from the CSV export in Keap is incompatible with Topline. The parenthesis '()' and dashes '-' make it incompatible. We have to highlight the entire column in the CSV file and ensure it is numbered in, remove any parenthesis and dashes, and then we can import without corrupting the data in the CRM.
Add a country code for numbers outside the sub-account country when importing numbers. If the sub-account country is set to the US, you won't need to add a +1 (US country code) to the imported phone numbers. However, if you're importing numbers outside of the US, you will need to add the country code
I.e. A sub-account that has set its business location to the US would need to add '+44 to call the UK. If the Sub-Accounts country is set to a different country other than the US (like - the UK, Australia, etc.), to call/SMS US numbers you would need to add a '+1 to the country's area code within the CSV File.
When importing contacts with a DND column within your CSV, please note that the contacts will be DND for ALL the channels. If you want to DND for specific channels, please set up a workflow first and use tags for each channel.
Ie: I would like john to be DND for SMS only. I would create a workflow that DNDs a contact when a tag 'DND SMS' is added. So now, on the CSV, I would add the Tag 'DND SMS' next to John's name. When importing, this would fire automation to DND John for SMS Only.
When importing contact notes, you may only have one note per contact record with a limit of 5000 characters. Please use the large text custom field if you have more than one note or more characters than the allowed amount.
As of now, We do not have any limit for CSV import for notes, and As per our current export behavior, we support Max of 255 Characters for the last note.
Please note:
For a detailed troubleshooting doc please see: Troubleshooting Bulk Imports Via CSV