Don't let your email marketing efforts go unnoticed! Get started right away with a dedicated sending domain.
Please Note:
Dedicated sending domains are only applicable to the users in the LC - Email system.

If you are using a new domain that has never been used for email please make sure to warm up your domain before emailing to a large list. Failure to do so will results in poor deliverability results.
Here are instructions for common DNS providers:
A dedicated sending domain allows you to send emails that appear to be coming from your brand, which can help you maintain a better reputation with email services. Any sub-account or agency can create a dedicated sending domain, and it's quick and easy.
By default, all emails sent from our platform will show the name of our email-sending servers in the "sent on behalf of" or "sent via" email headers:

If your sending domain is listed below, you are using the LC Email system default domains.
When you set up your own custom mail server domain, you will see a different "mailed-by," "sent on behalf," or "sent via" field.
Learn how to create a Dedicated Sending Domain efficiently by following these precise instructions. With steps tailored for Topline, this guide ensures a seamless process for setting up dedicated domains and verifying records.
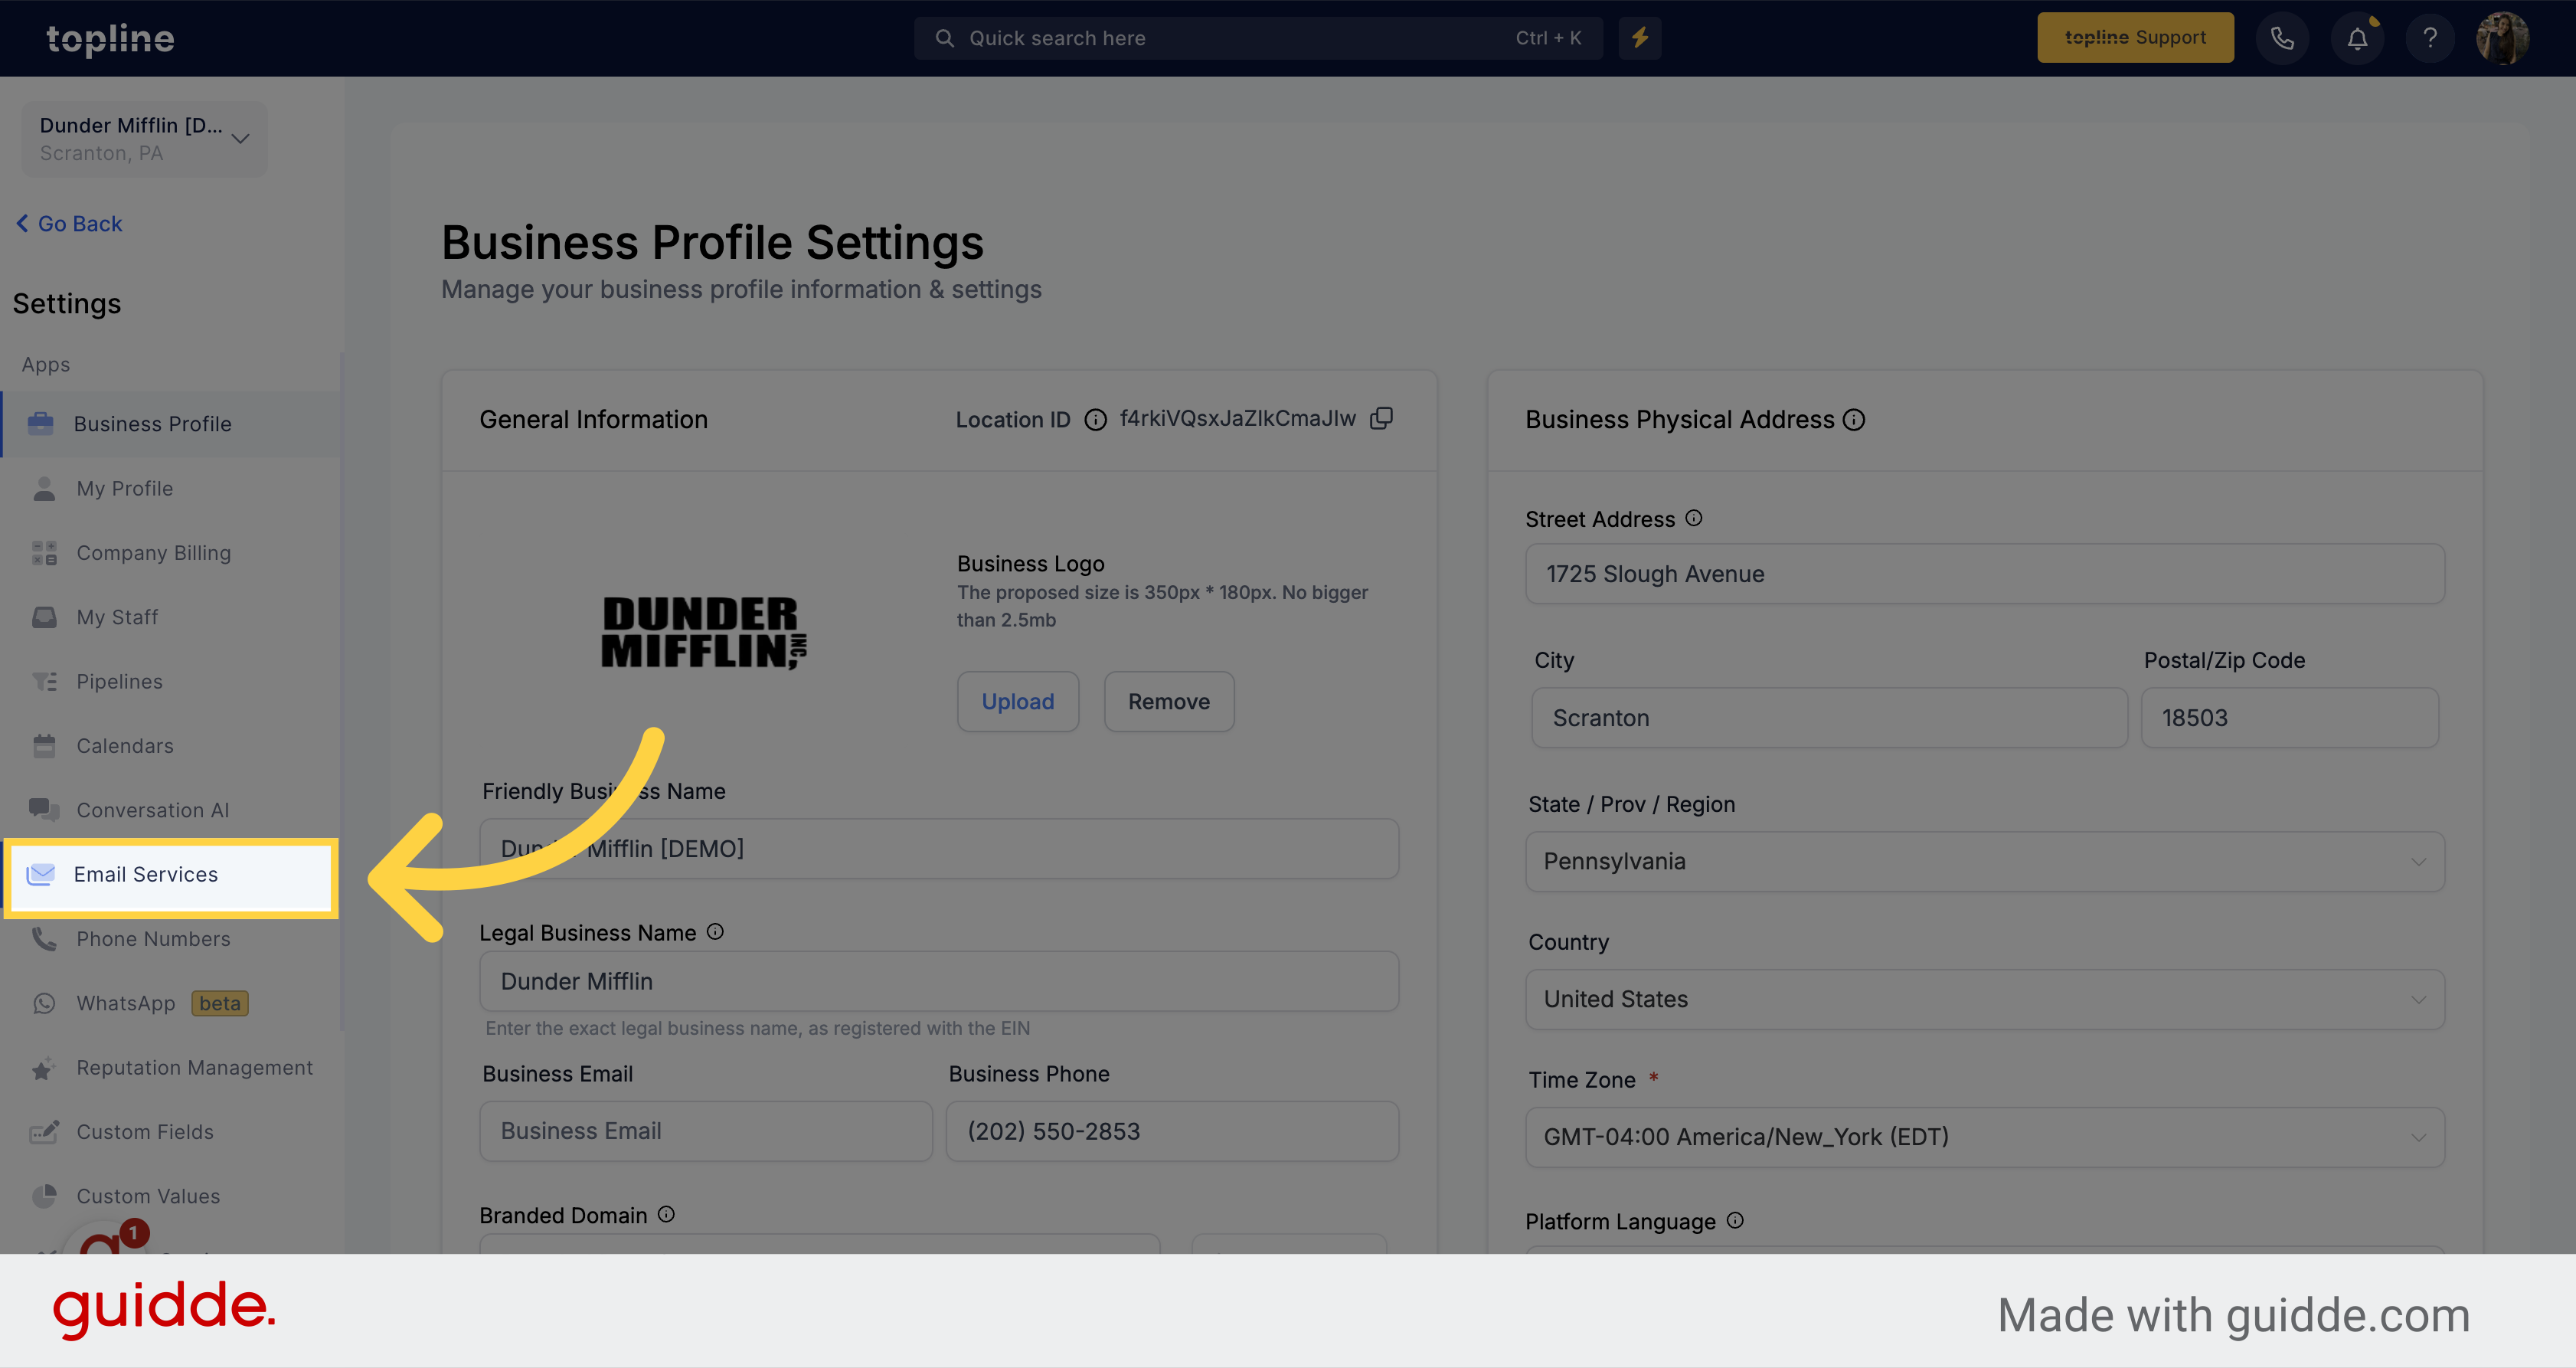
Access the settings section on the left side menu.
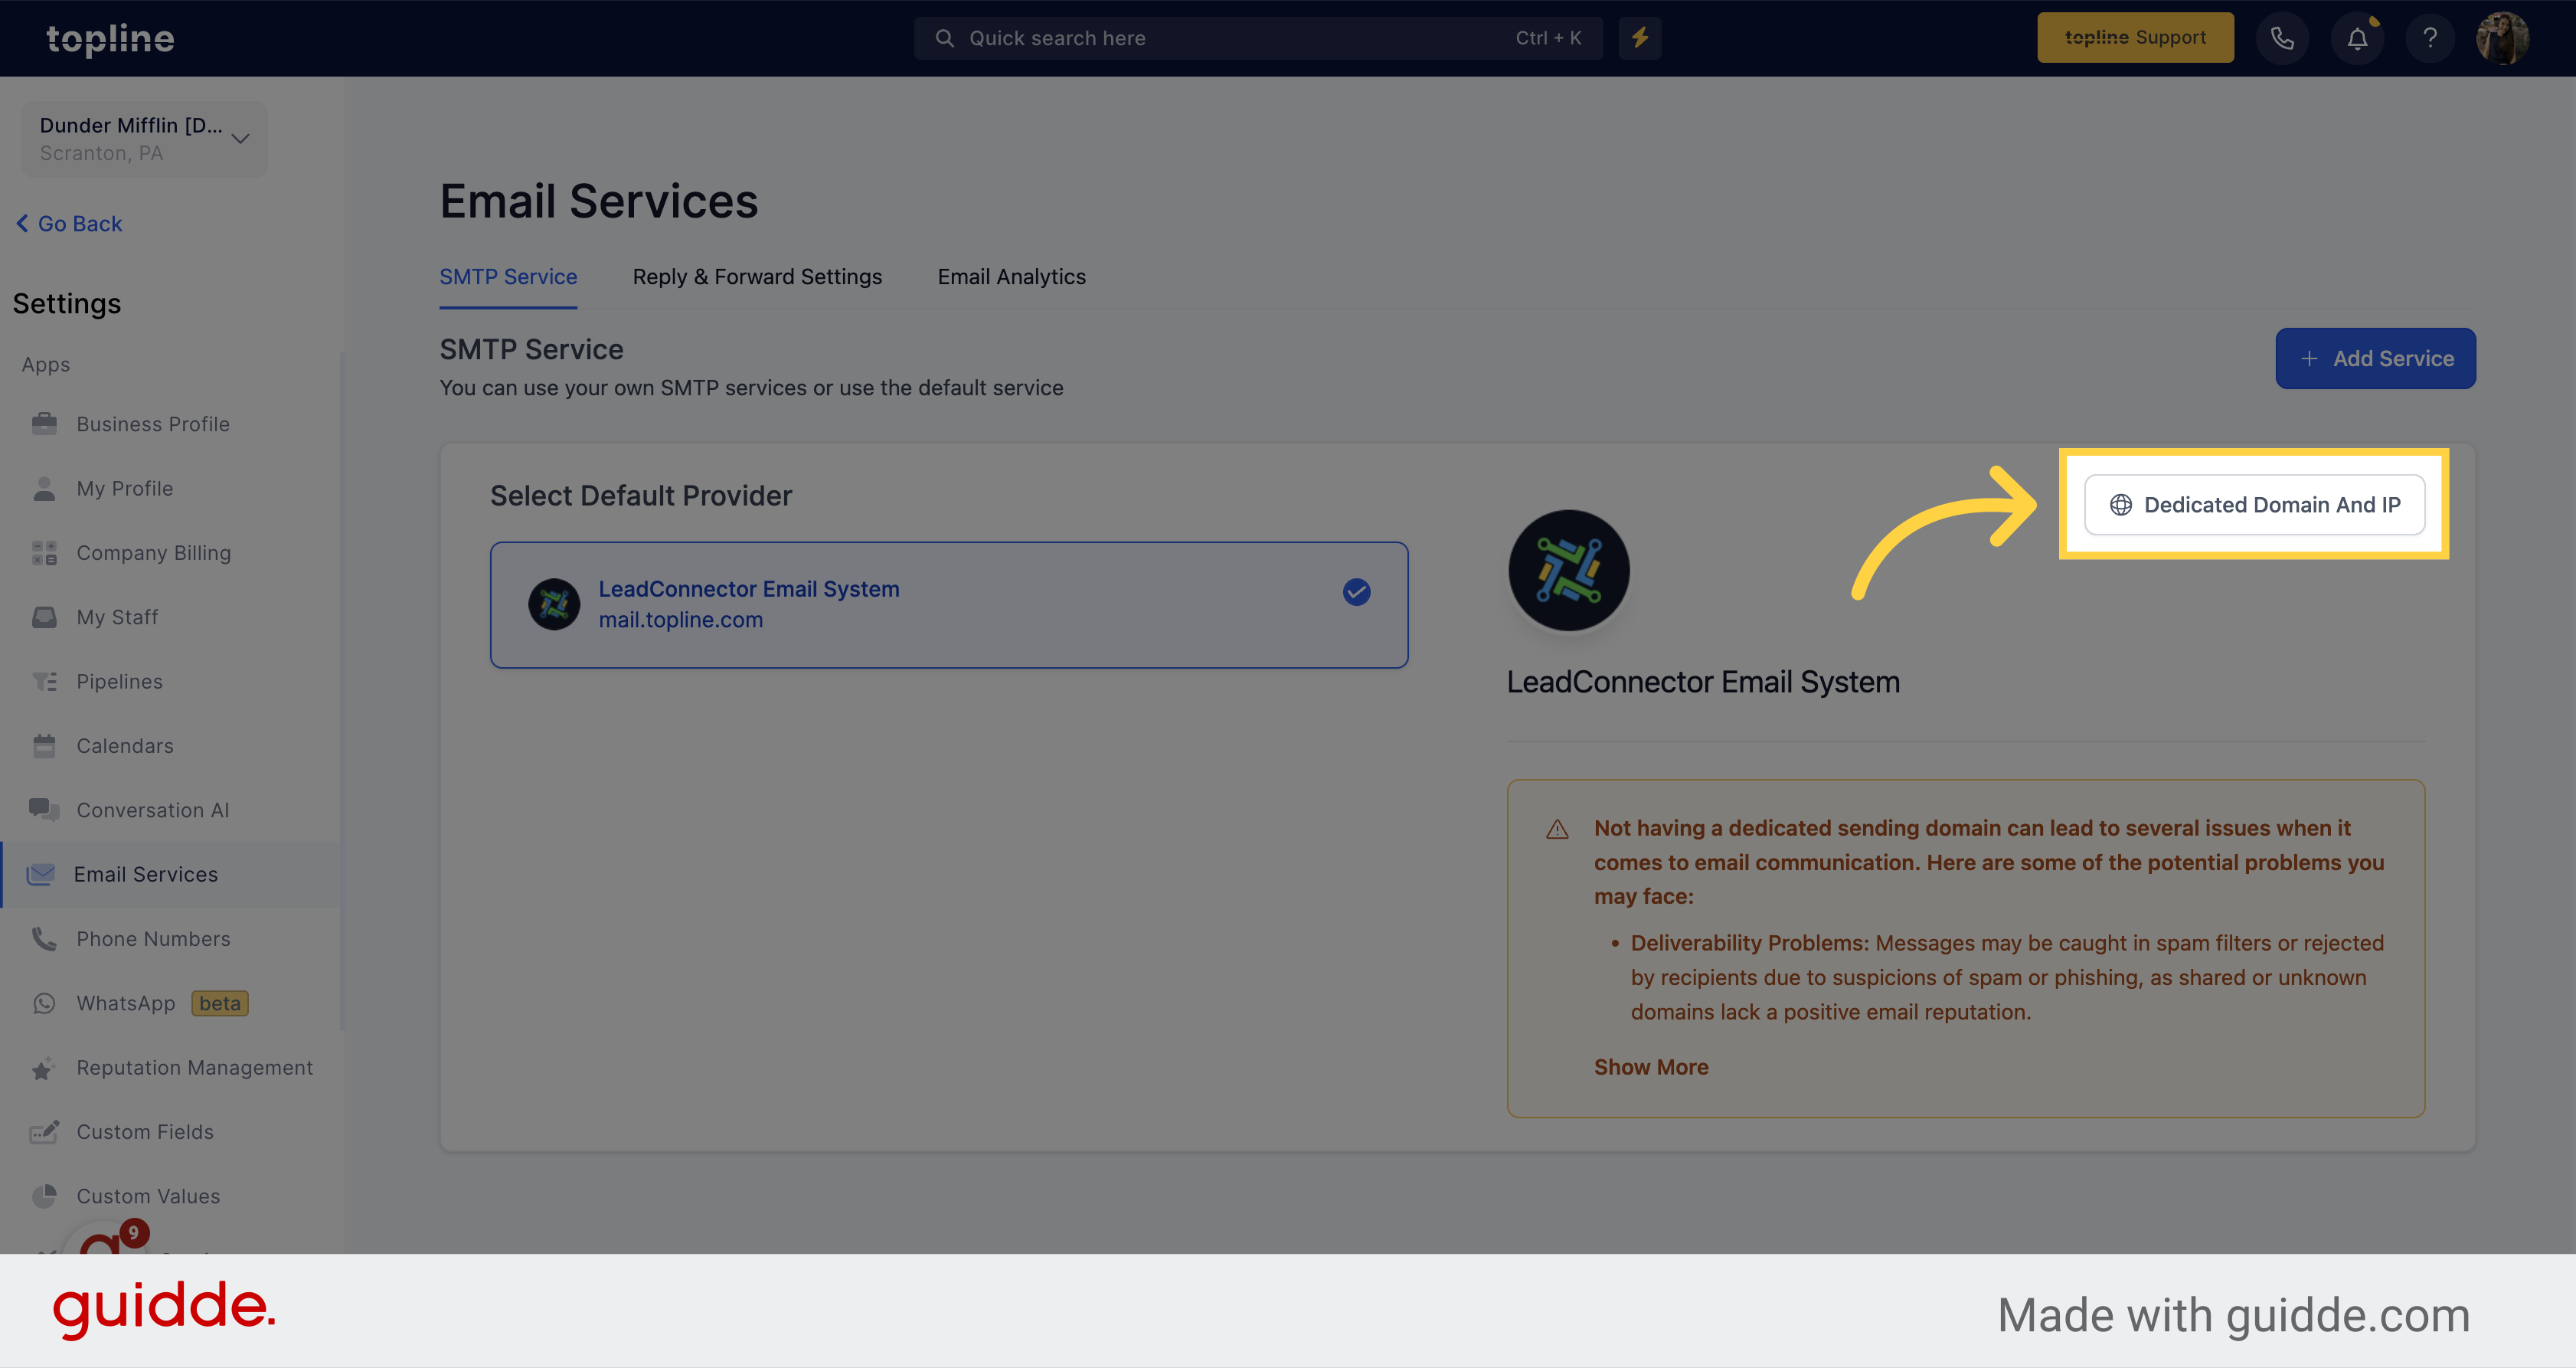
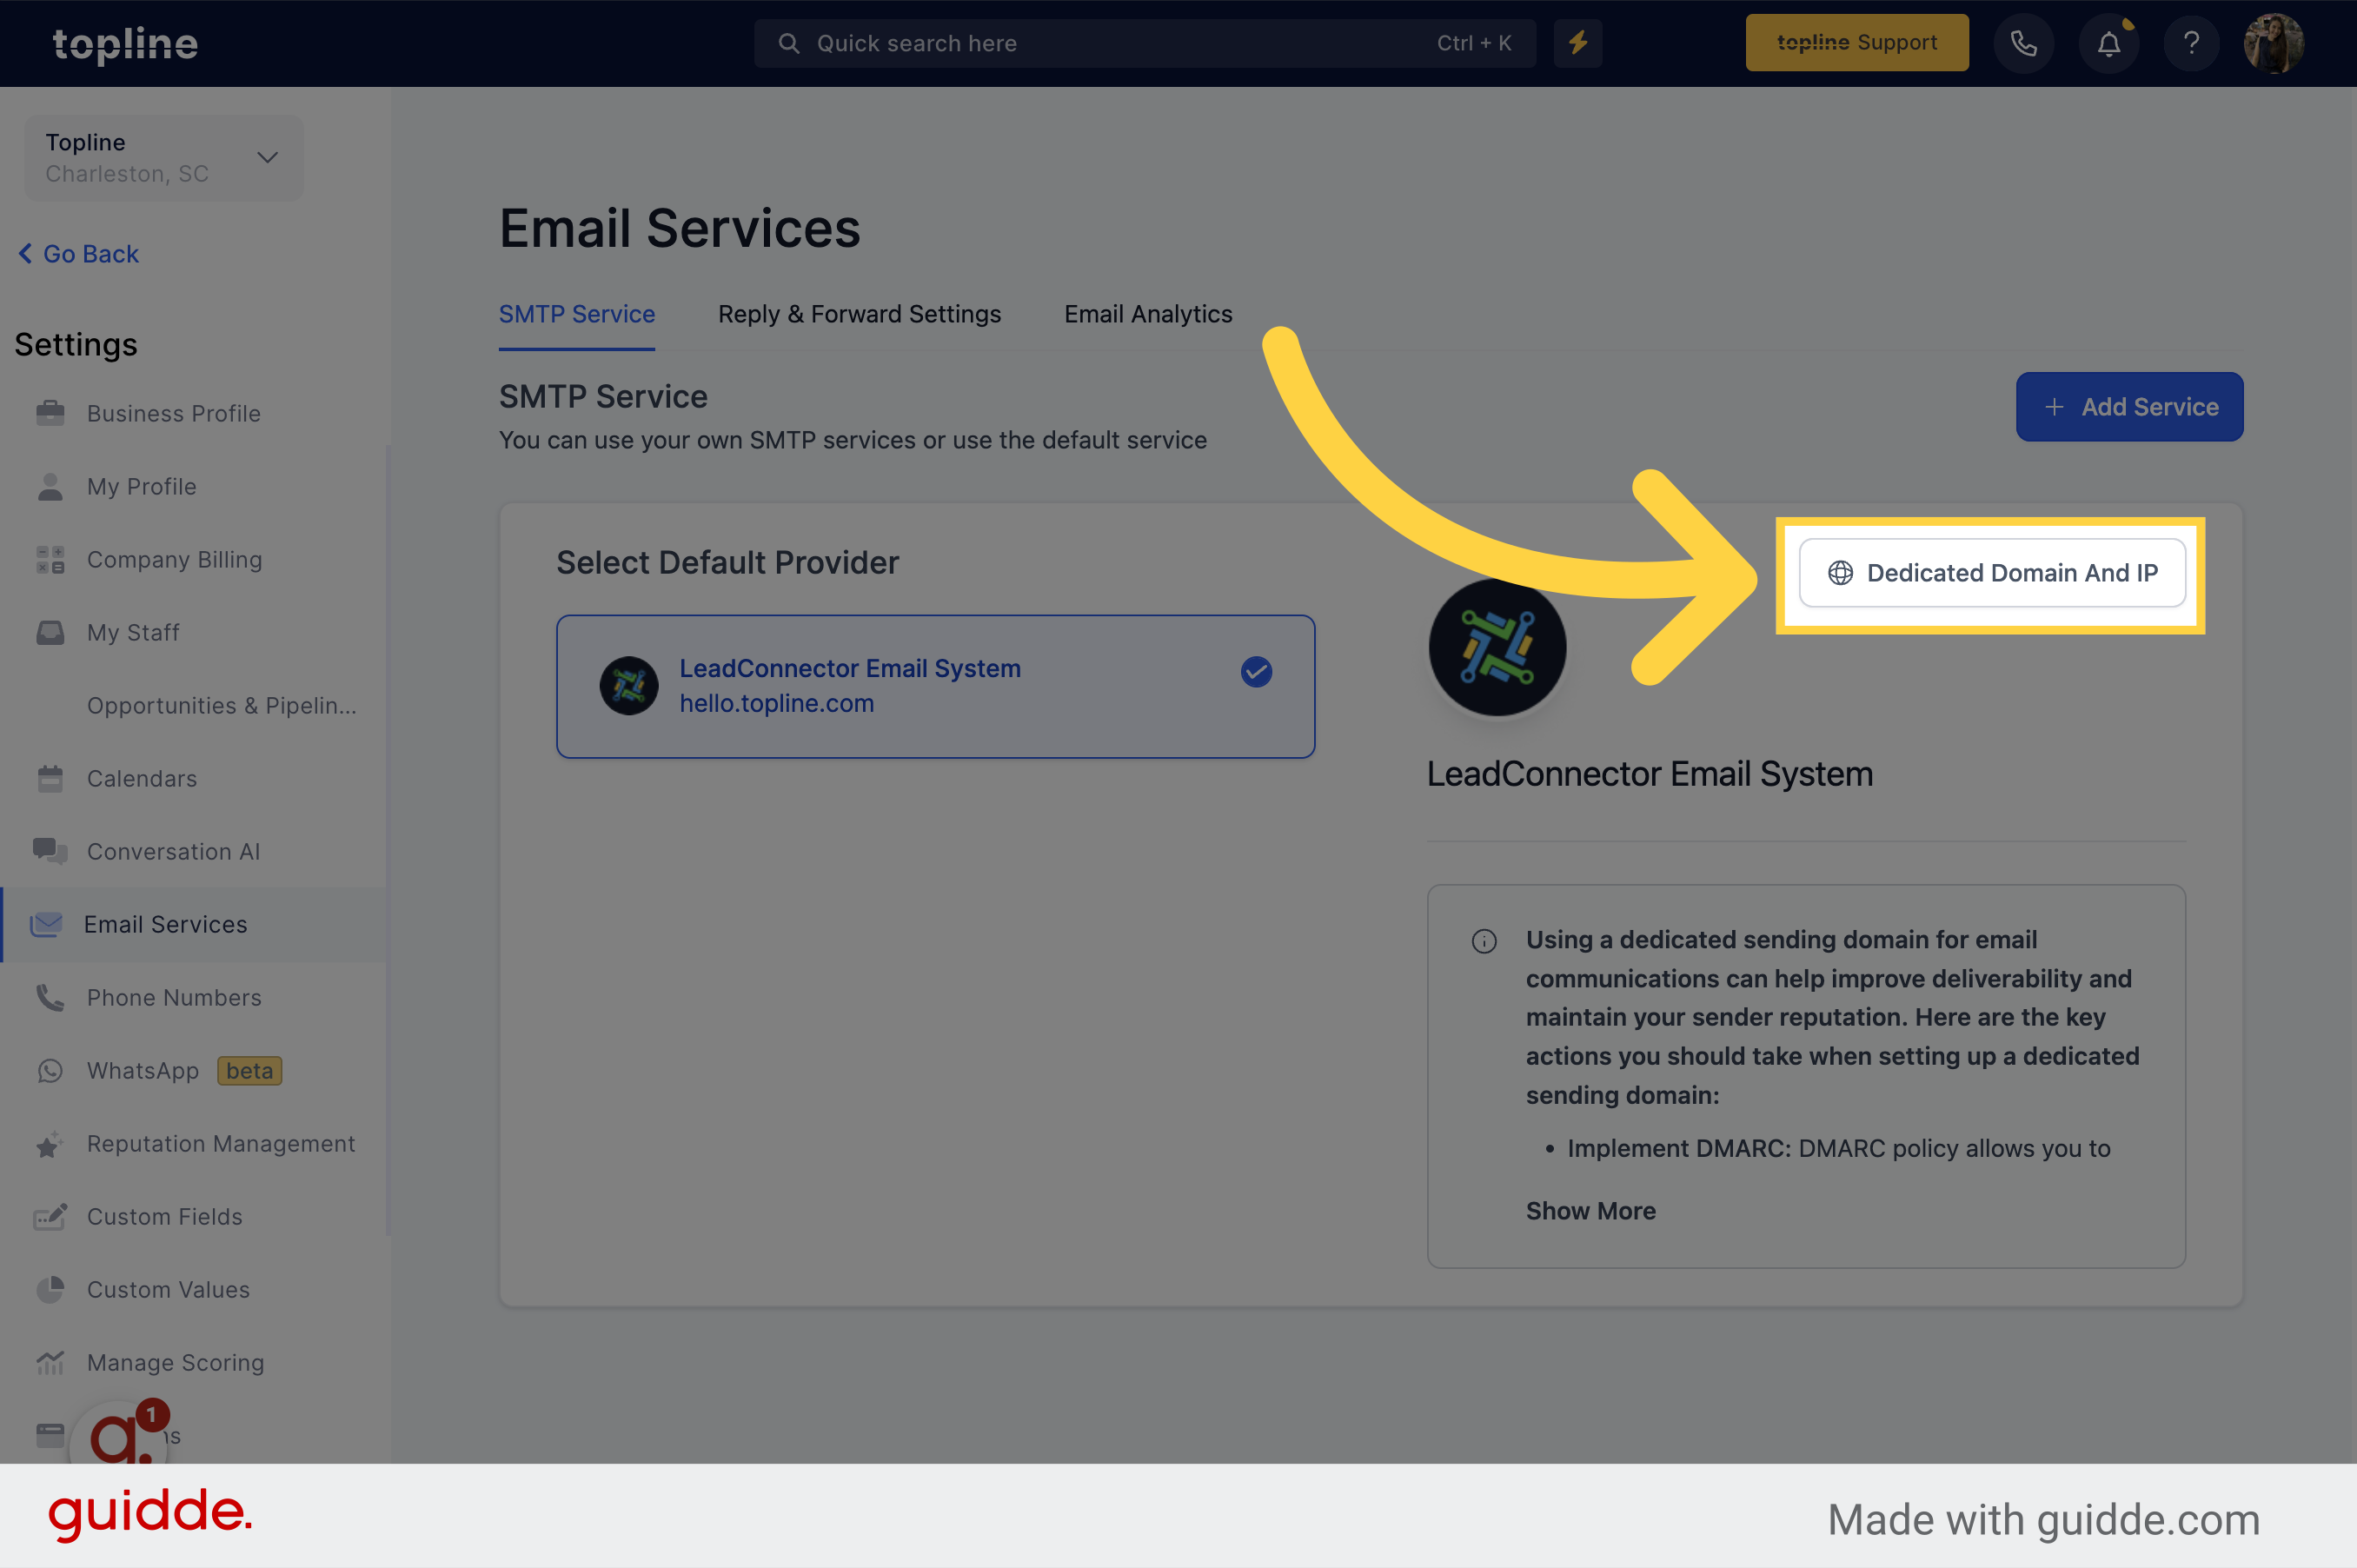
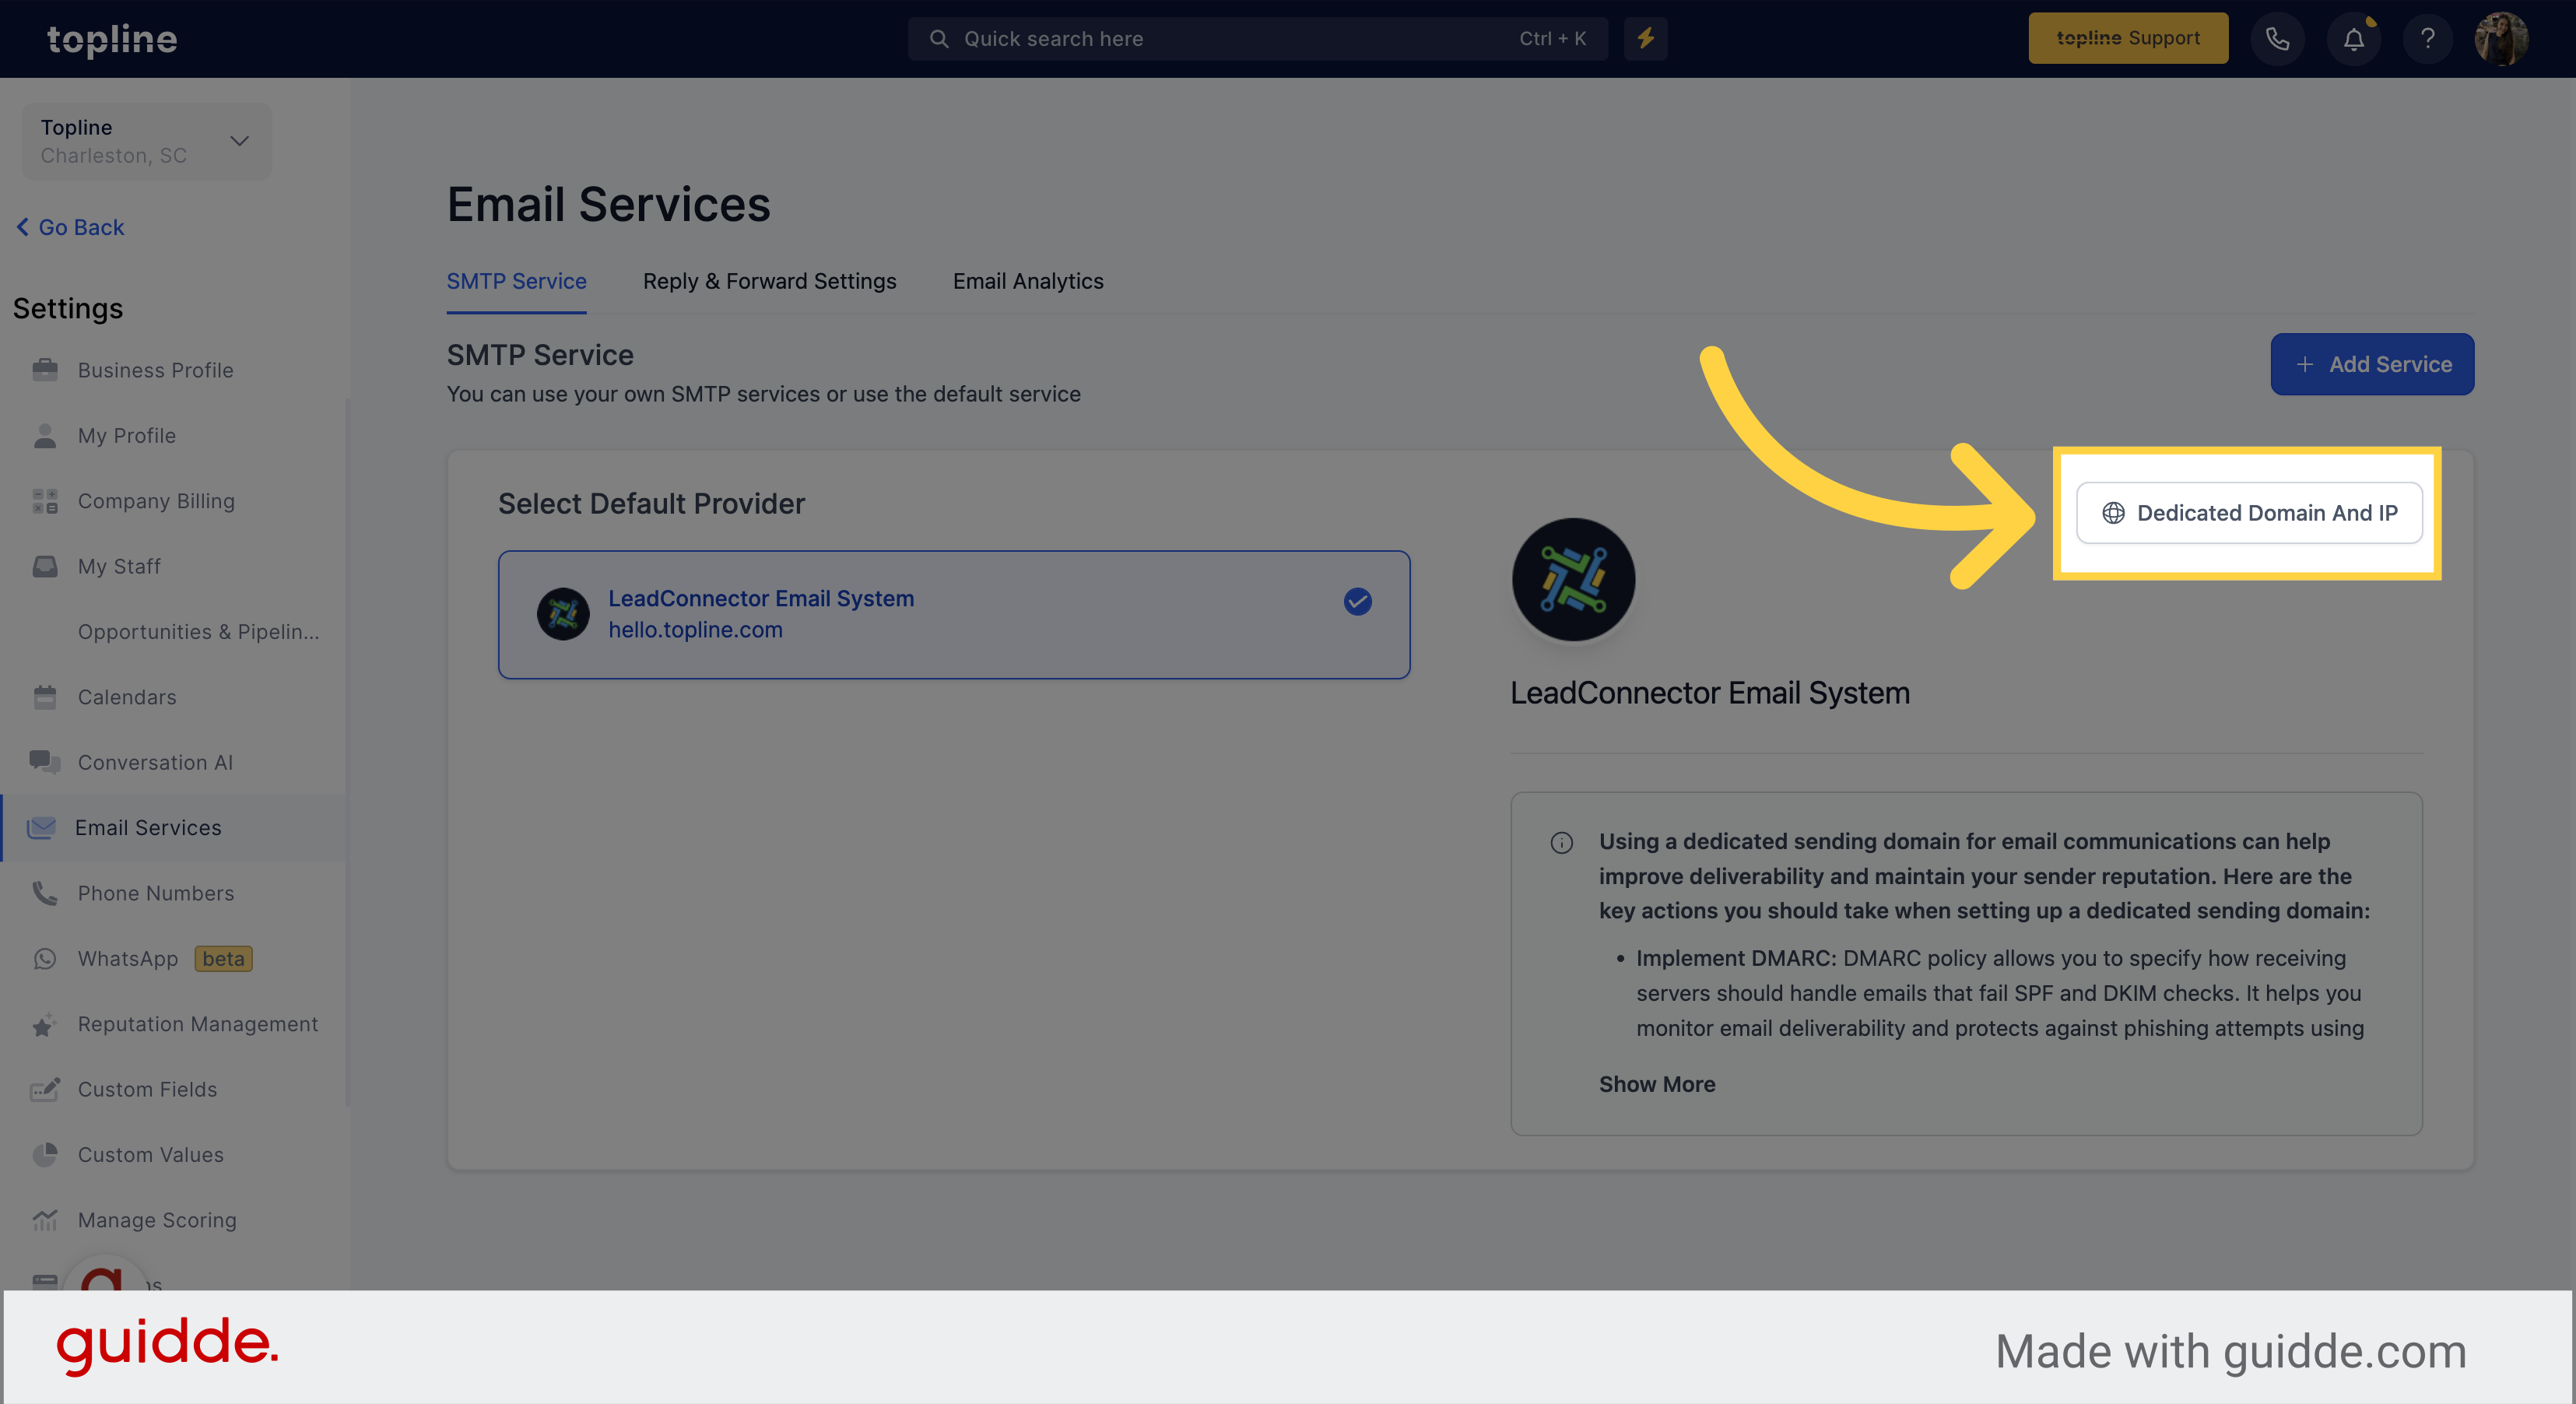
Navigate to the Email Services option on the settings menu.
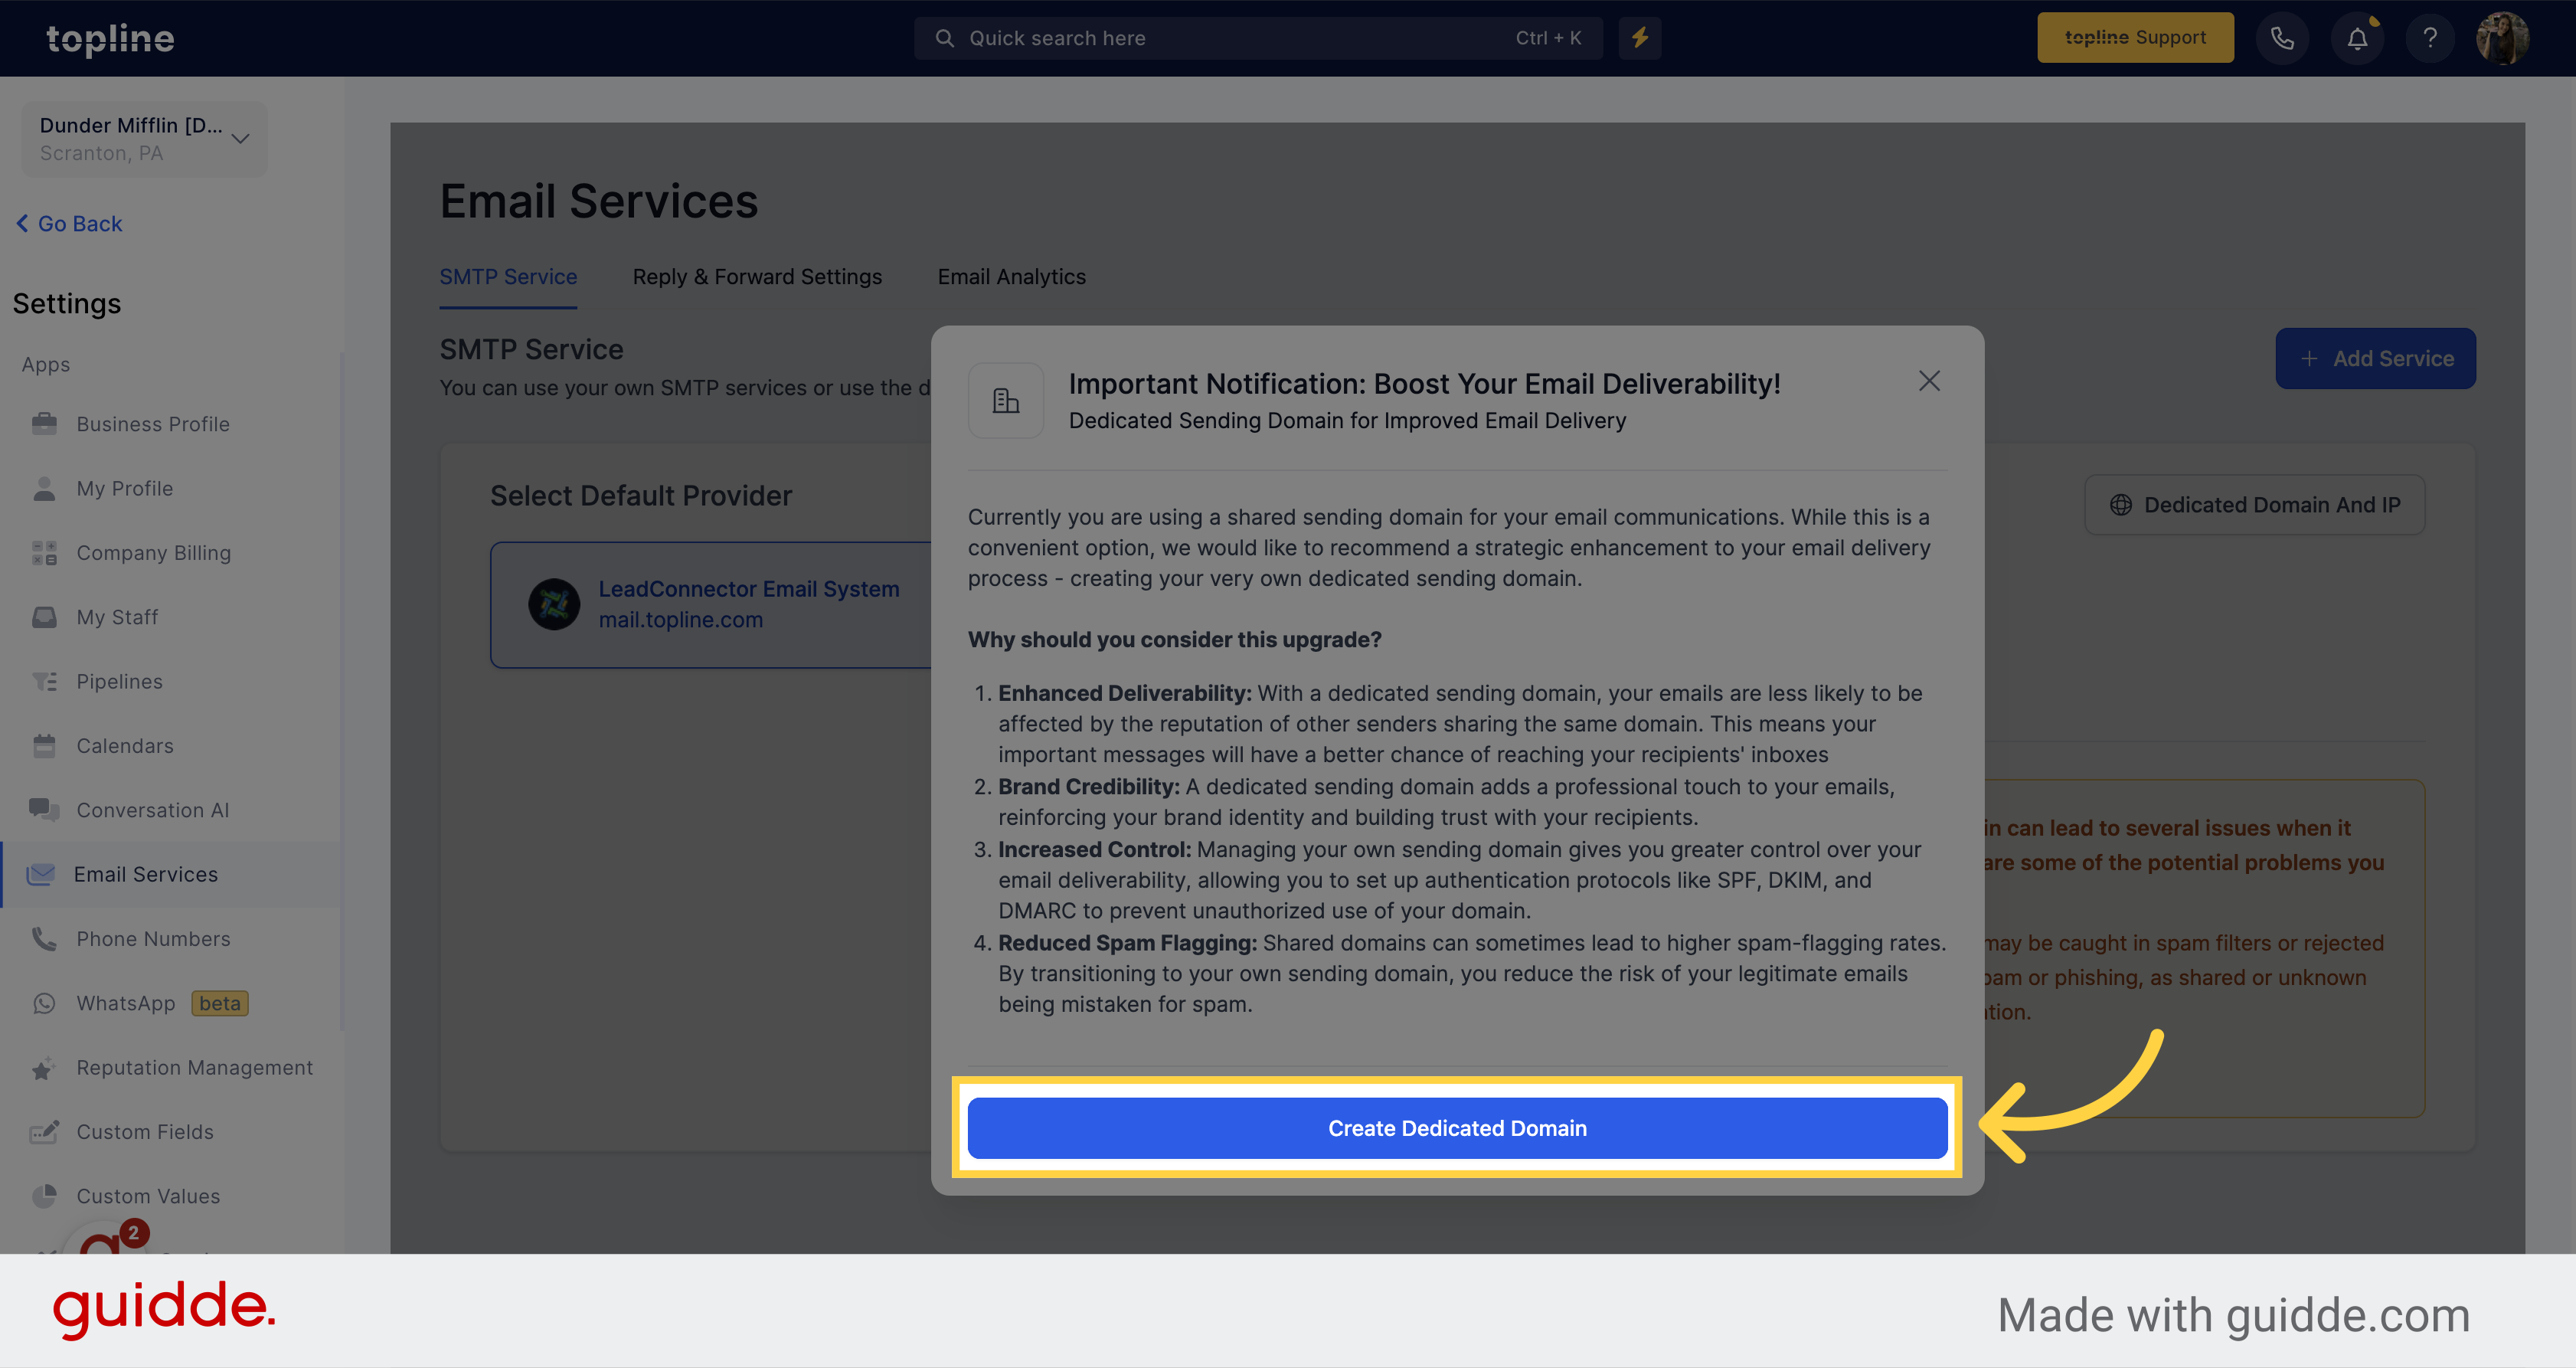
Initiate the creation of a Dedicated Domain by clicking on the option on the pop up window.
You can also create a dedicated domain by clicking on the Dedicated Domain and IP option on the Email Services view.
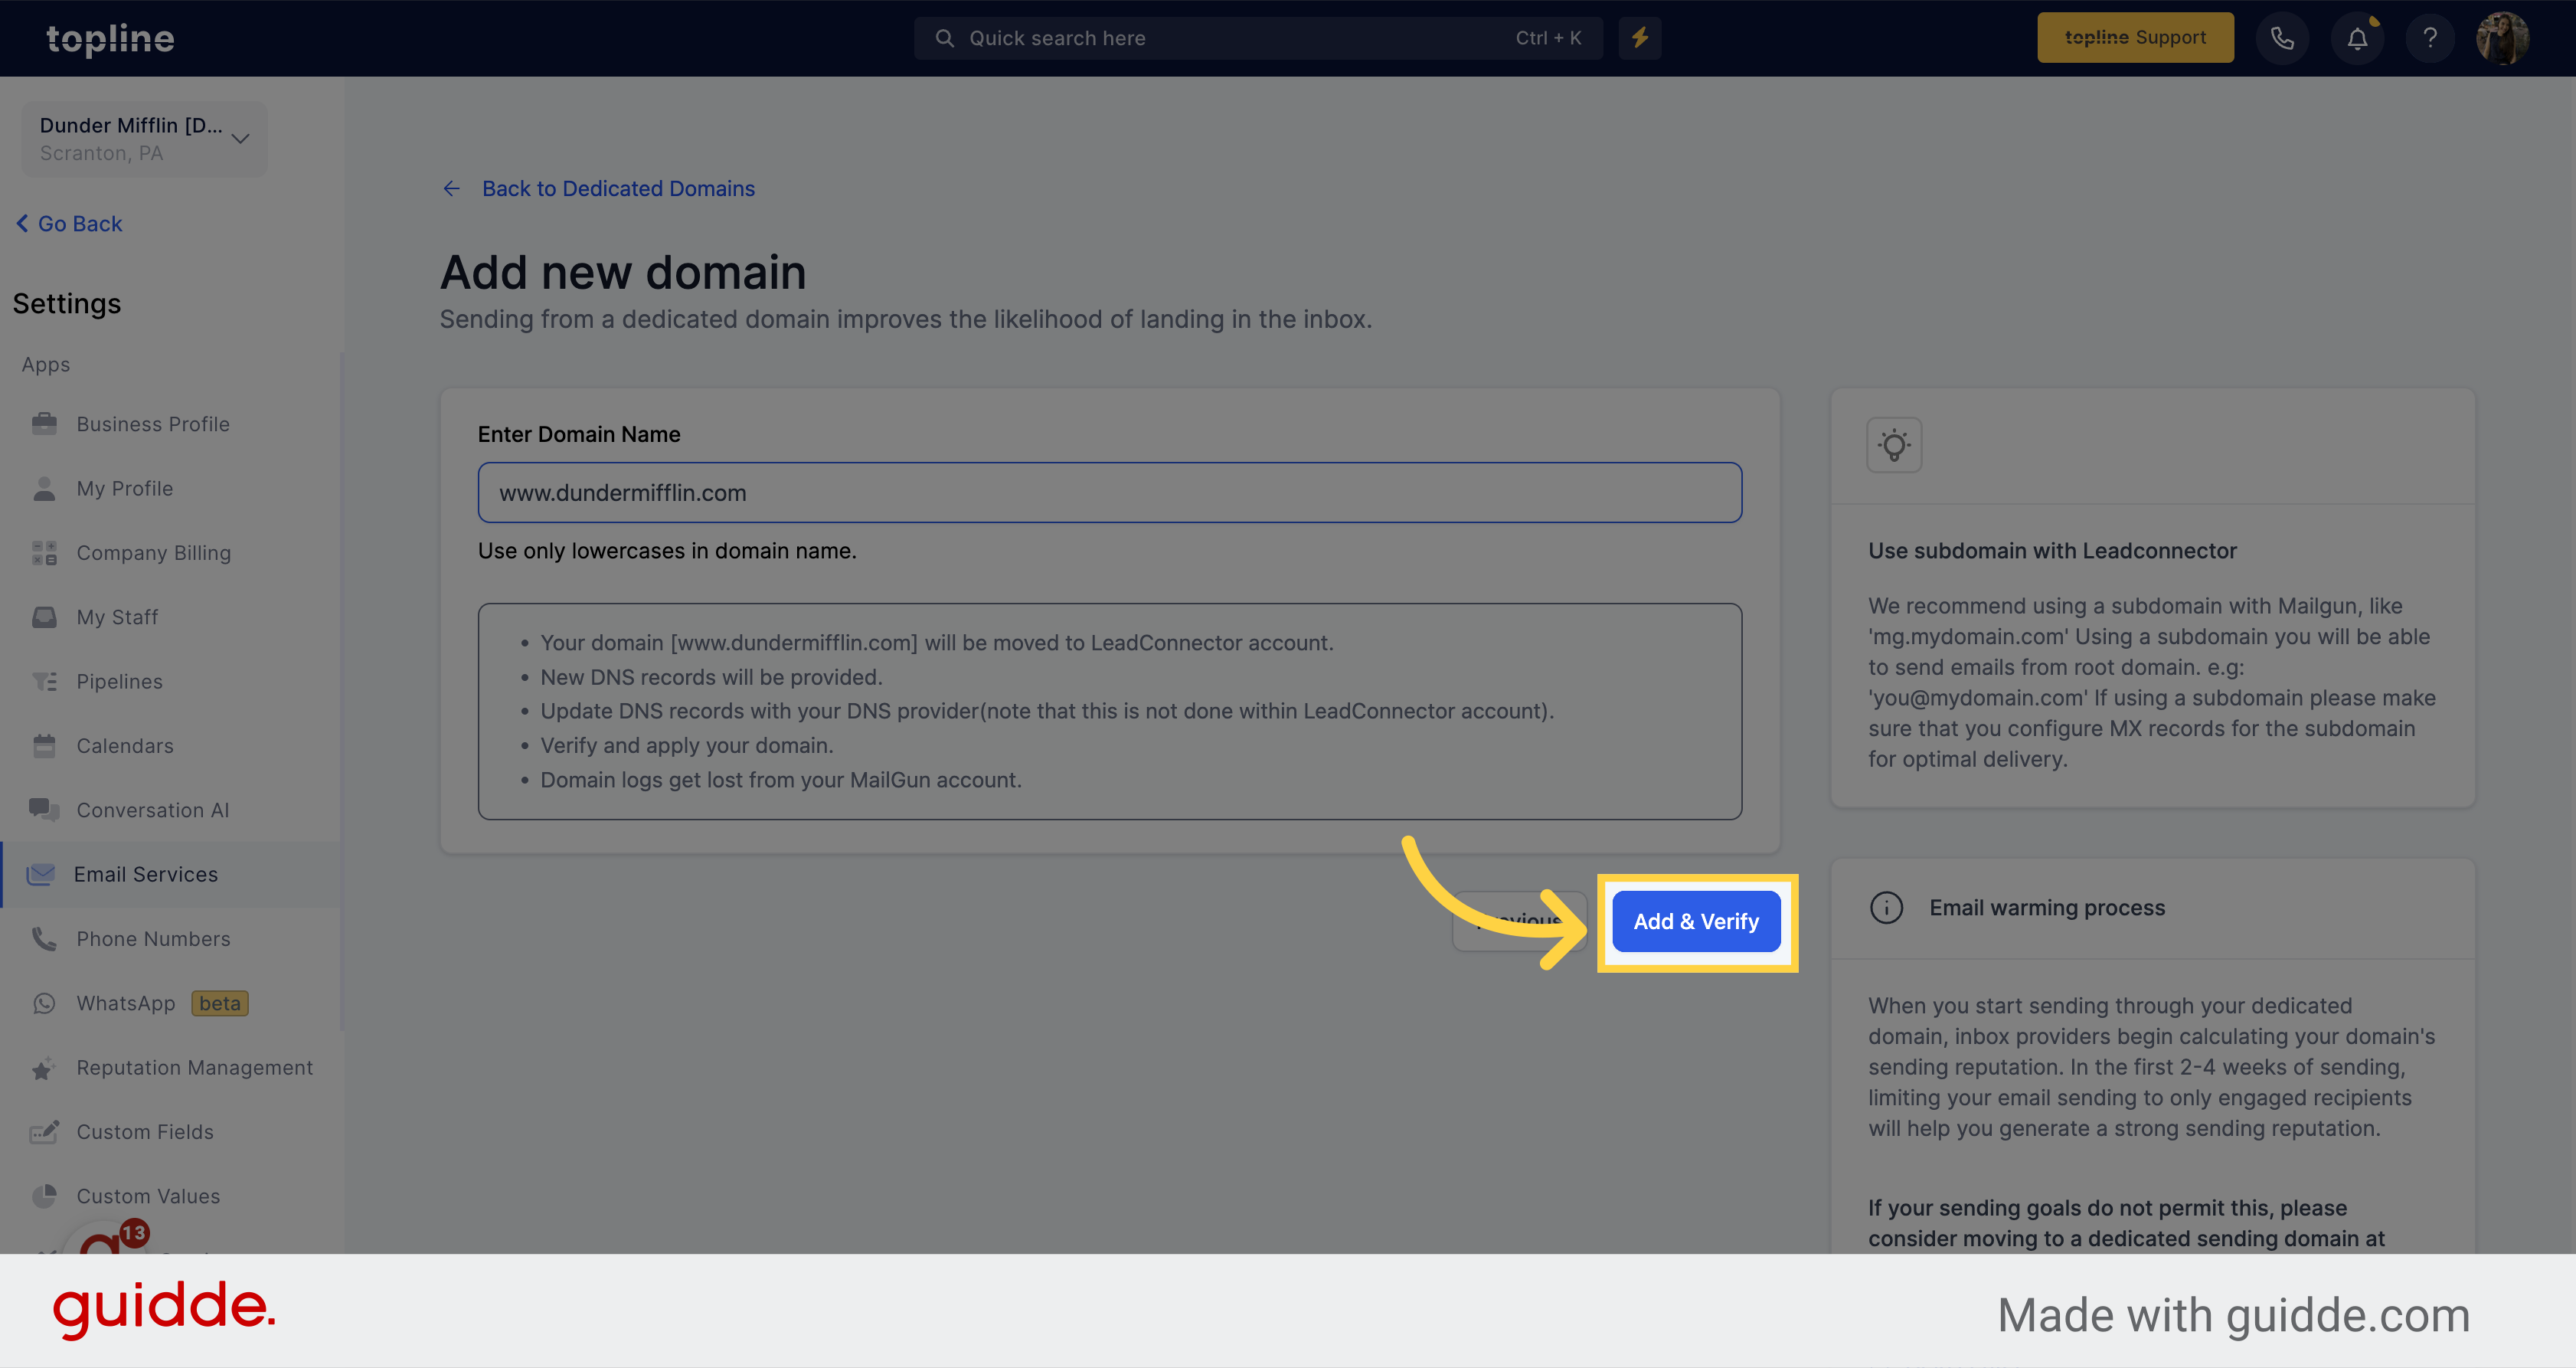
Add the information of your domain on the field.

Once you have entered the domain name, click on the Add & Verify option.
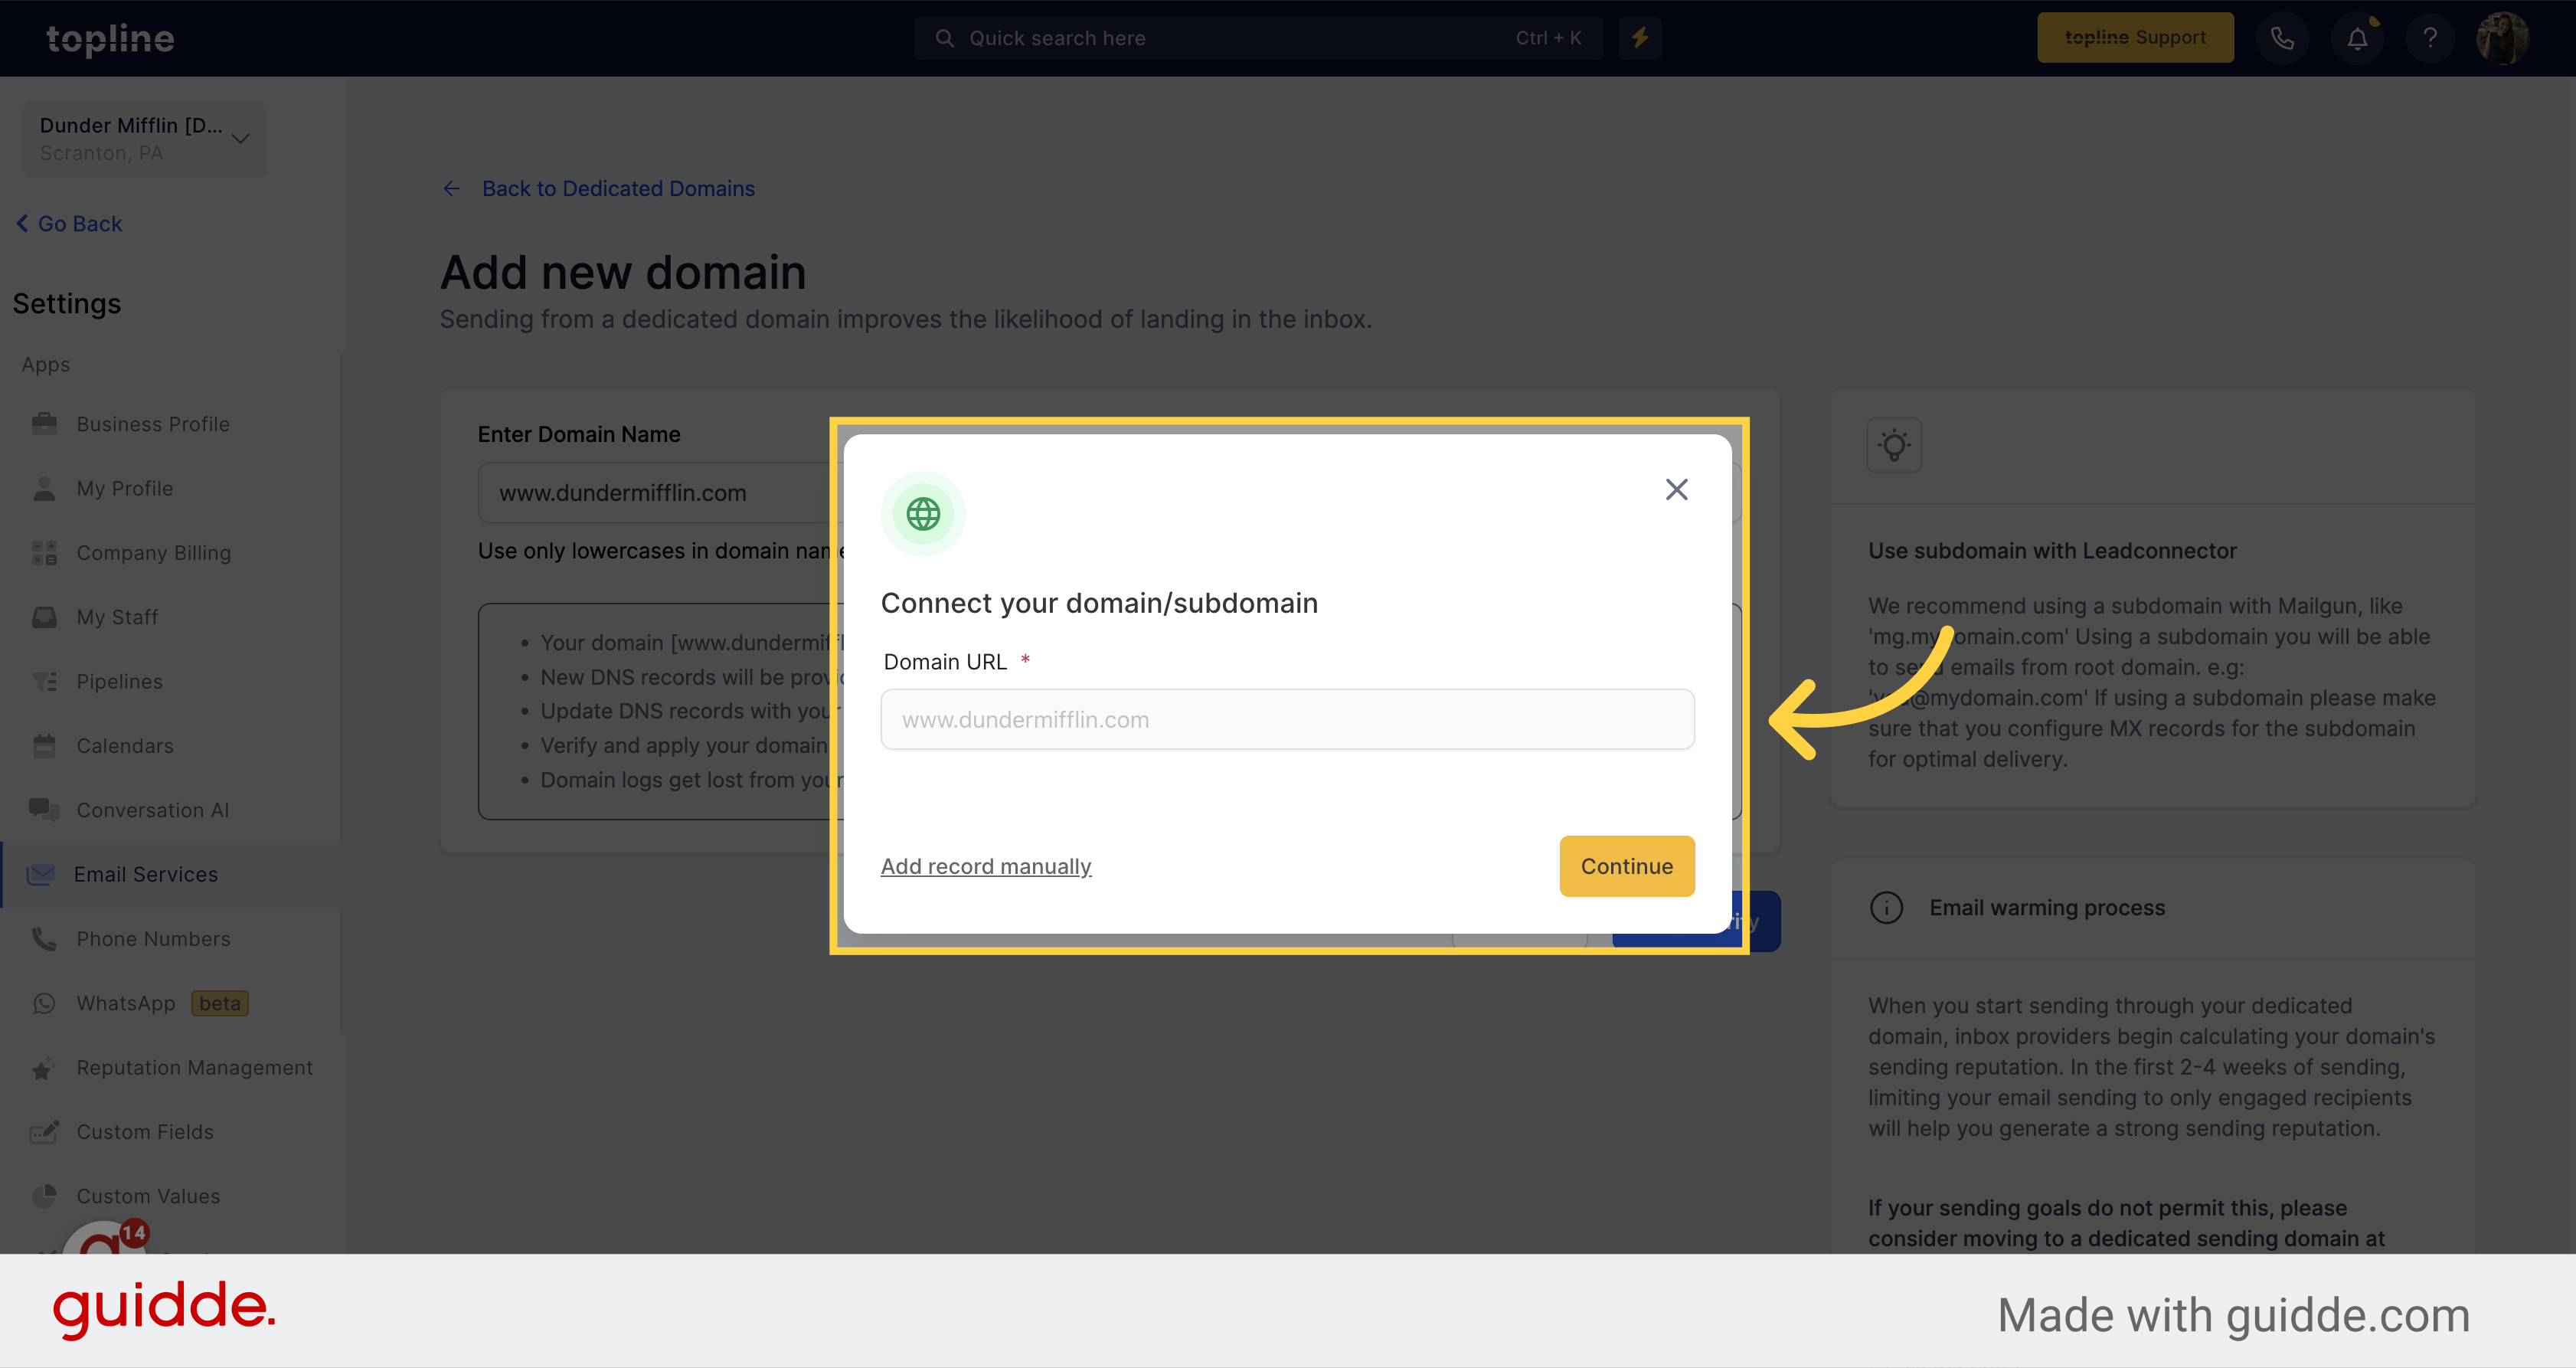
Add your domain URL on the empty field.
Add your domain details.
Here are instructions for common DNS providers:
Note: The propagation process can take up to 24 hours. If it has been longer than 24 hours please double-check your DNS settings by following the process above.
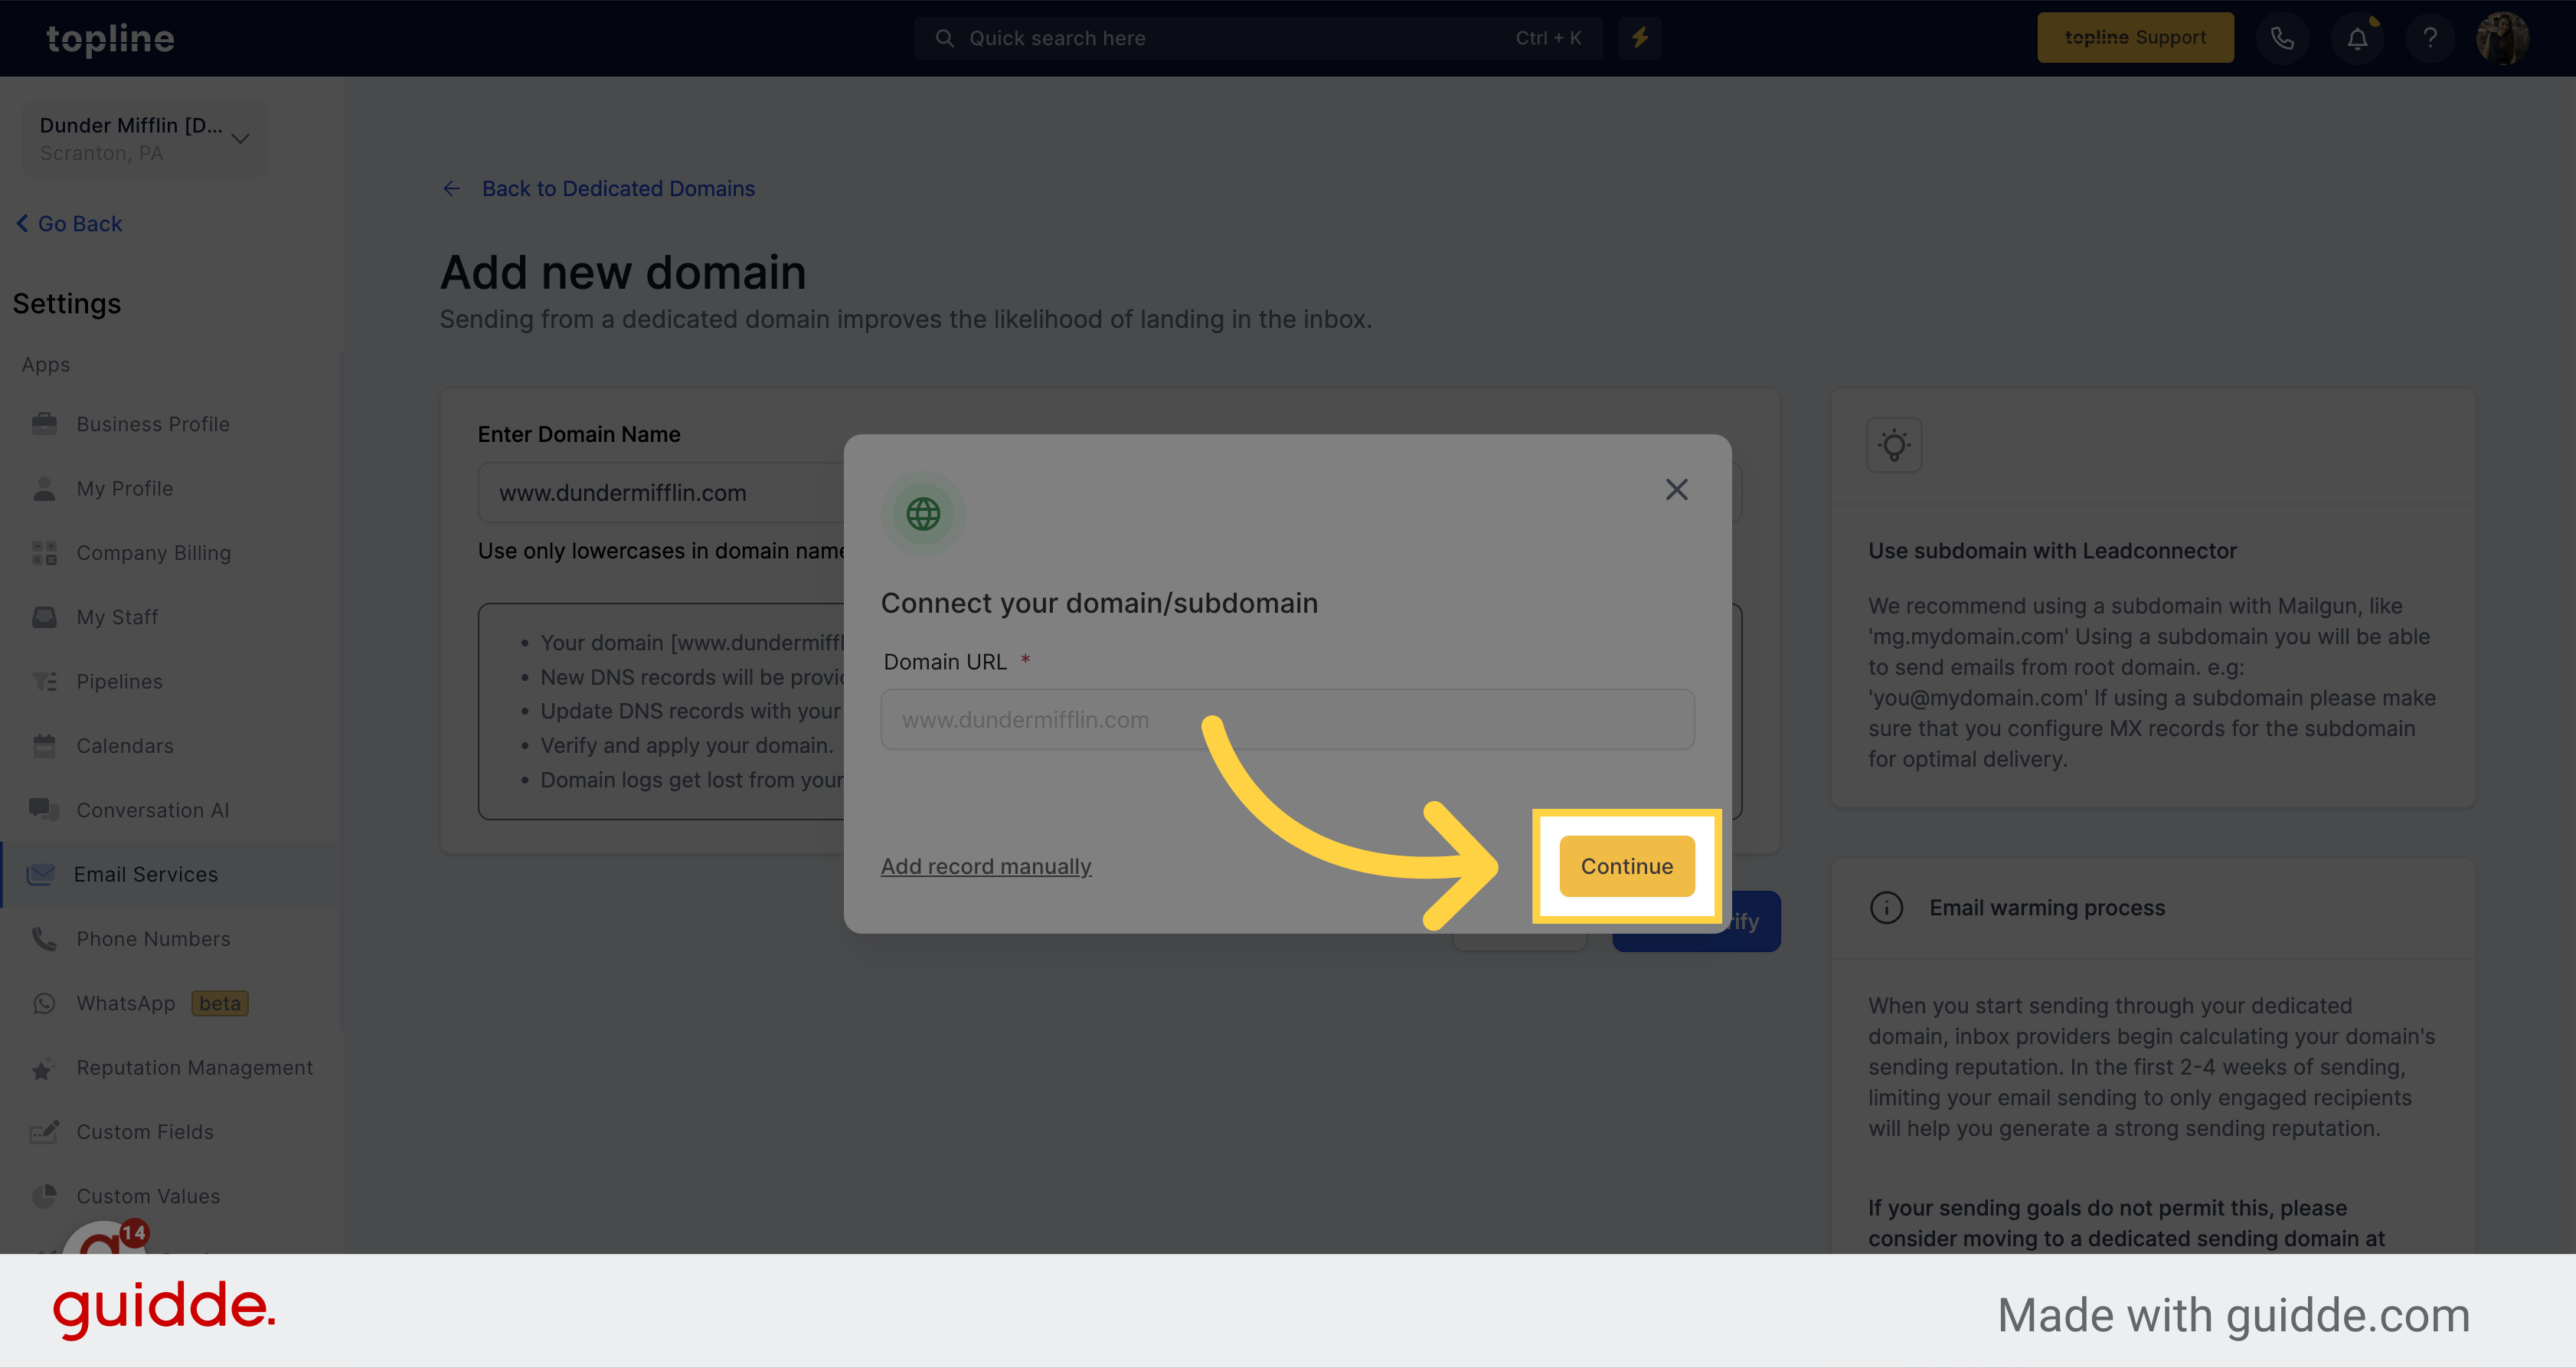
Proceed by clicking on the "Continue" button.
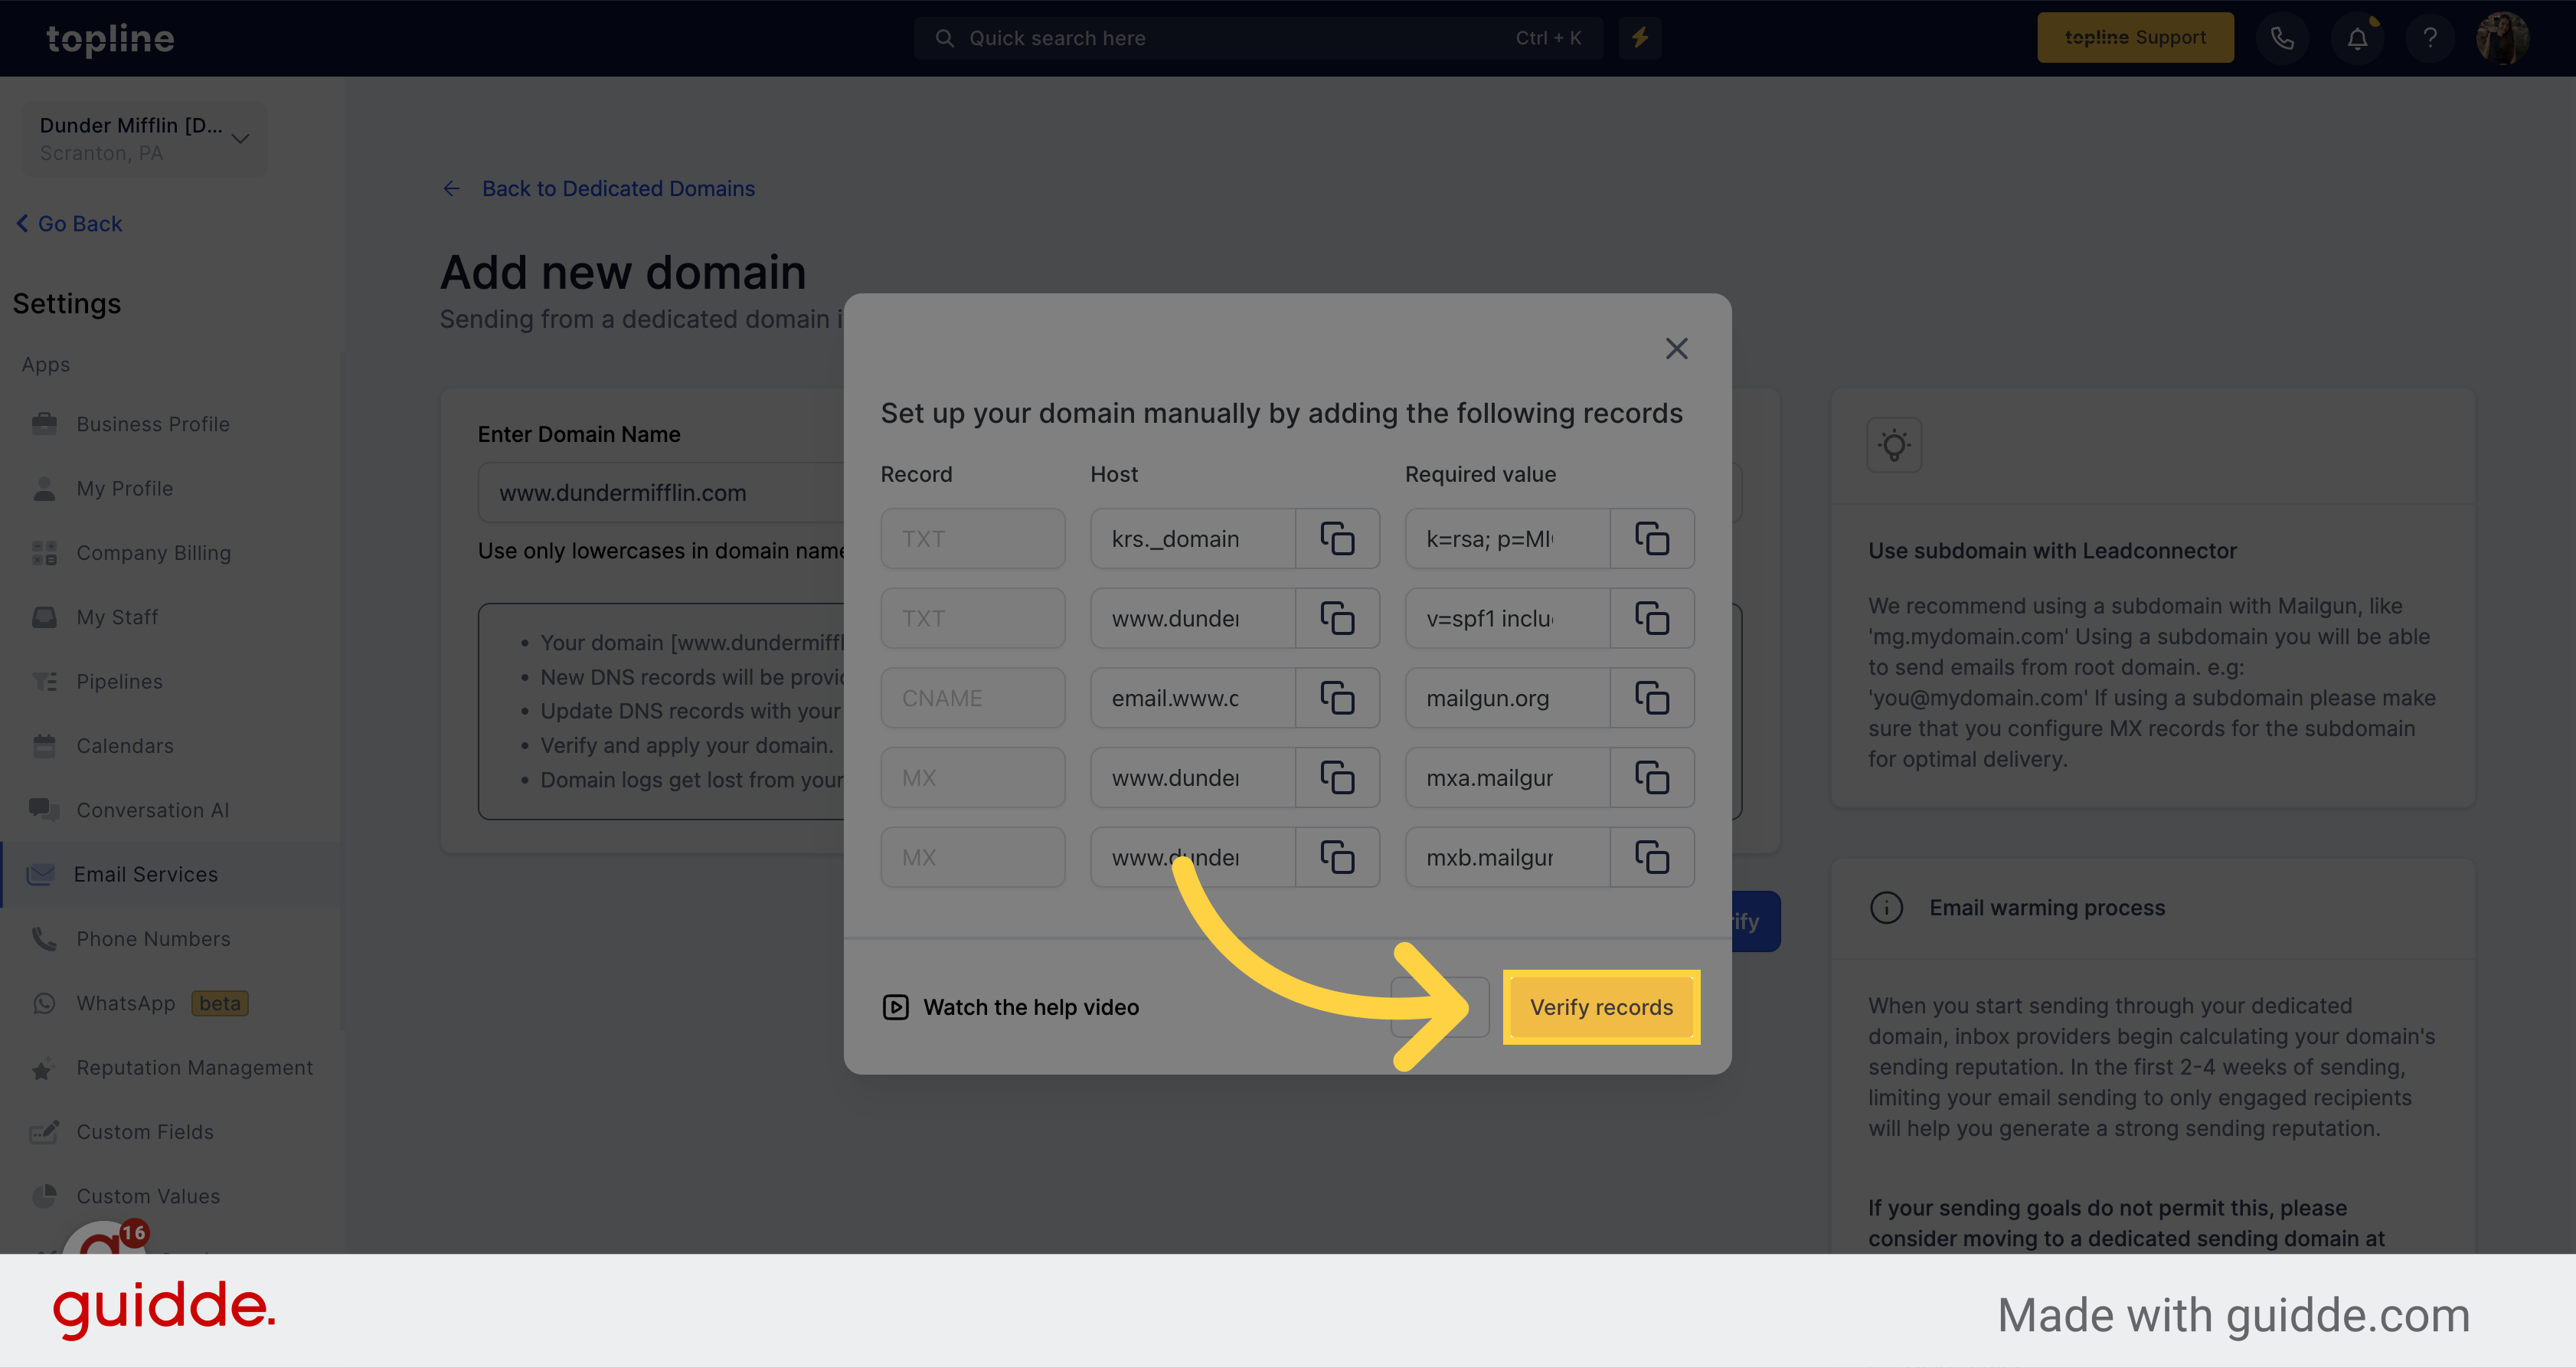
Add the records shown on the pop up and then, verify the records by clicking on the respective option.
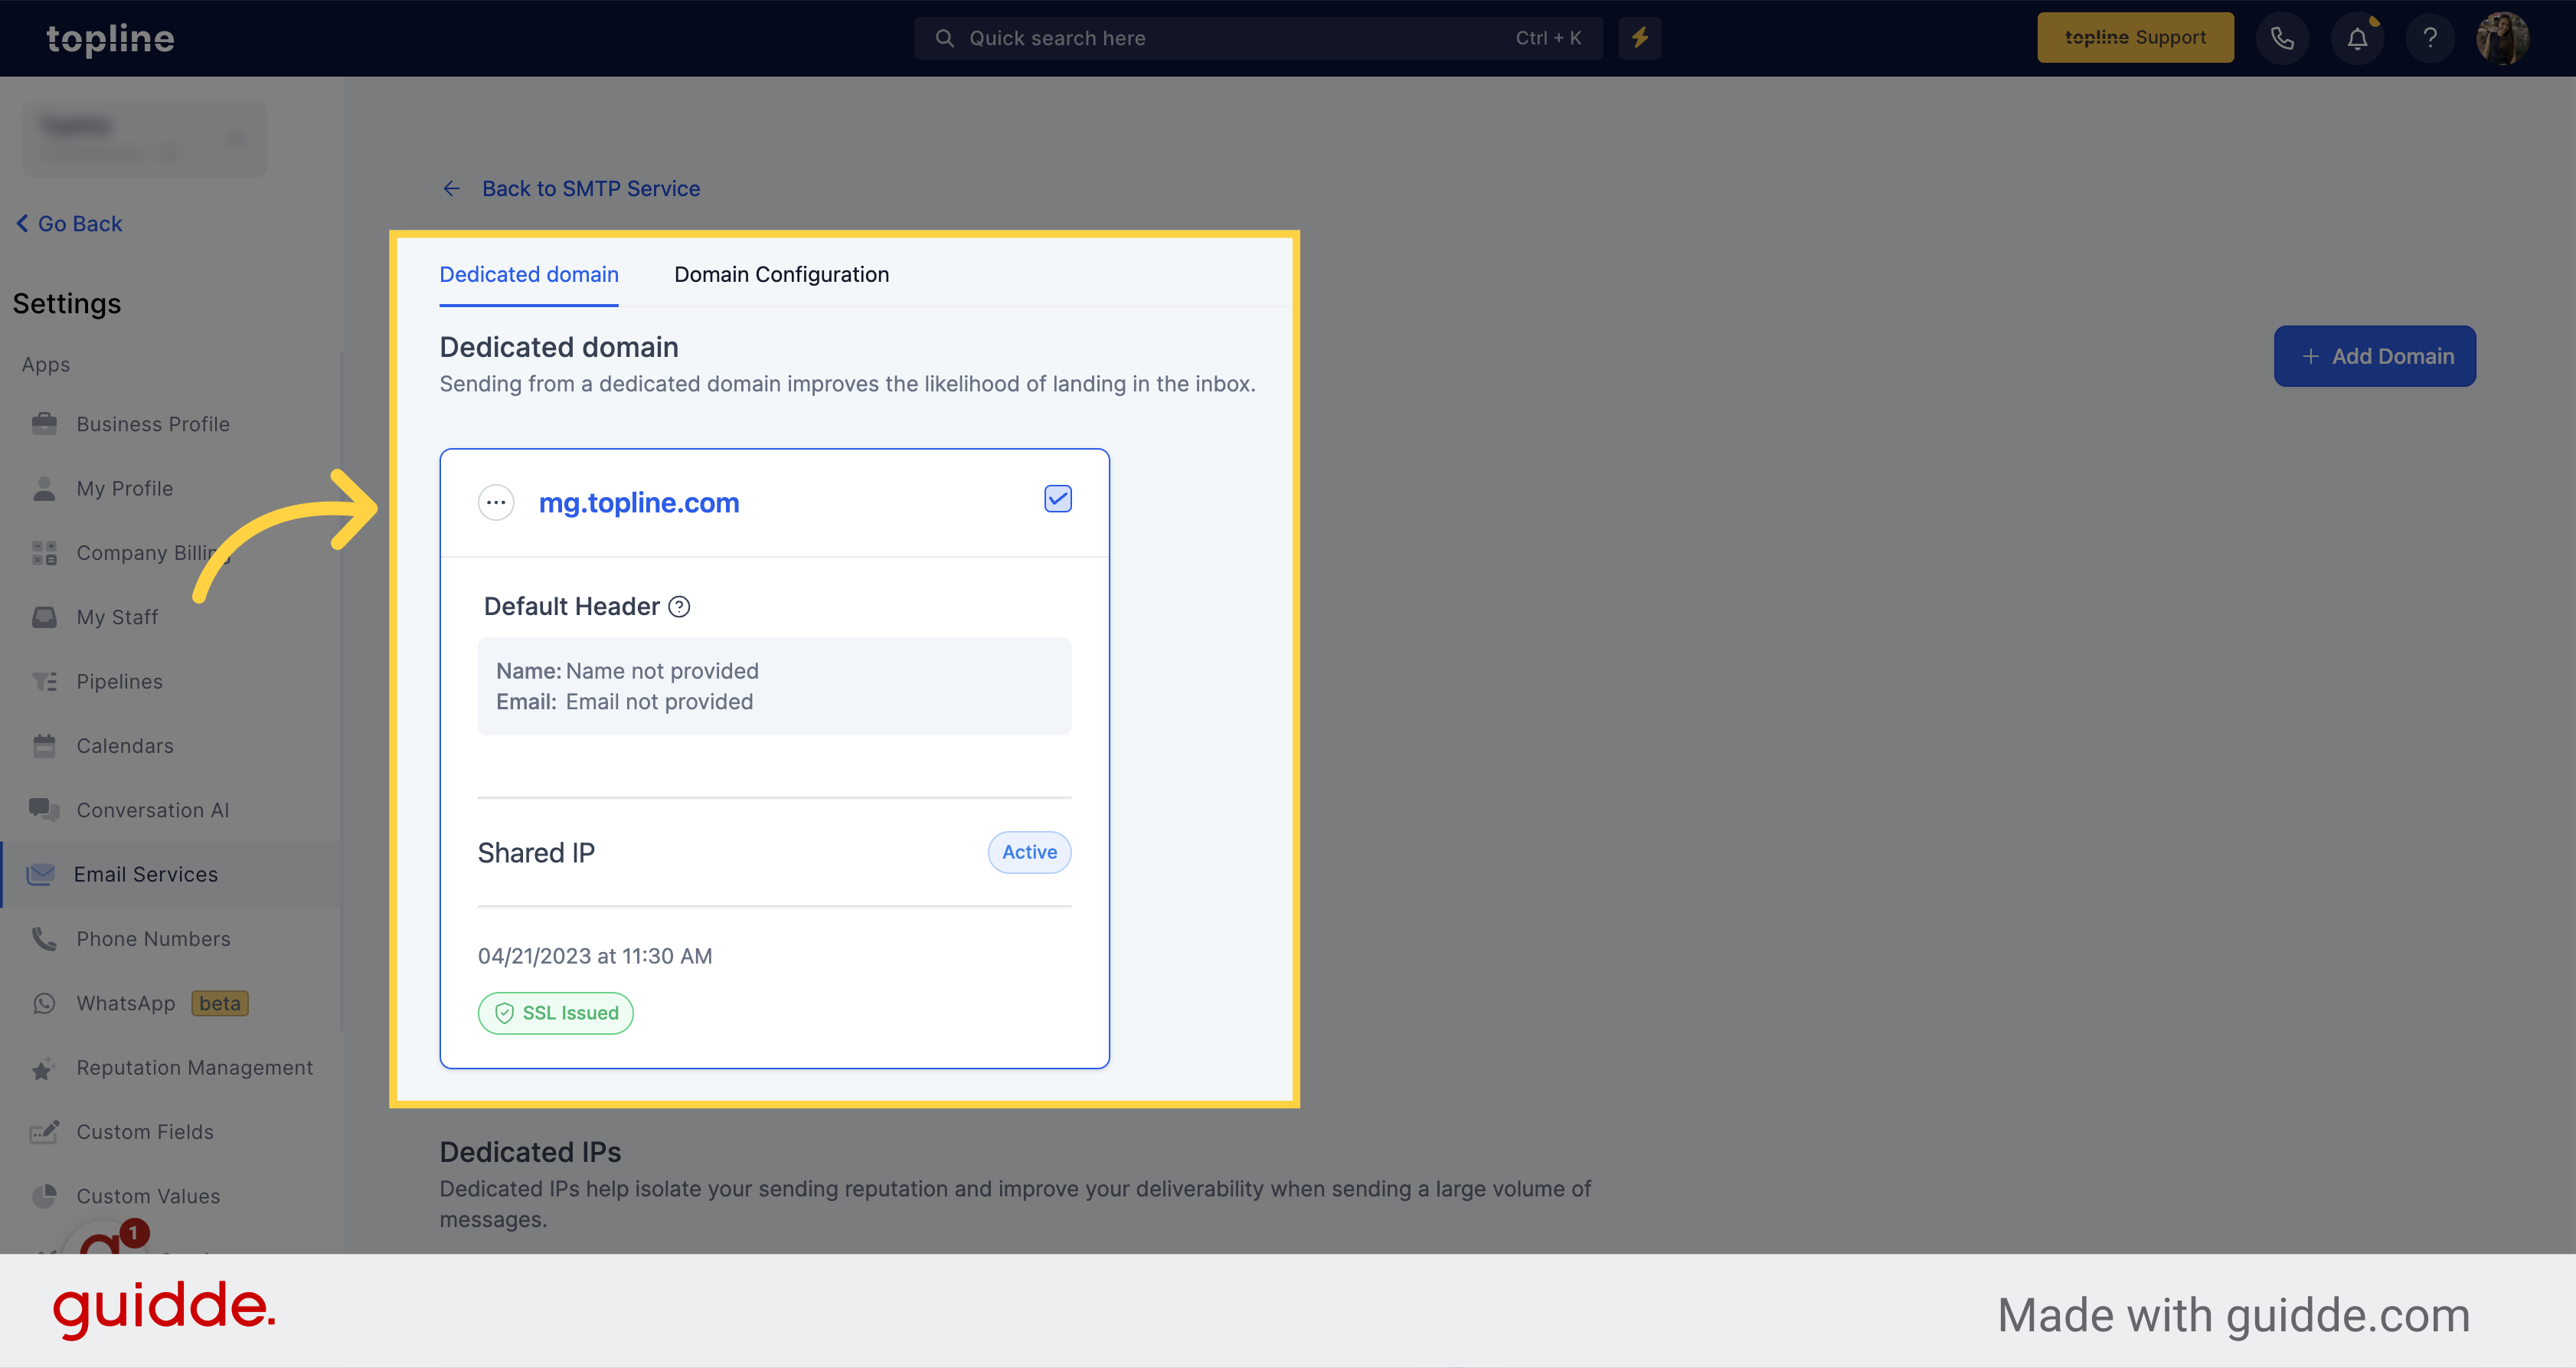
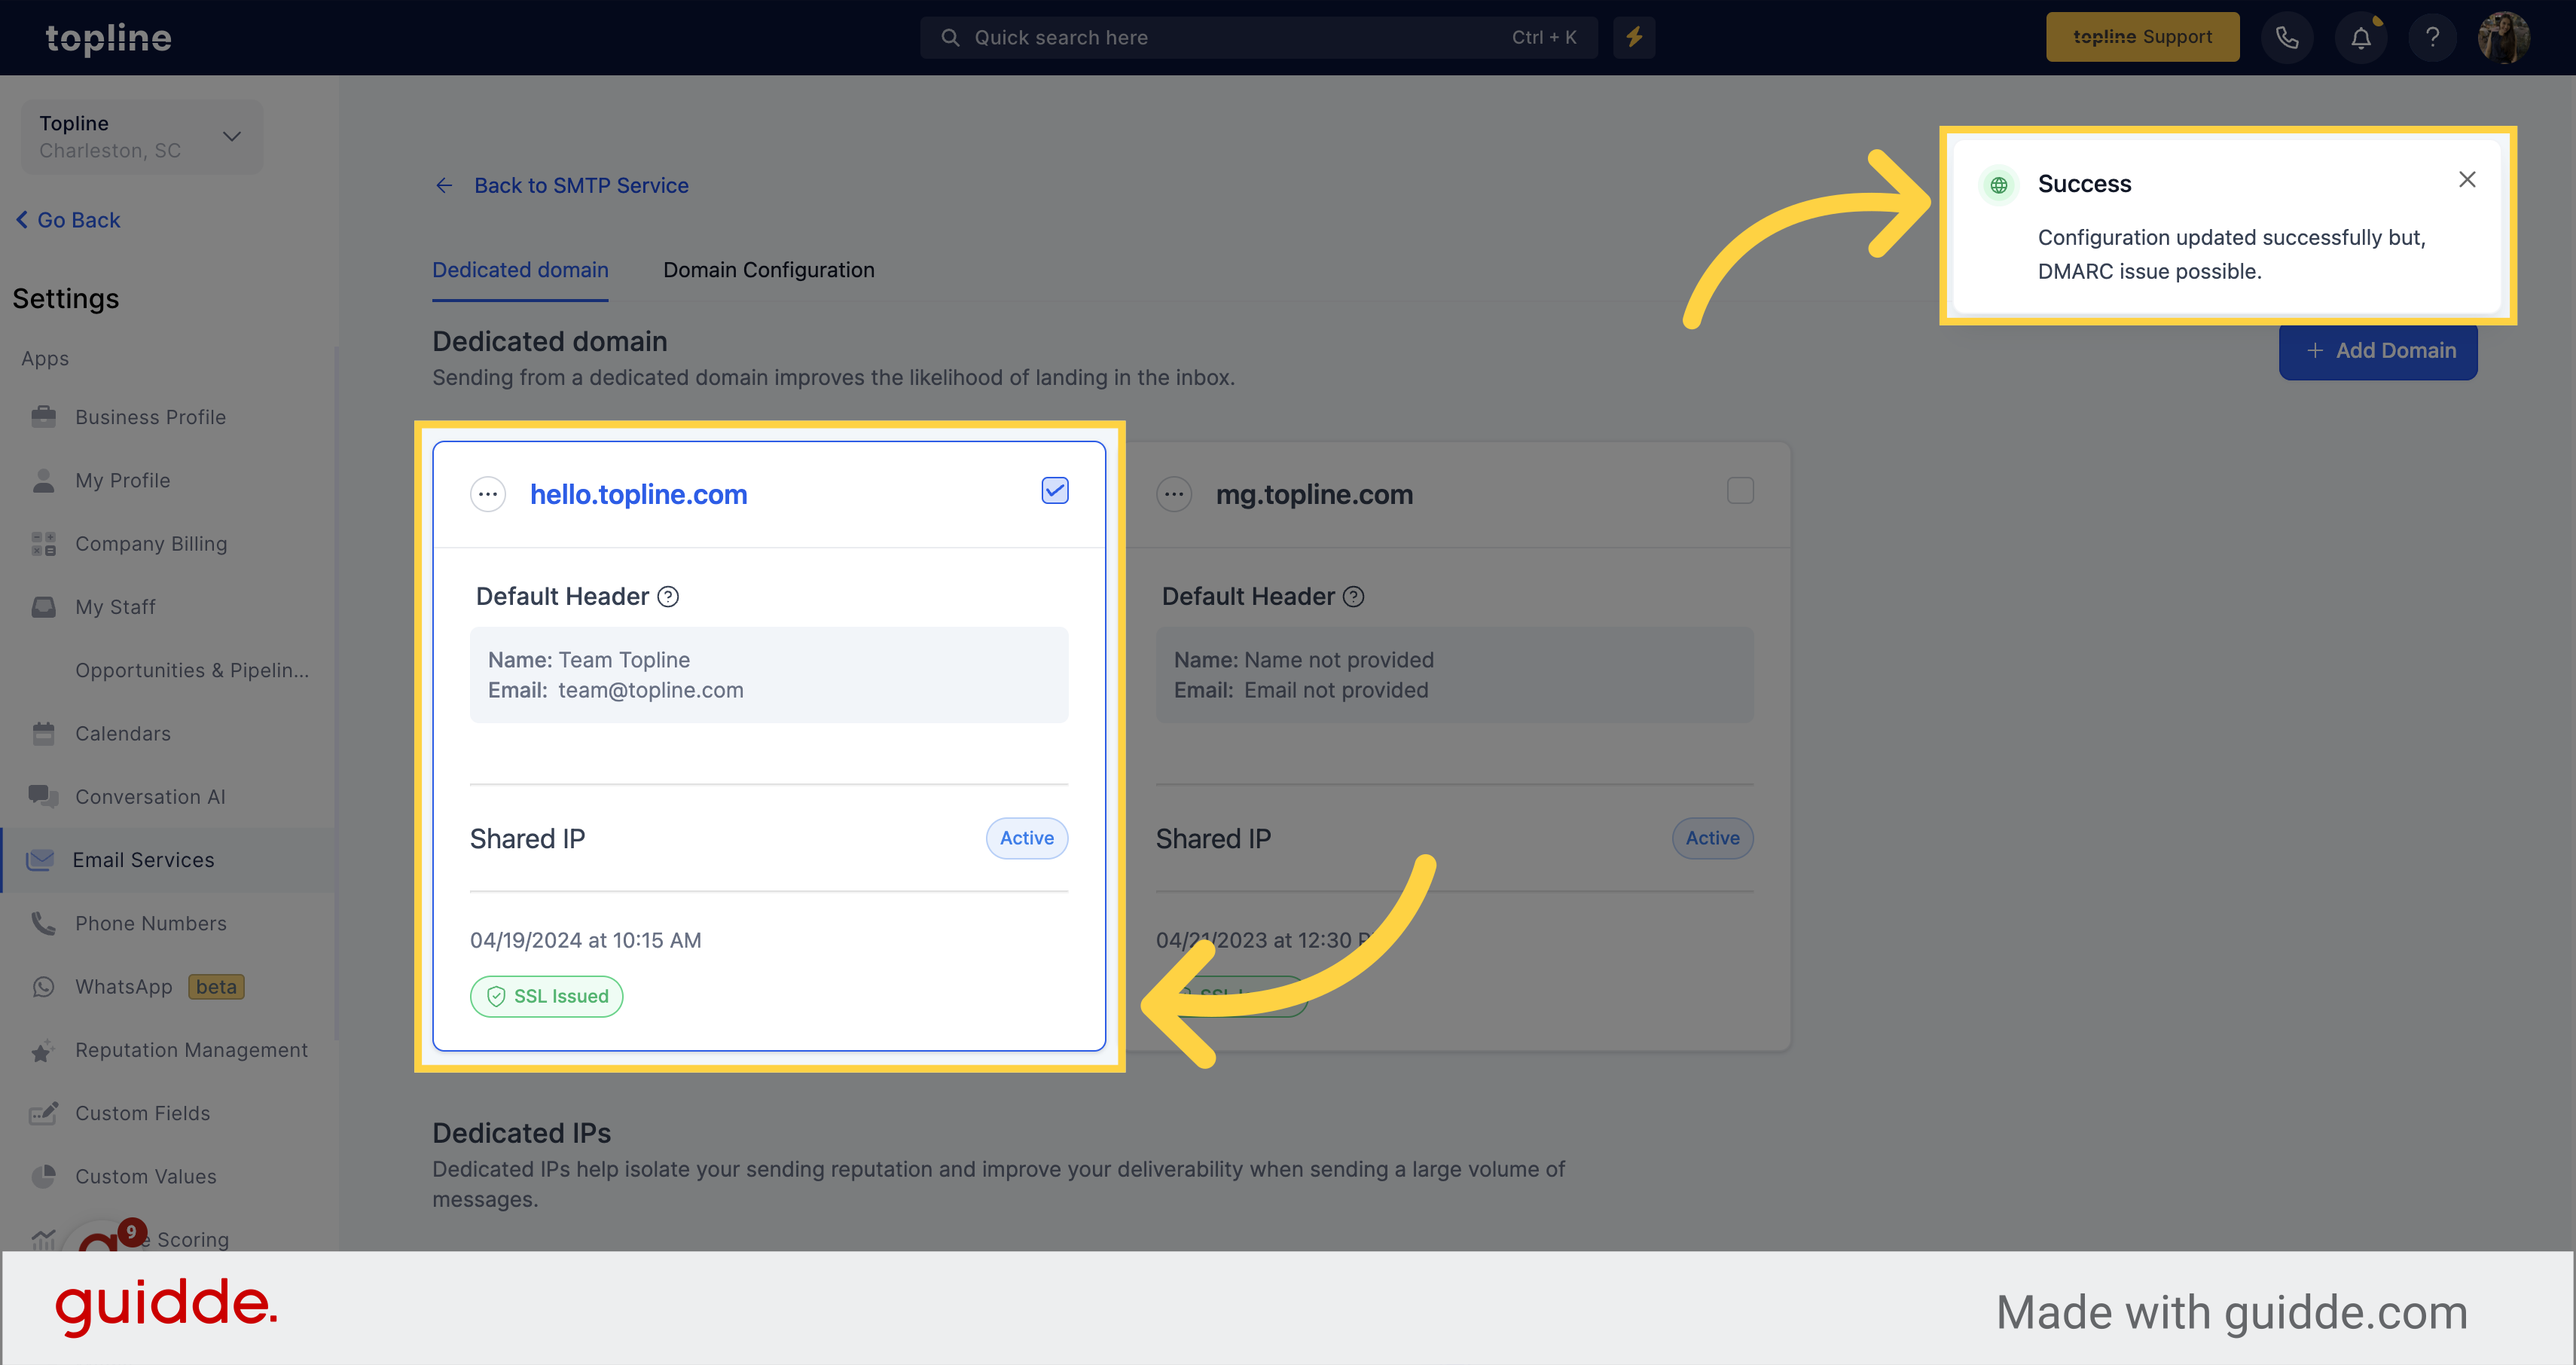
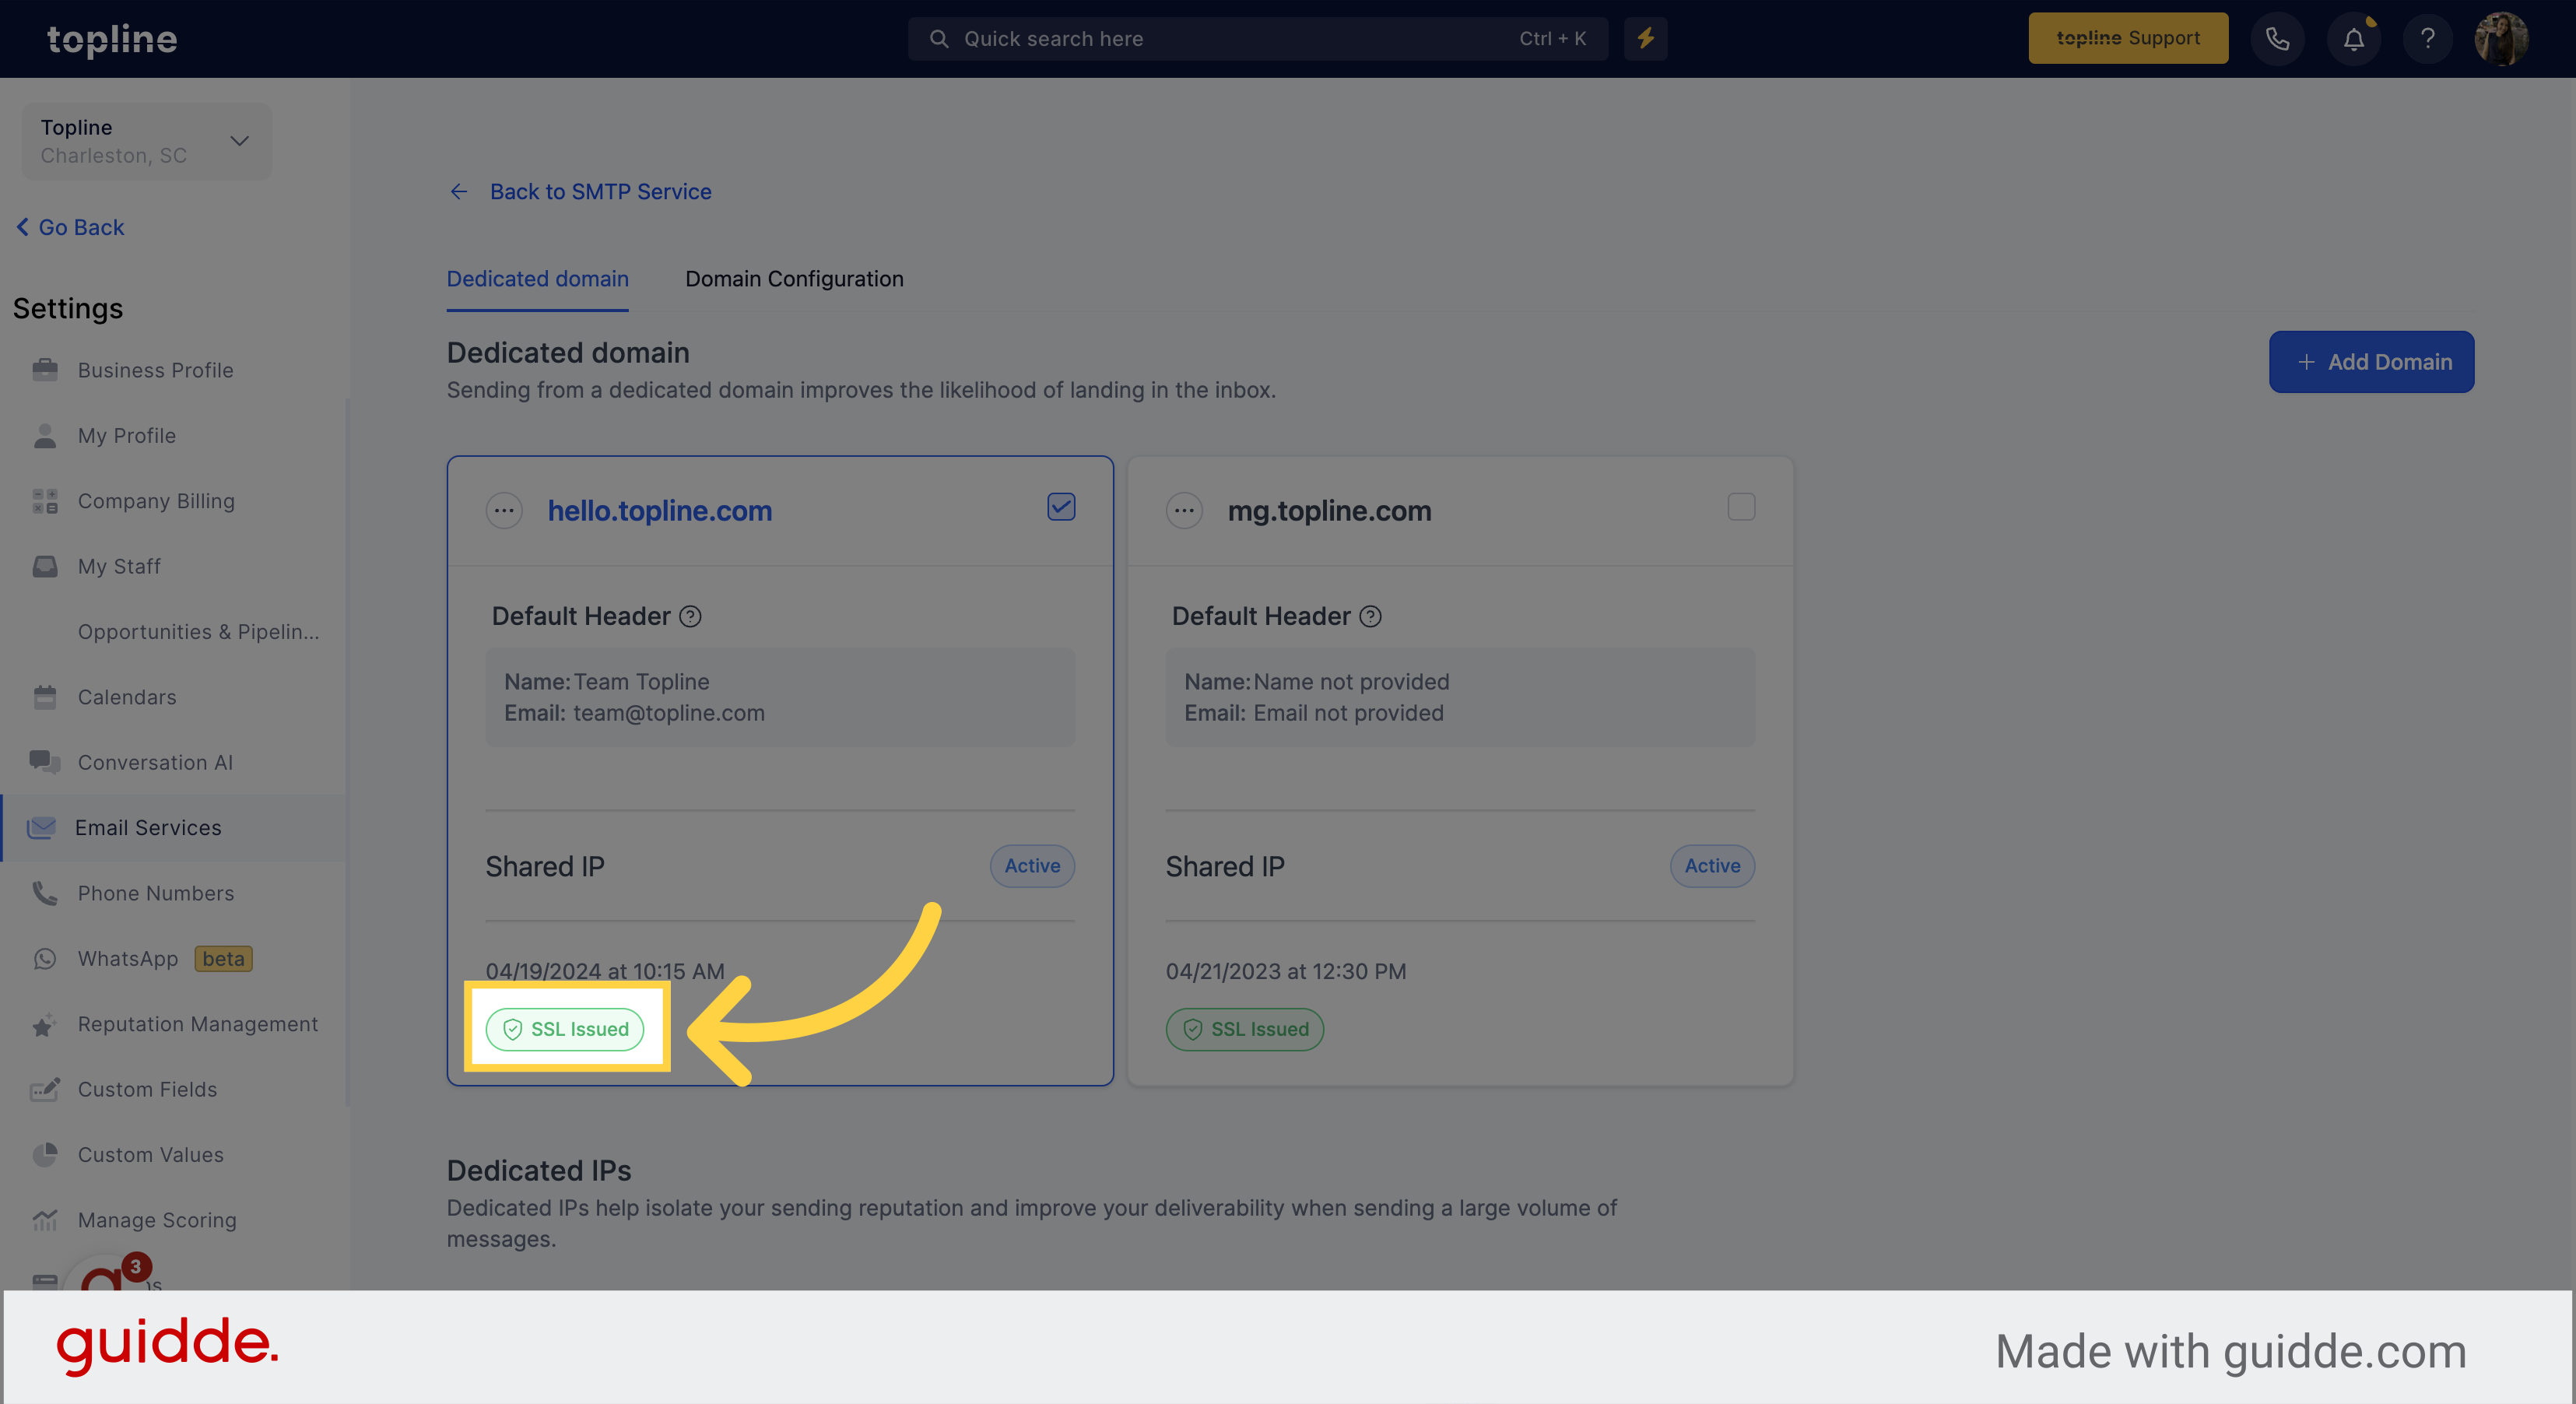
You can visualize the linked domain in this view.
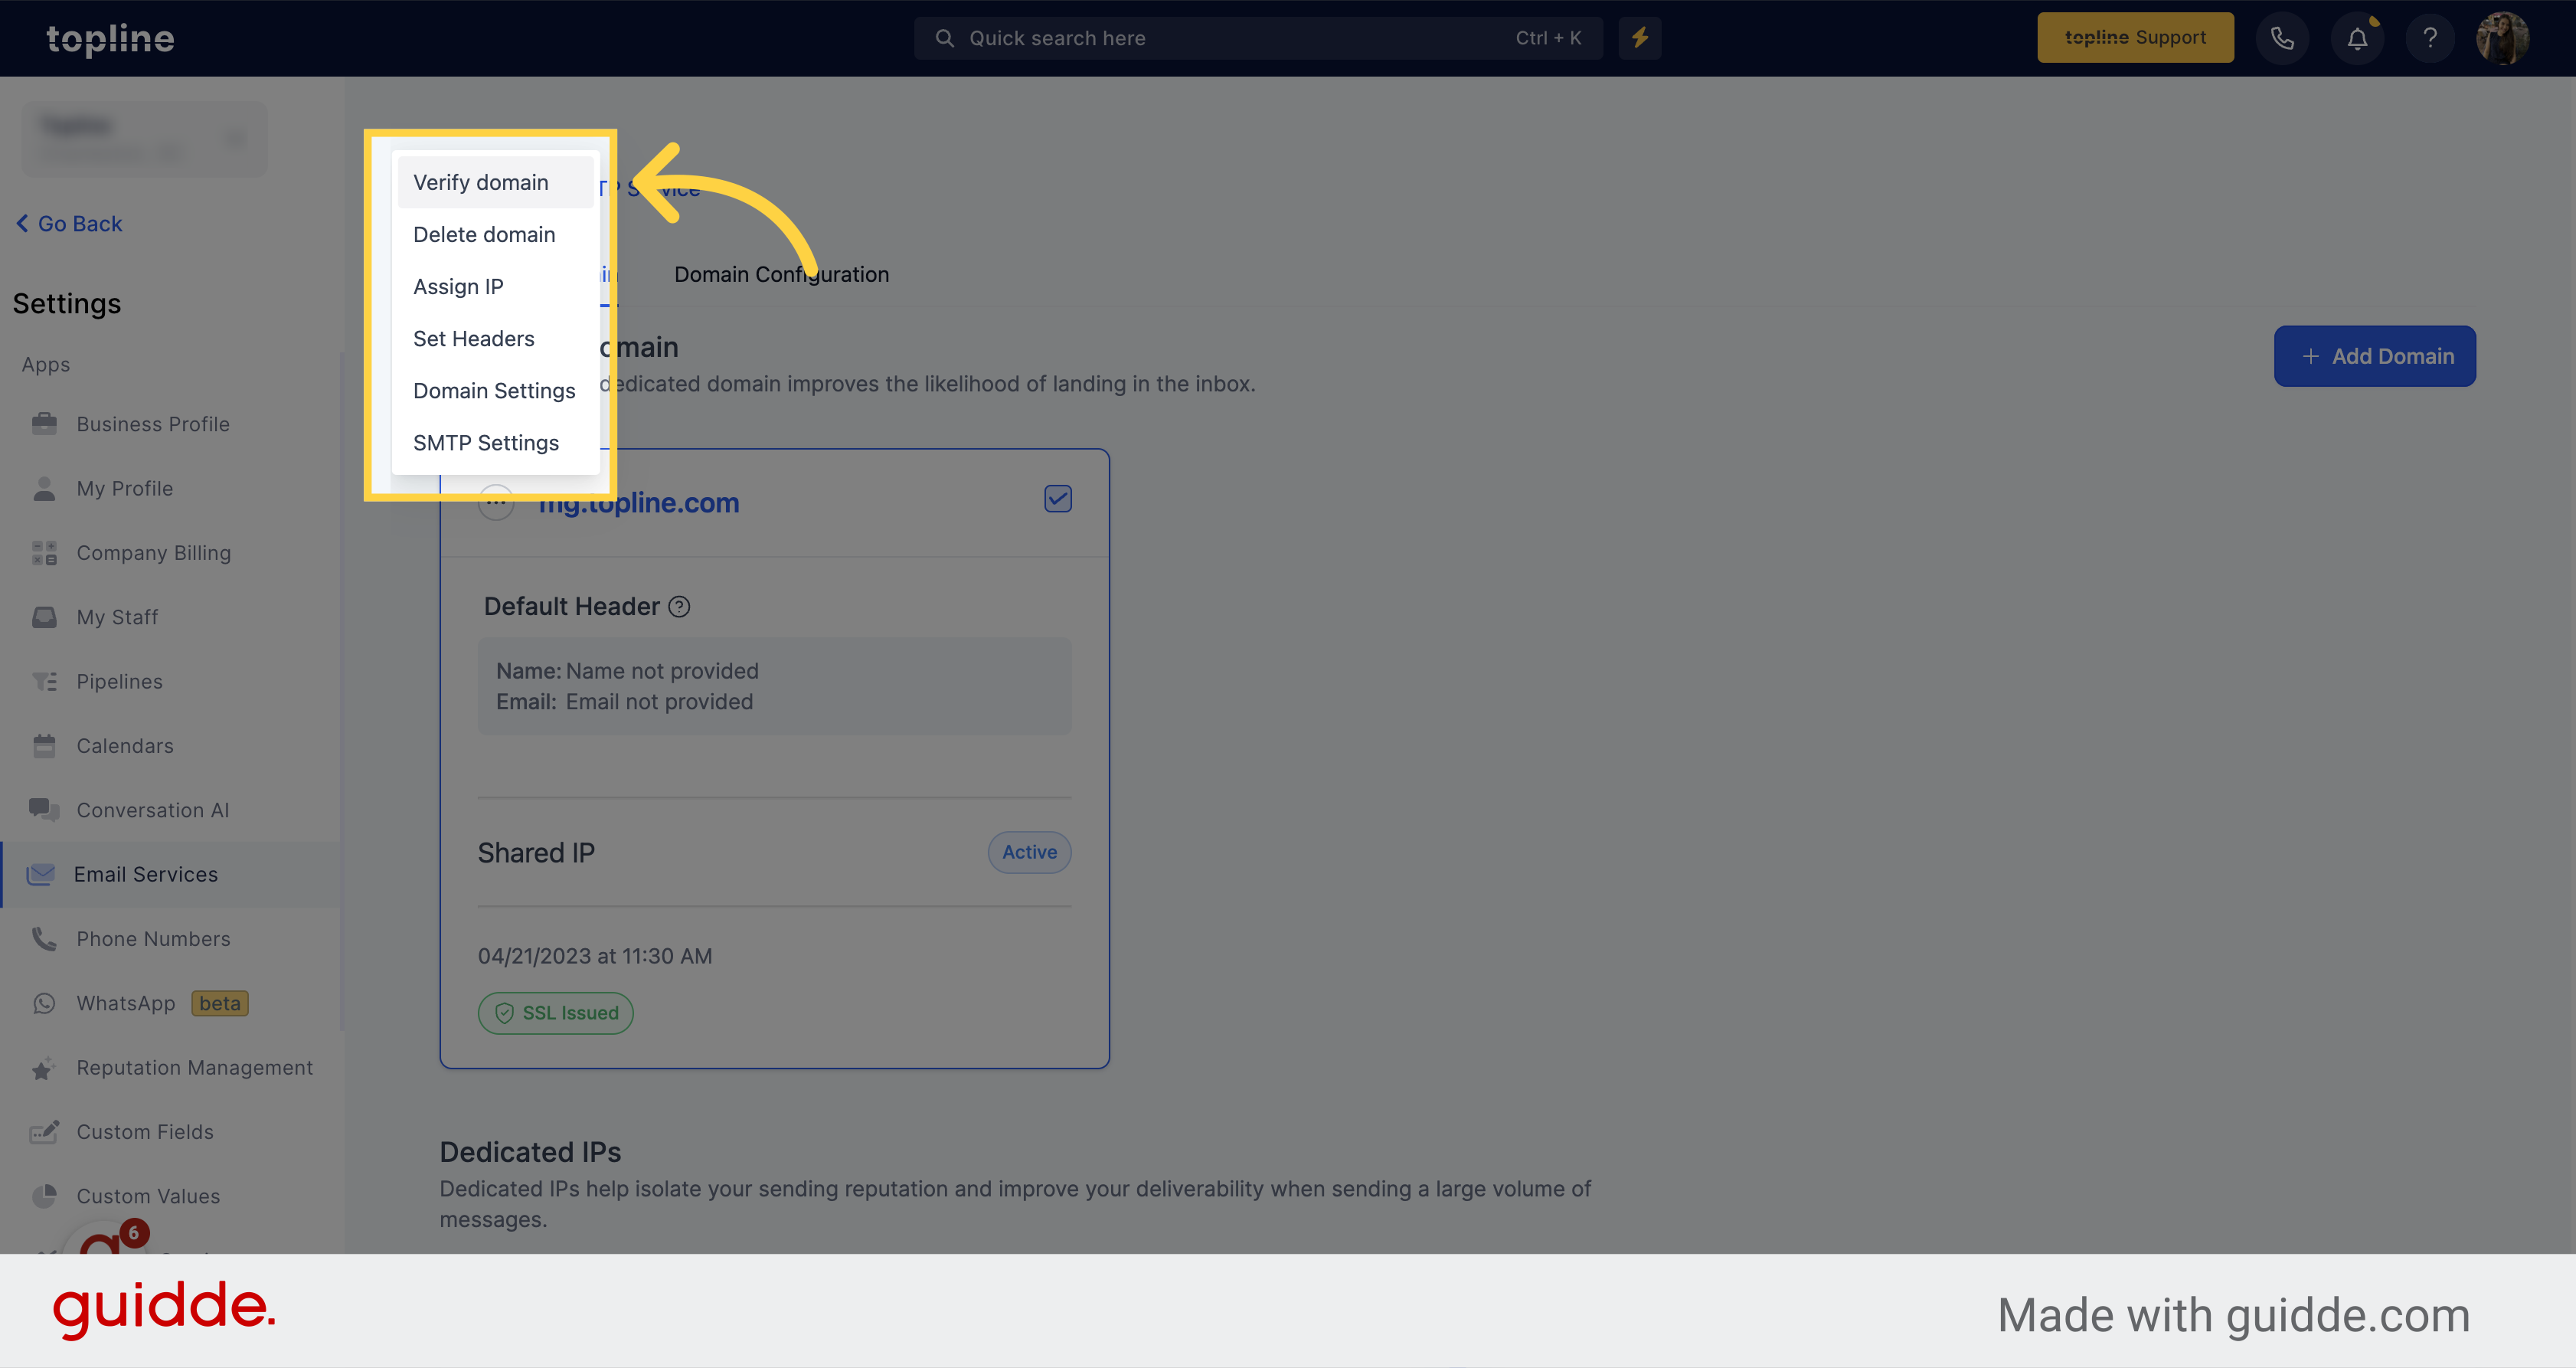
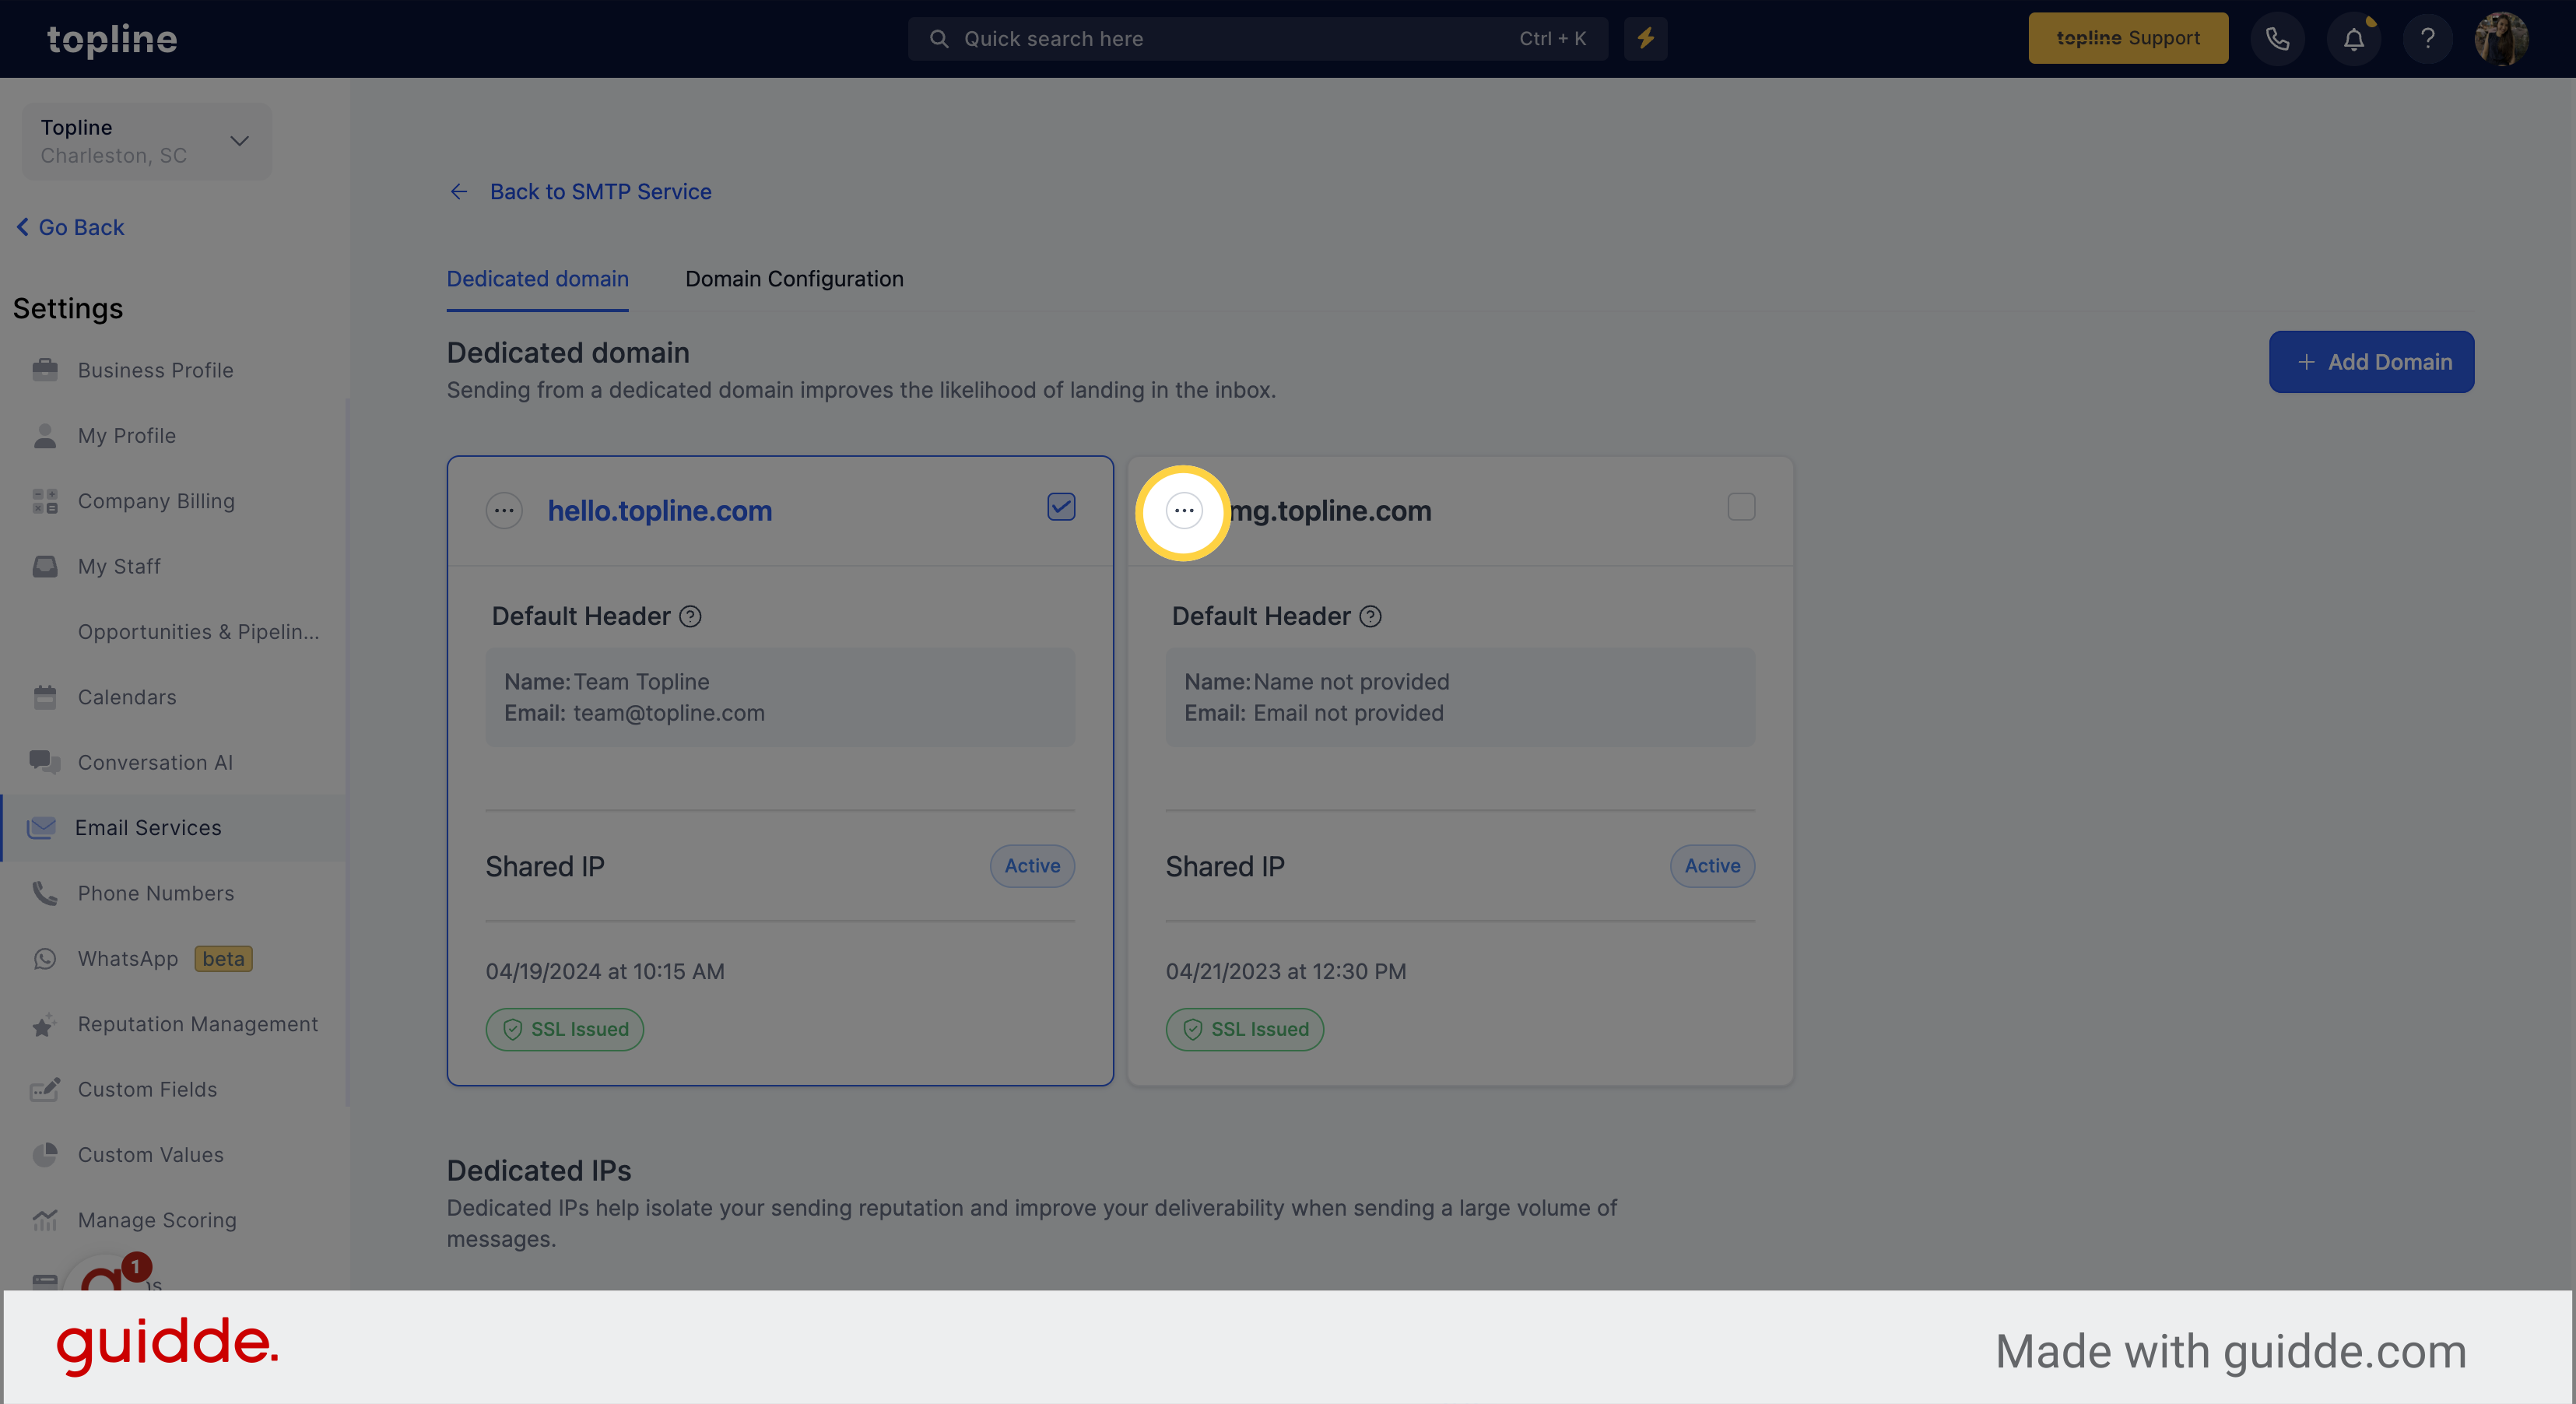
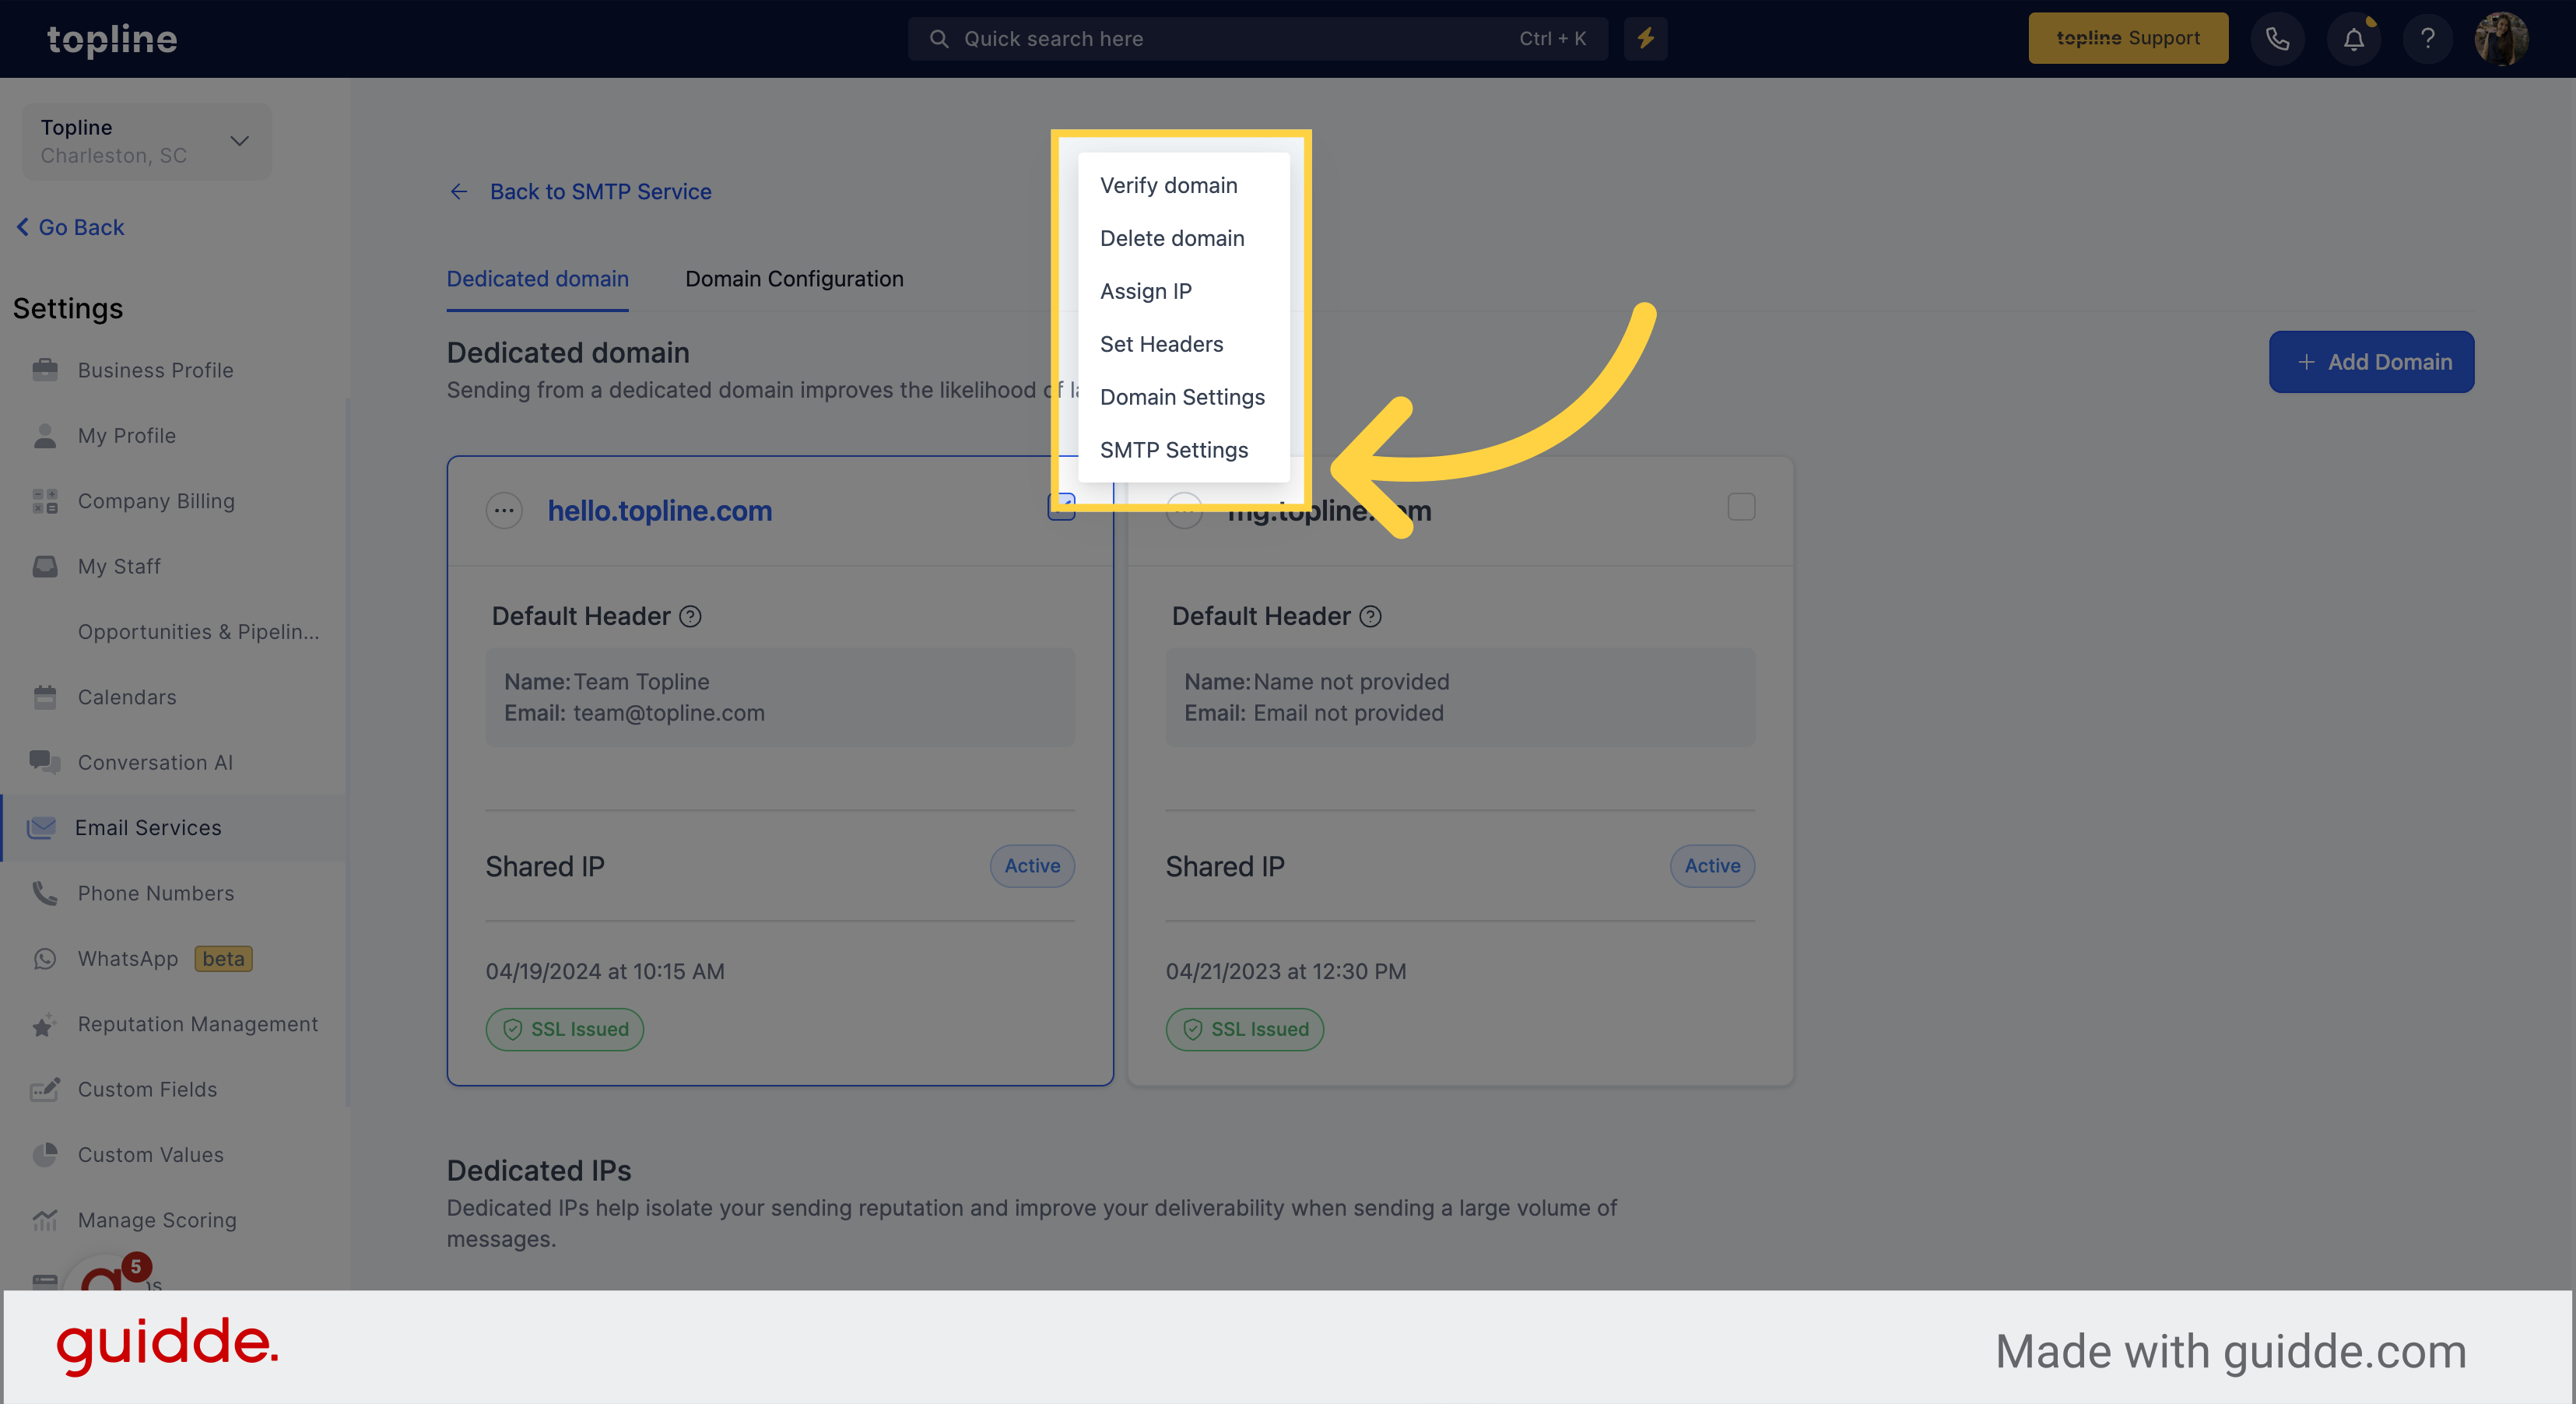
Click on the three dots, and then select the Verify Domain option.
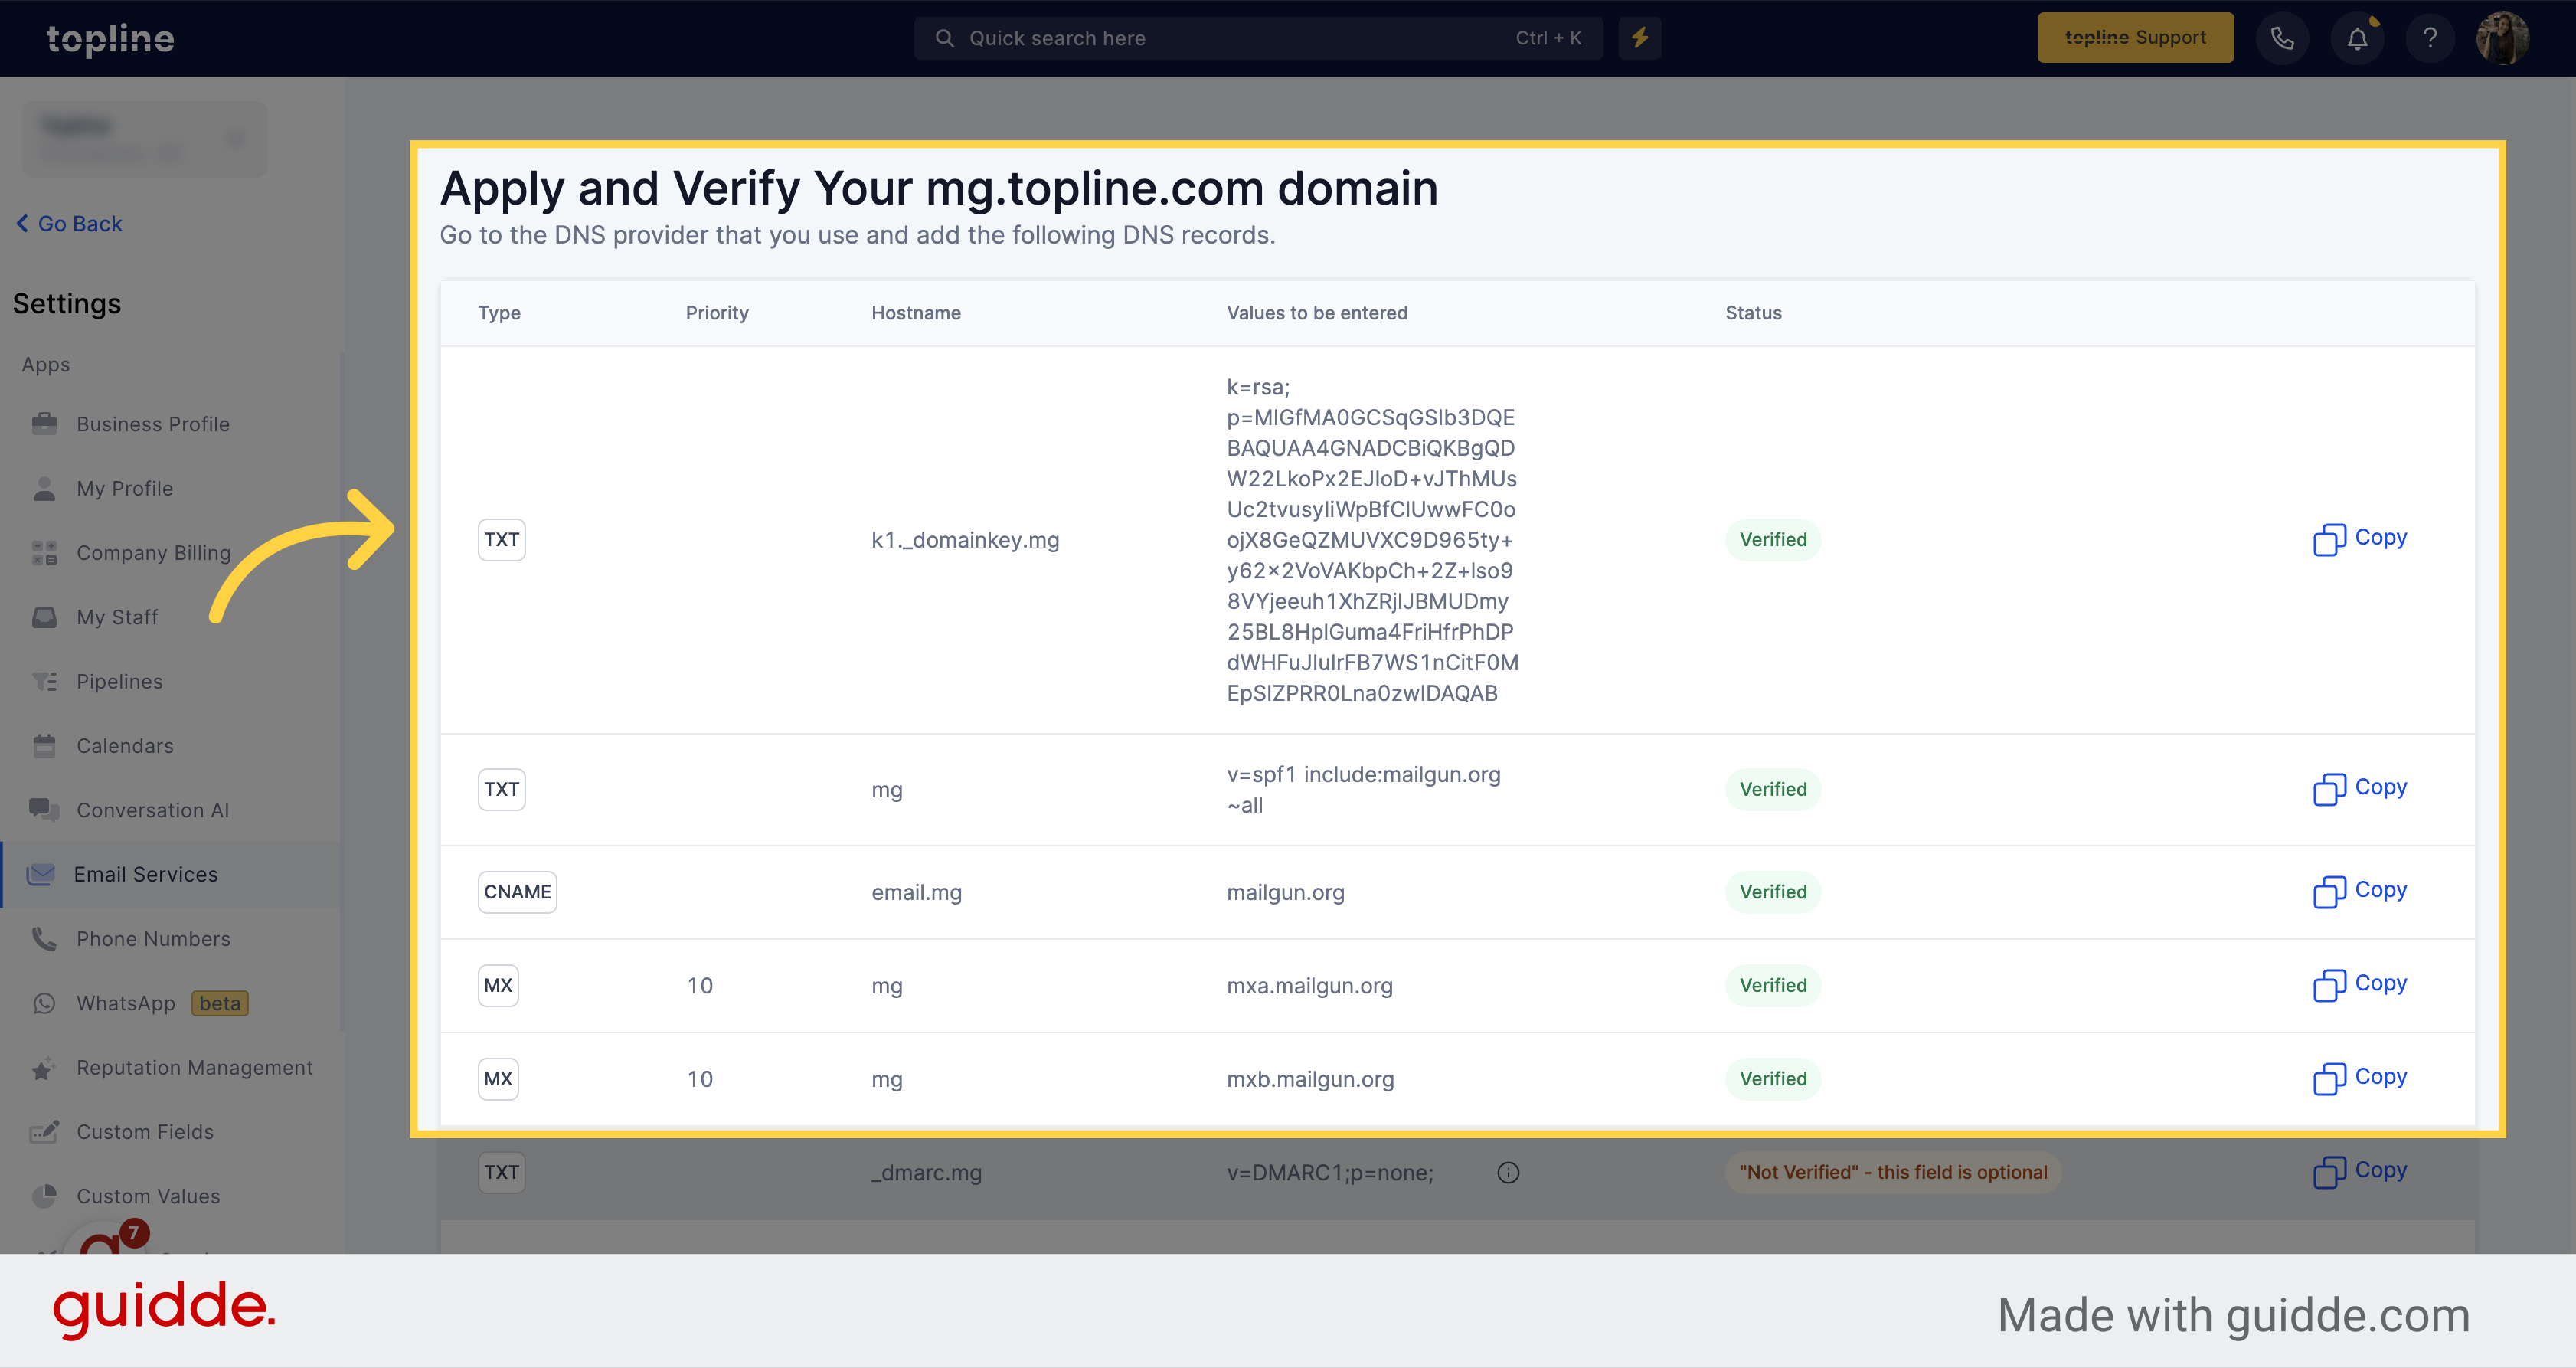
Check the status of your domain and make sure everything is verified.
This guide will walk you through setting up specific sending sub-domains for workflows, bulk actions, email campaigns, and more. Follow the engaging instructions to efficiently configure the required settings in the application.
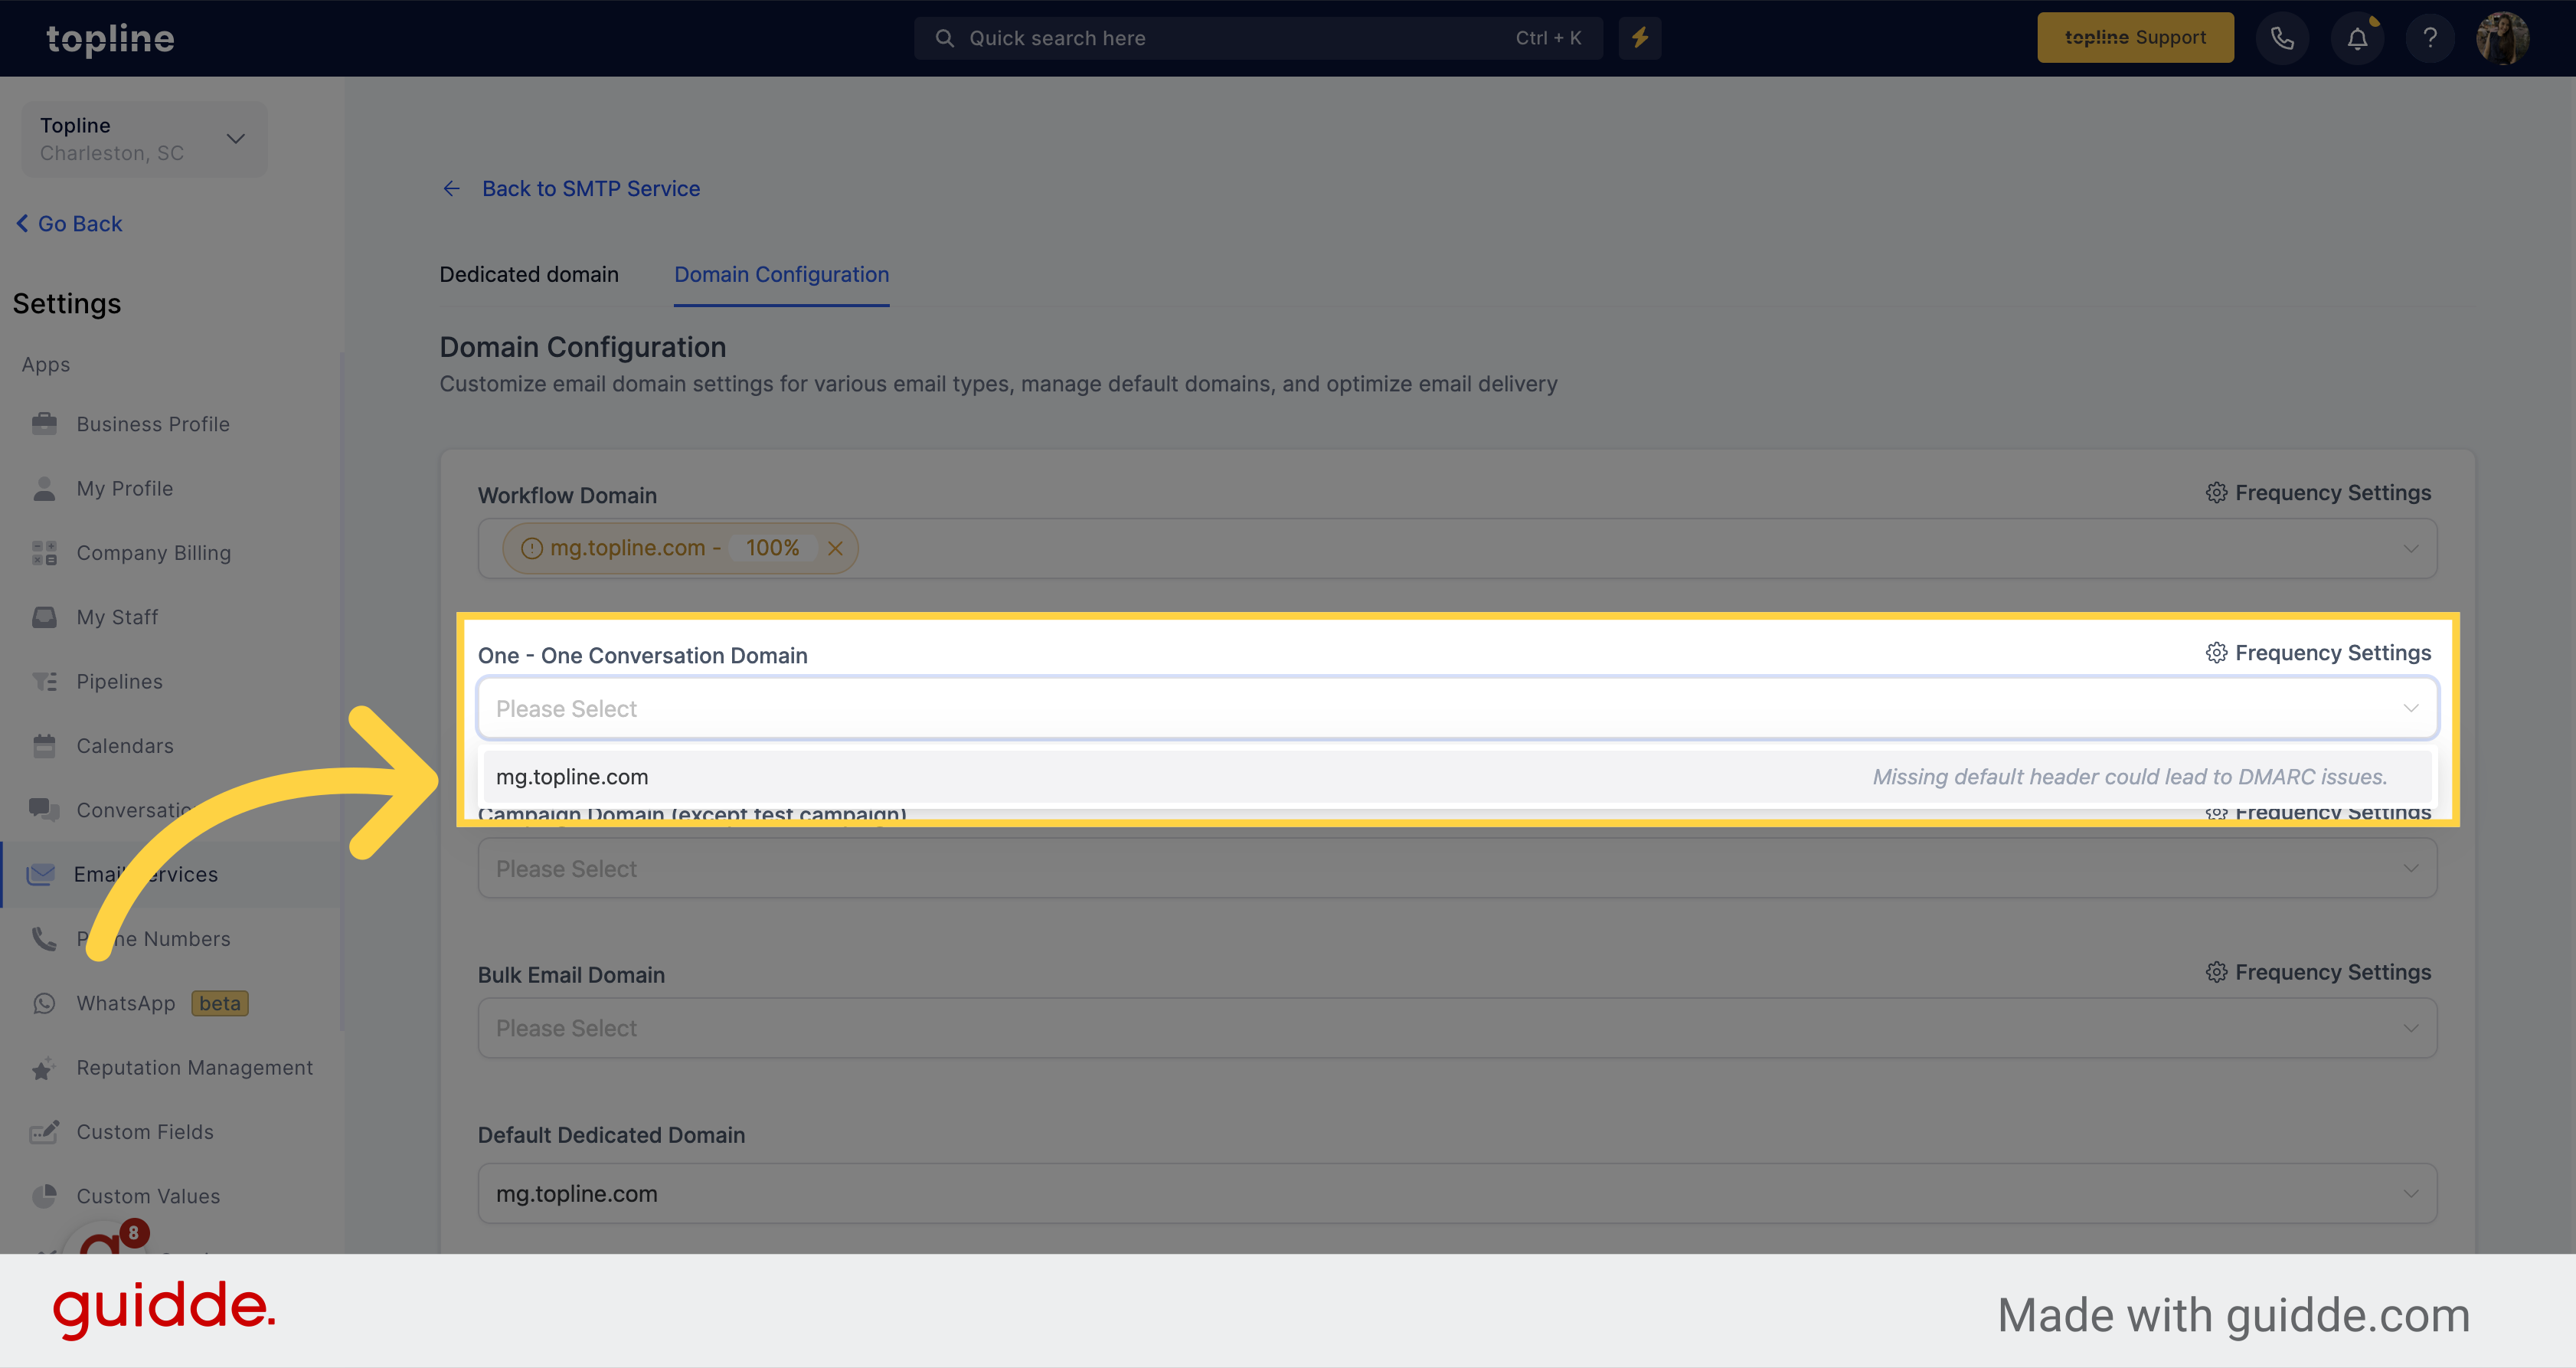
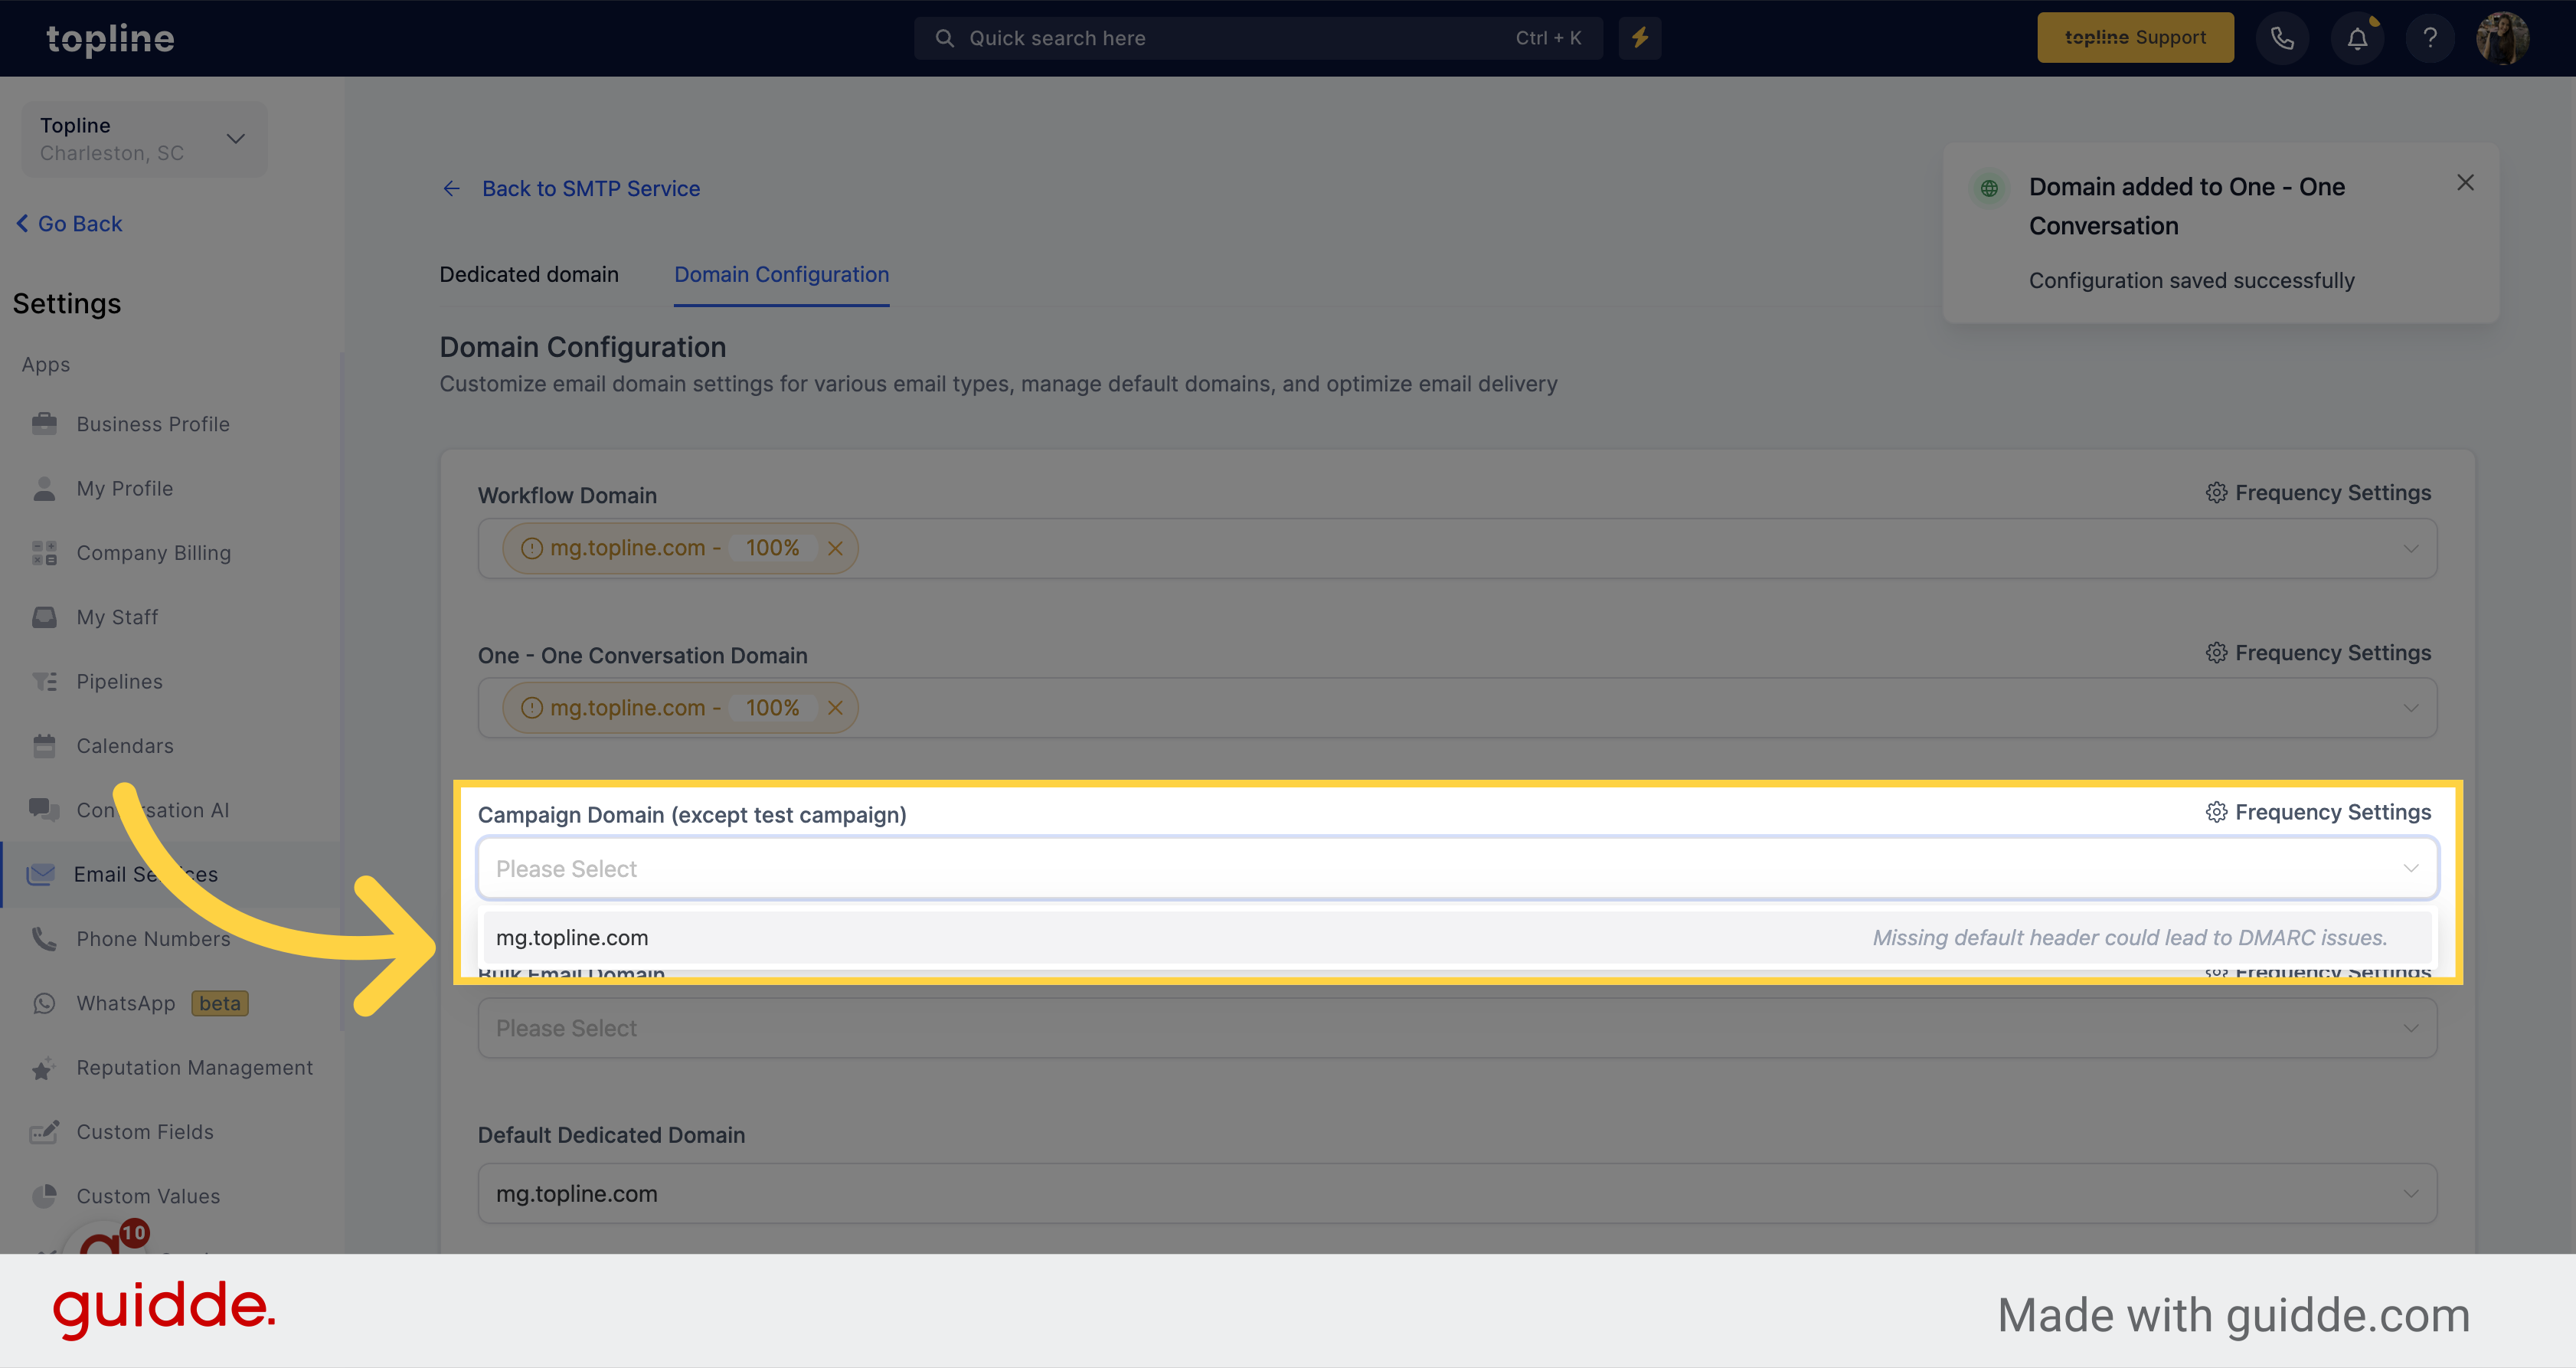
Currently domains can be assigned to Campaign, Bulk email, One-One Conversation and Workflow emails.
Default dedicated domain will be used for all other emails.Click on this option to select the specific domain and IP.

Select the Domain Configuration option on the upper menu.
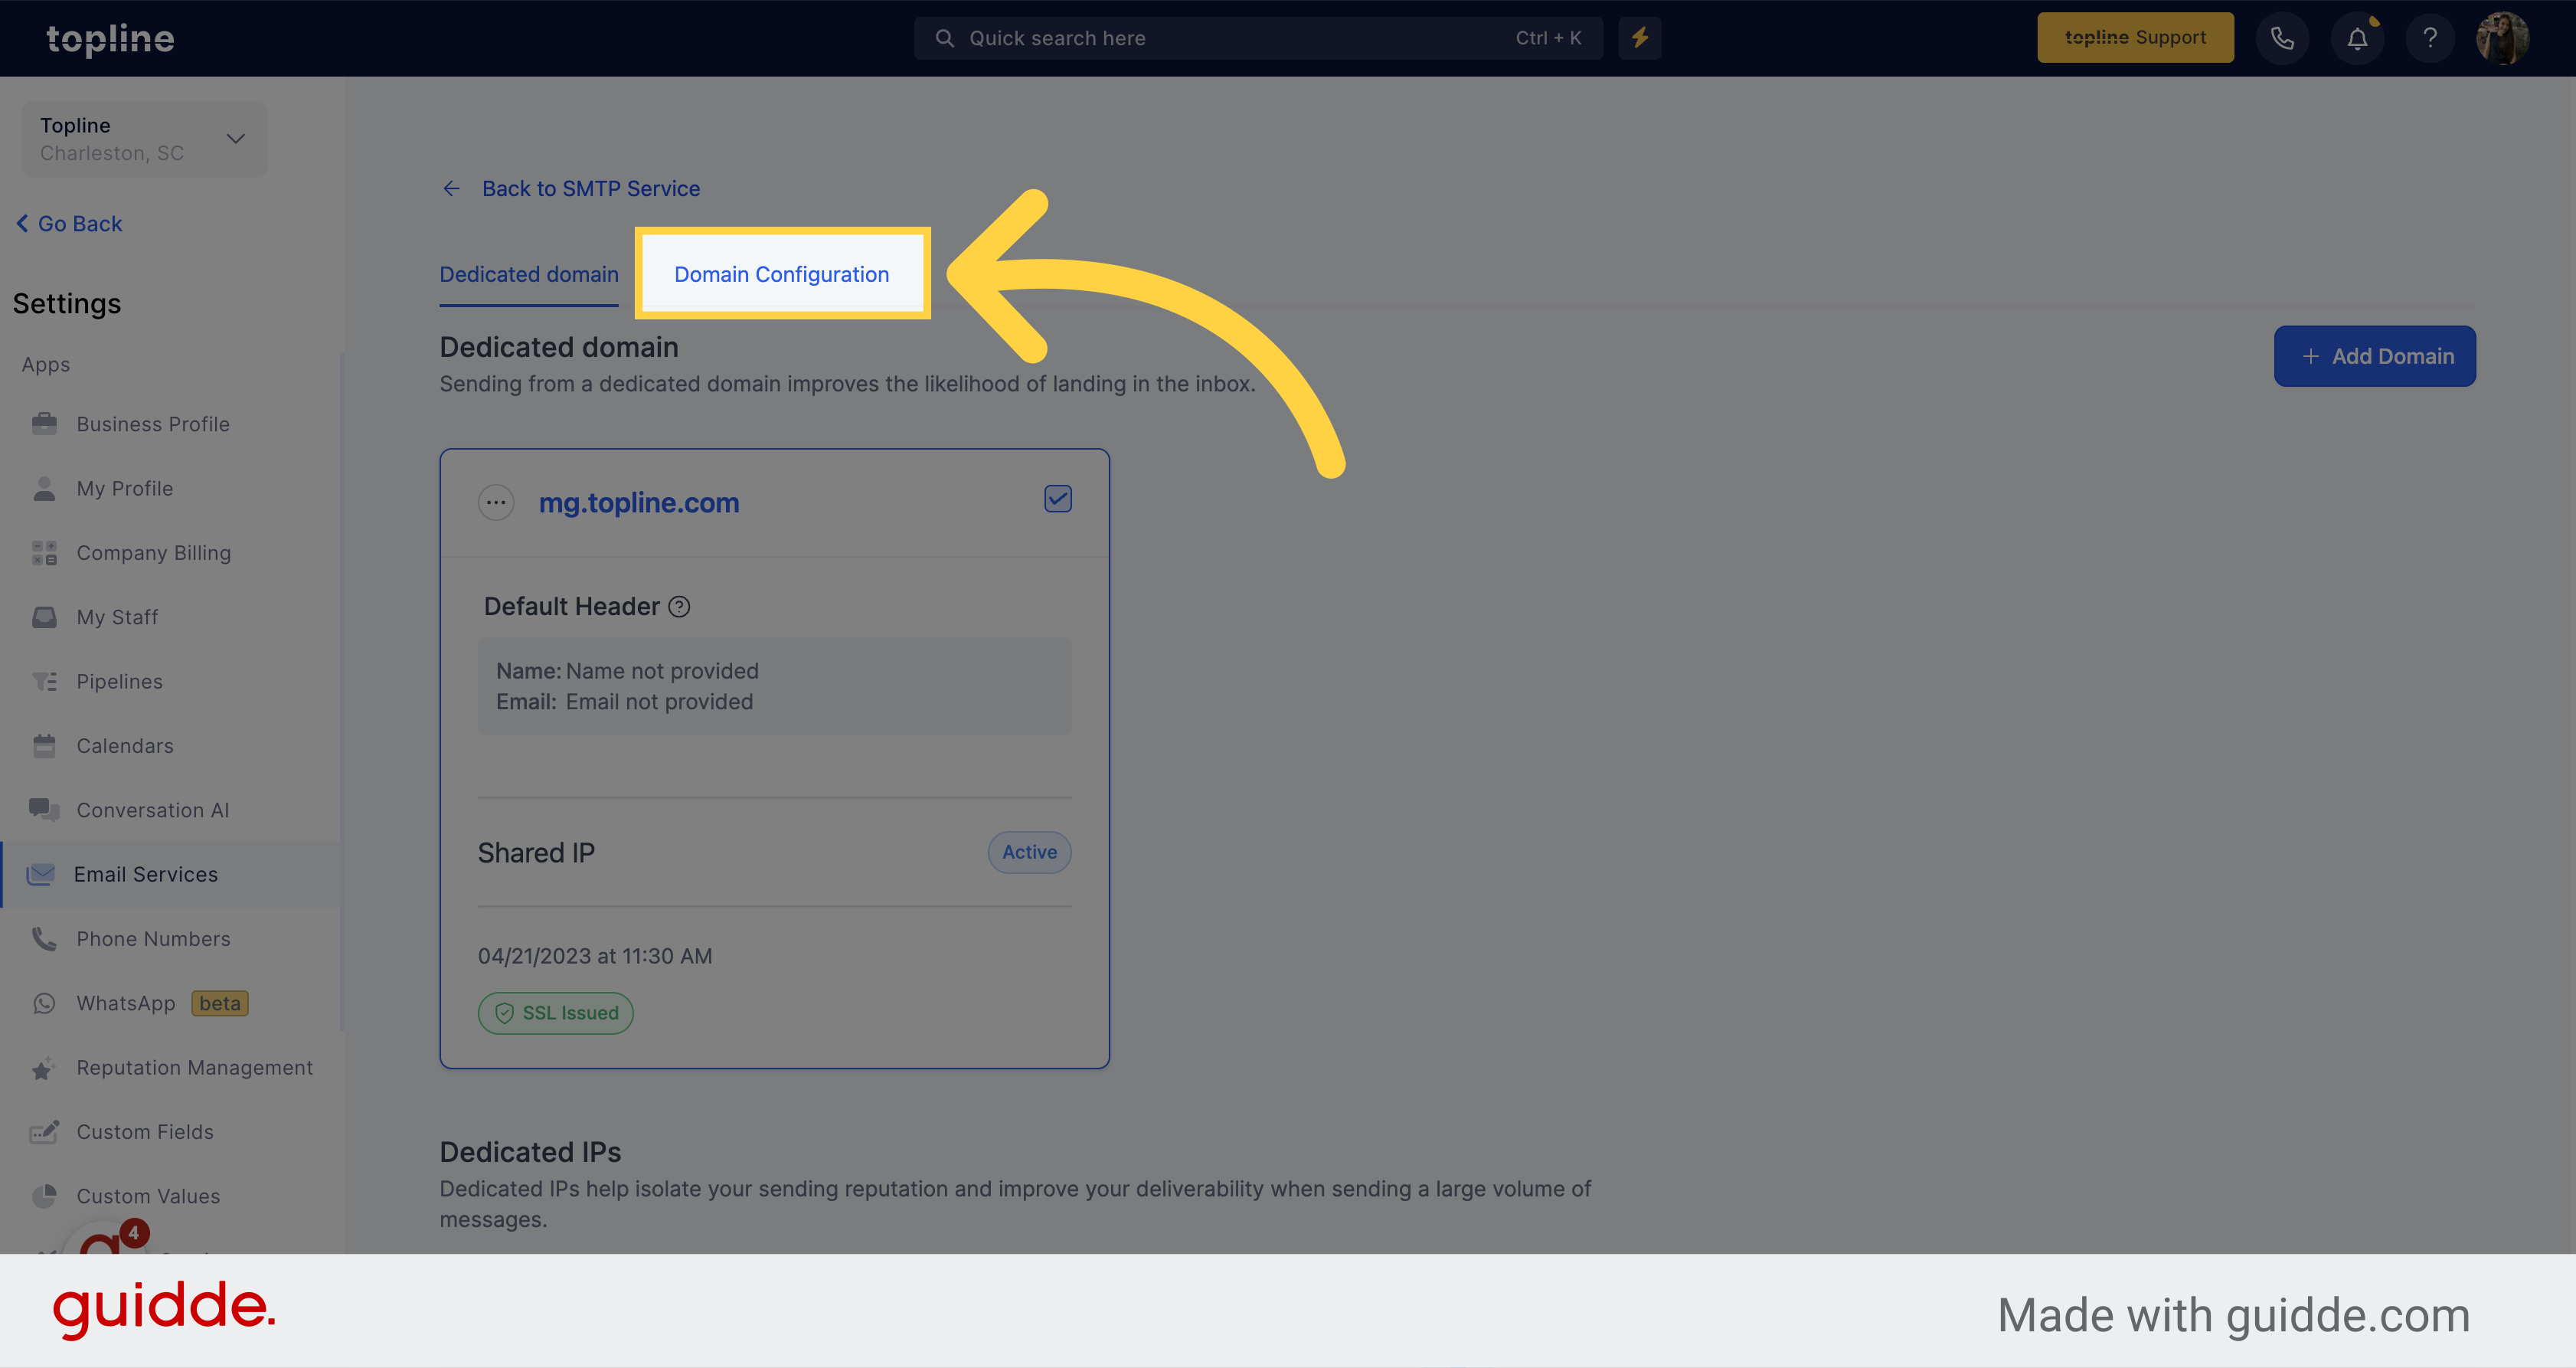
Select from the dropdown the domain you want to configure.
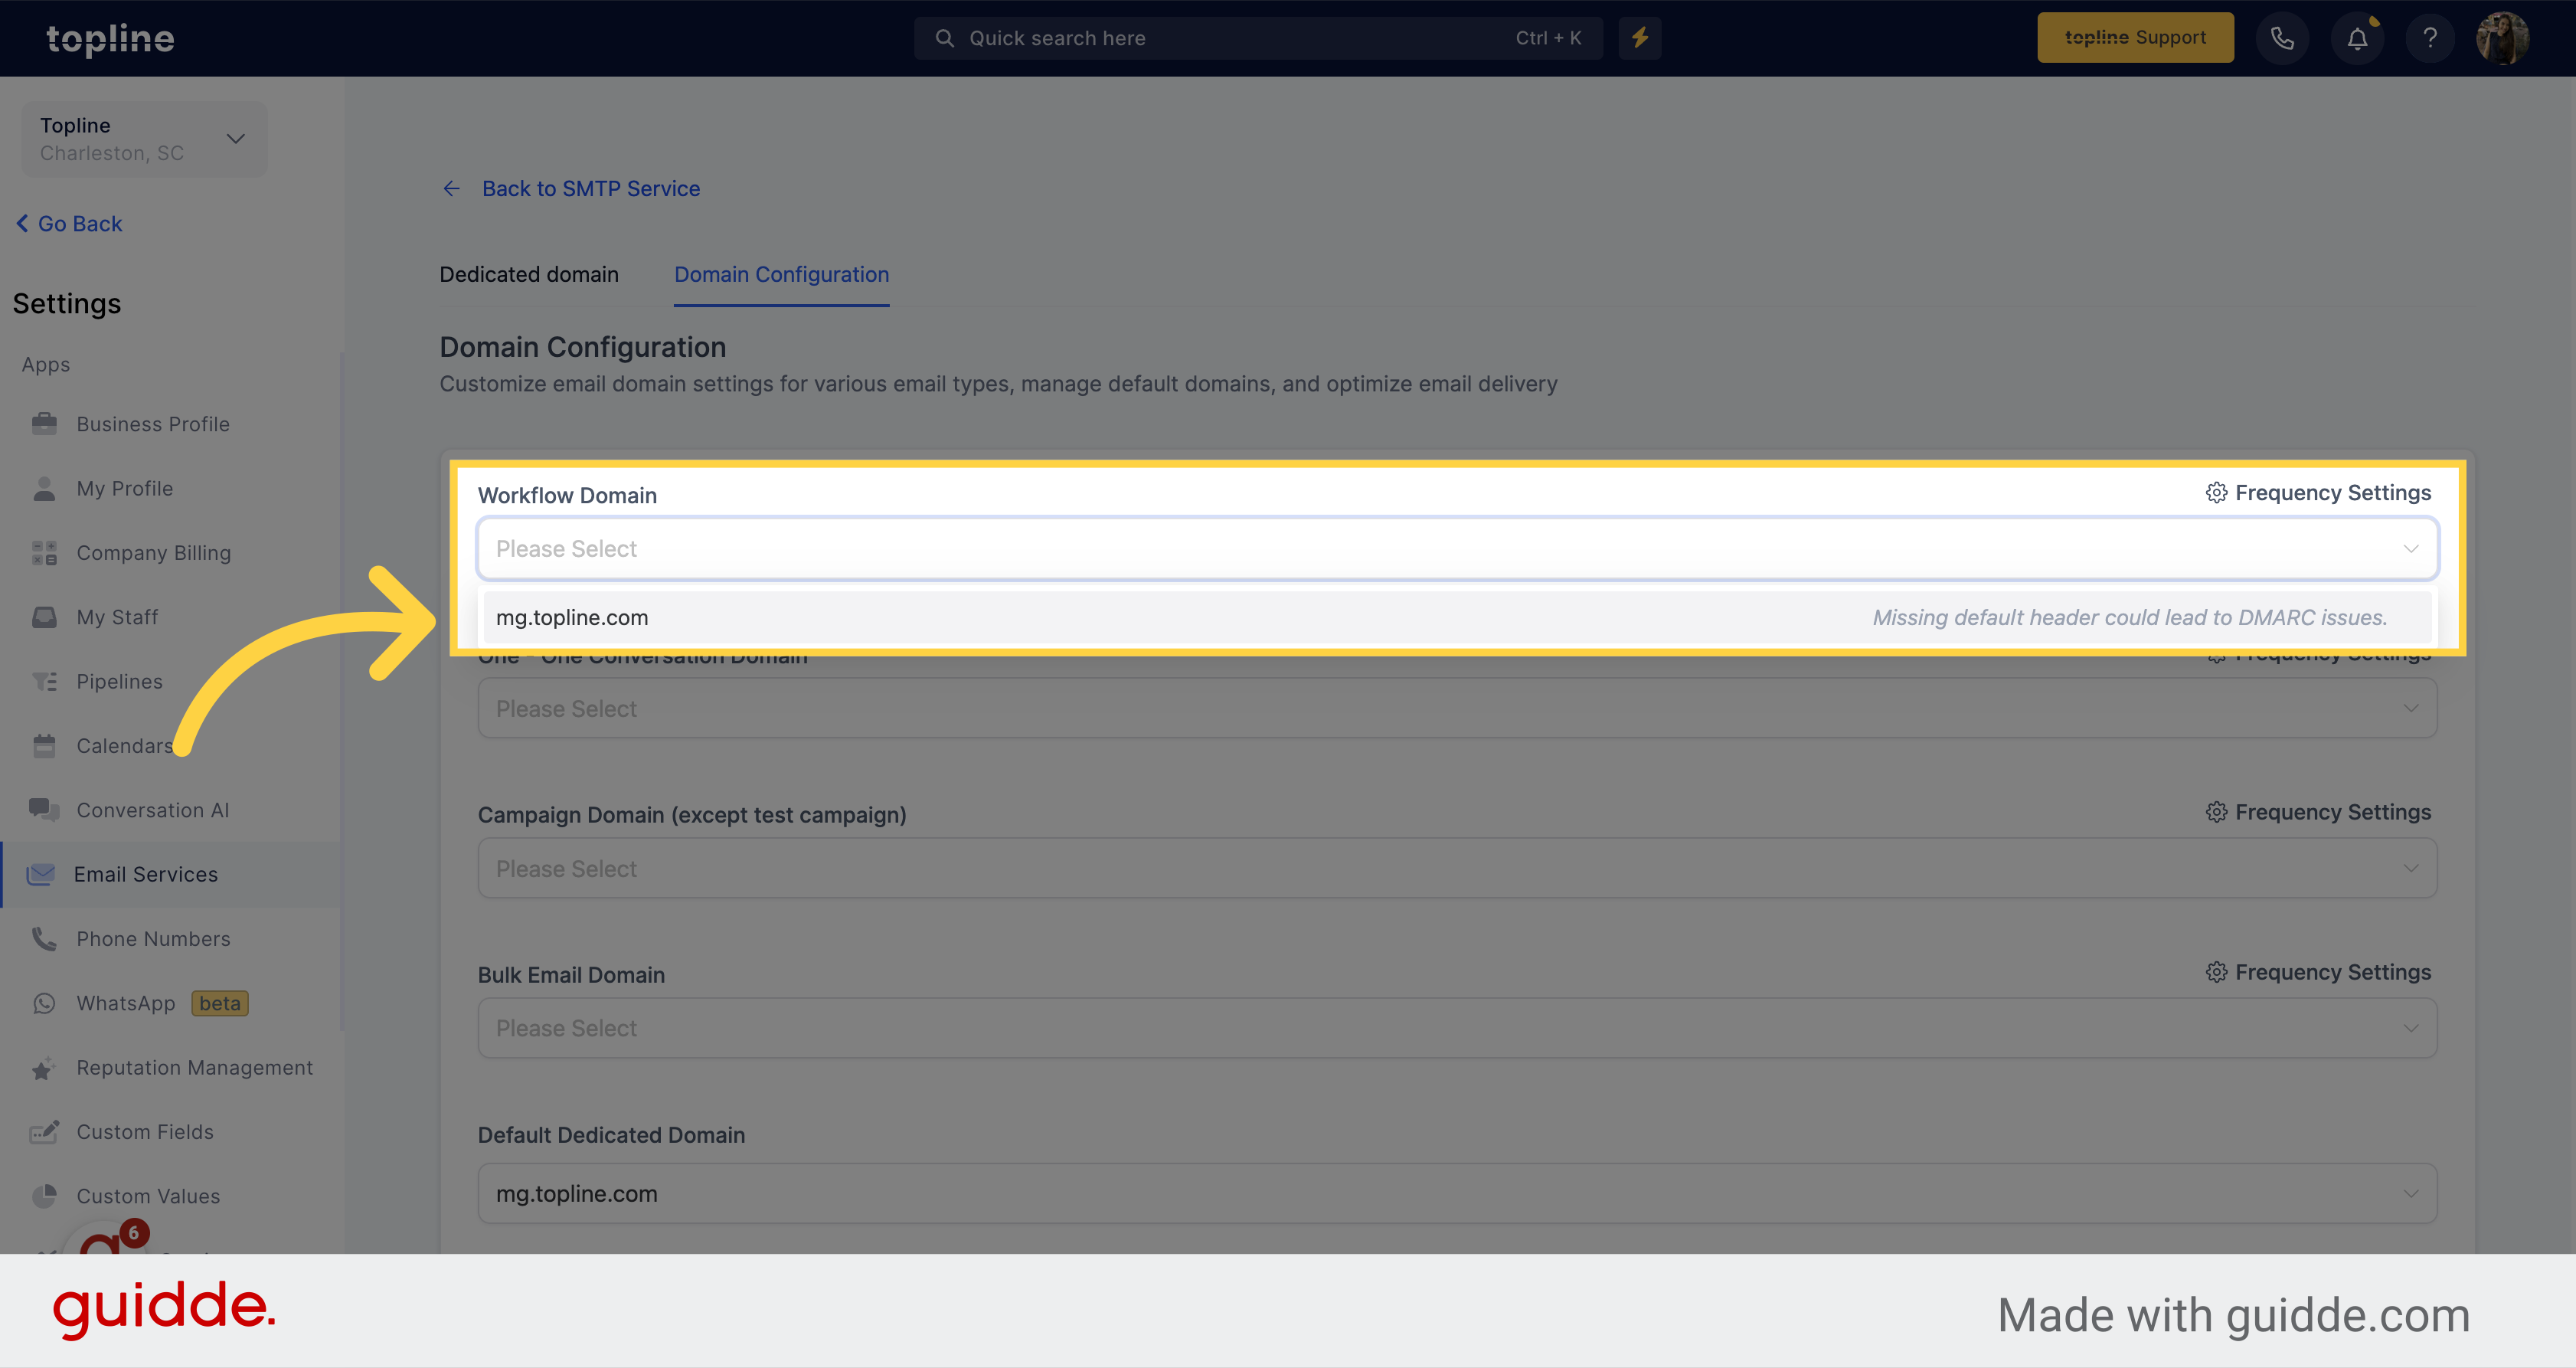
Select the needed domain from the dropdown.
Select the domain you want to link to campaigns.
Select the domain you want to add for bulk send emails.
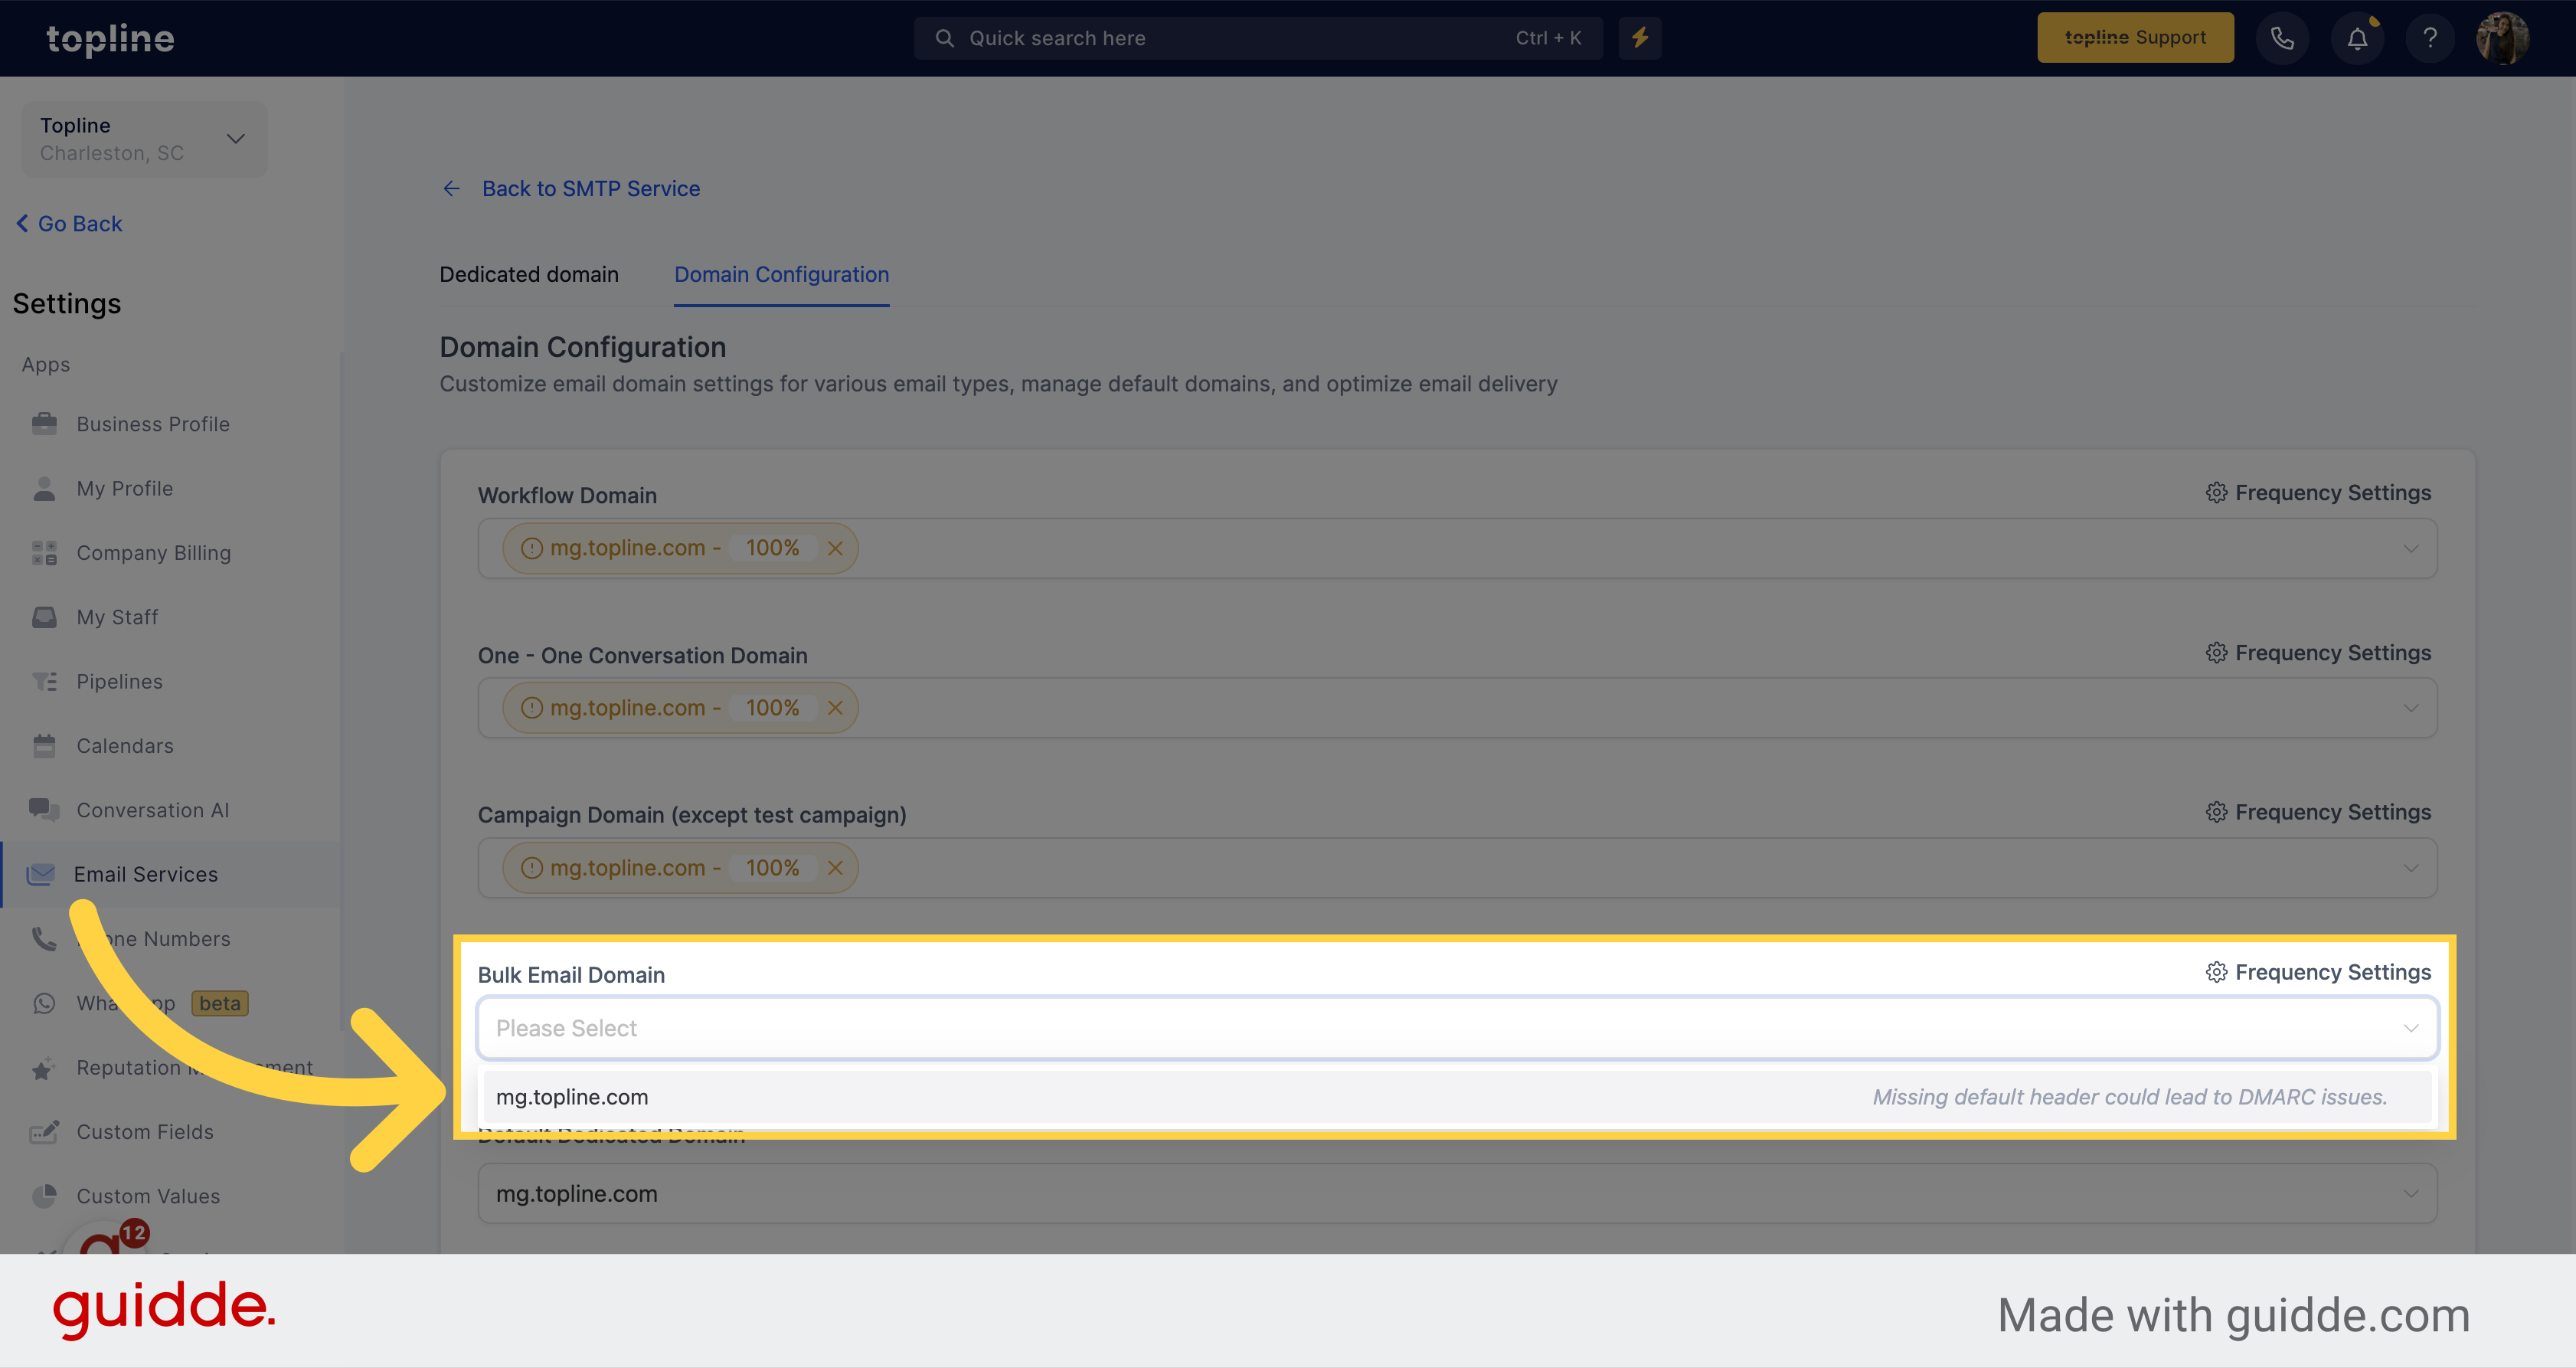
This functionality allows users to allocate a percentage of their scheduled emails to be sent from each domain they've added.
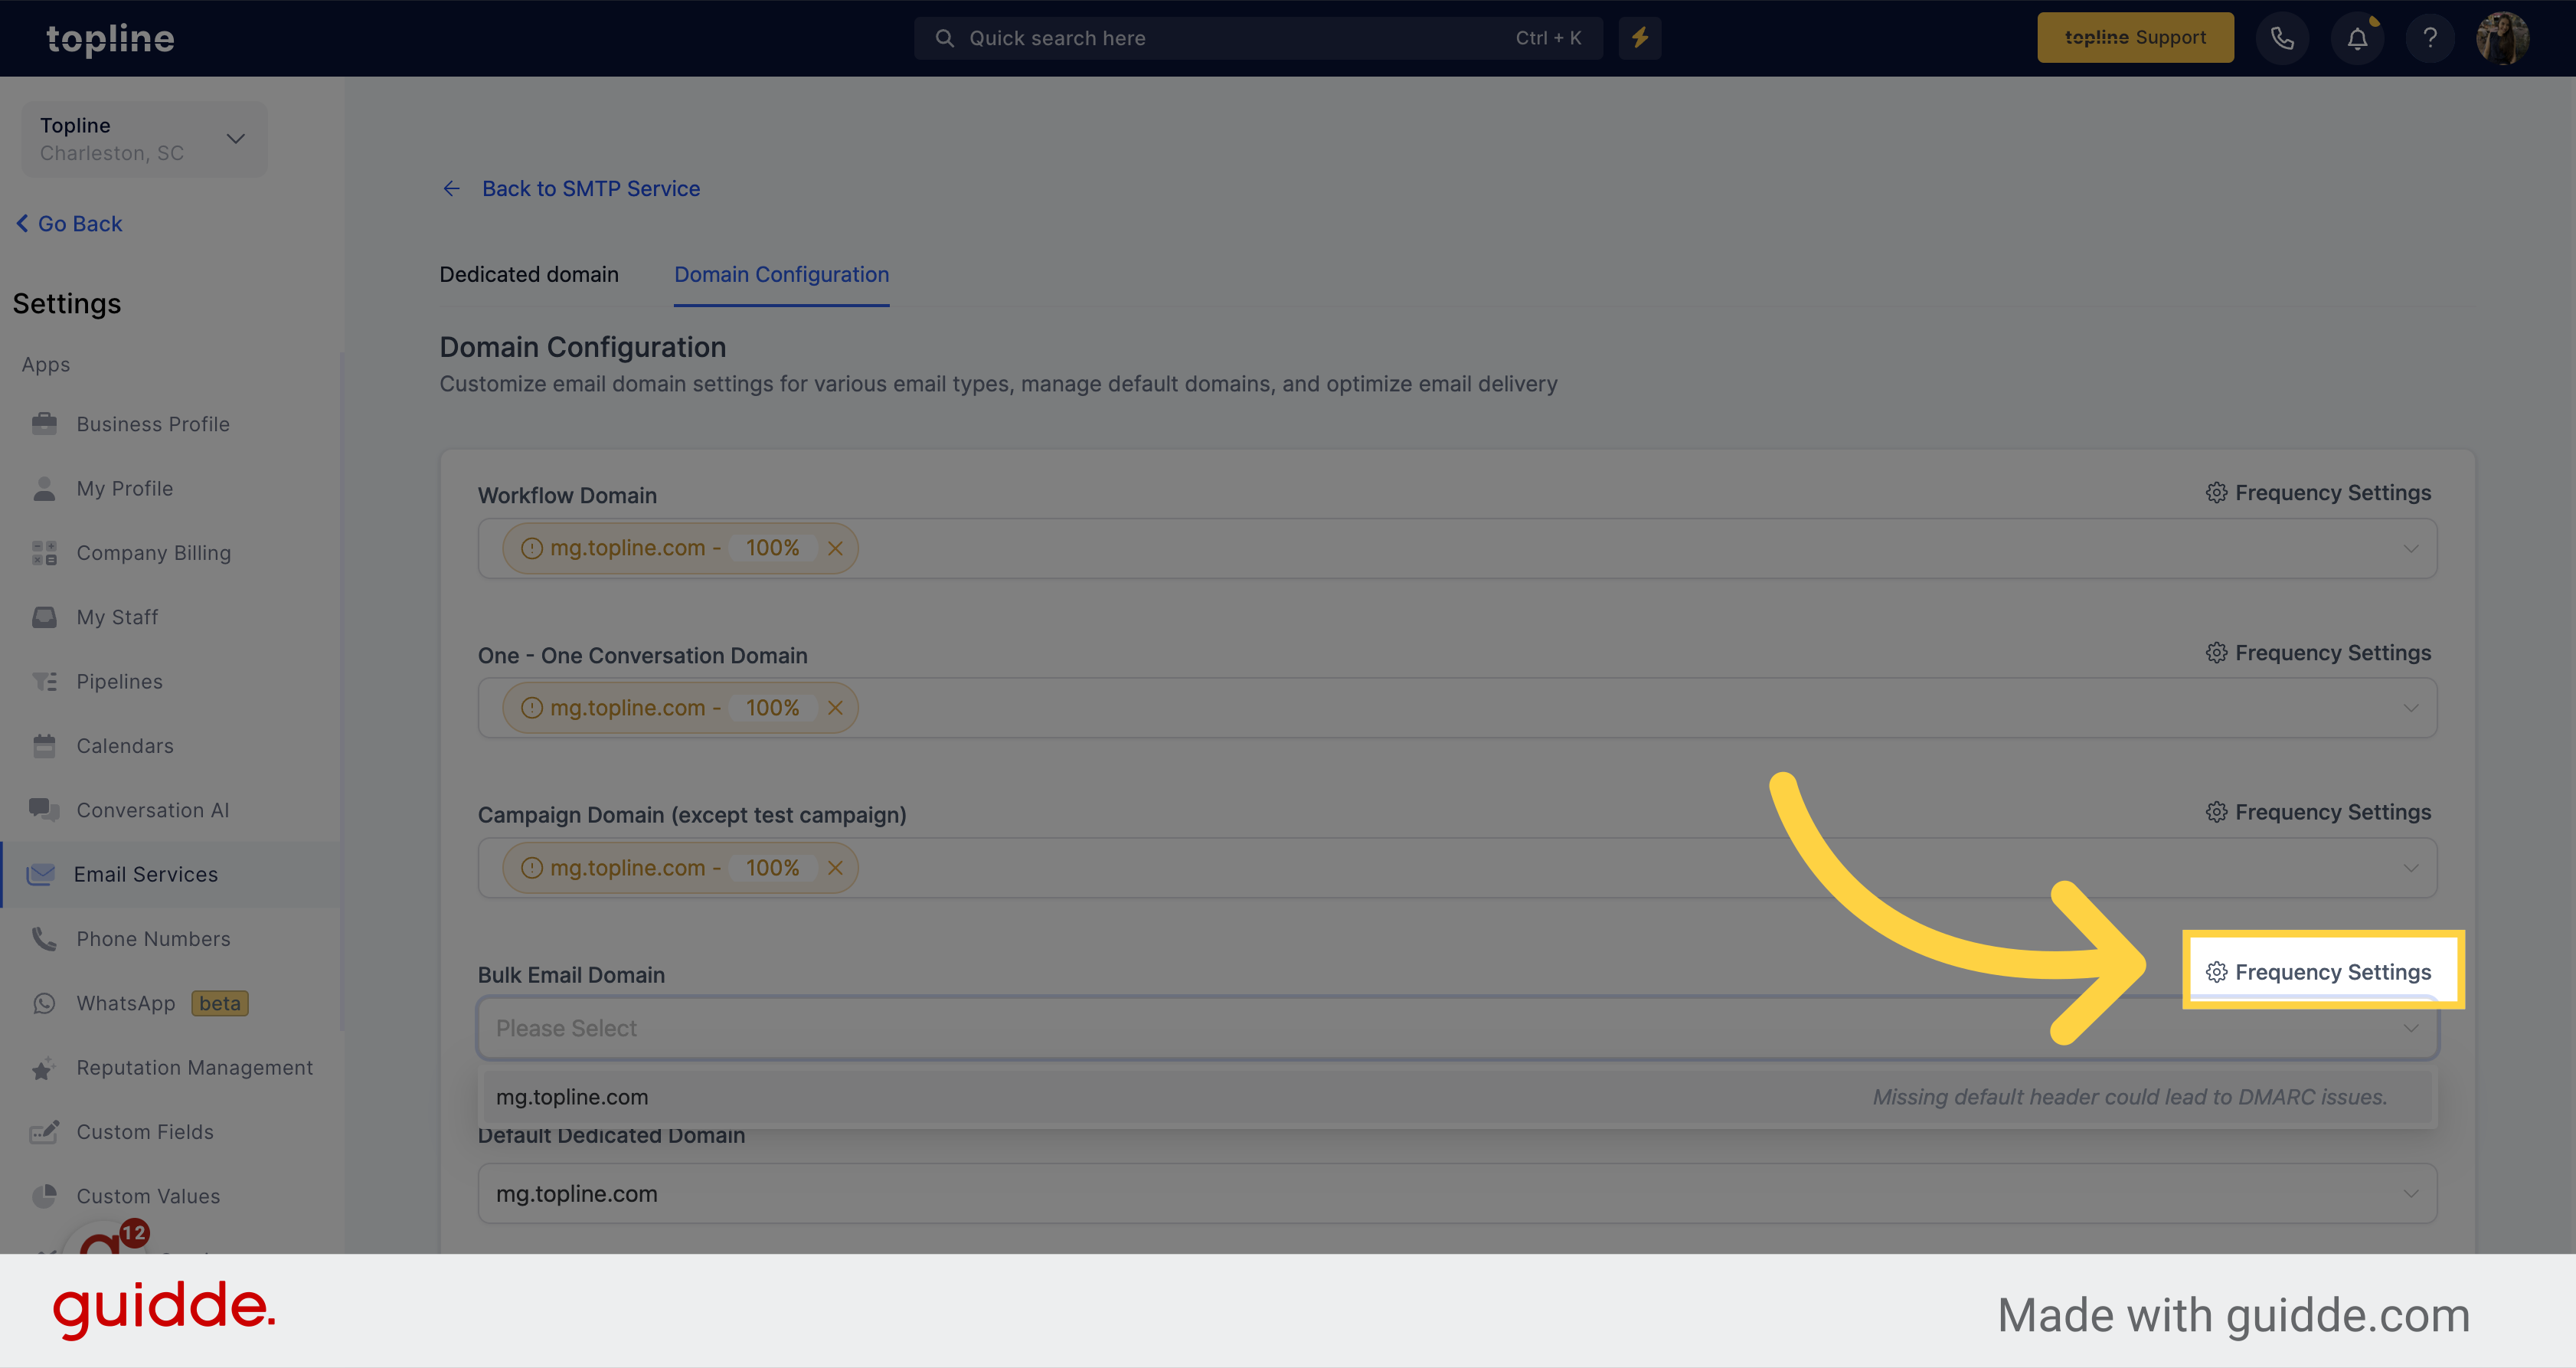
By assigning different frequencies to each domain, you can prioritize domains with better deliverability rates or adjust the sending frequency based on the performance of each domain. This can help ensure that emails are reaching the intended recipients' inboxes consistently.In the process of setting up a default header for a dedicated sending domain in Topline, you will navigate through various steps within the platform to ensure all emails originating from the specified domain adhere to the designated header.
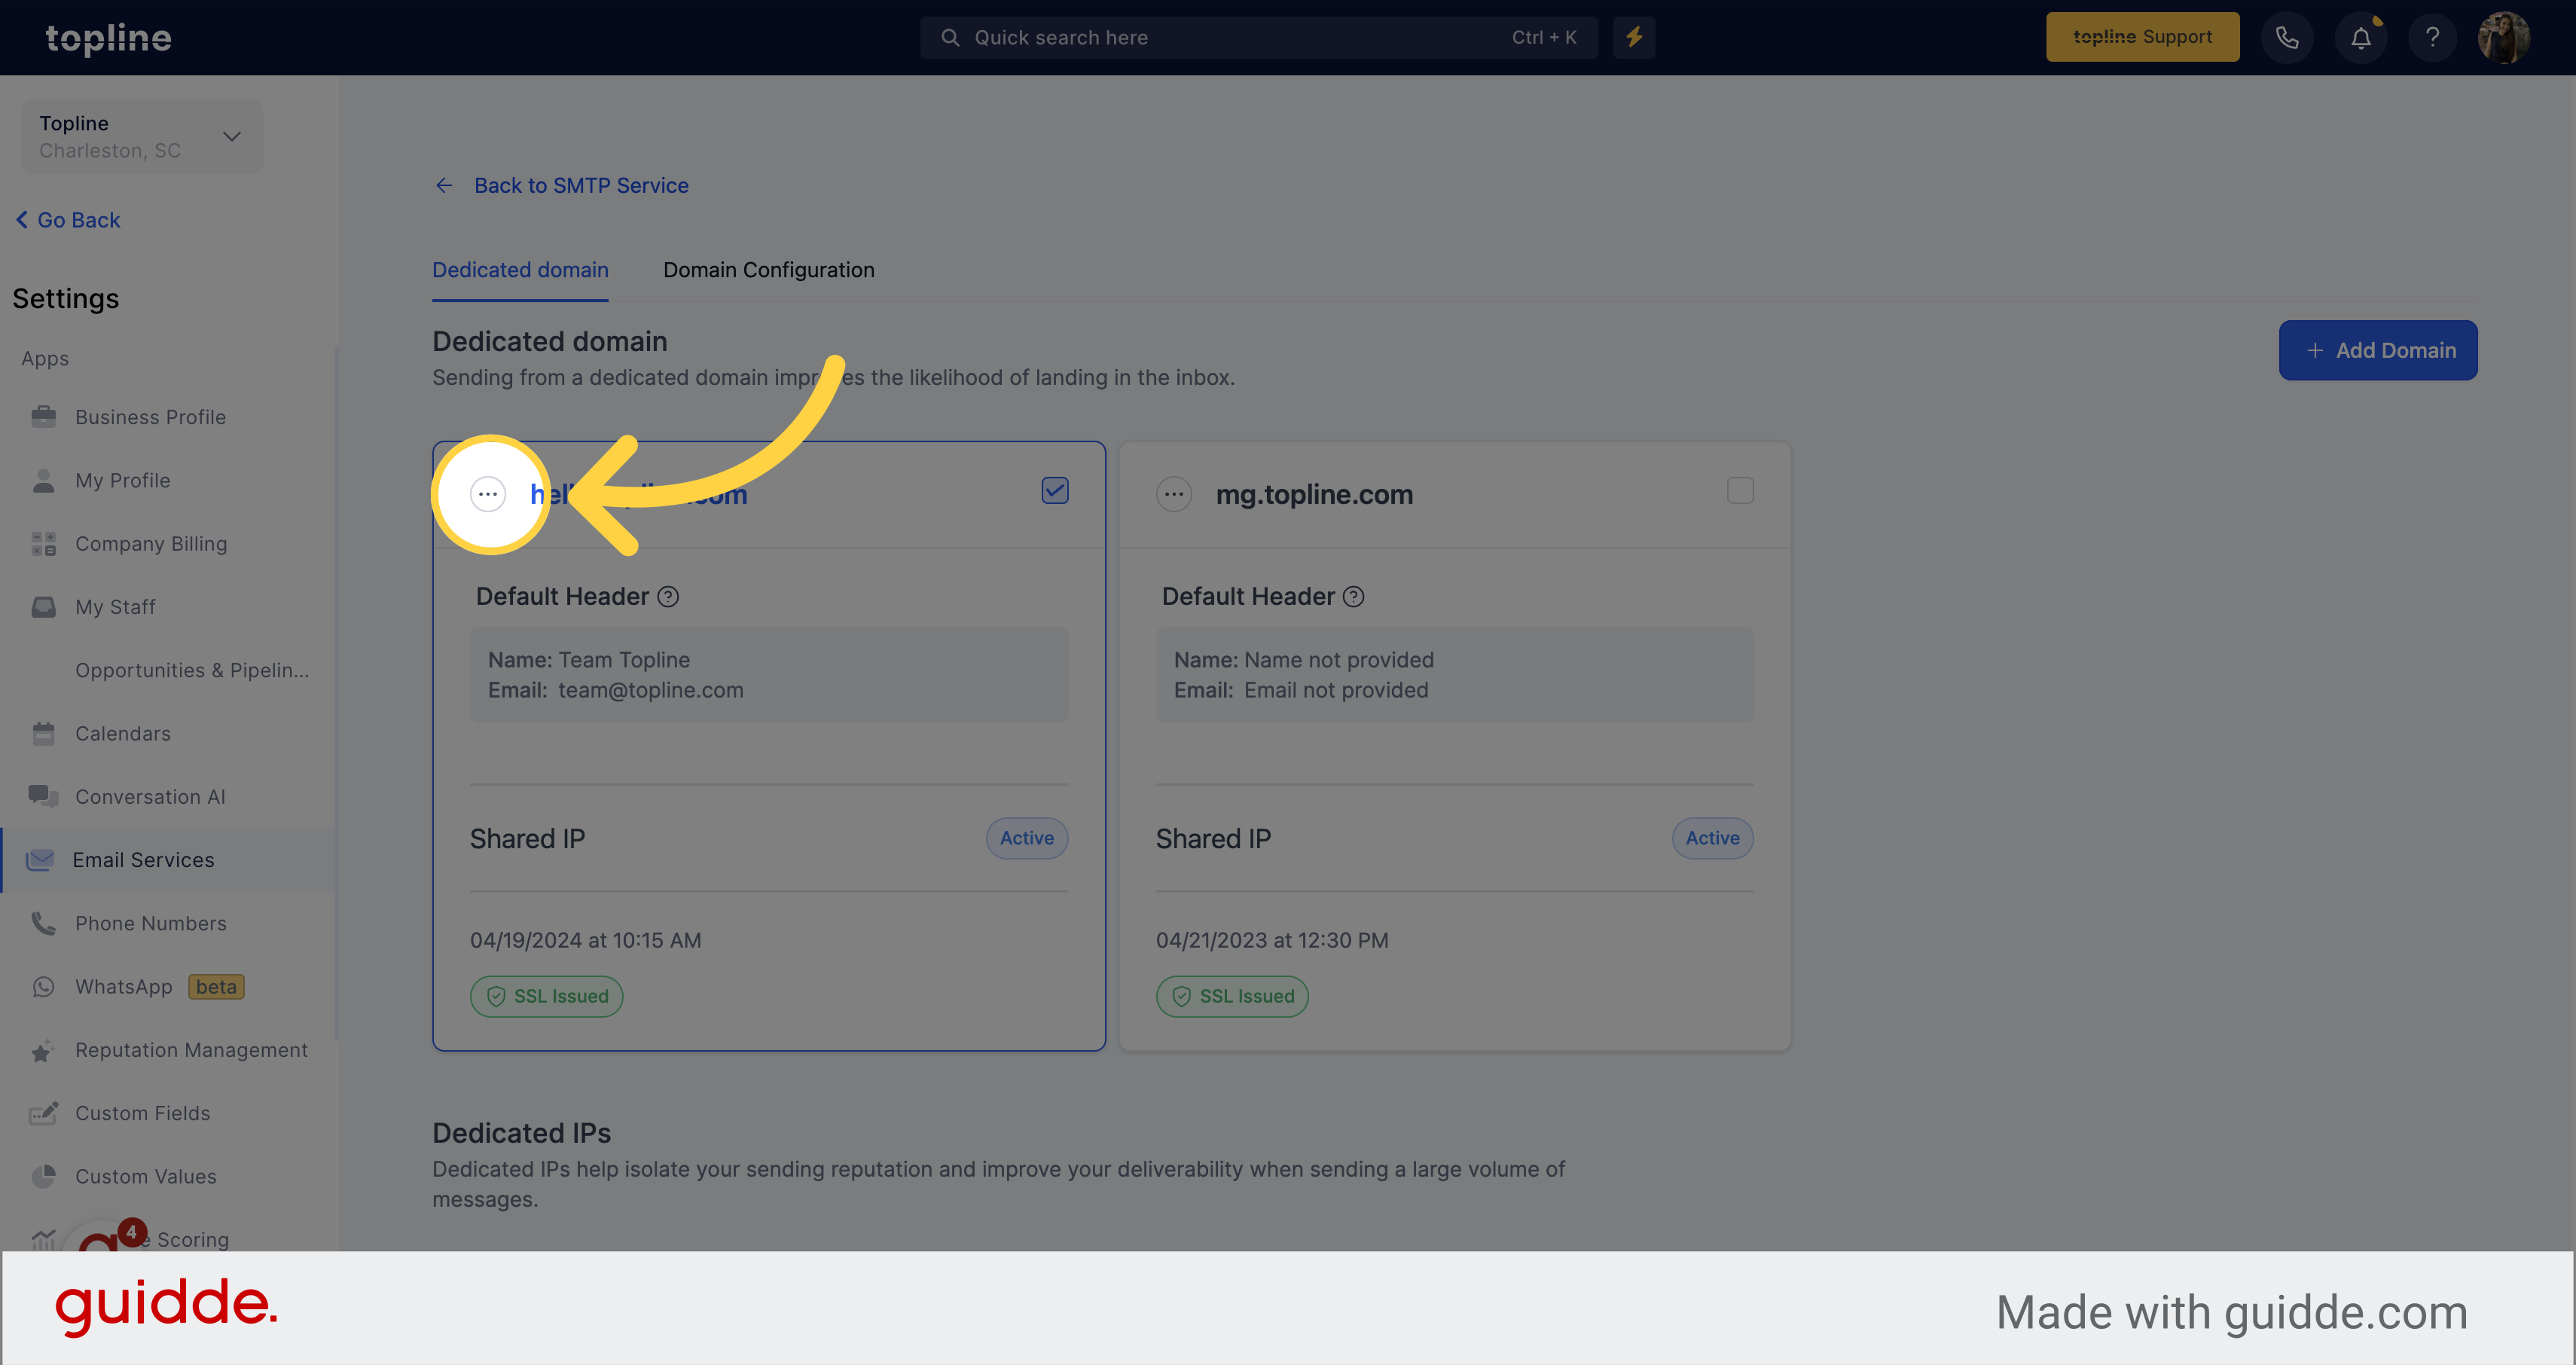
In the Email Services view, select the Dedicated Domain And IP option.

Click on the three dots located next to the domain name for more options.
Choose the Set Headers option on the menu.
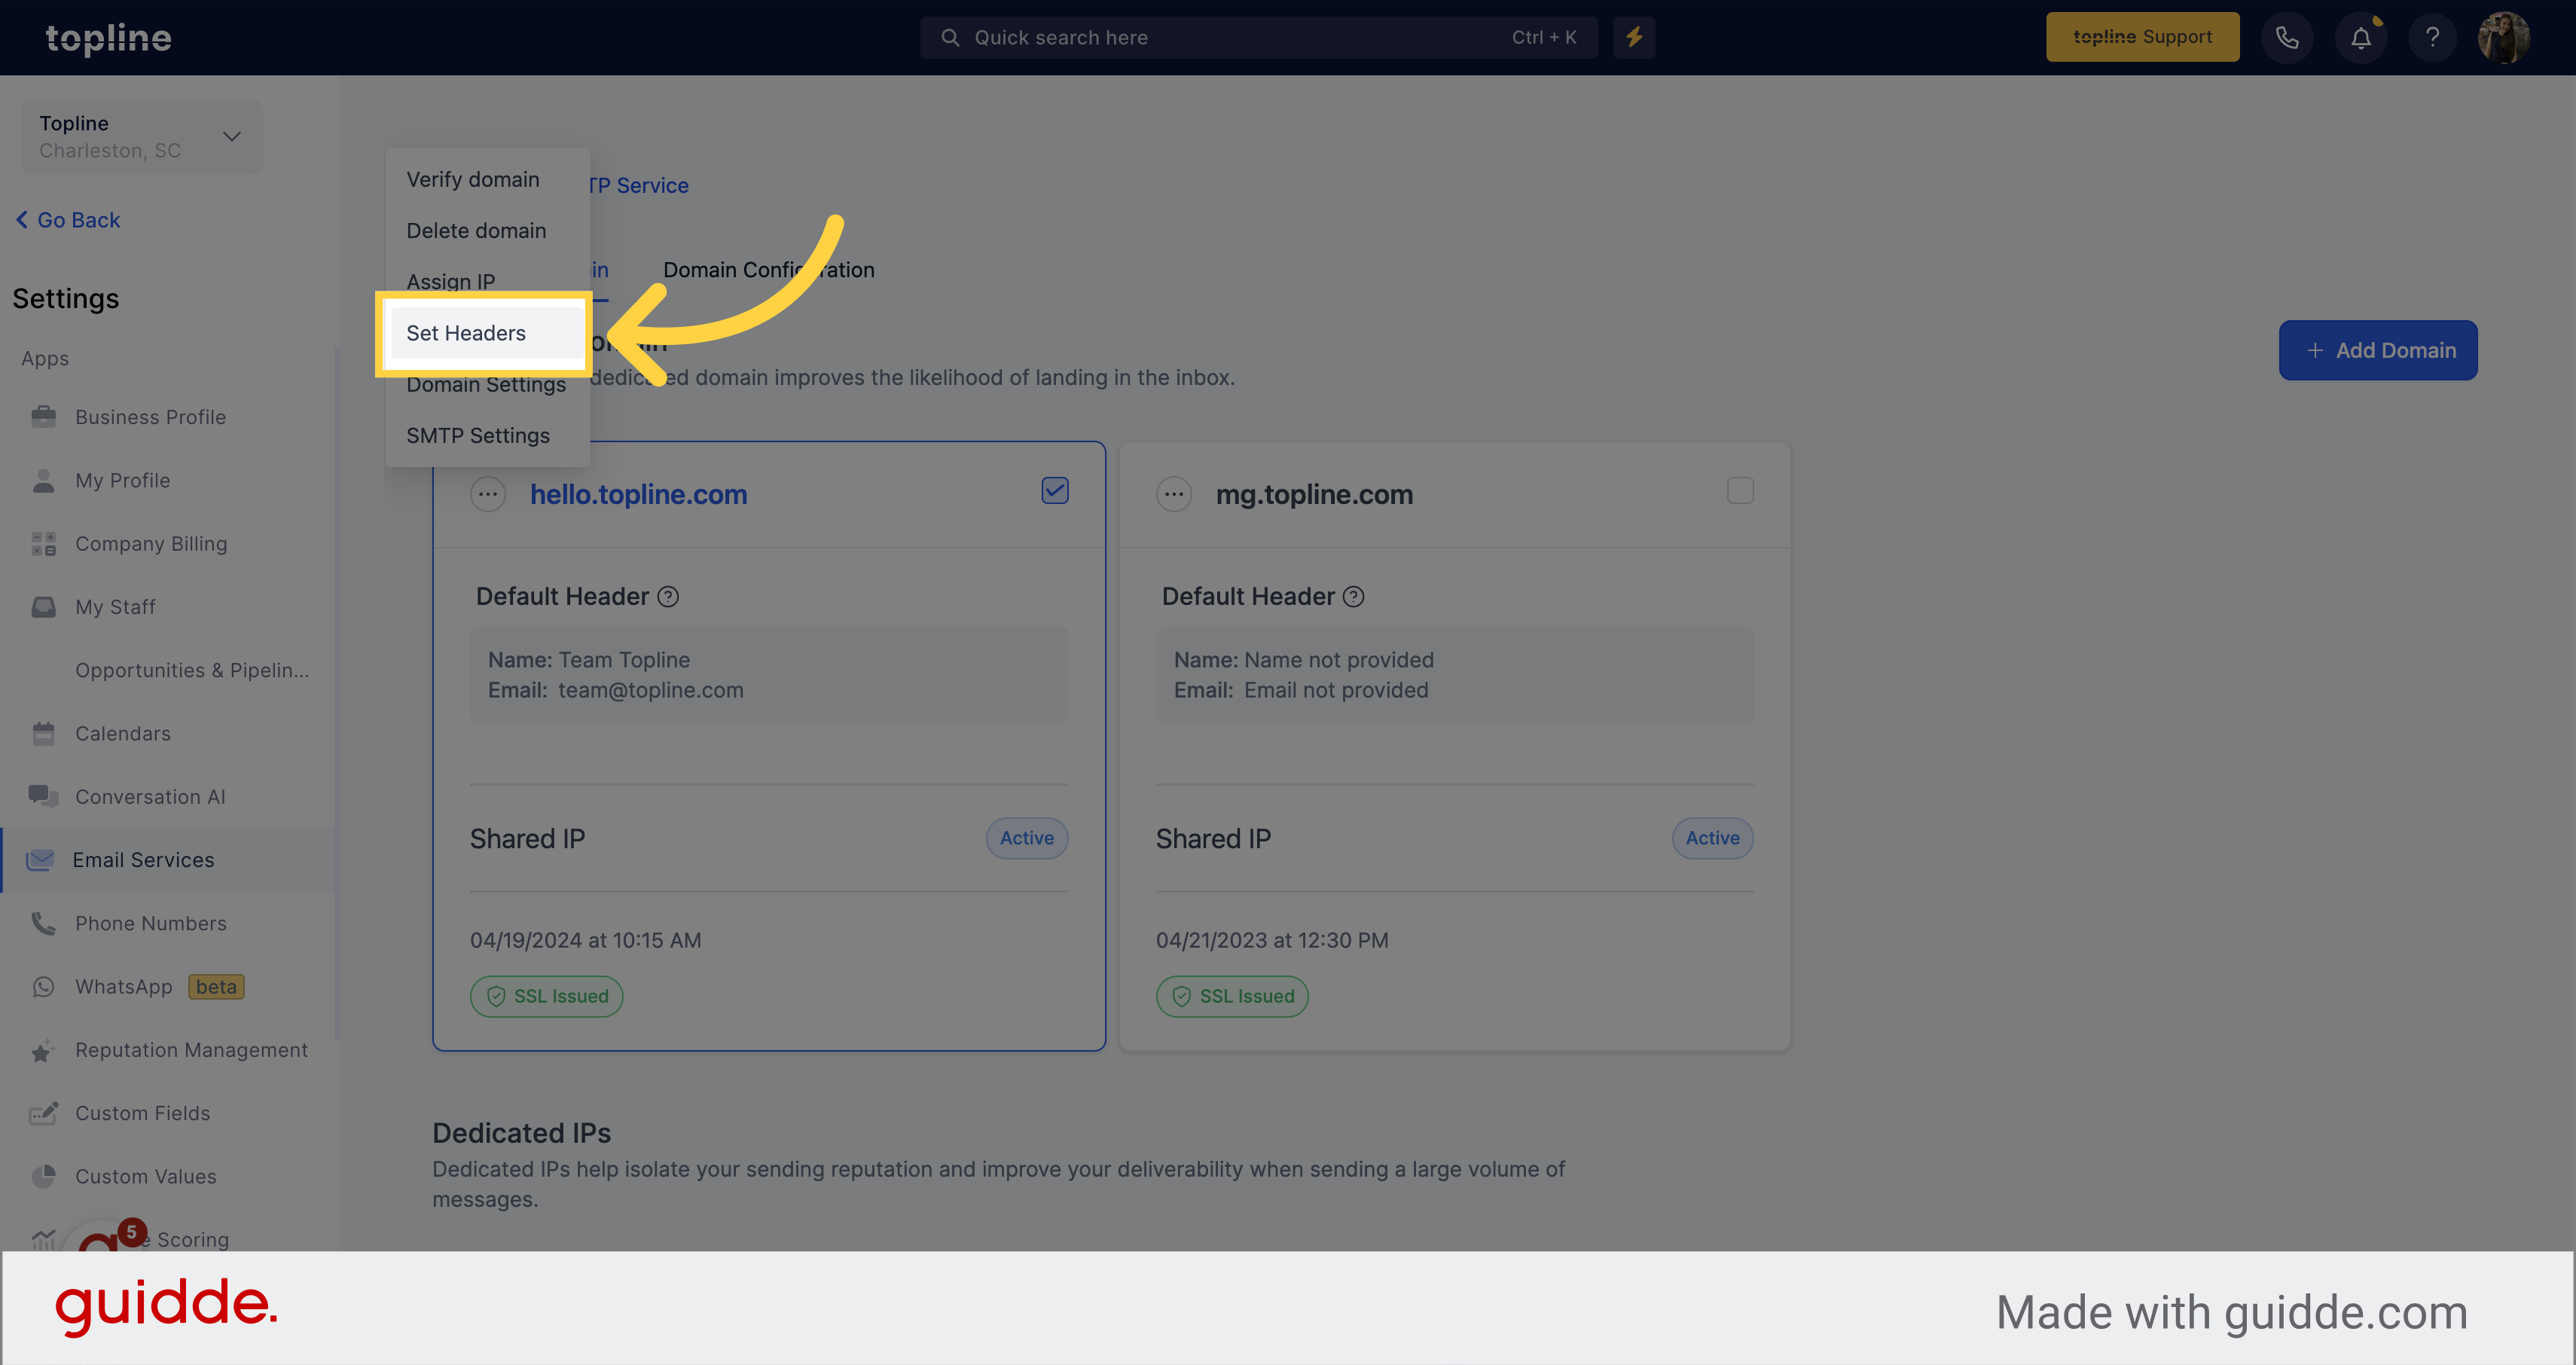
Add the from name and from email that will be applied to all emails, once you are done click on Save.
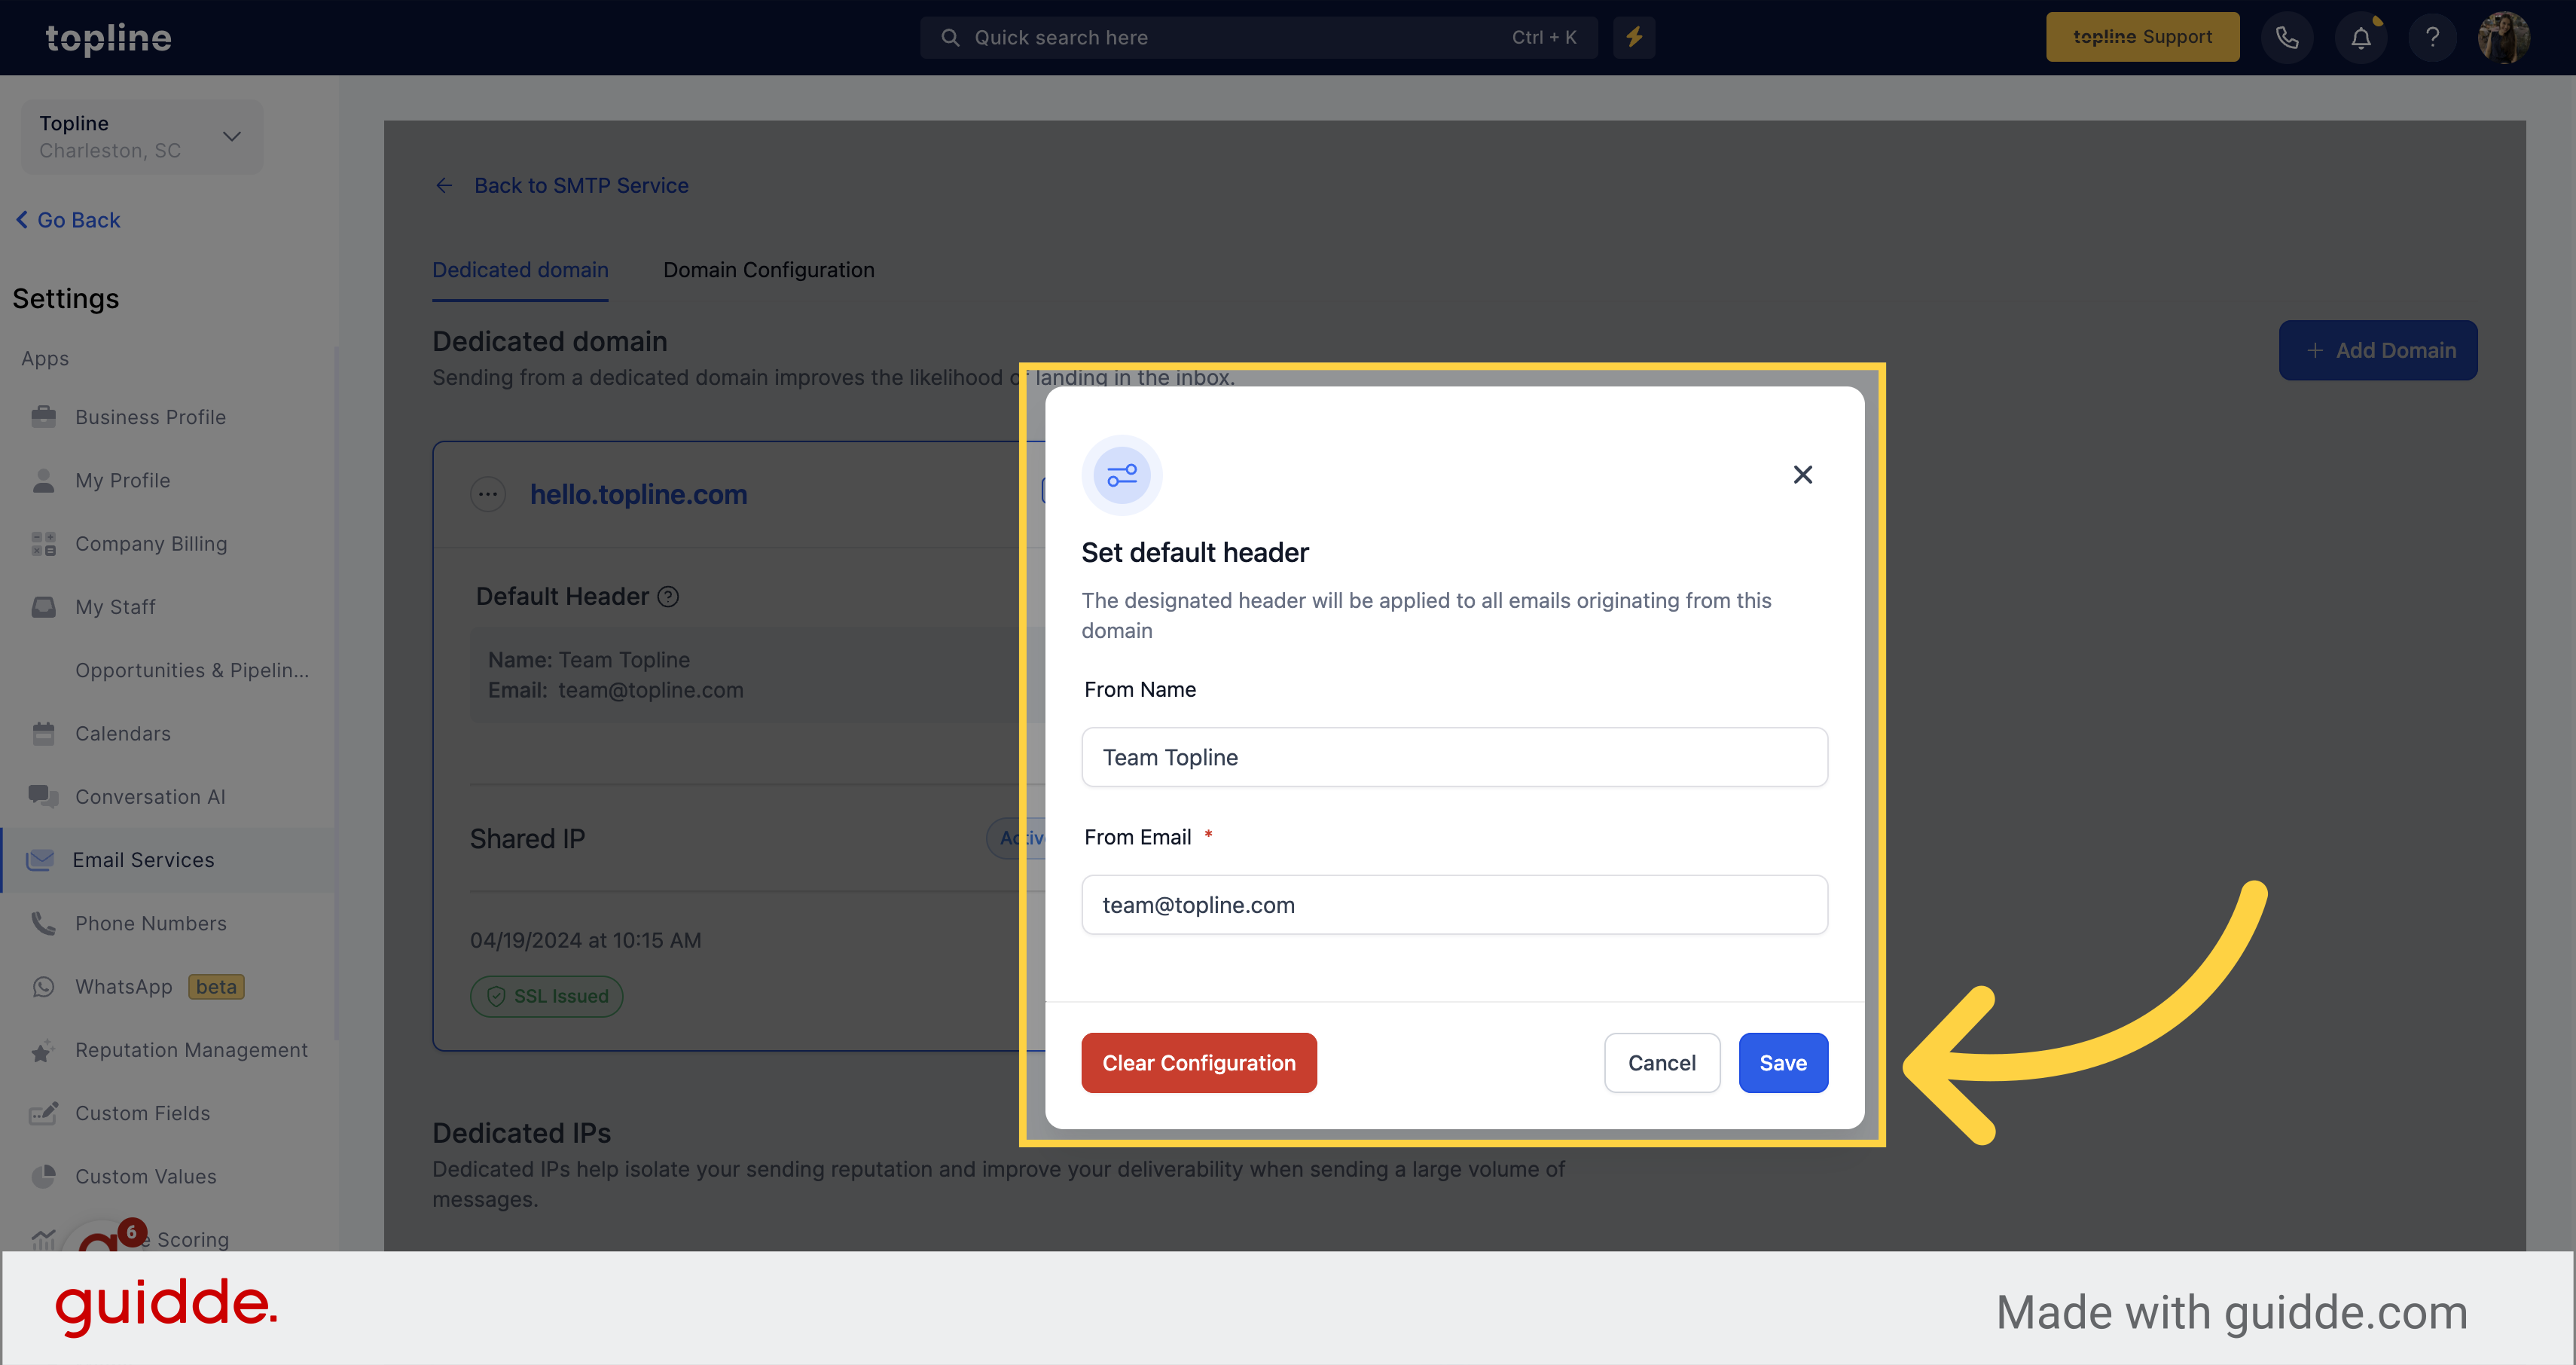
Once your settings have been saved they will be applied to your emails.
The designated header will be applied to all emails sending through the domain.Follow these clear steps to manage email services and domain settings effortlessly in the application. Empower your team by mastering this Email Tracking feature efficiently.
Select the Dedicated Domain and IP option on the Email Services view.
Click on the three dots to access more options.
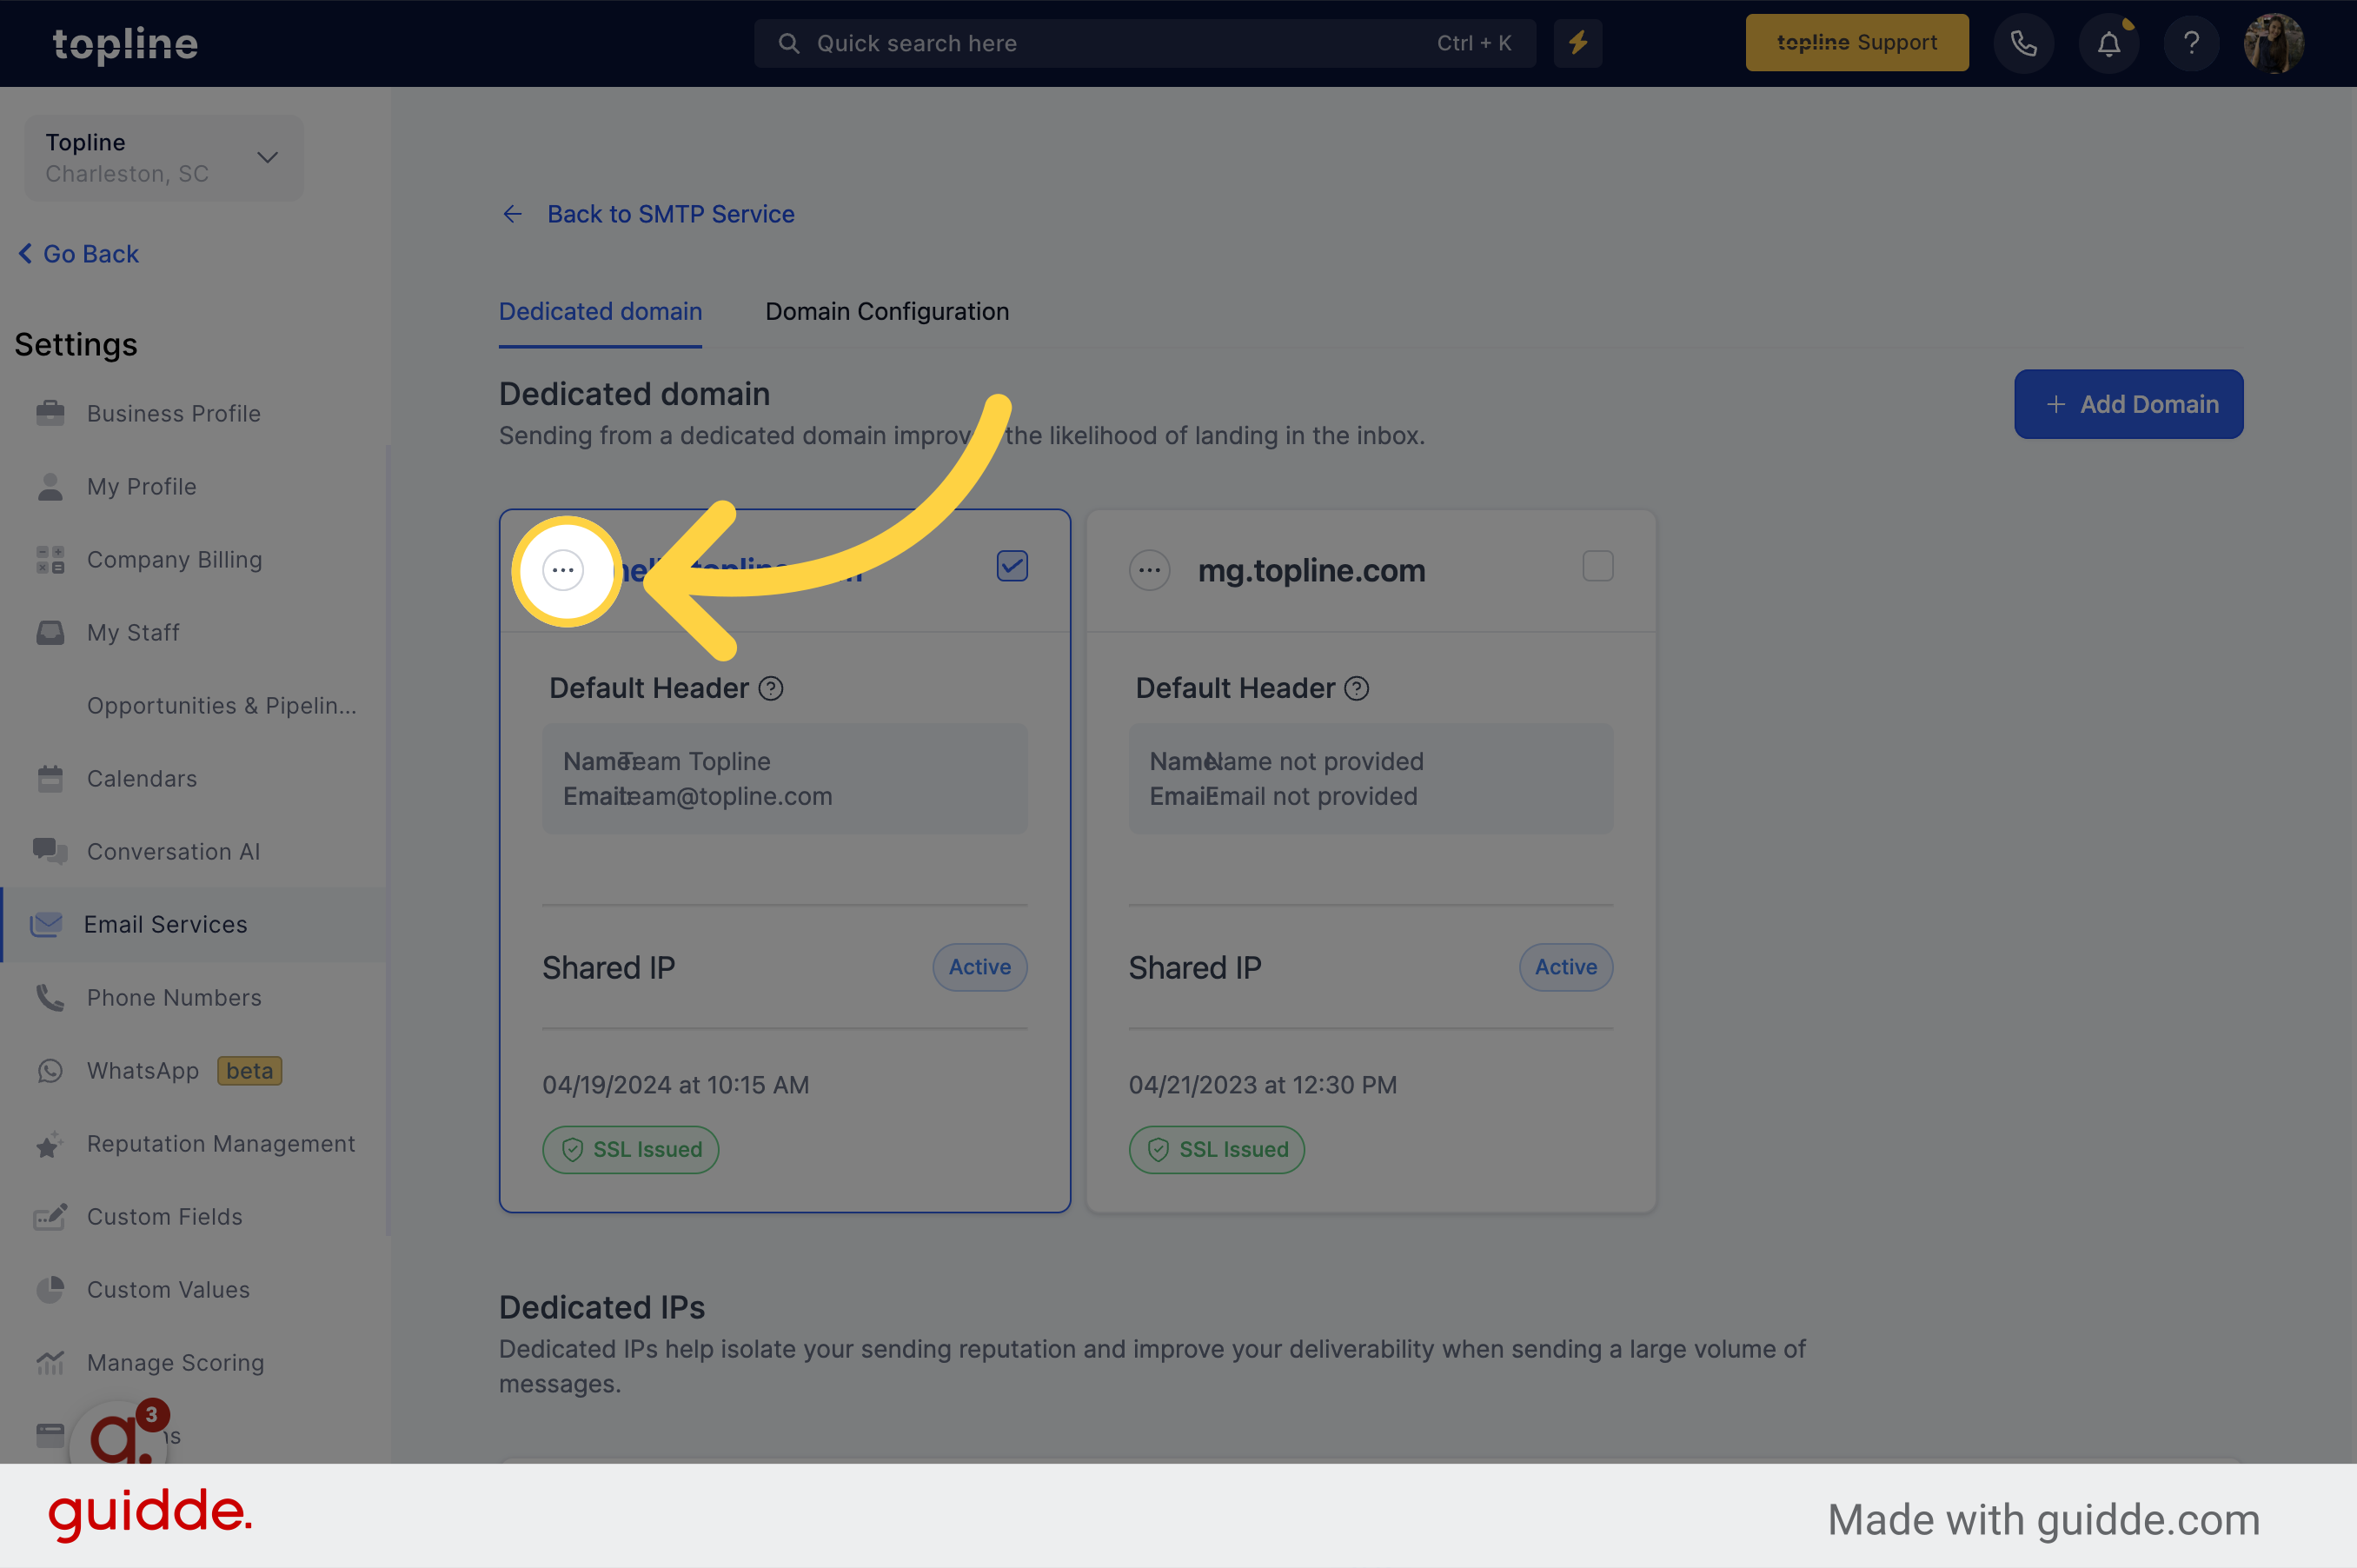
From the menu, select the domain settings.
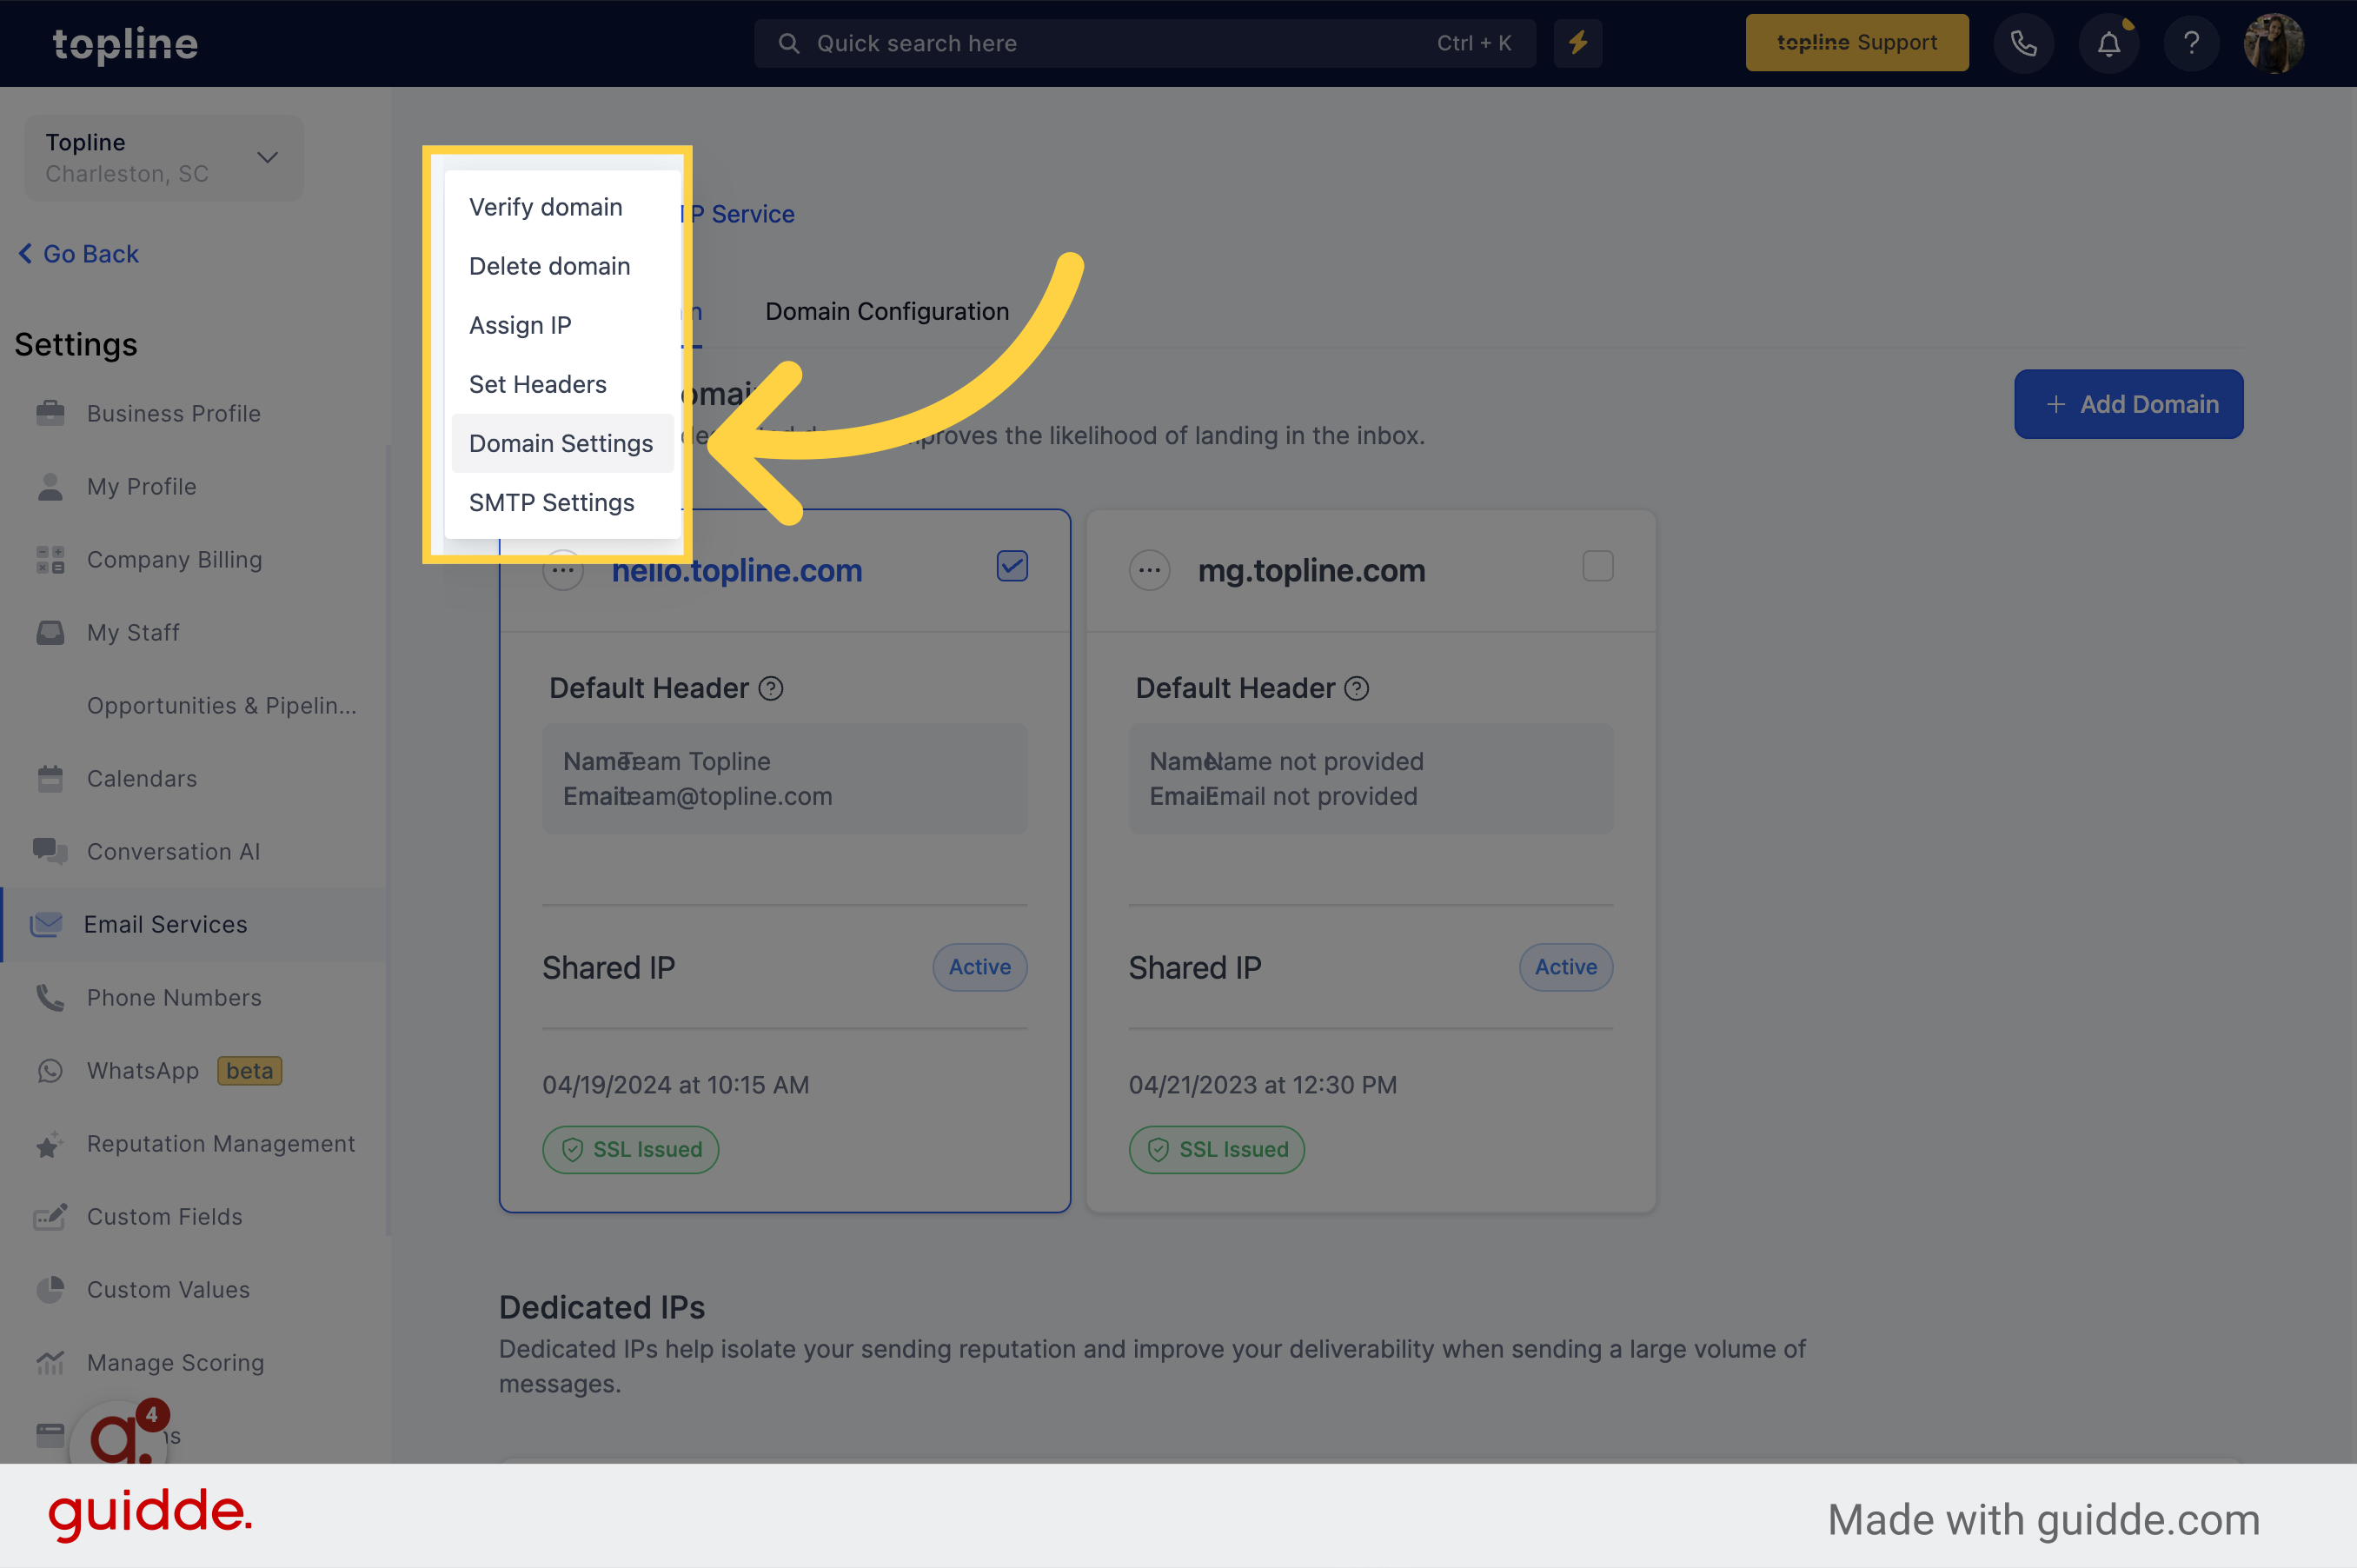
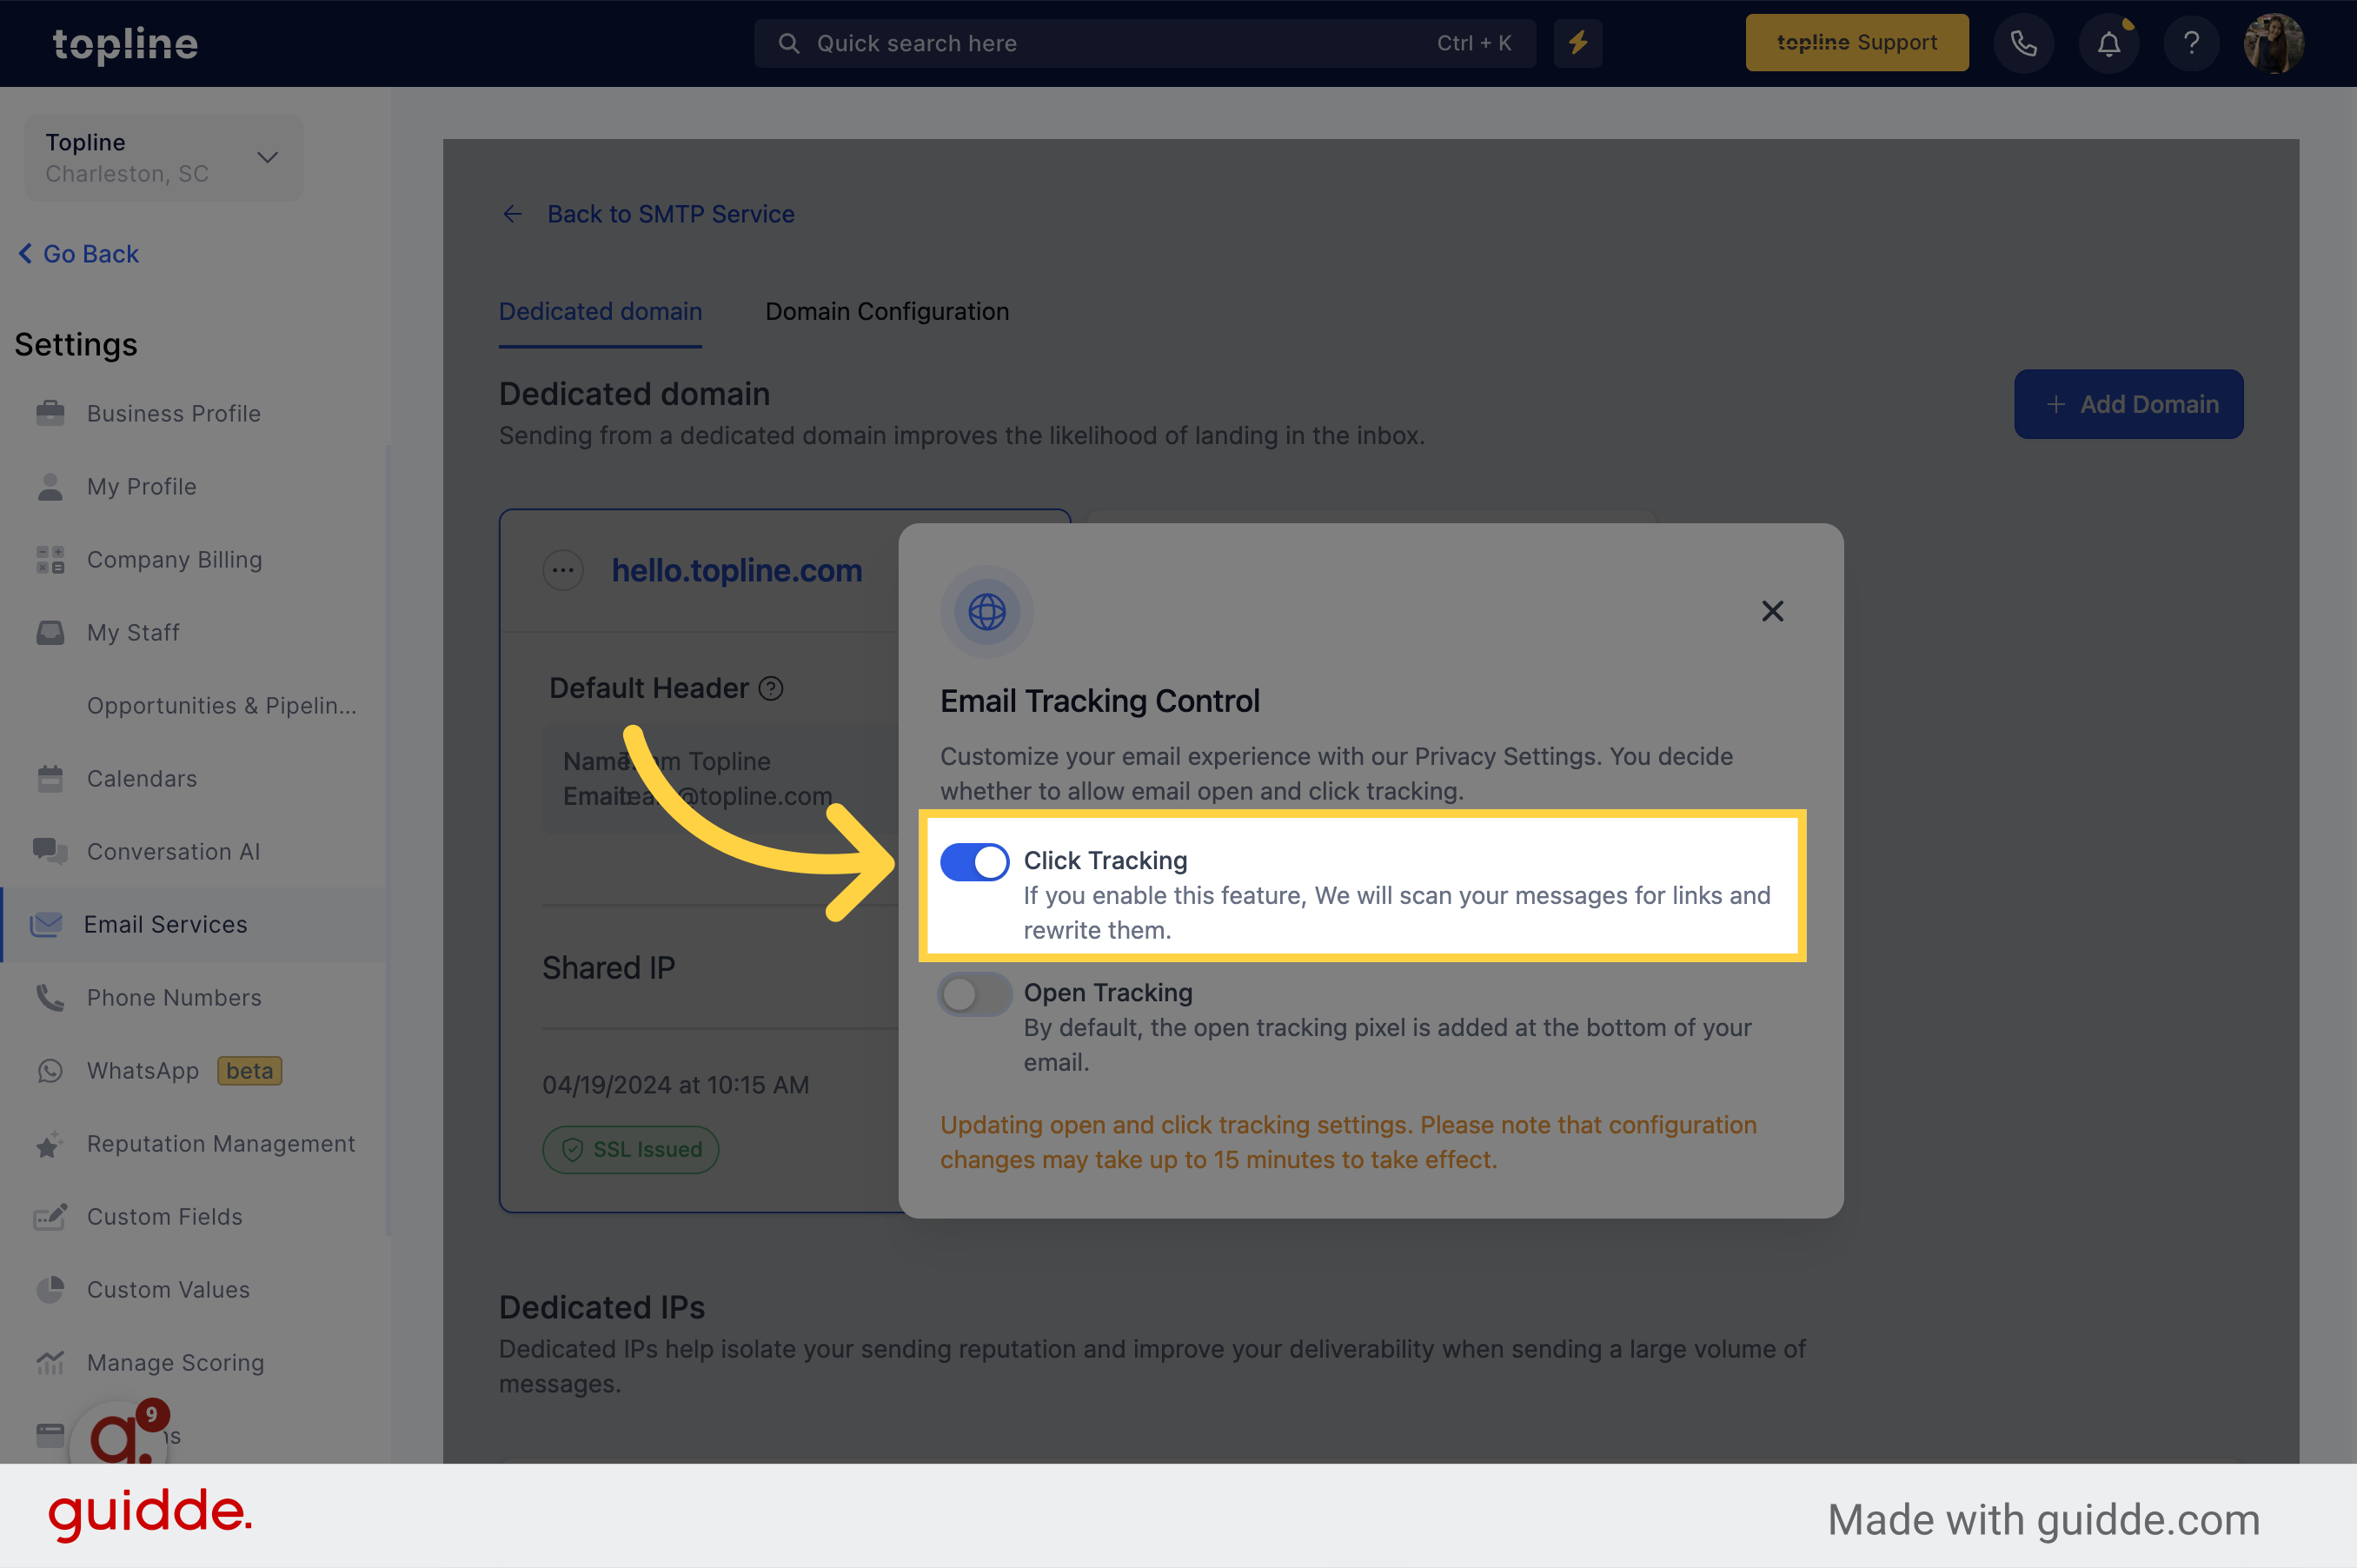
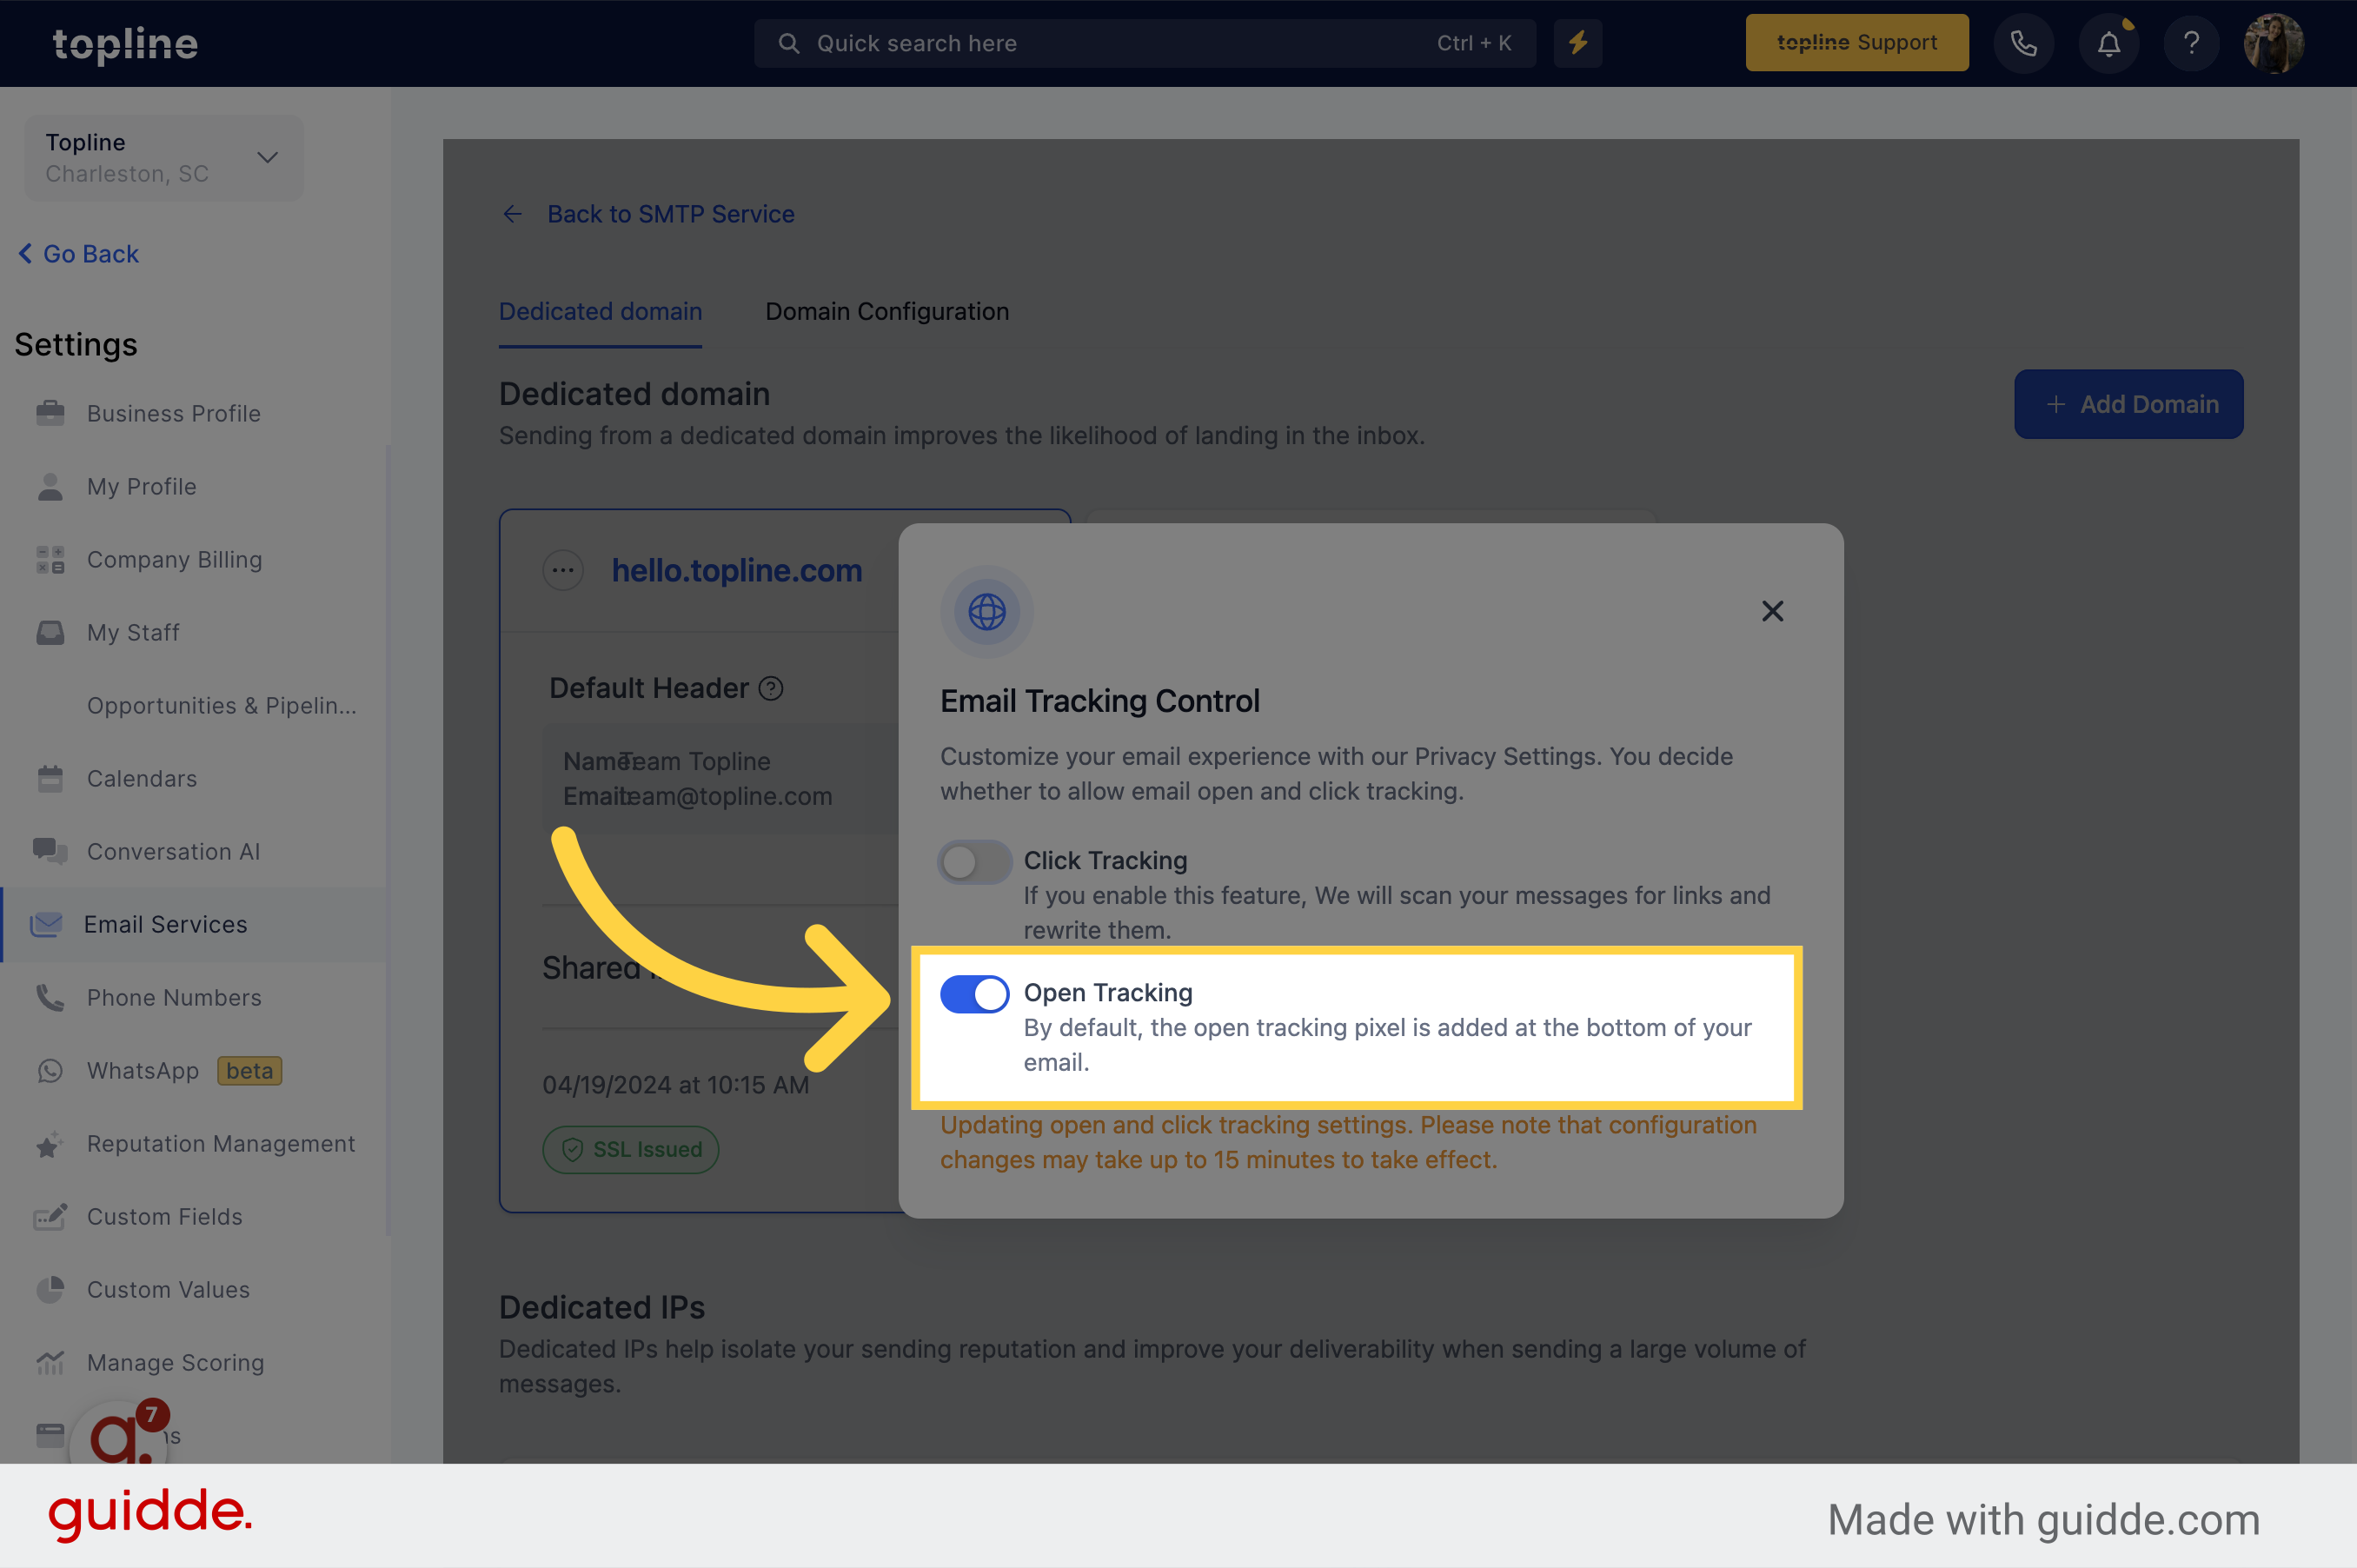
A pop up window will appear, you can decide whether to allow email open and click tracking.
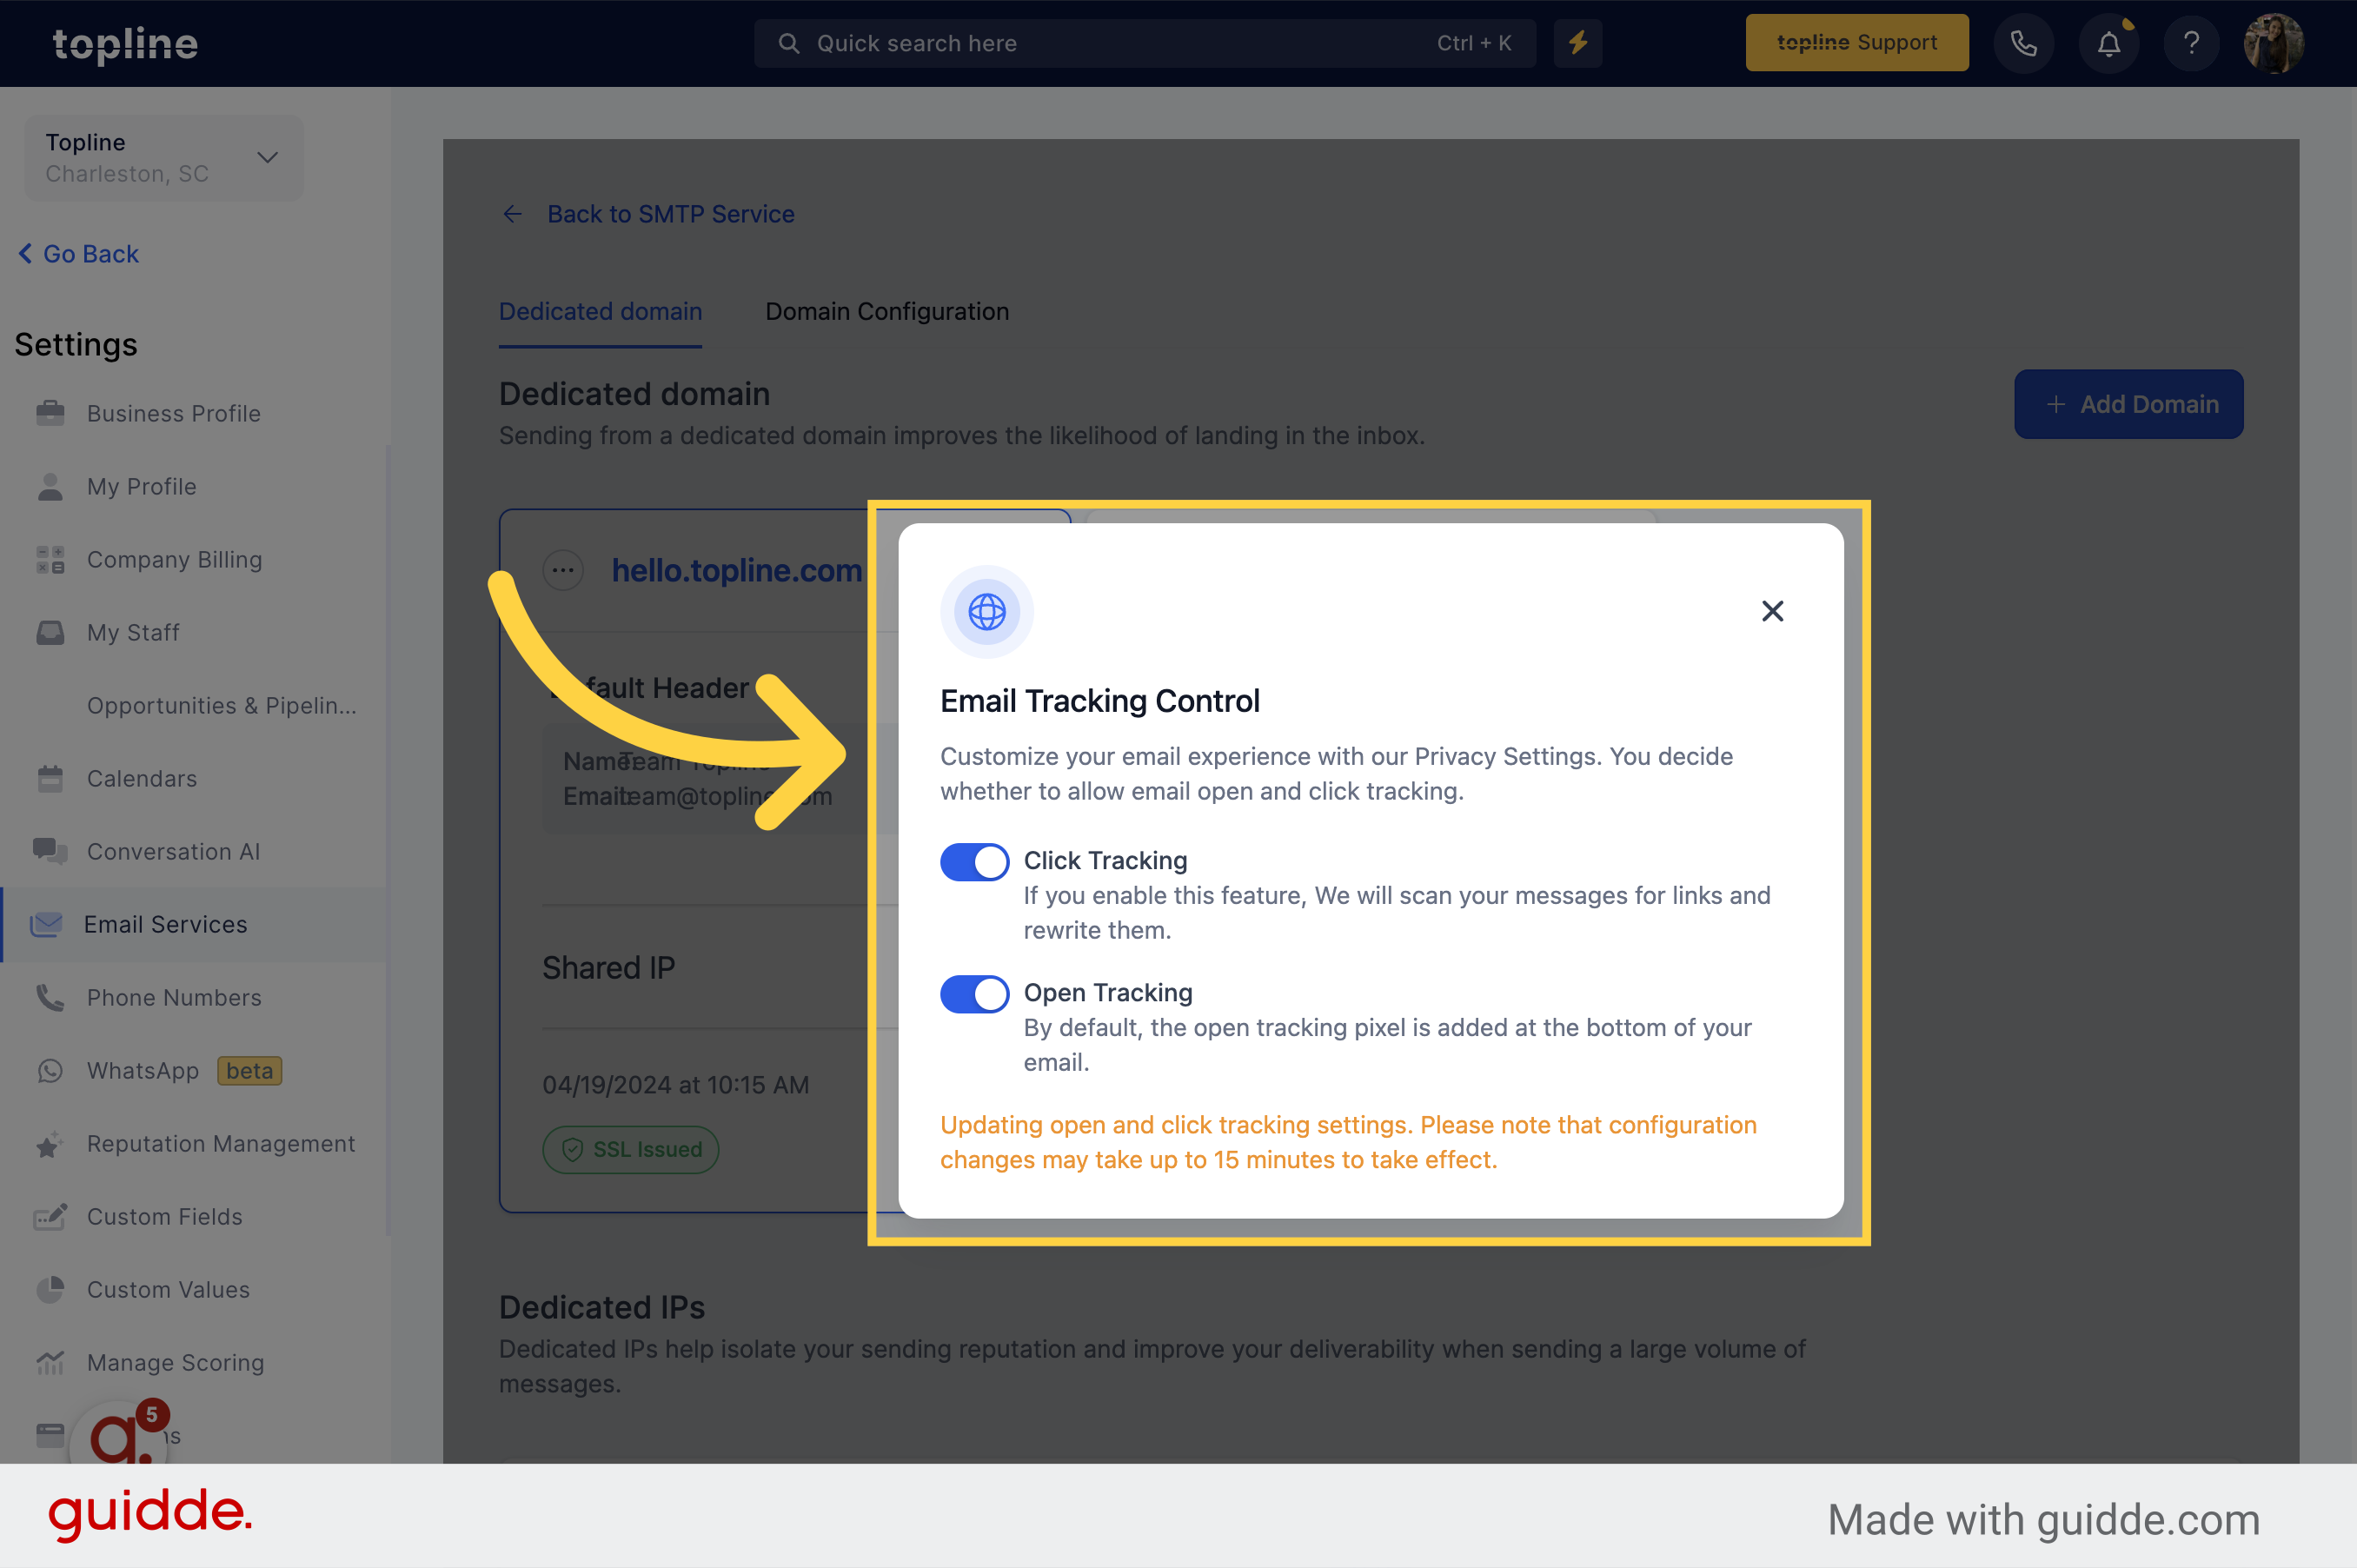
You can enable/disable click tracking for specific domain by adjusting the tracking in the dedicated sending domain tracking settings.
You can enable/disable open tracking for specific domain by adjusting the tracking in the dedicated sending domain tracking settings.
It would be best if you used a unique subdomain that is not used for any other purpose. A subdomain is a secondary part of your root domain. For example, if your dedicated sending domain is hello@mg.yourbrand.com, your subdomain would be the “mg” portion.
Navigate to Email Services on Settings, and then select Dedicated Domain and IP.
Check the checkbox to make as active/default.
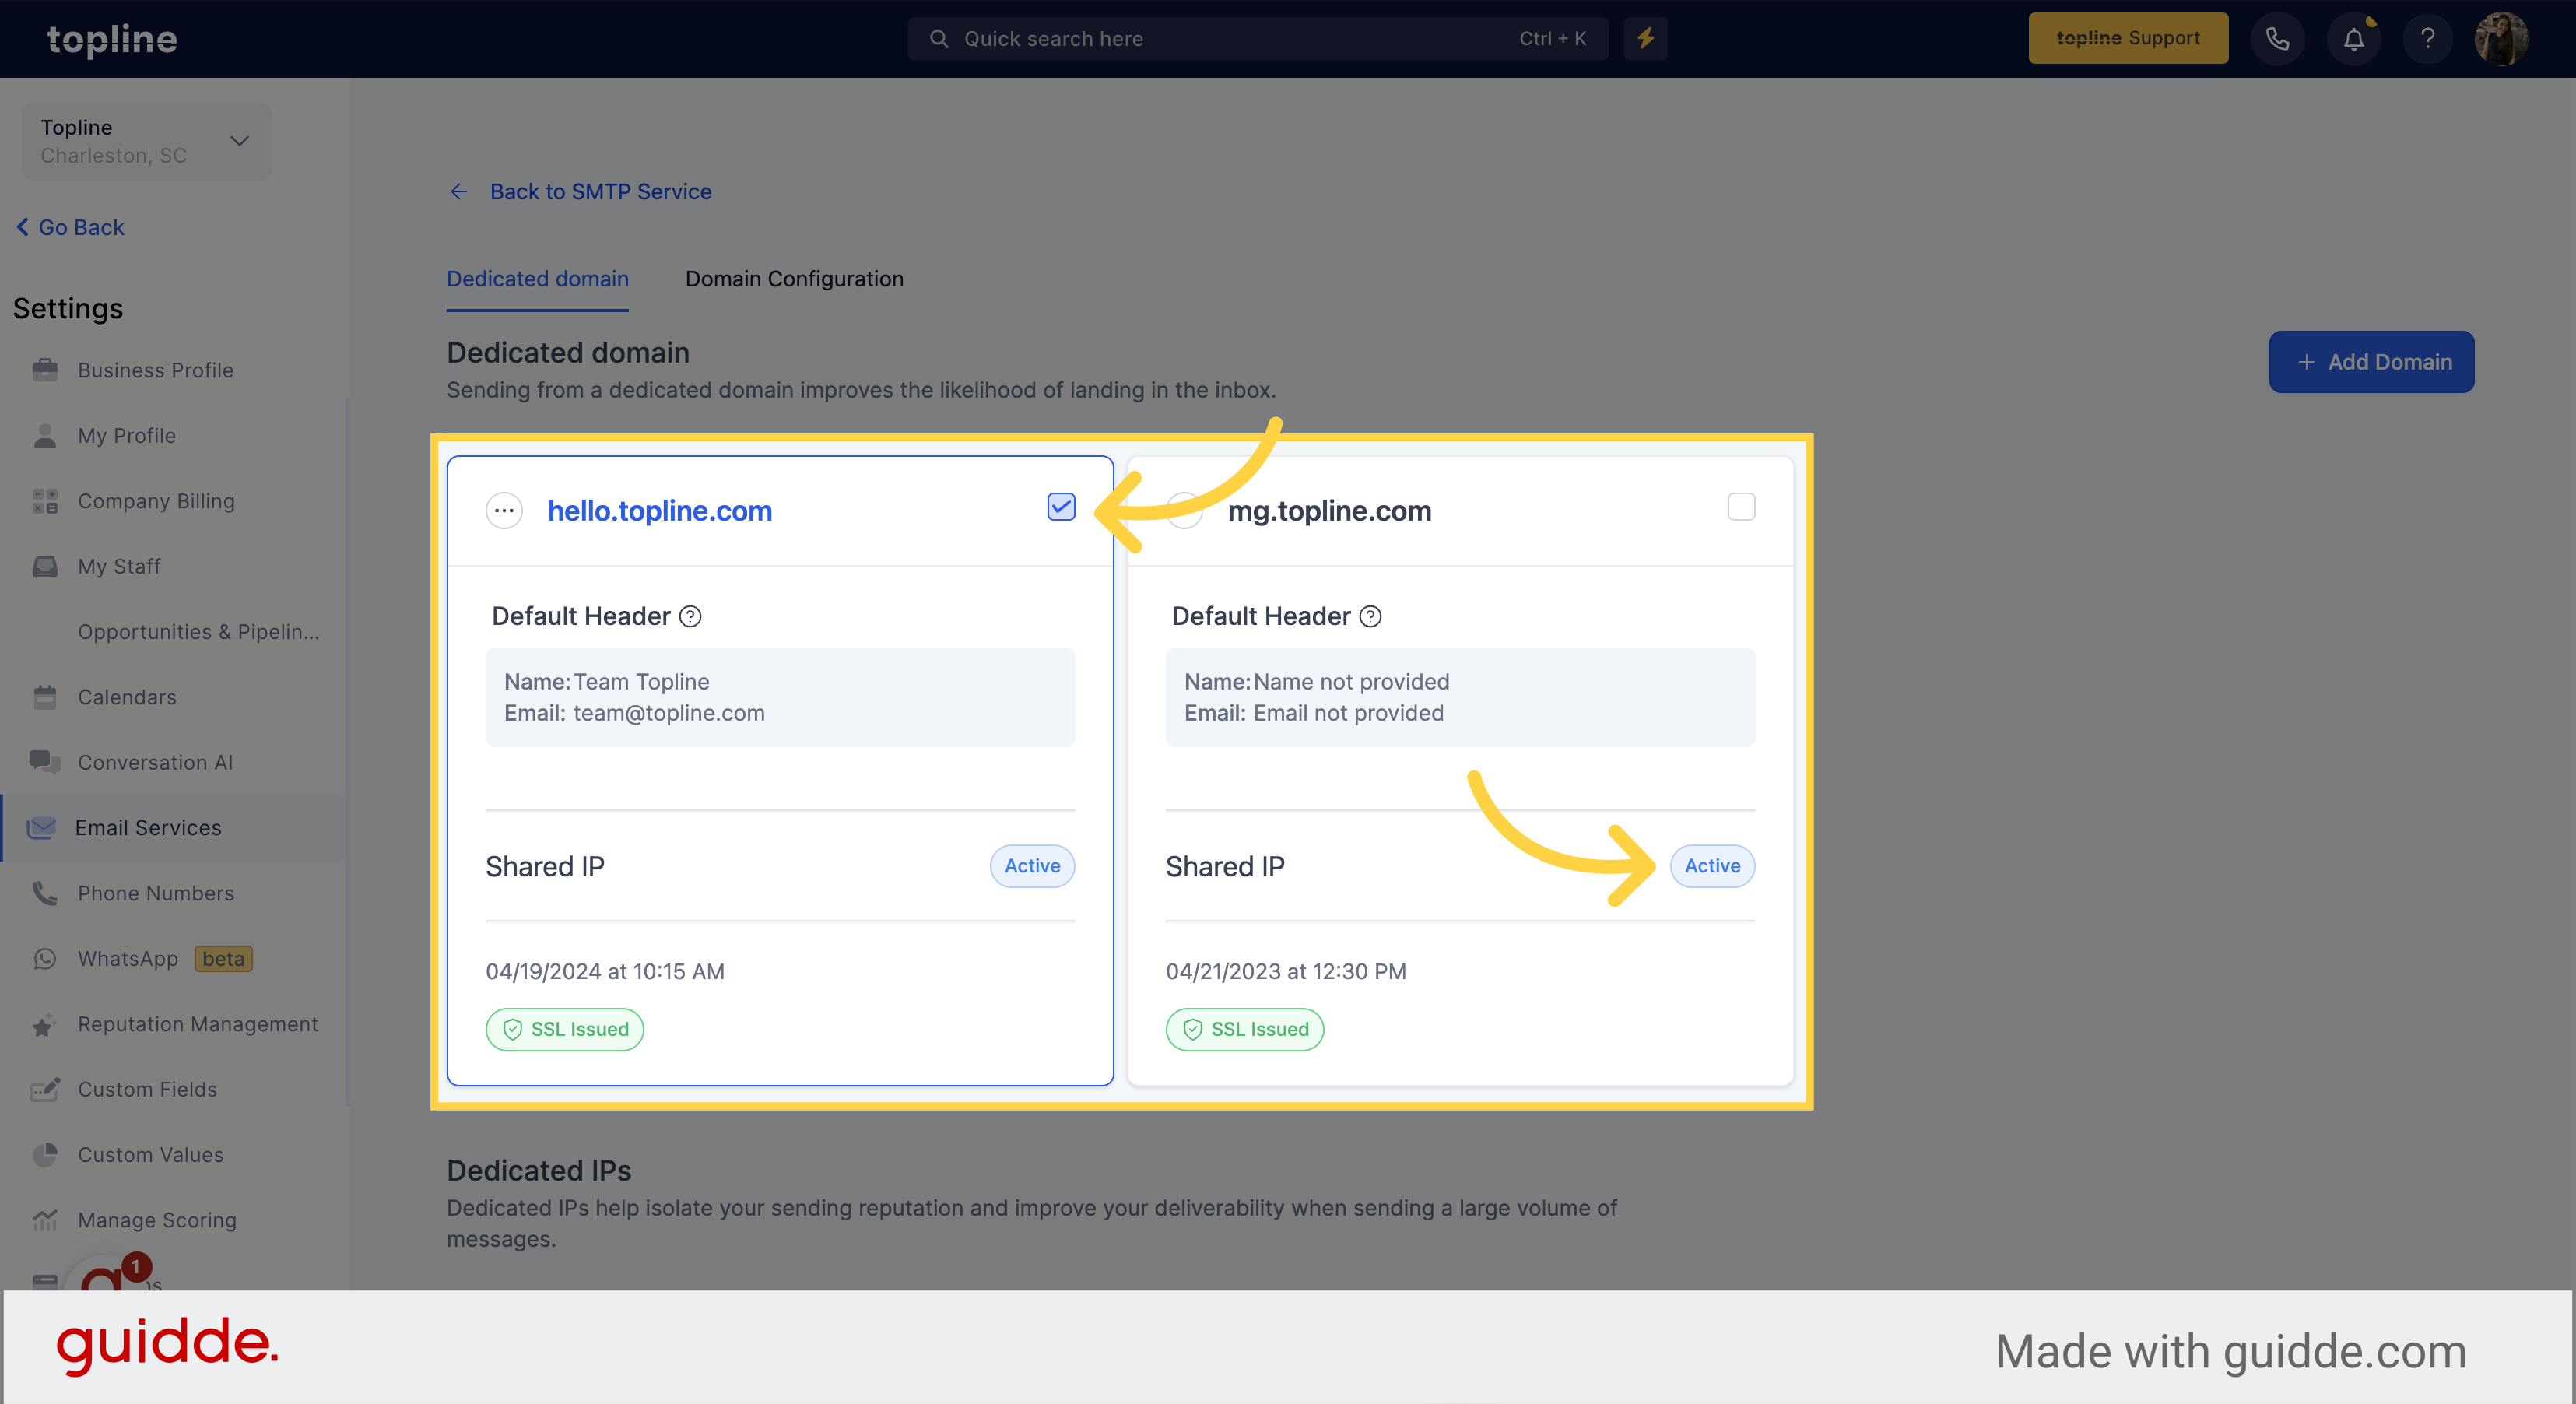
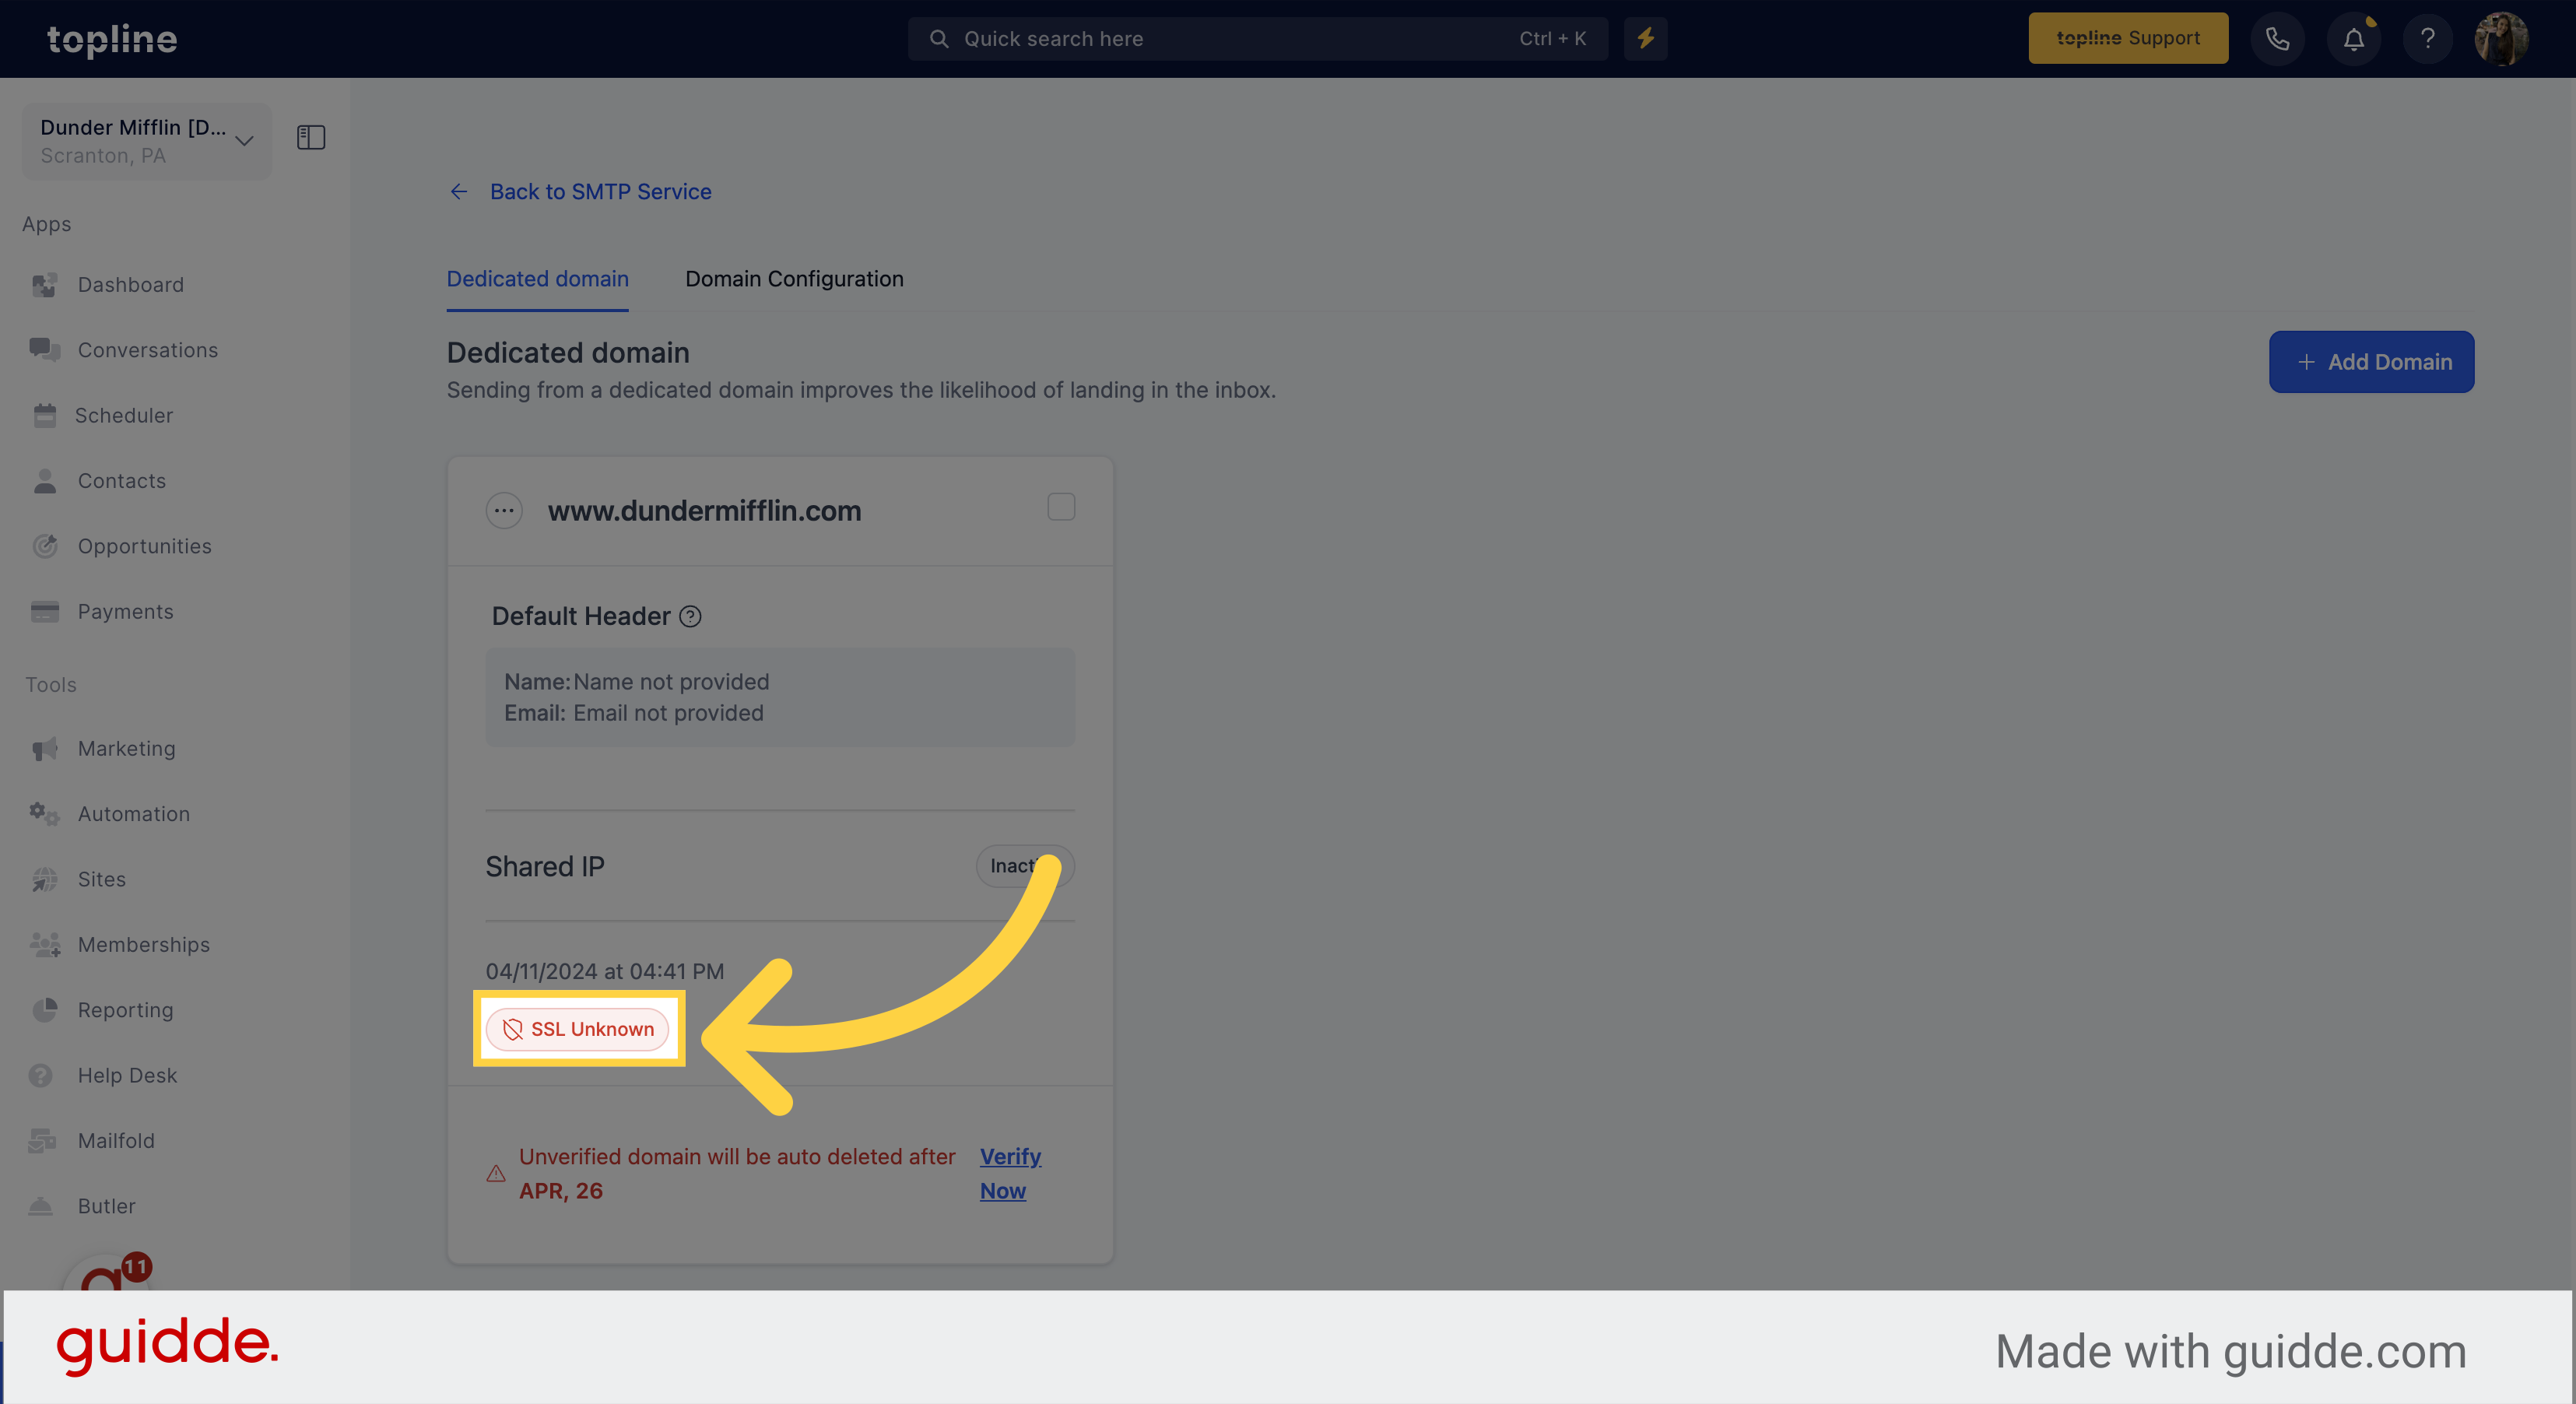
All the unverified domains will be in an inactive state.
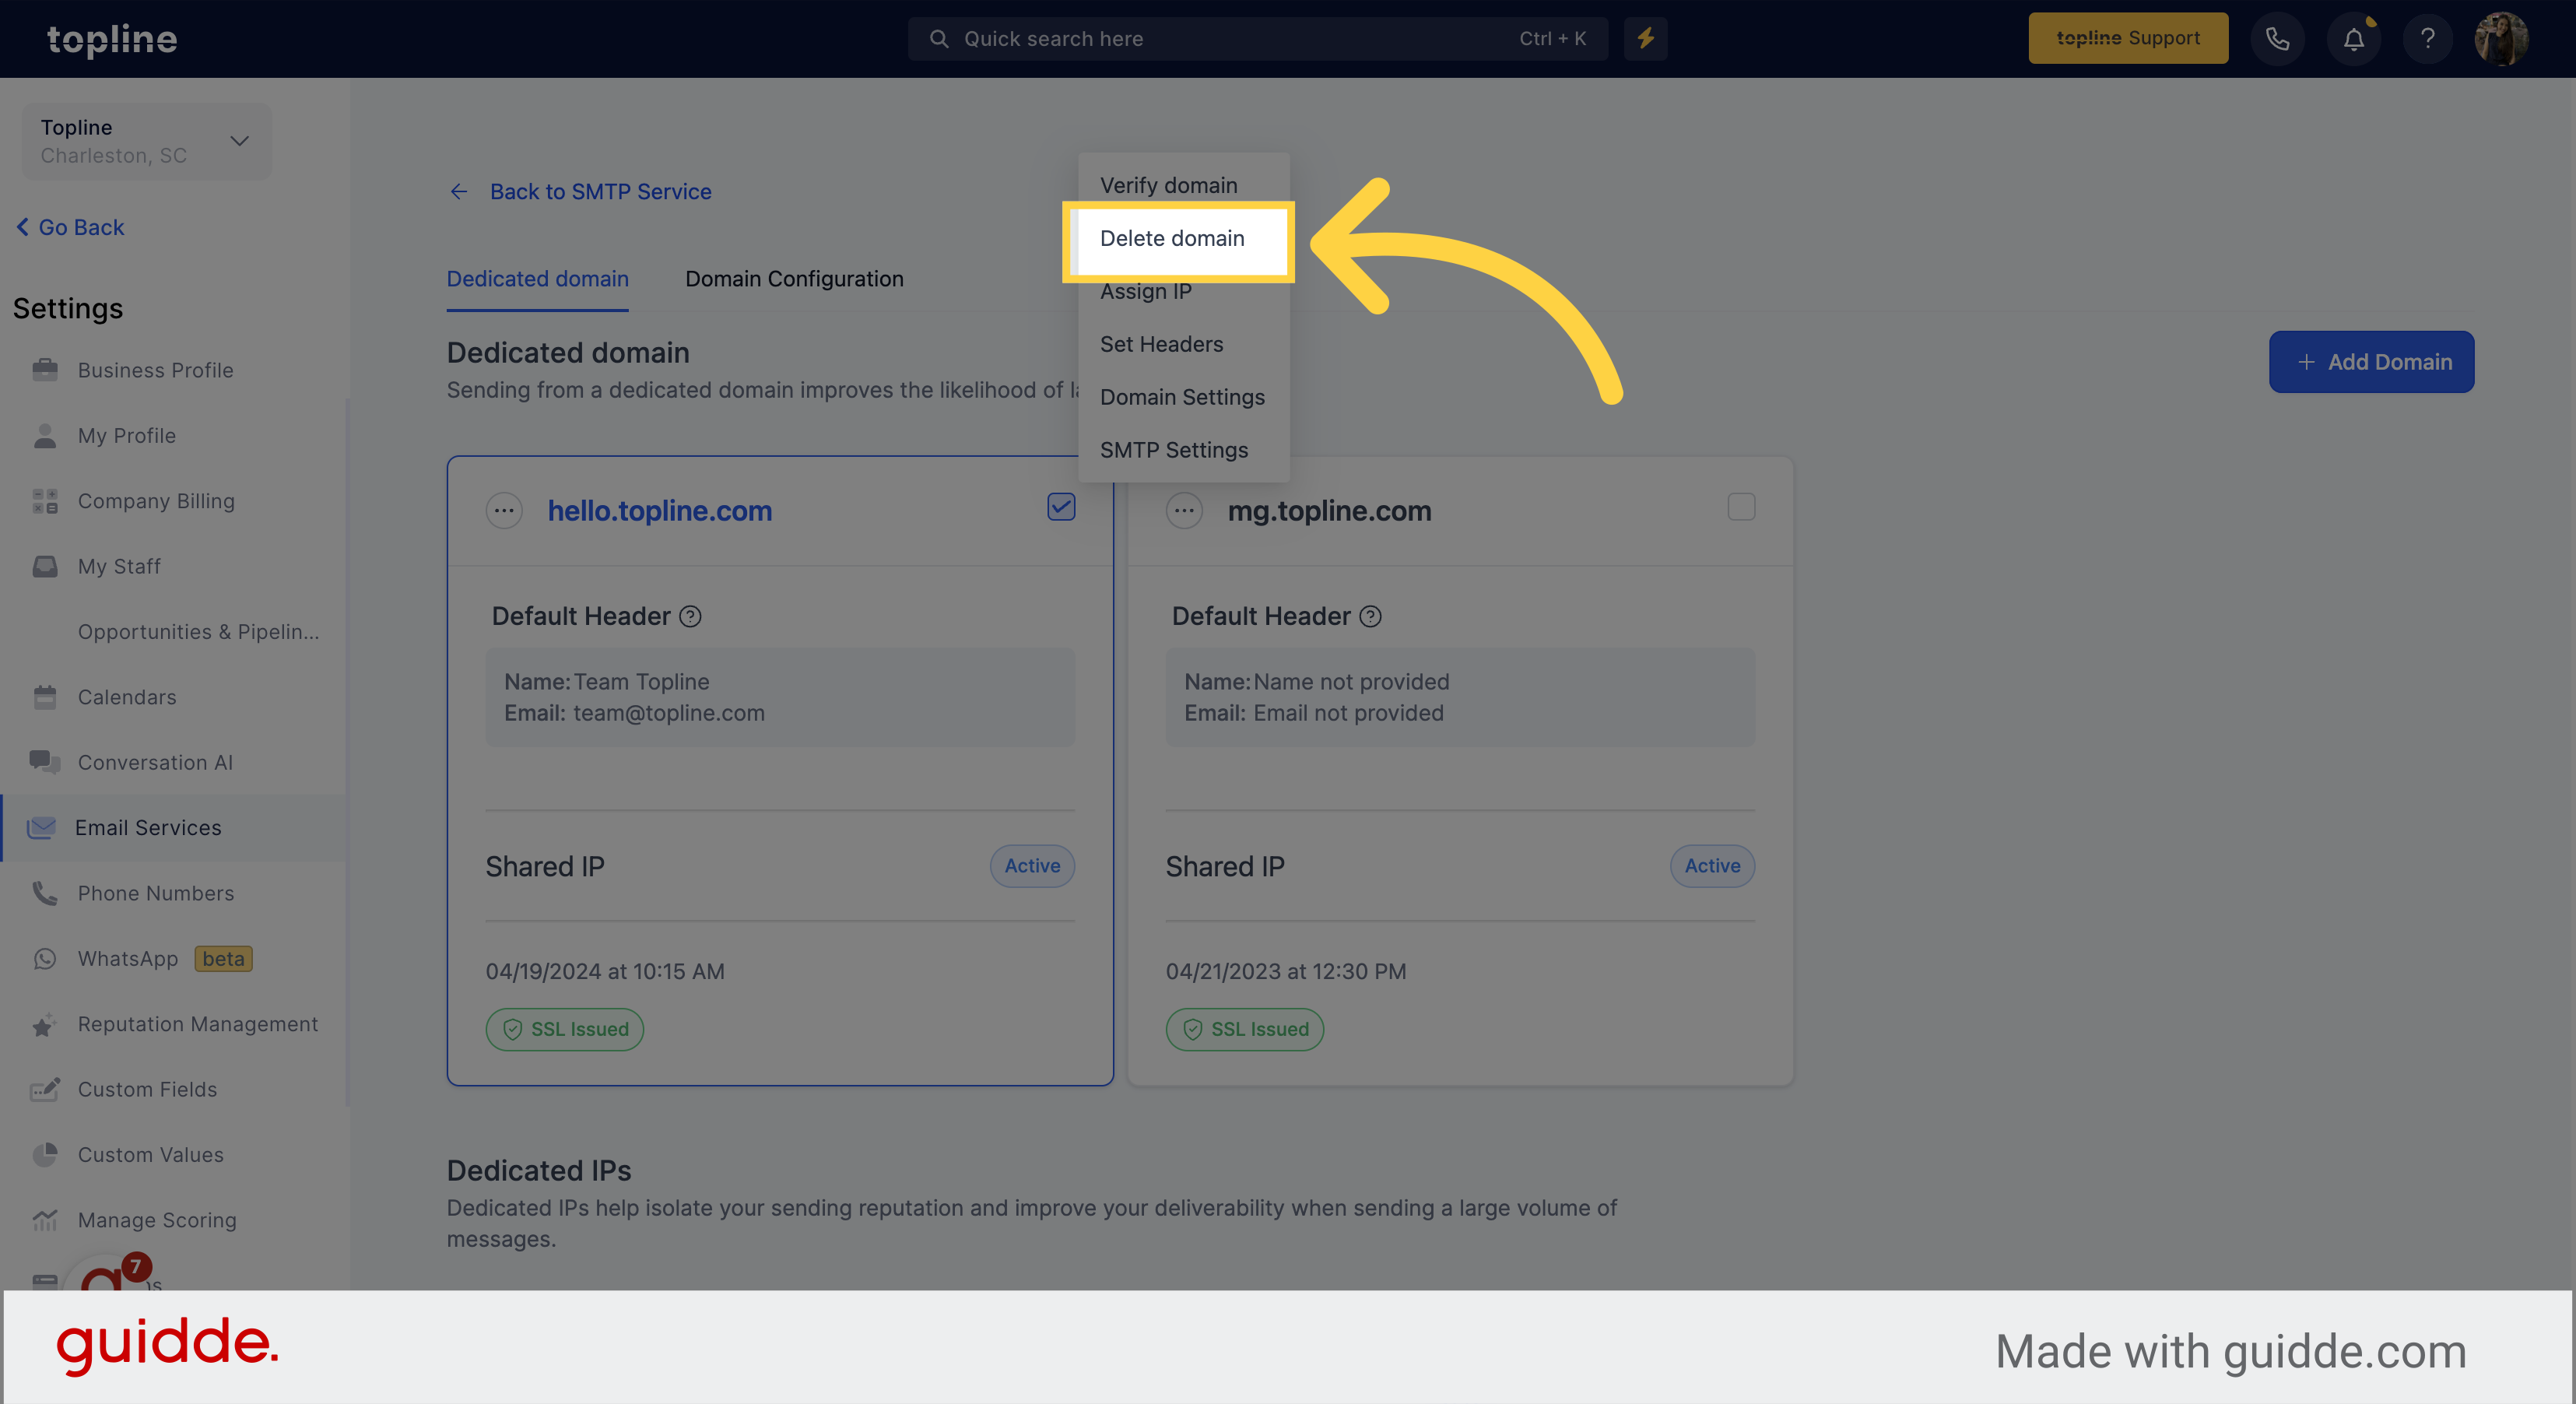
Select the three dots to get more options.
To verify domain, click on verify domain.
You will be able to see the same records and unverified records. once you have added all the records, click Verify button again, and this will generate an SSL certificate
Select the delete domain option from the options menu.