To create a Smart List, navigate to the Contacts section.

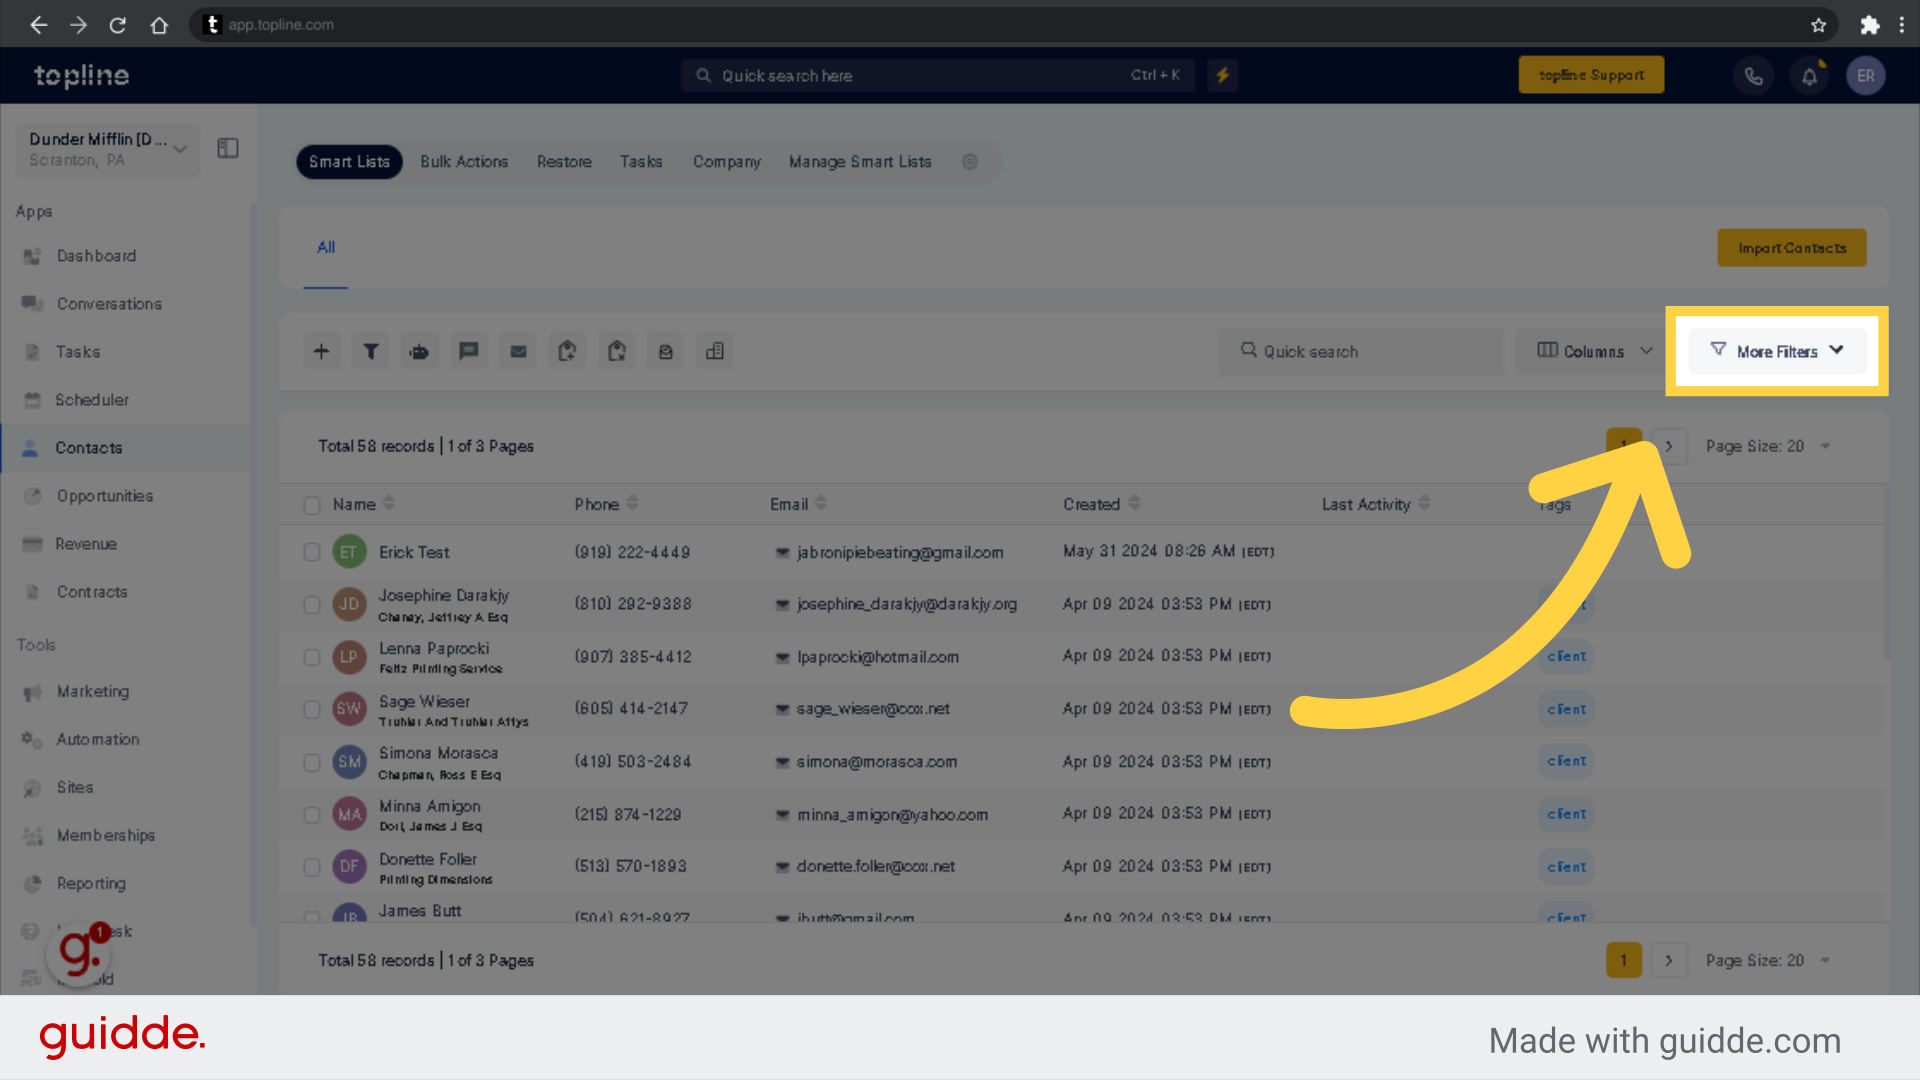
Click "More Filters" to view the drop-down list of filters.
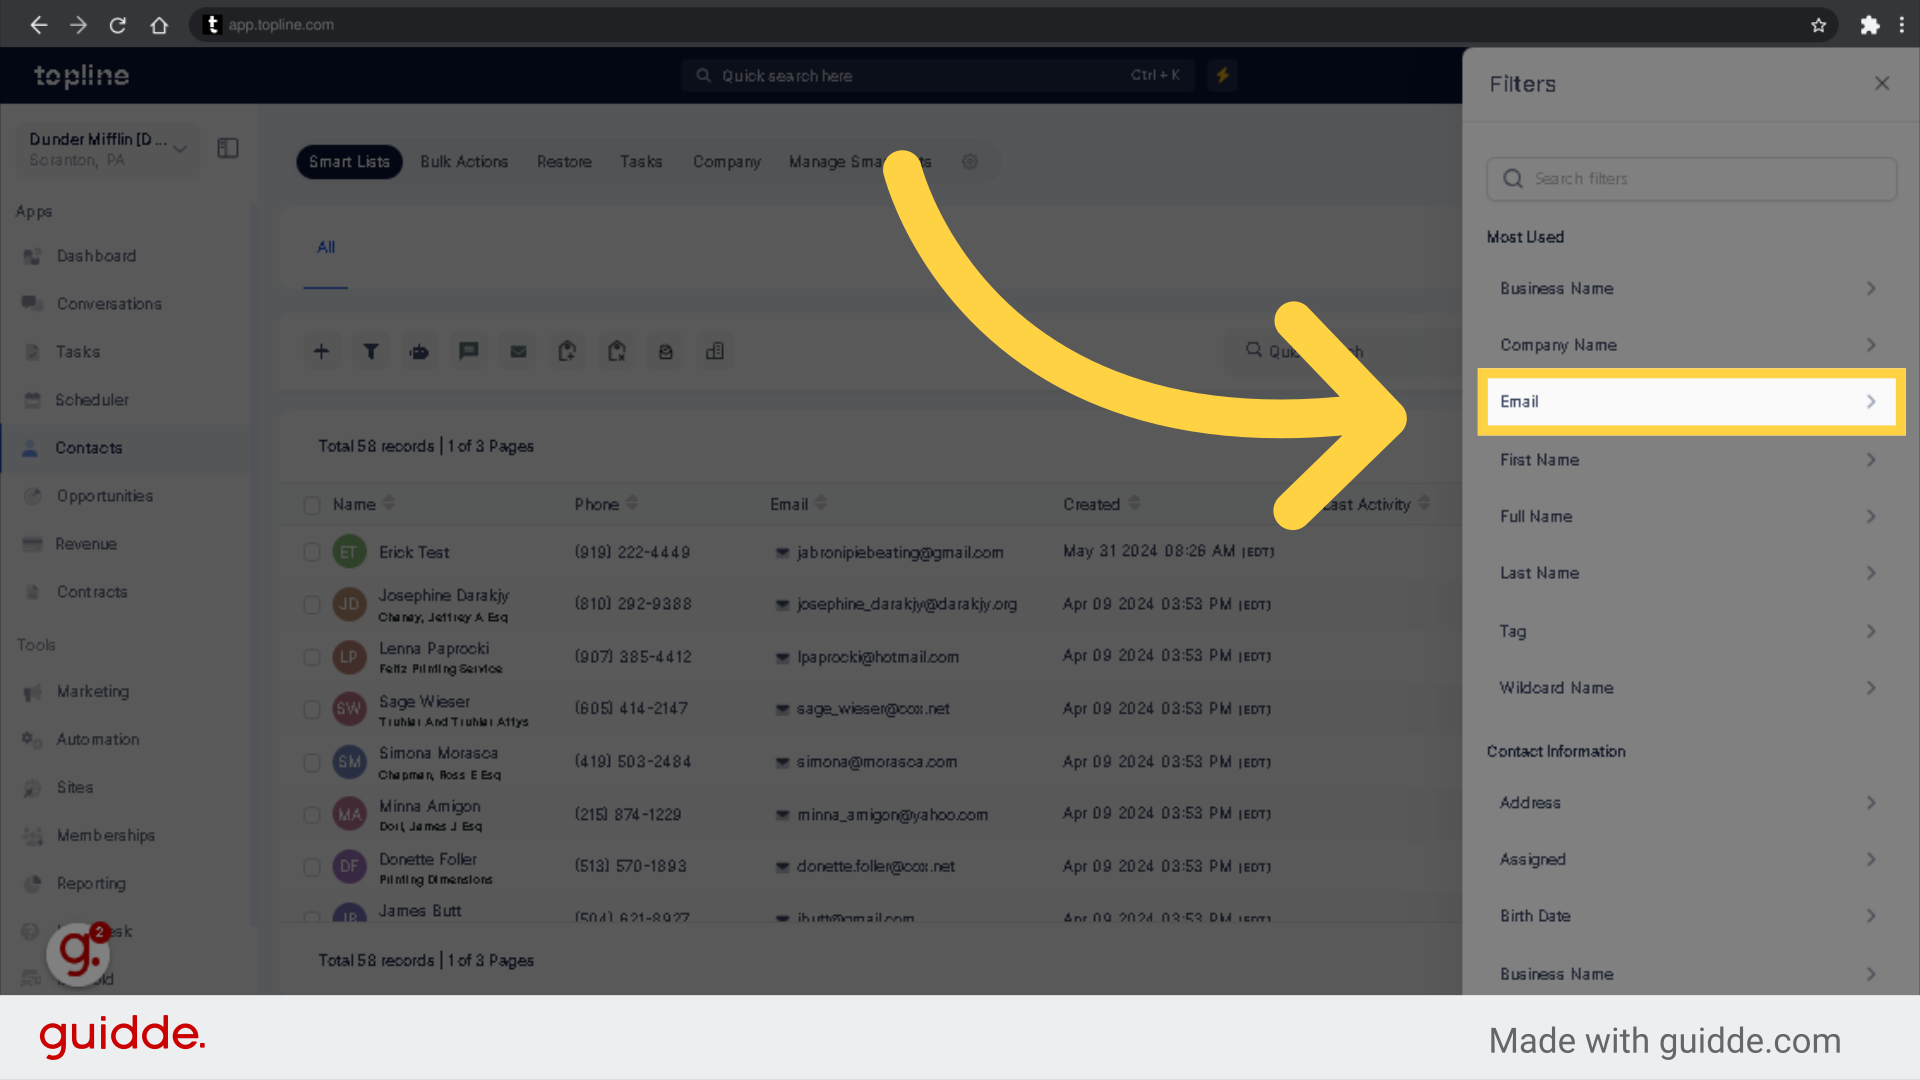
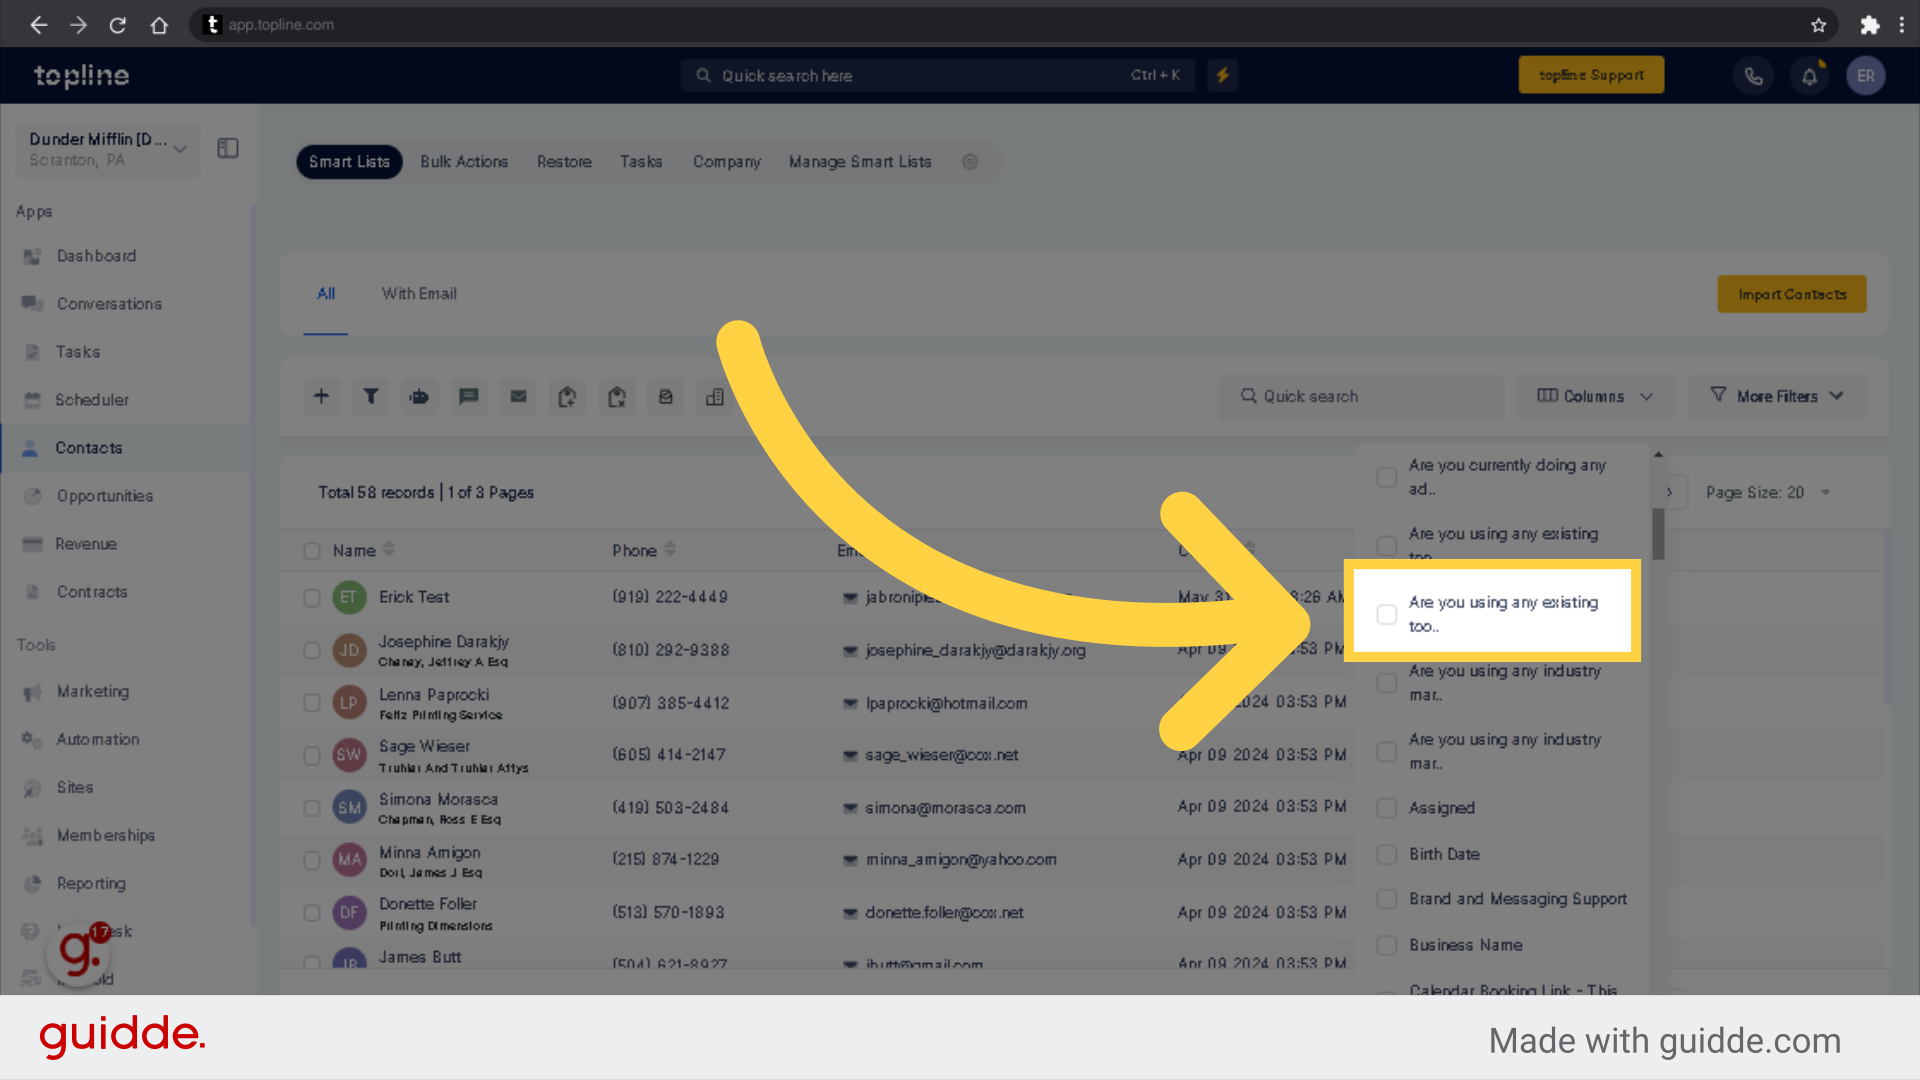
Select the option from the dropdown menu that you wanted to add in your Smart List. You may add two or more option depends on your range.
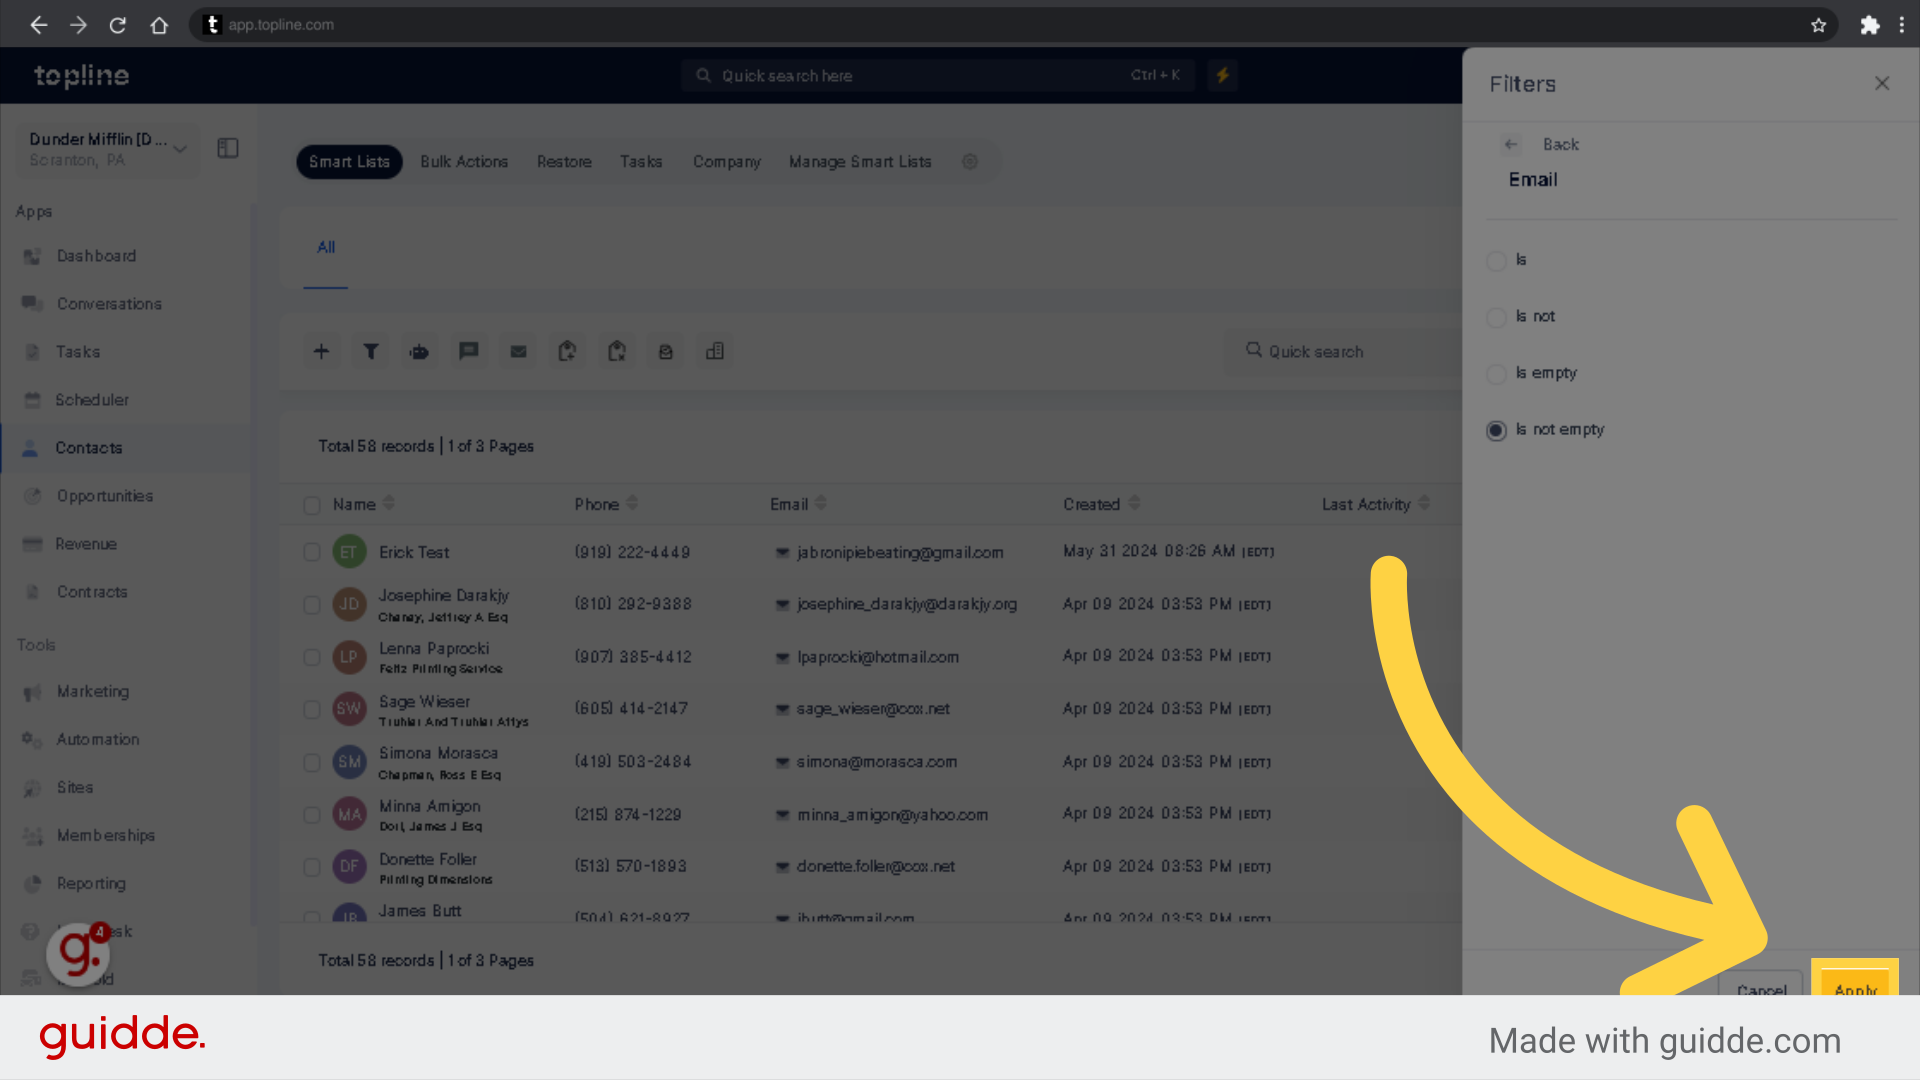
Choose the "Is Not Empty" condition.
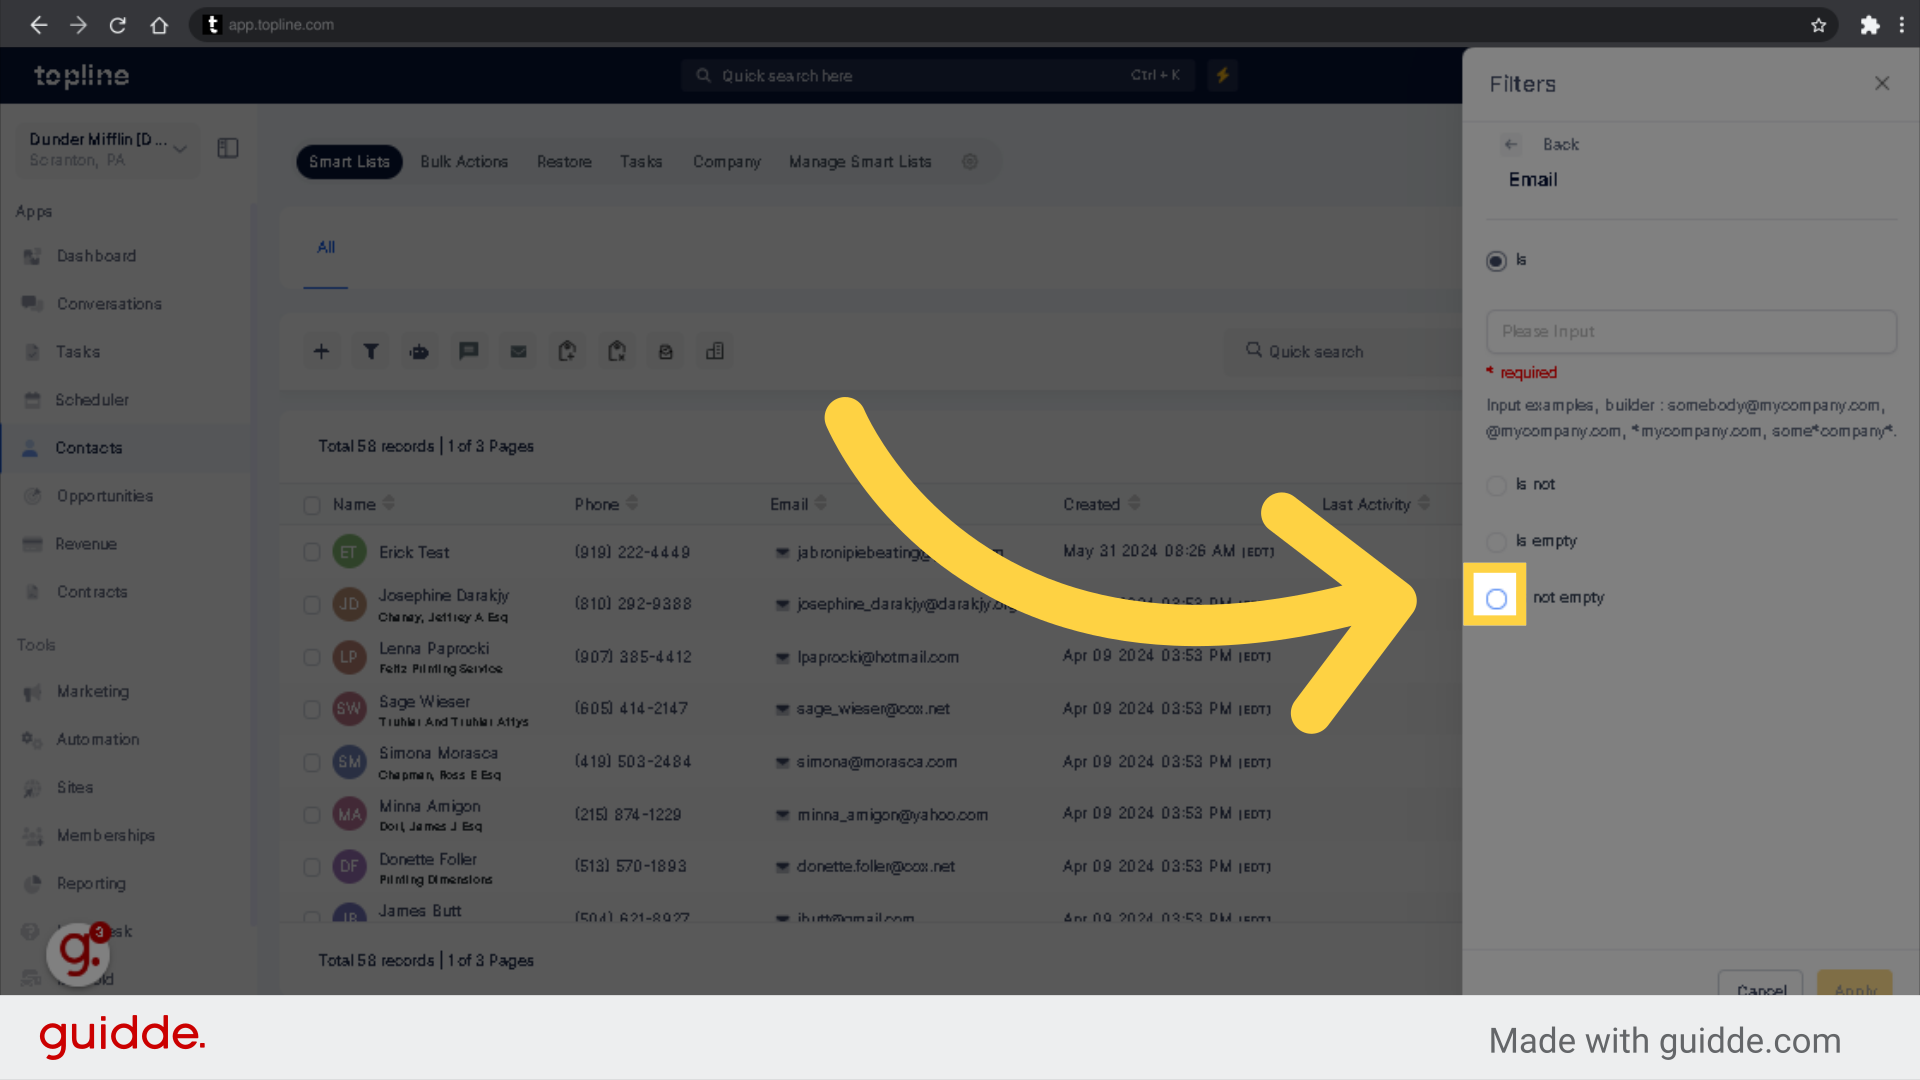
To apply the filter, click on "Apply."
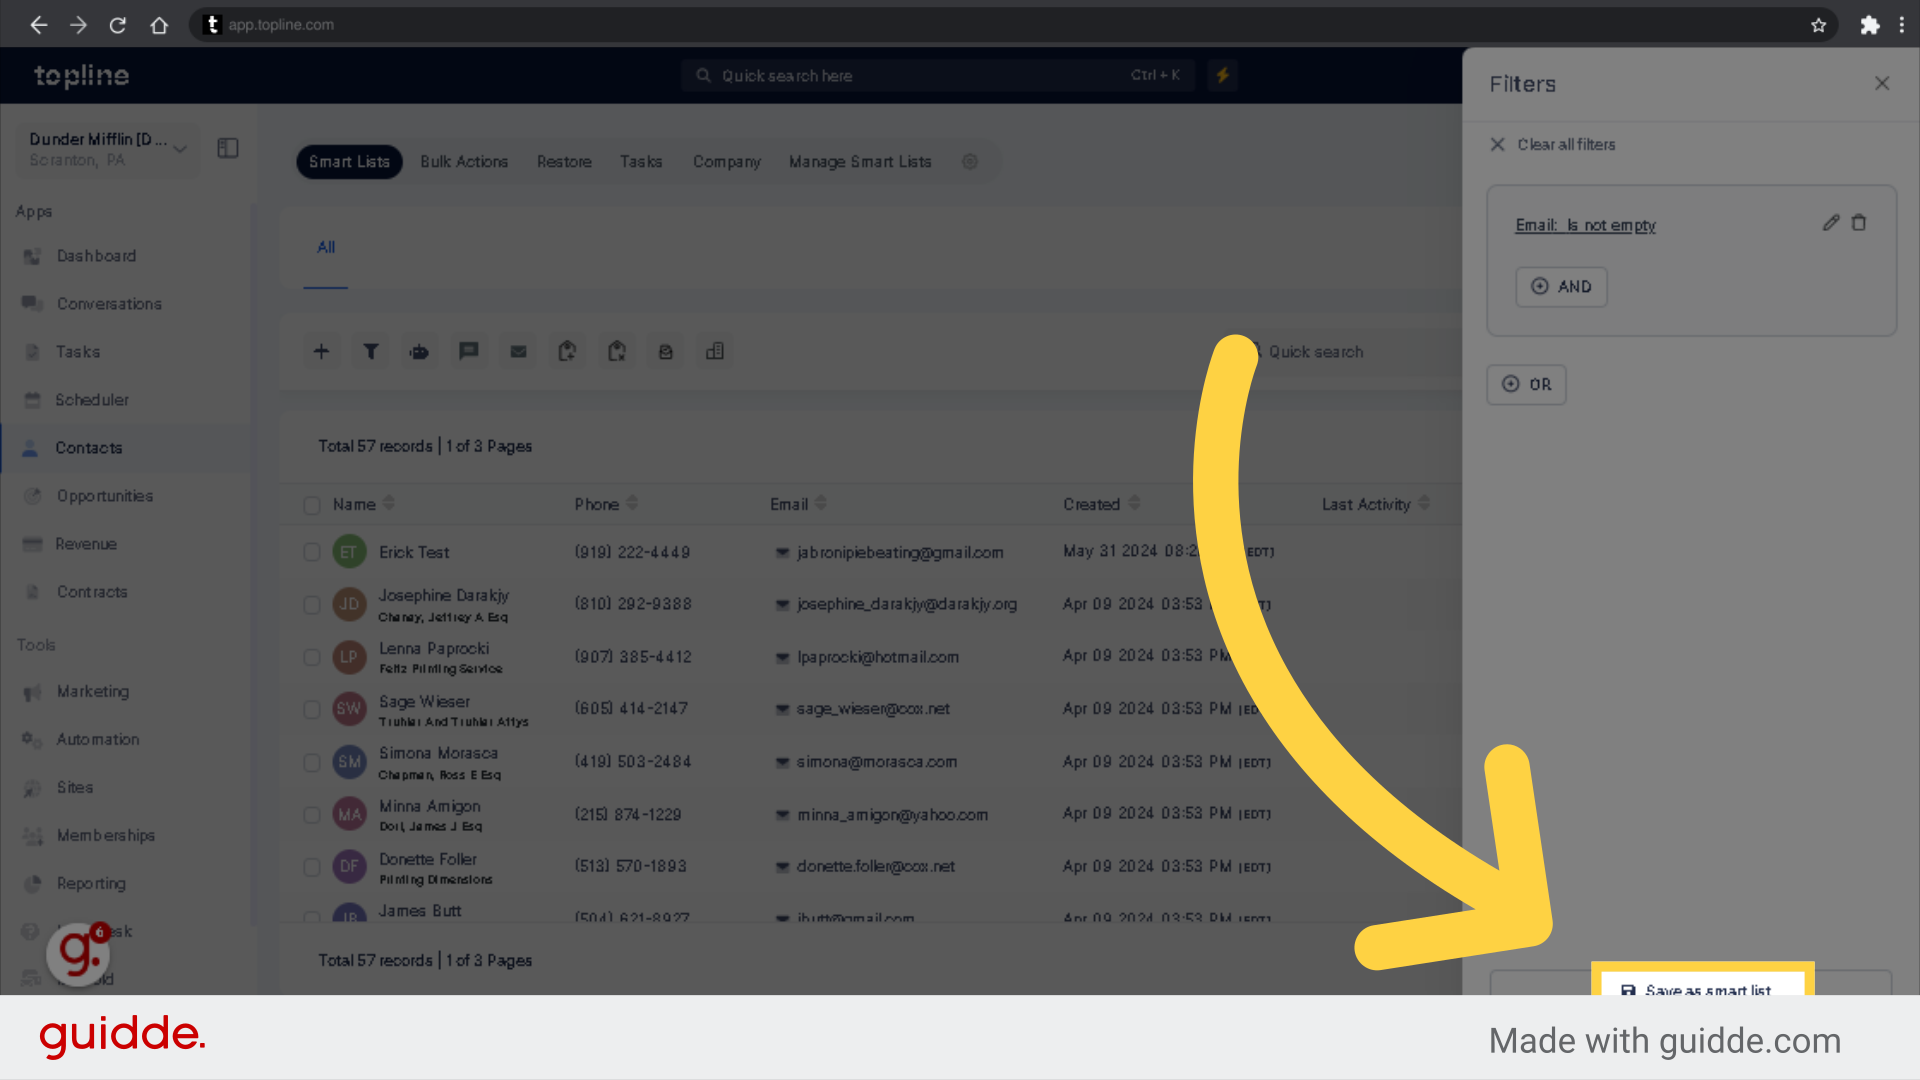
To create the selection as a smart list, click "Save as smart list".
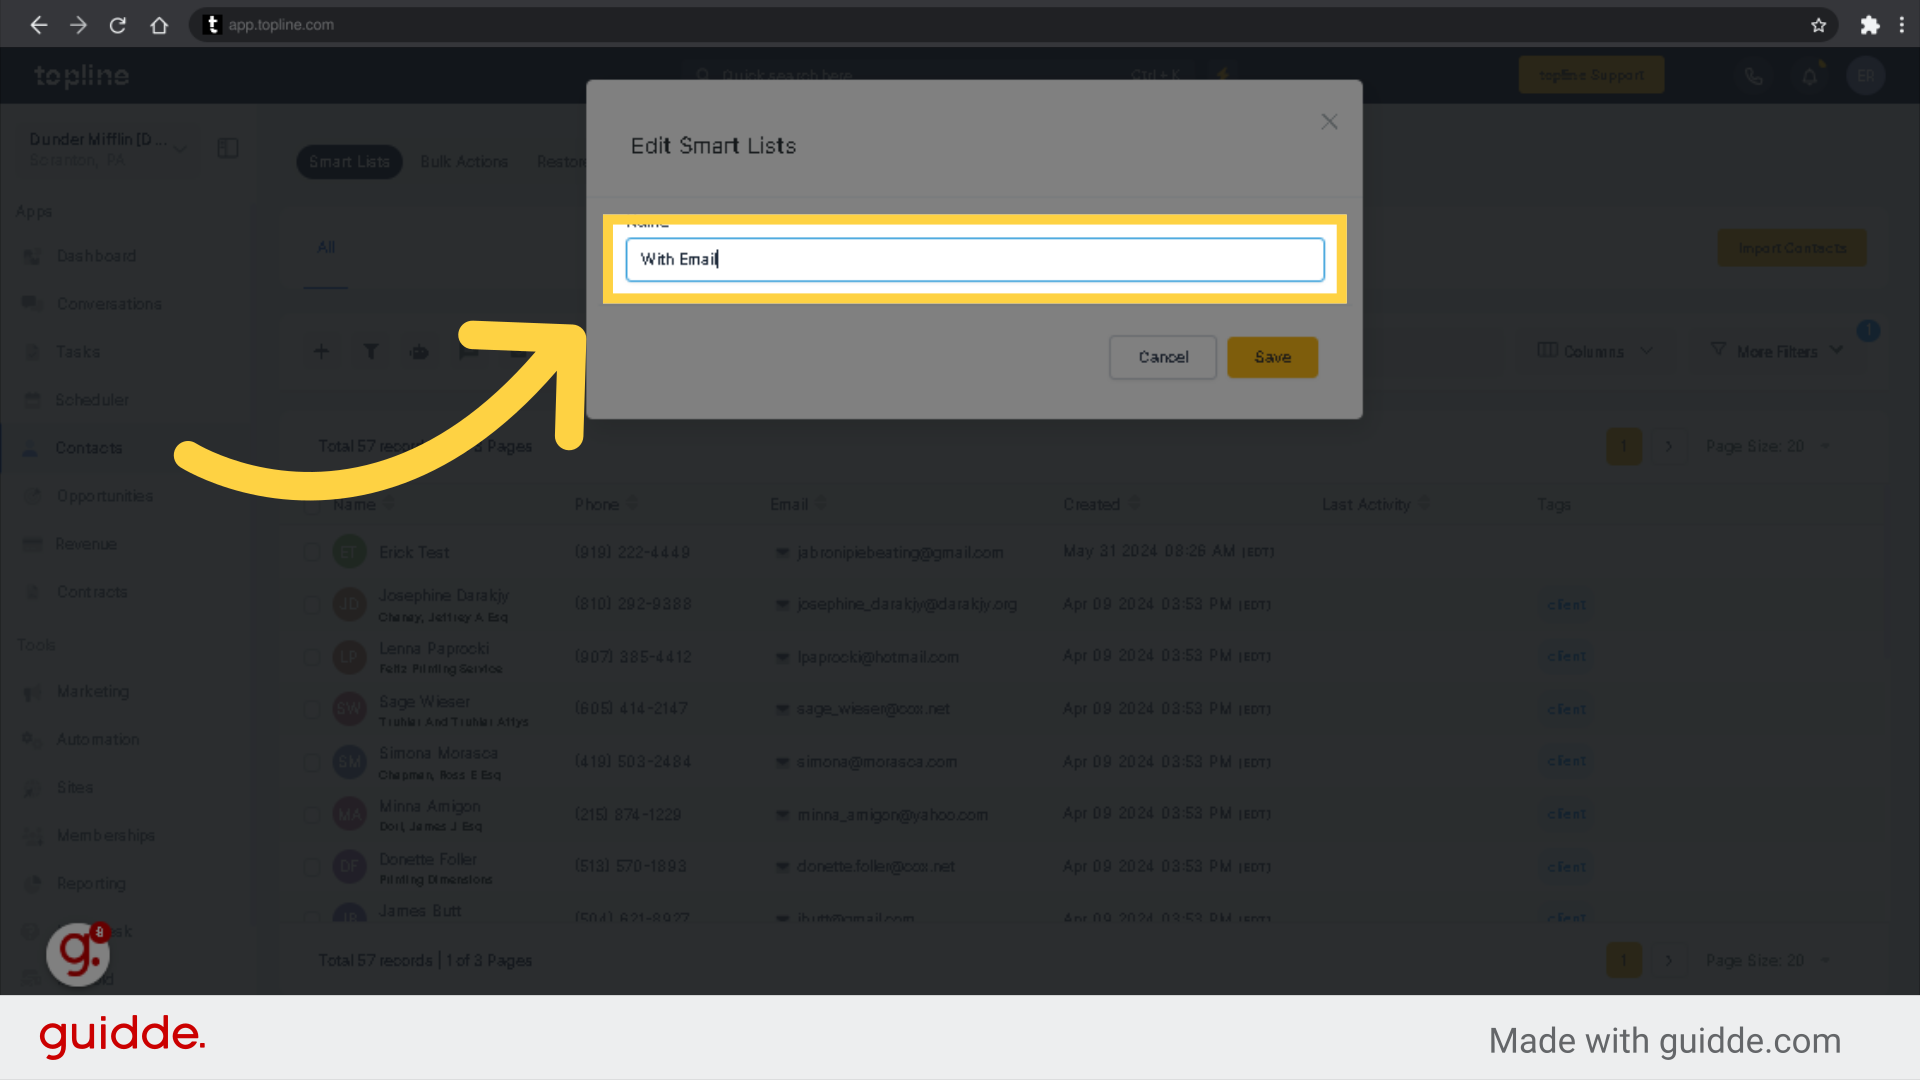
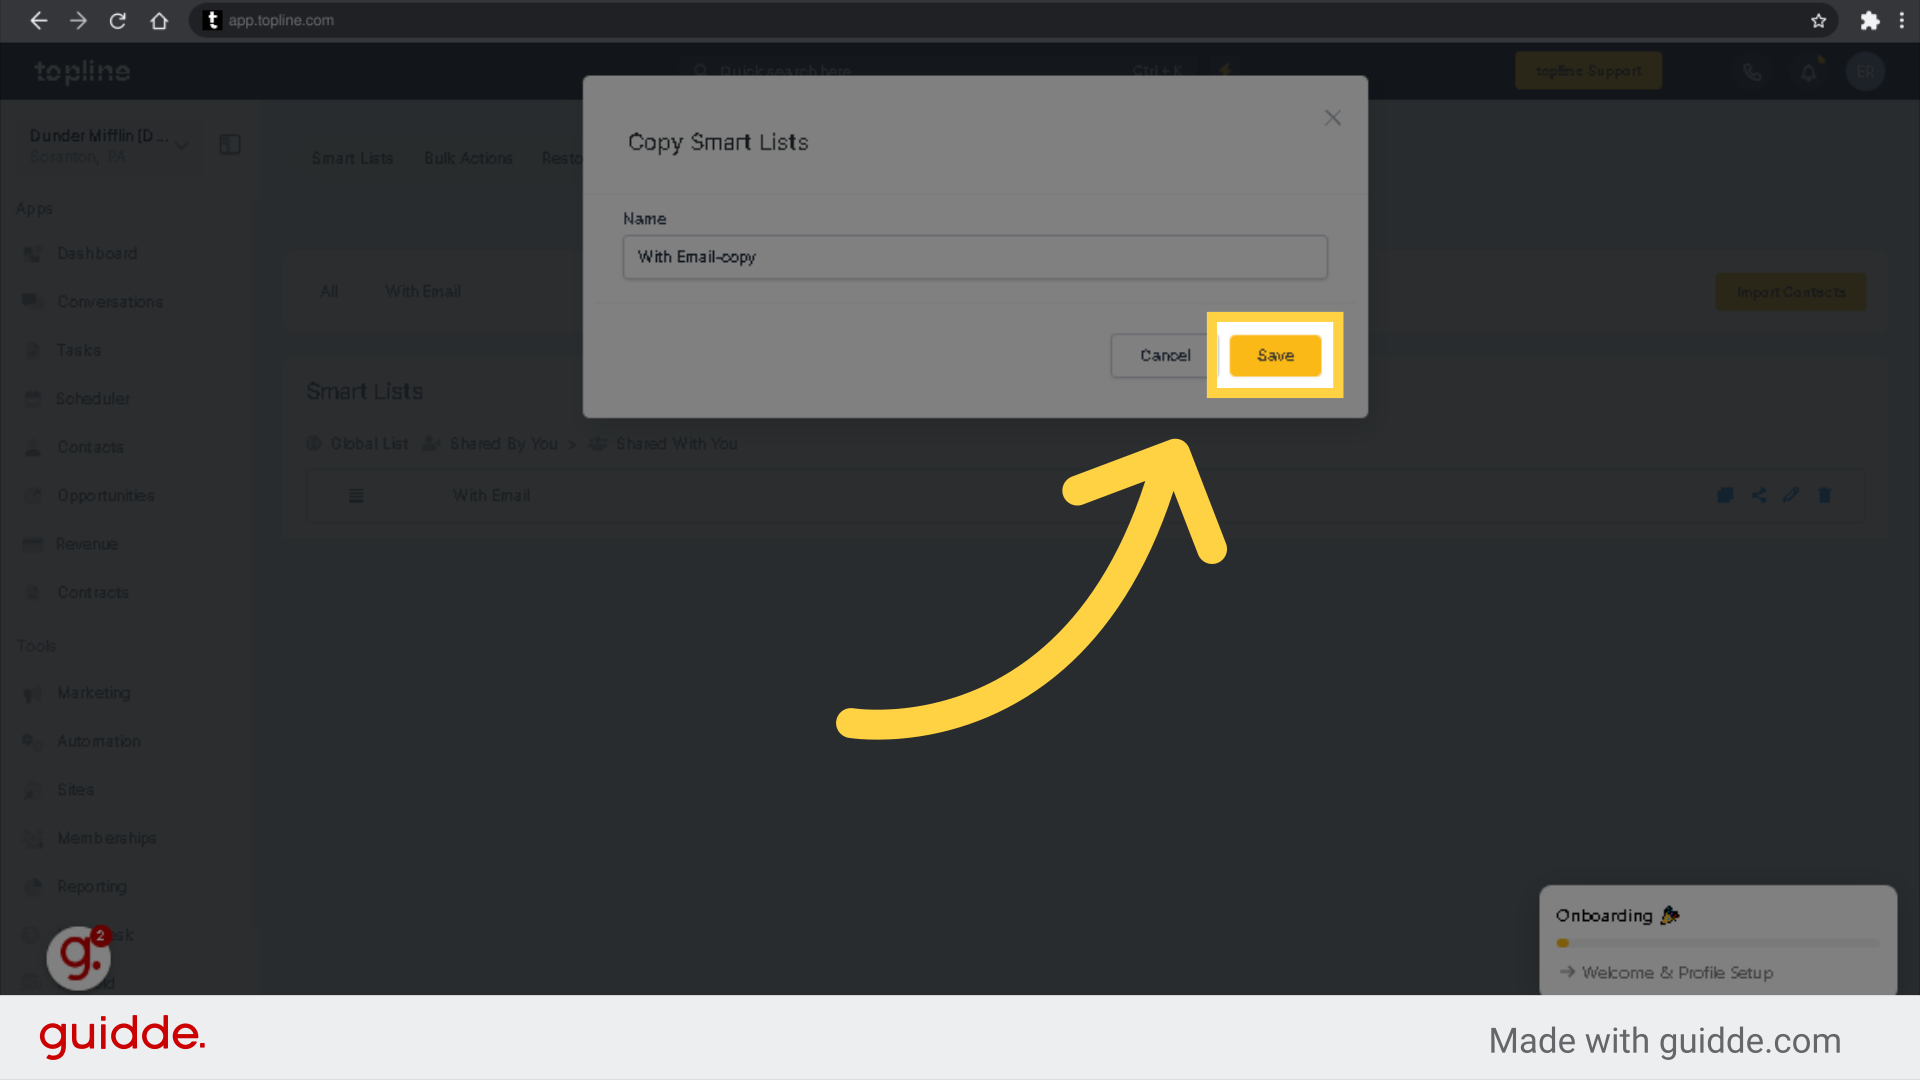
Enter the name for the Smart List you wish to add.
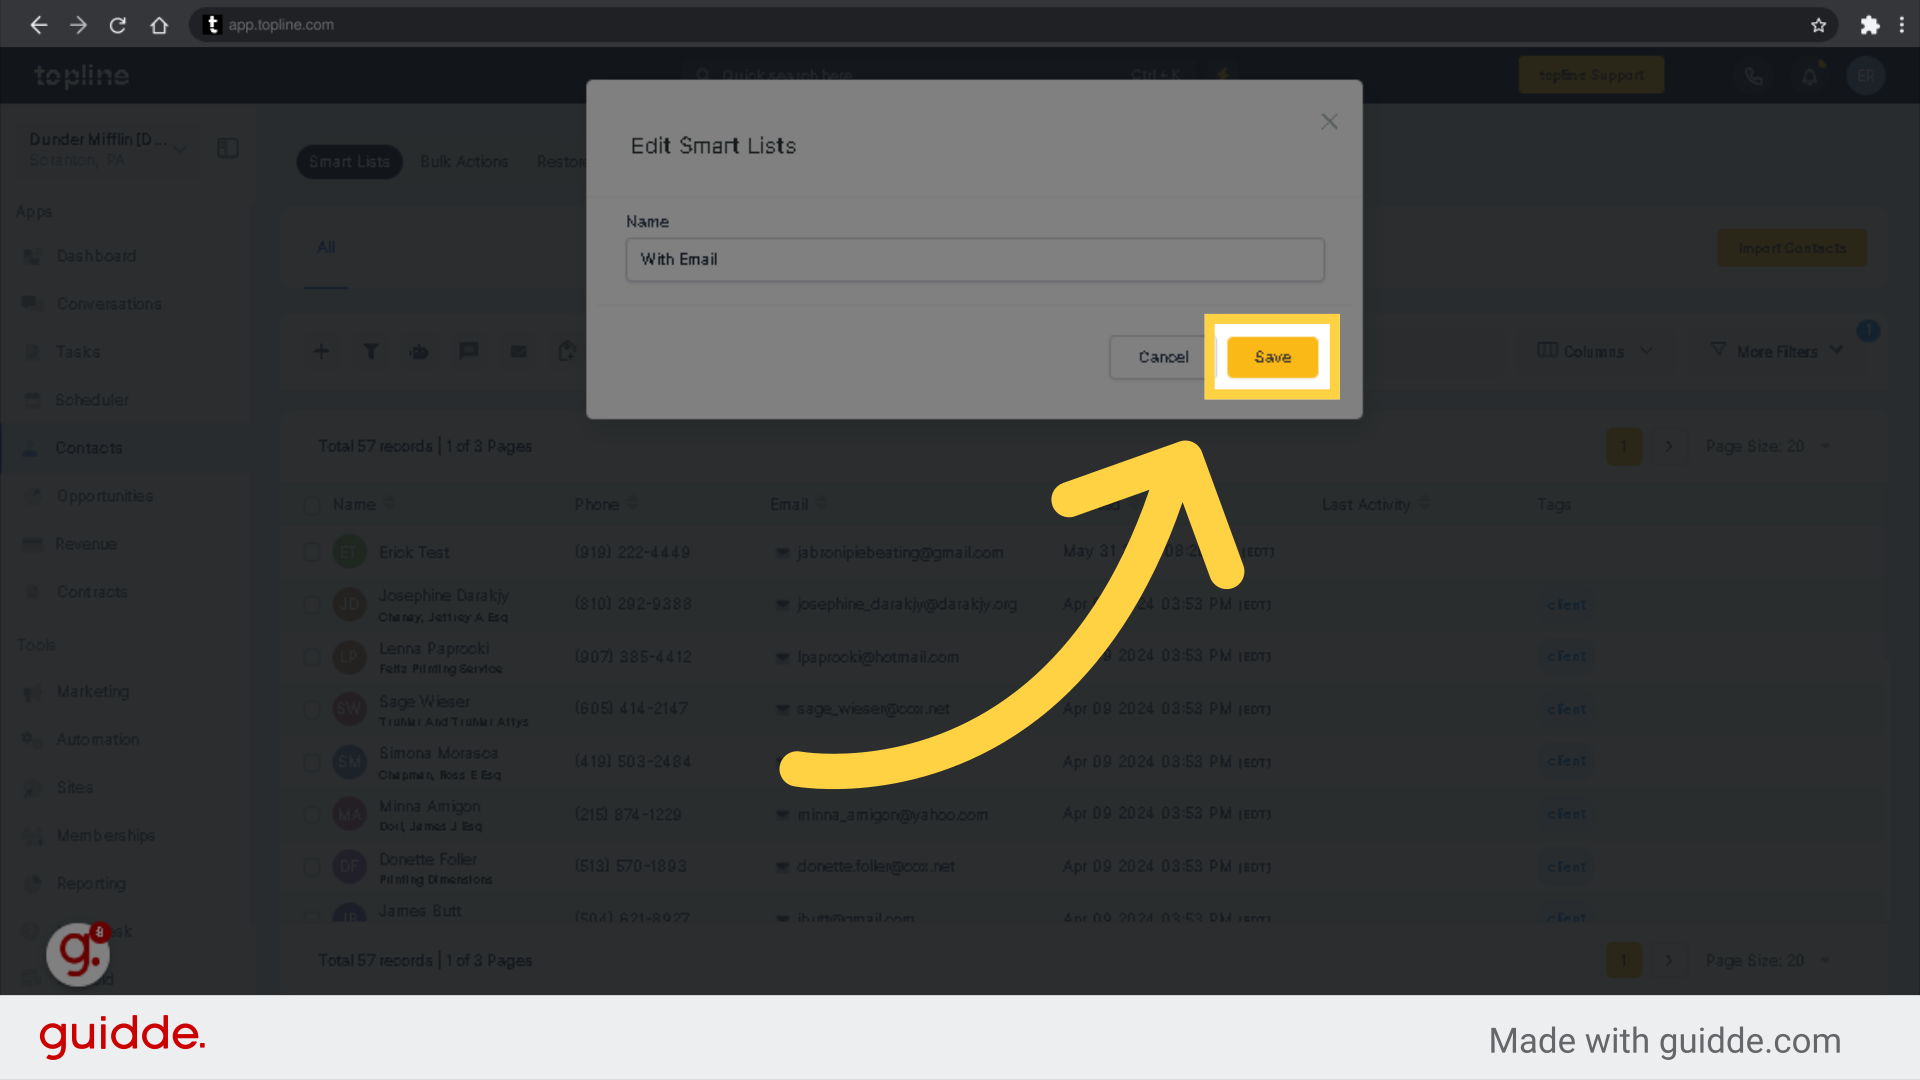
Save the new Smart List by clicking on "Save."
A new Smart List tab will be generated. These lists can be filtered based on various conditions, allowing you to segment your contacts in the most relevant way to your needs.
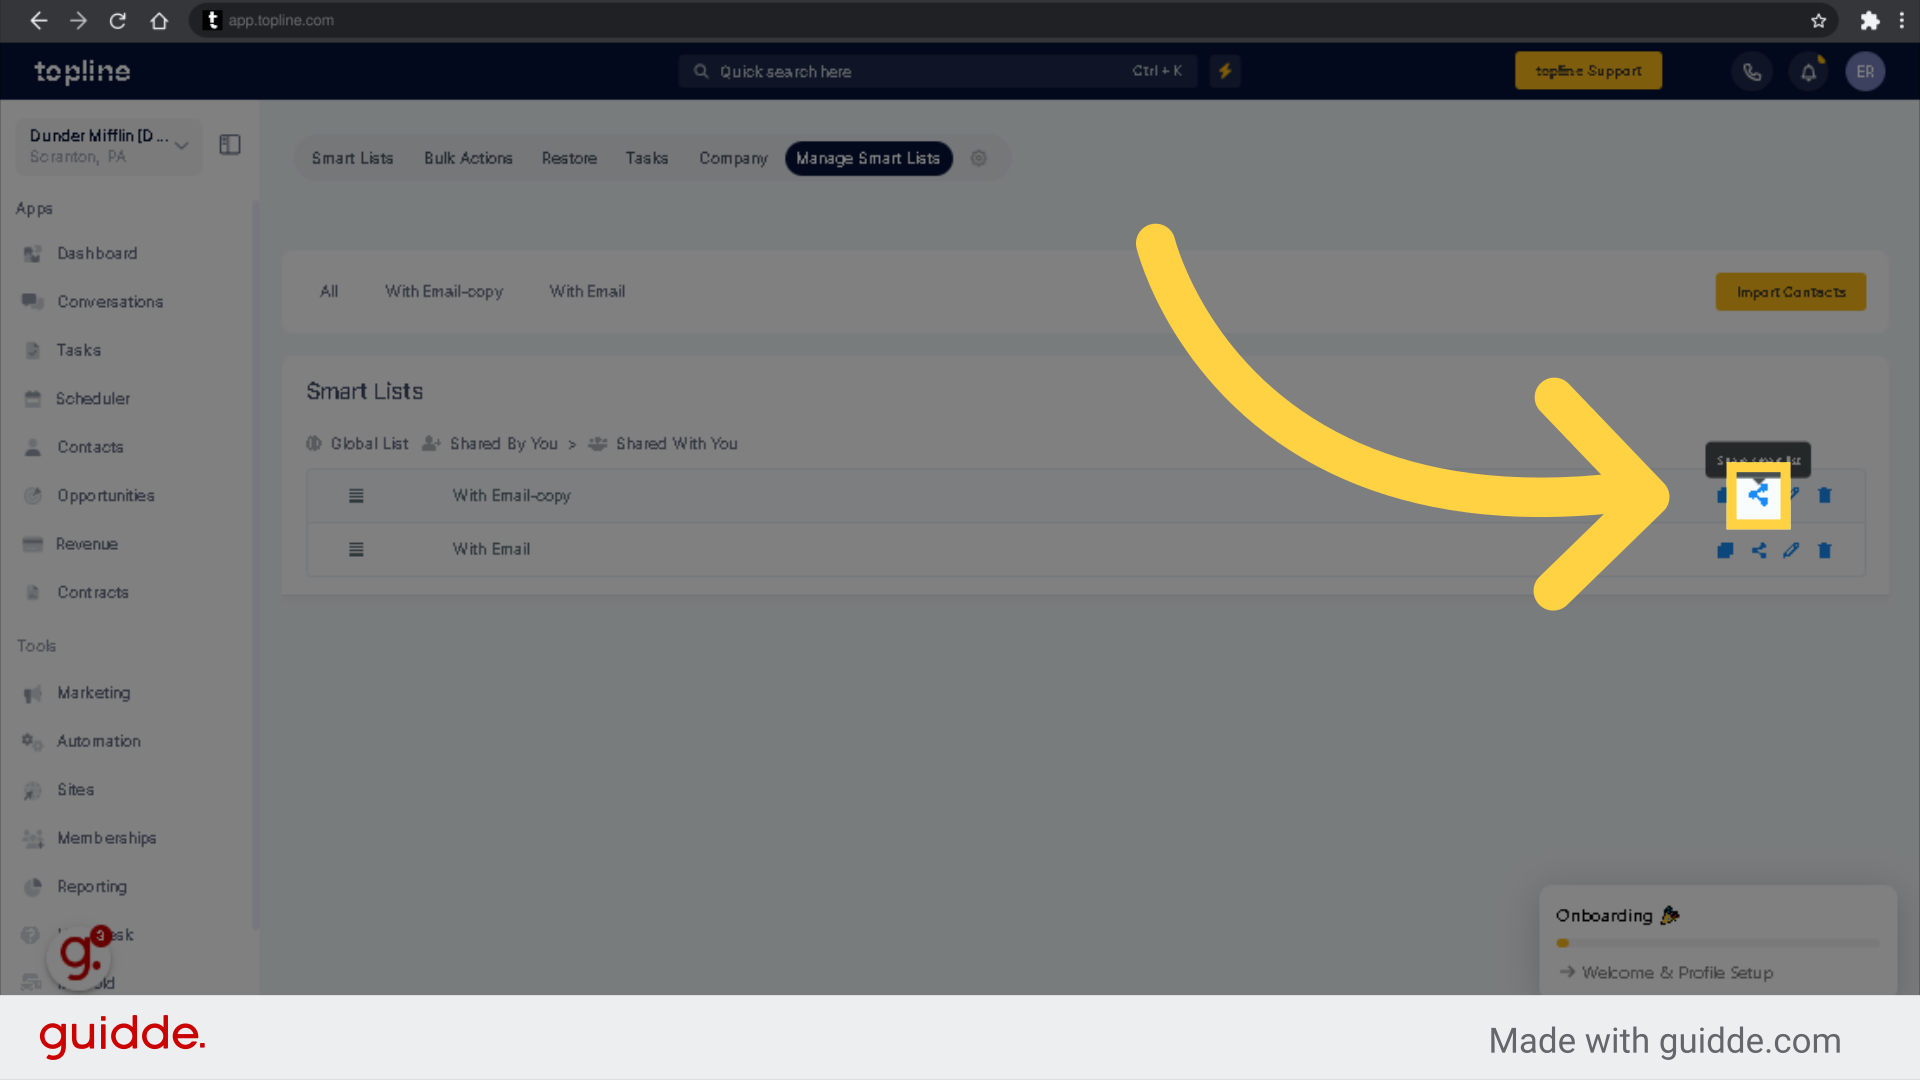
Access the Smart Lists management if you want to copy, share, edit or delete your Smart List.
Here is where you select the action you wish to do.

Click on the "Ok" button to confirm the desired changes.
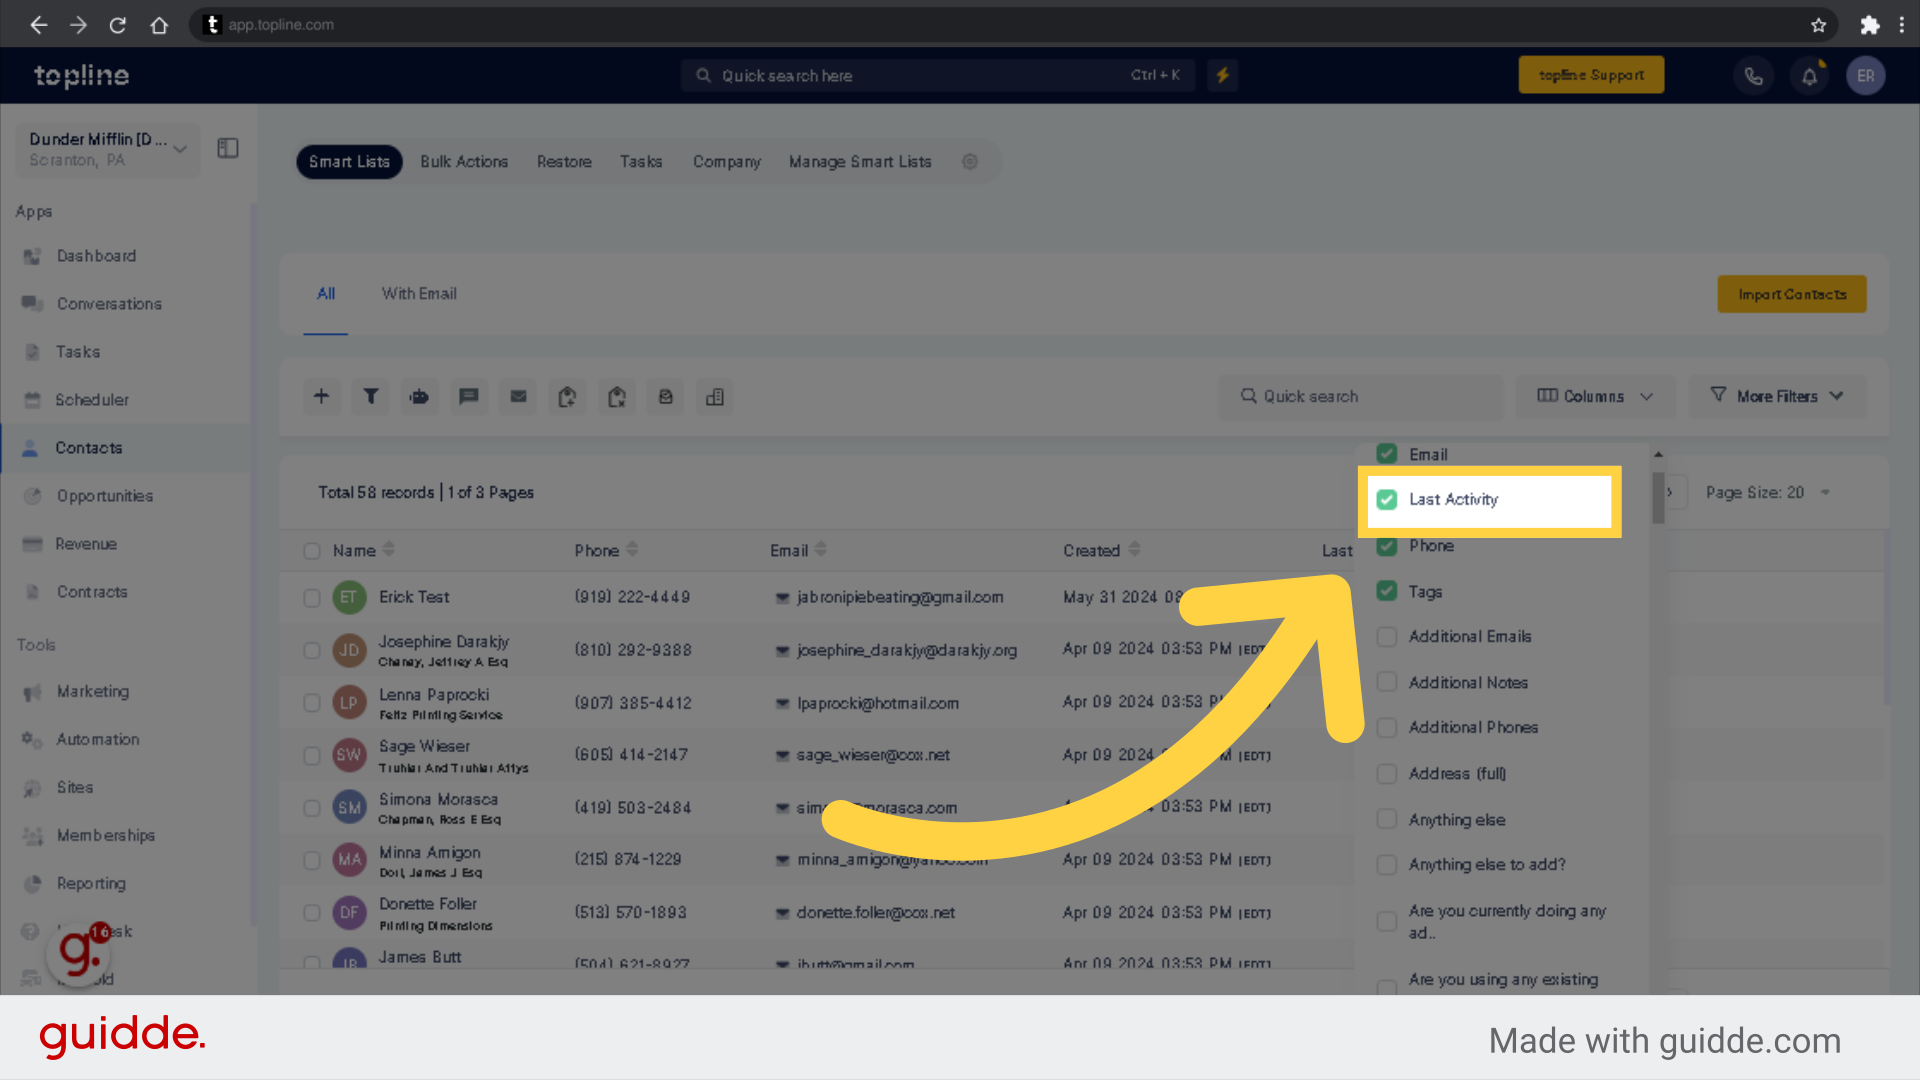
You can also choose which data columns to display, giving you a customized view of your contact information.
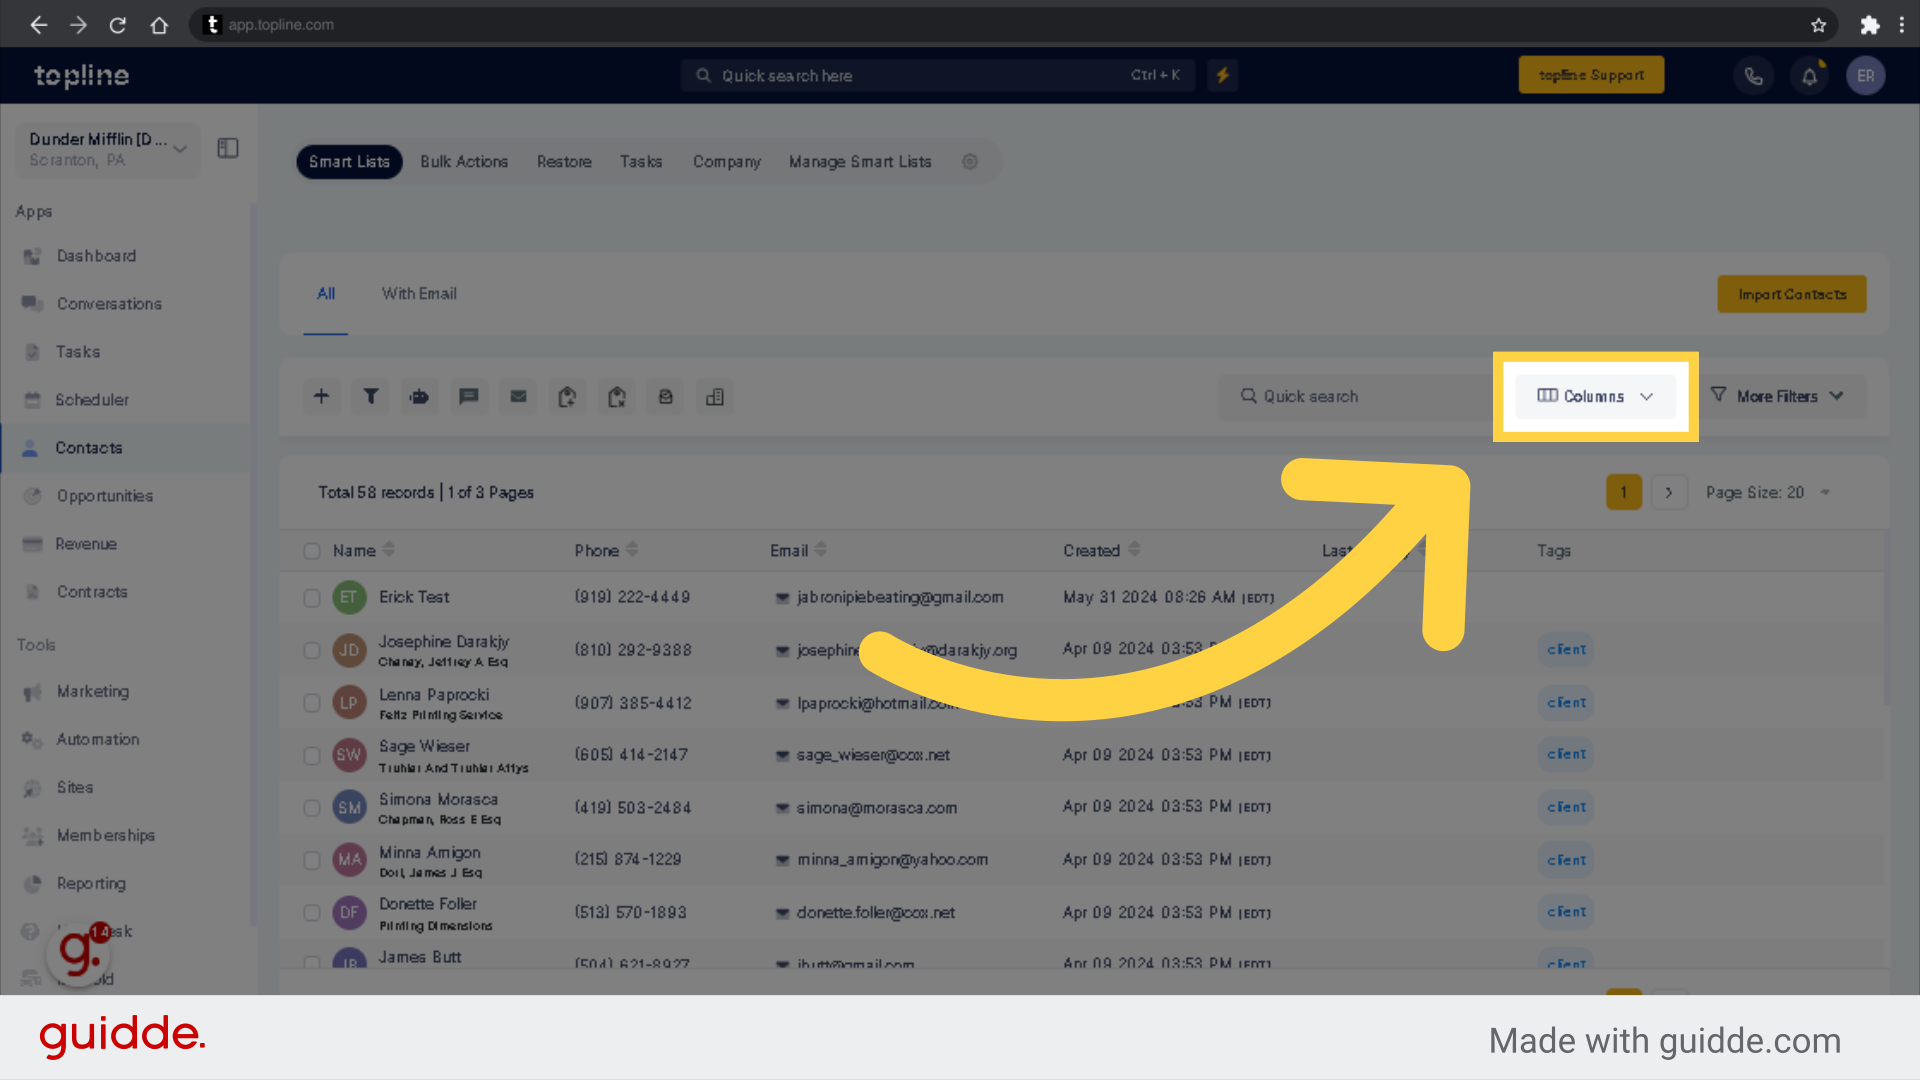
You customize your page by ticking or unticking the box listed in the columns section, you can modify the view in each list.
A helpful tool when looking for recent activity or filter by people who haven't interacted in a certain period of time is by selecting the "Last Activity" column.
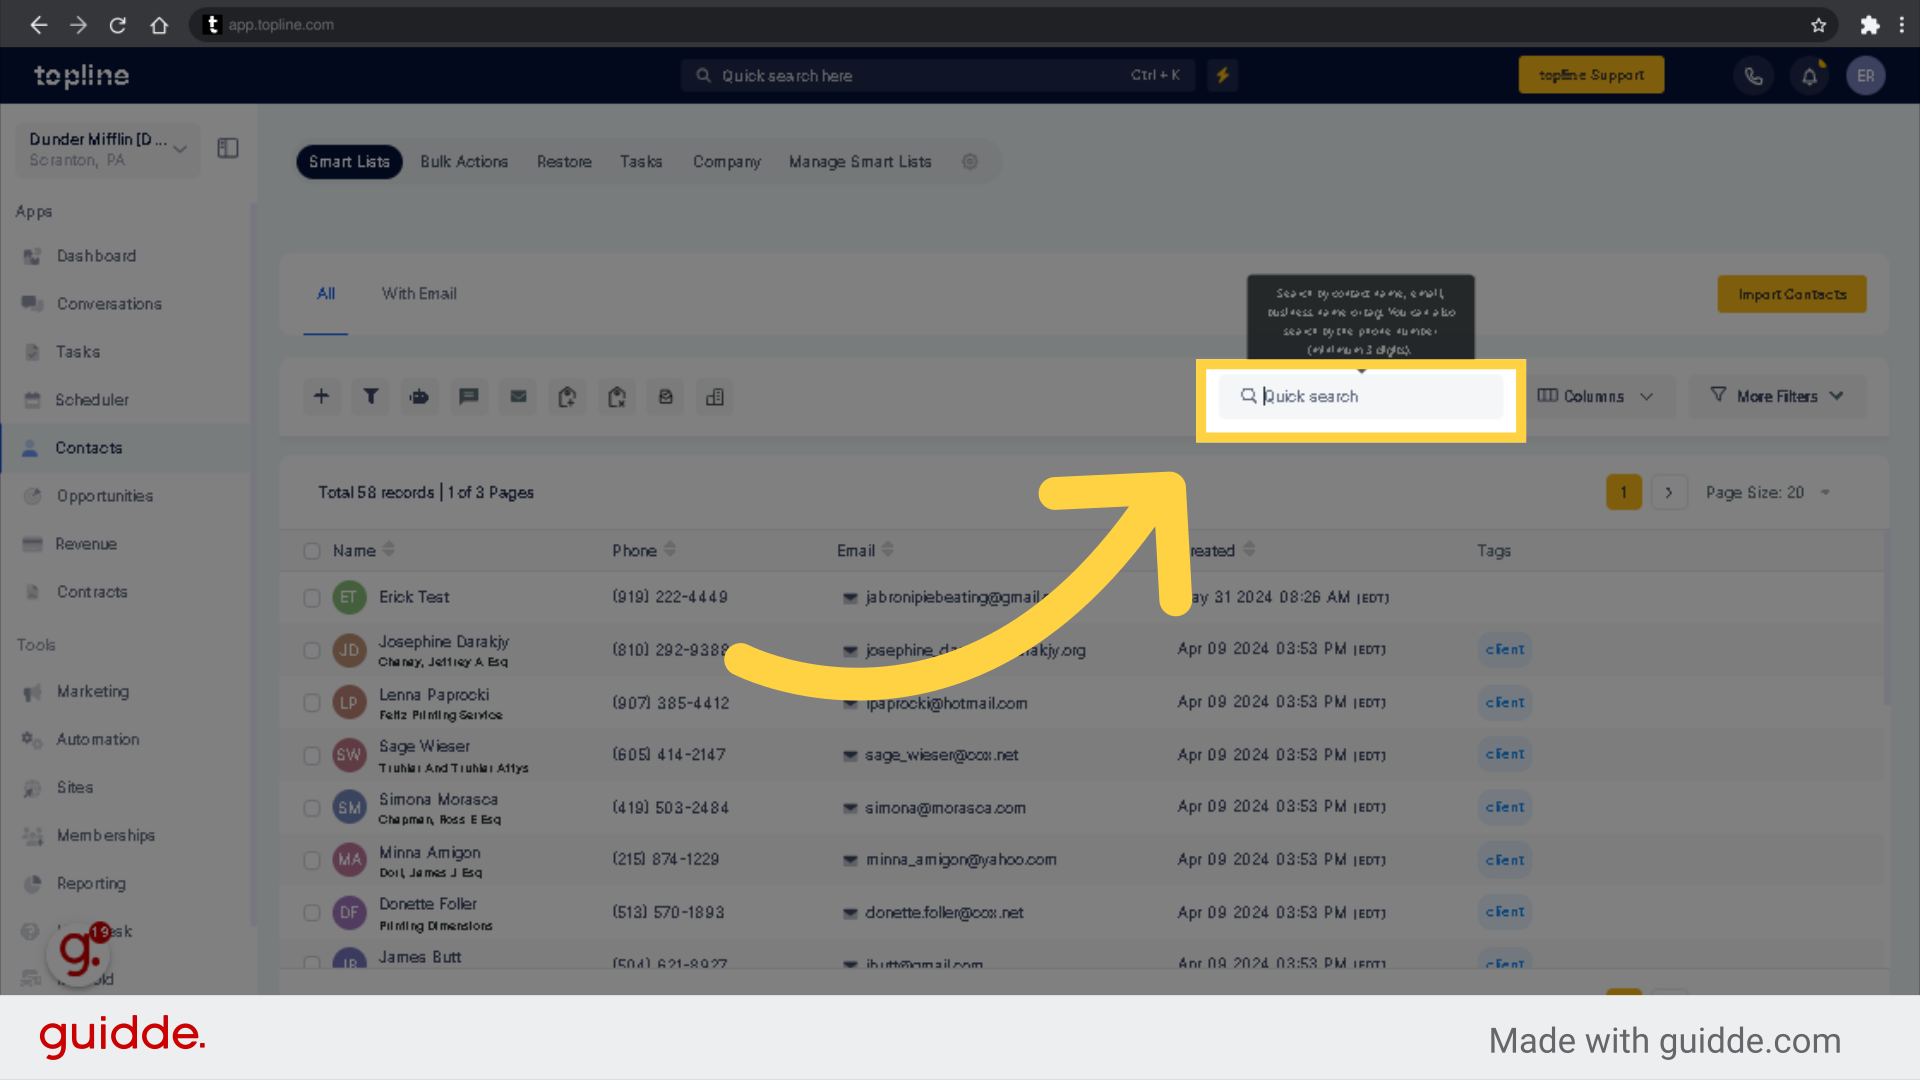
Another tip is to access the Quick Search feature, if you want to find a specific contact on your Smart List. You can search by contact name, email, business name or tag. You can also search by the phone number (minimum 3 digits).
Marketing Campaign Segmentation: With Smart Lists, marketers can better target their audience by creating specific lists based on certain criteria. For instance, a business can create a Smart List of customers who have purchased within the last six months and target them with a new product launch campaign.
Customer Relationship Management (CRM): Businesses can use Smart Lists to manage customer relationships more effectively. For instance, a Smart List can be created to identify customers who haven't been contacted in a while, helping ensure consistent customer engagement.
Sales Lead Prioritization: A Smart List can help sales teams to prioritize leads based on specific attributes like lead source, lead score, or recent activity. This enables the sales team to focus their efforts on high-potential leads.
Product Development Feedback: Smart Lists can help identify customers who frequently use a particular product or service. These customers can then be targeted for feedback or reviews, helping with product development.
Customer Retention Strategies: Businesses can create Smart Lists to identify customers at risk of churn, such as those who have reduced their service usage. These customers can then be targeted with specific retention strategies.
Event Planning: For businesses that hold events, Smart Lists can be used to identify potential attendees based on past attendance, location, or interest in event topics. This can help in sending targeted invitations and planning the event capacity.
Customer Support: Smart Lists can help identify customers who have submitted multiple support tickets or have unresolved issues. This allows customer service teams to reach out and improve customer satisfaction proactively.
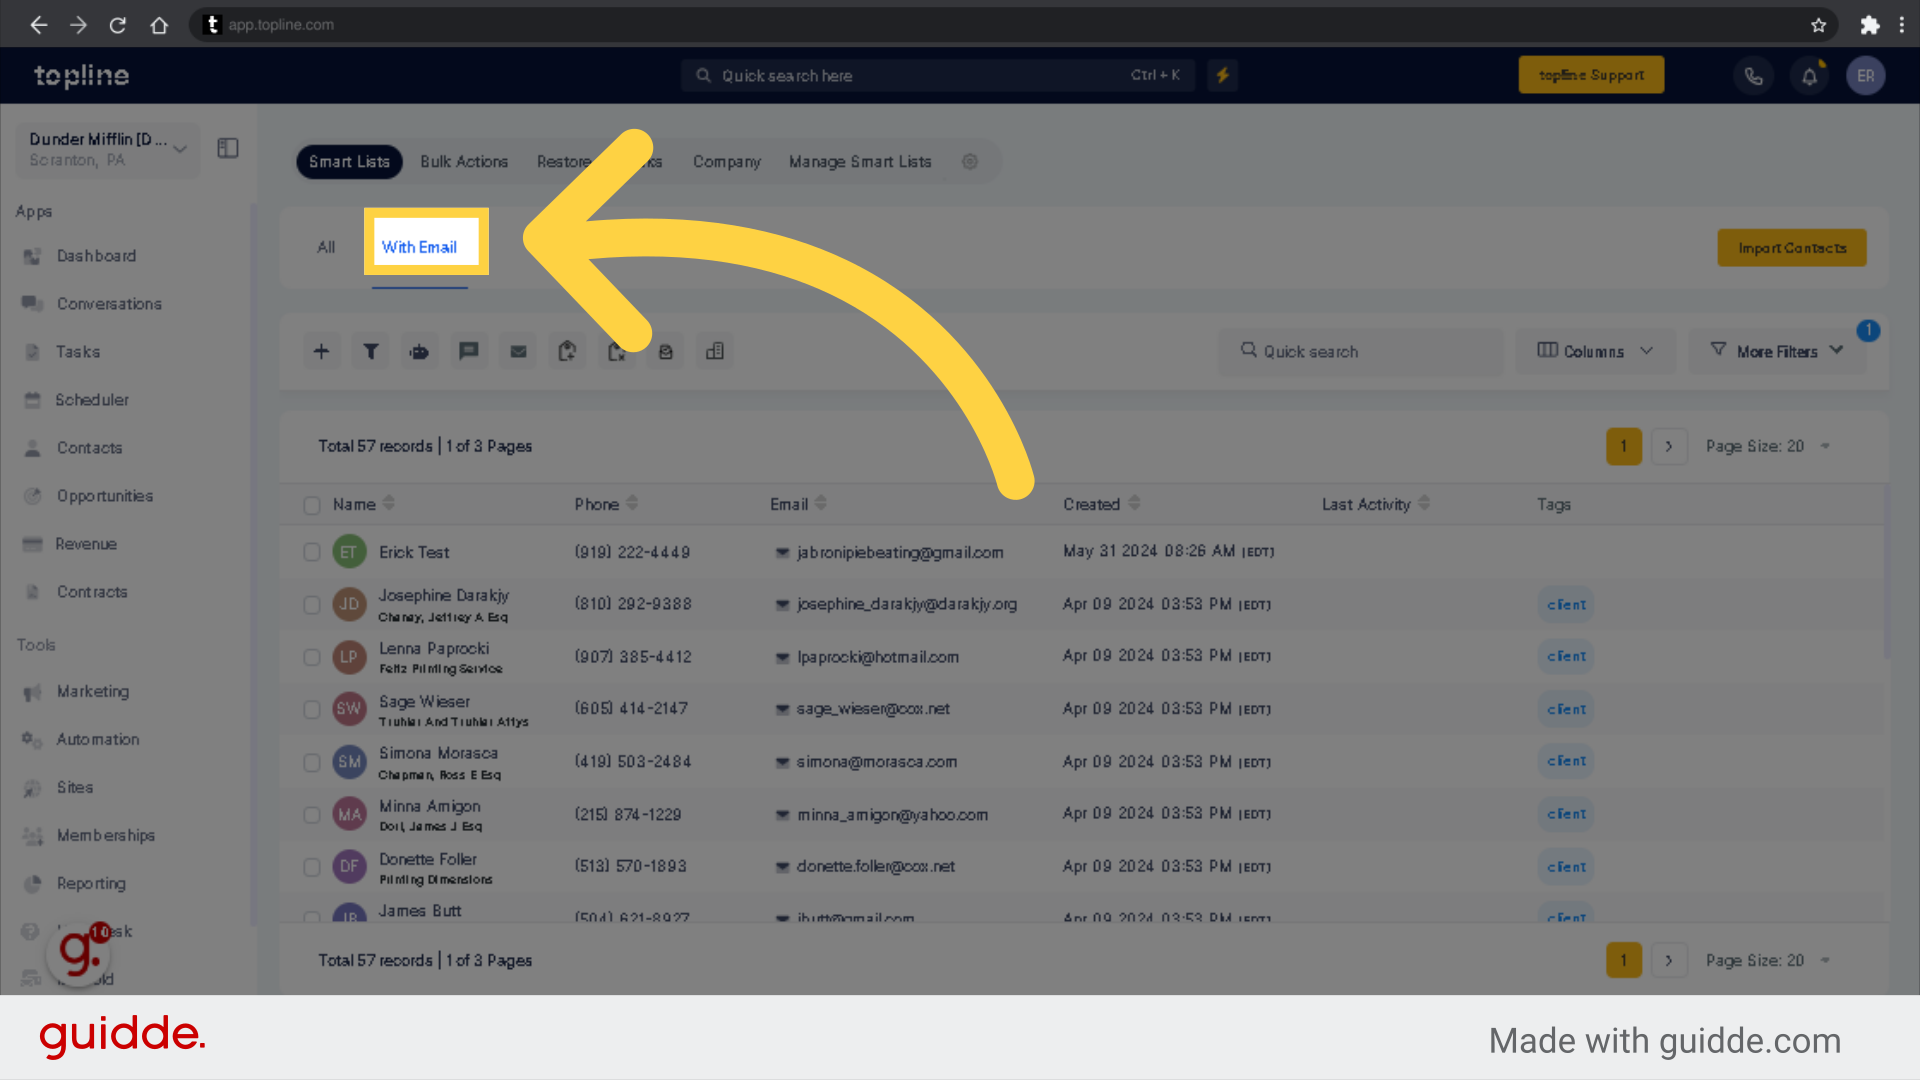
To access your Smart Lists, go to the Contacts section and select a Smart List name from the top to open it.
If you want to modify an existing Smart List, open it, and you'll see the saved filters for that list on the right-hand side.
Select the trash can icon or the X. To modify a filter, click the pencil icon or the dropdown arrow to remove a filter. Use the Save icon to store your changes.
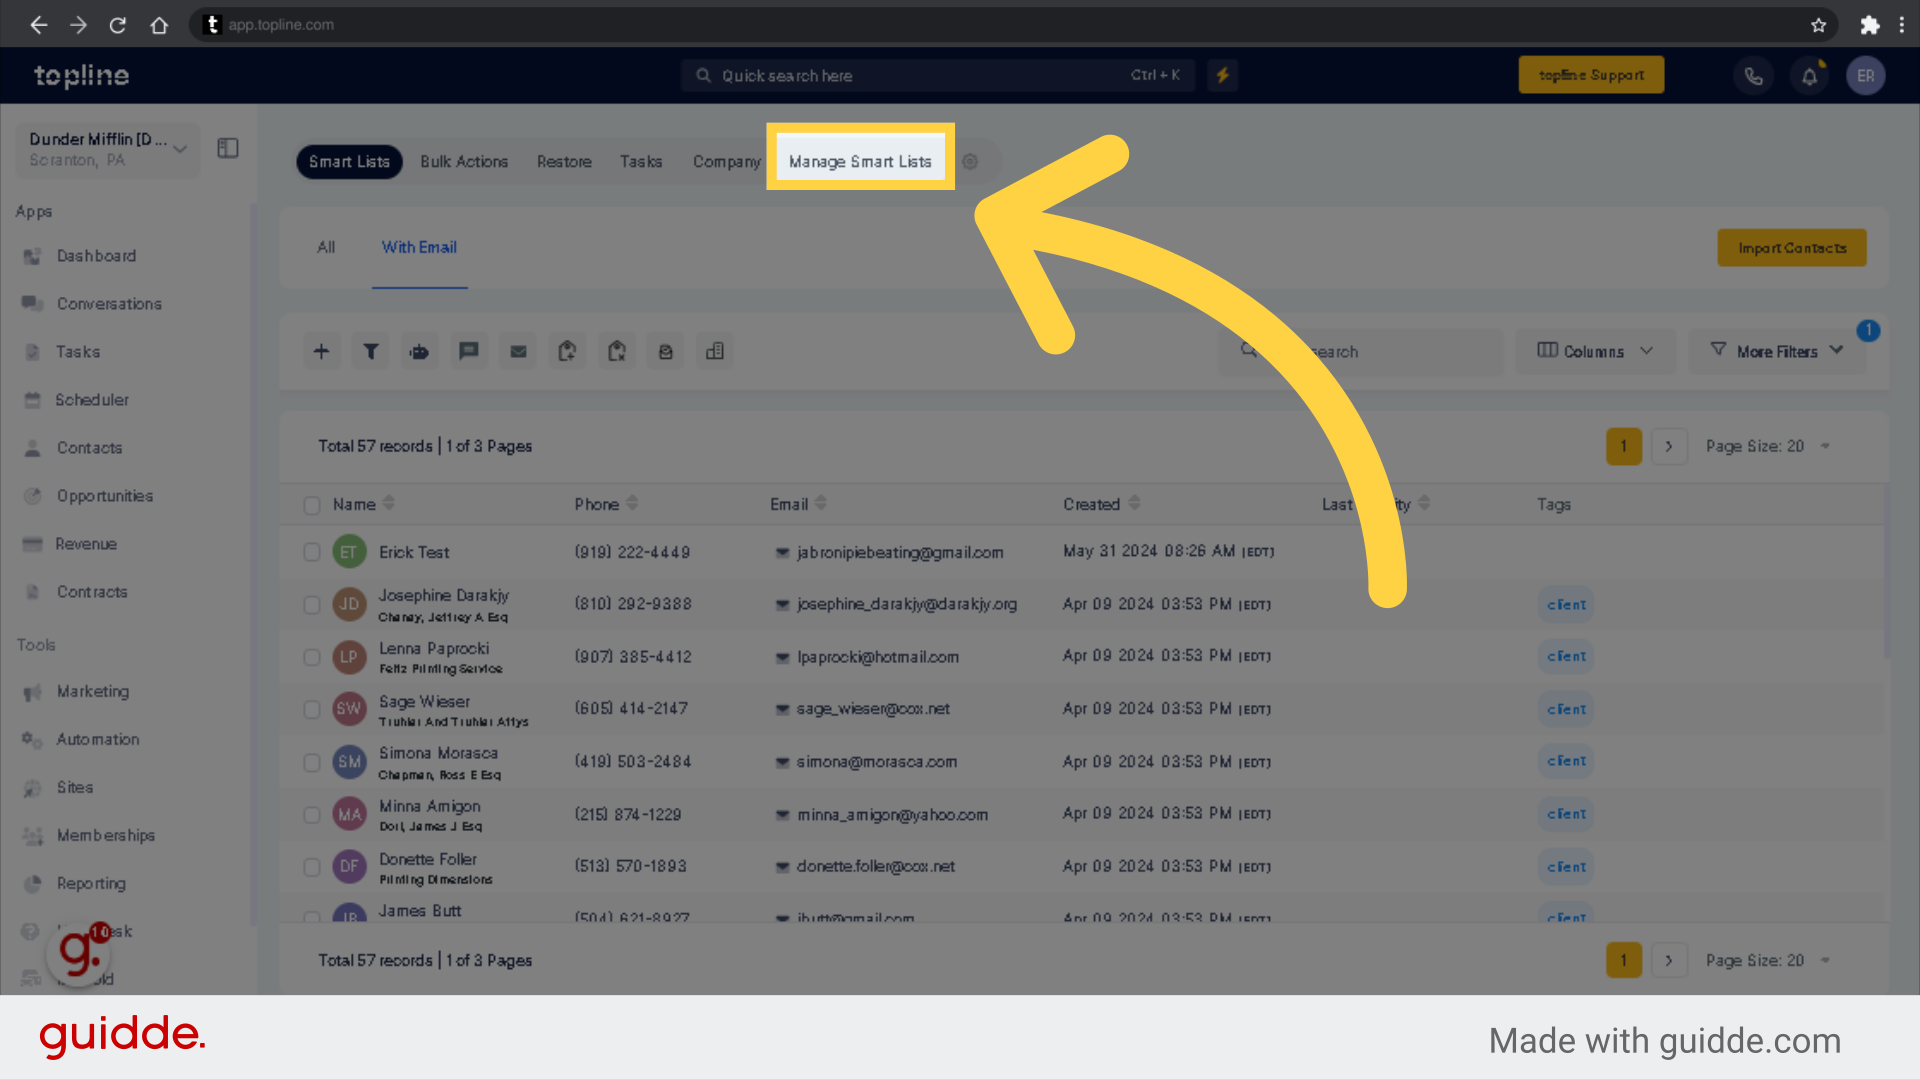
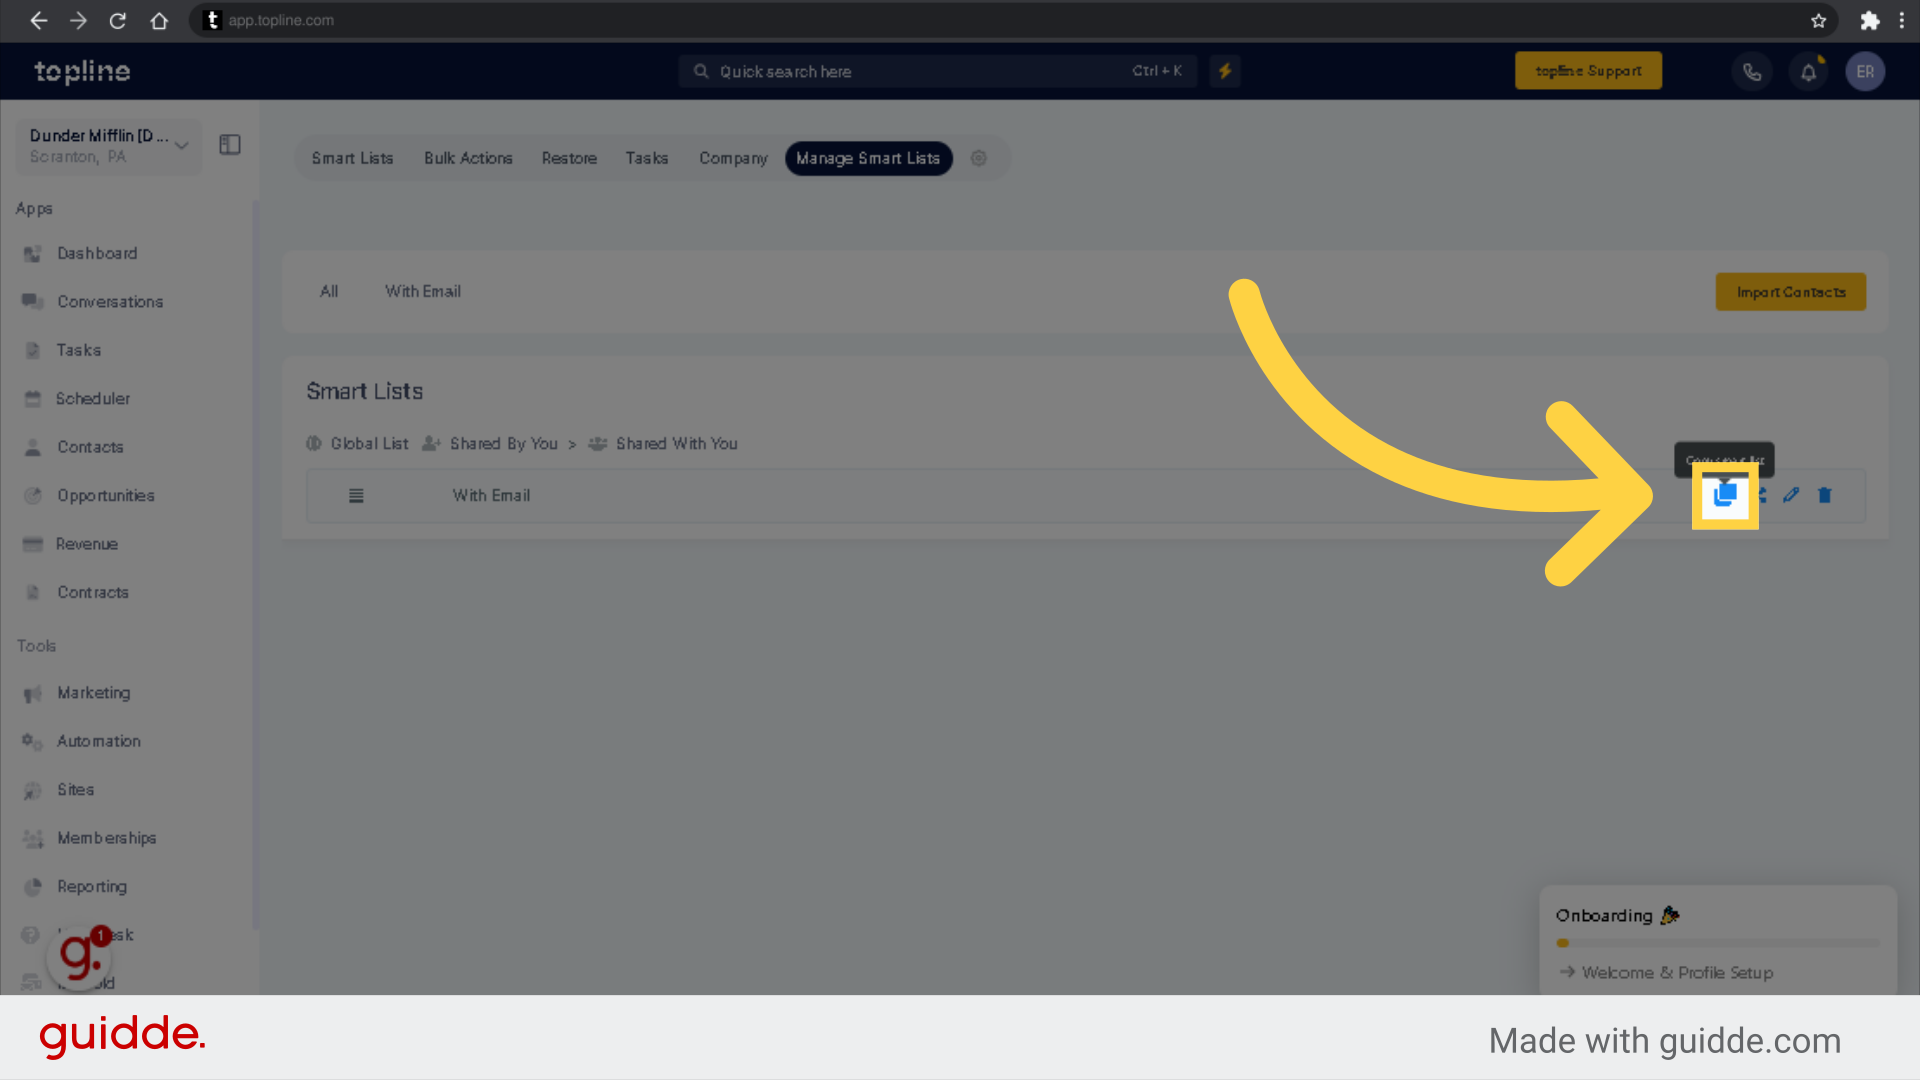
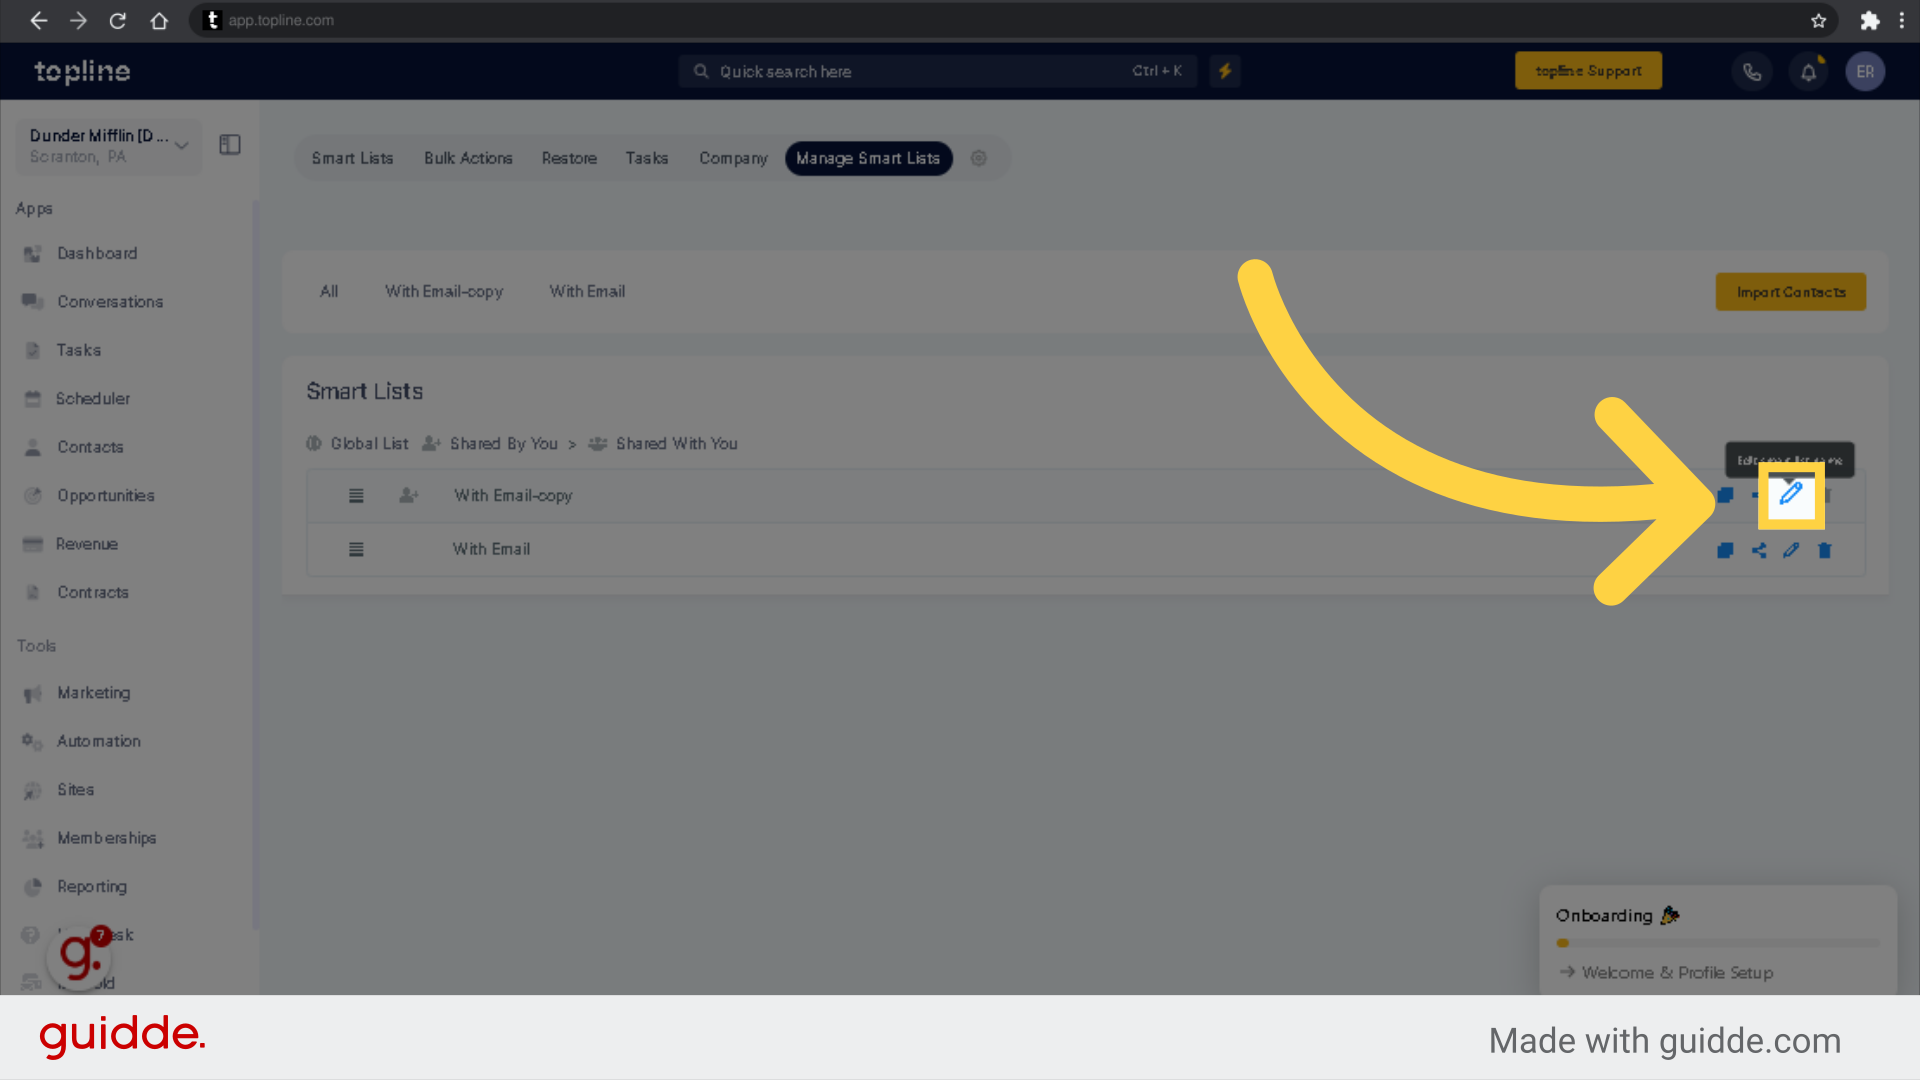
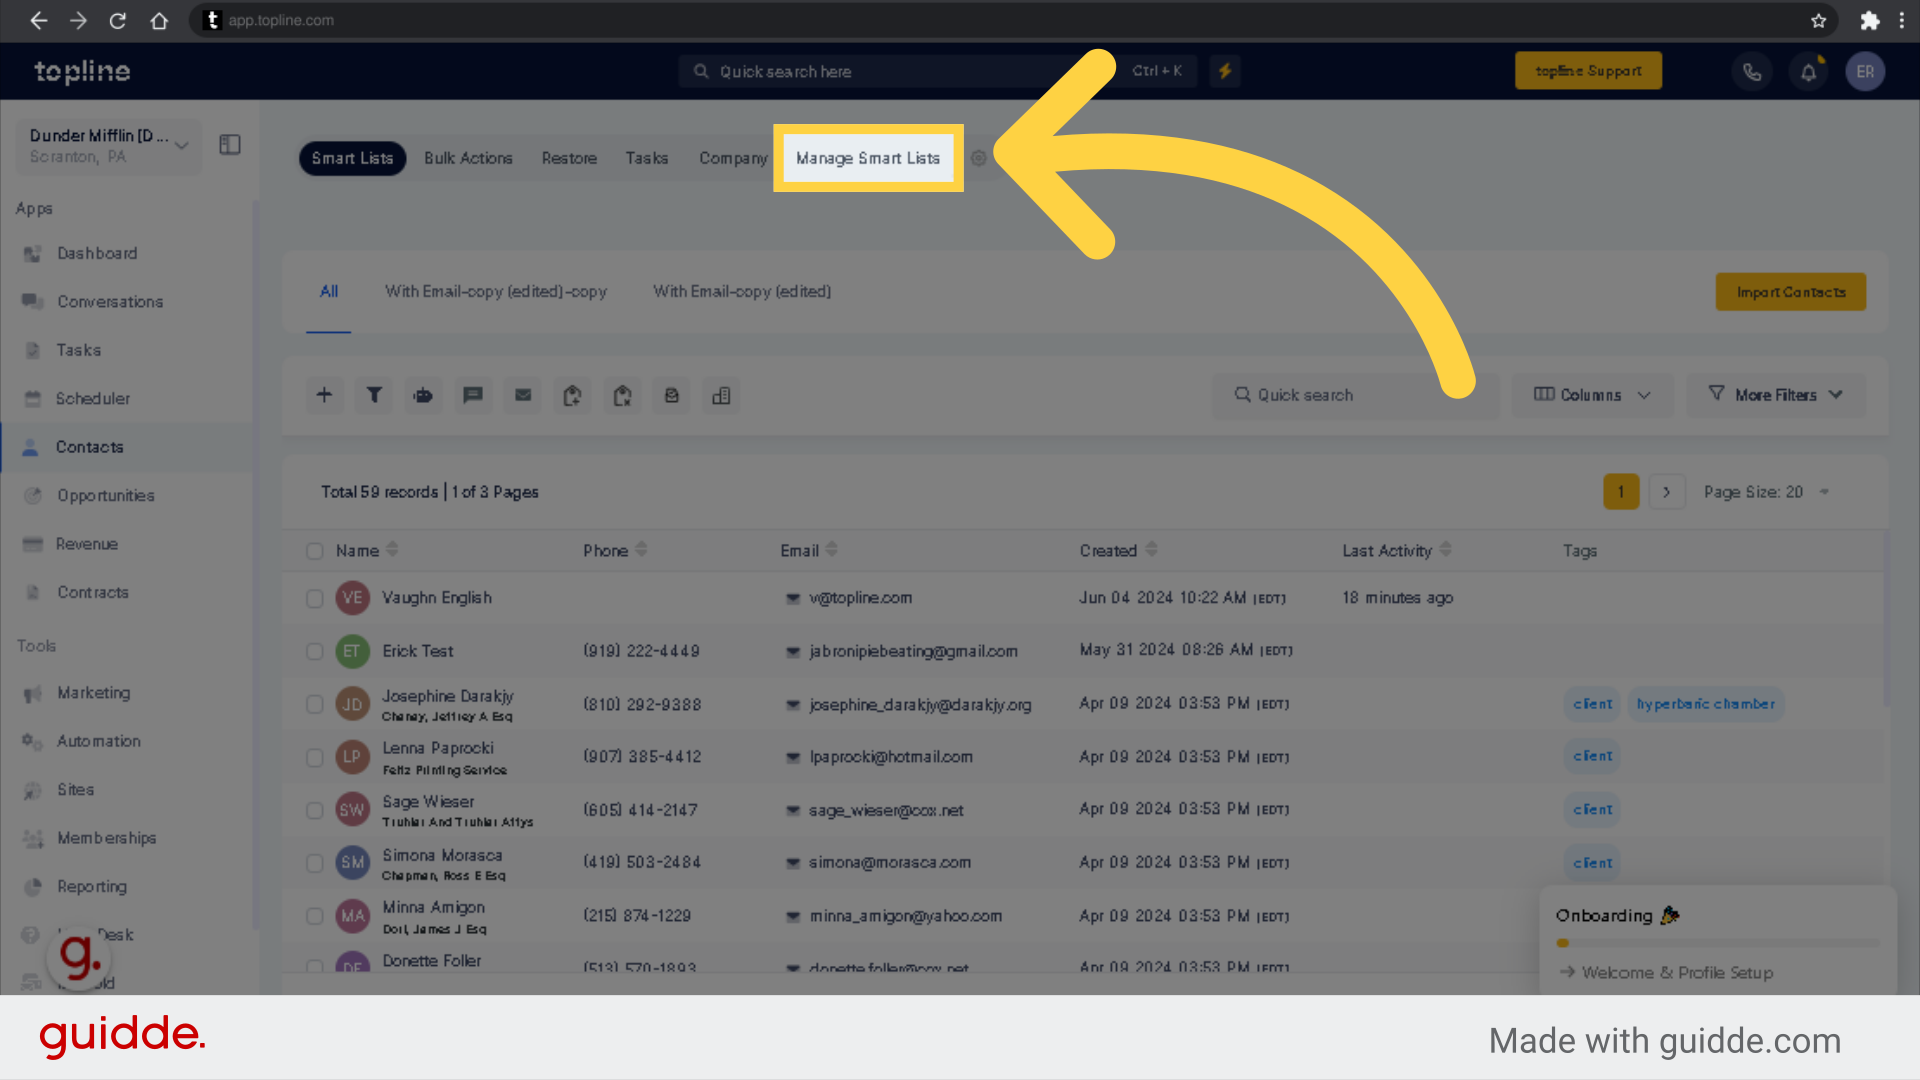
You can manage your Smart Lists by navigating to "Manage Smart Lists" at the top right of the Contacts page. This area lets you duplicate, share, rename, or erase a Smart List using the icons to the right.
You can modify an existing Smart List by duplicating, sharing, renaming, or erasing a Smart List using the icons to the right.

Click "Copy Smart List" to clone the Smart List.
Save any changes made to the smart list.
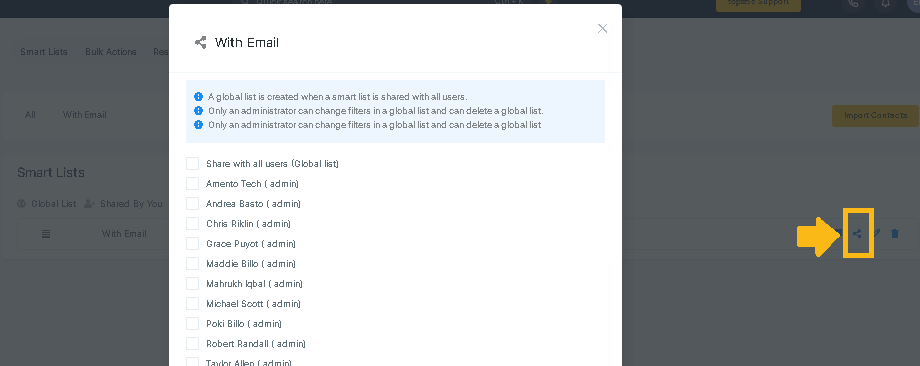
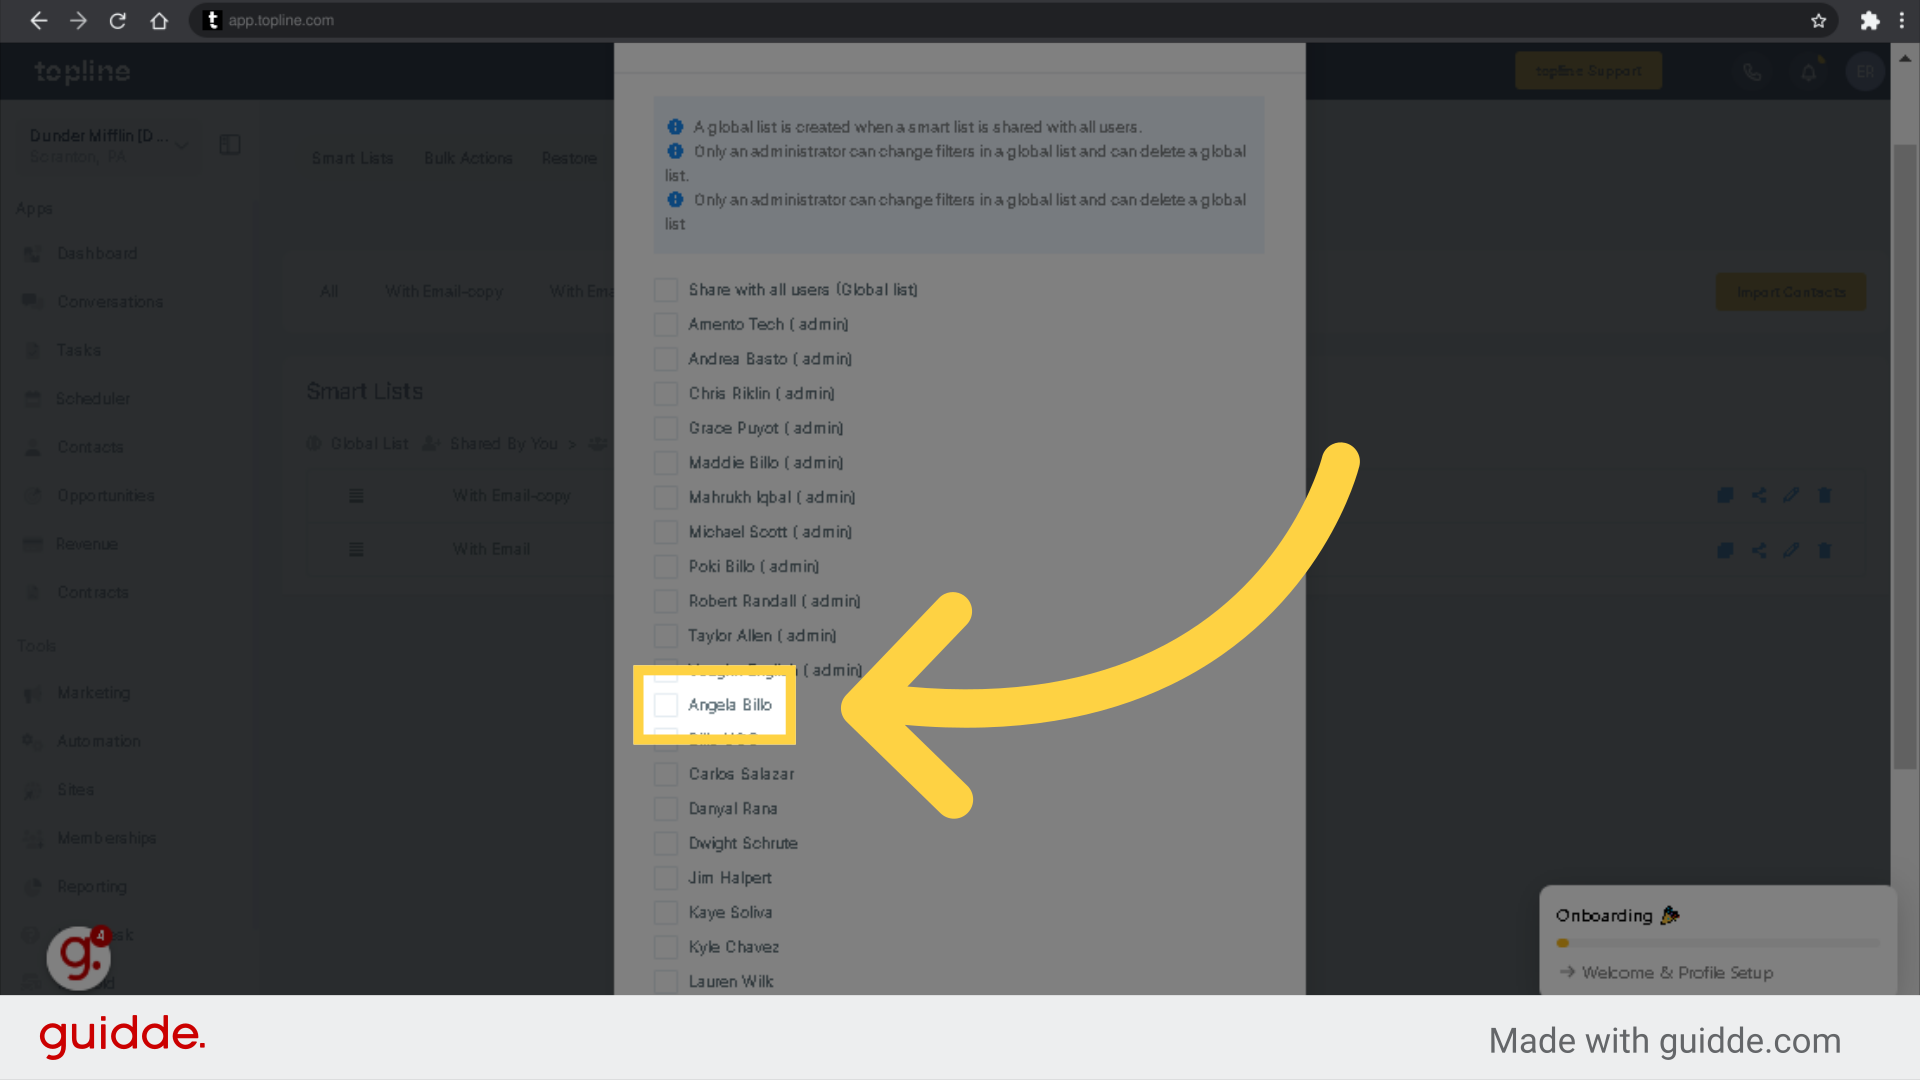
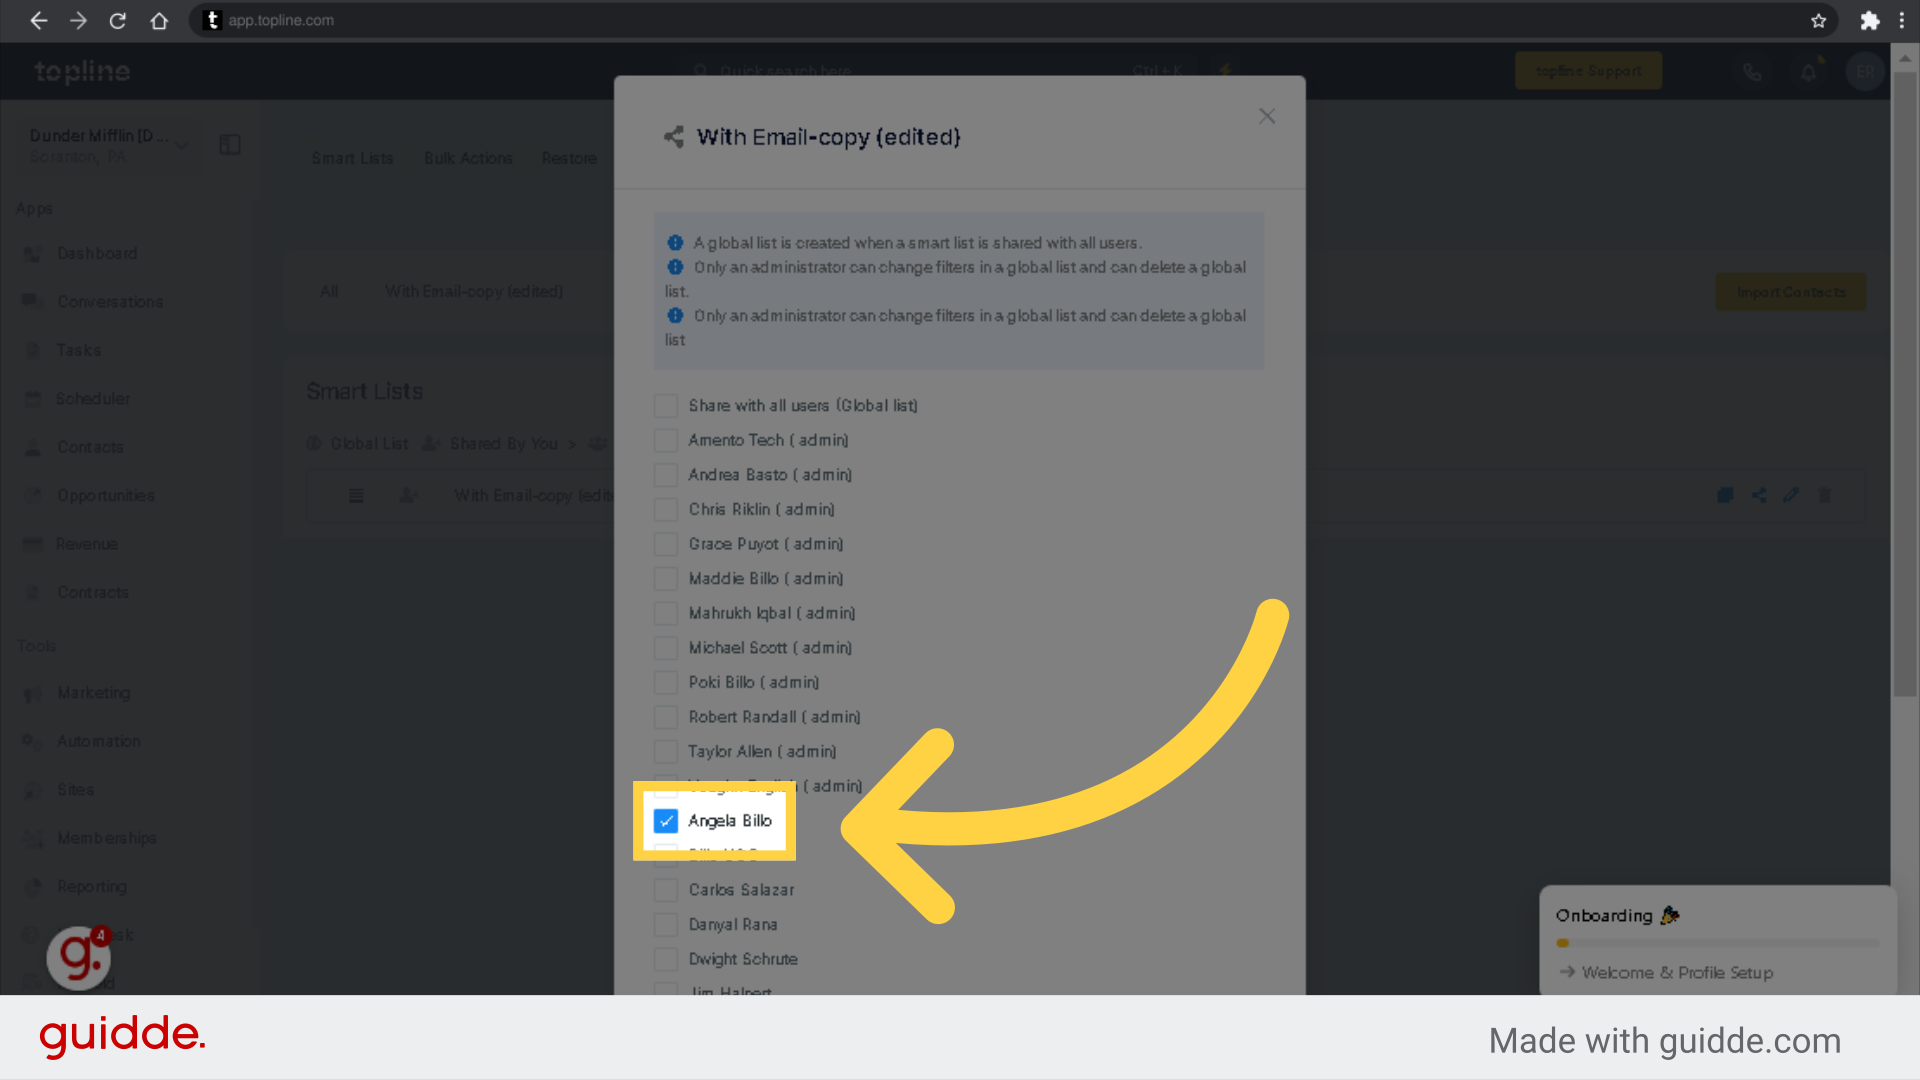
A global list is created when a smart list is shared with all users. Only an administrator can change filters in a global list and can delete a global list. Only an administrator can change filters in a global list and can delete a global list
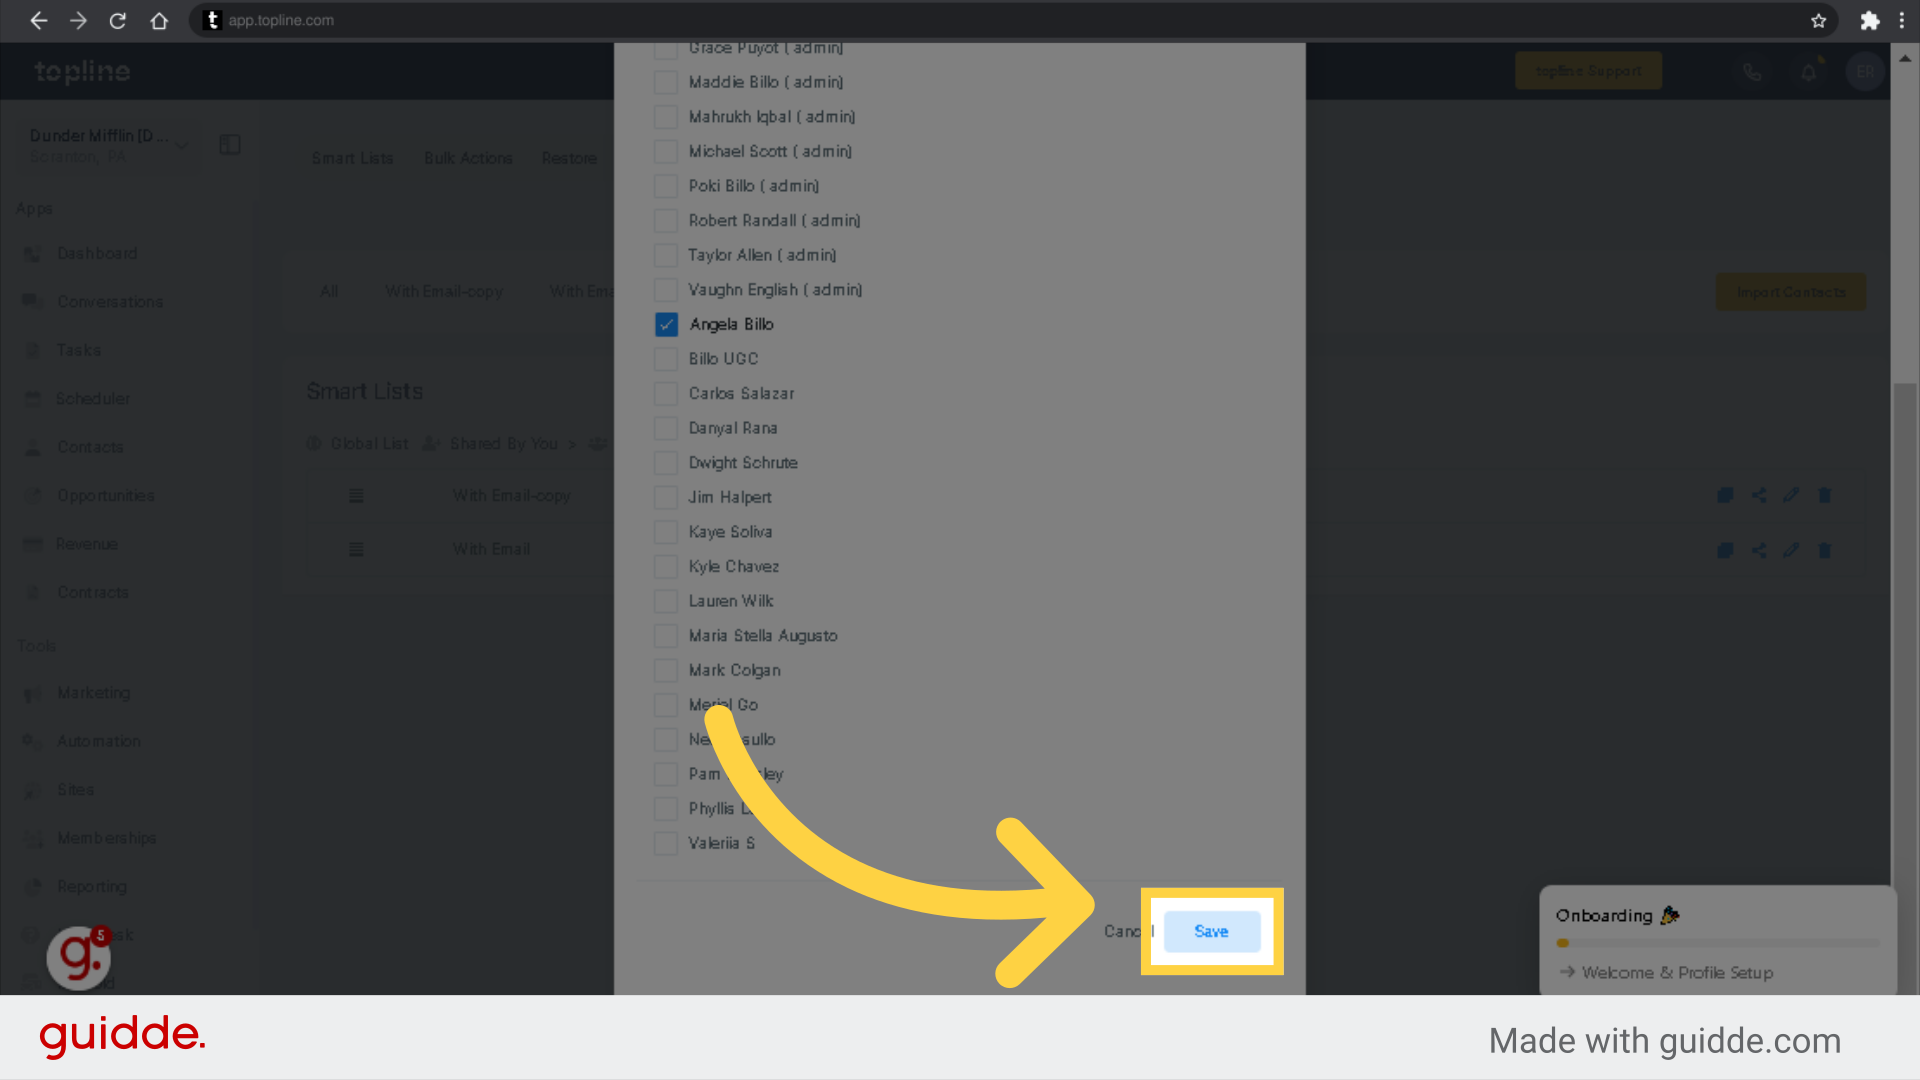
Select a Contact you want to share your Smart List.
Save the changes made to the smart list.
Click "Edit Smart List Name" to edit the name.
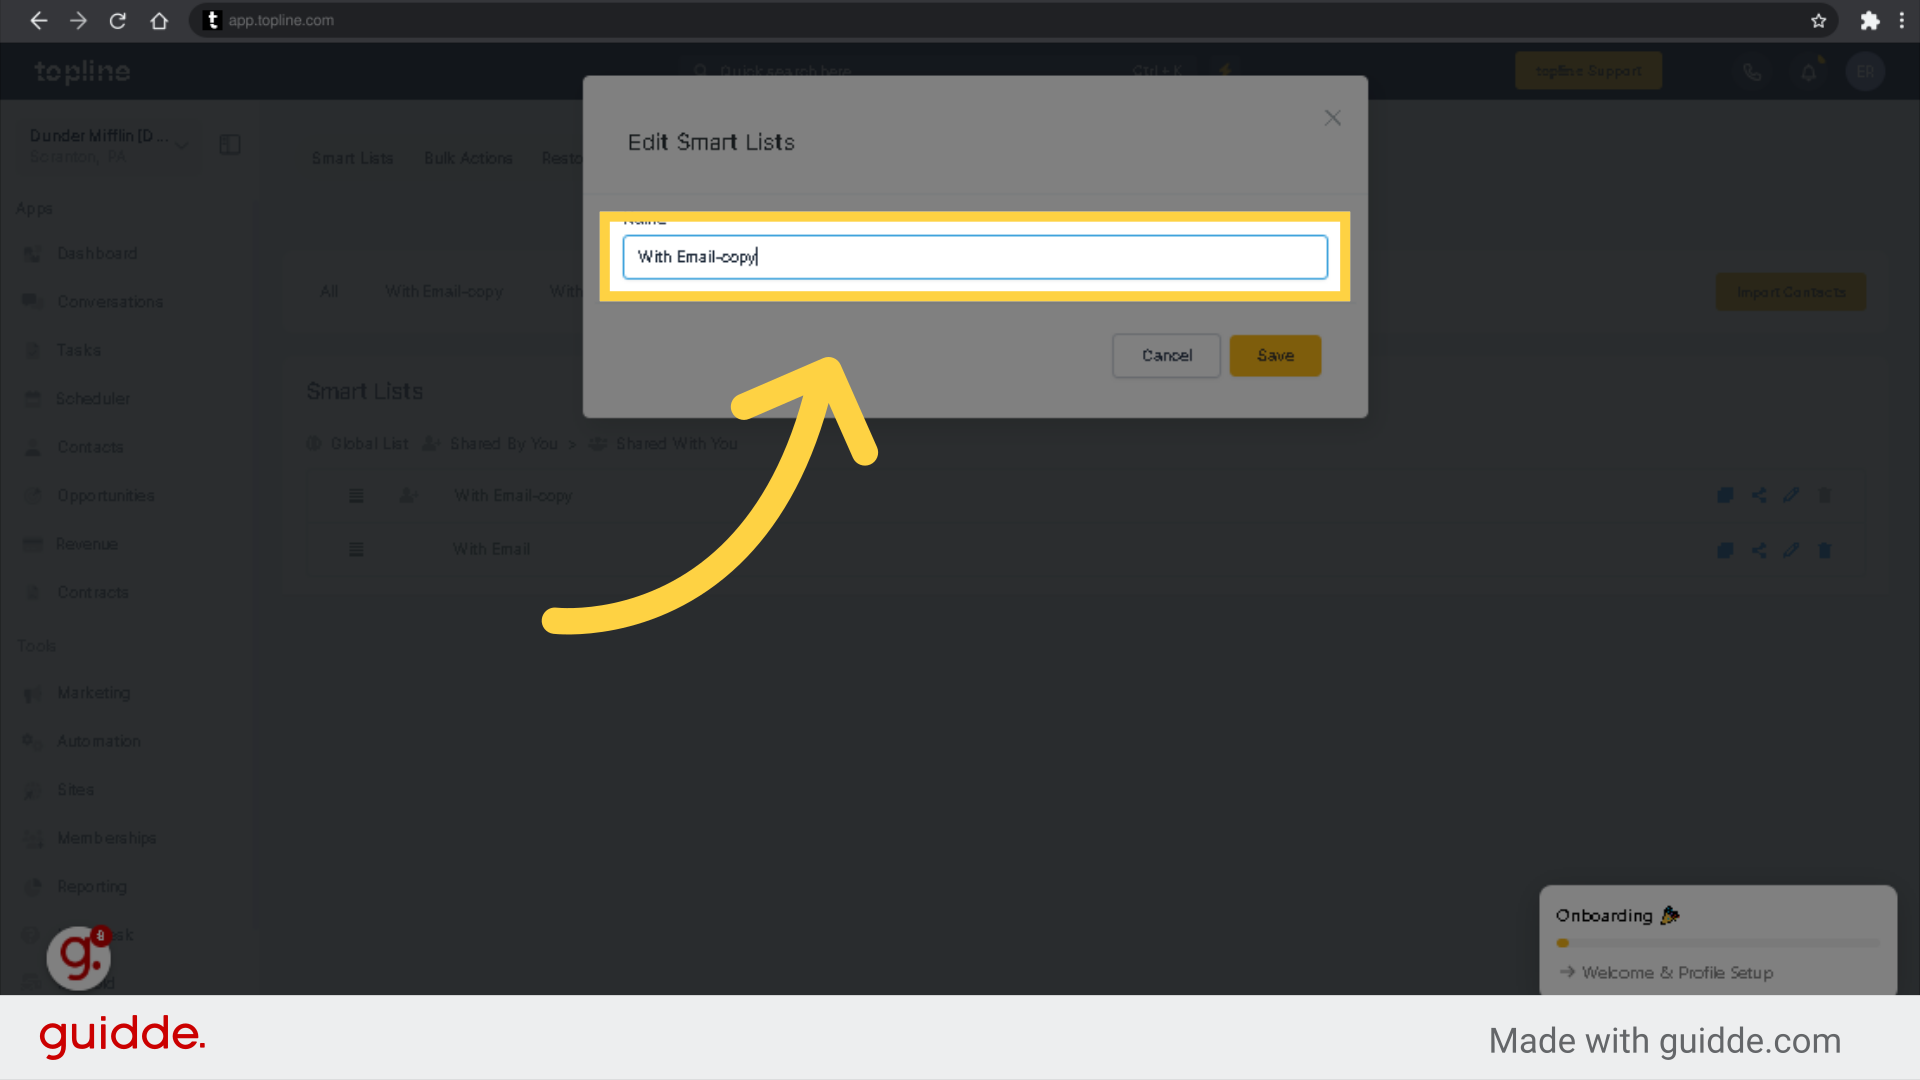
Edit or change the Smart List.
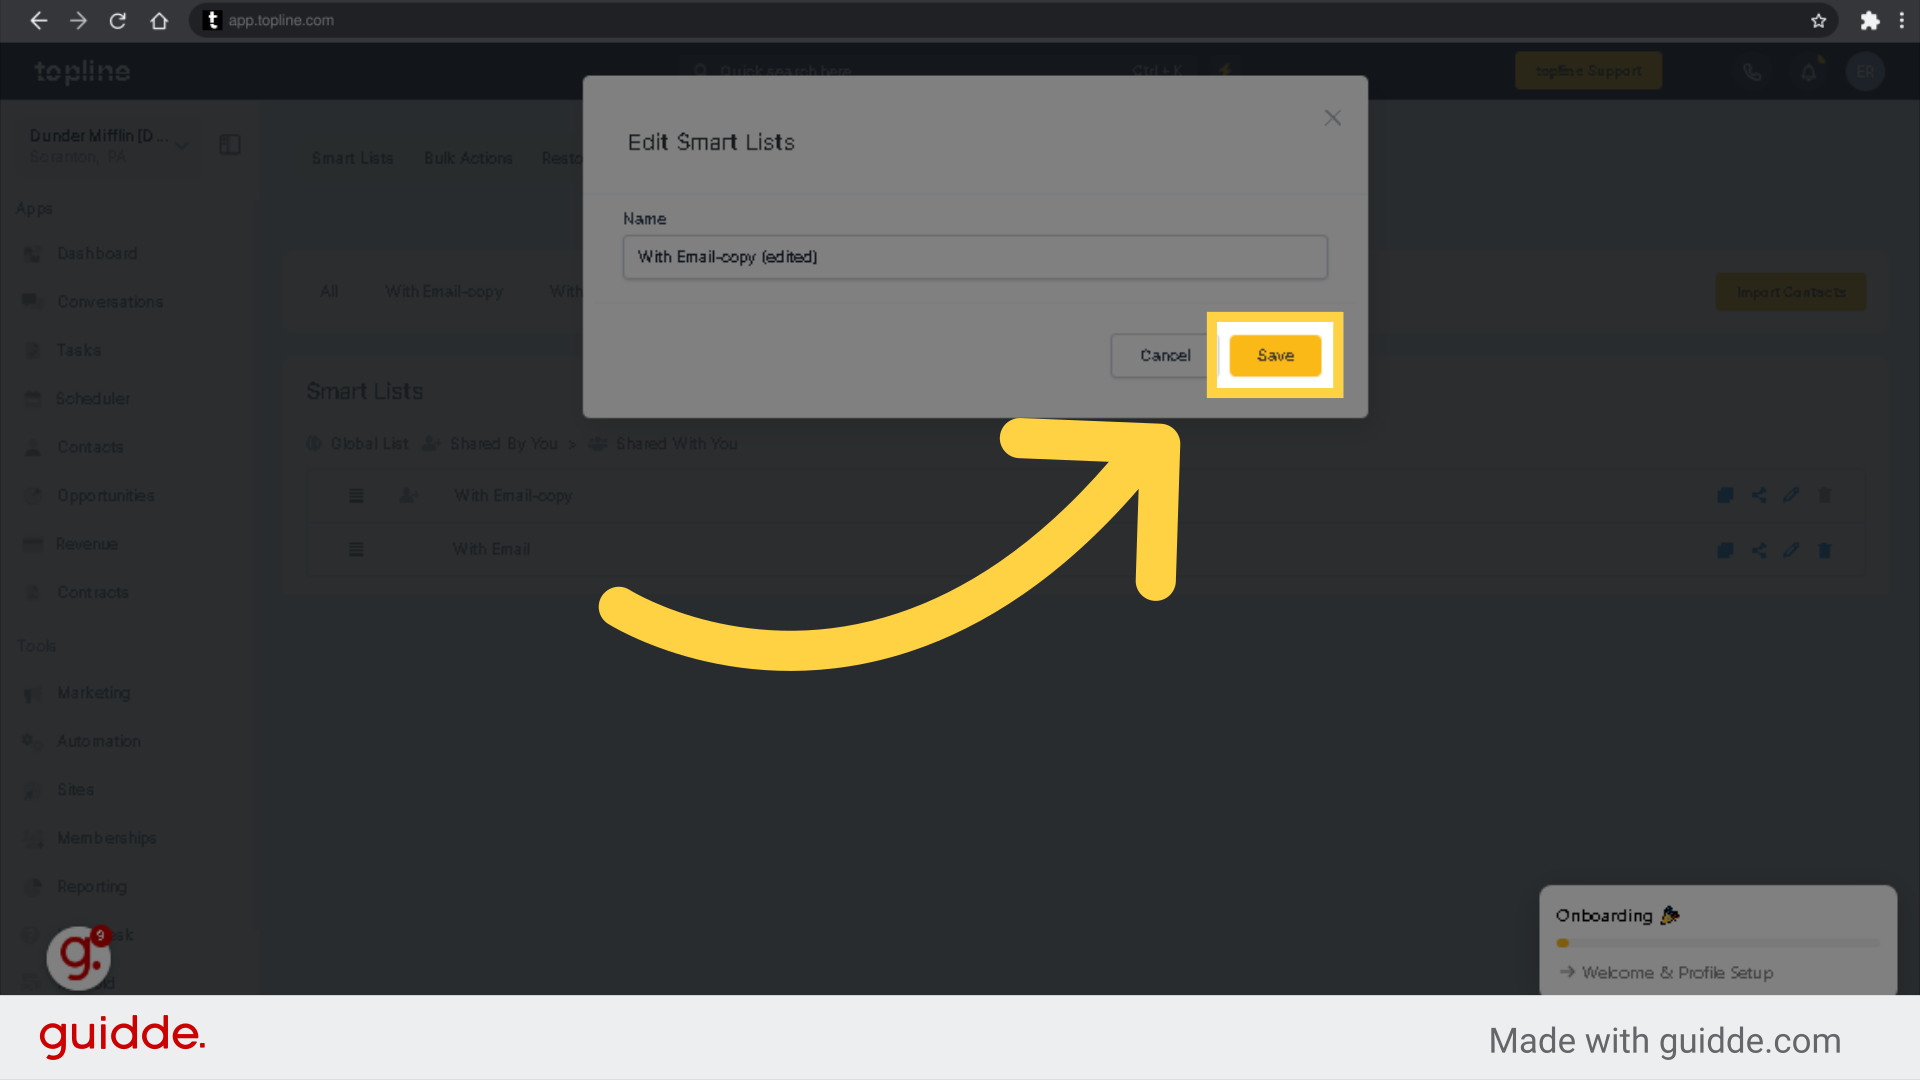
Click "Save" to edit the Smart List.
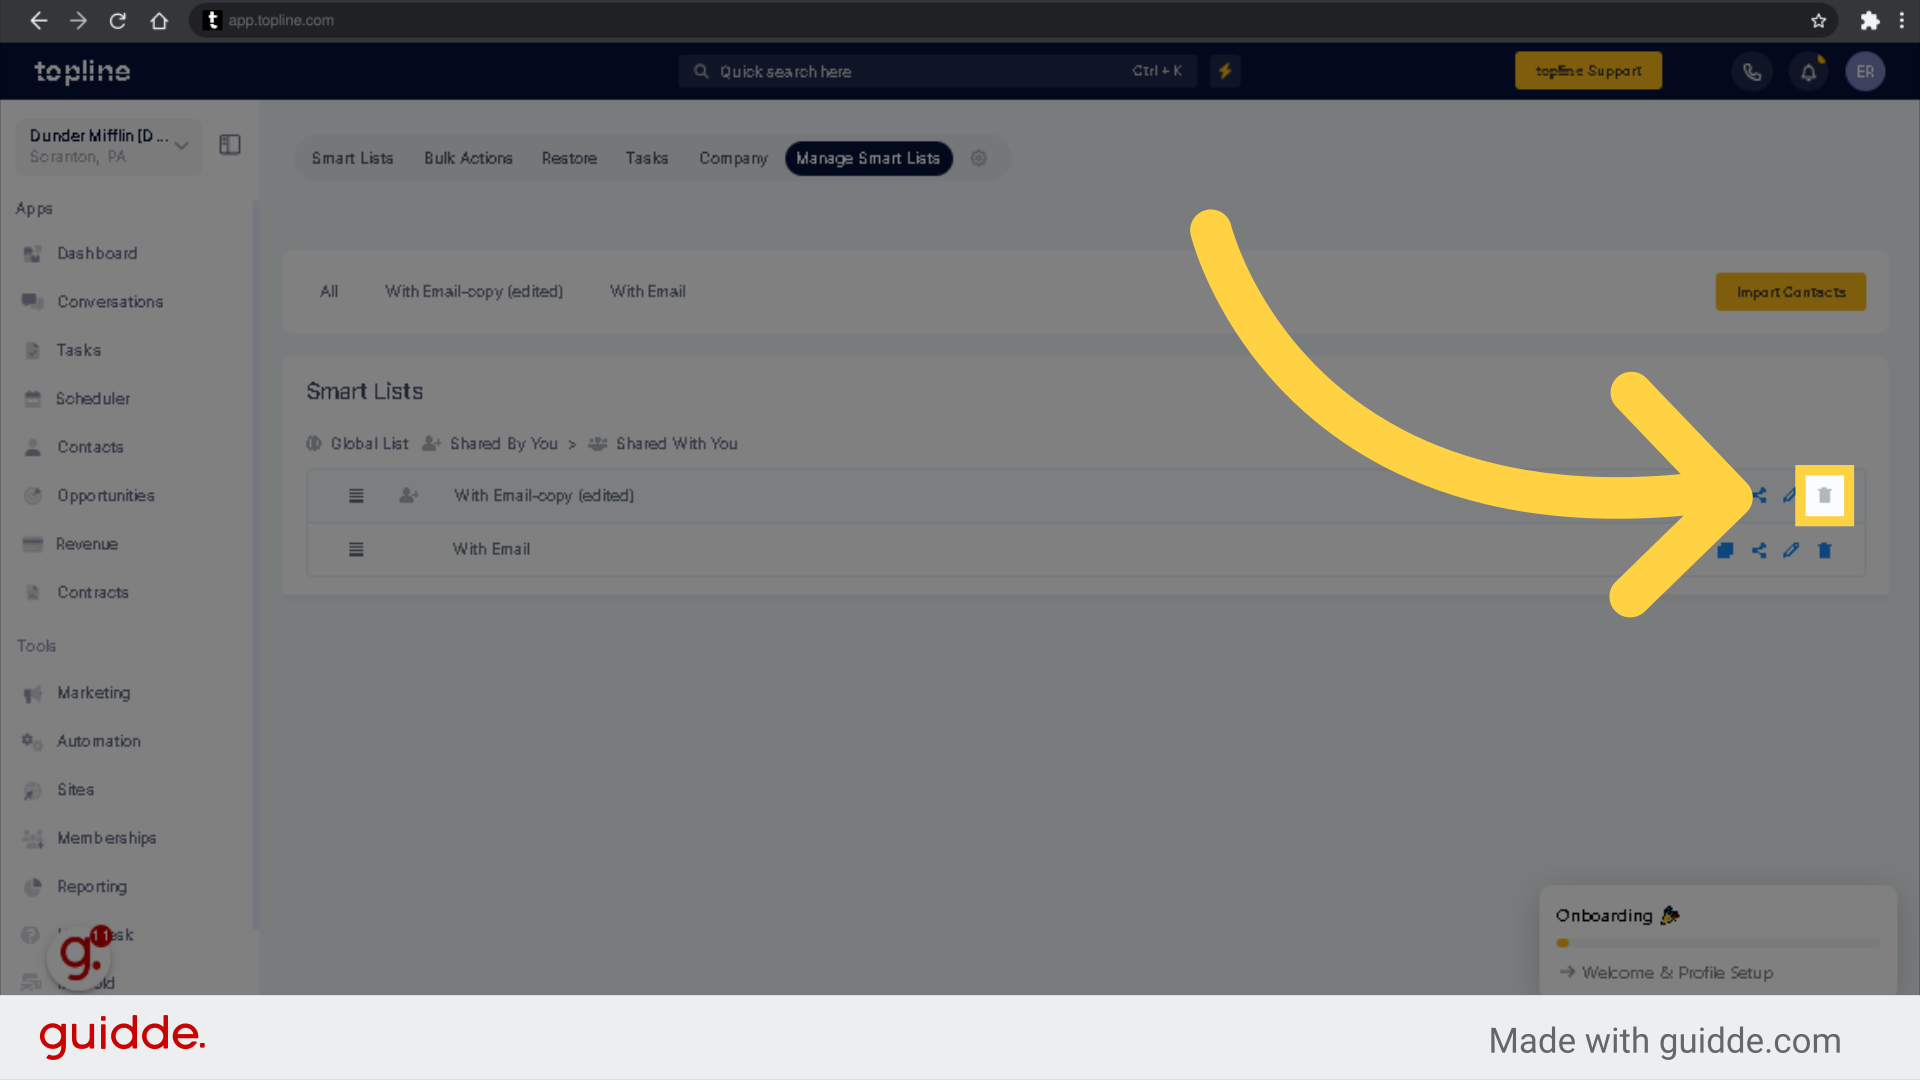
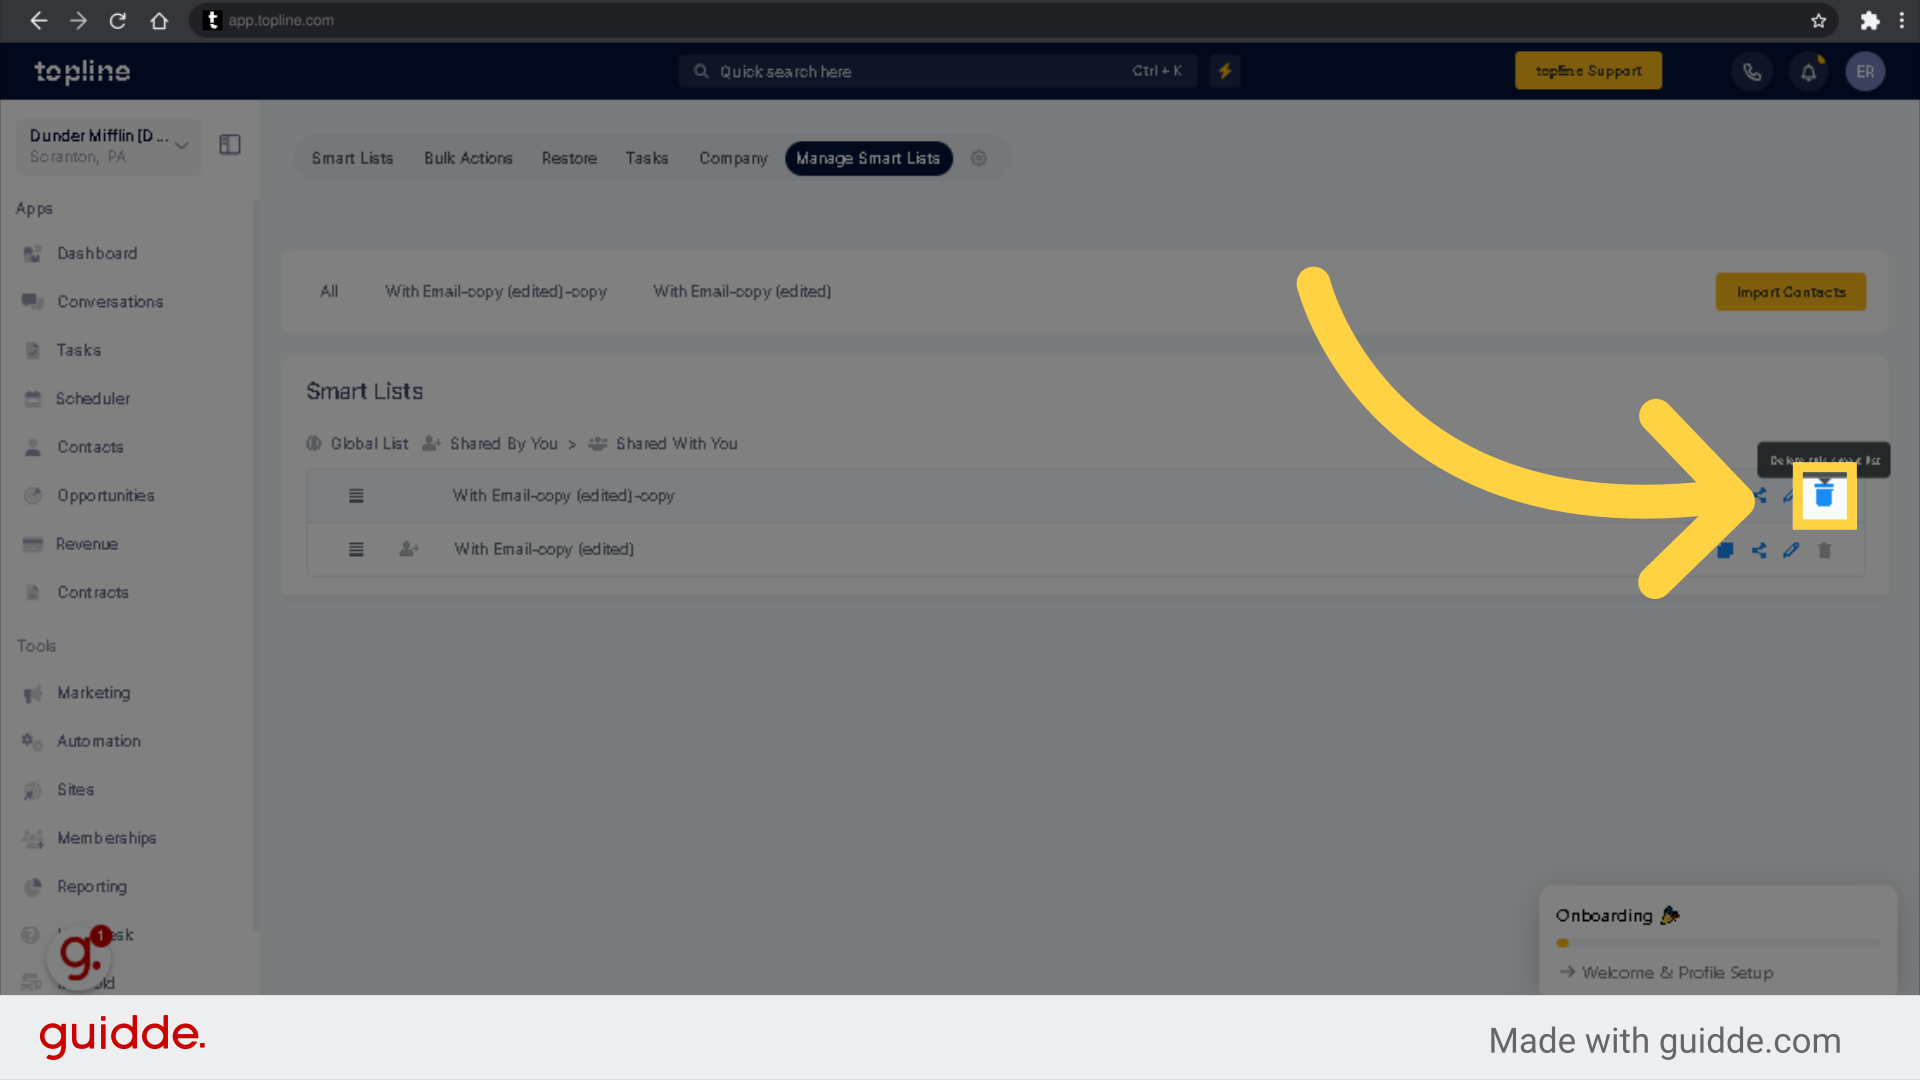
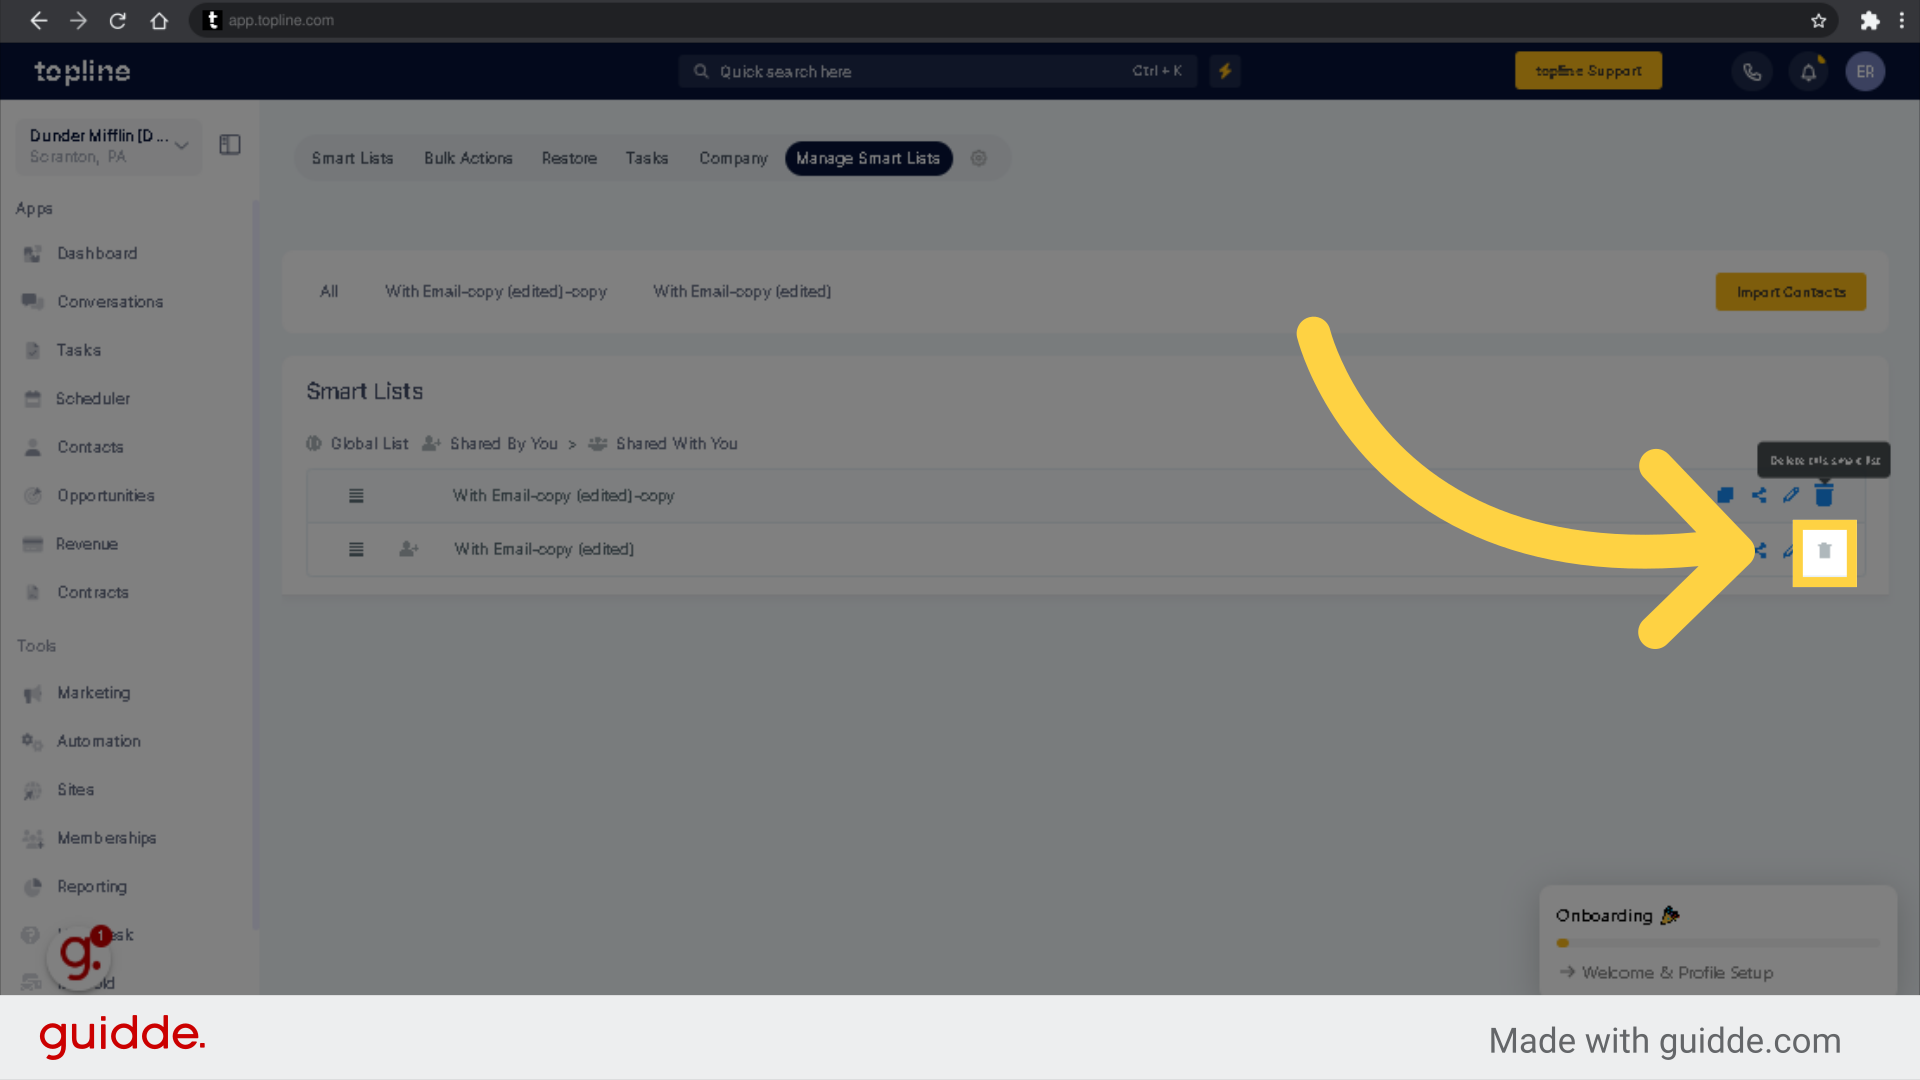
To erase a Smart List, click "Delete this Smart List".
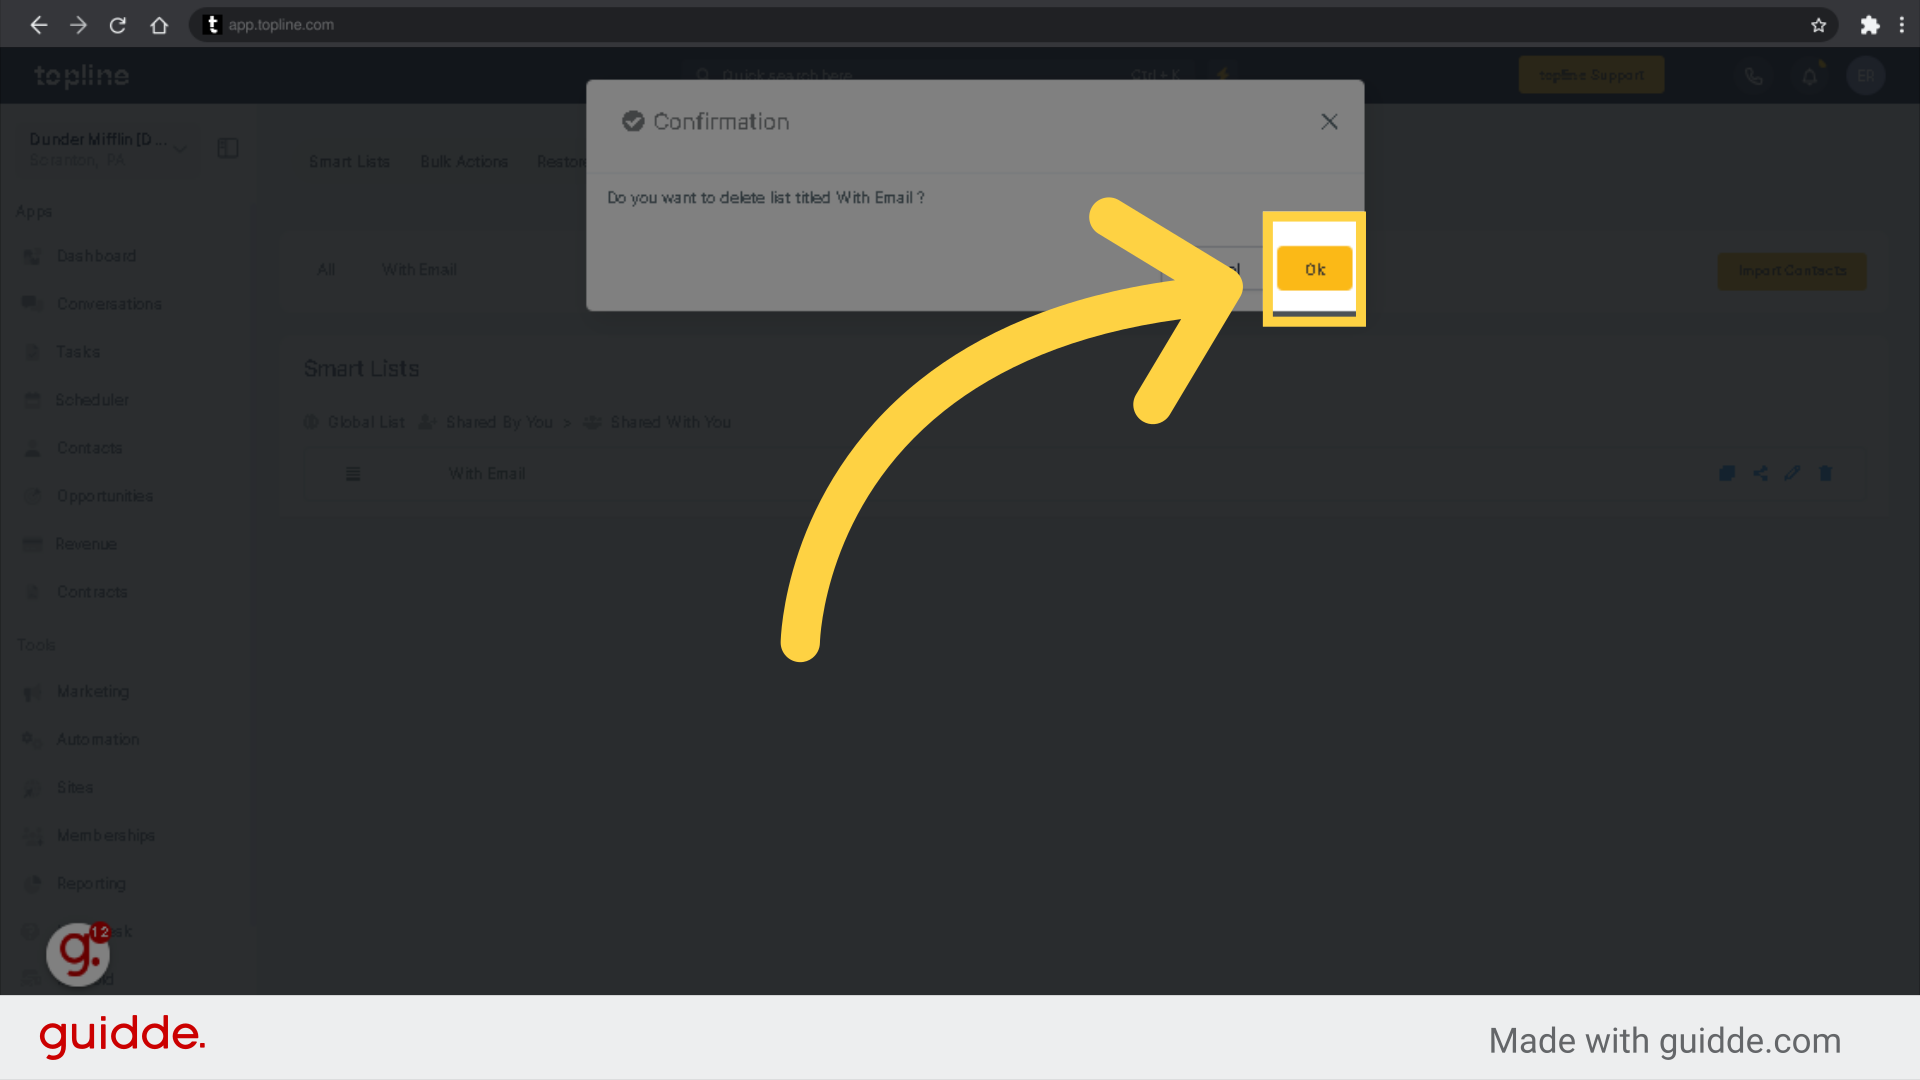
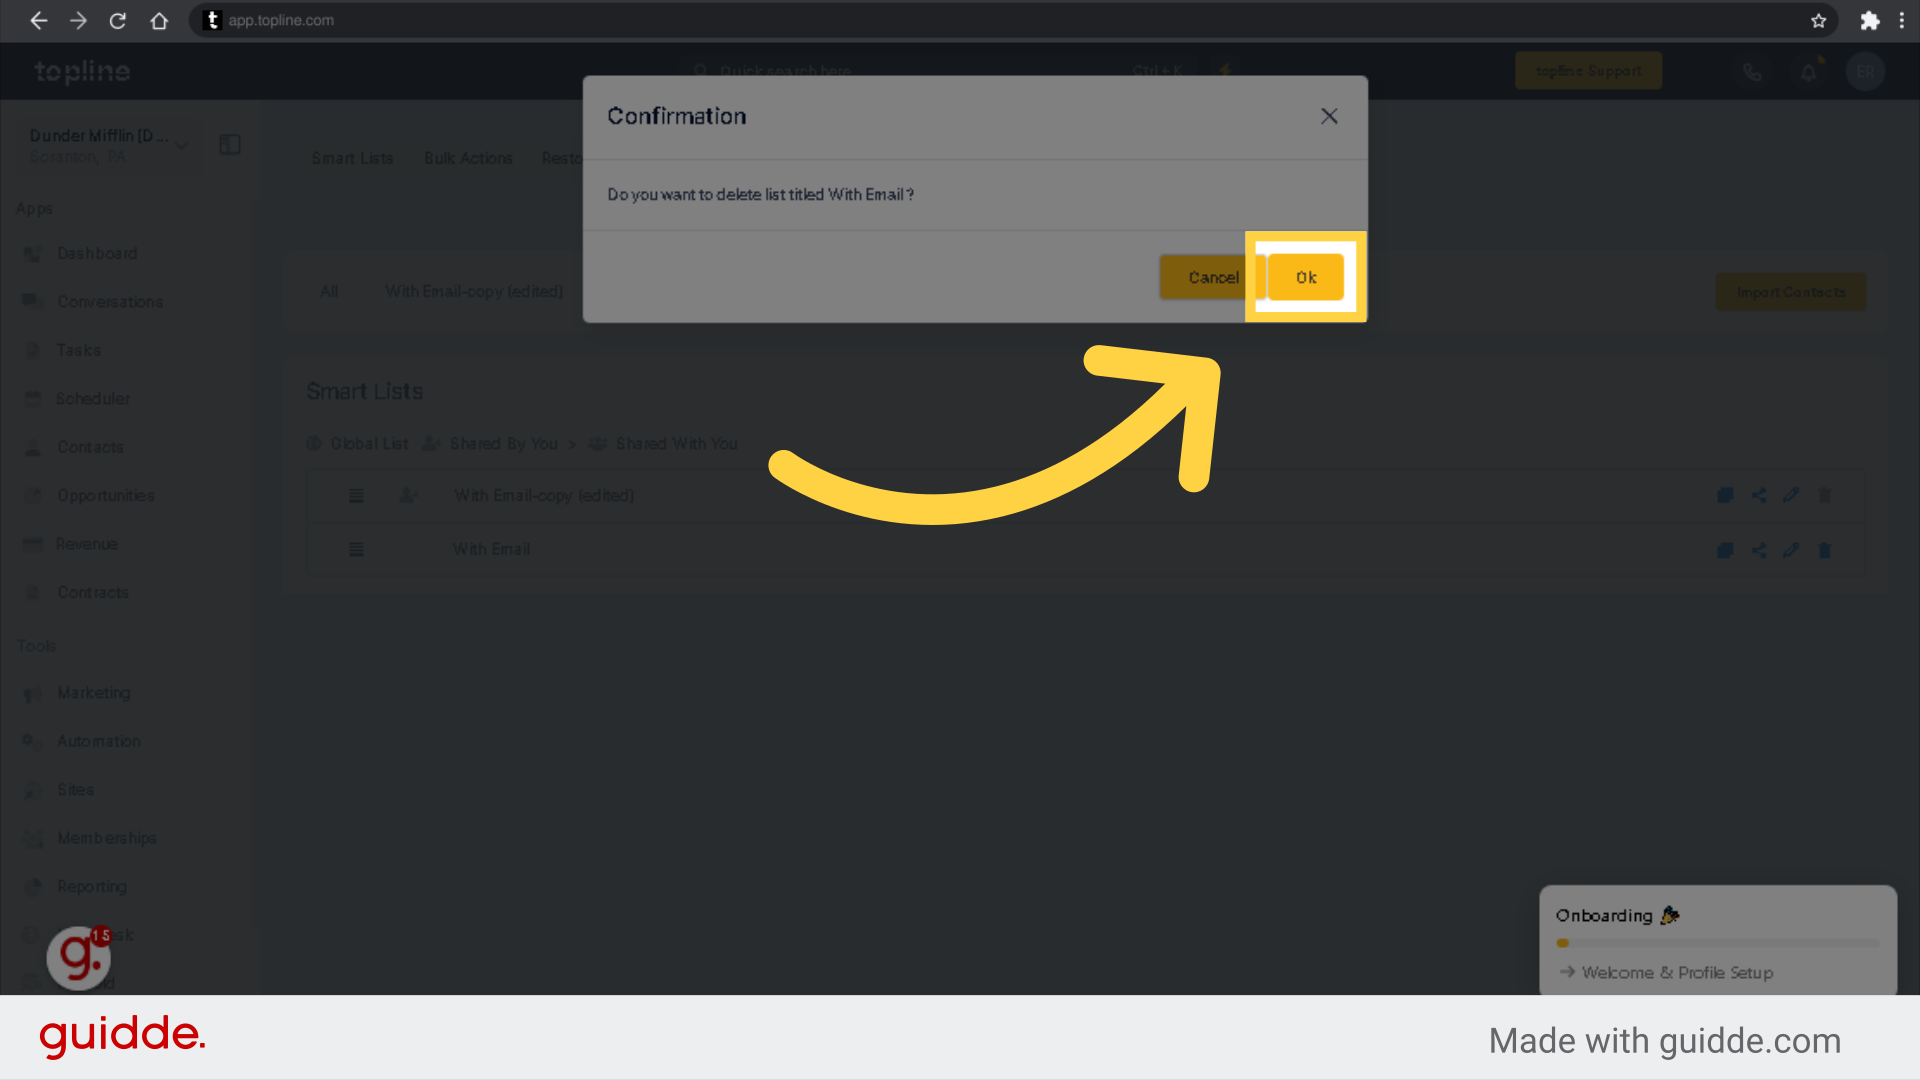
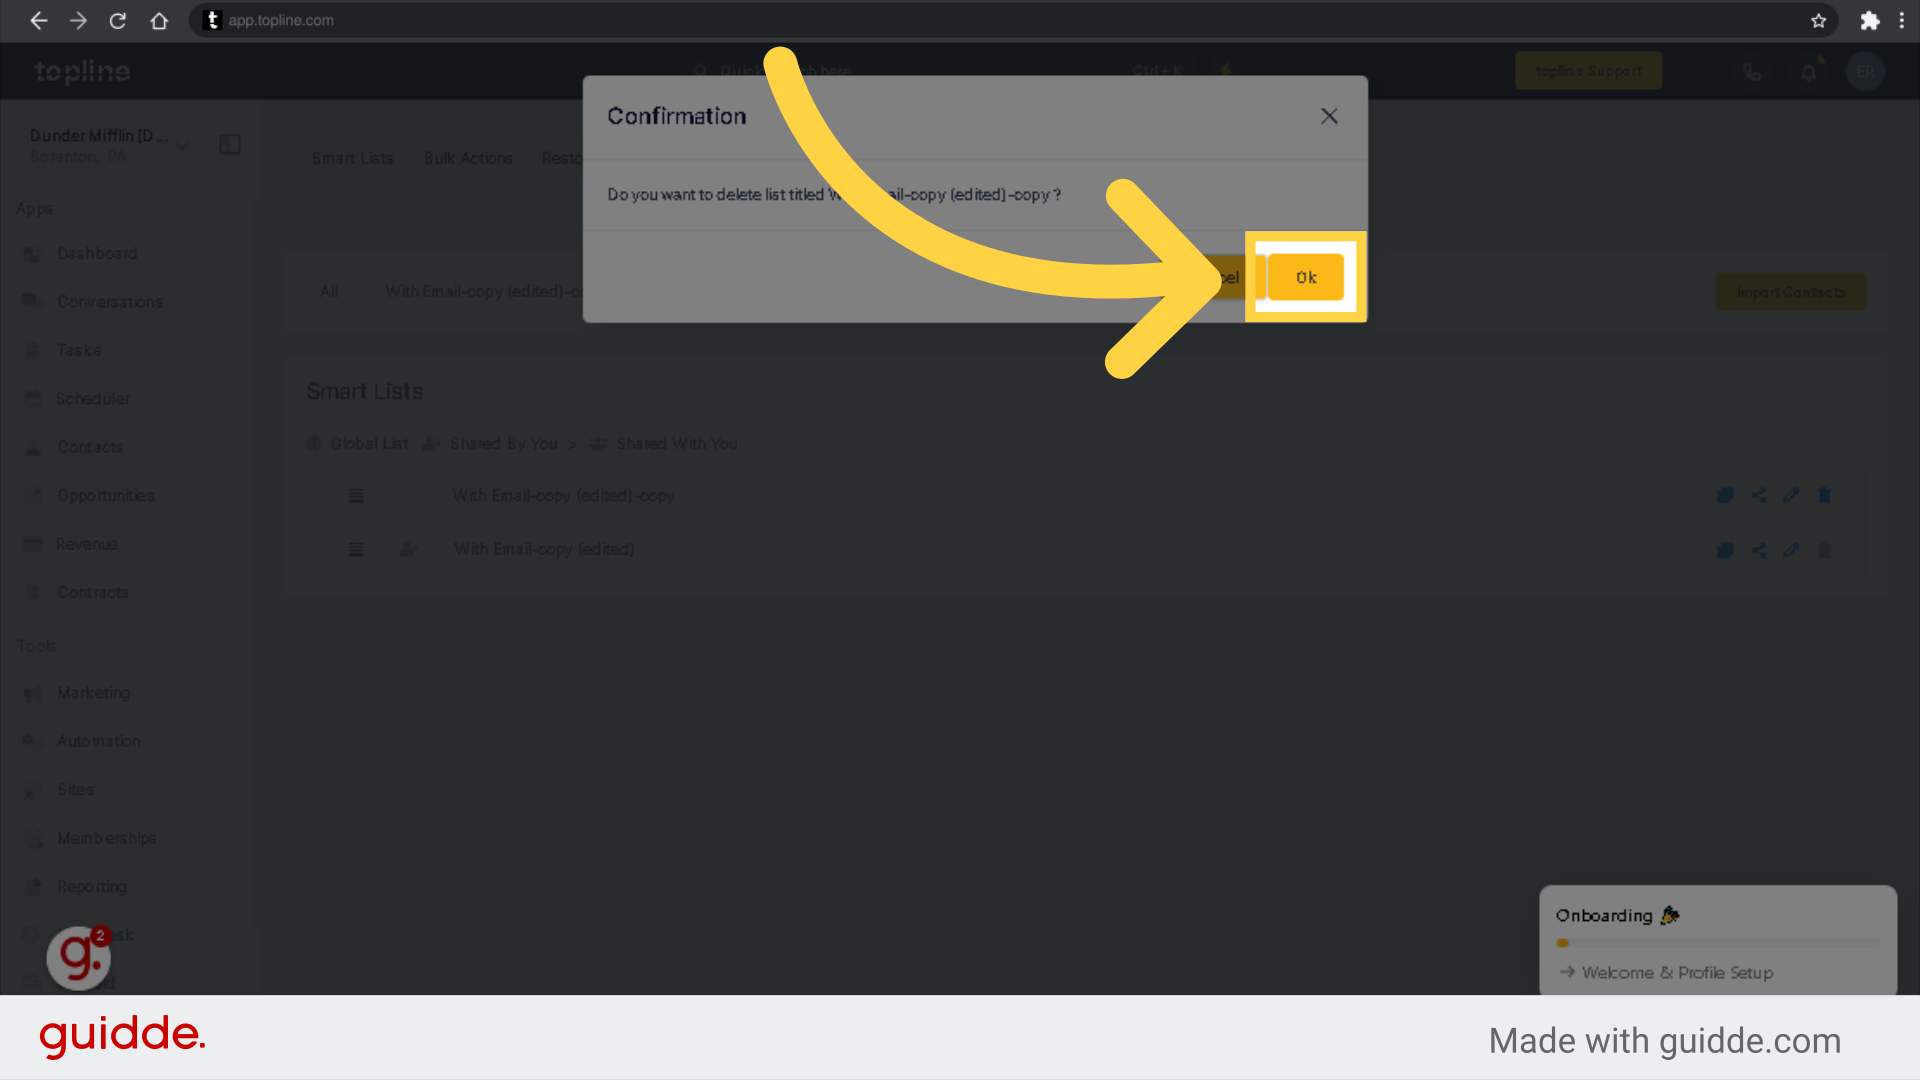
Click "Ok" to delete the Smart List.
Create a list of all contacts that have never been or have not been contacted in the last 90 days.
1. Go to Smart List > Go to All Tab
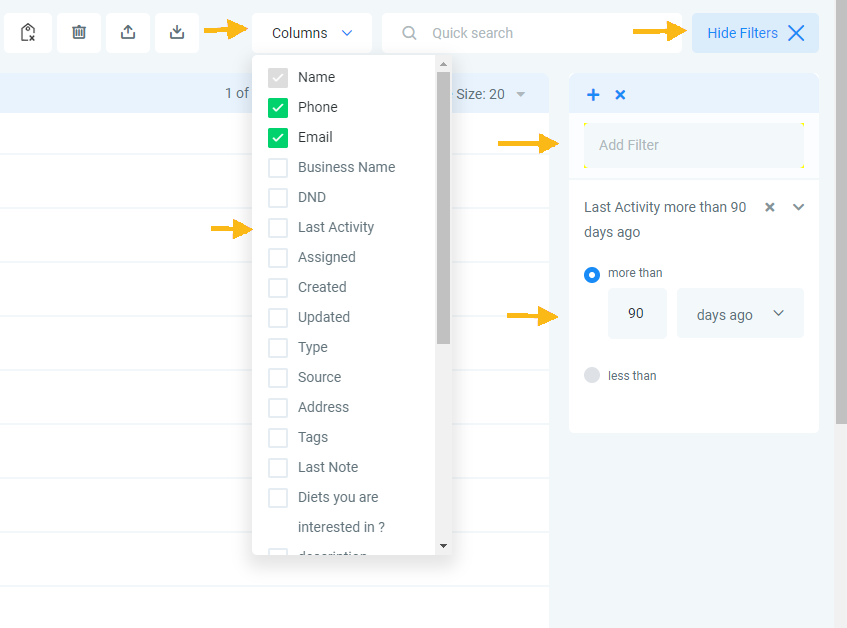
2. Click More Filters.
3. Type 'last in the text box, which shows 'Add Filter.' You will see the 'Last Activity' filter as one of the options.
4. Select the last activity filter. Once it is added. Click the 'More Than' radio button. Type in 90 days.
5. Click on the column's dropdown. Select the Last Activity column.
6. Press the + icon to name & save this list.
____________________________________________________________________________________
A: Contacts are added automatically to a Smart List if they meet the filter conditions set for that Smart List. For instance, if a Smart List includes all contacts with the "client" tag, any contact tagged as "client" will automatically be added.
A: No, contacts are not manually added to Smart Lists. They are added automatically based on the filters and conditions set for that Smart List. If you add a tag to a contact that matches a filter condition for a Smart List, they will automatically be added to that Smart List.
A: Smart Lists are essentially saved filters. If you wish to create a new one, you should clear the existing filters and add new ones. If you only see "Pipeline", it might be due to a temporary interface issue. Try refreshing the page and attempting the process again.
A: The issue you're experiencing might be related to the filters set for the smart list. Smart lists automatically include contacts that match the set filters. If you're trying to add contacts based on a specific attribute, such as a batch ID, ensure that attribute is included in your smart list filters. If you're still experiencing problems, a useful workaround can be to tag all the contacts you want to include, change the filter to match that tag and add contacts to the list. This way, all the contacts that share the tag will automatically be included in the smart list.
A: You can delete a Smart List by going to the "Manage Smart Lists" tab. However, remember that the delete option might be greyed out if a Smart list is shared with only one user. To delete such a list, you need to first untick the user. Once the user is unticked, the delete option will become available, and you can delete the smart list.
This guide will walk you through the process of deleting all records from the Smart List in Topline.
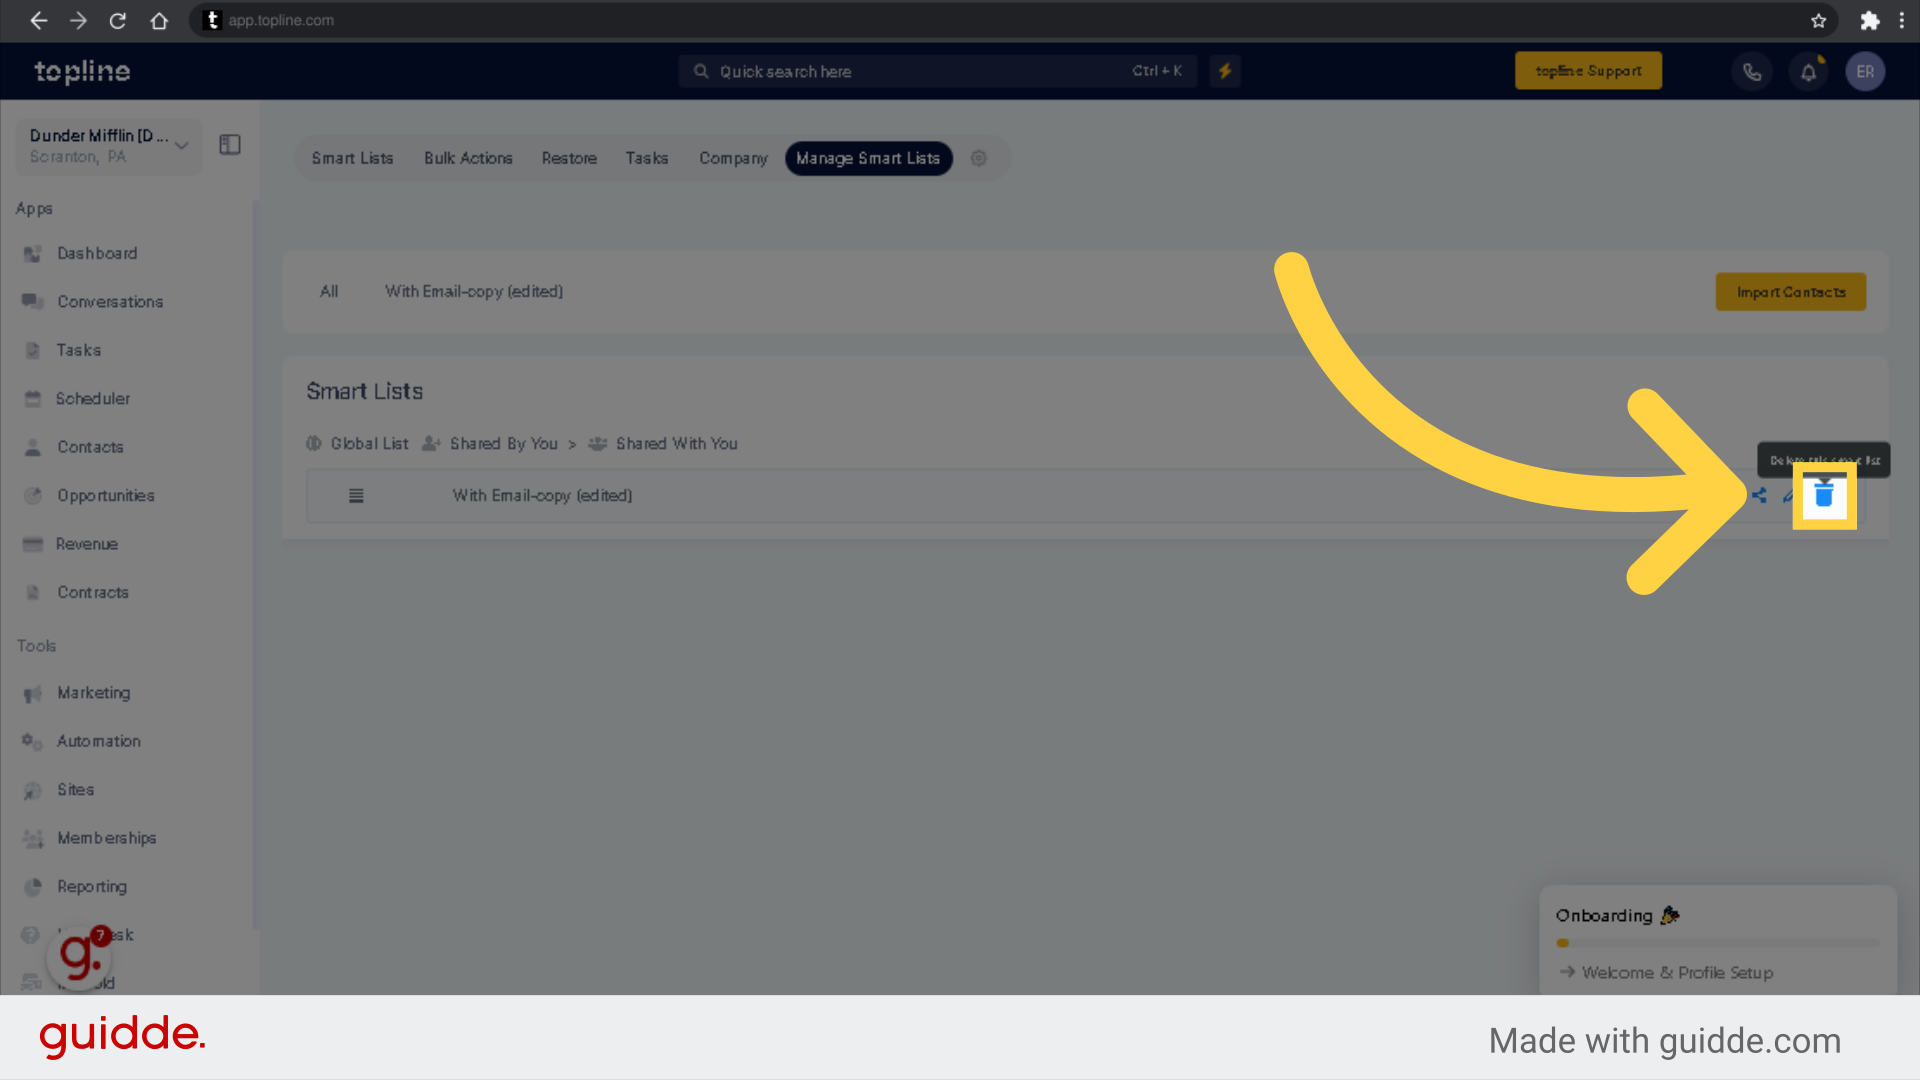
Navigate to the Smart Lists management section.
To erase a Smart List, click "Delete this Smart List".
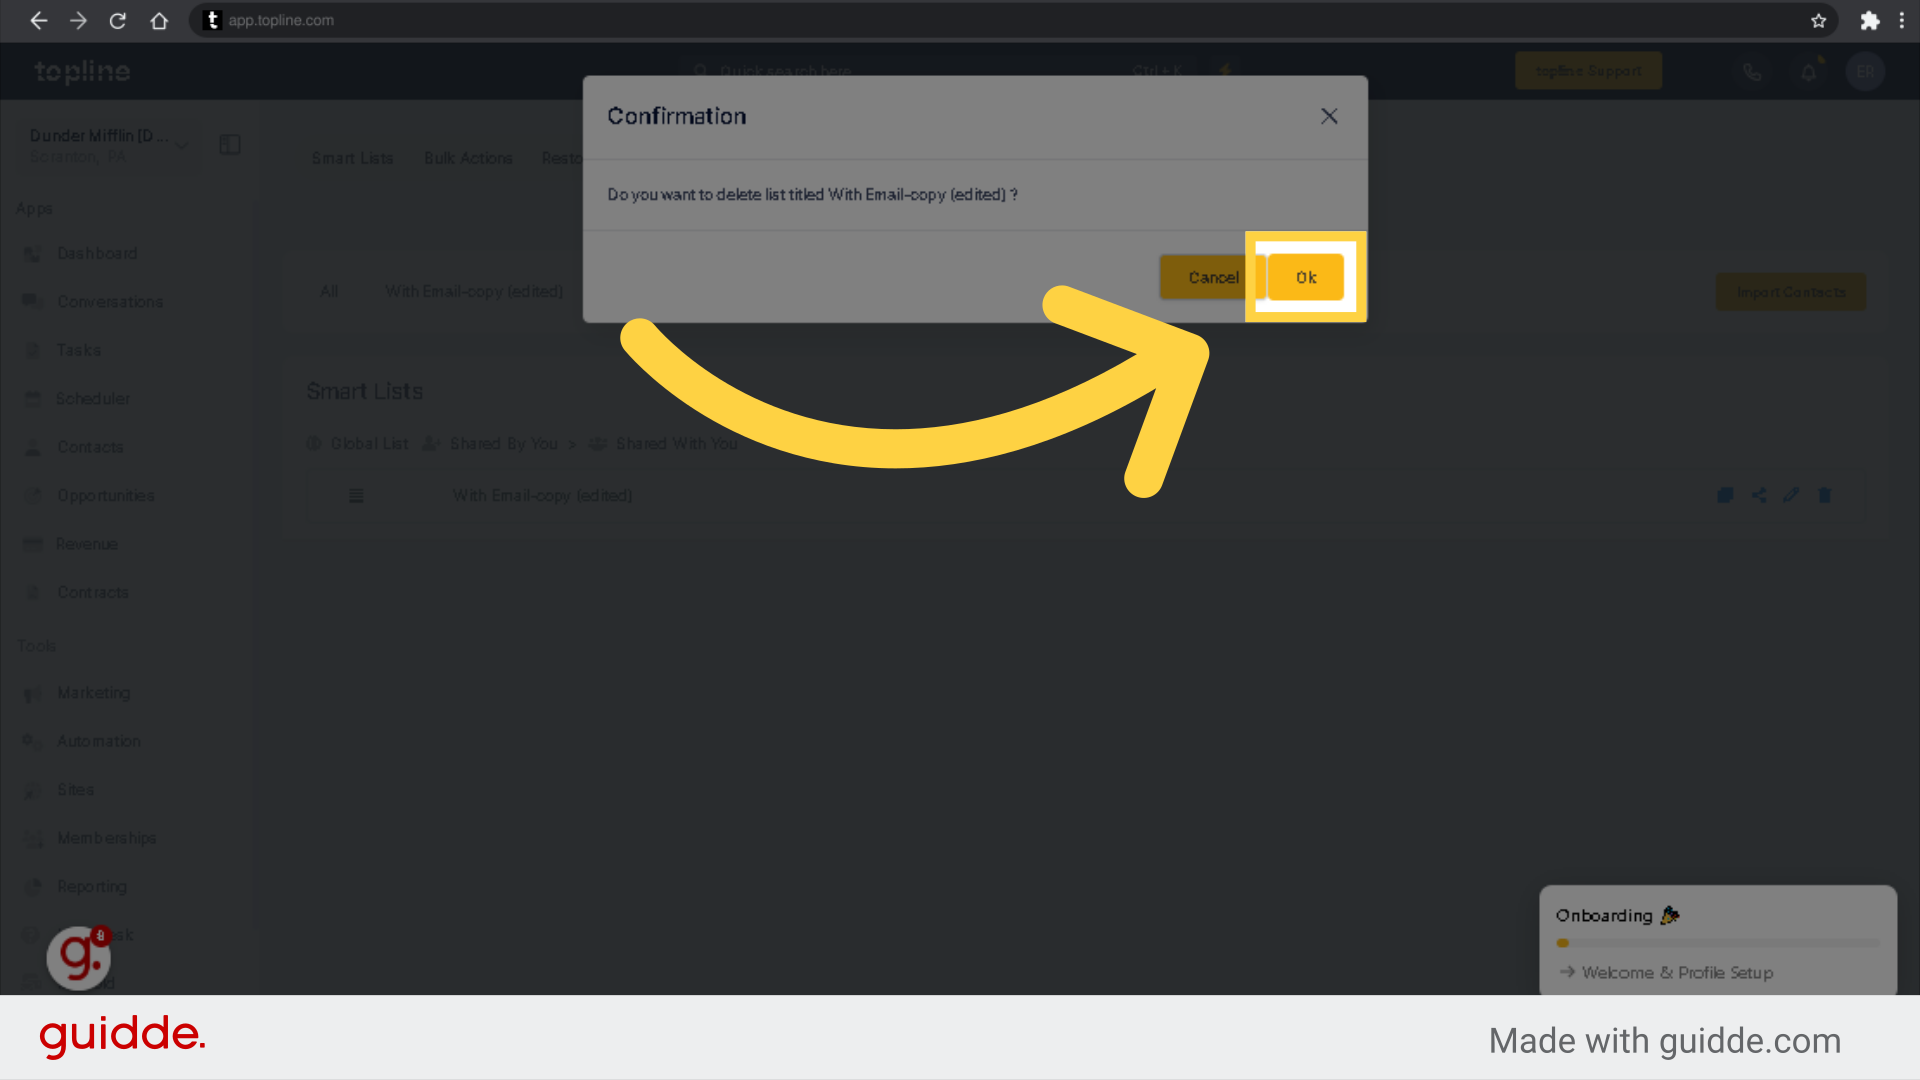
Confirm the deletion action.
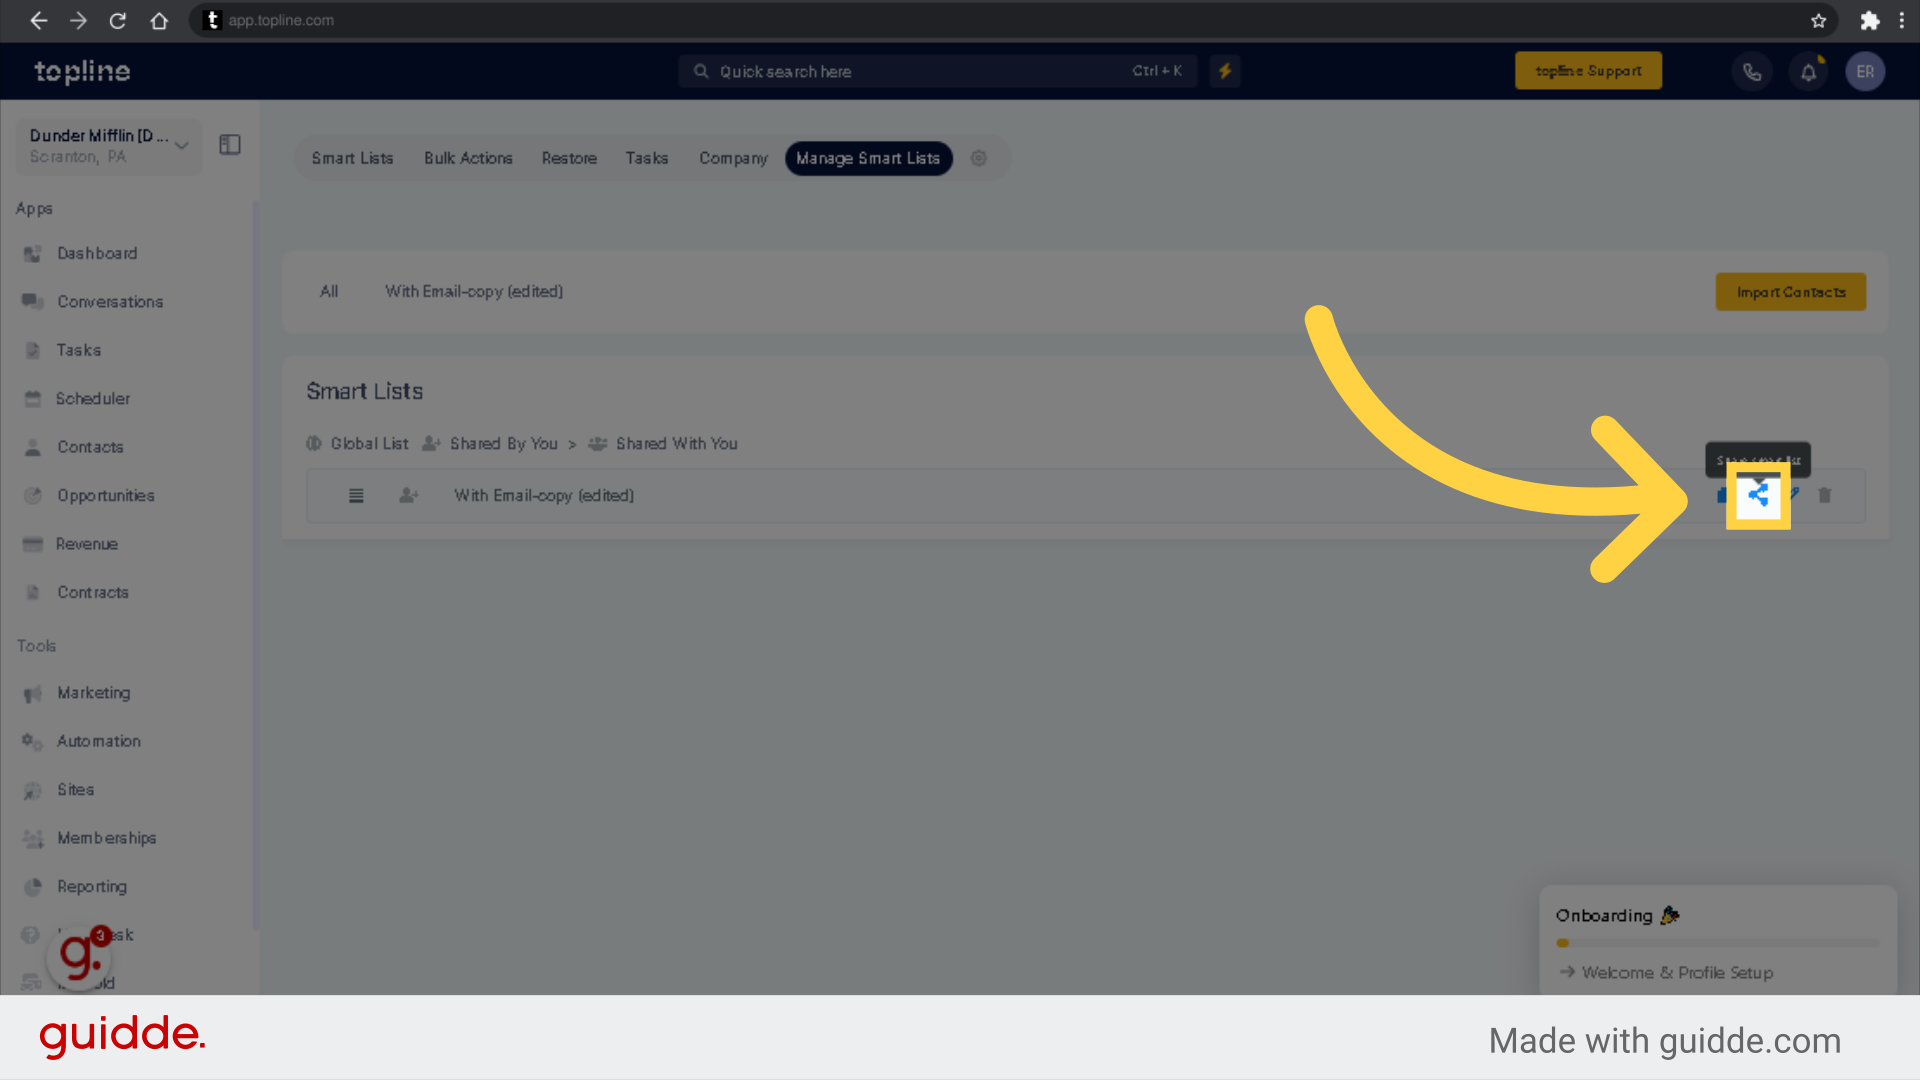
Here's another helpful tip to delete a Smart List with a greyed out trash icon.
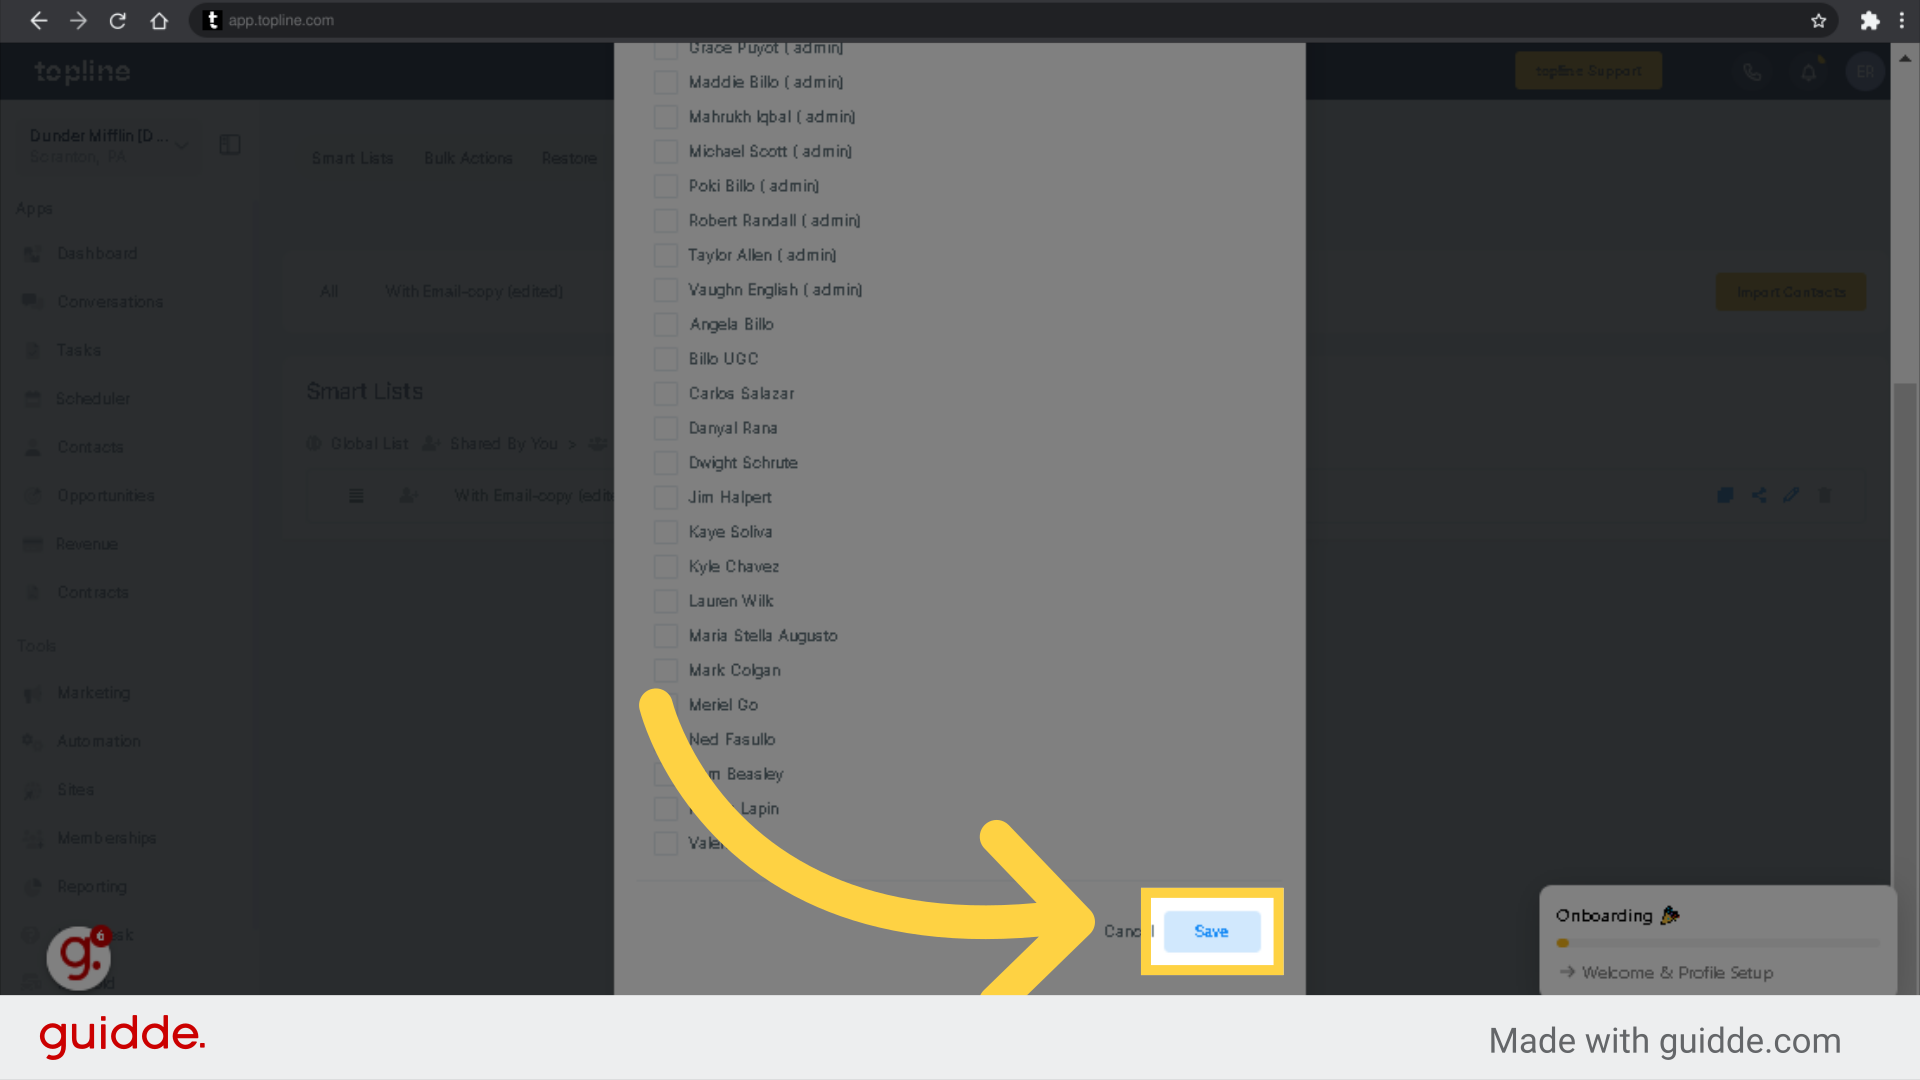
To untick the shared user to have access to delete the Smart List.
Untick the user to remove it from the shared Smart List.
Save the changes made.
Delete icon is no longer greyed out and you can now click "Delete".
Click Ok, to confirm the action.
A: Currently, you can create a smart list by filtering based on that specific tag, and this list can be exported as a CSV. However, viewing conversion rates for a specific list is not directly possible. Conversion rates can only be seen from pipeline statuses marked as WON on the dashboard or from adding a source to pipeline cards and seeing the lead source reporting area at the bottom of the dashboard.
A: The only way the smart list can be deleted is to provide the end user with "Contact" page access. They can then go to manage Smart List and delete it. If the user is not supposed to view contacts data, they can be enabled with "only assigned data" from the permission level and provide contact page access.
A: Users cannot manage their smart lists without having 'settings' access. This issue has been added to Topline OS roadmap for future updates.
A: Topline OS does not log information about who created and shared a smart list.
A: Smart Lists are created at the user level, not at the location level. However, with "global versus local" Smart Lists, users can now push their Smart Lists to the full account, making them visible to all users.
A: As of the time of writing, no feature allows moving Smart Lists from one account to another or importing them into a snapshot.
A: Yes, you can share Smart Lists. Go to 'Manage Smart Lists' and click the 'share' button to do this.