In this guide, you will learn how to manage notifications. Users should be able to set their notification preference inside the Profile tab in Settings and receive notifications based on that via different channels.
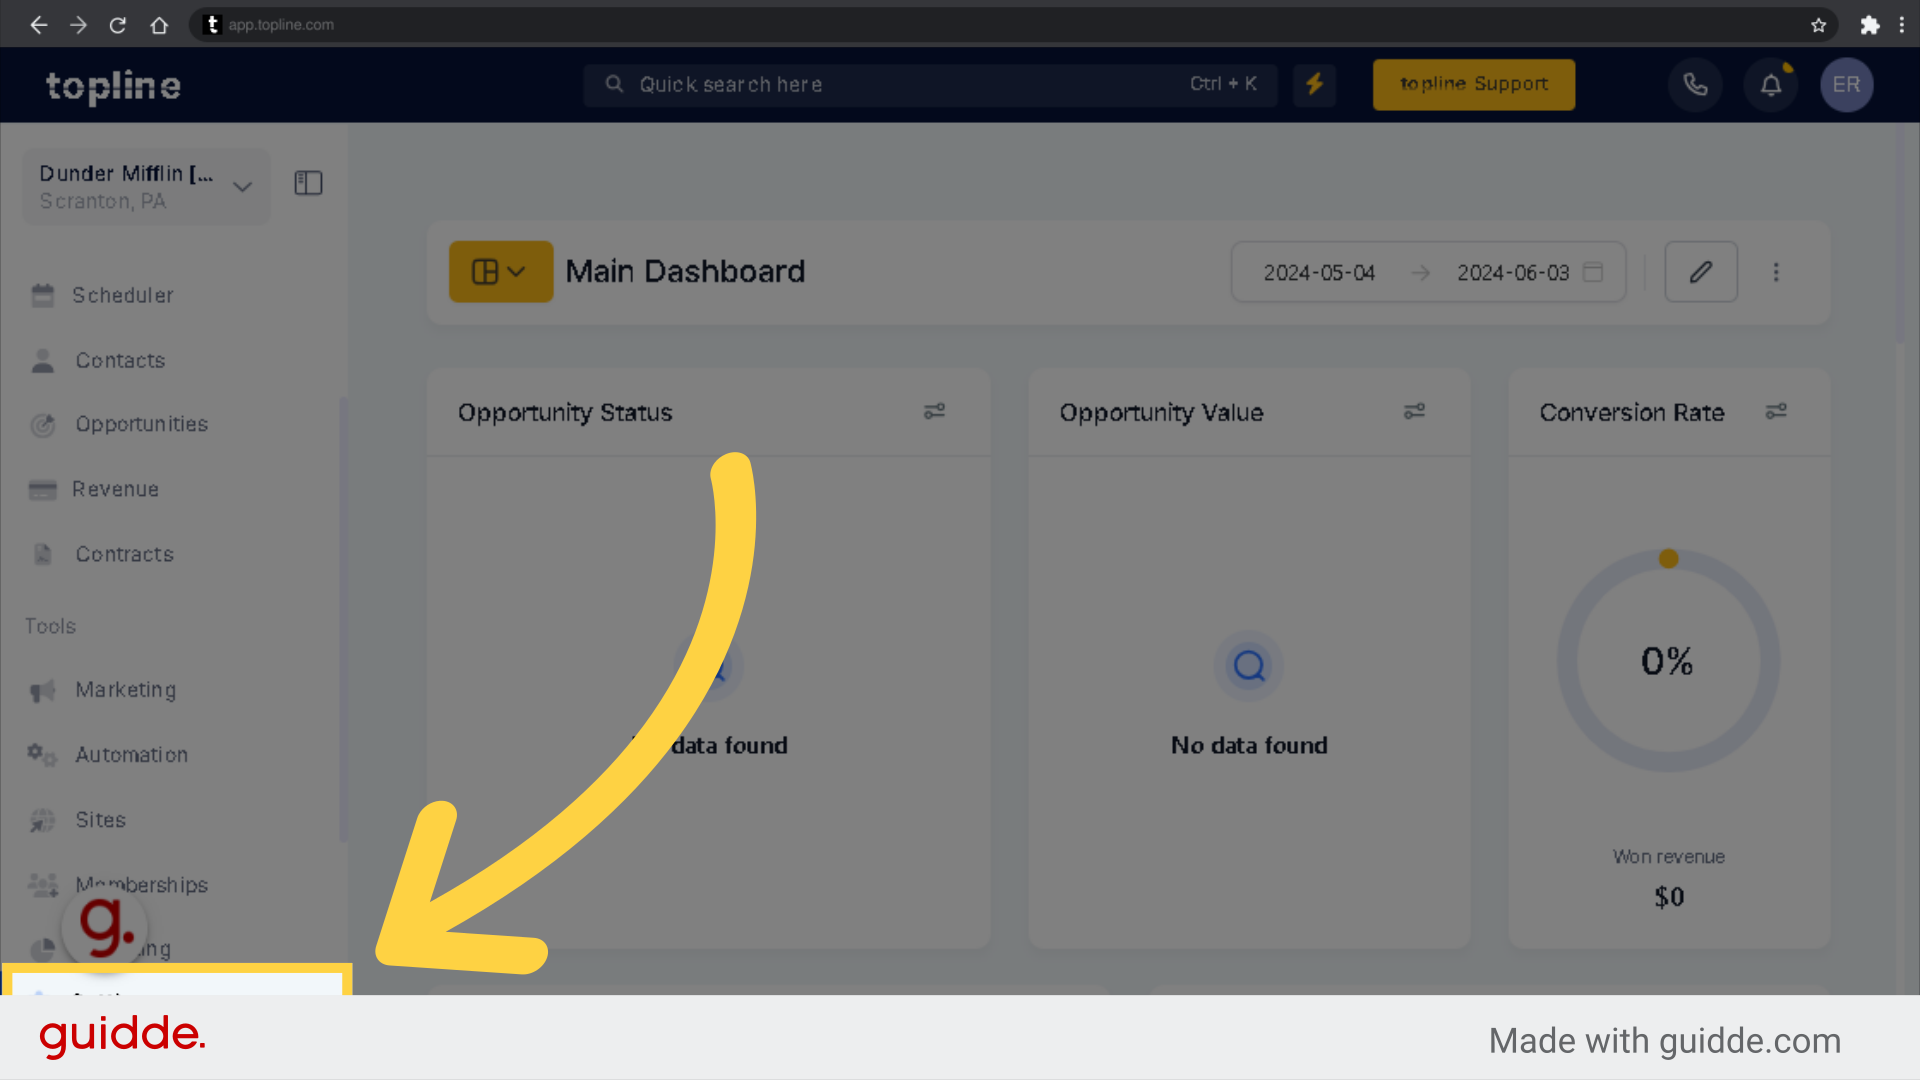
Access the Setting on the lower left side Menu.
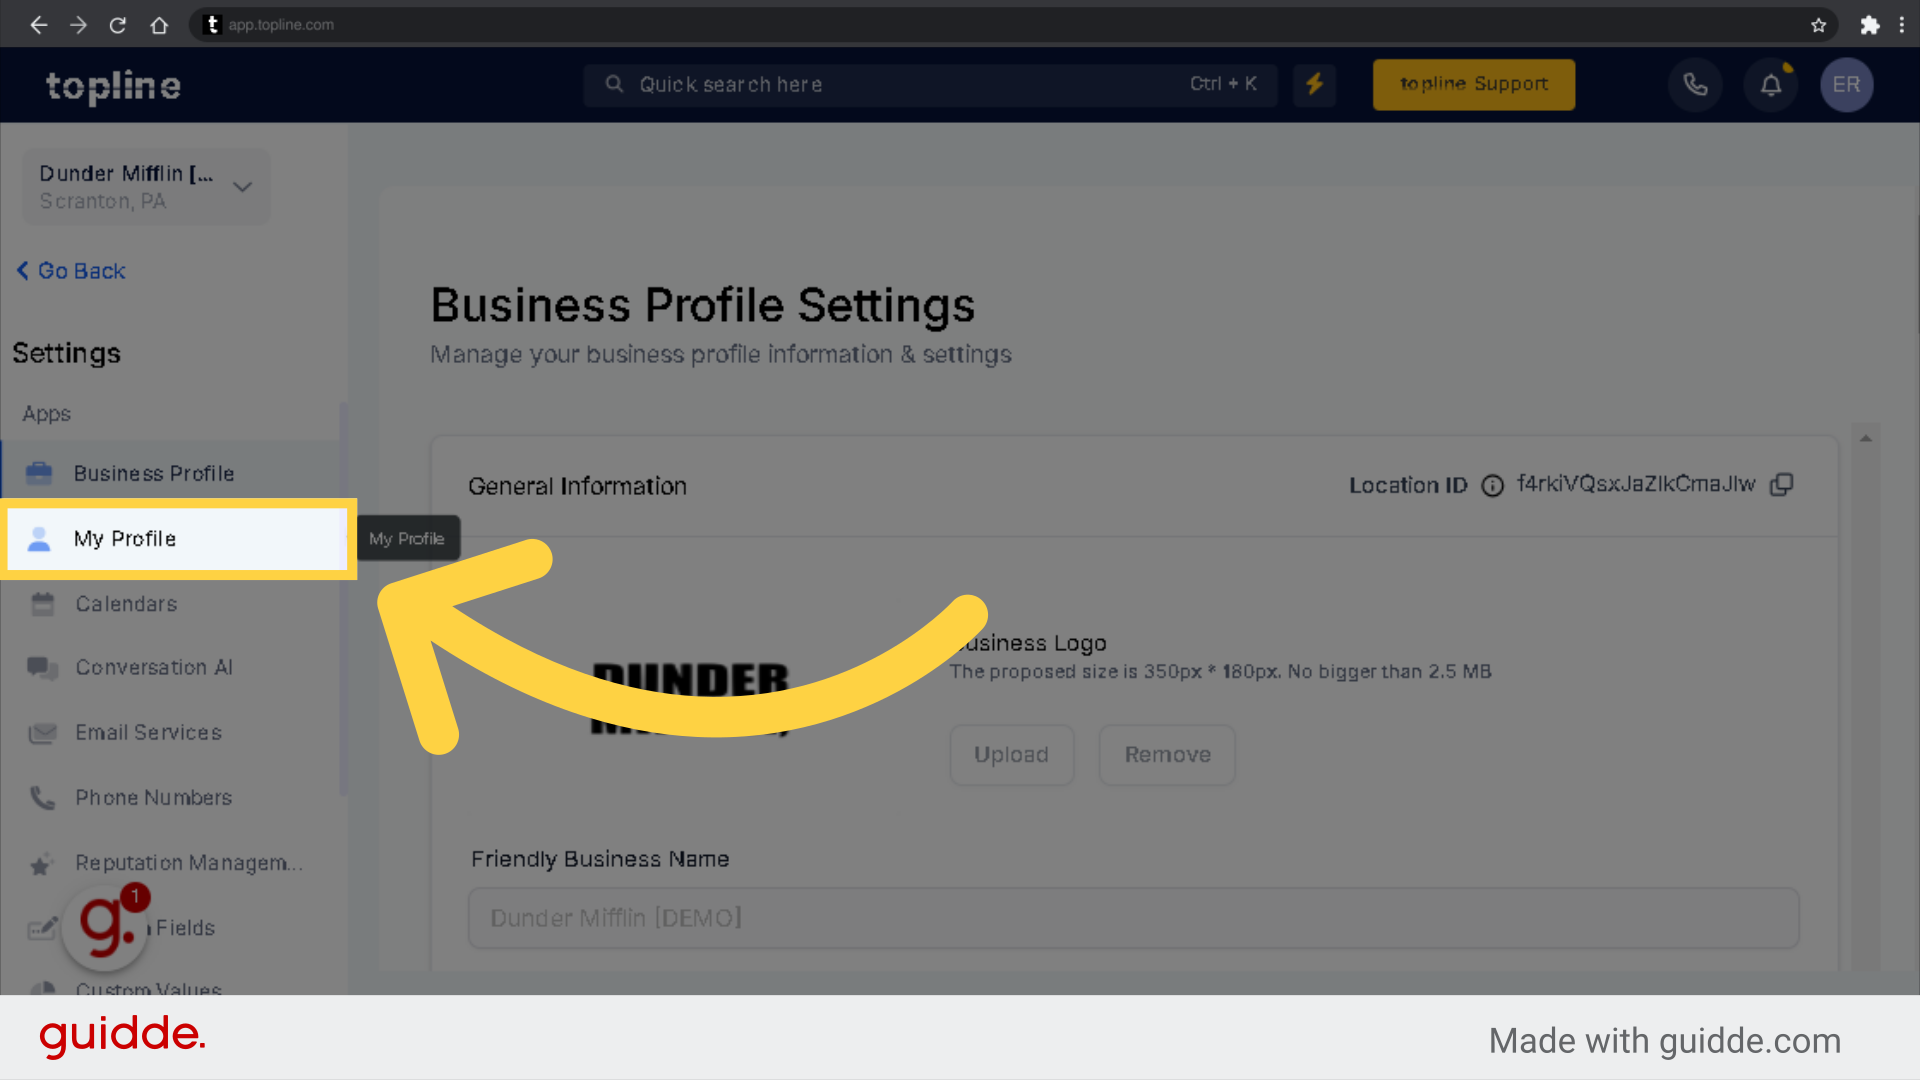
Once done, Access "My Profile" on the left side Apps Menu.
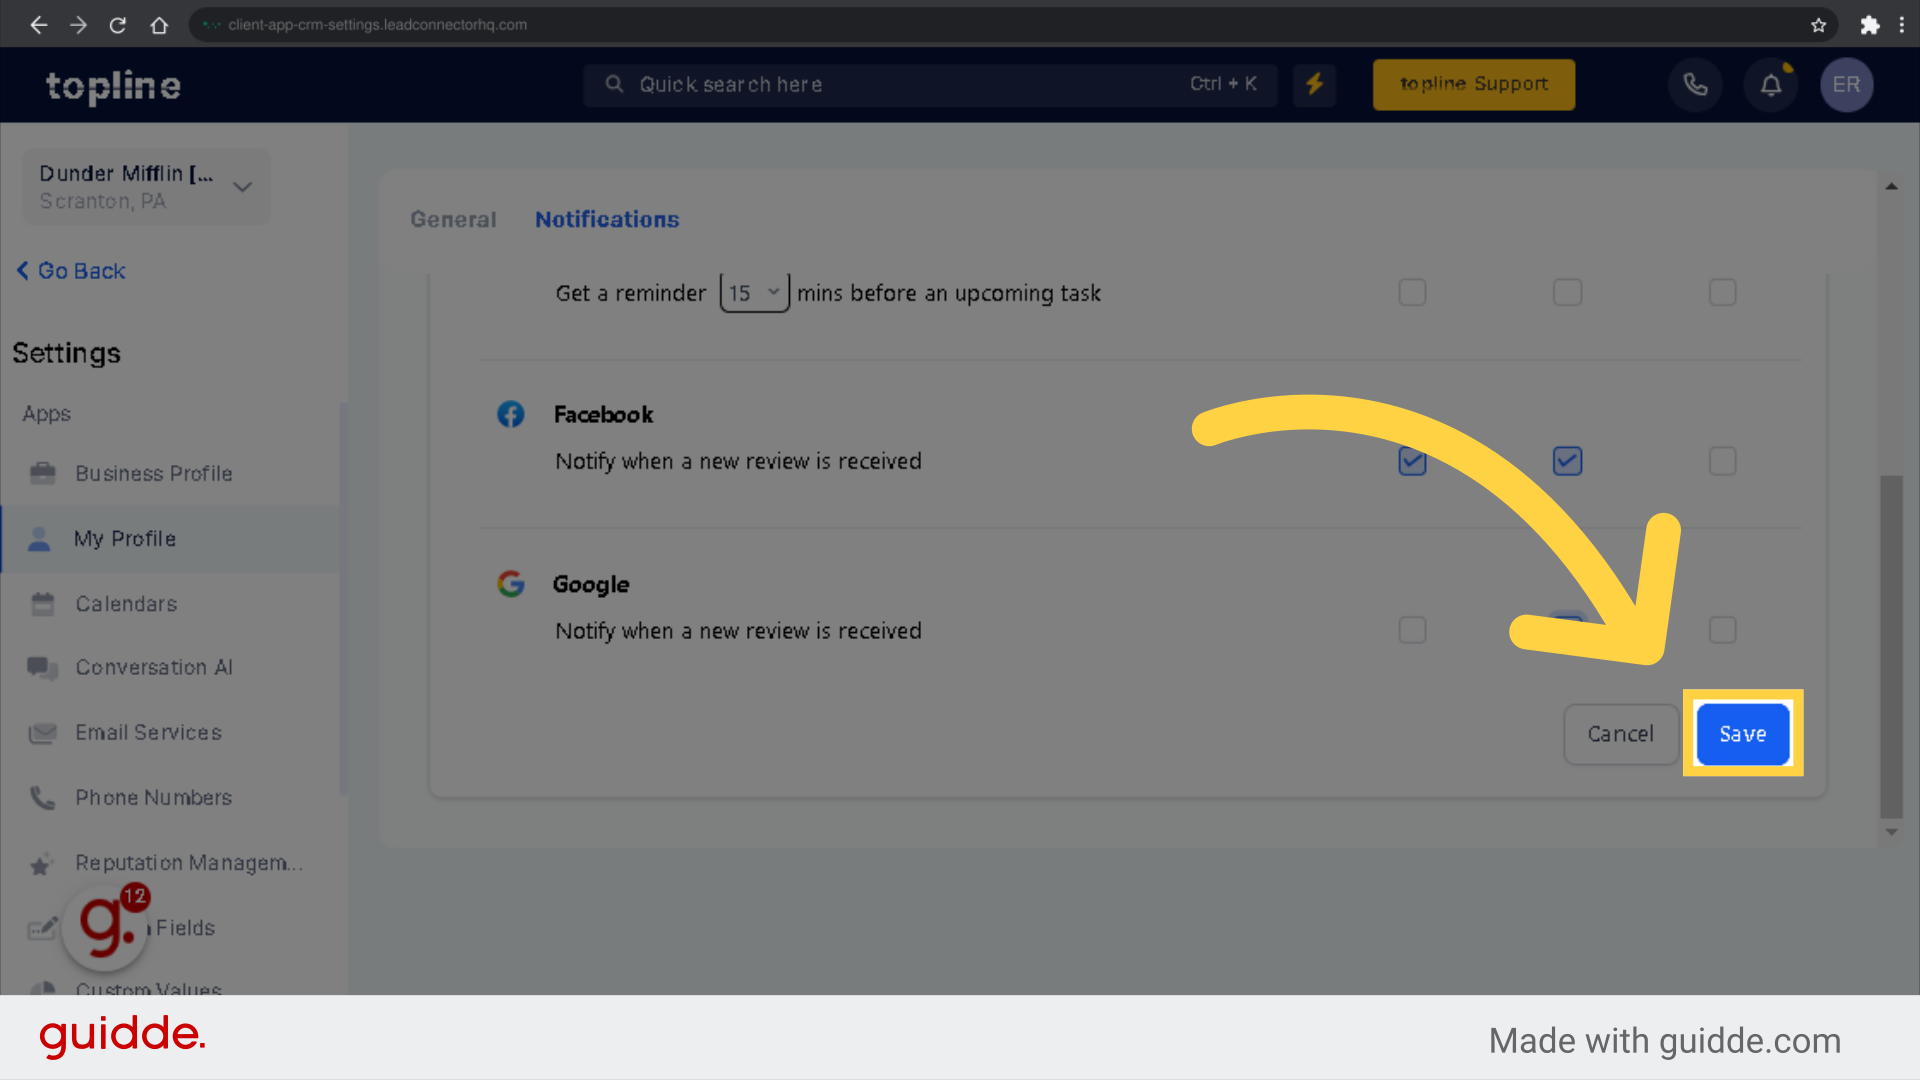
Click "Notifications", this feature is accessible inside the Profile tab. You may select how you want to get notified about different events, you can choose whether or not to get notified about new conversation and message.
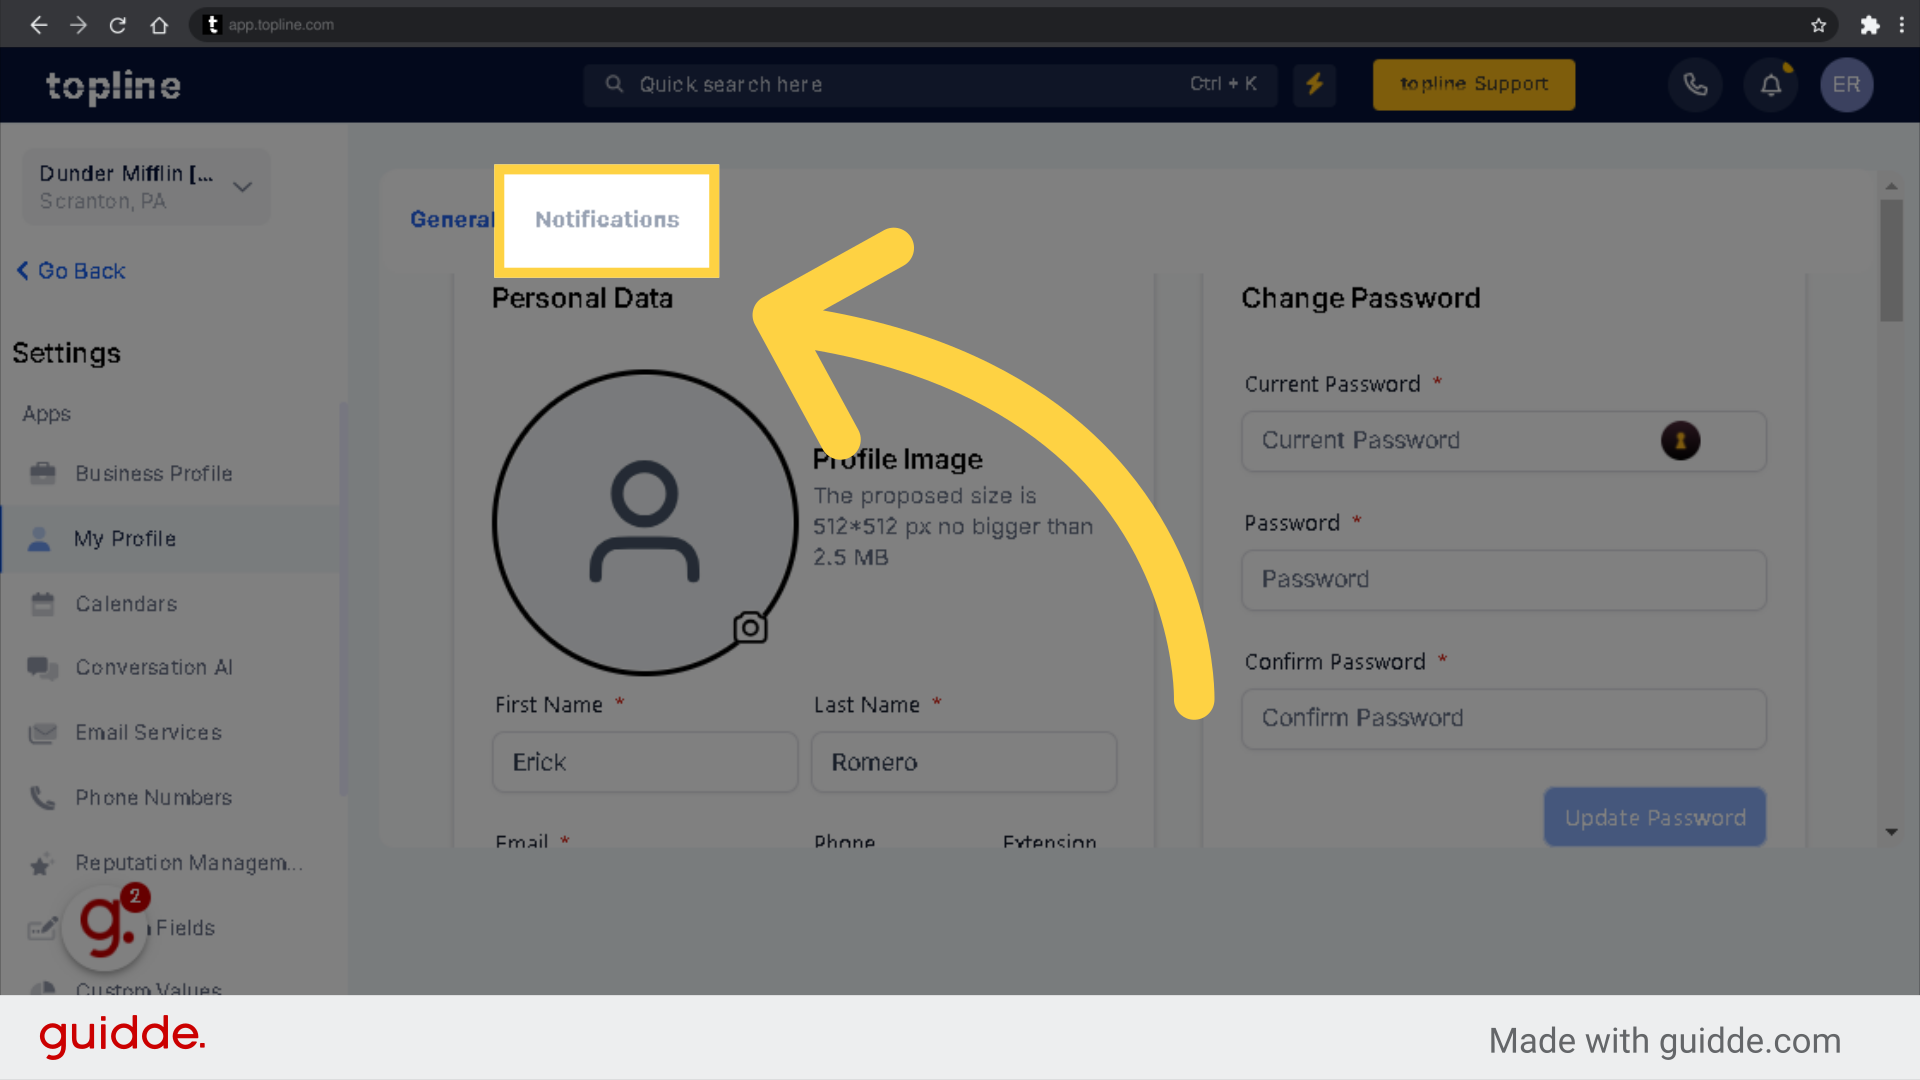
A user should be able to change their notification preferences under the Profile tab in Settings and receive notifications in accordance with that preference. You can choose if you wanted to be notified via In-App, Email or SMS.
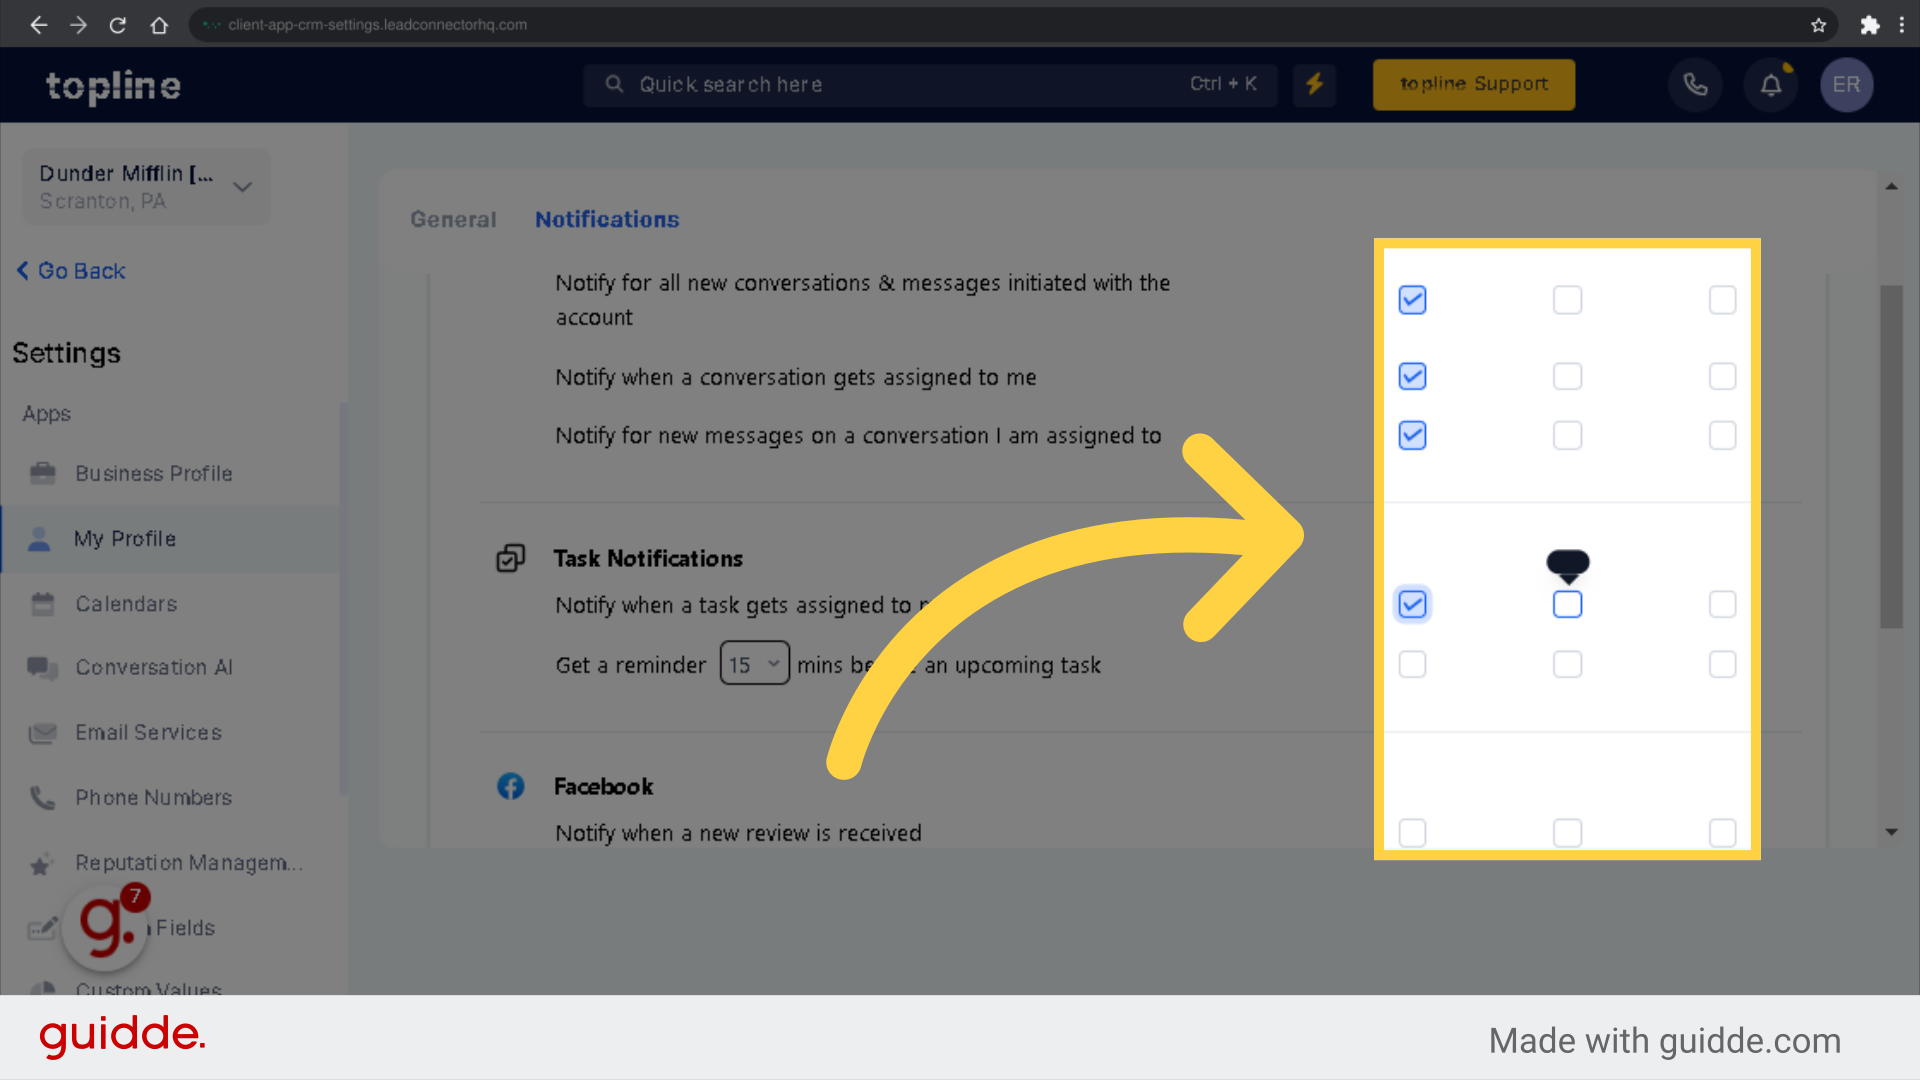
Please remember, whenever you make any changes to click the "Save" button once the changes has been made.
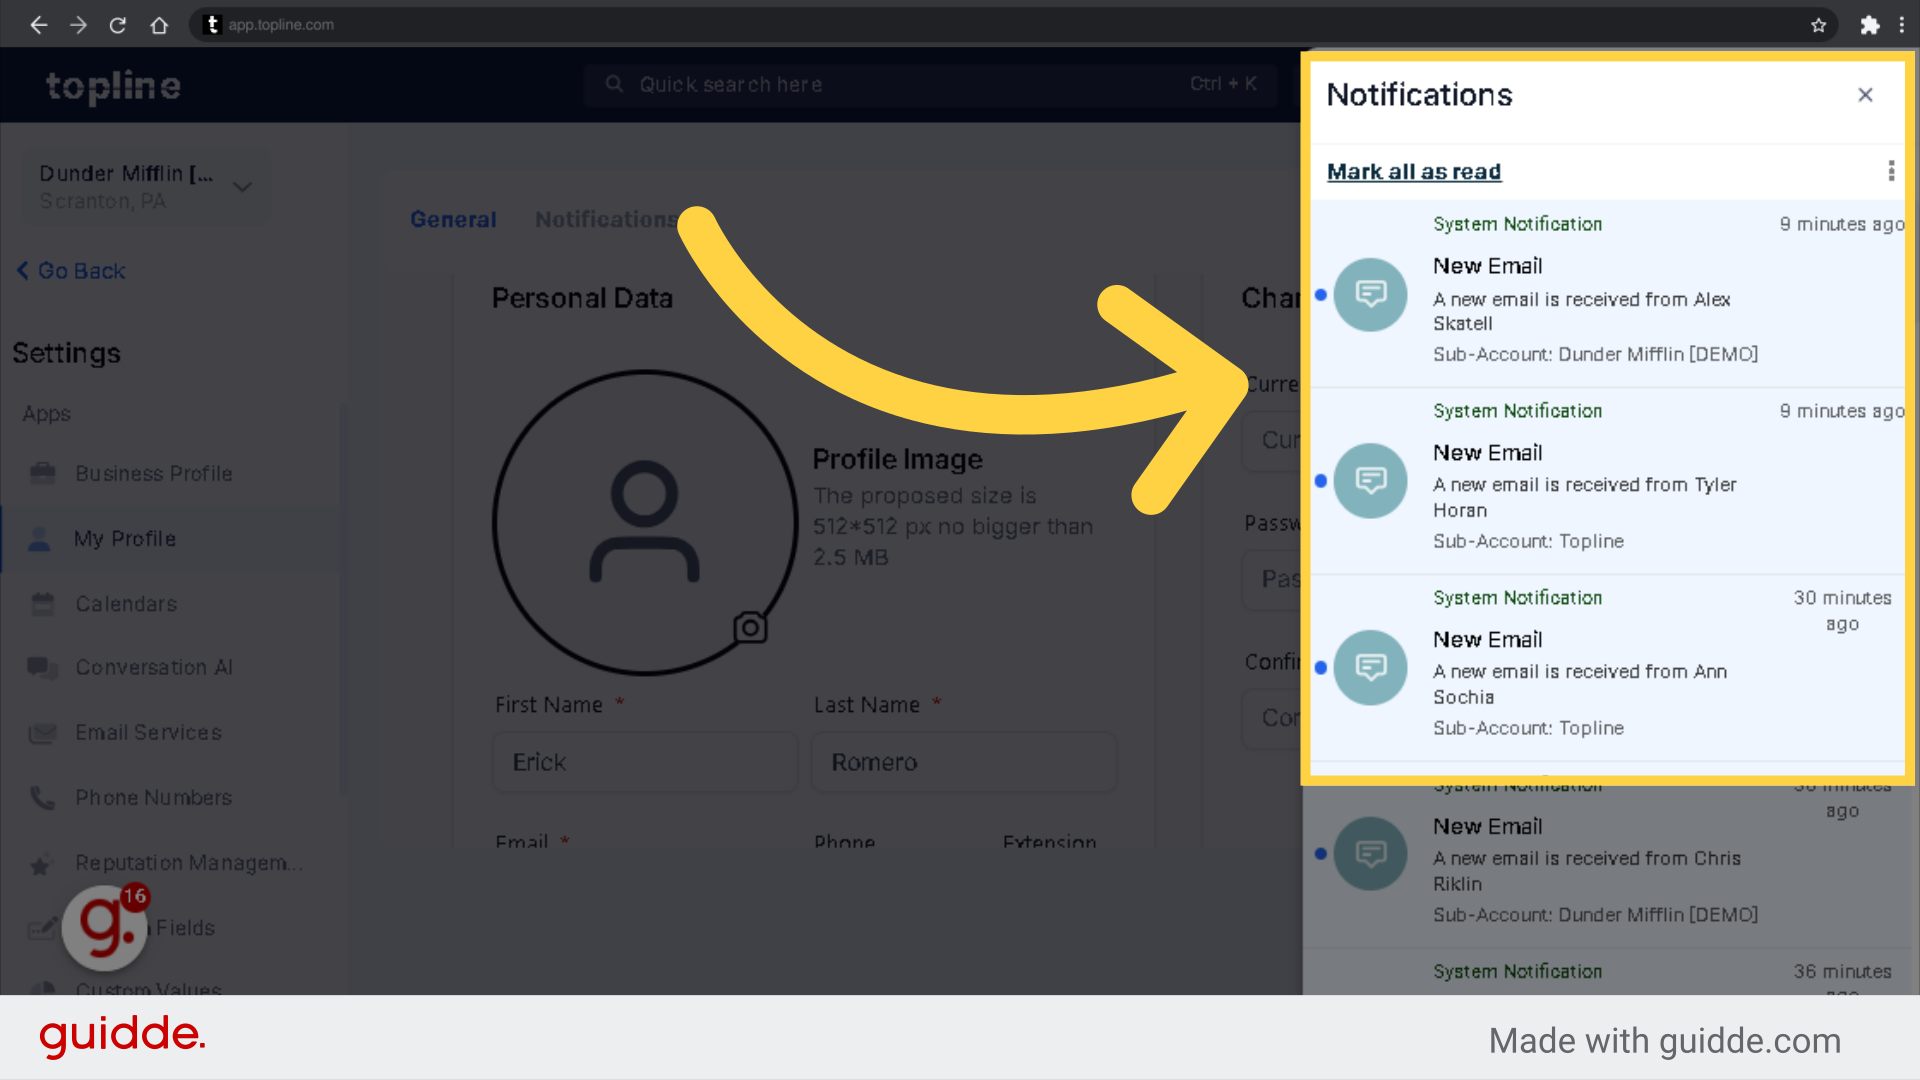
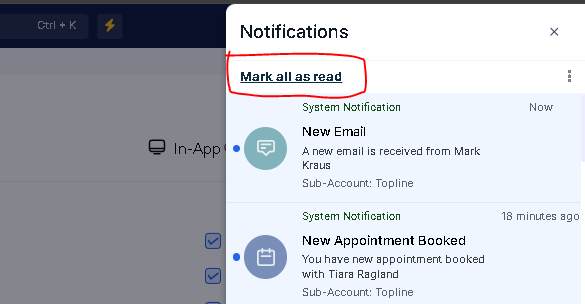
Notification manager lets you view all notifications in the notification bar.
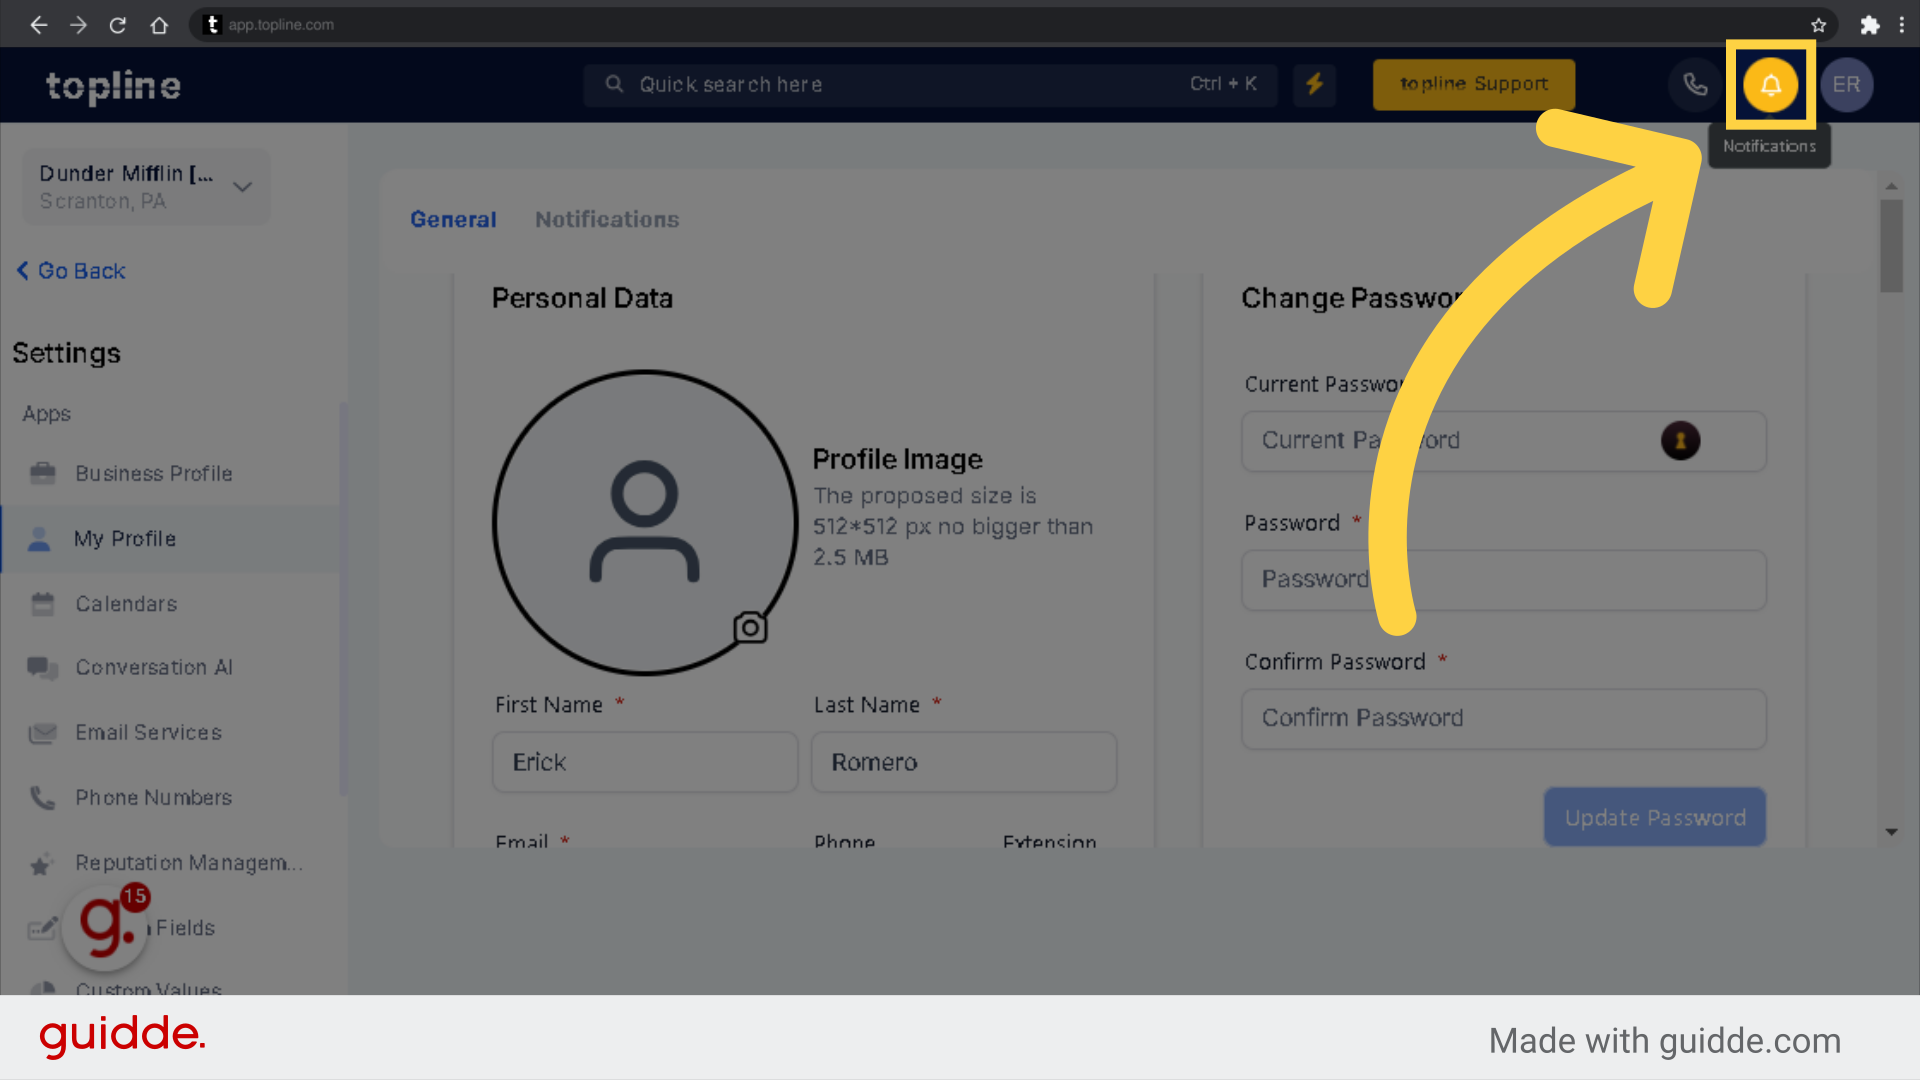
Clicking on a notification, the user is redirected to the screen to which the notification was sent.
Users should be able to set their notification preference inside the Profile tab in Settings and receive notifications based on that via different channels. Clicking on a notification, the user is redirected to the screen to which the notification was sent.
Notifications can be sent via the following channels:
A user can receive notifications within the desktop platform. By default, all notifications will be sent here.
Users can receive notifications when they are outside the CRM. They need to ensure that the CRM's website can push desktop notifications in the browser settings.

Users can receive notifications in mobile applications. All notifications will be sent here if Web app notifications are enabled by default.
Please Note
Users can receive notifications via email if Email is supported and marked as the chosen Notification channel

When a notification pops up on the web app you are able to click it to get redirected to the origin of that notification as explained here
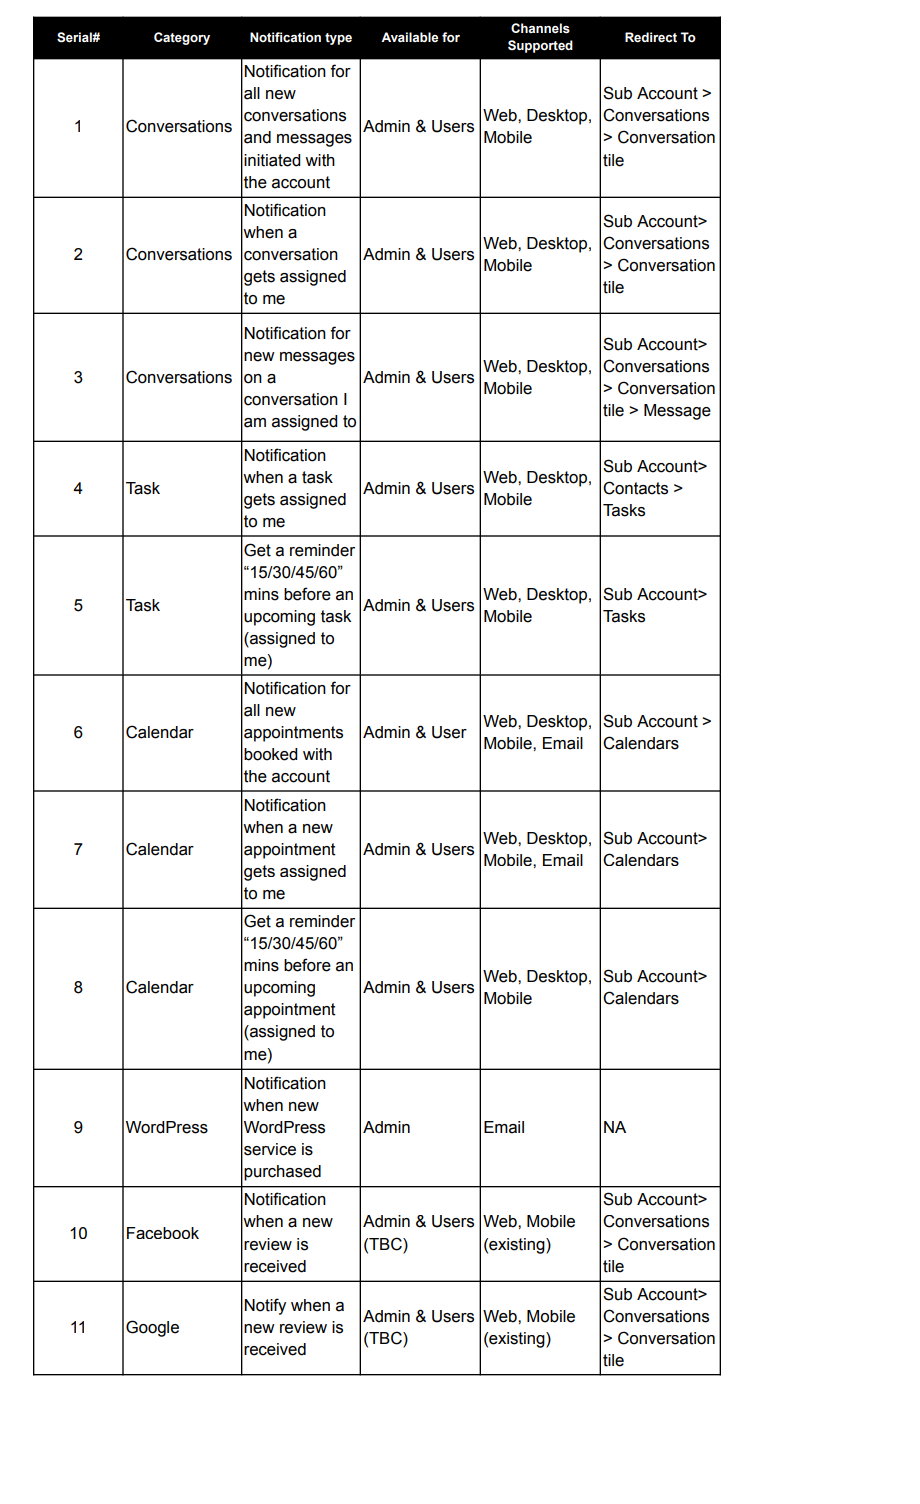
This table explains how the redirect feature is meant to work:
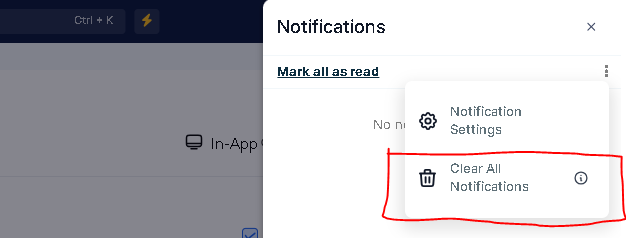
It changes the status of all the notifications from unread to read
You can scroll through 25 records before the notification panel loads the next 25.
It clears out all notification records fetched for the user (who is logged in at that time when clicking the button) at the page level. If there are further notifications for the user after the button is clicked, we will populate those after the clear-all process. These cleared notifications cannot be restored.