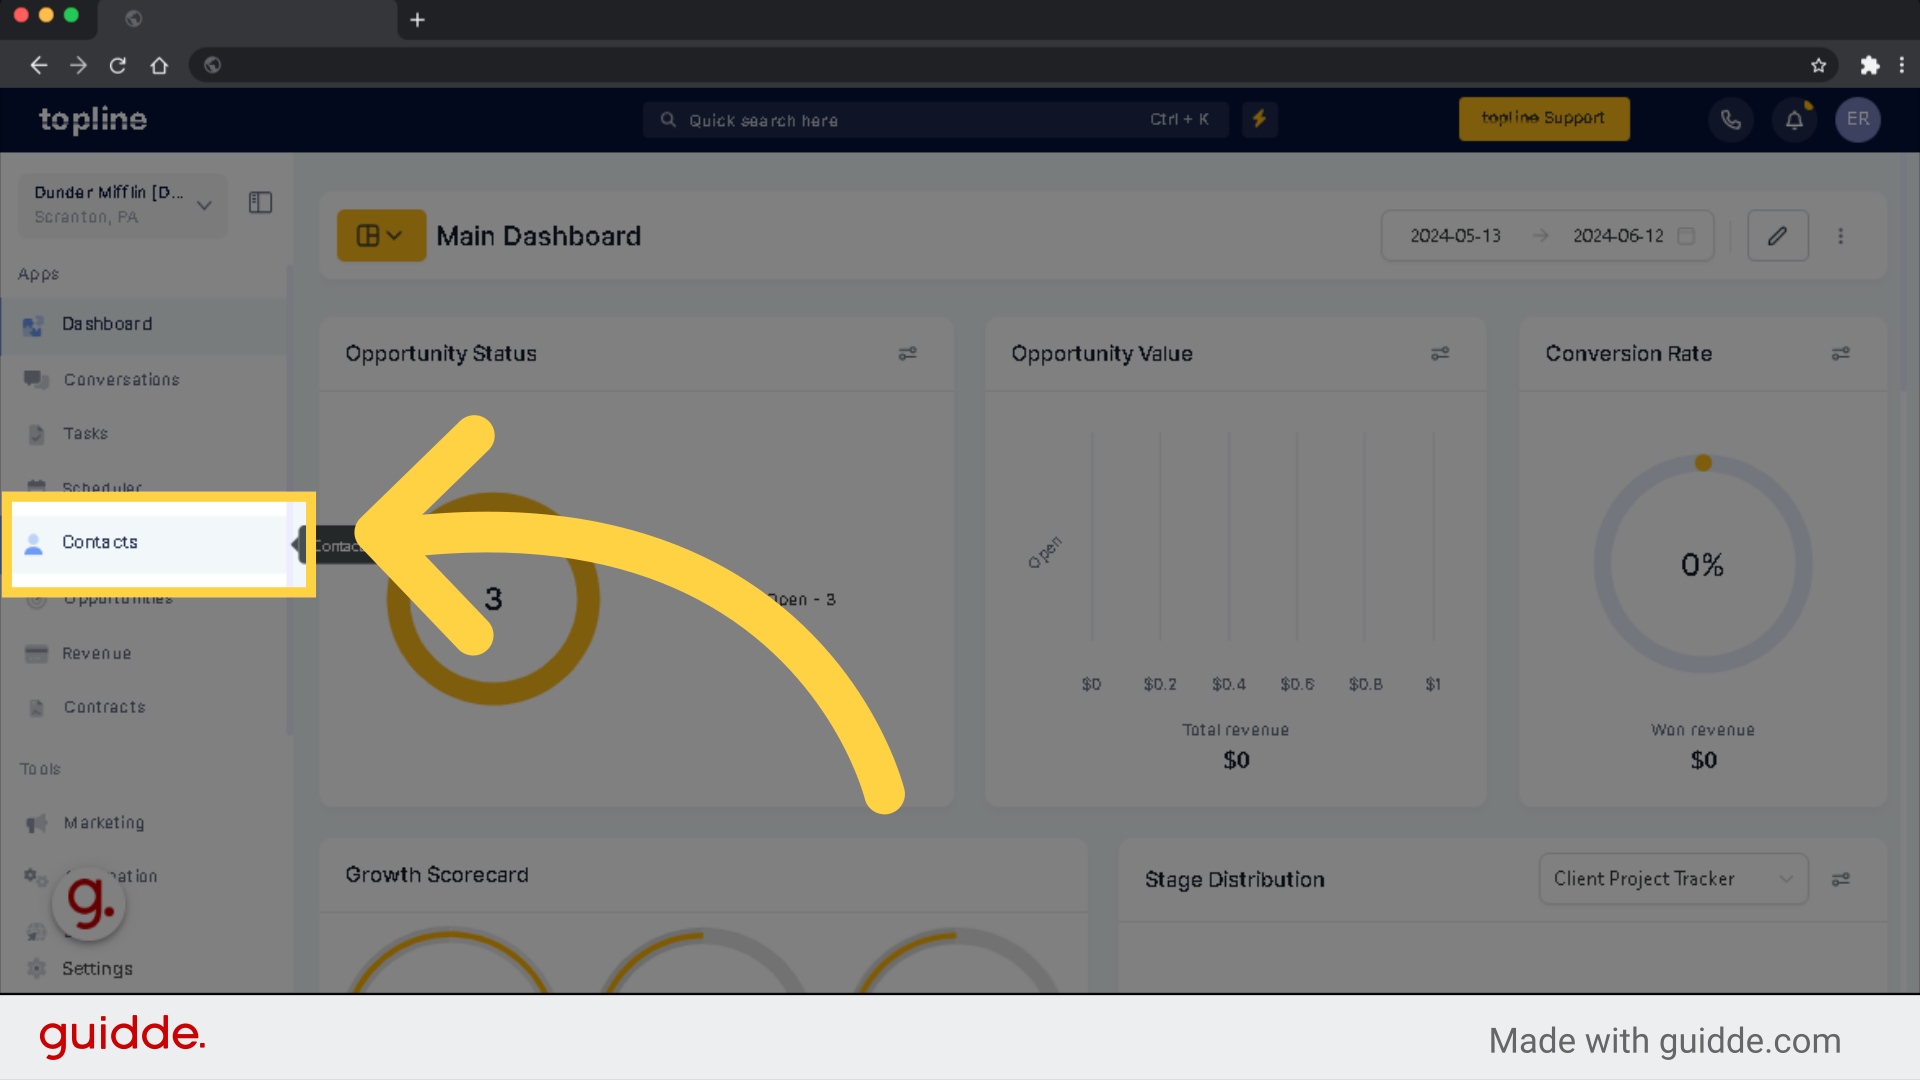
Navigate to the Contacts section on the left side menu.
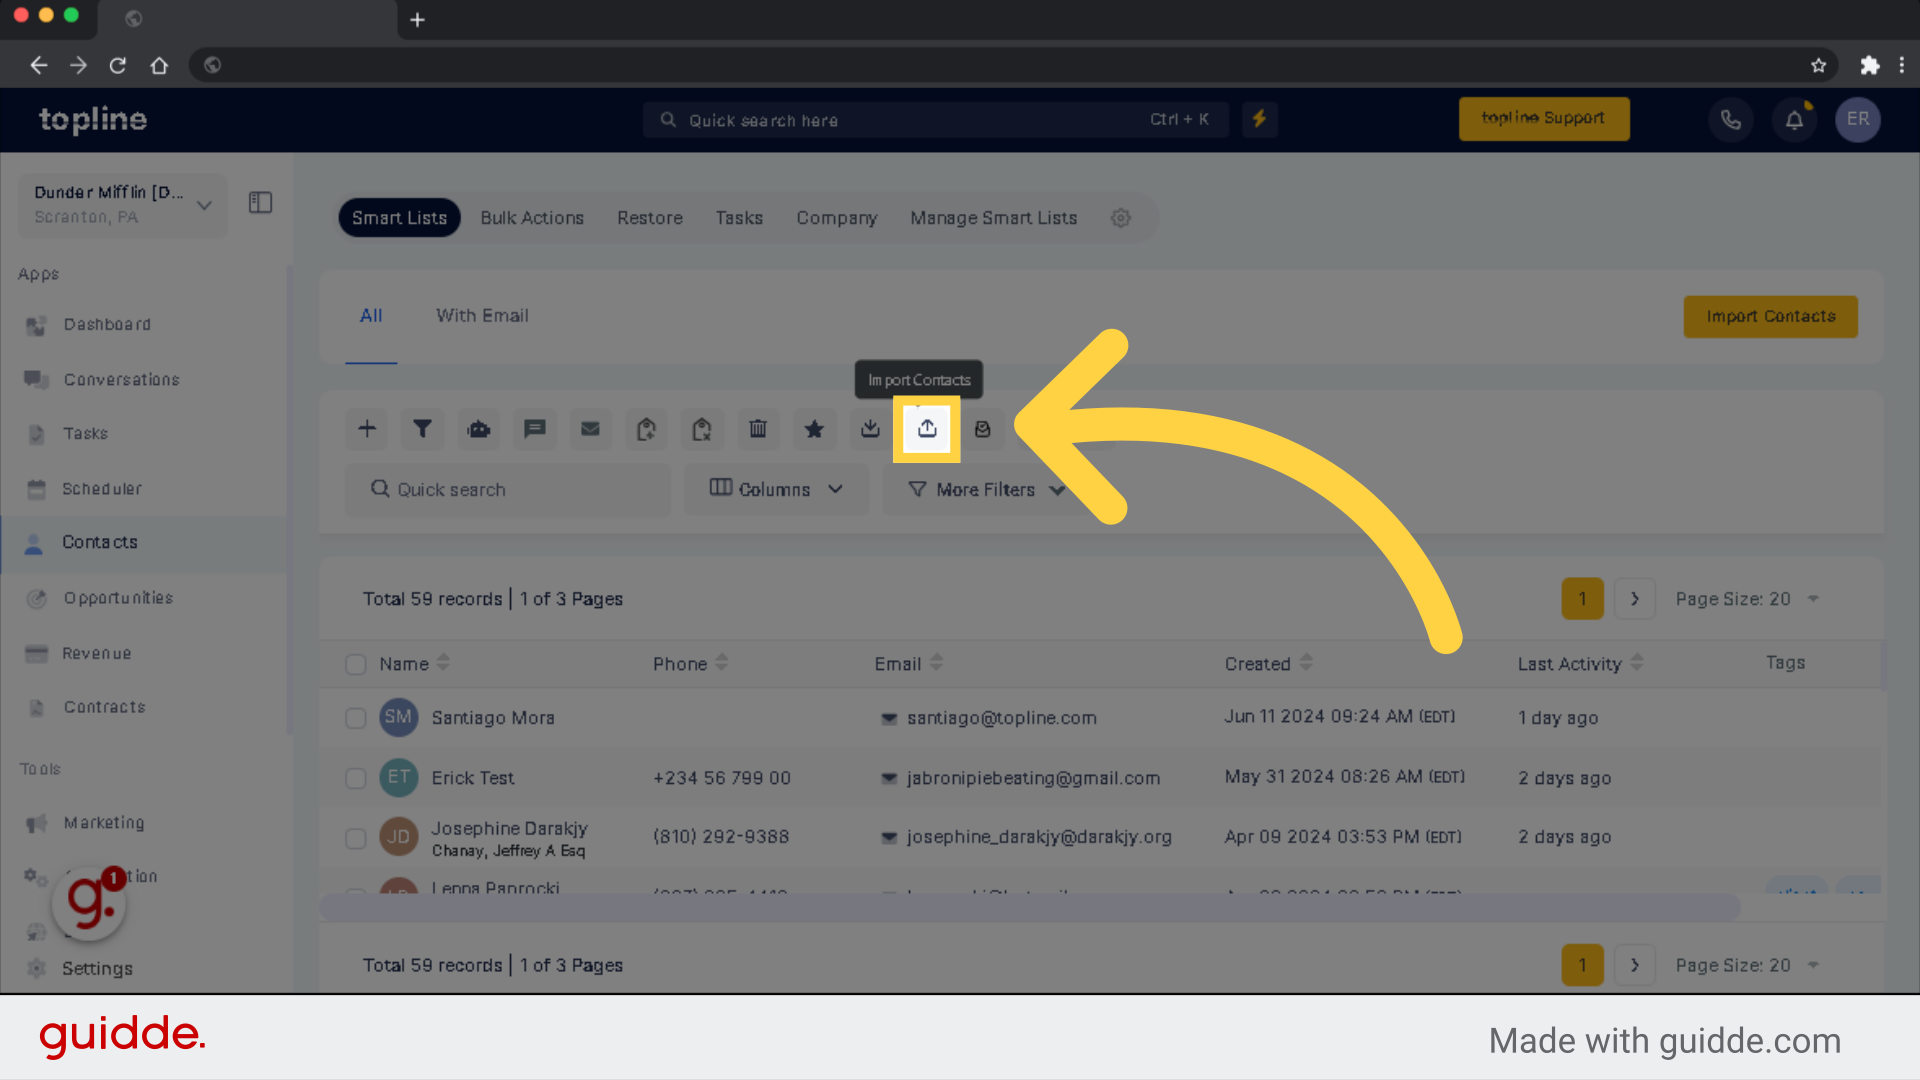
To import a csv file, click Import Contacts.
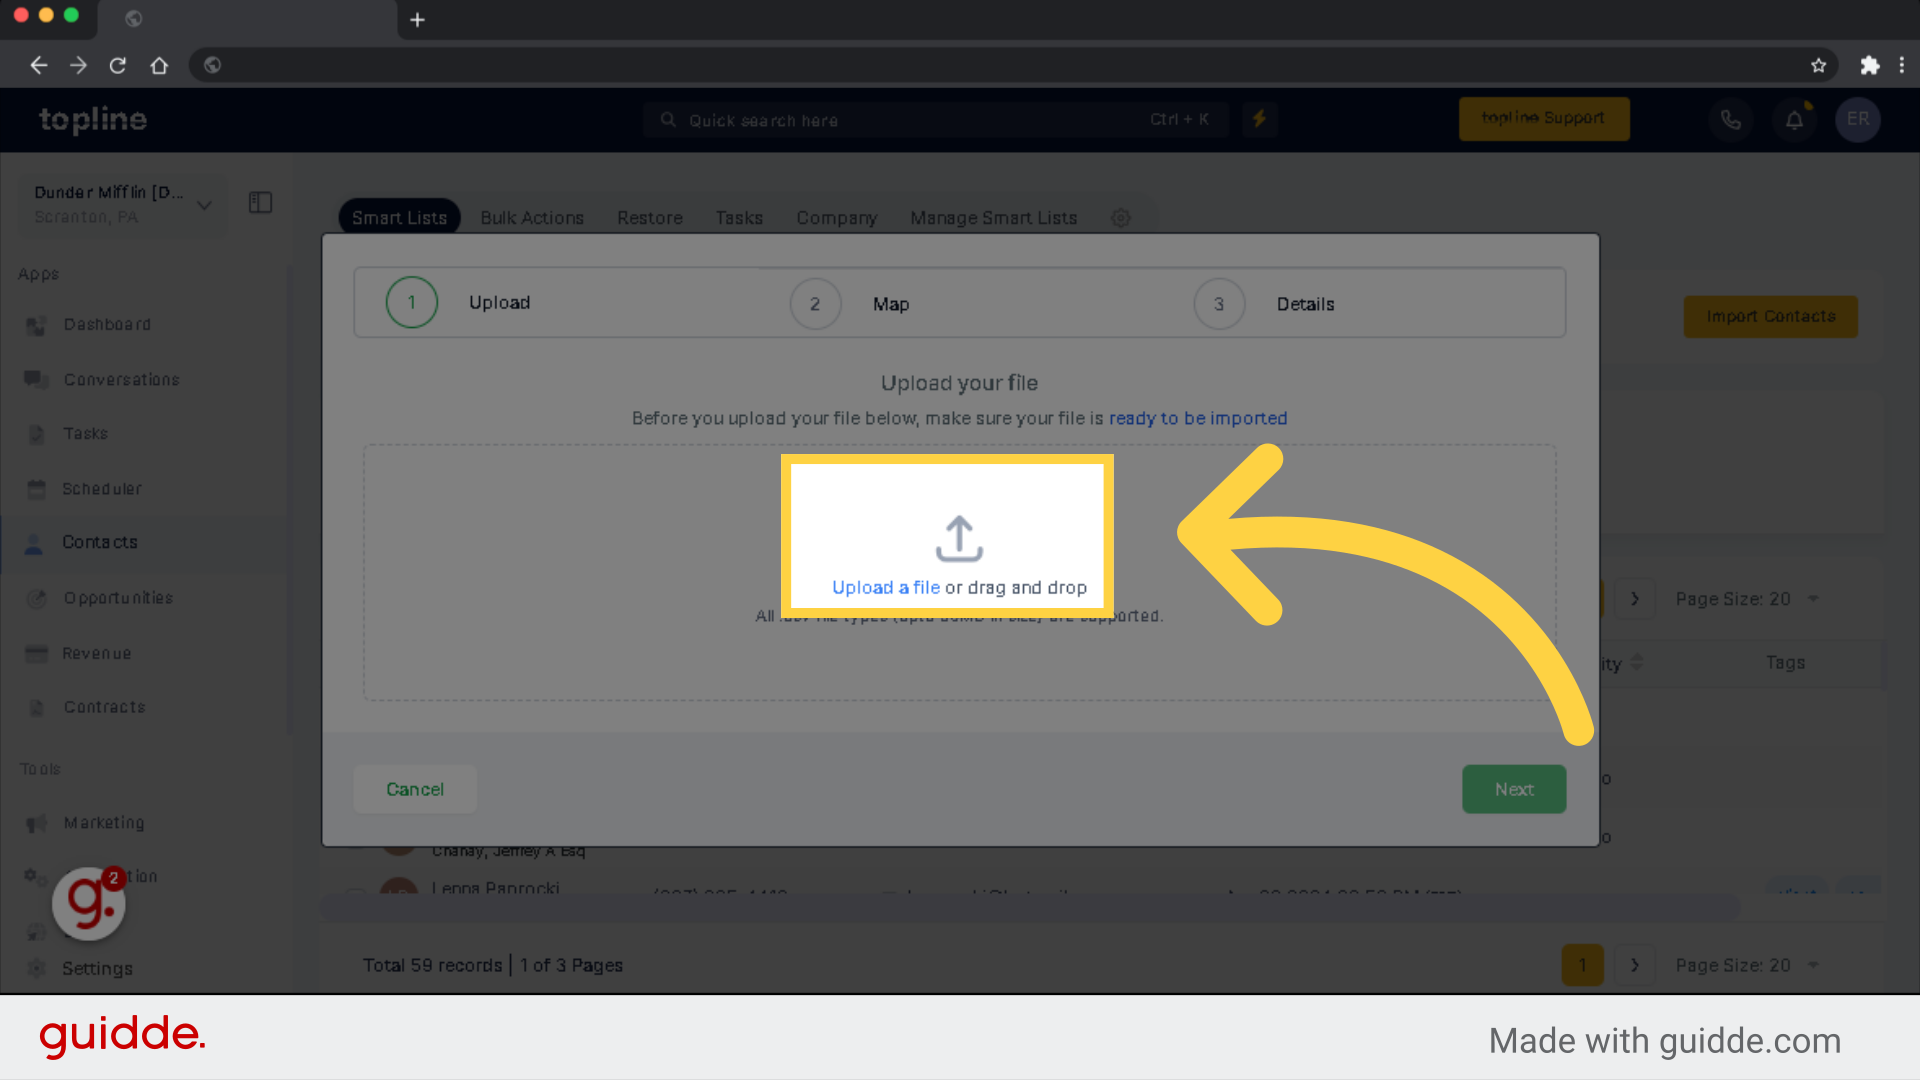
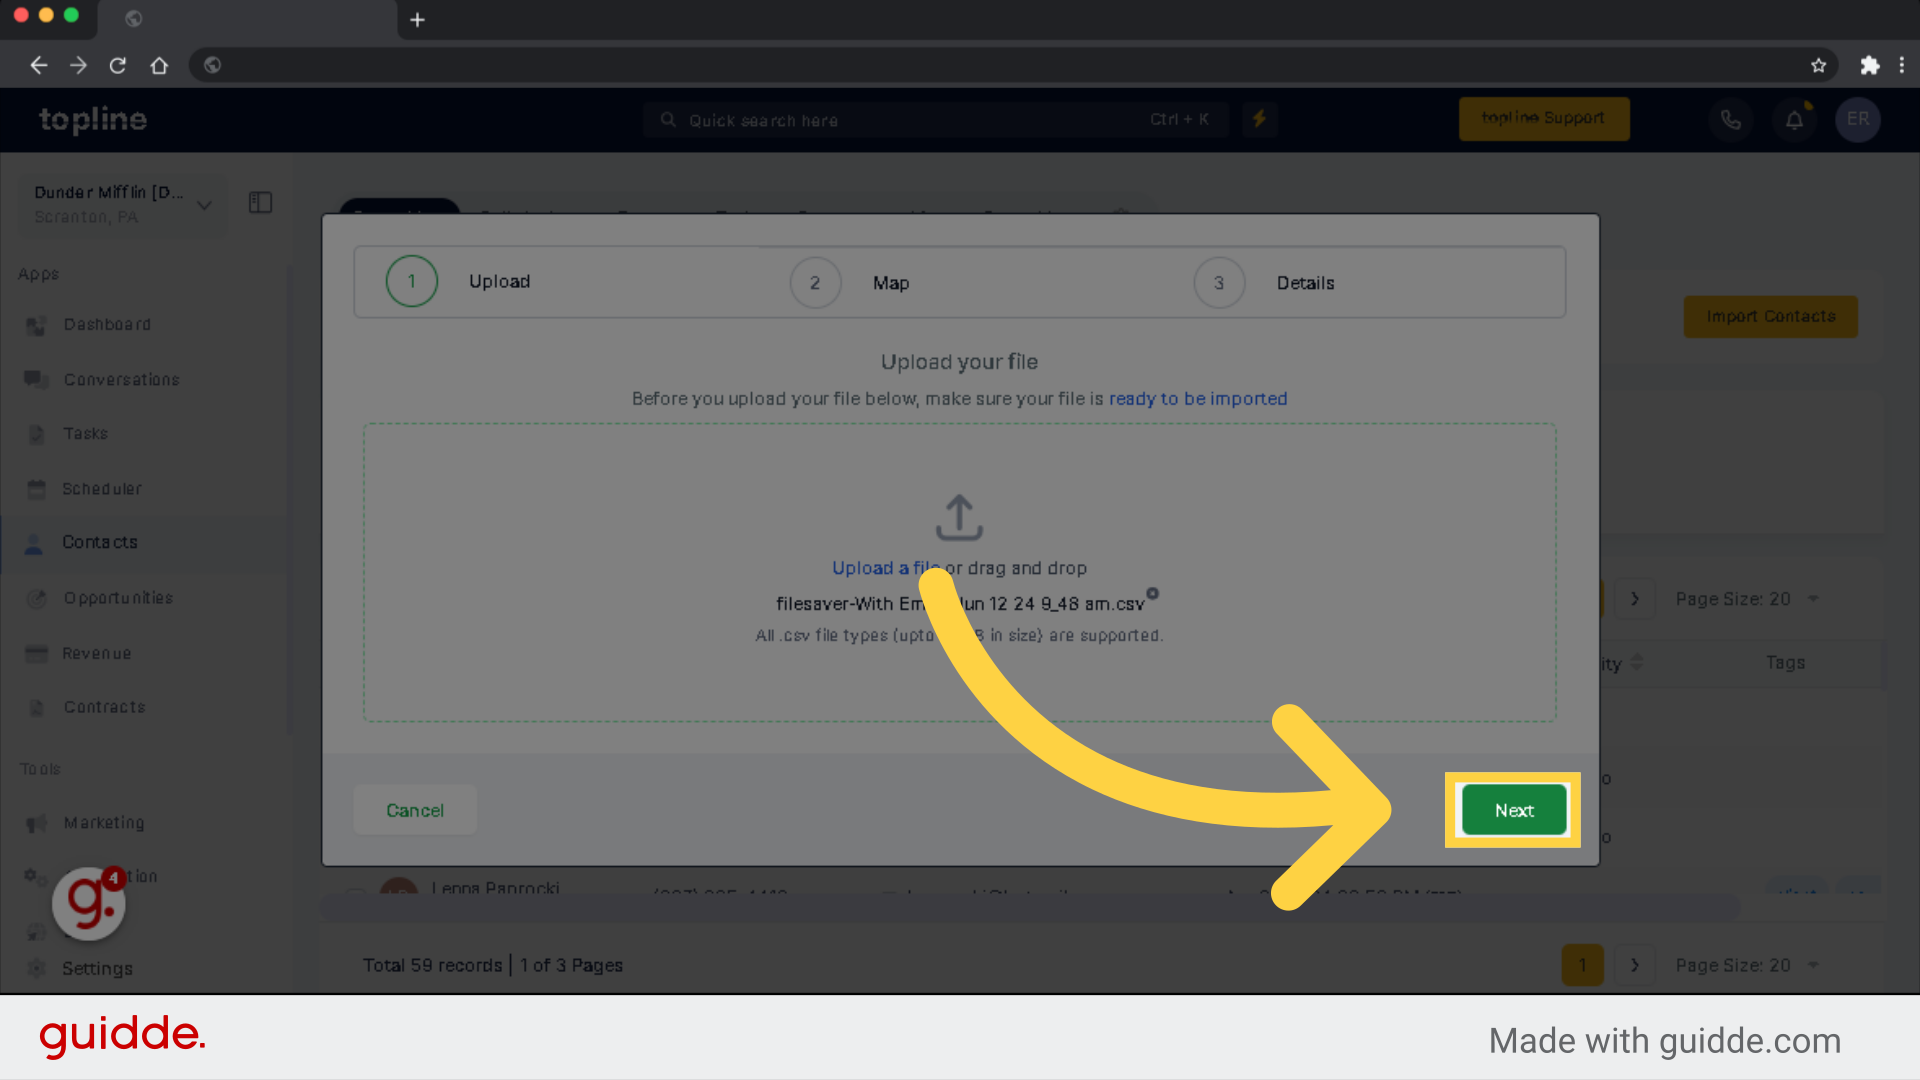
Before you upload your file below, make sure your file is ready to be imported. You can click on upload a file or drag or drop a file from your computer. Note or Requirements: All .csv file types (up to 50MB in size) are supported only.
Click Next to proceed to the next step.
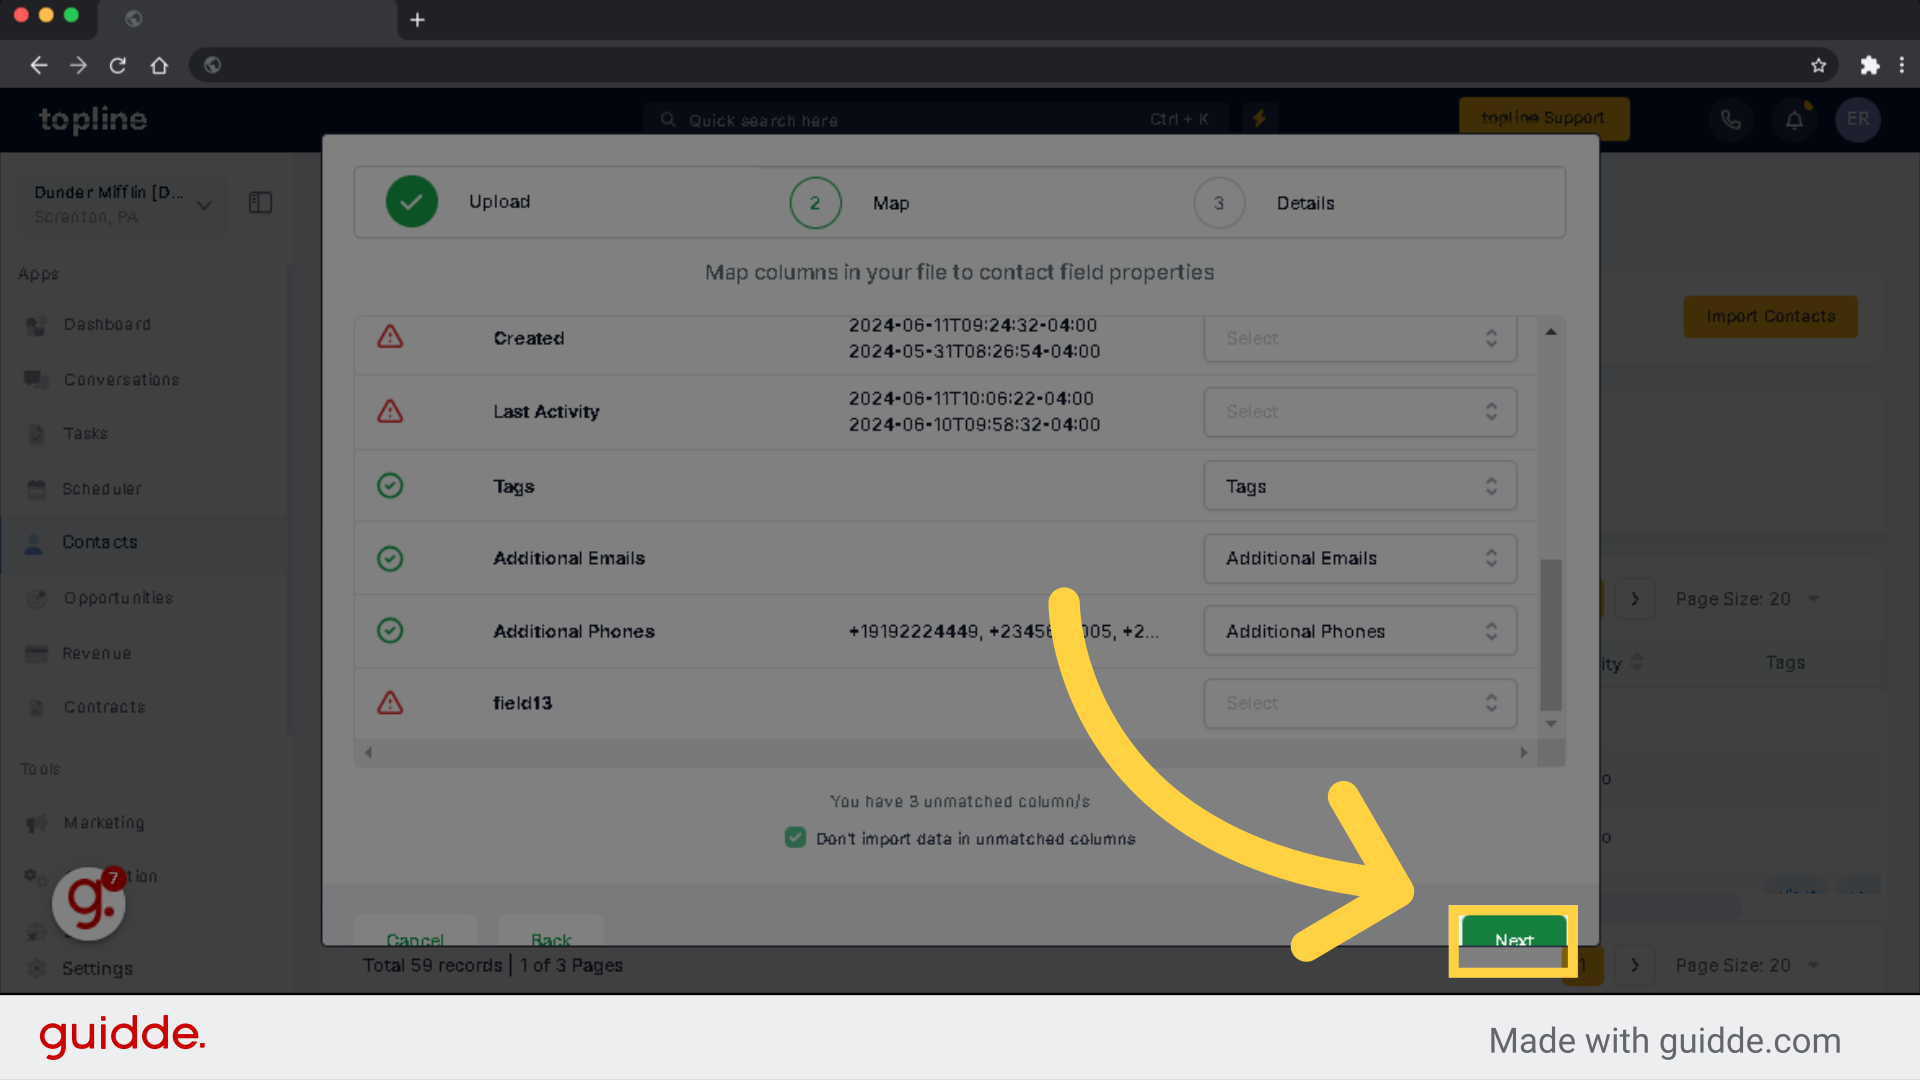
You'll see the mapping View and system will automatically map the fields.
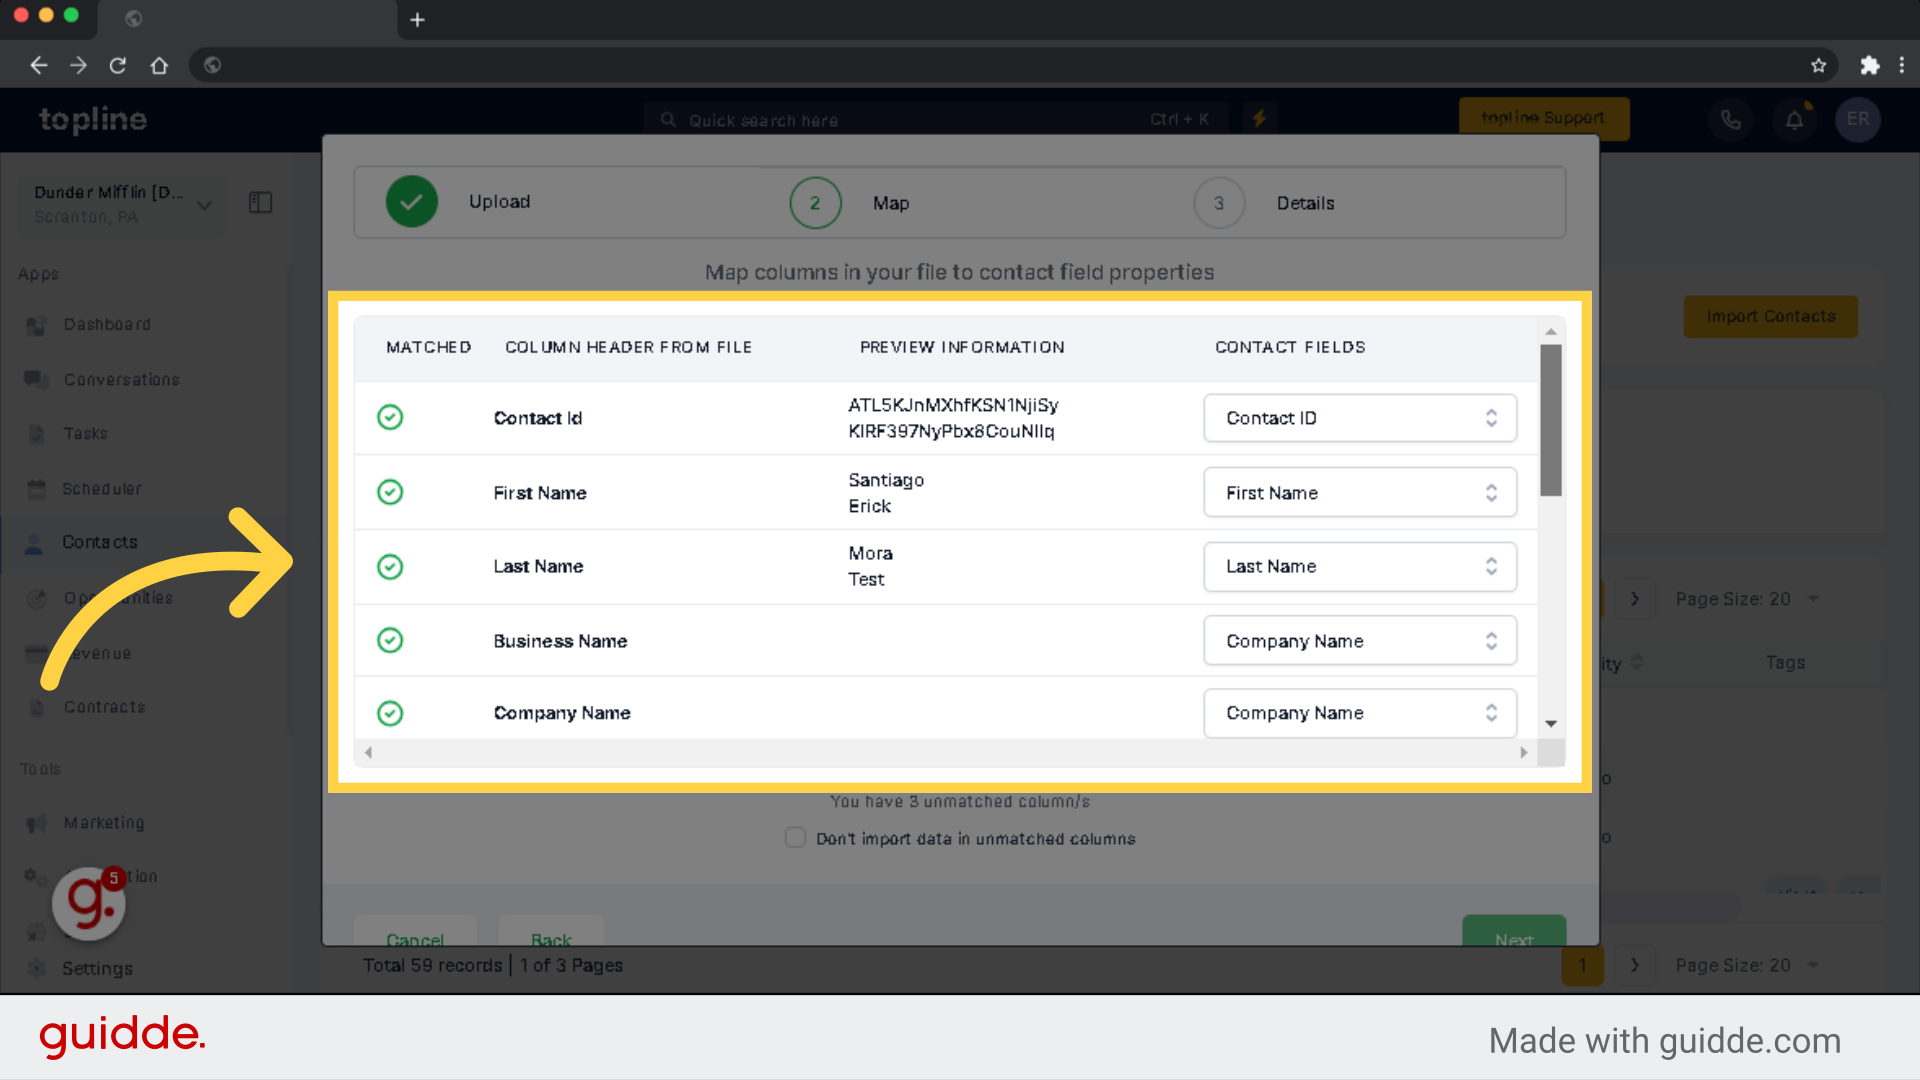
You will need to create a custom field, if a field does not exist in the CRM or is an unmatched column.
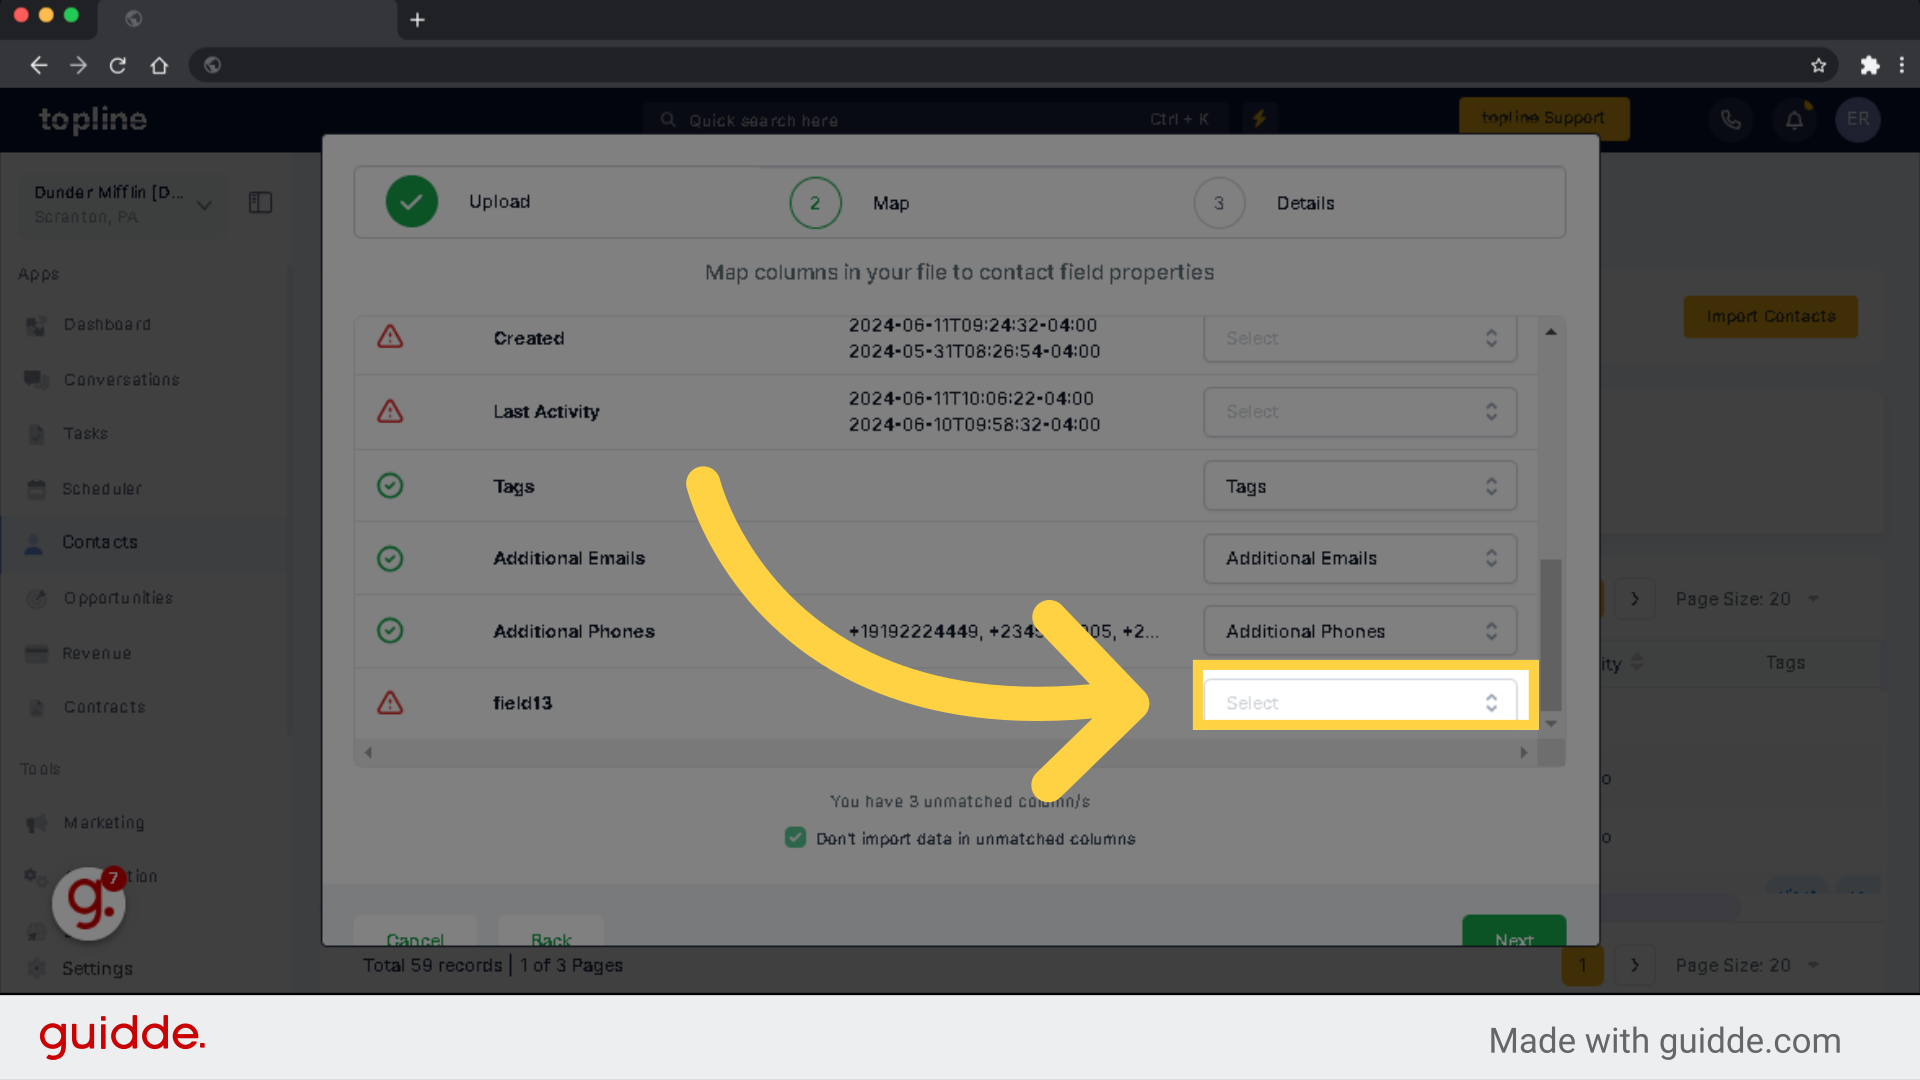
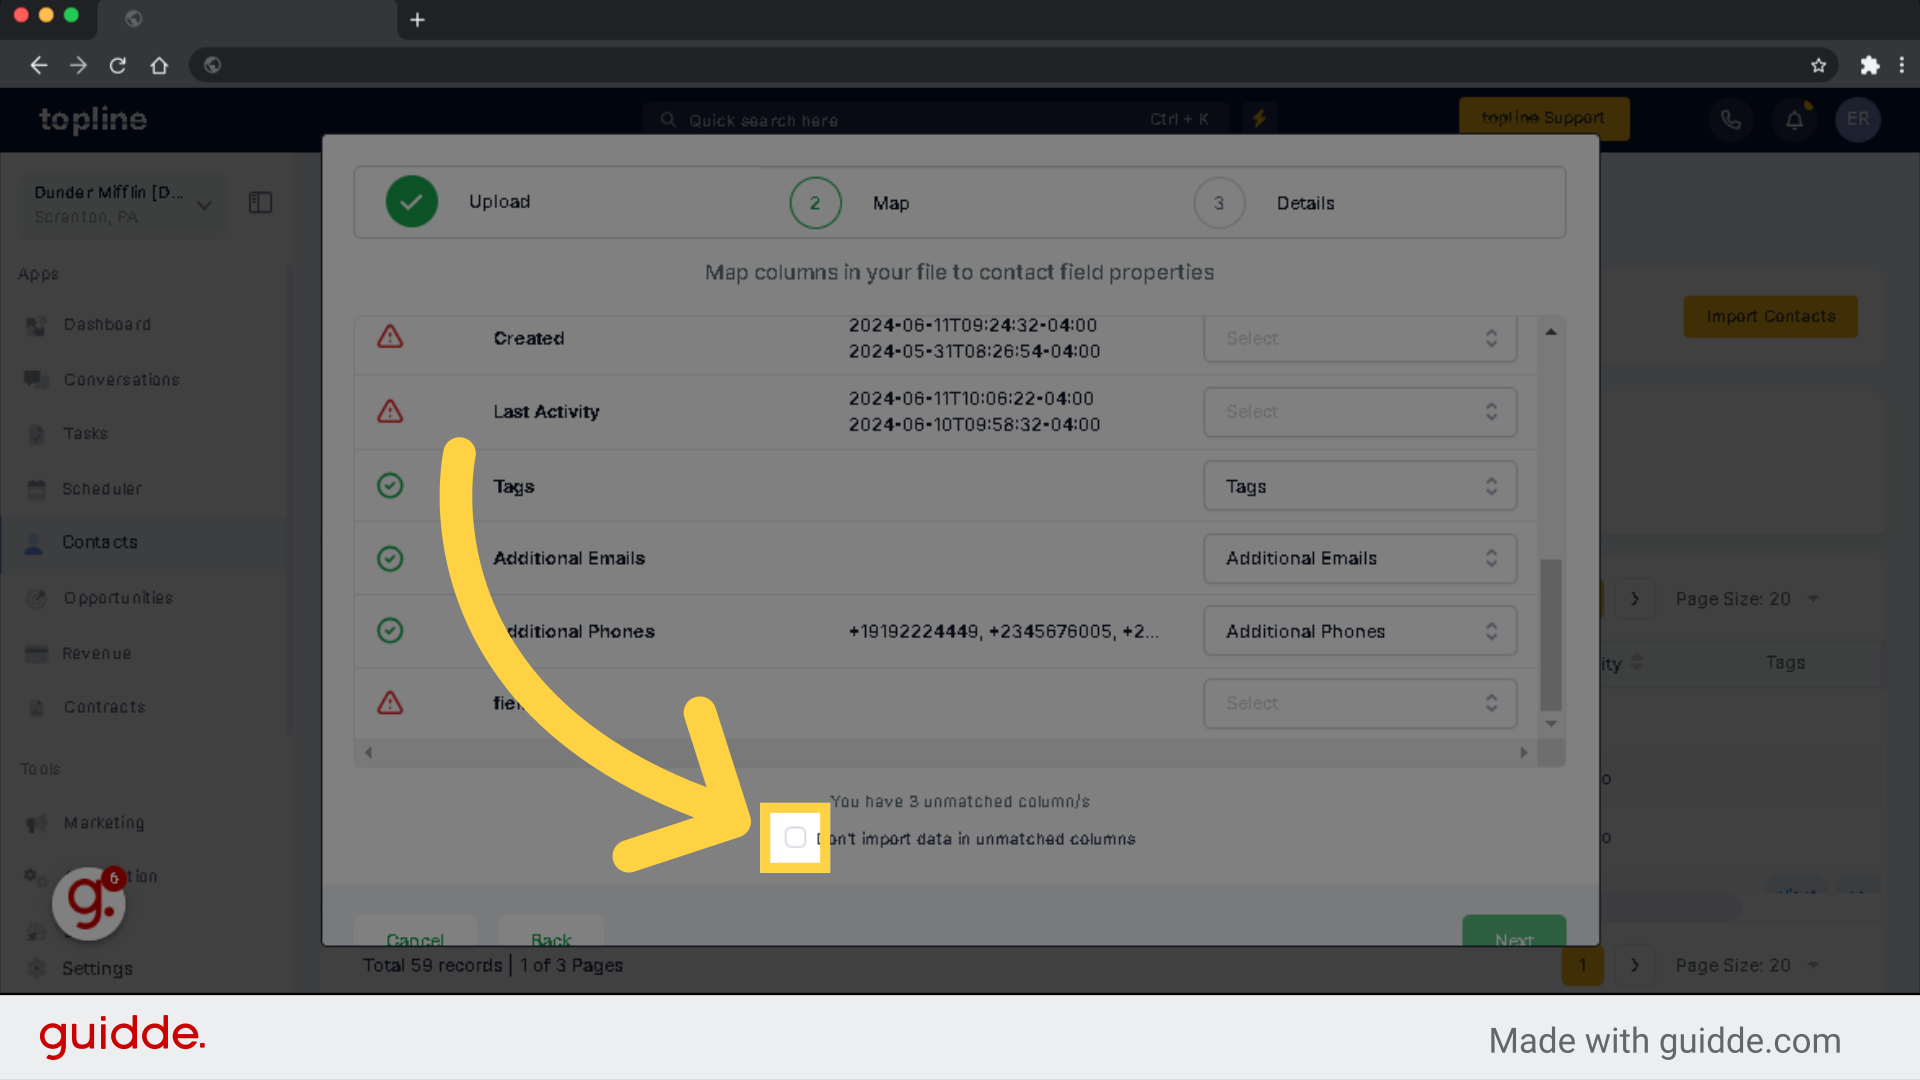
You also need to exclude unmatched columns from import in order to proceed if there are unmatched columns.
Click next to proceed to the next page.
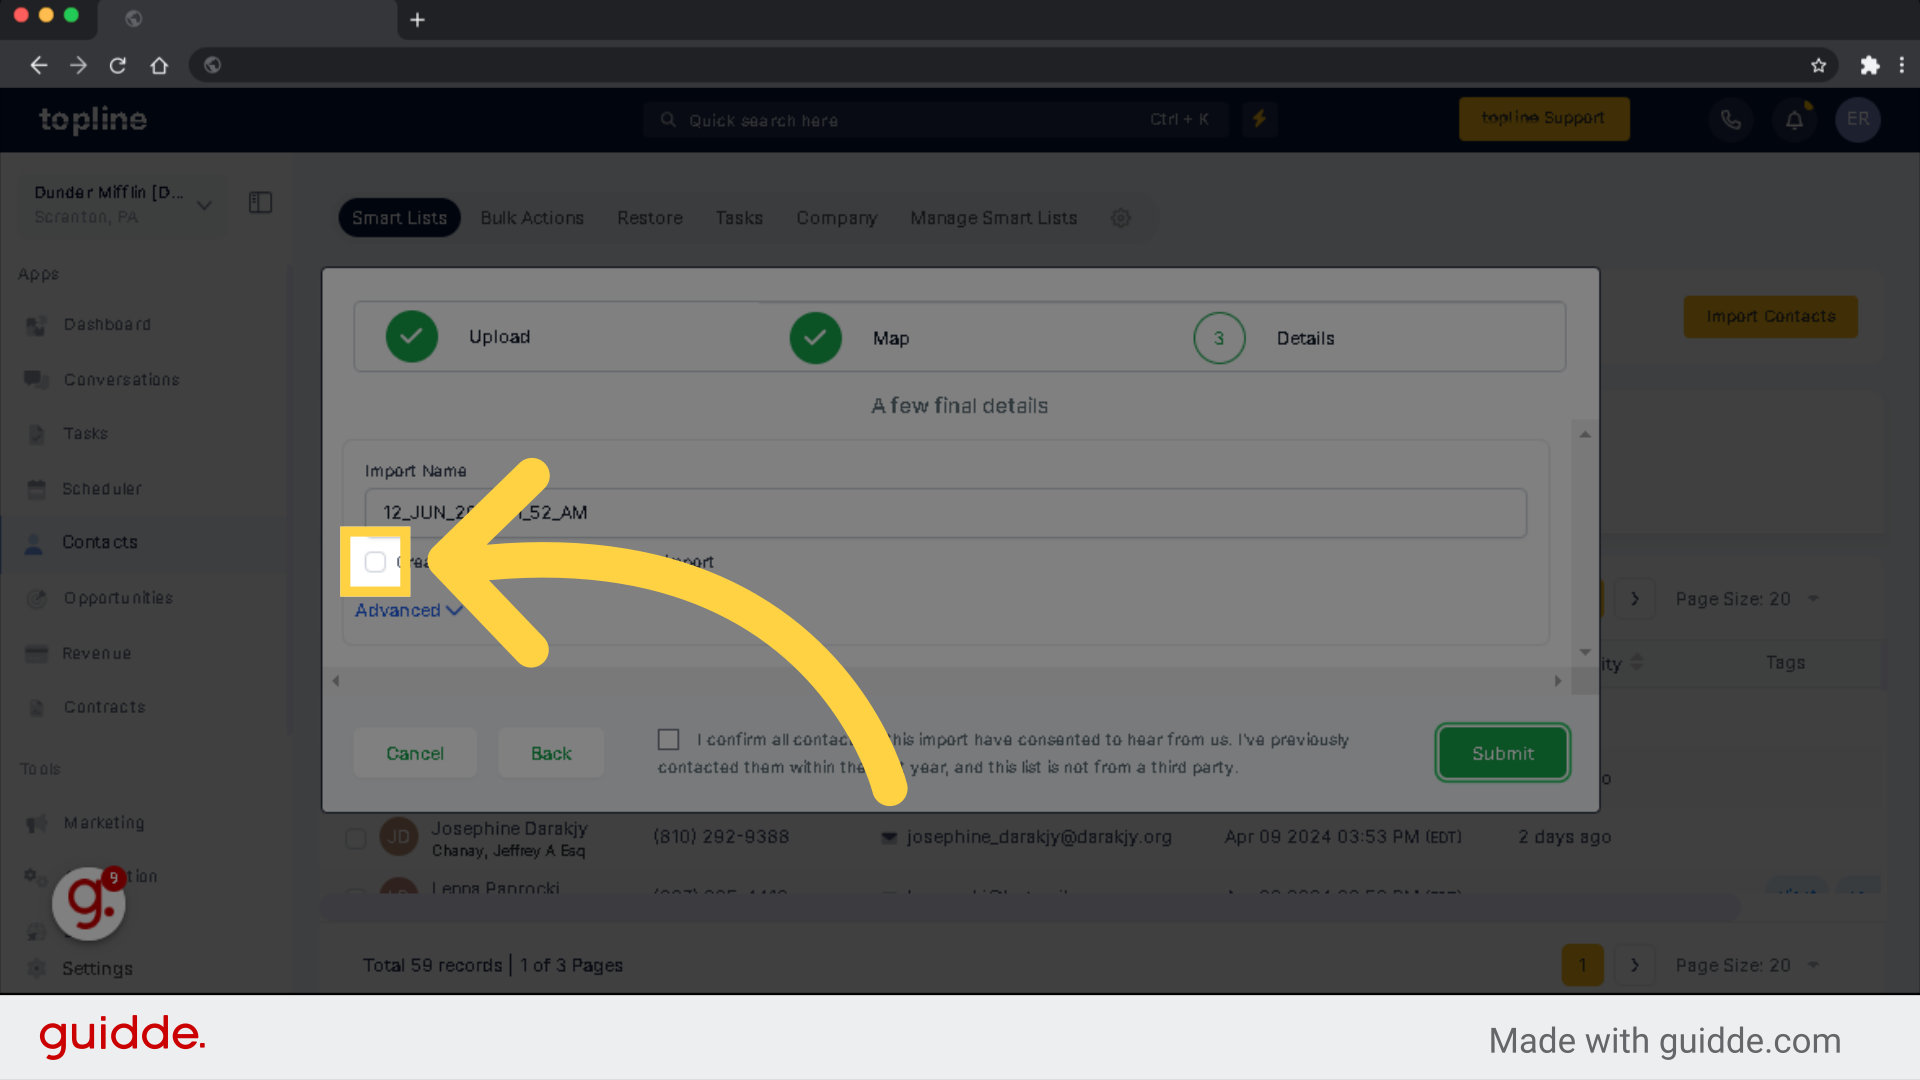
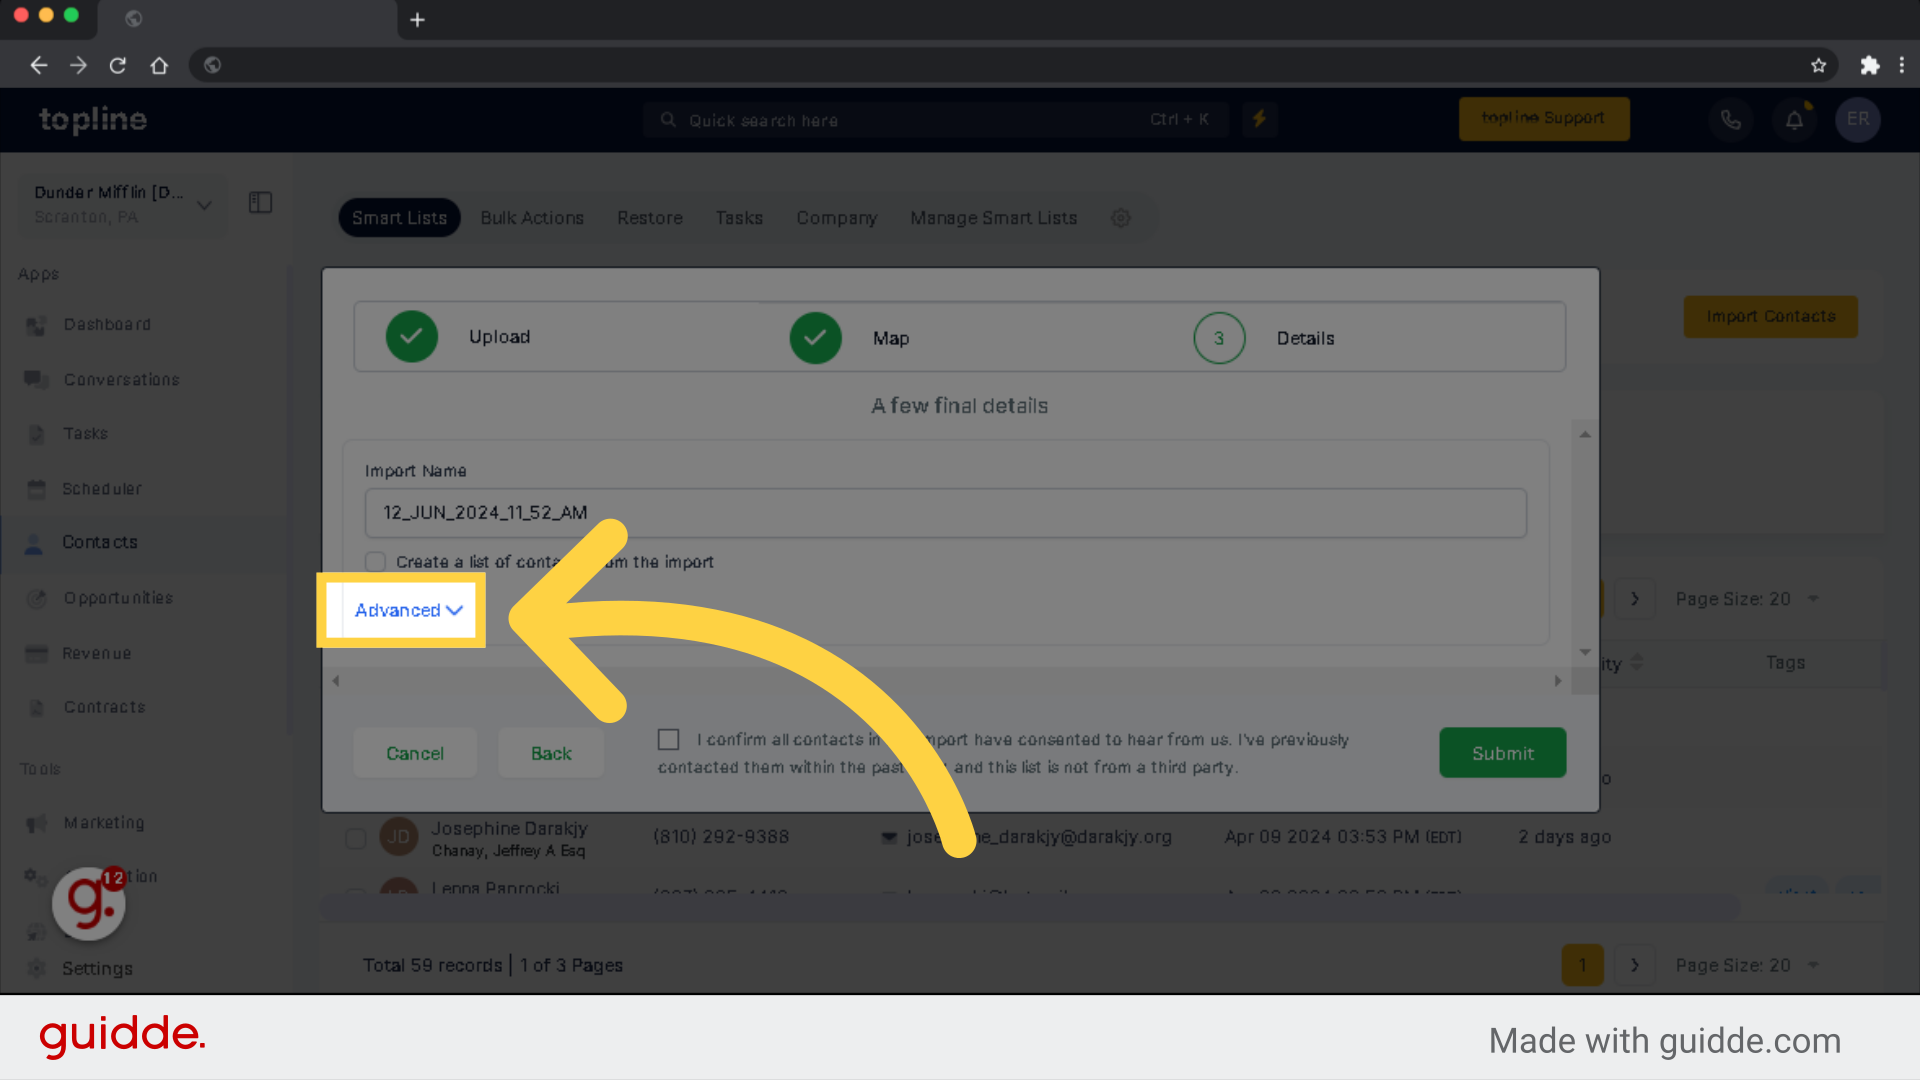
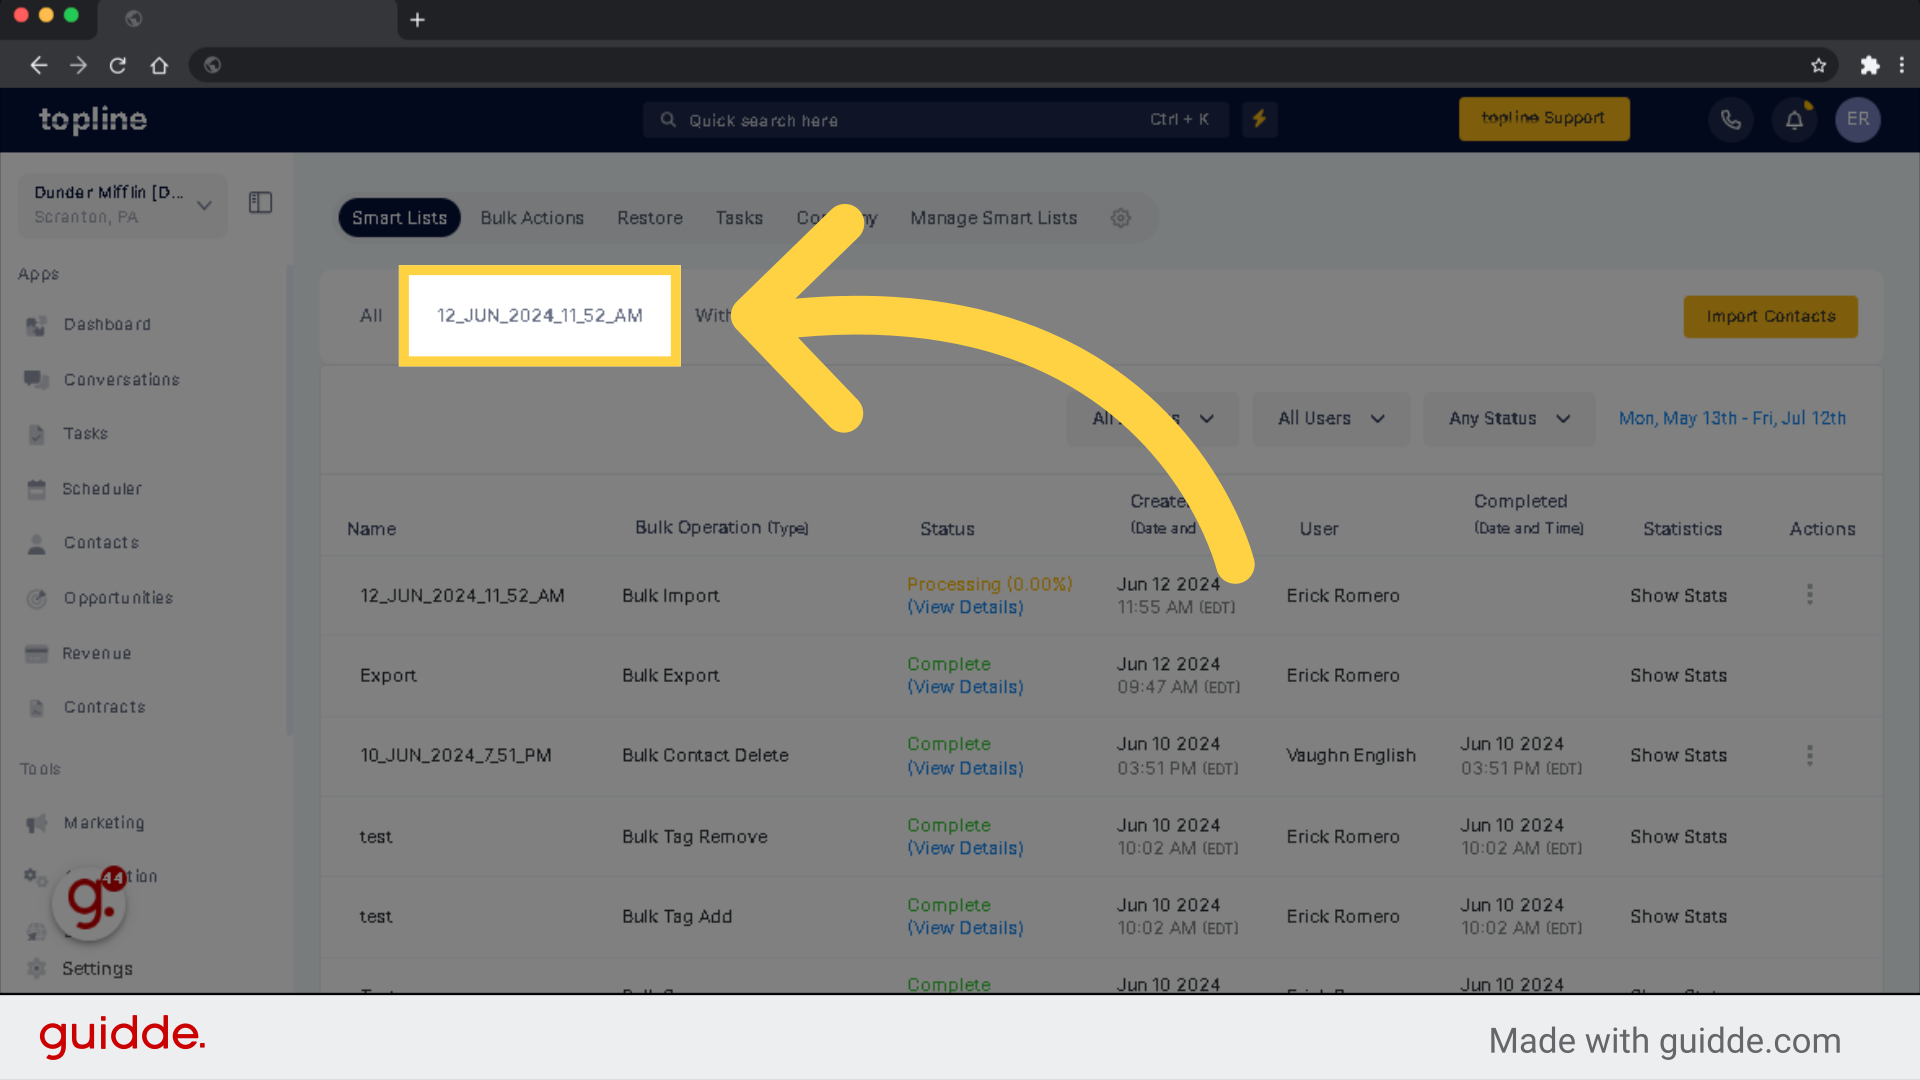
Tick the box, if you wish to create a Smart List from the imported data.
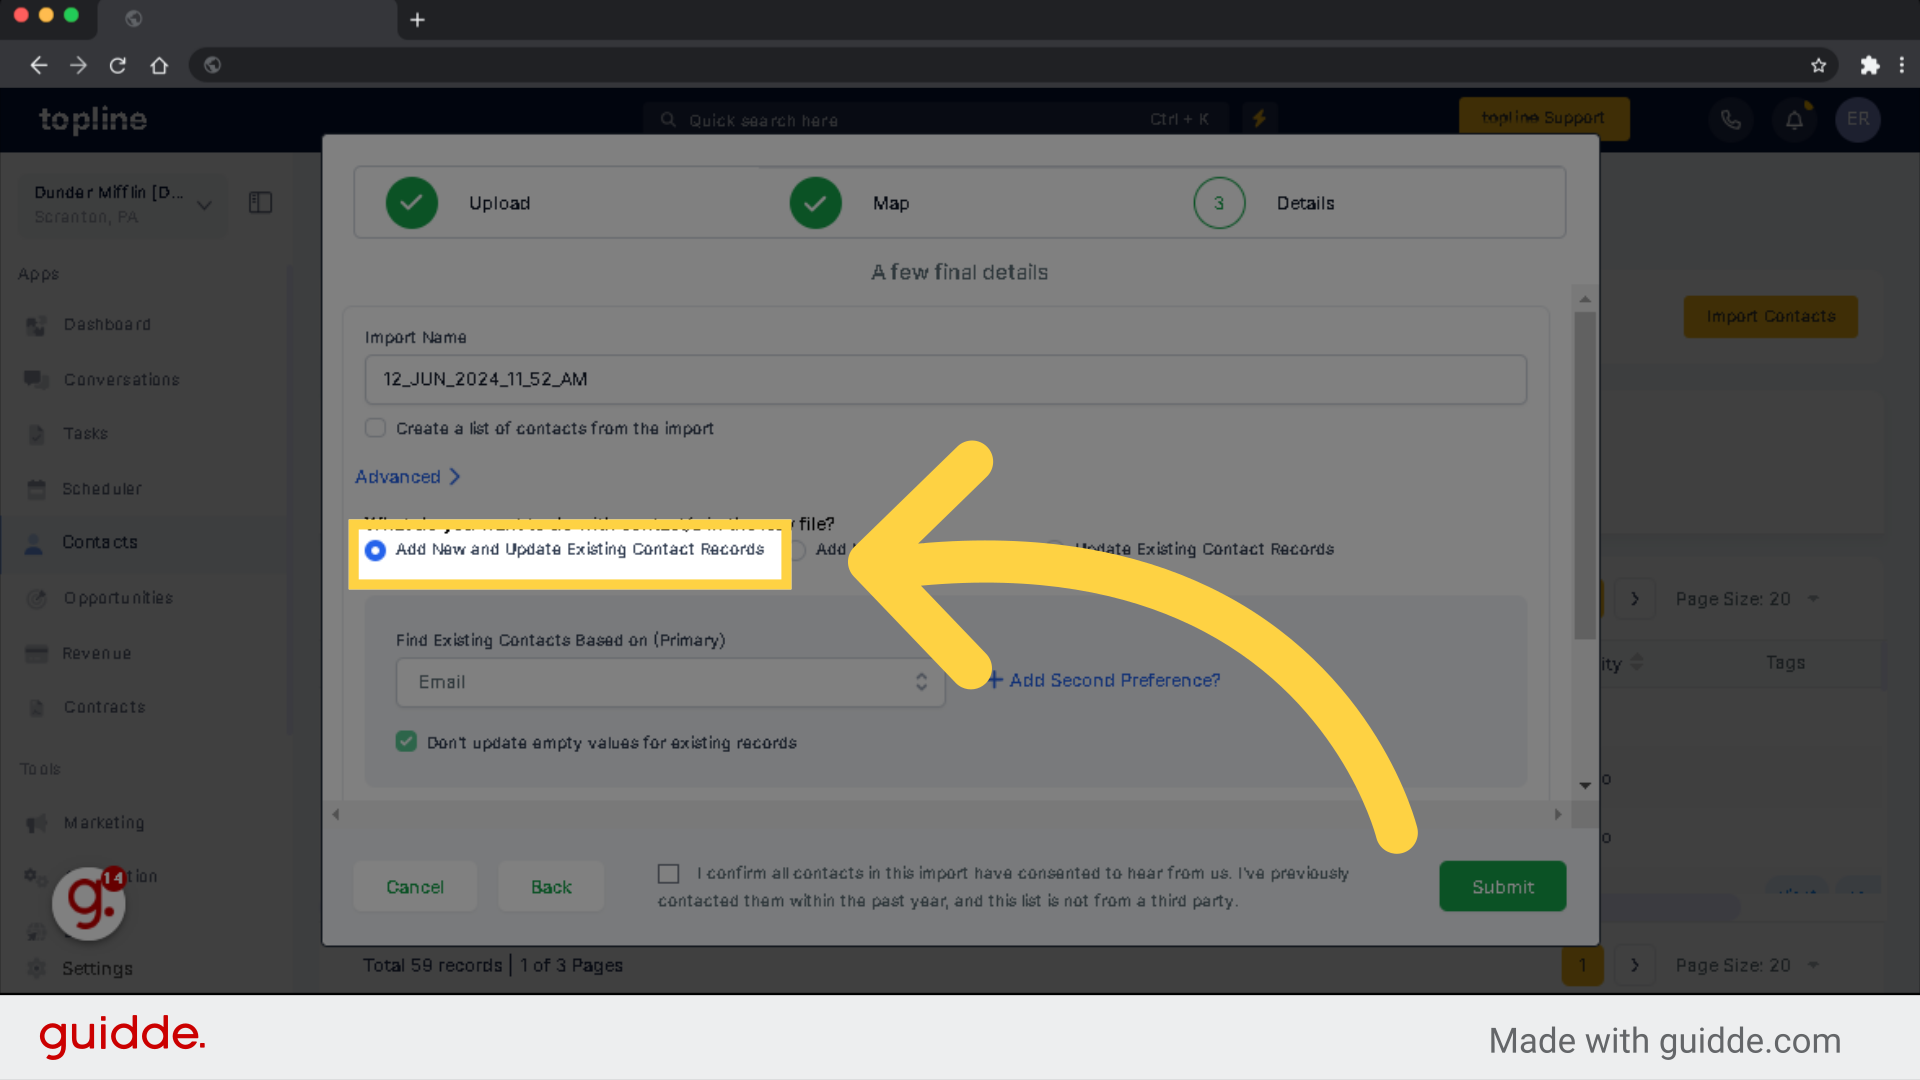
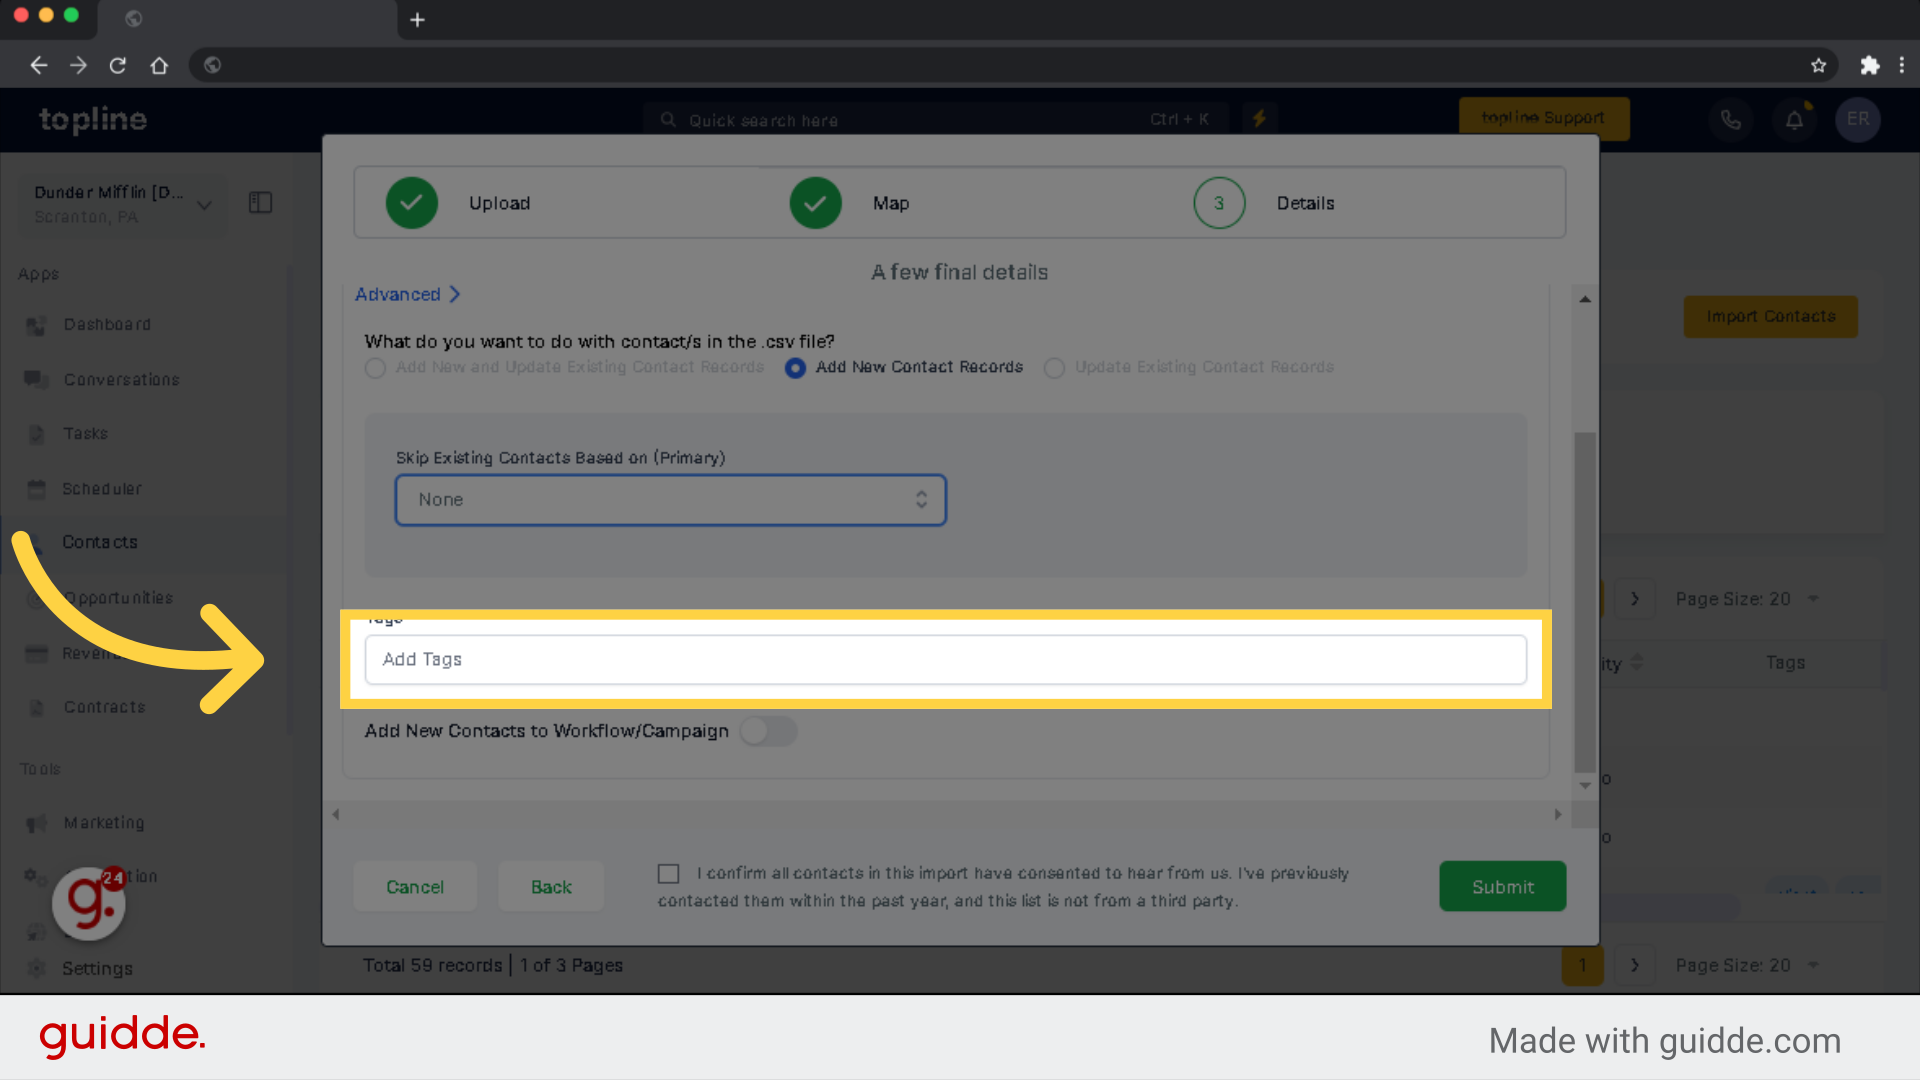
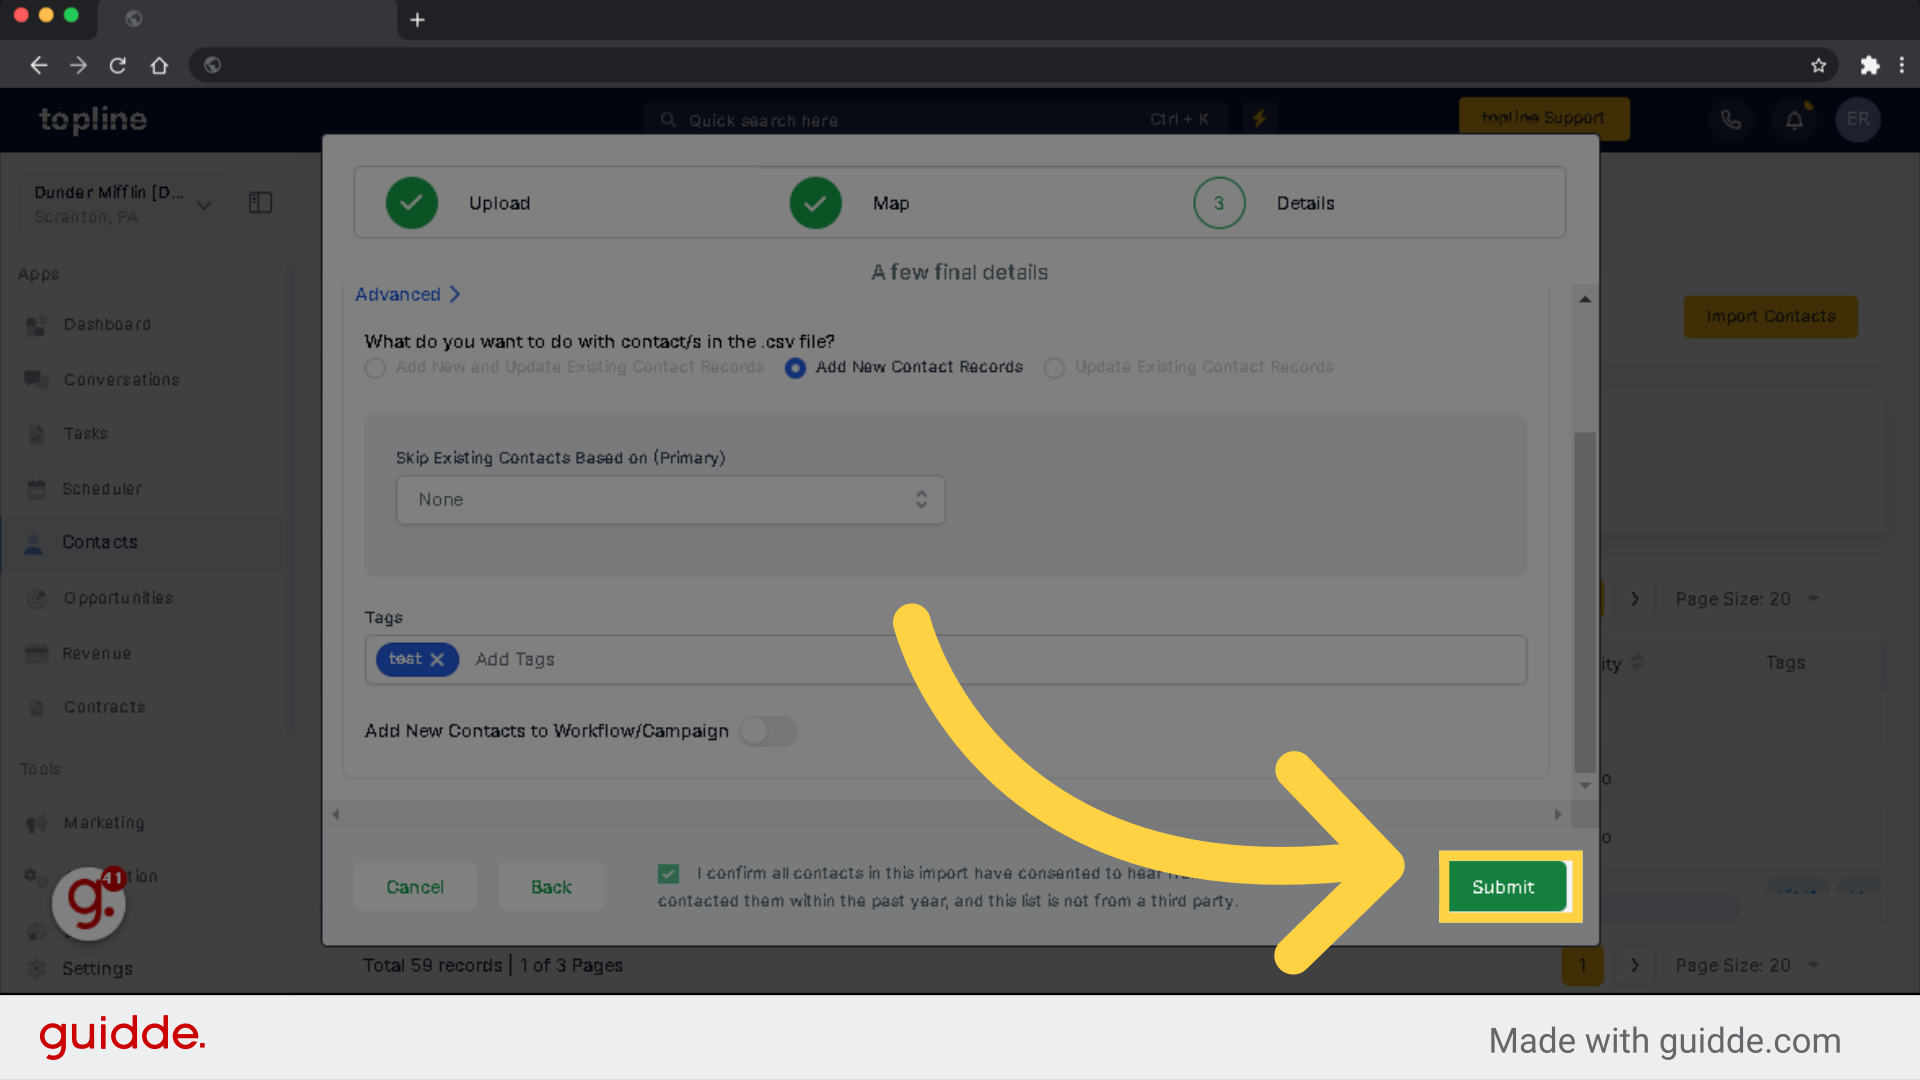
Here gives you option on what do you want to upload with the contact/s in the csv file.
This option will bring in all the new contacts that does not exist in the contact list and update the missing fields un the existing list.
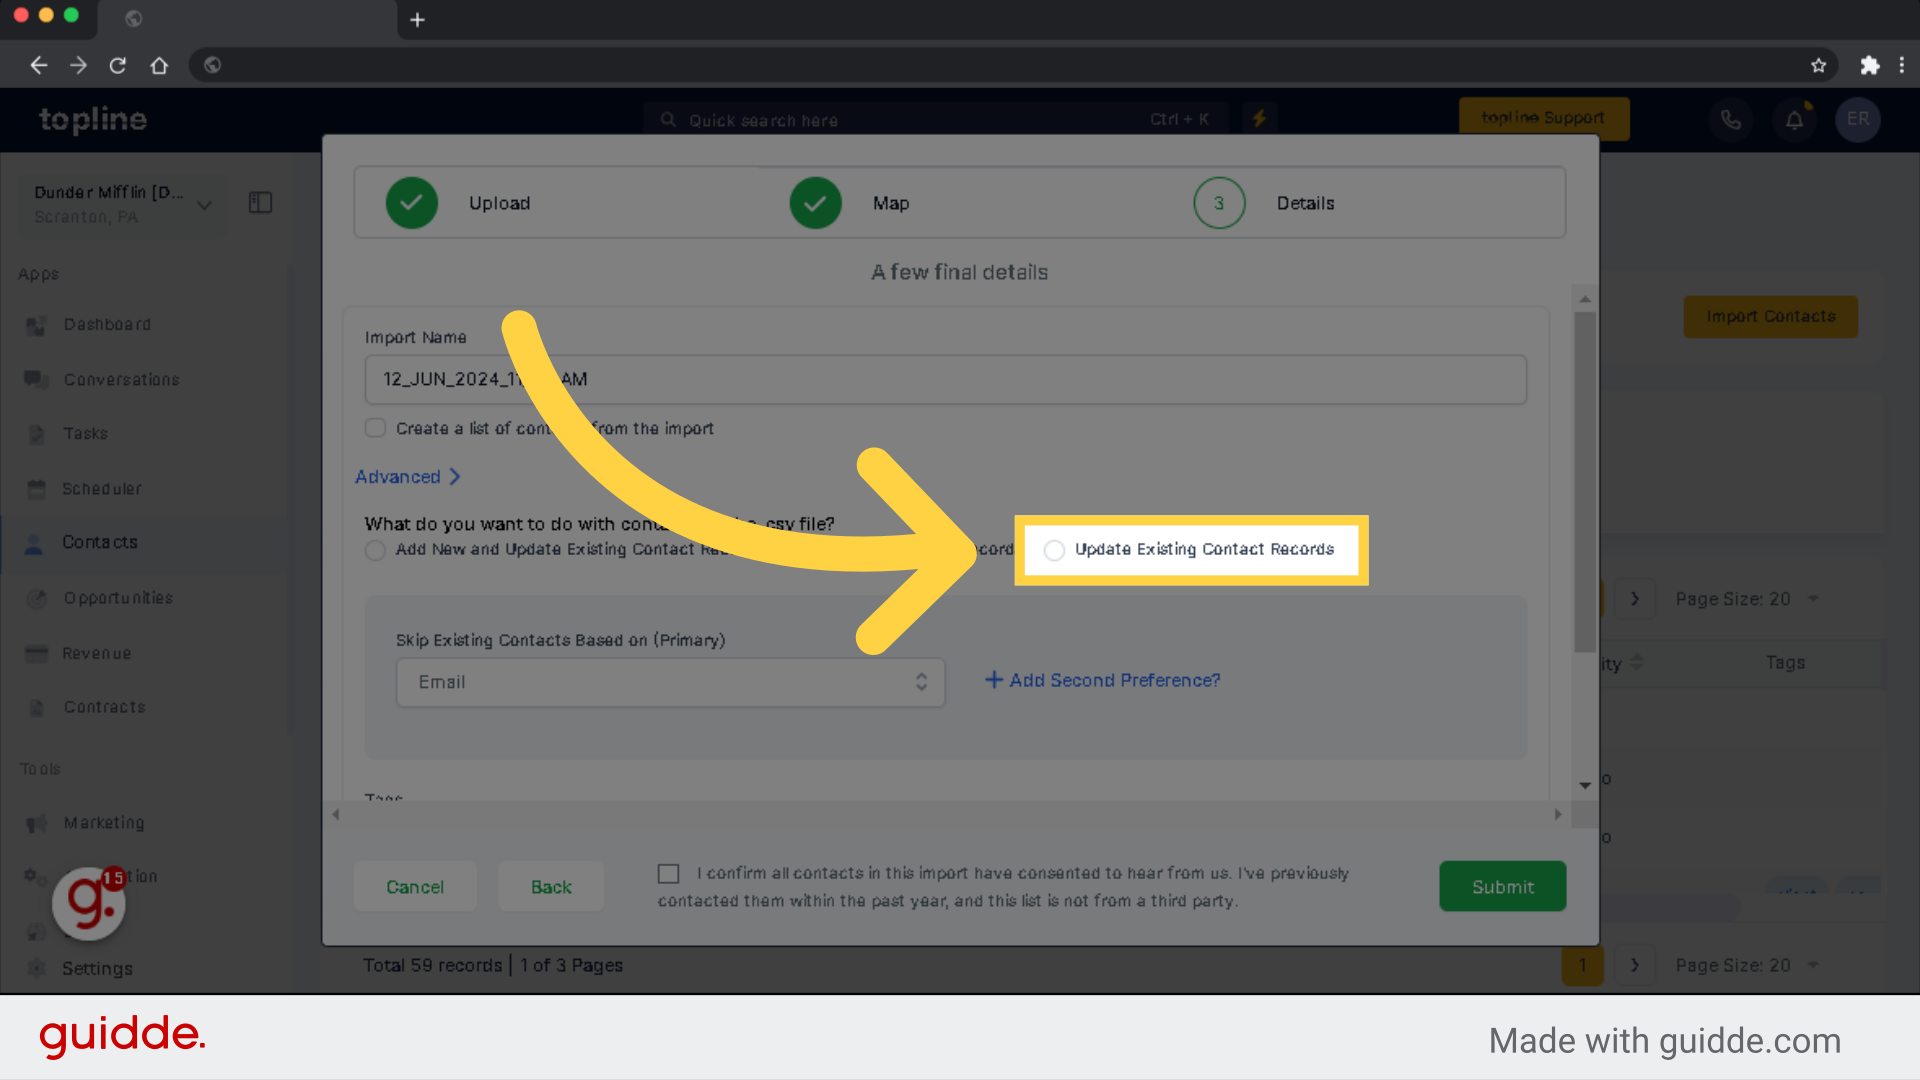
This option will only bring in contacts that do not exist in your contact list.
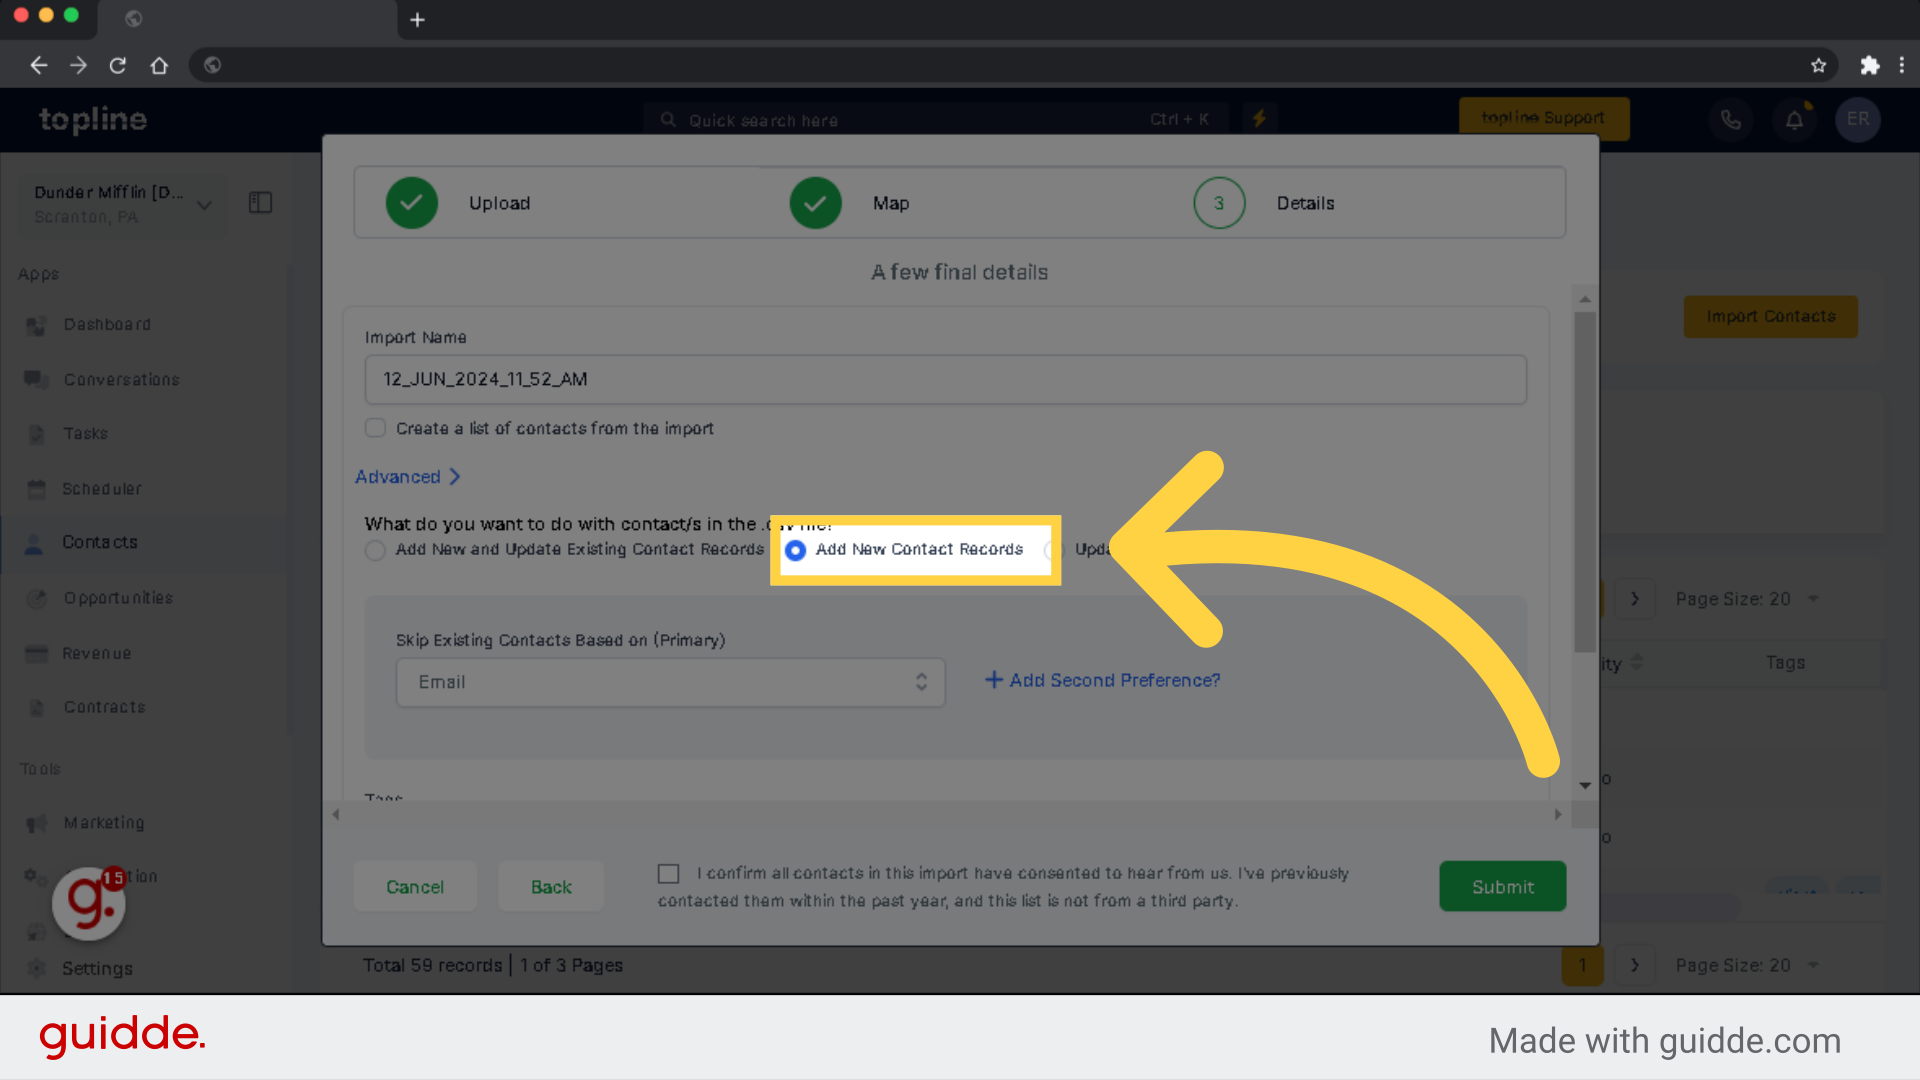
This will create new contact records and will not update existing contacts in the location.
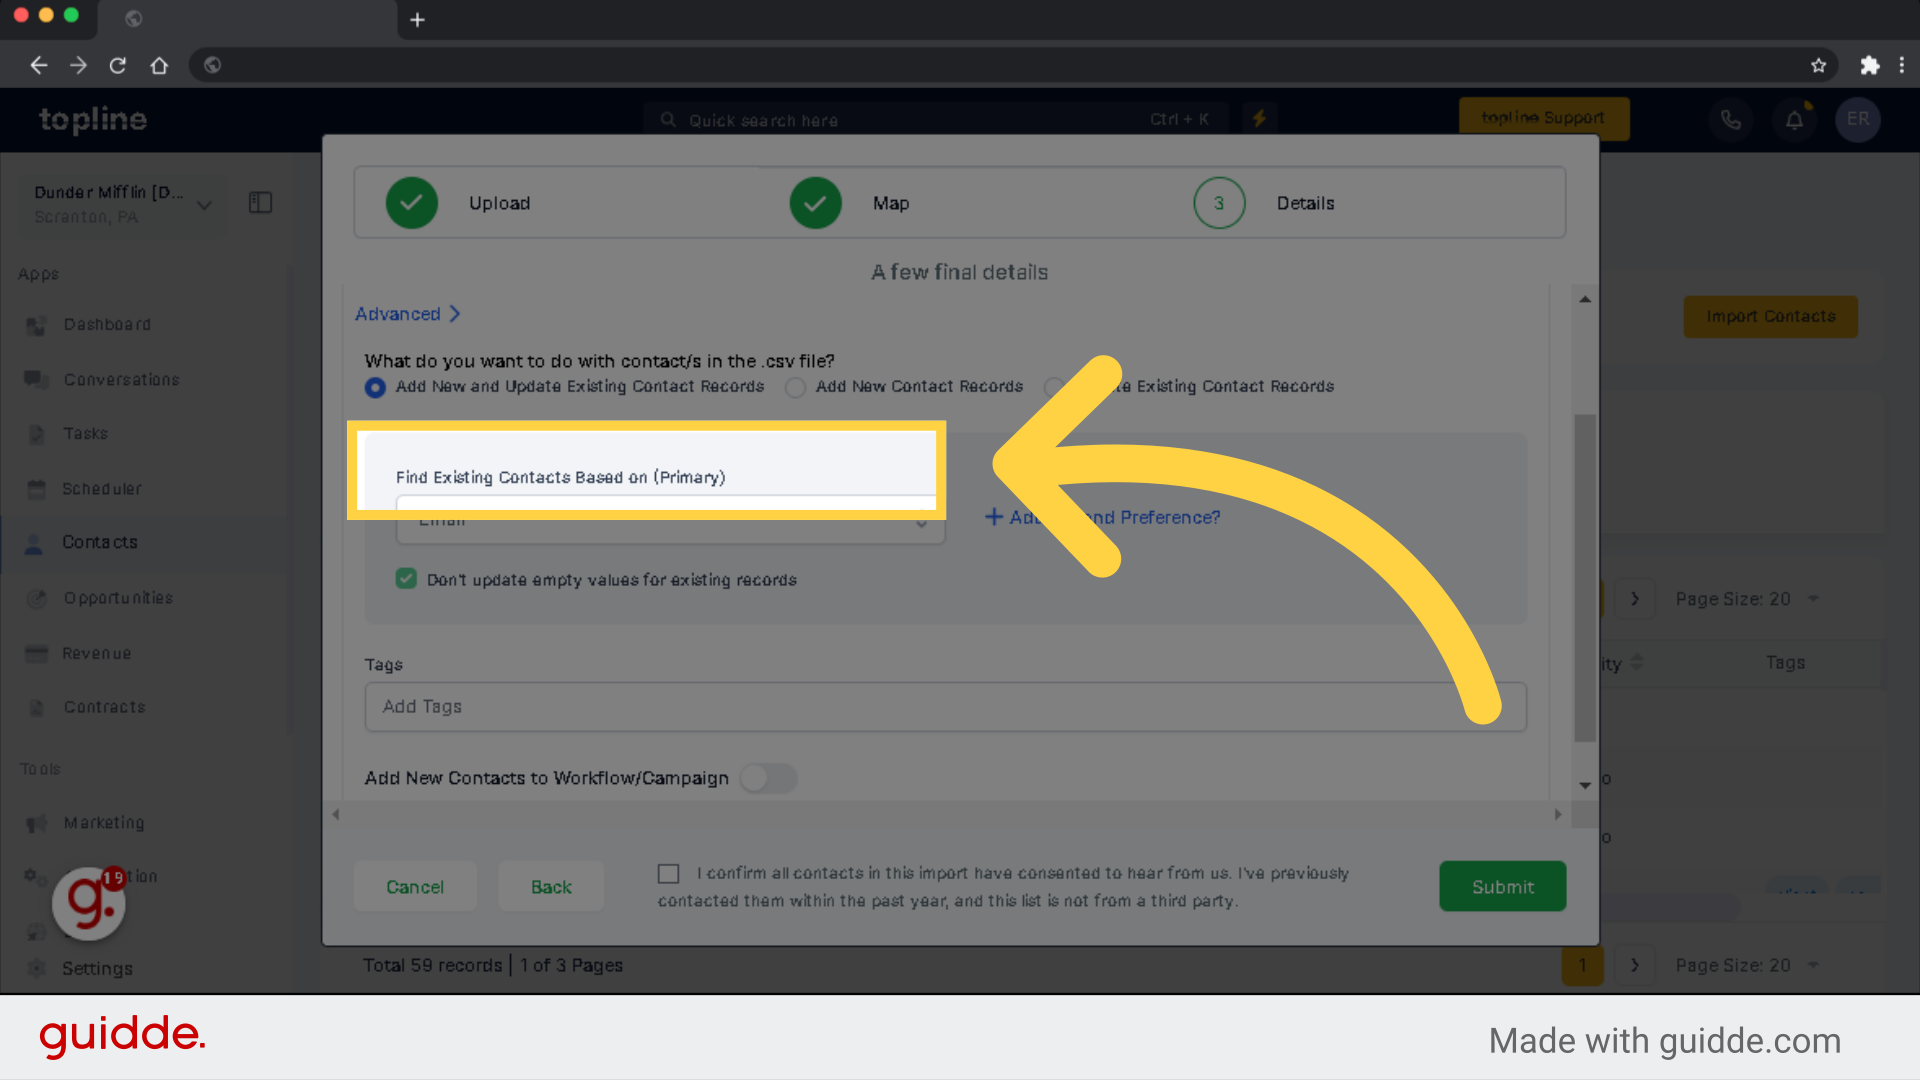
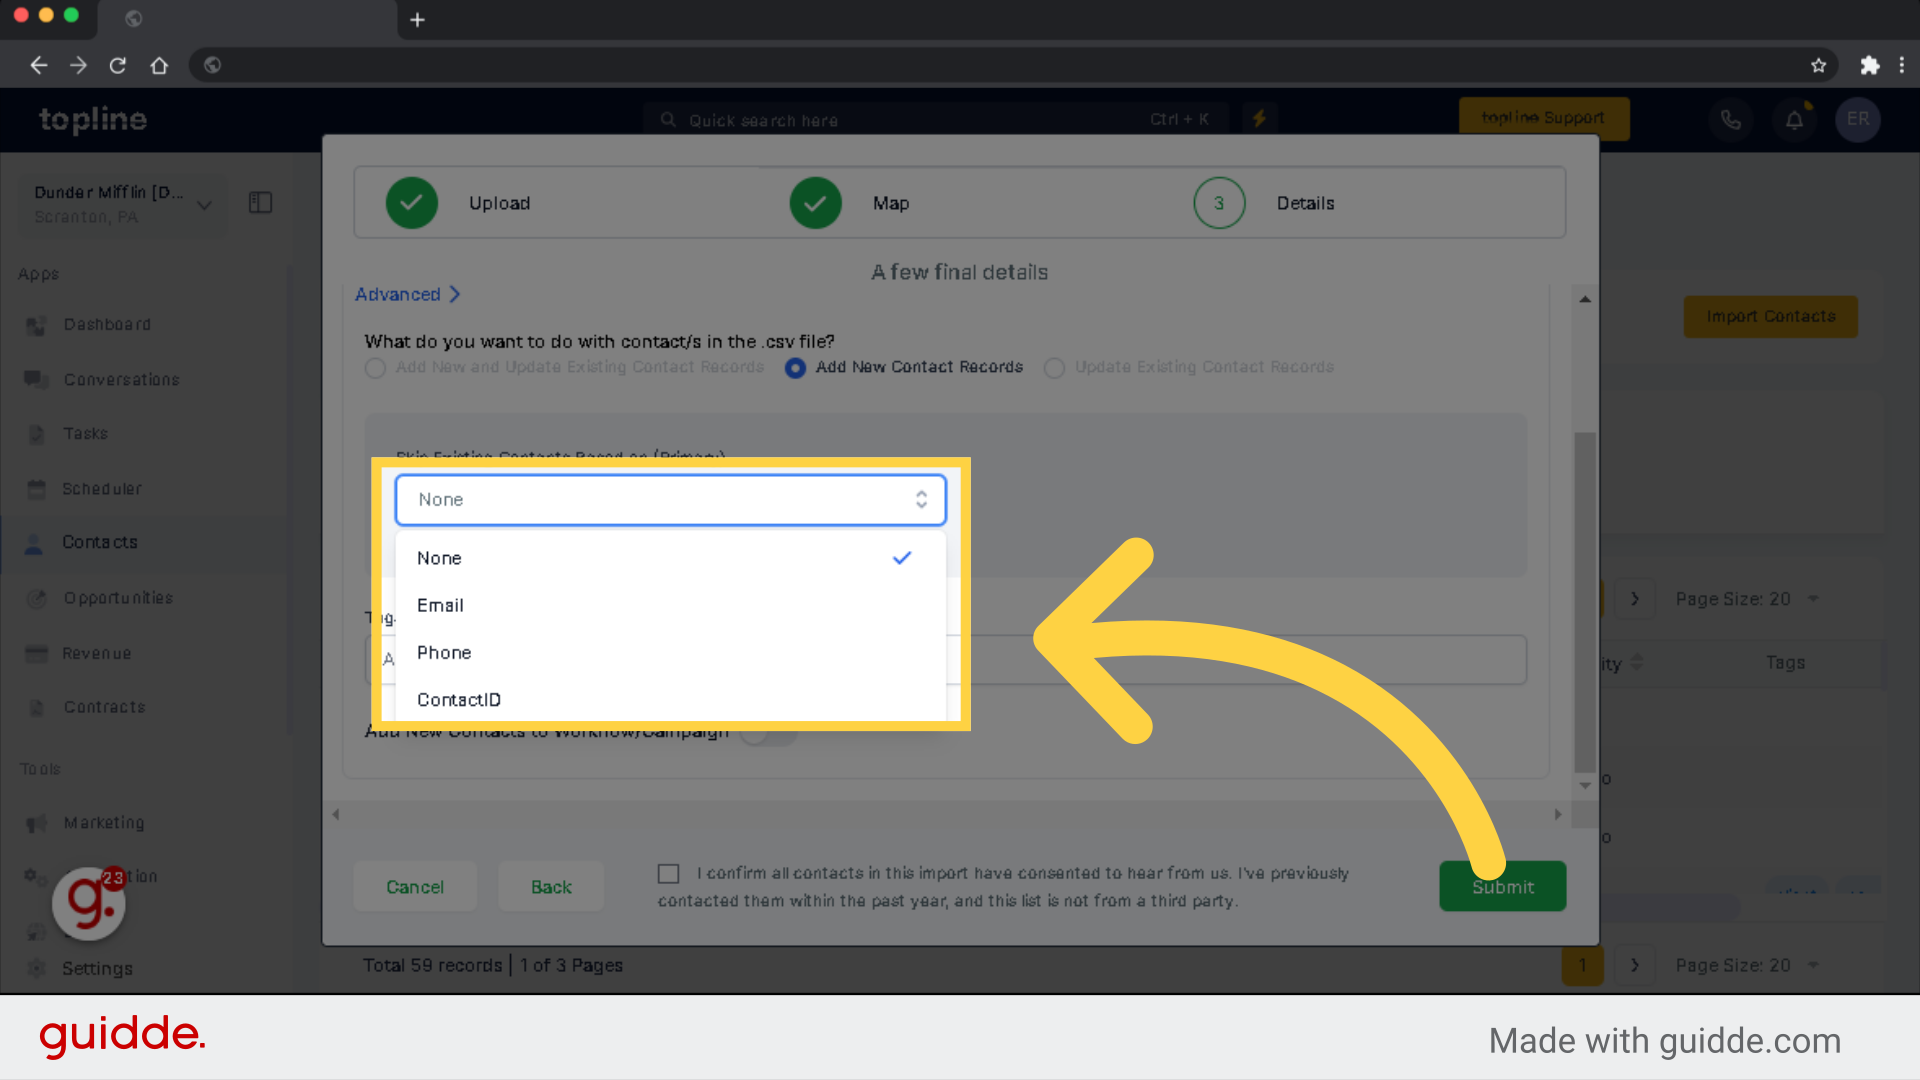
This option allows you to choose fields other than Email for de-duplication purposes during the Bulk CSV Upload.
Using this option, you can enter a number of duplicate contacts without them being automatically merged. If your CSV does not have an email and or phone #, use this option.
Please Note:

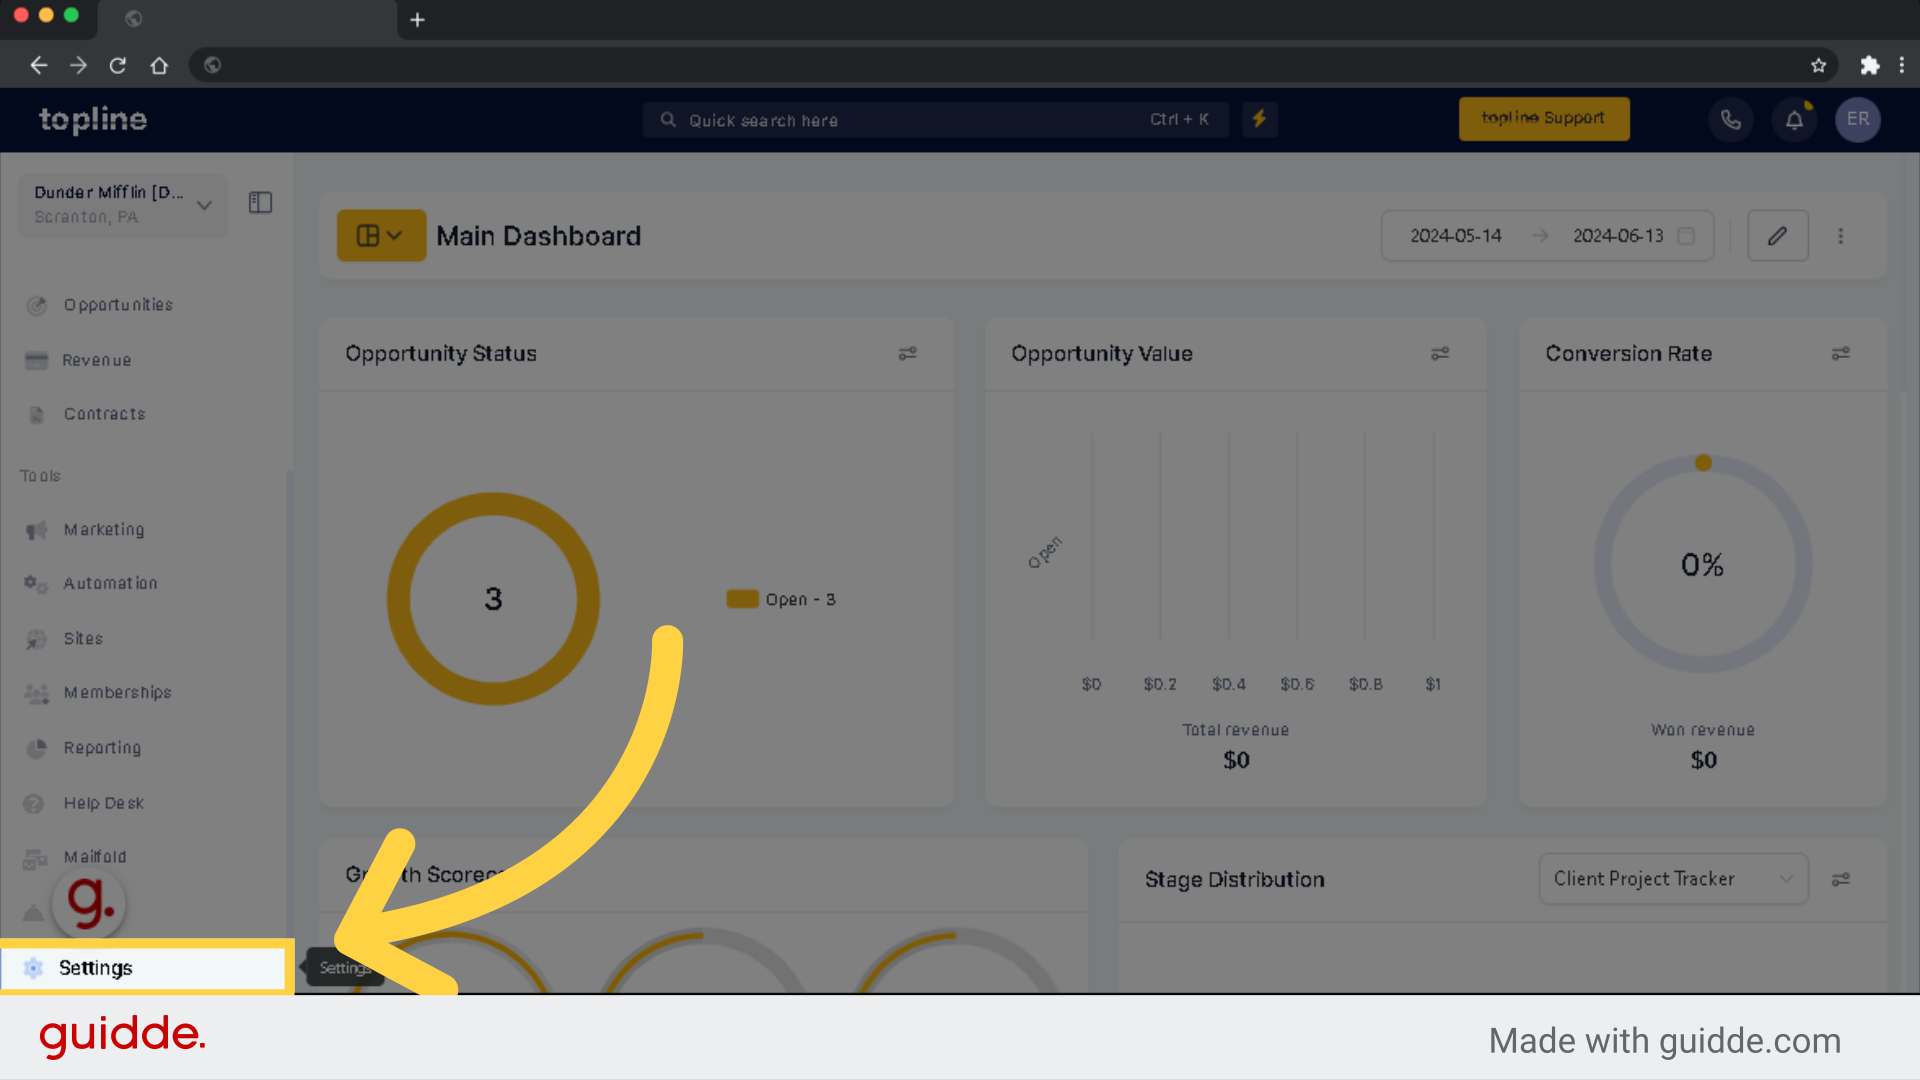
To allow duplicate contact, you will need to access the Settings option on the lower left side Menu.
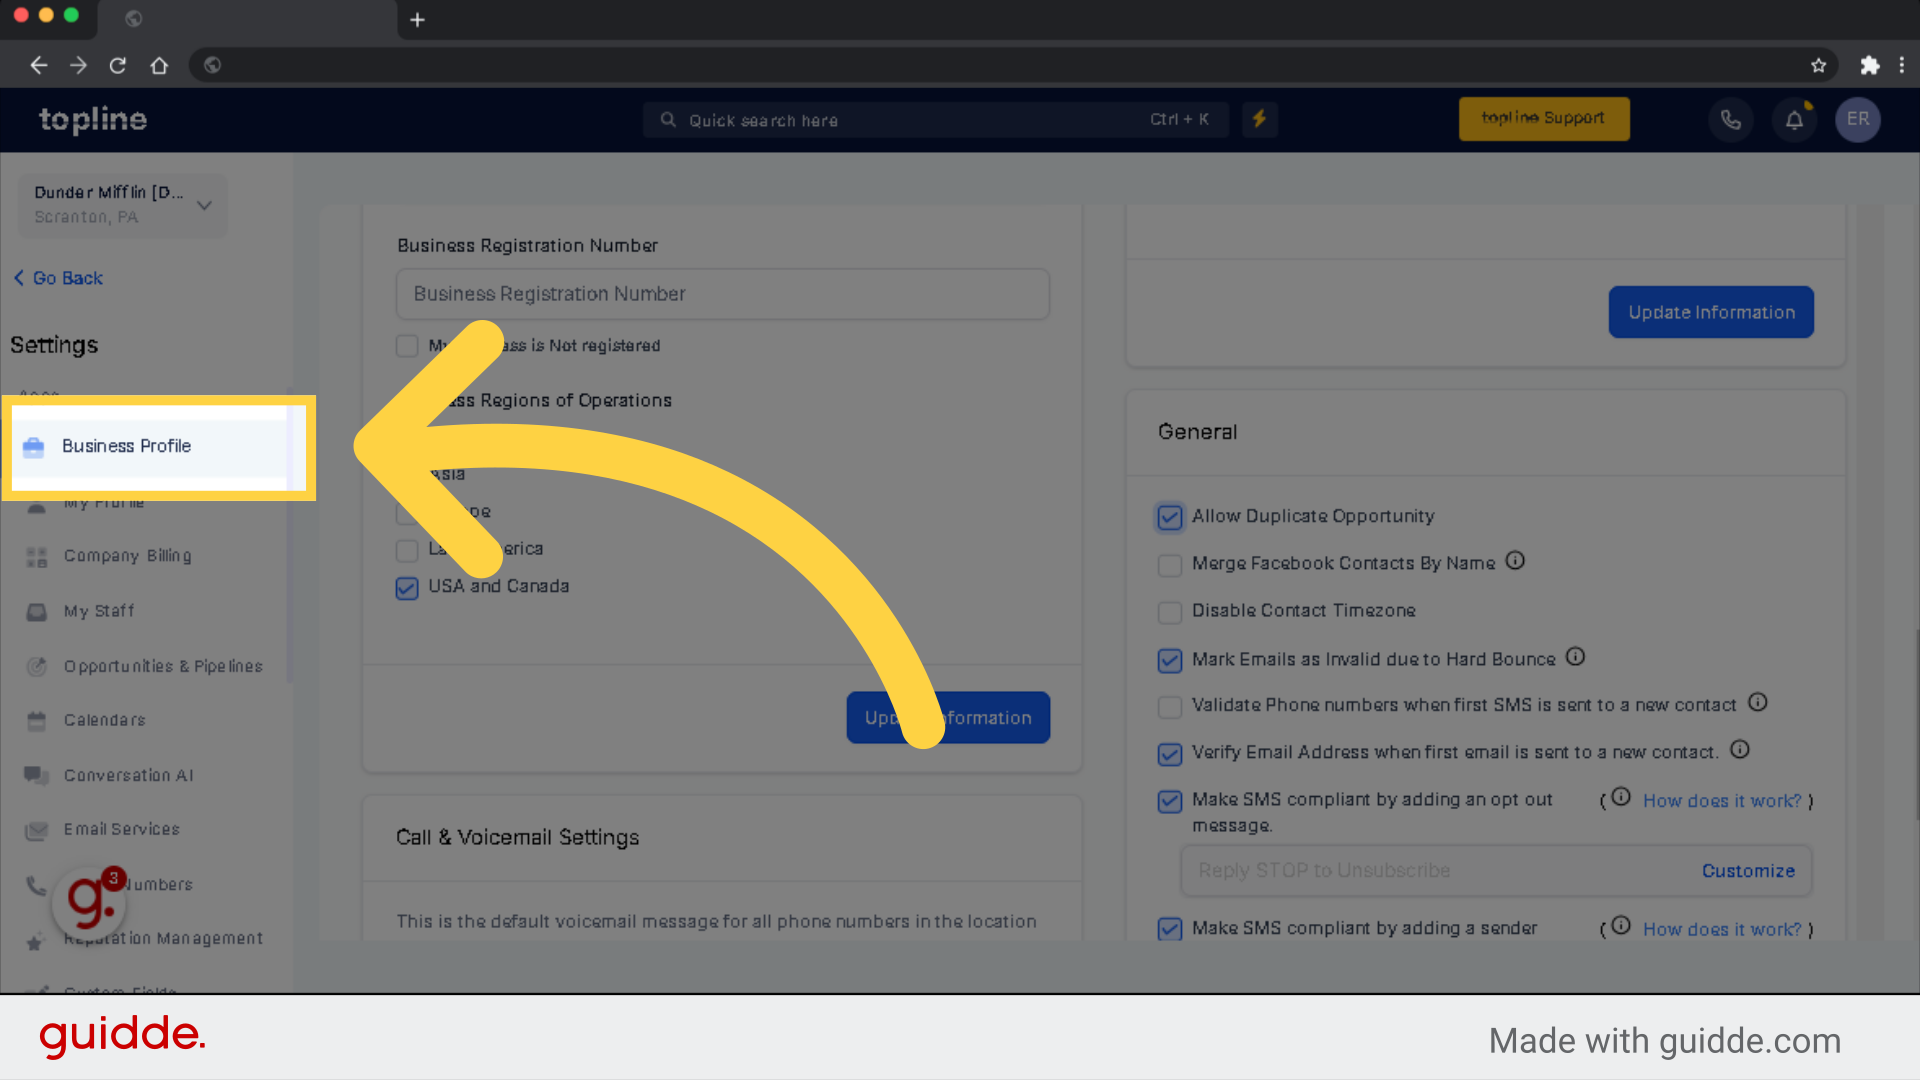
Access Business Profile on the left side features menu.
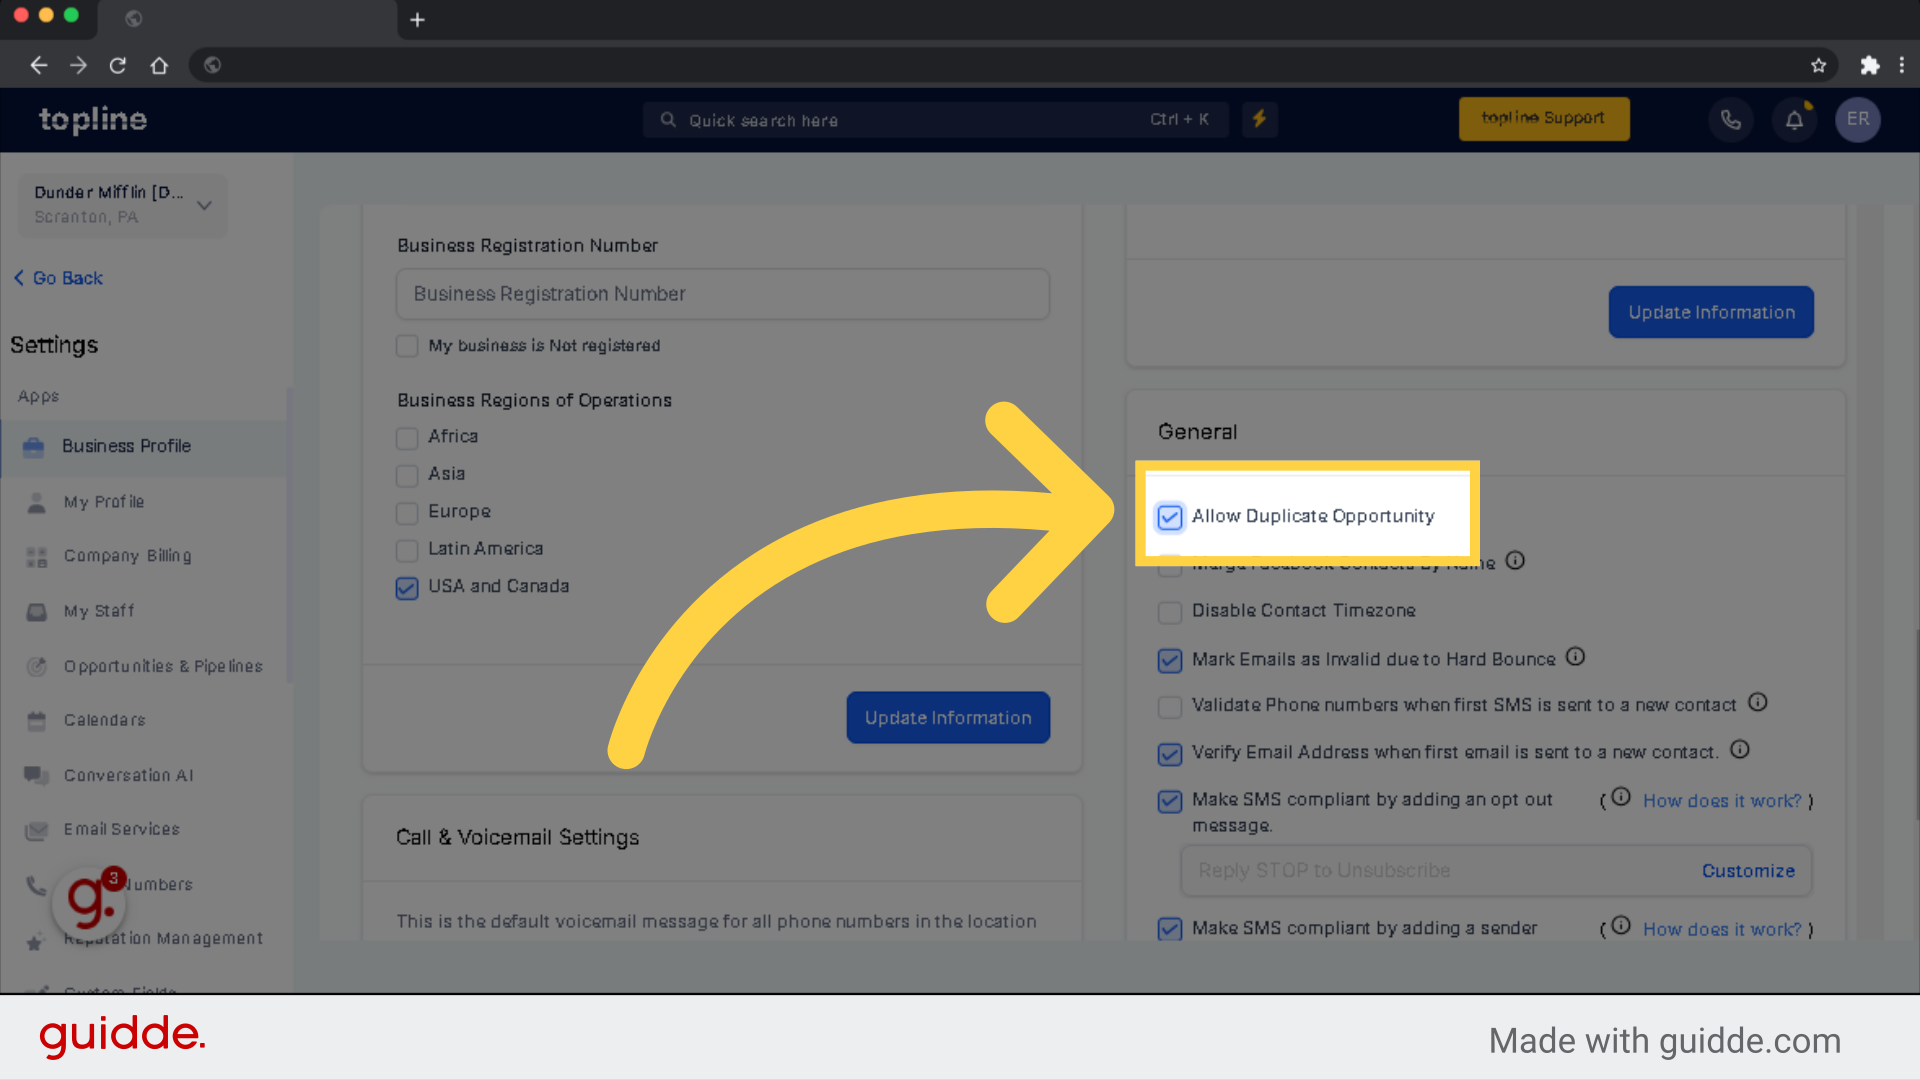
Tick the box to allow duplicate entries for contacts.
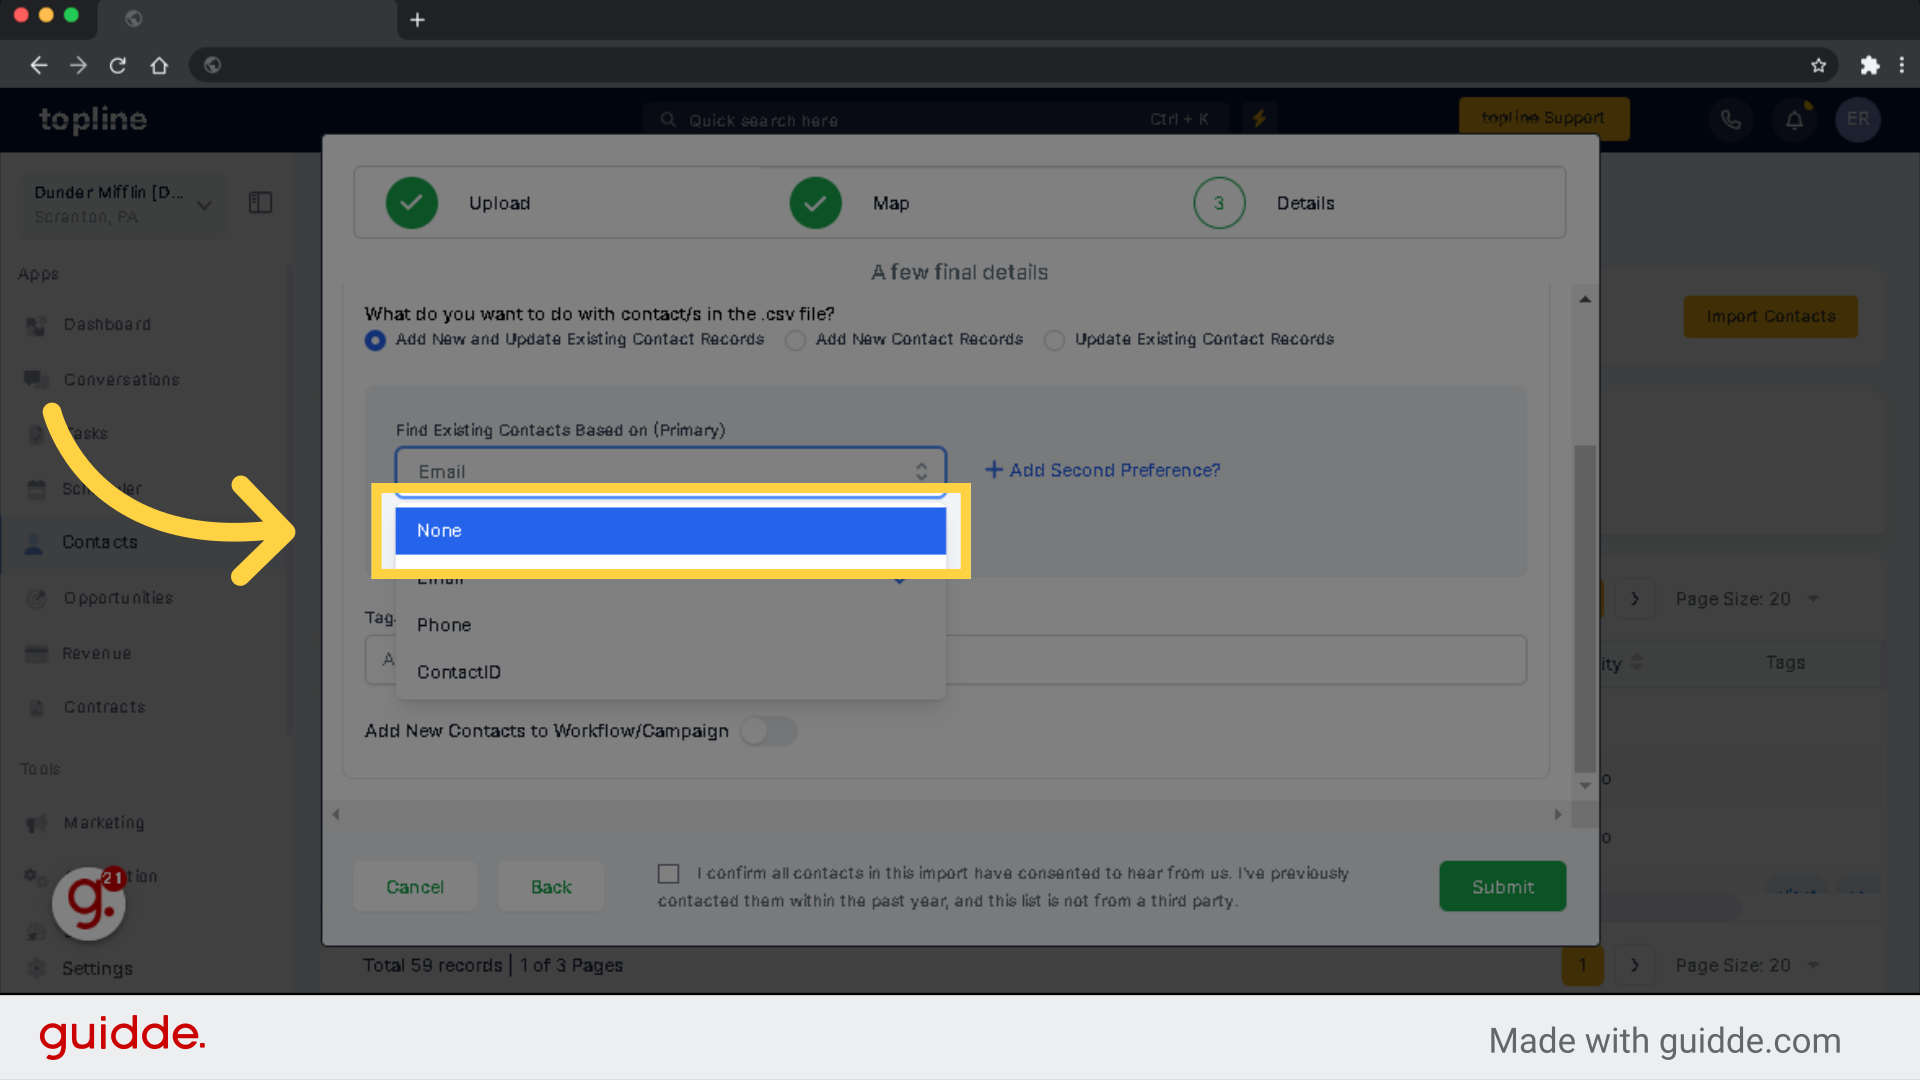
If you click on this dropdown, it gives you an option to select None, Email, Phone and Contact ID as a unique identifier.
Please Note:
To apply tag to all, simple to type out the tag here.
You can add workflows to the list by toggling the switch.
Please Note:
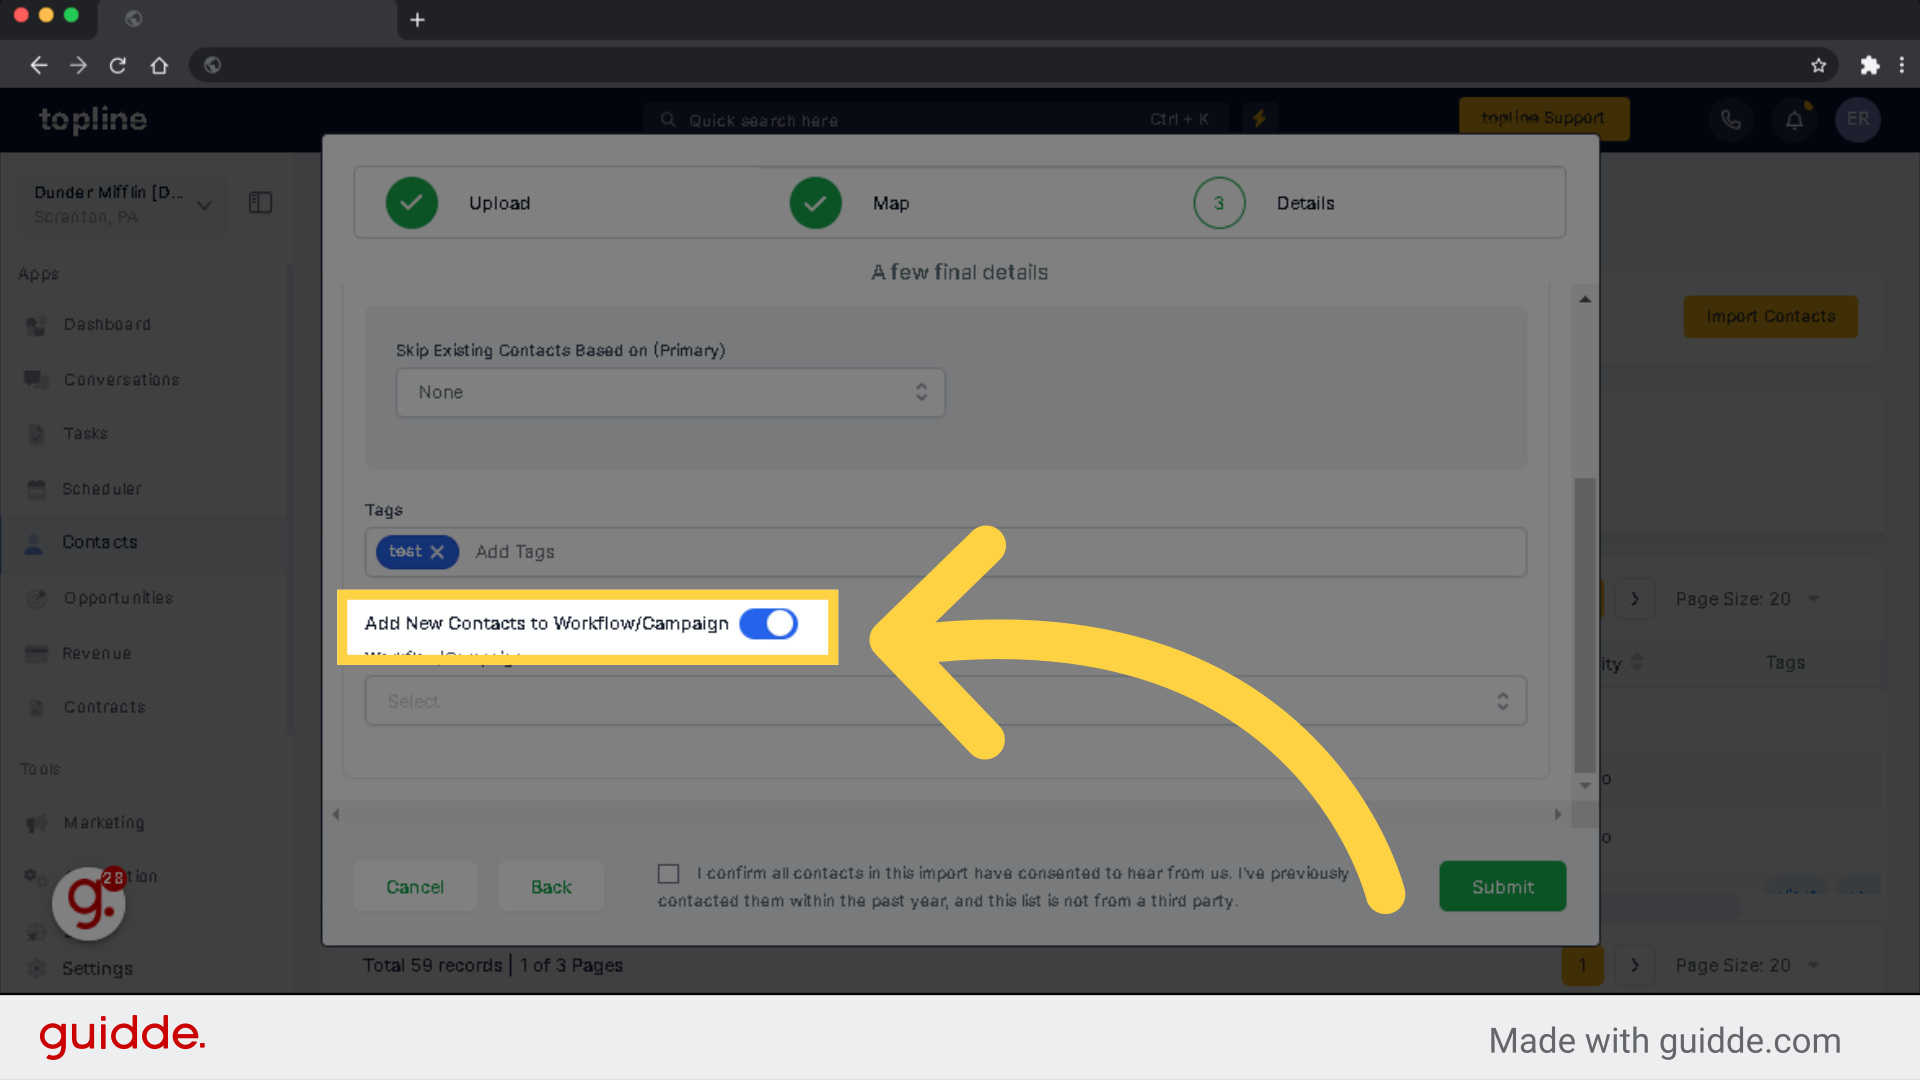
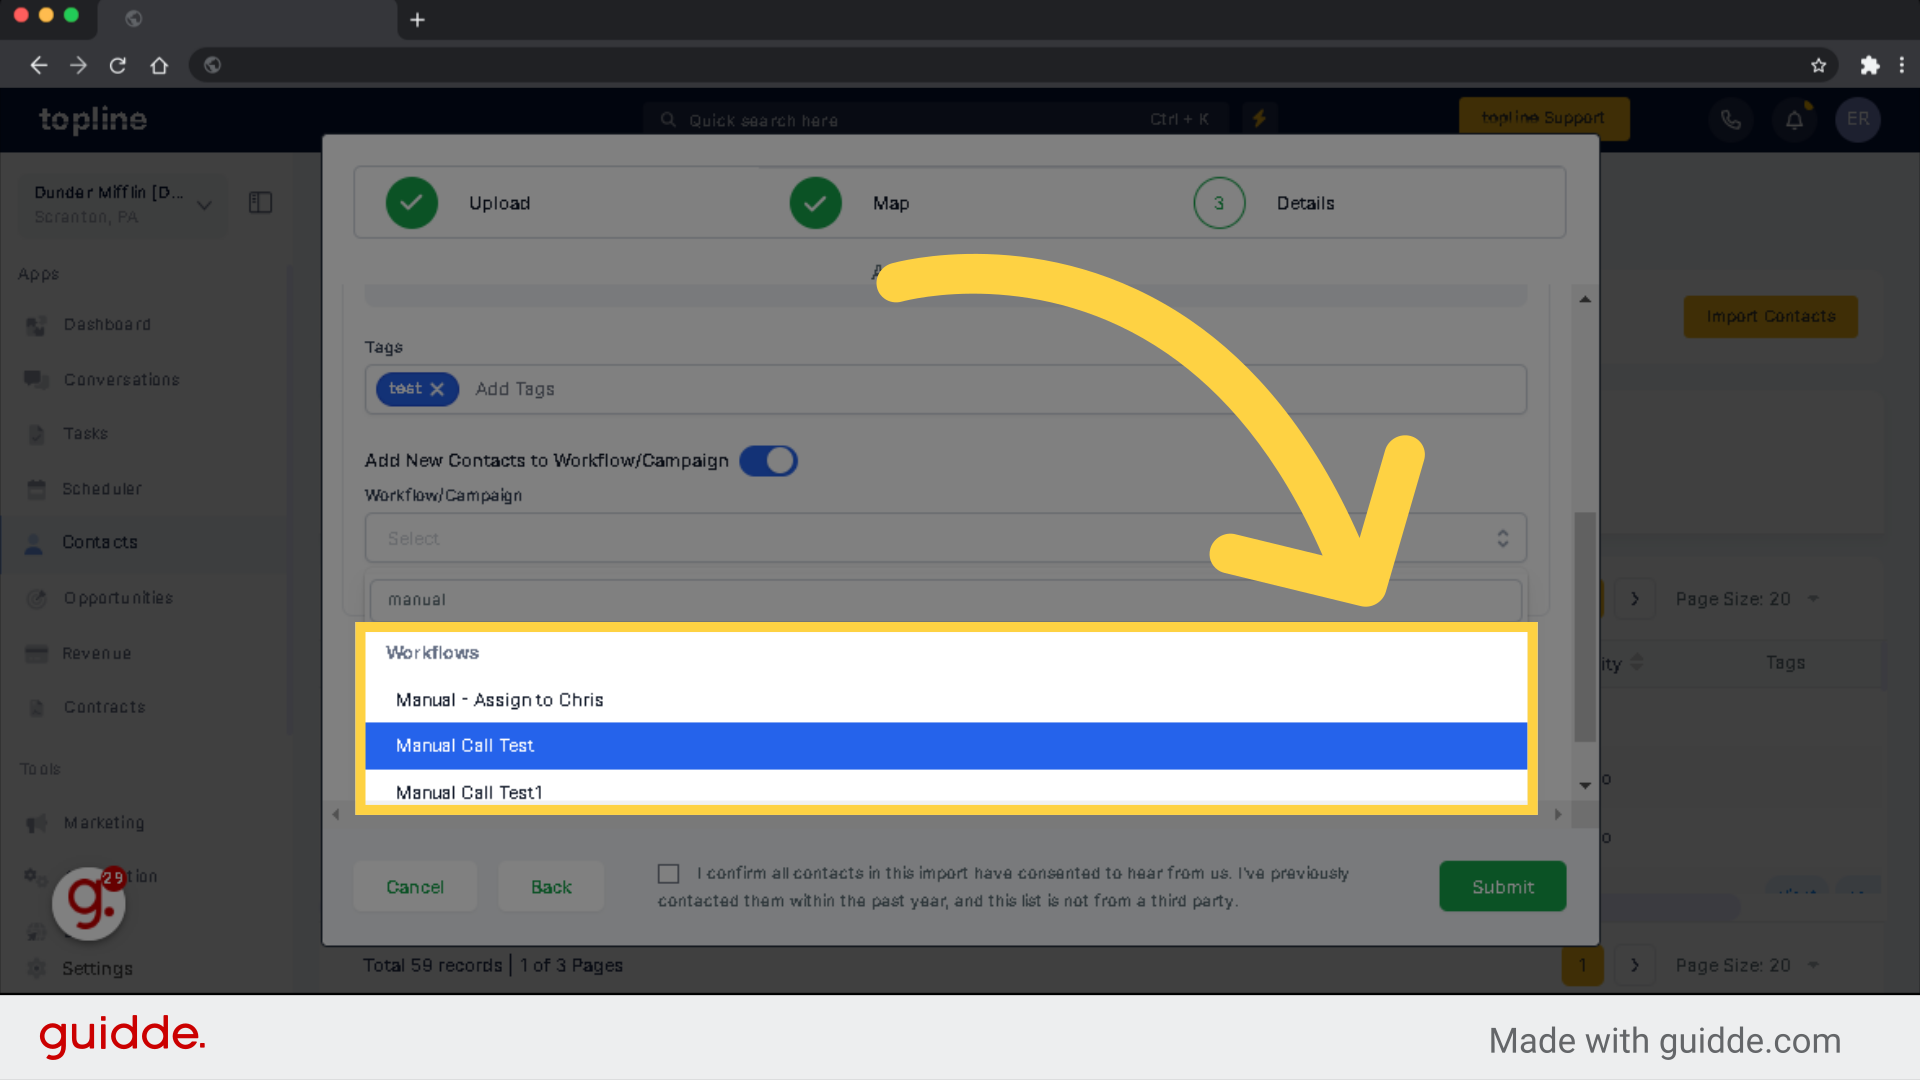
In this page, you will need to select your workflow from the dropdown menu.
Tick the box to proceed and to confirm all contacts in this import have consented to hear from us. I've previously contacted them within the past year, and this list is not from a third party.
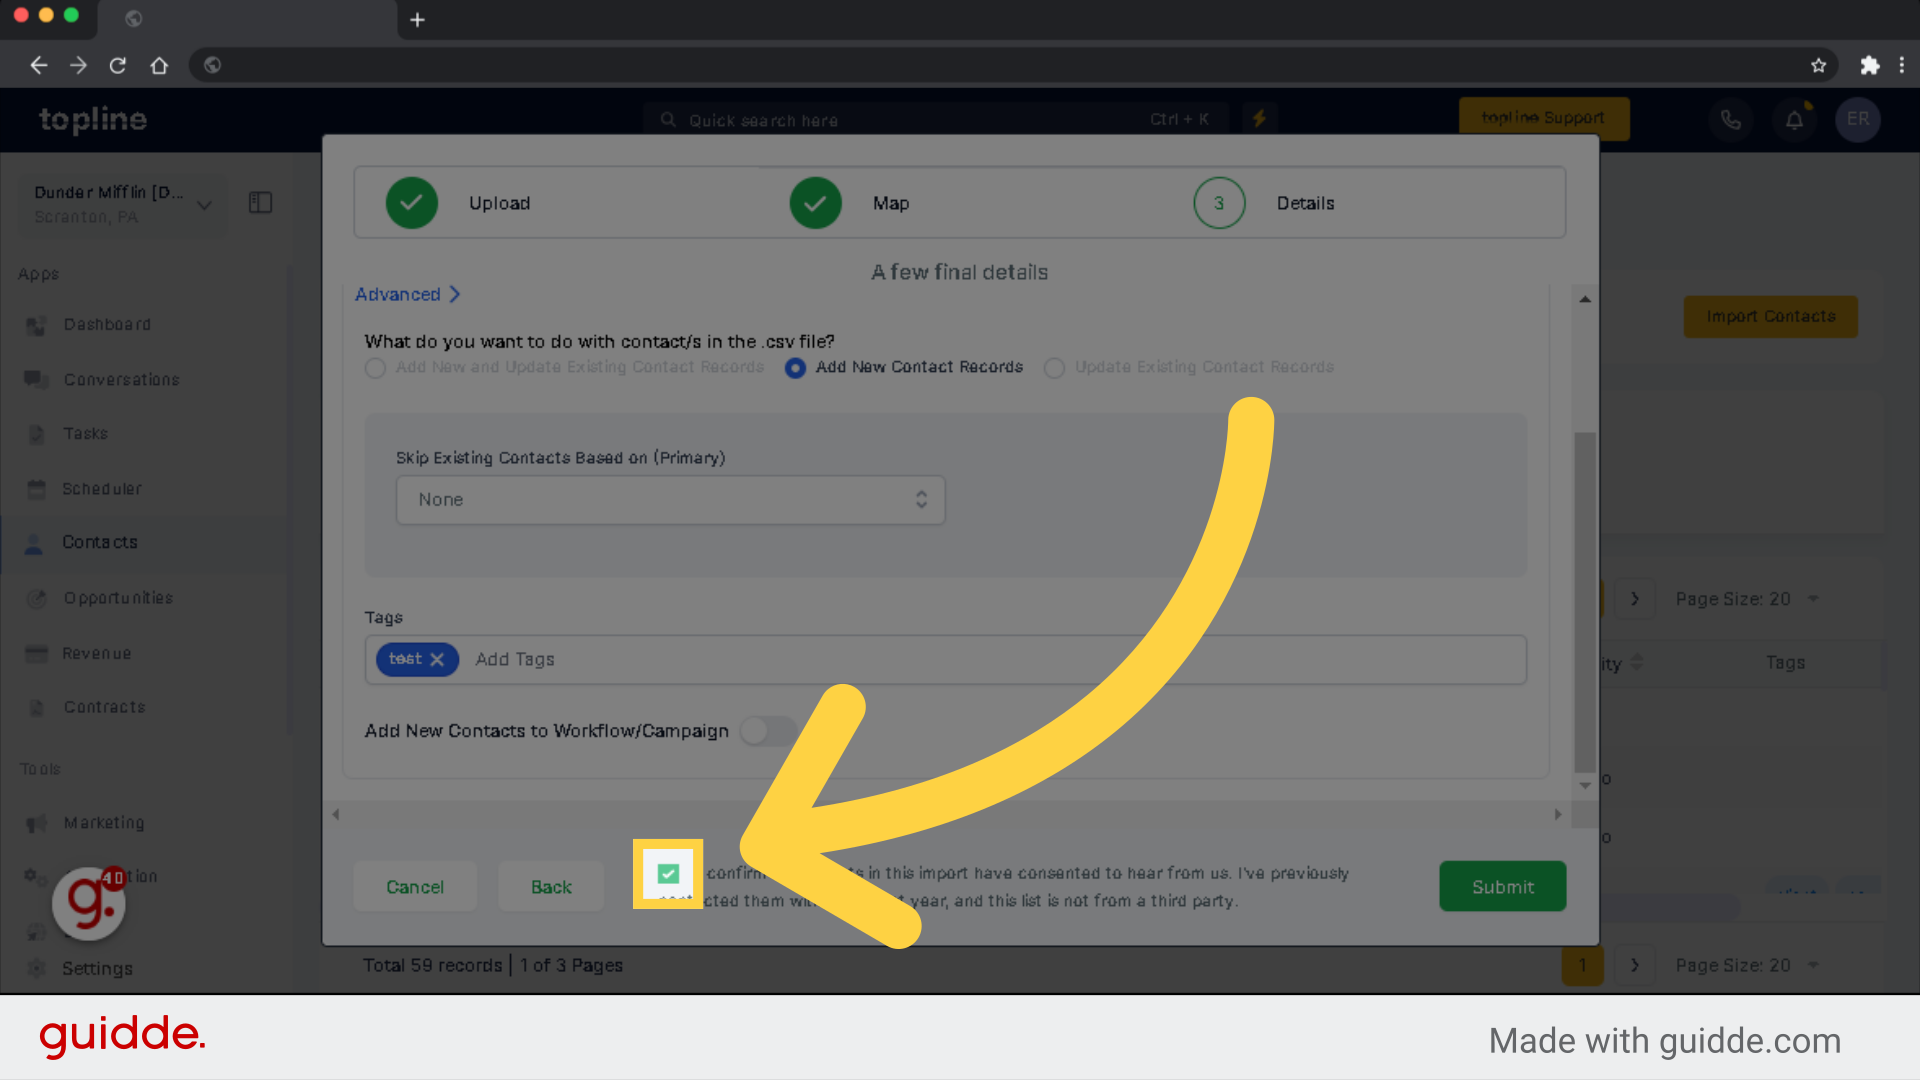
Submit the data to import all the contacts in the system.
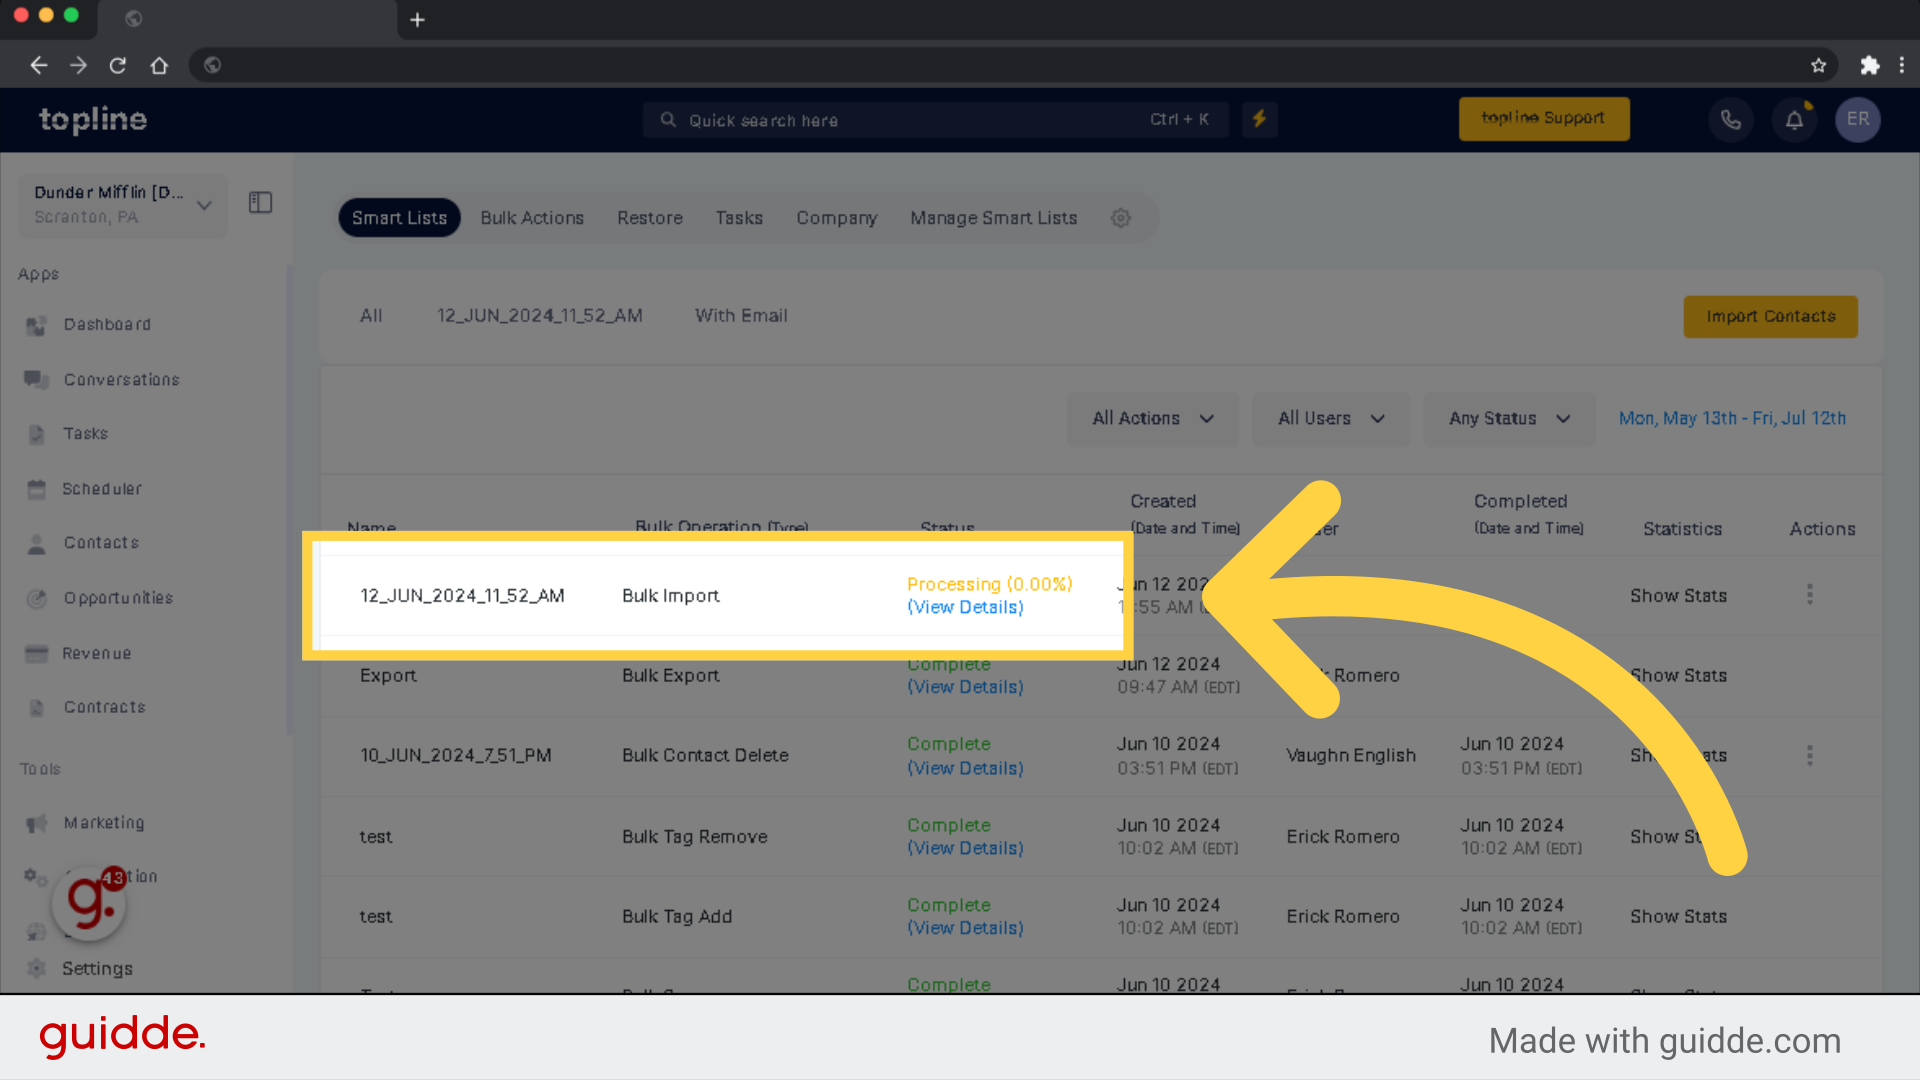
Click here to view progress and it will take you to the bulk actions tab.
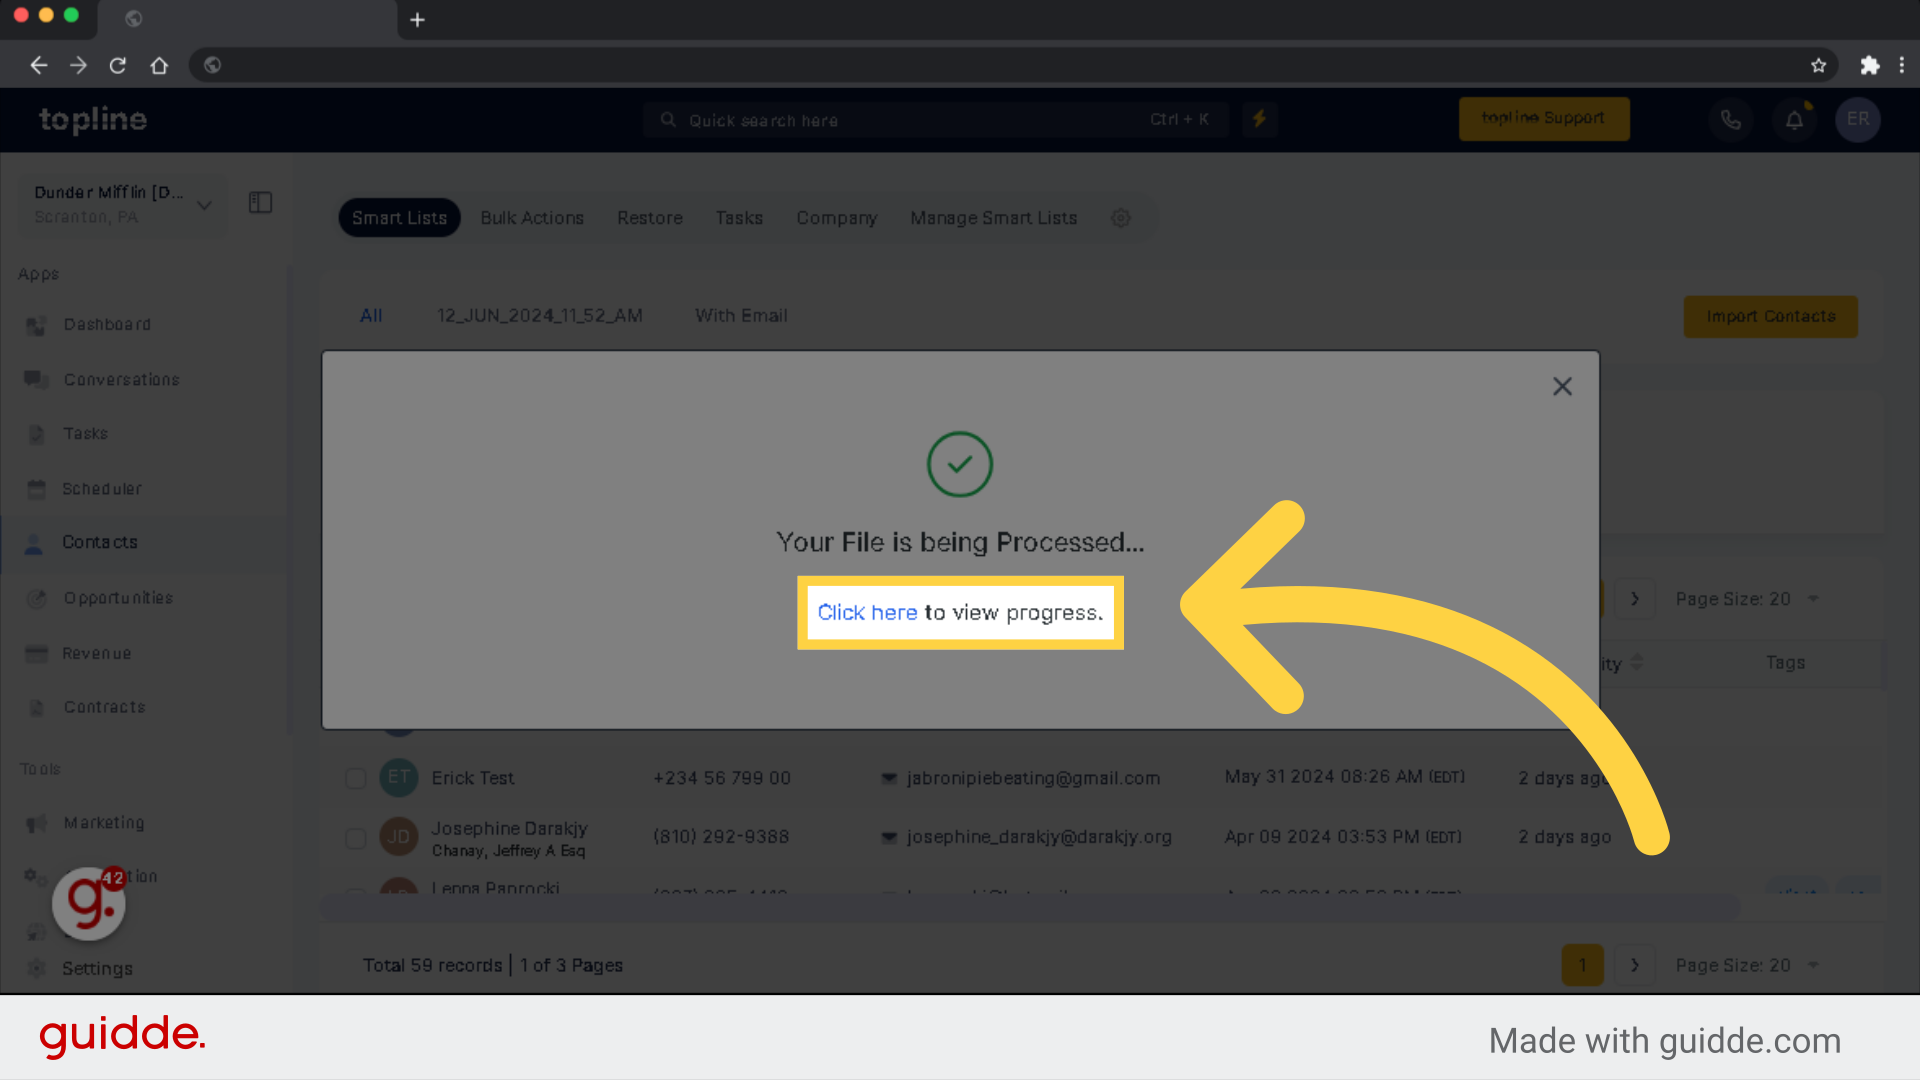
This will show you file you uploaded is now processing and the stats. Once done, this list will show in the contacts list
A new Smart List tab will be added, if you marked the check box earlier in creating a contact list from the imported data.
_____________________________________________________________________________________________________________
Only users with an 'Admin' role will have the option to import and export contacts.
The import file needs to be a .csv file
Have only one sheet/tab within the spreadsheet
Be smaller than 50MB
(Note: a typical .csv file with 4 columns and 10,000 records will be ~500kb in size)
The first row should NOT be blank! Include a header row in which at least one column header corresponds to a field in the system.
Please Note:
It's always best practice to clean your list and check for duplicates before importing into any software, especially if you are running cold traffic campaigns. Failure to do so can results in deliverability issues.
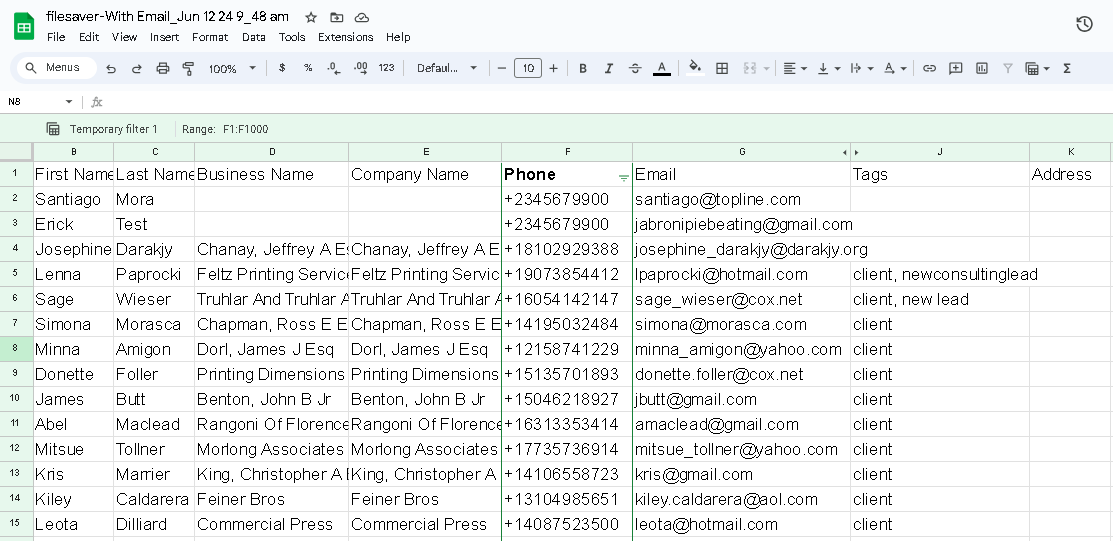
You can leverage the power of effective contact management with our new 'Additional Emails' feature, complemented by the Bulk Import capability. Seamlessly map, manage, and maintain multiple emails for each contact, enhancing data handling. Our innovative approach simplifies large-volume data management, ensuring a streamlined and efficient process for users.
To ensure contact uniqueness, both the primary and additional email (if selected as the first preference) will be used. In cases where multiple duplicate matches are found for an additional email, that specific email will be left out.
Any invalid emails in the additional fields will be removed, leaving only valid ones for a contact.
If the email column in the CSV is blank, but the additional email column has values, the first additional email will serve as the primary email.
When updating an existing contact, the specified emails in the CSV will be combined with the ones already associated with the contact.
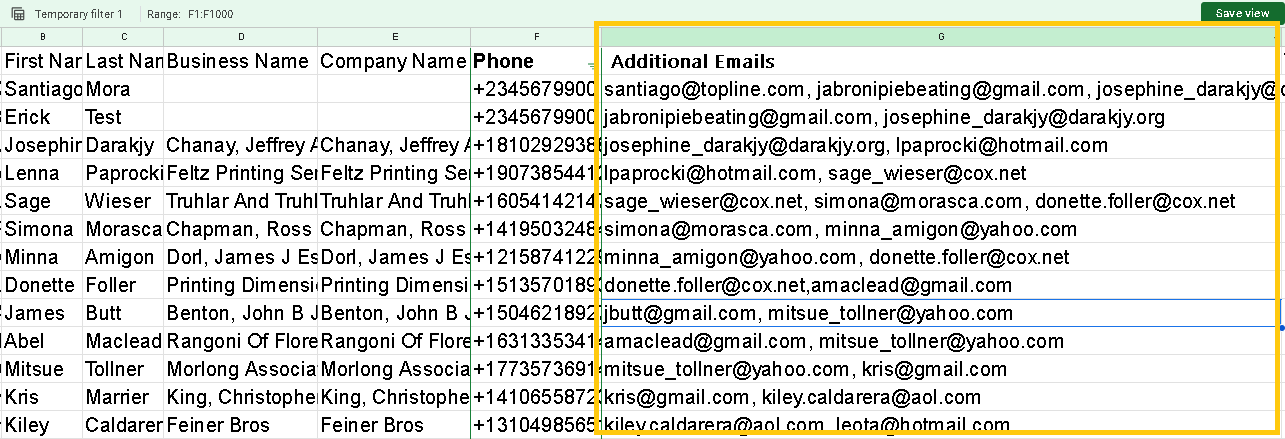
The "Additional Email" column can hold a maximum of 10 email IDs, with only the first 10 being considered if more are included.
Within the Contact Import section, users will discover a new system field named “Additional Emails.”
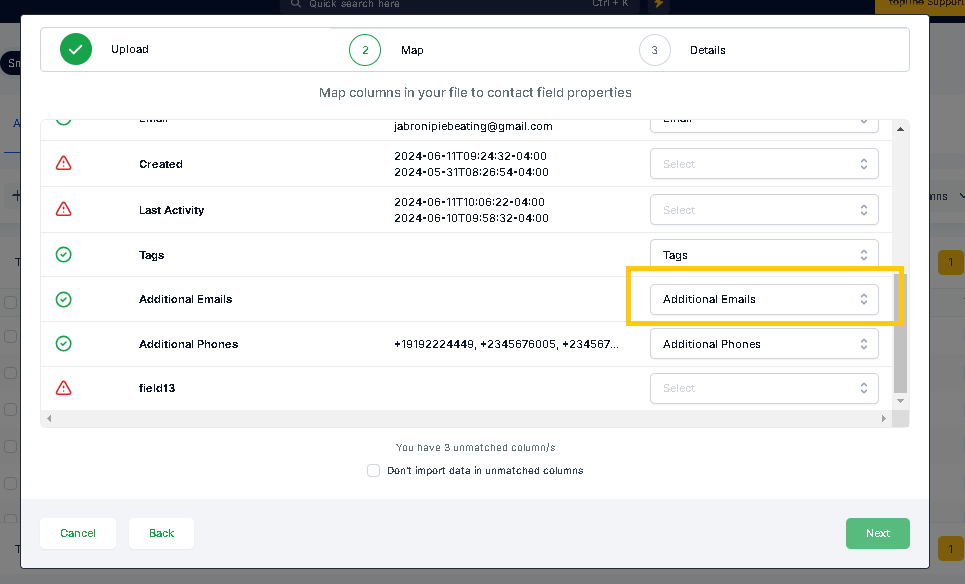
This feature enables users to map all their extra emails.
During the import process, it's necessary to include all additional emails in one column. These should be separated by commas (,), slashes (/), or semicolons (;), and then mapped to the “Additional Emails” field in the system.
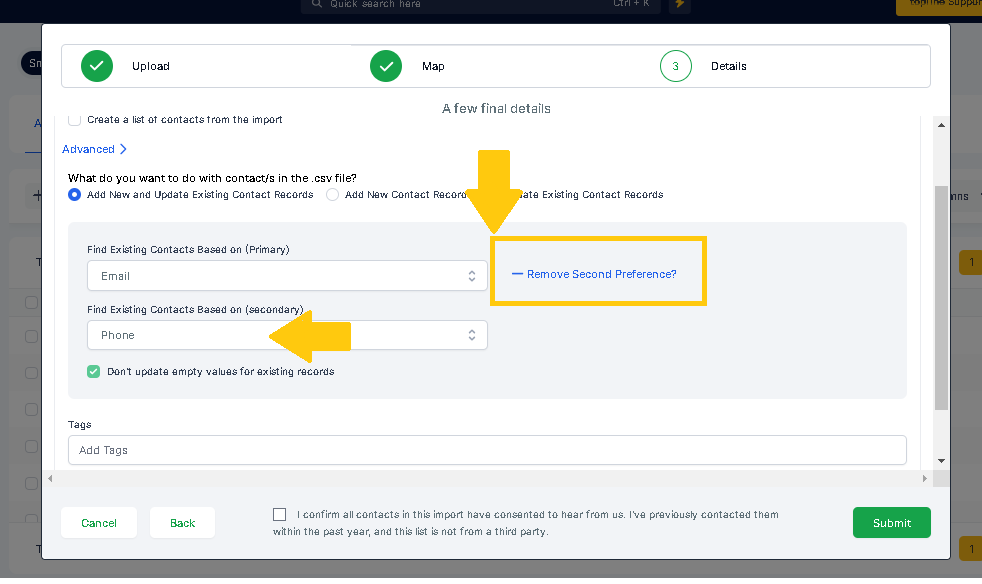
Please use the 'secondary preference' option for a mixed CSV. The system will search for the first preference and then the second if it cannot locate the first. In the example above the first preference is 'Email' and the second is 'Phone'.
Now we can find existing contact based on the secondary field, so if the contact record has only the phone number, we can also upload them!
If a contact has multiple phone numbers or emails, please split the contacts into multiple so they will be uploaded.
Example:


Keep the email blank for the second lead with a different phone number because it will create duplicates when we upload contacts with phone numbers as the unique field.
The phone field from the CSV export in Keap is incompatible with Topline OS. The parenthesis '()' and dashes '-' make it incompatible. We have to highlight the entire column in the CSV file and ensure it is numbered in, remove any parenthesis and dashes, and then we can import without corrupting the data in the CRM.
Add a country code for numbers outside the sub-account country when importing numbers. If the sub-account country is set to the US, you won't need to add a +1 (US country code) to the imported phone numbers. However, if you're importing numbers outside of the US, you will need to add the country code
I.e. A sub-account that has set its business location to the US would need to add '+44 to call the UK. If the Sub-Accounts country is set to a different country other than the US (like - the UK, Australia, etc.), to call/SMS US numbers you would need to add a '+1 to the country's area code within the CSV File.
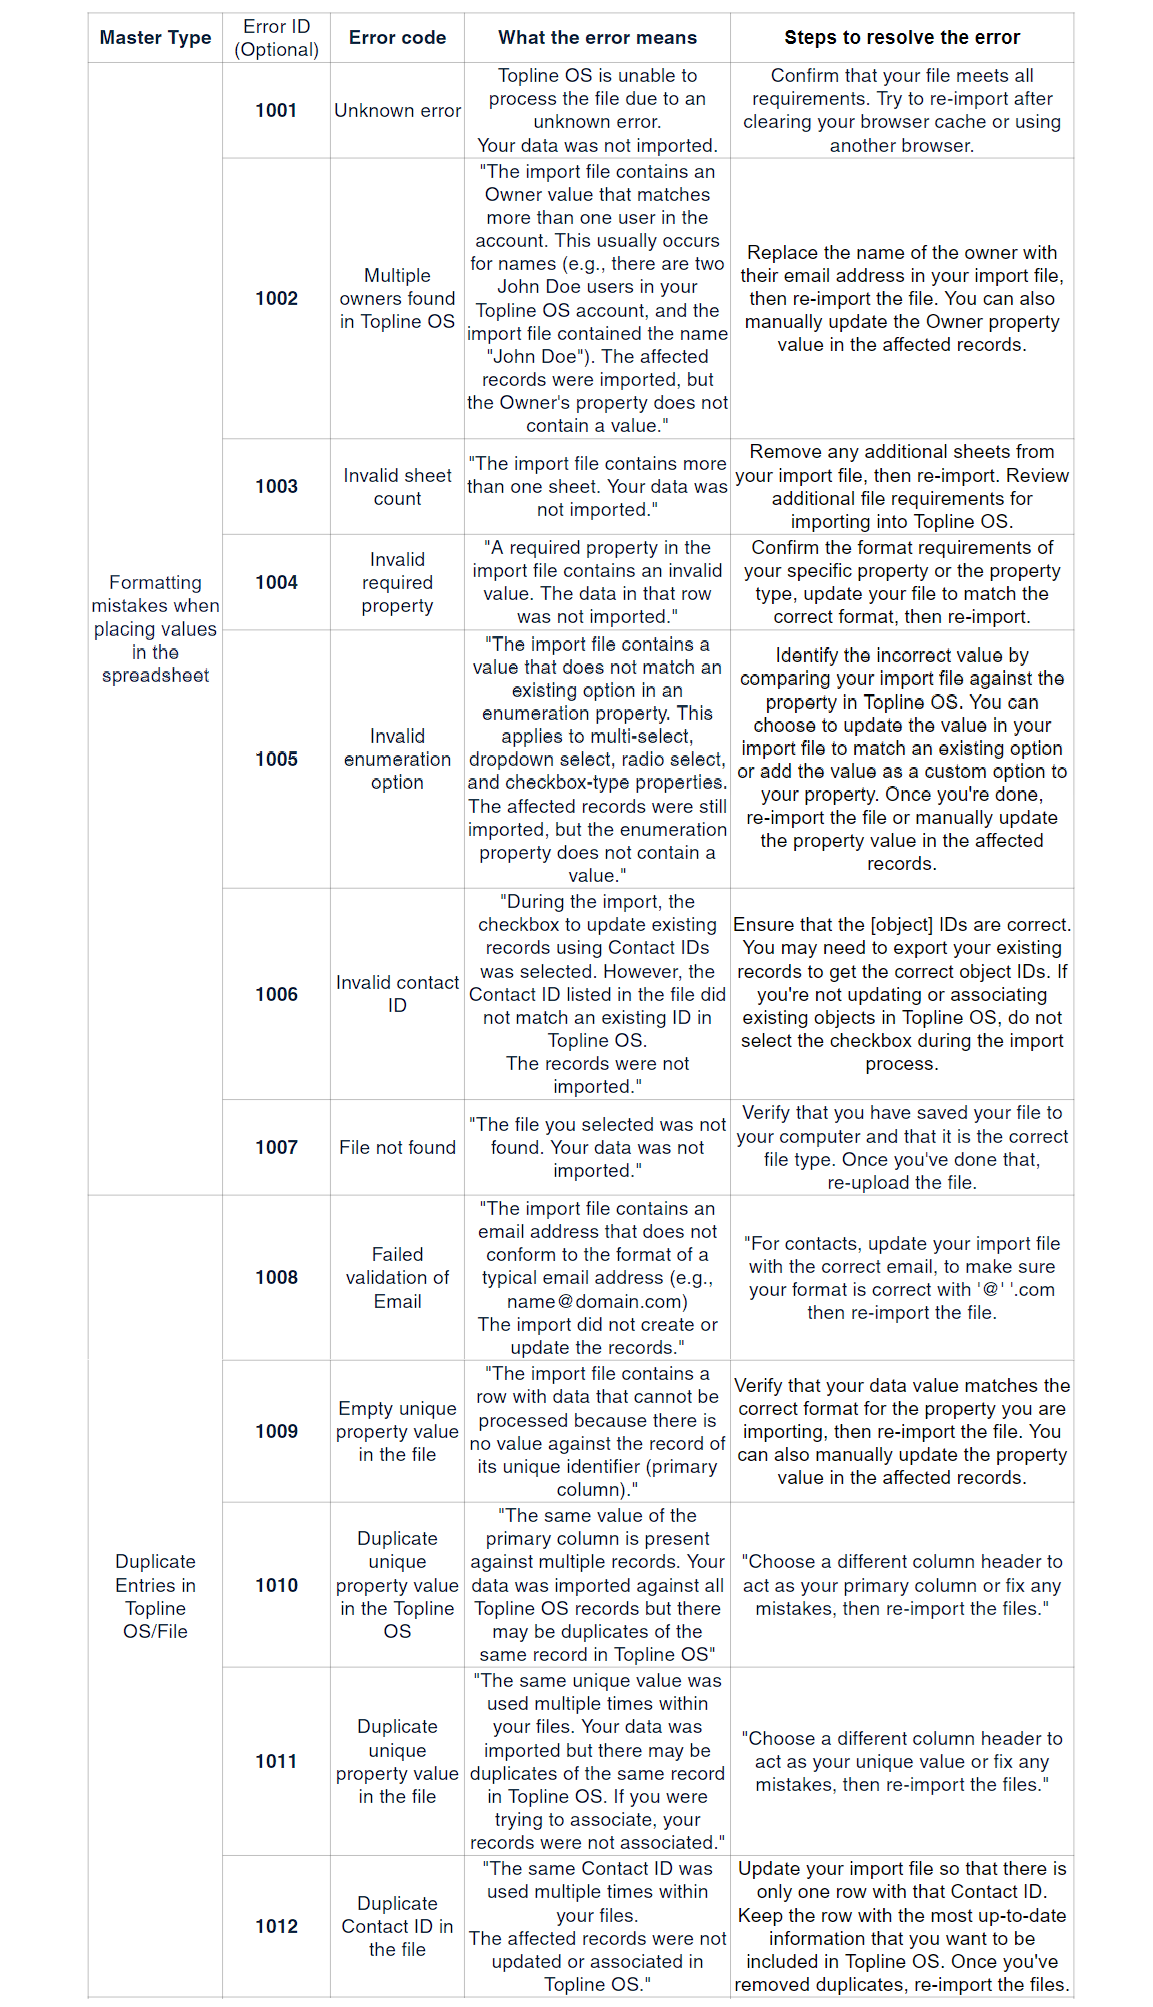
I'm trying to import a CSV with a DND Column, but all contacts are set to DND for ALL channels.
When importing contacts with a DND column within your CSV, please note that the contacts will be DND for ALL the channels. If you want to DND for specific channels, please set up a workflow first and use tags for each channel.
Ie: I would like john to be DND for SMS only. I would create a workflow that DNDs a contact when a tag 'DND SMS' is added. So now, on the CSV, I would add the Tag 'DND SMS' next to John's name. When importing, this would fire automation to DND John for SMS Only.
When importing contact notes, you may only have one note per contact record with a limit of 5000 characters. Please use the large text custom field if you have more than one note or more characters than the allowed amount.
As of now, We do not have any limit for CSV import for notes, and As per our current export behavior, we support Max of 255 Characters for the last note.
Please note:
Depending on the records you are importing, your file could include the following columns:
Acceptable formats-
mm/dd/yyyy (e.g. 10/28/2020)
yyyy/mm/dd (e.g. 2020/10/28)
You can also replace '/' with '-' '.' and it'll recognize the uploaded fields as a Date field (Available in our future release!)
Multiple Options, Checkbox, Textbox List
Acceptable formats-
Value 1, Value 2, Value 3 ...... (e.g. Blue, Yellow, Green or Blue, Yellow, Green or Blue, Yellow , Green)
You can also replace ' , ' with ' ; ' ' . ' and it'll recognize the uploaded fields as the aforementioned field
Radio, Single Option
Acceptable formats:
Value 1 (e.g. Blue)
File Upload, Signature
Not Supported
Contact Owner
To assign an owner to your contacts during the import, include the name of the 'User'
Acceptable formats:
FirstName LastName (e.g. Logan Paul or logan paul)
LastName FirstName (e.g. Paul Logan or paul logan)
Note #1: Unless the user has both FirstName and Last Name, the system will not recognize it during the upload
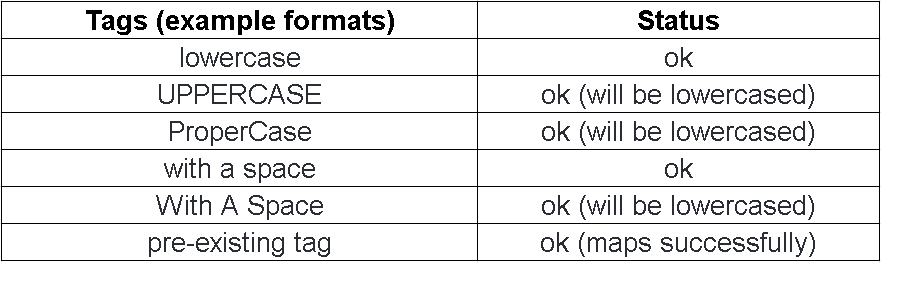
Tags
Acceptable formats-
Value 1, Value 2, Value 3 ...... (e.g. Blue, Yellow, Green or Blue, Yellow, Green or Blue, Yellow, Green)
You can also replace ' , ' with ' ; ' ' . ' and it'll recognize the uploaded fields as the aforementioned field.
Do Not Disturb
Acceptable formats-
True or False ( true or false )
Yes or No ( yes or no )
Phone Number
For the vast majority of cases, as long as you format the phone numbers in E.164 (Ex: +1 1234567890) our system will recognize it as valid- irrespective of the default Country picked at the sub-account level
Additionally, if you have set the Country to the US, the following would work perfectly fine as well
123-456-7890
(123) 4567890
1234567890
Furthermore, if you are working with international numbers (Outside the US), we'd encourage you to visit: https://libphonenumber.appspot.com/ and run your phone number format by the tool in conjunction with the codes below to ascertain its appropriateness for upload.
Numerical
Acceptable formats-
1.23.4
1234
.123
Monetary
Acceptable formats-
1234
1,234,234,333
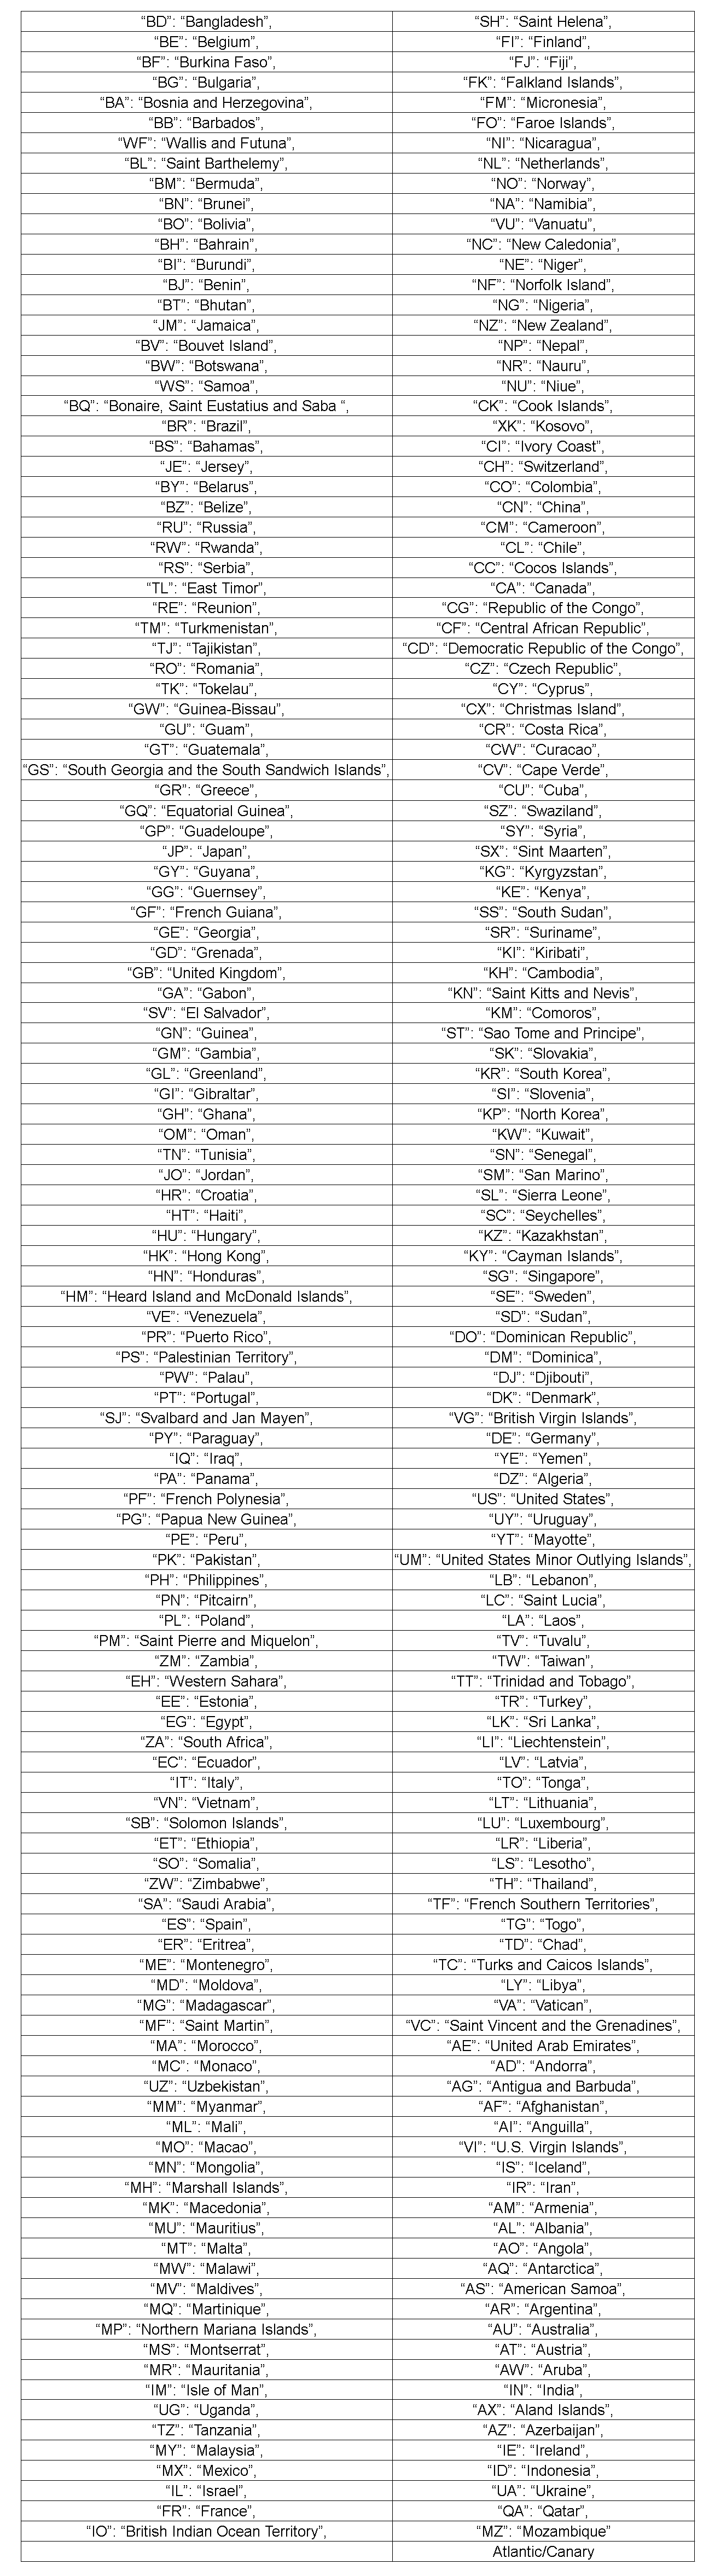
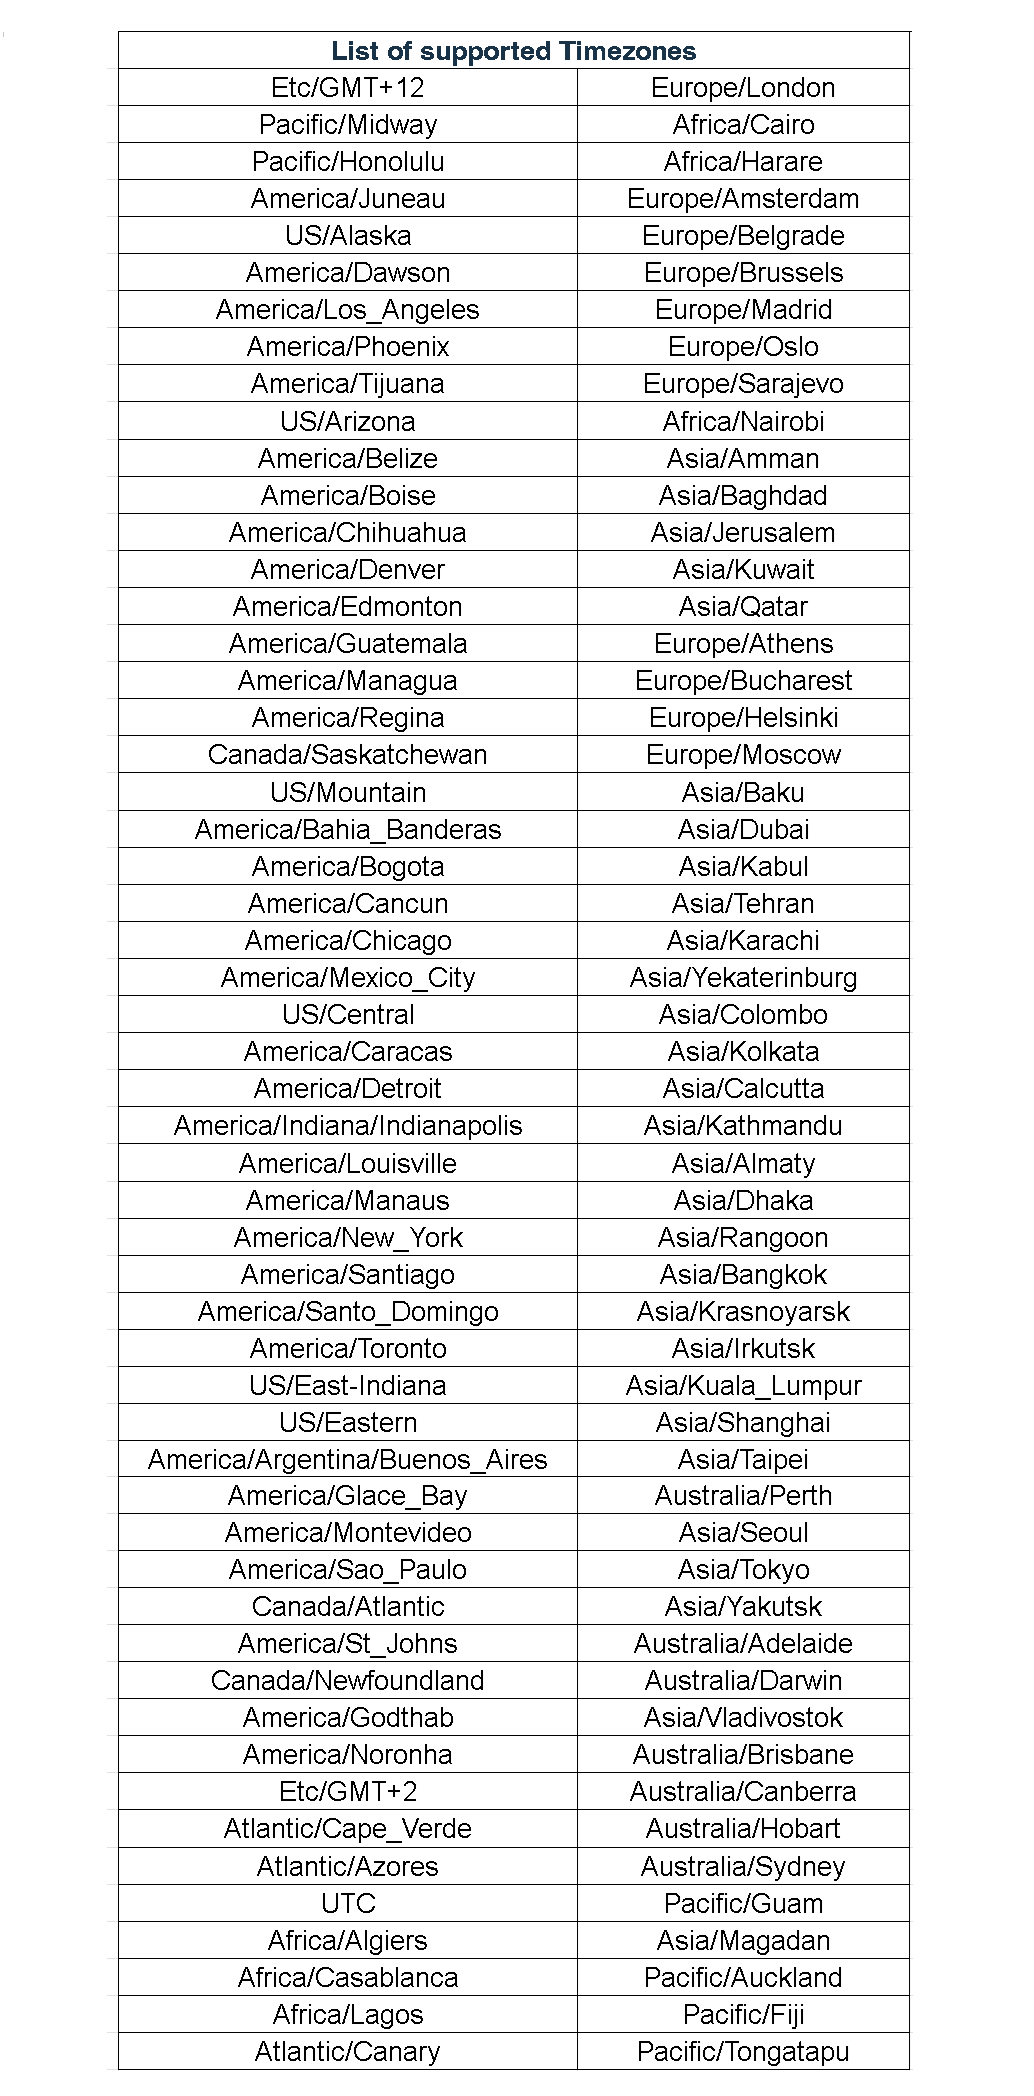
List of supported Countries