Access to the Scheduler section.
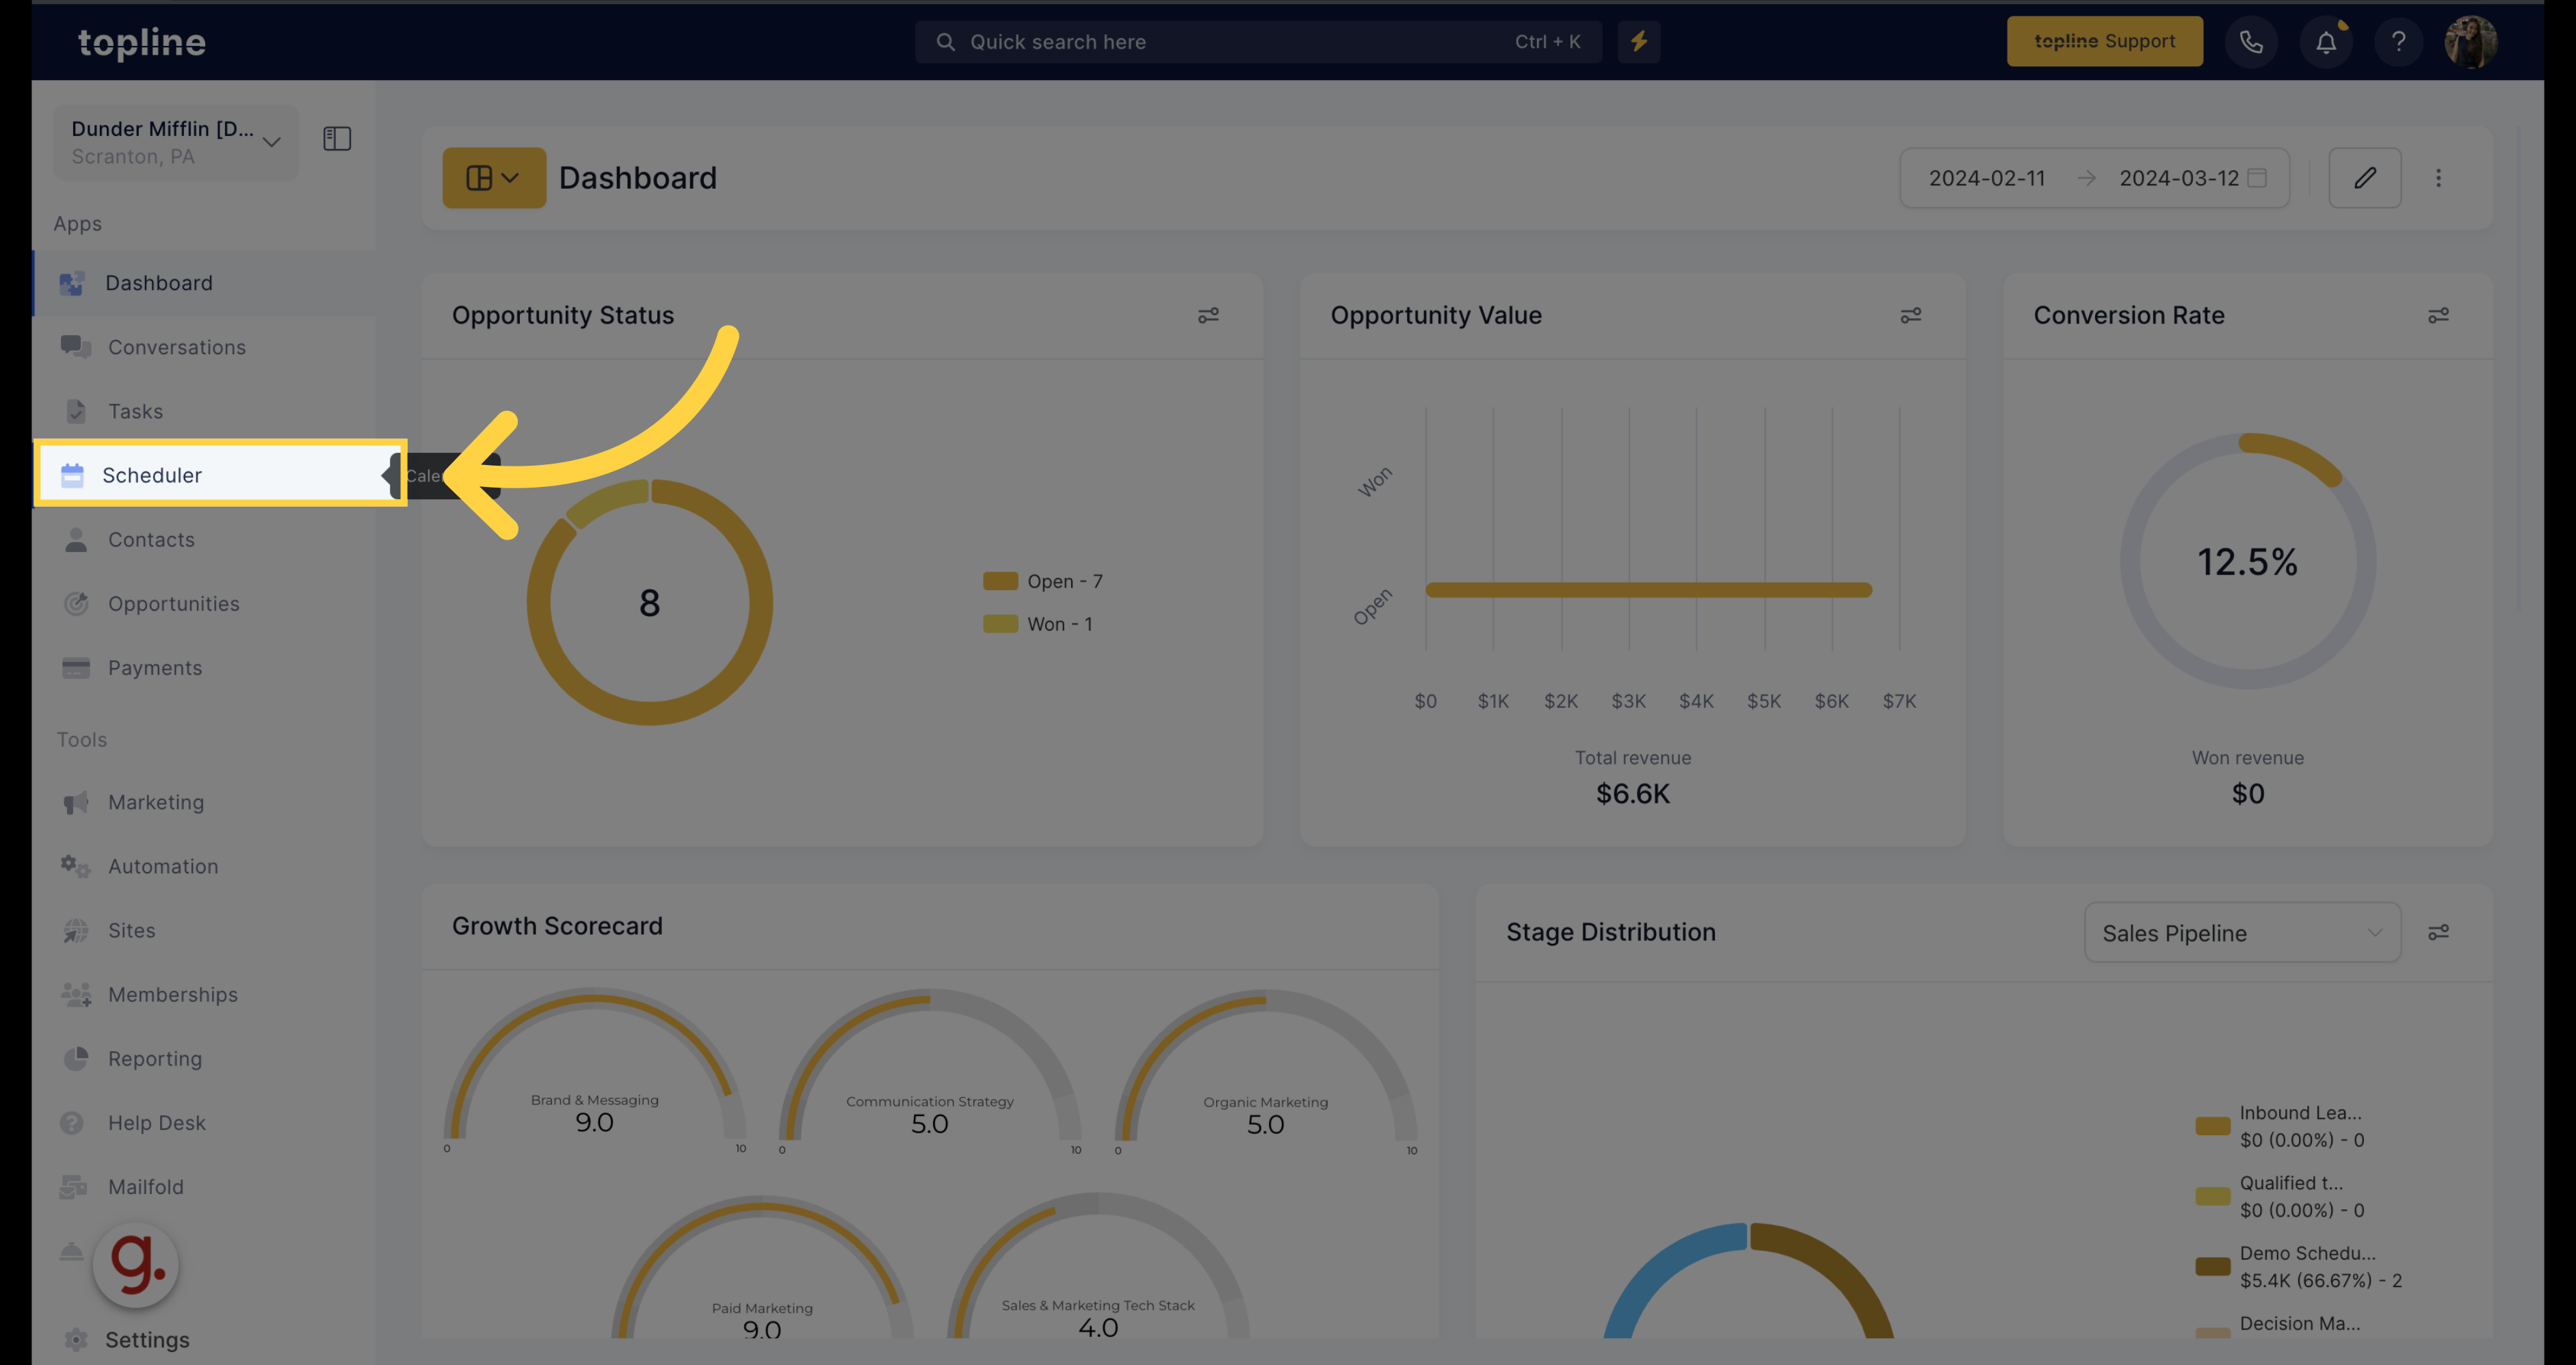
Navigate to Scheduler Settings.

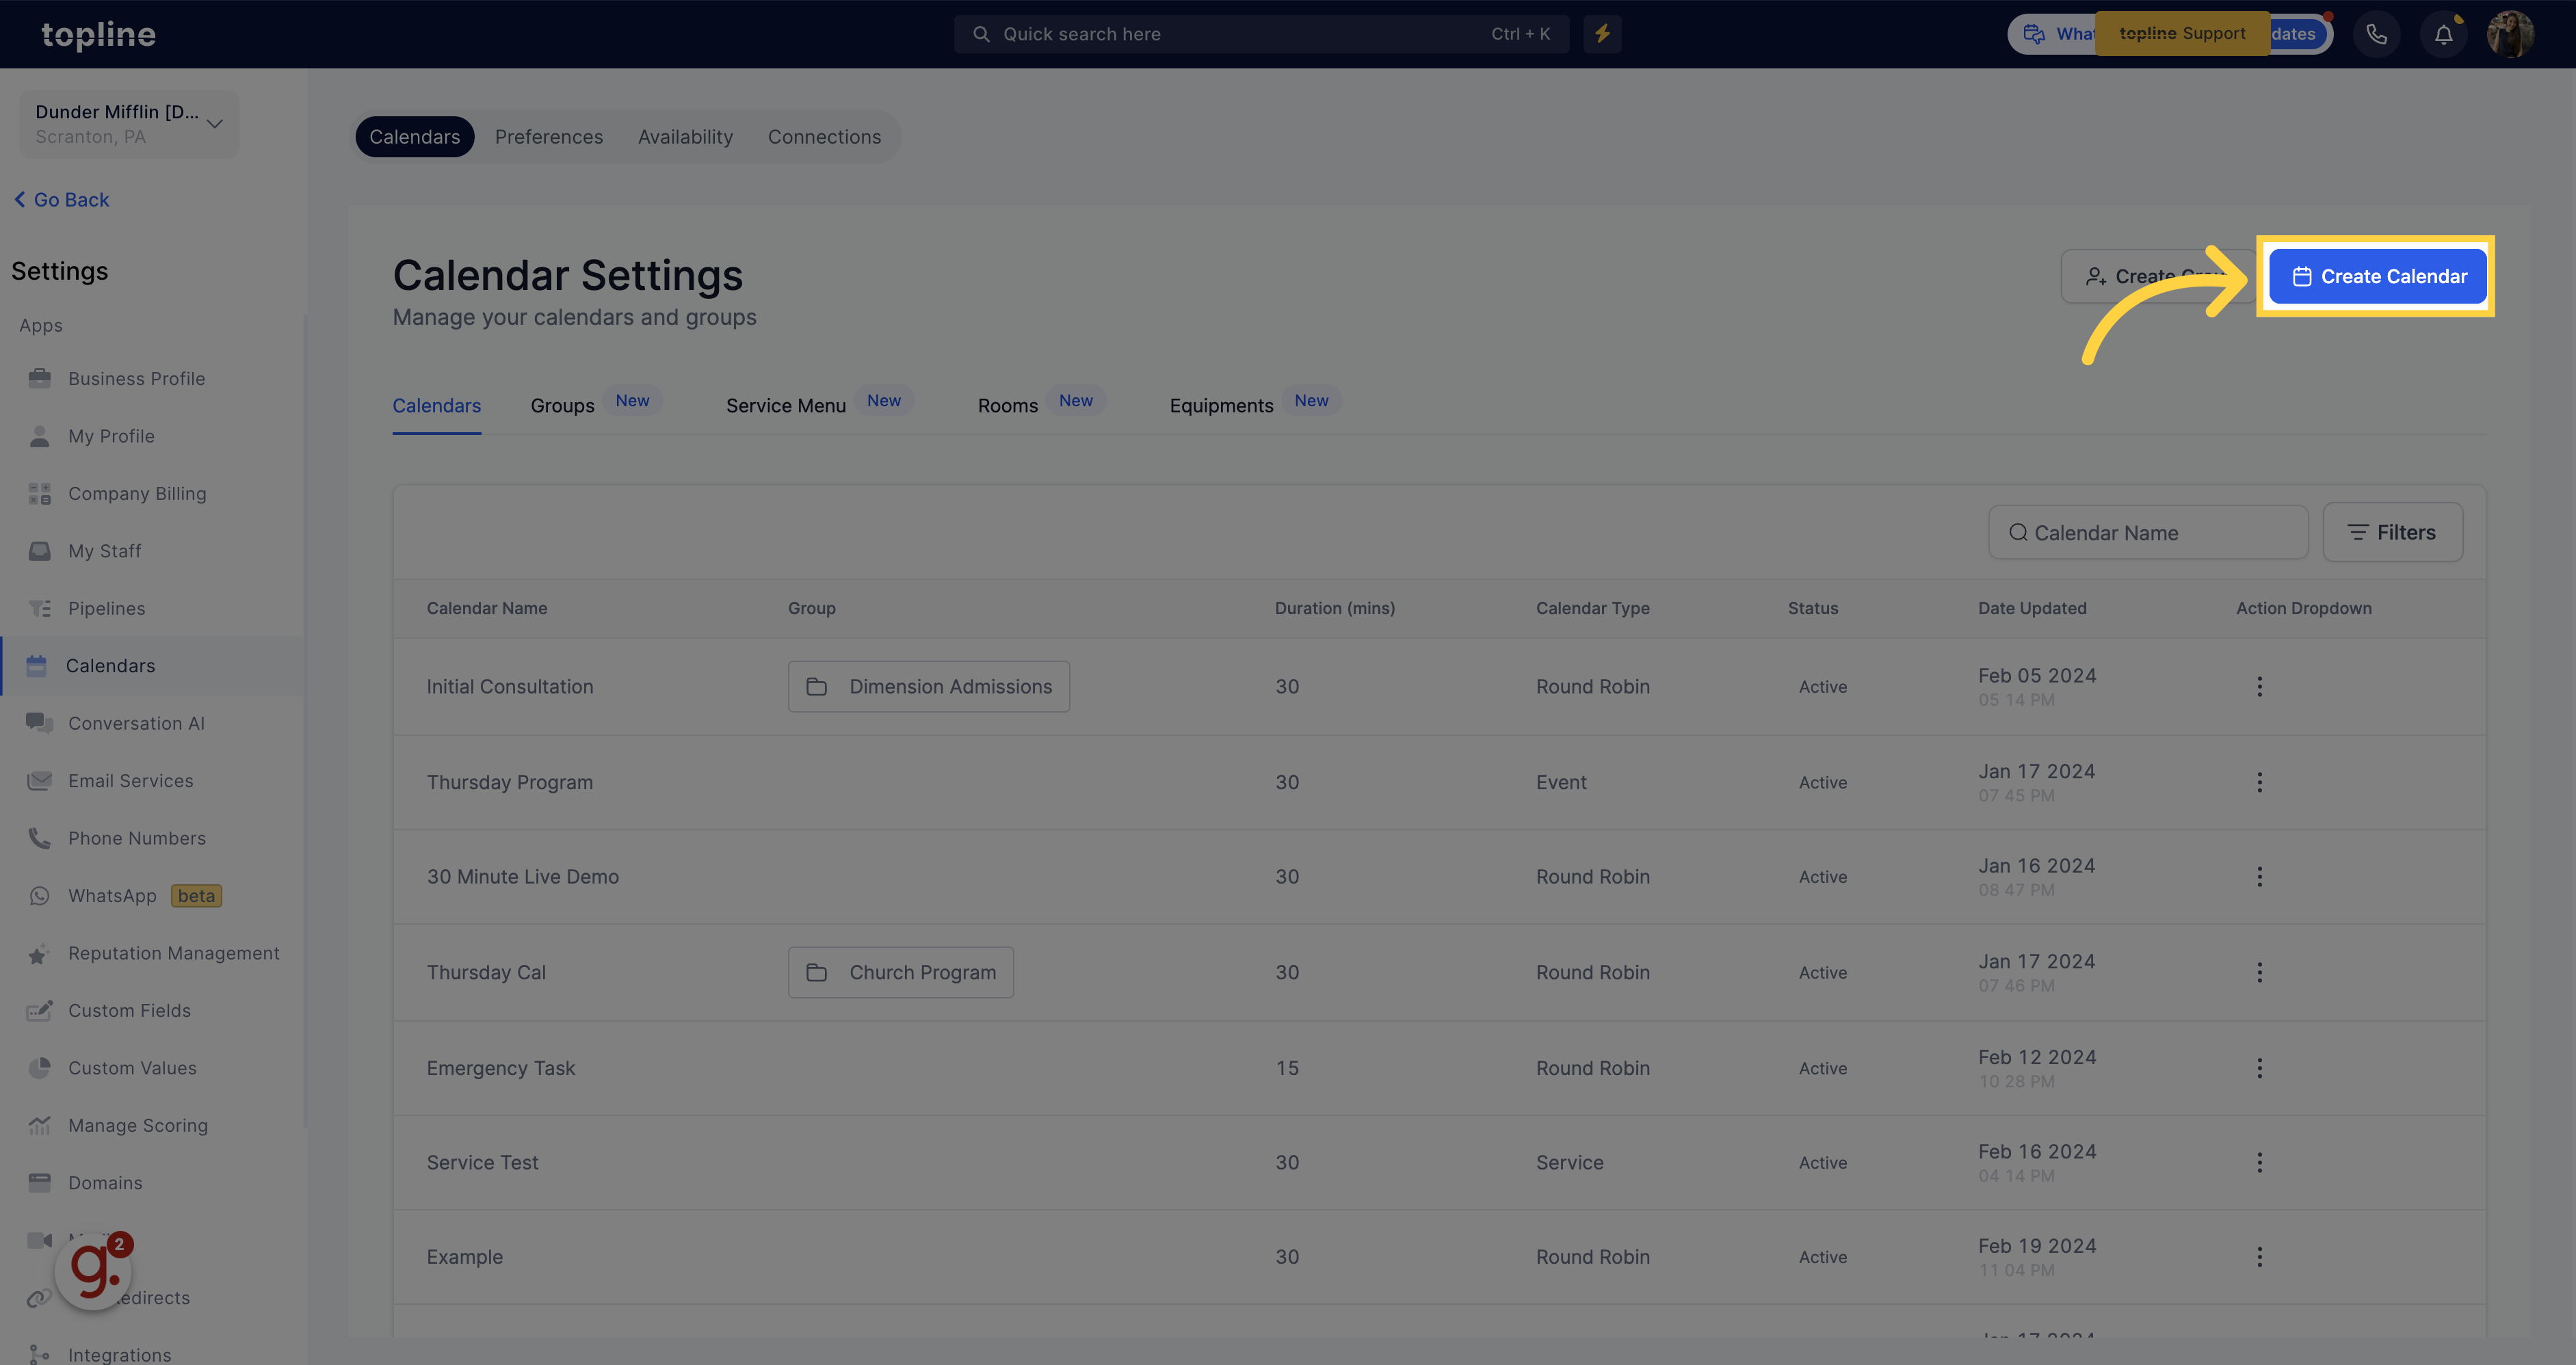
Create a new calendar by clicking on the create calendar option.
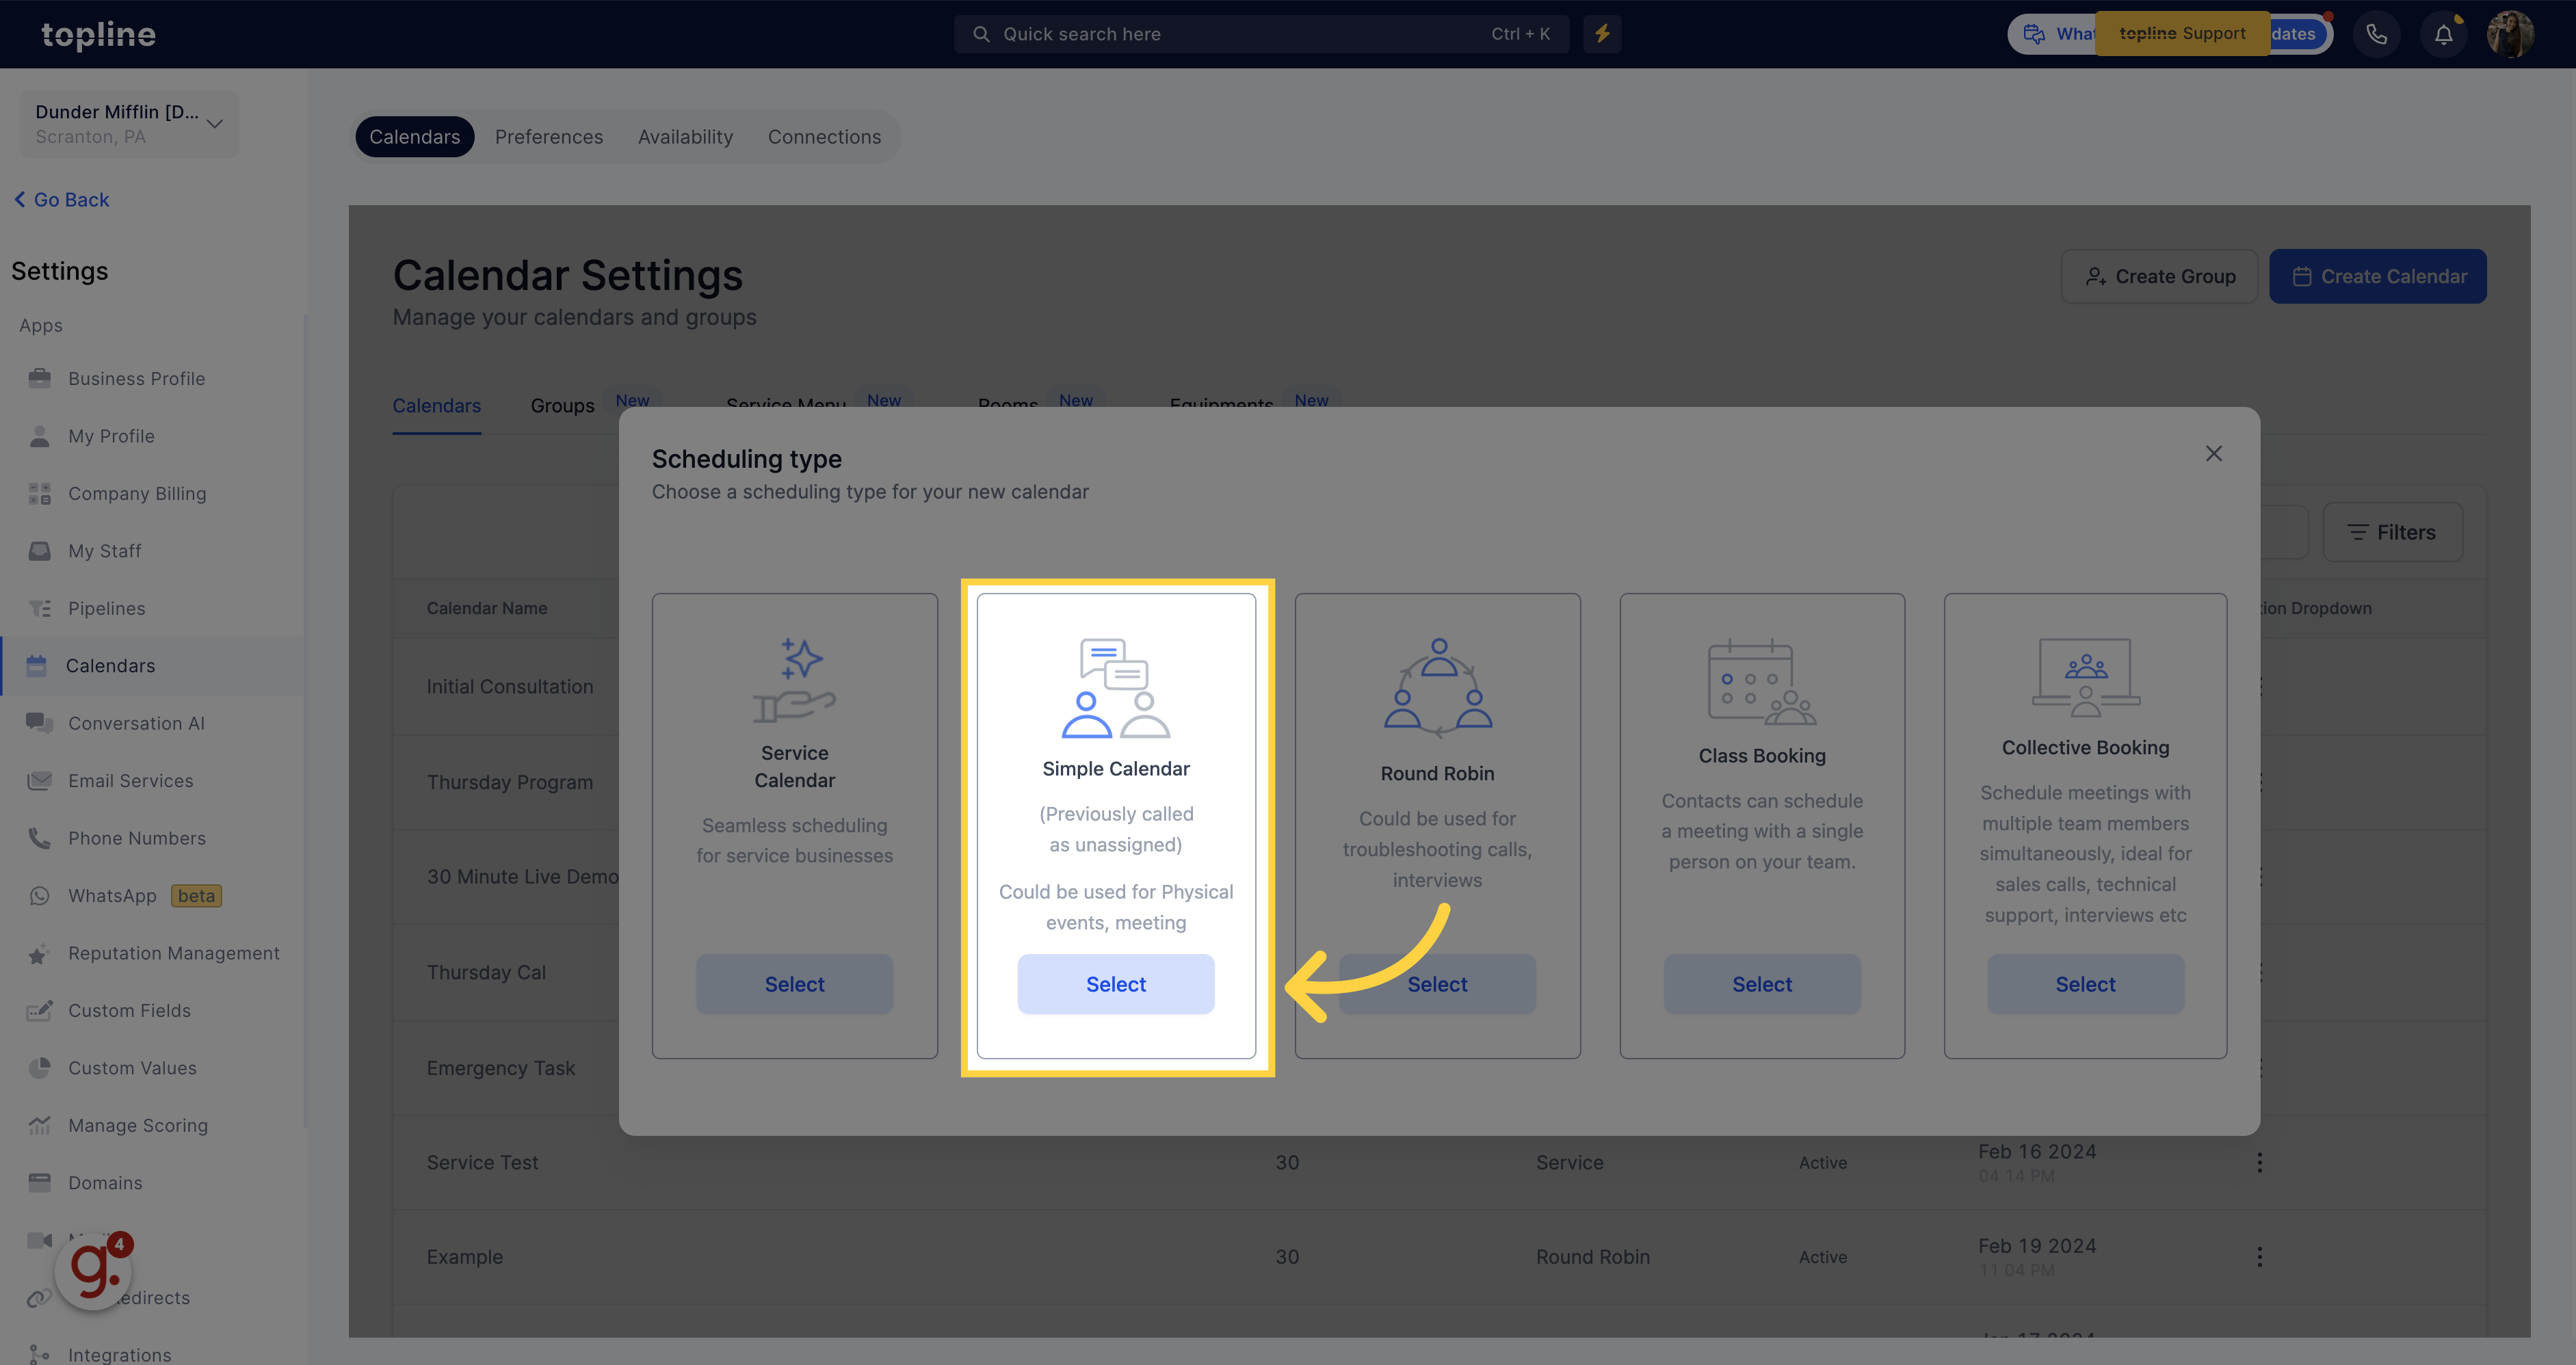
You can select the scheduling type: like Service Calendar, Simple Calendar, Round Robin, Class Booking, or Collective Booking.
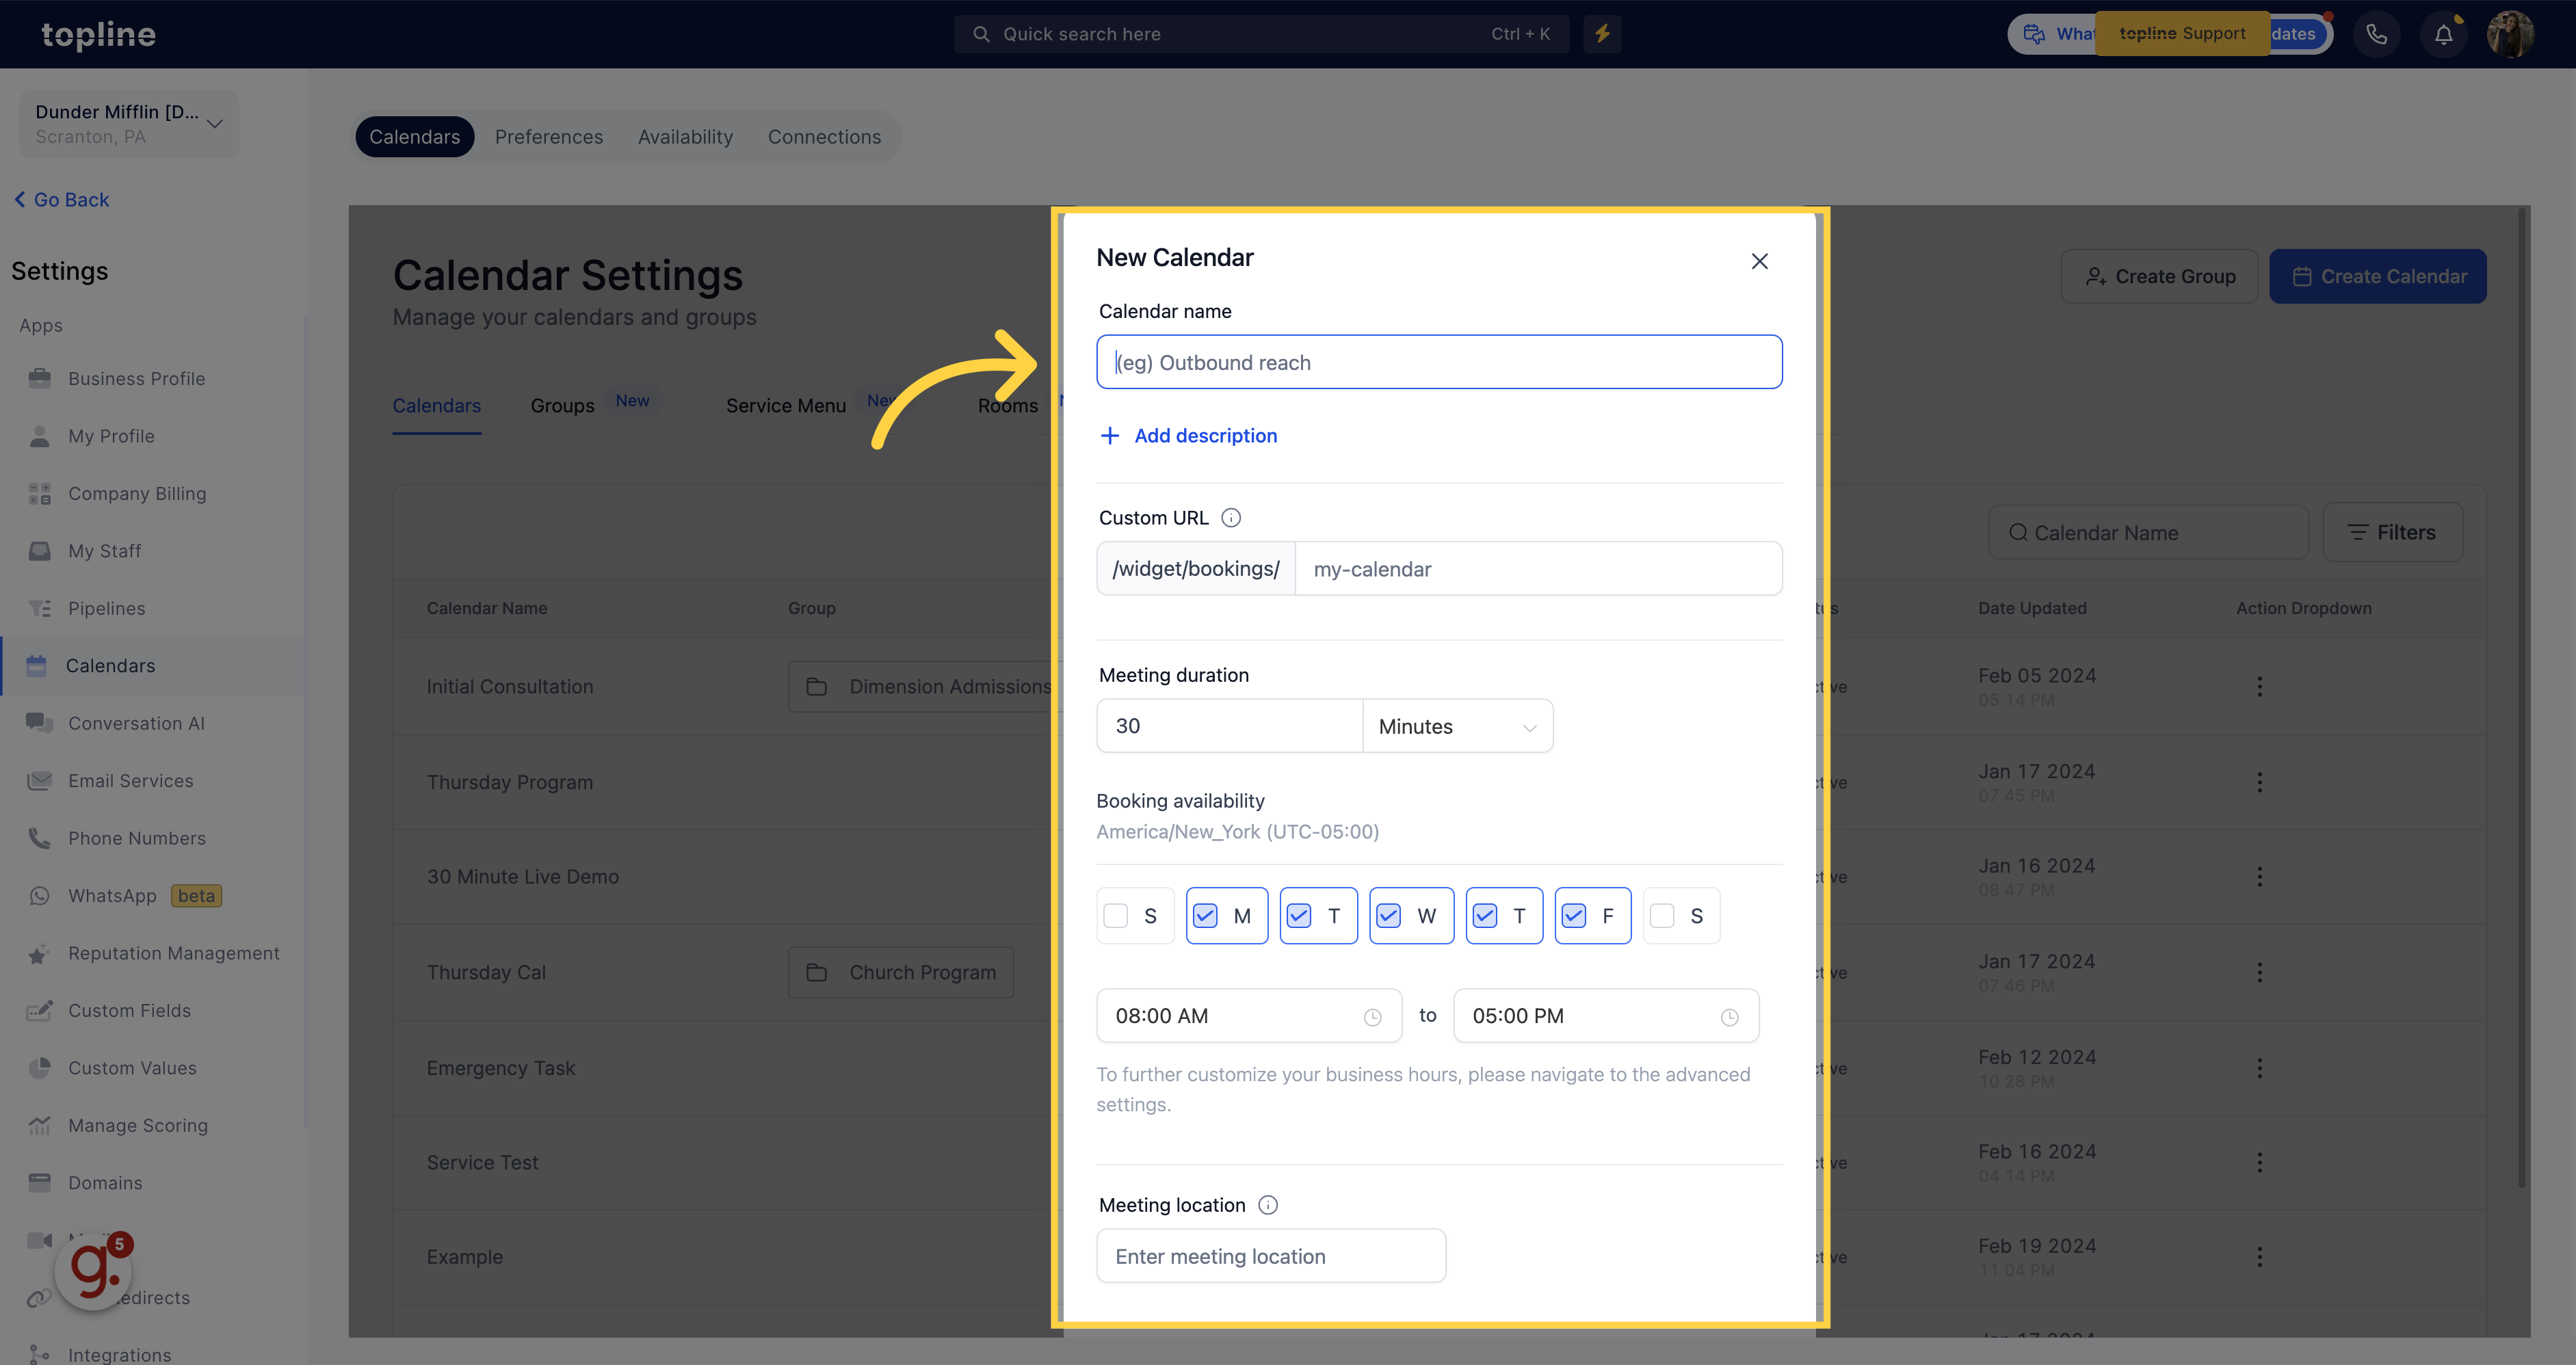
A pop up window will appear, fill out the fields, and go to advanced settings.
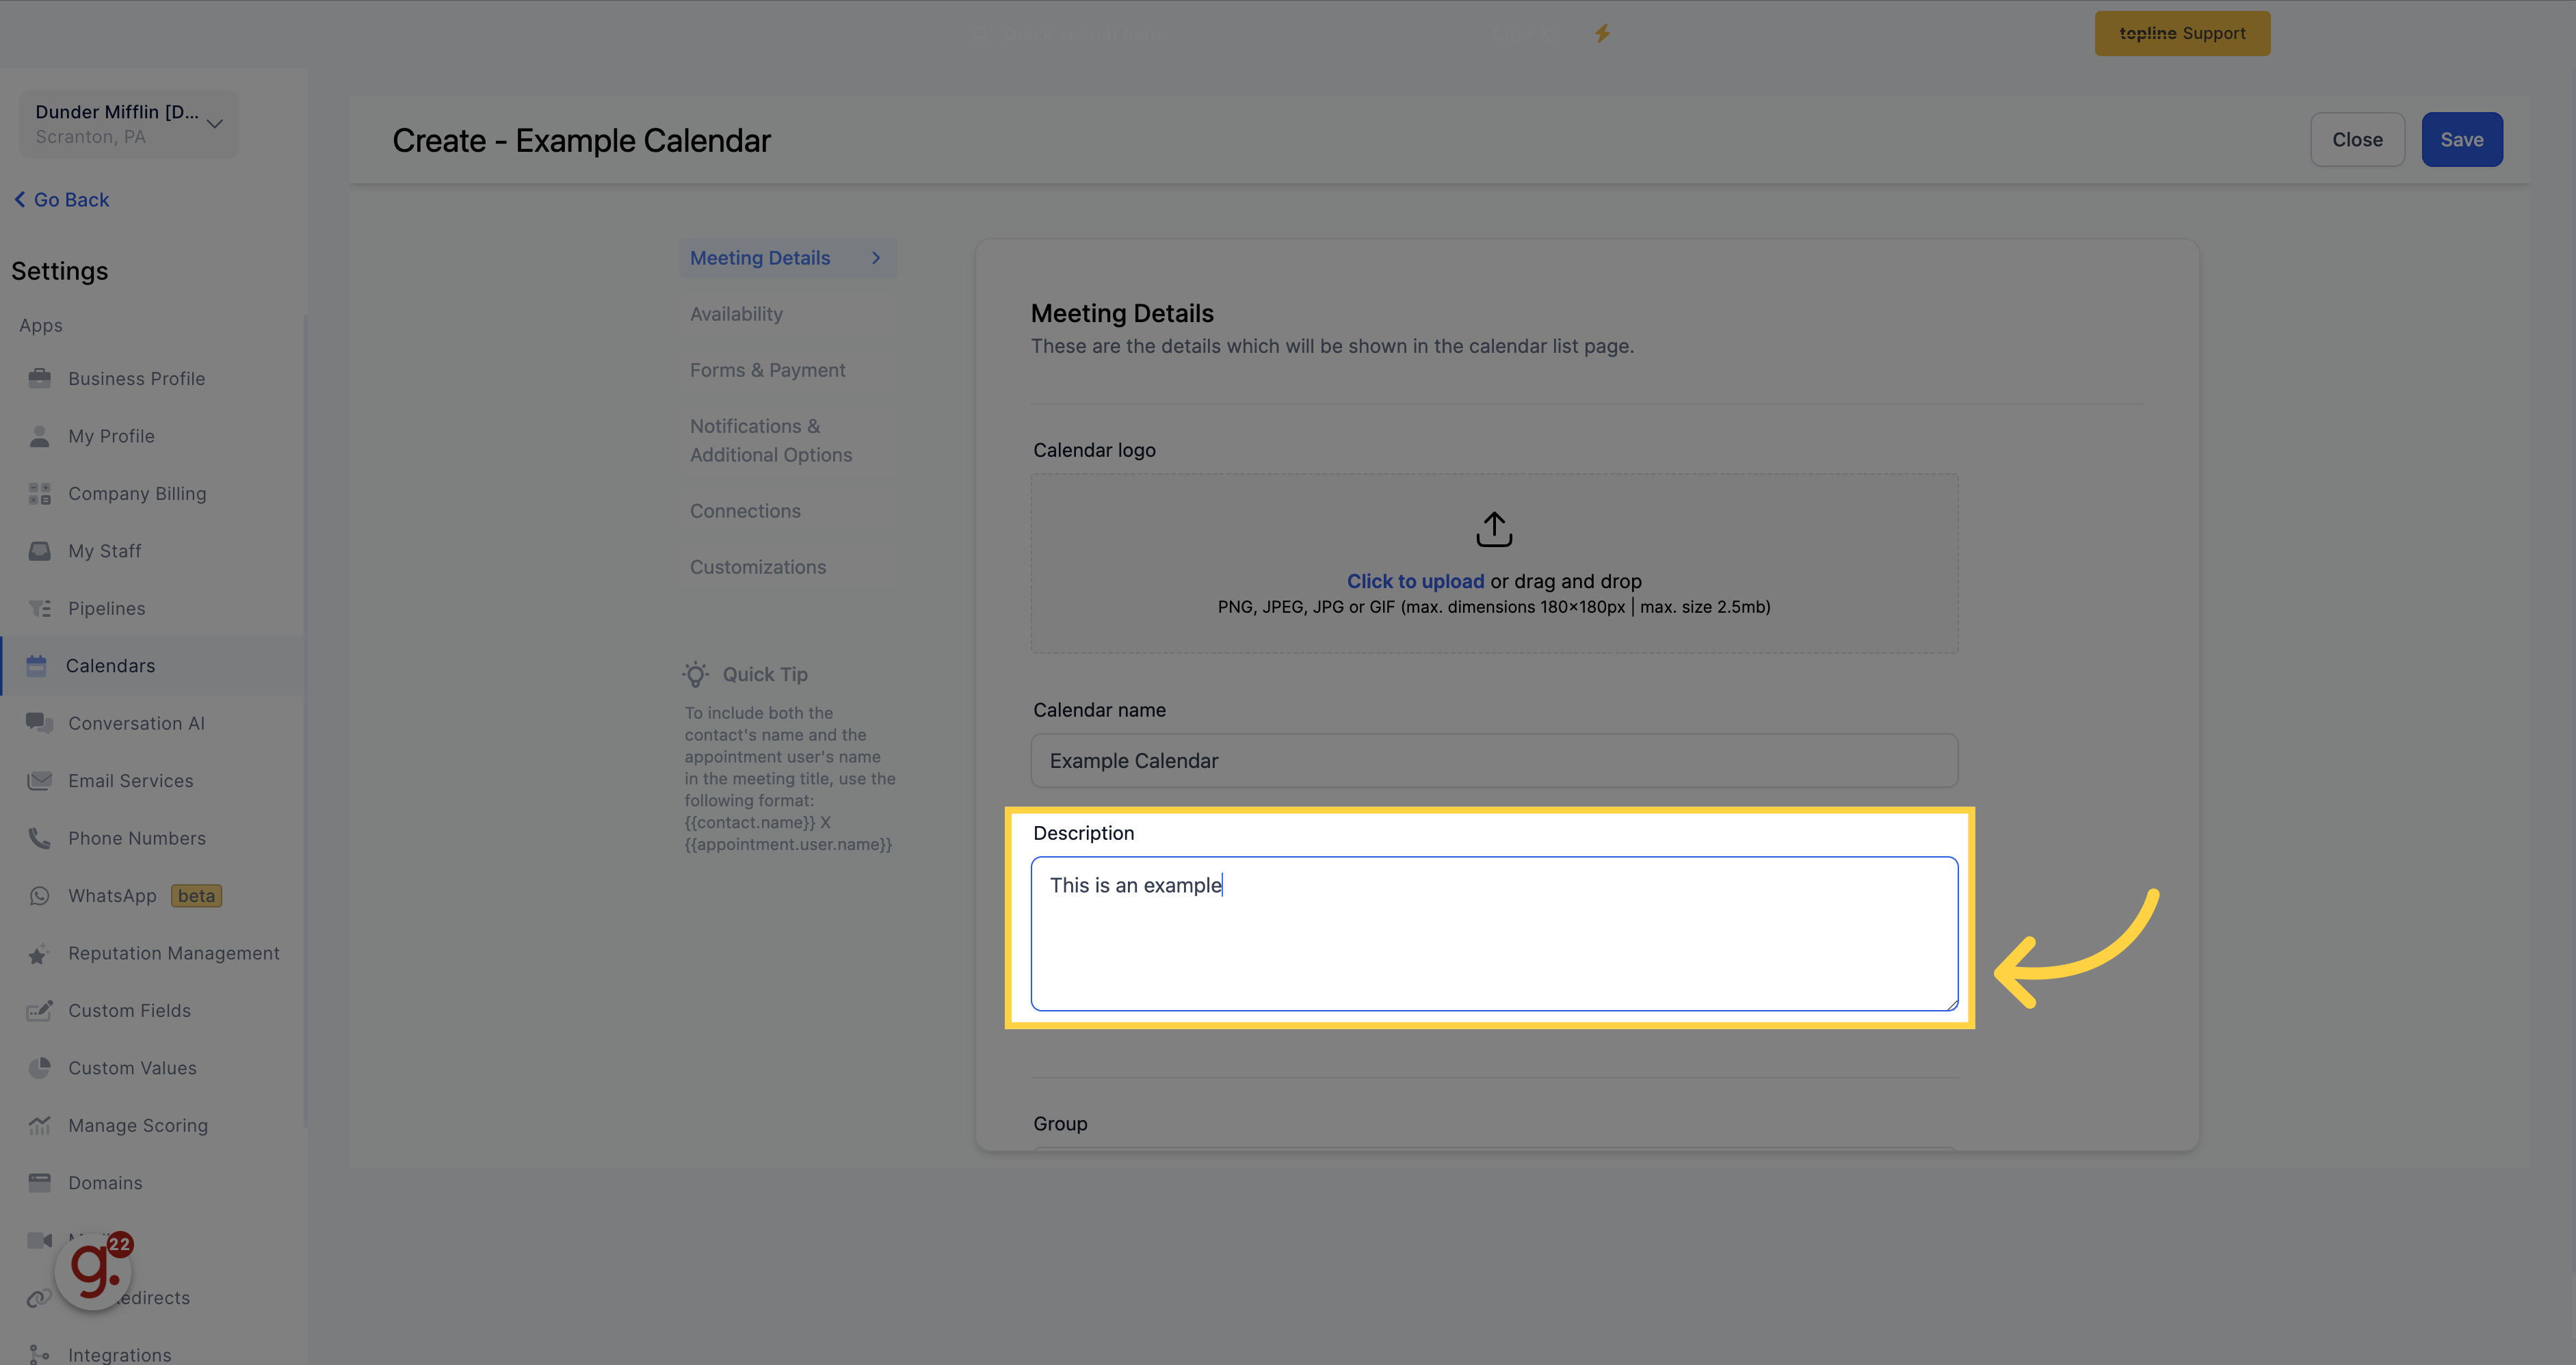
Here you can customize the details which will be shown in the calendar list page.
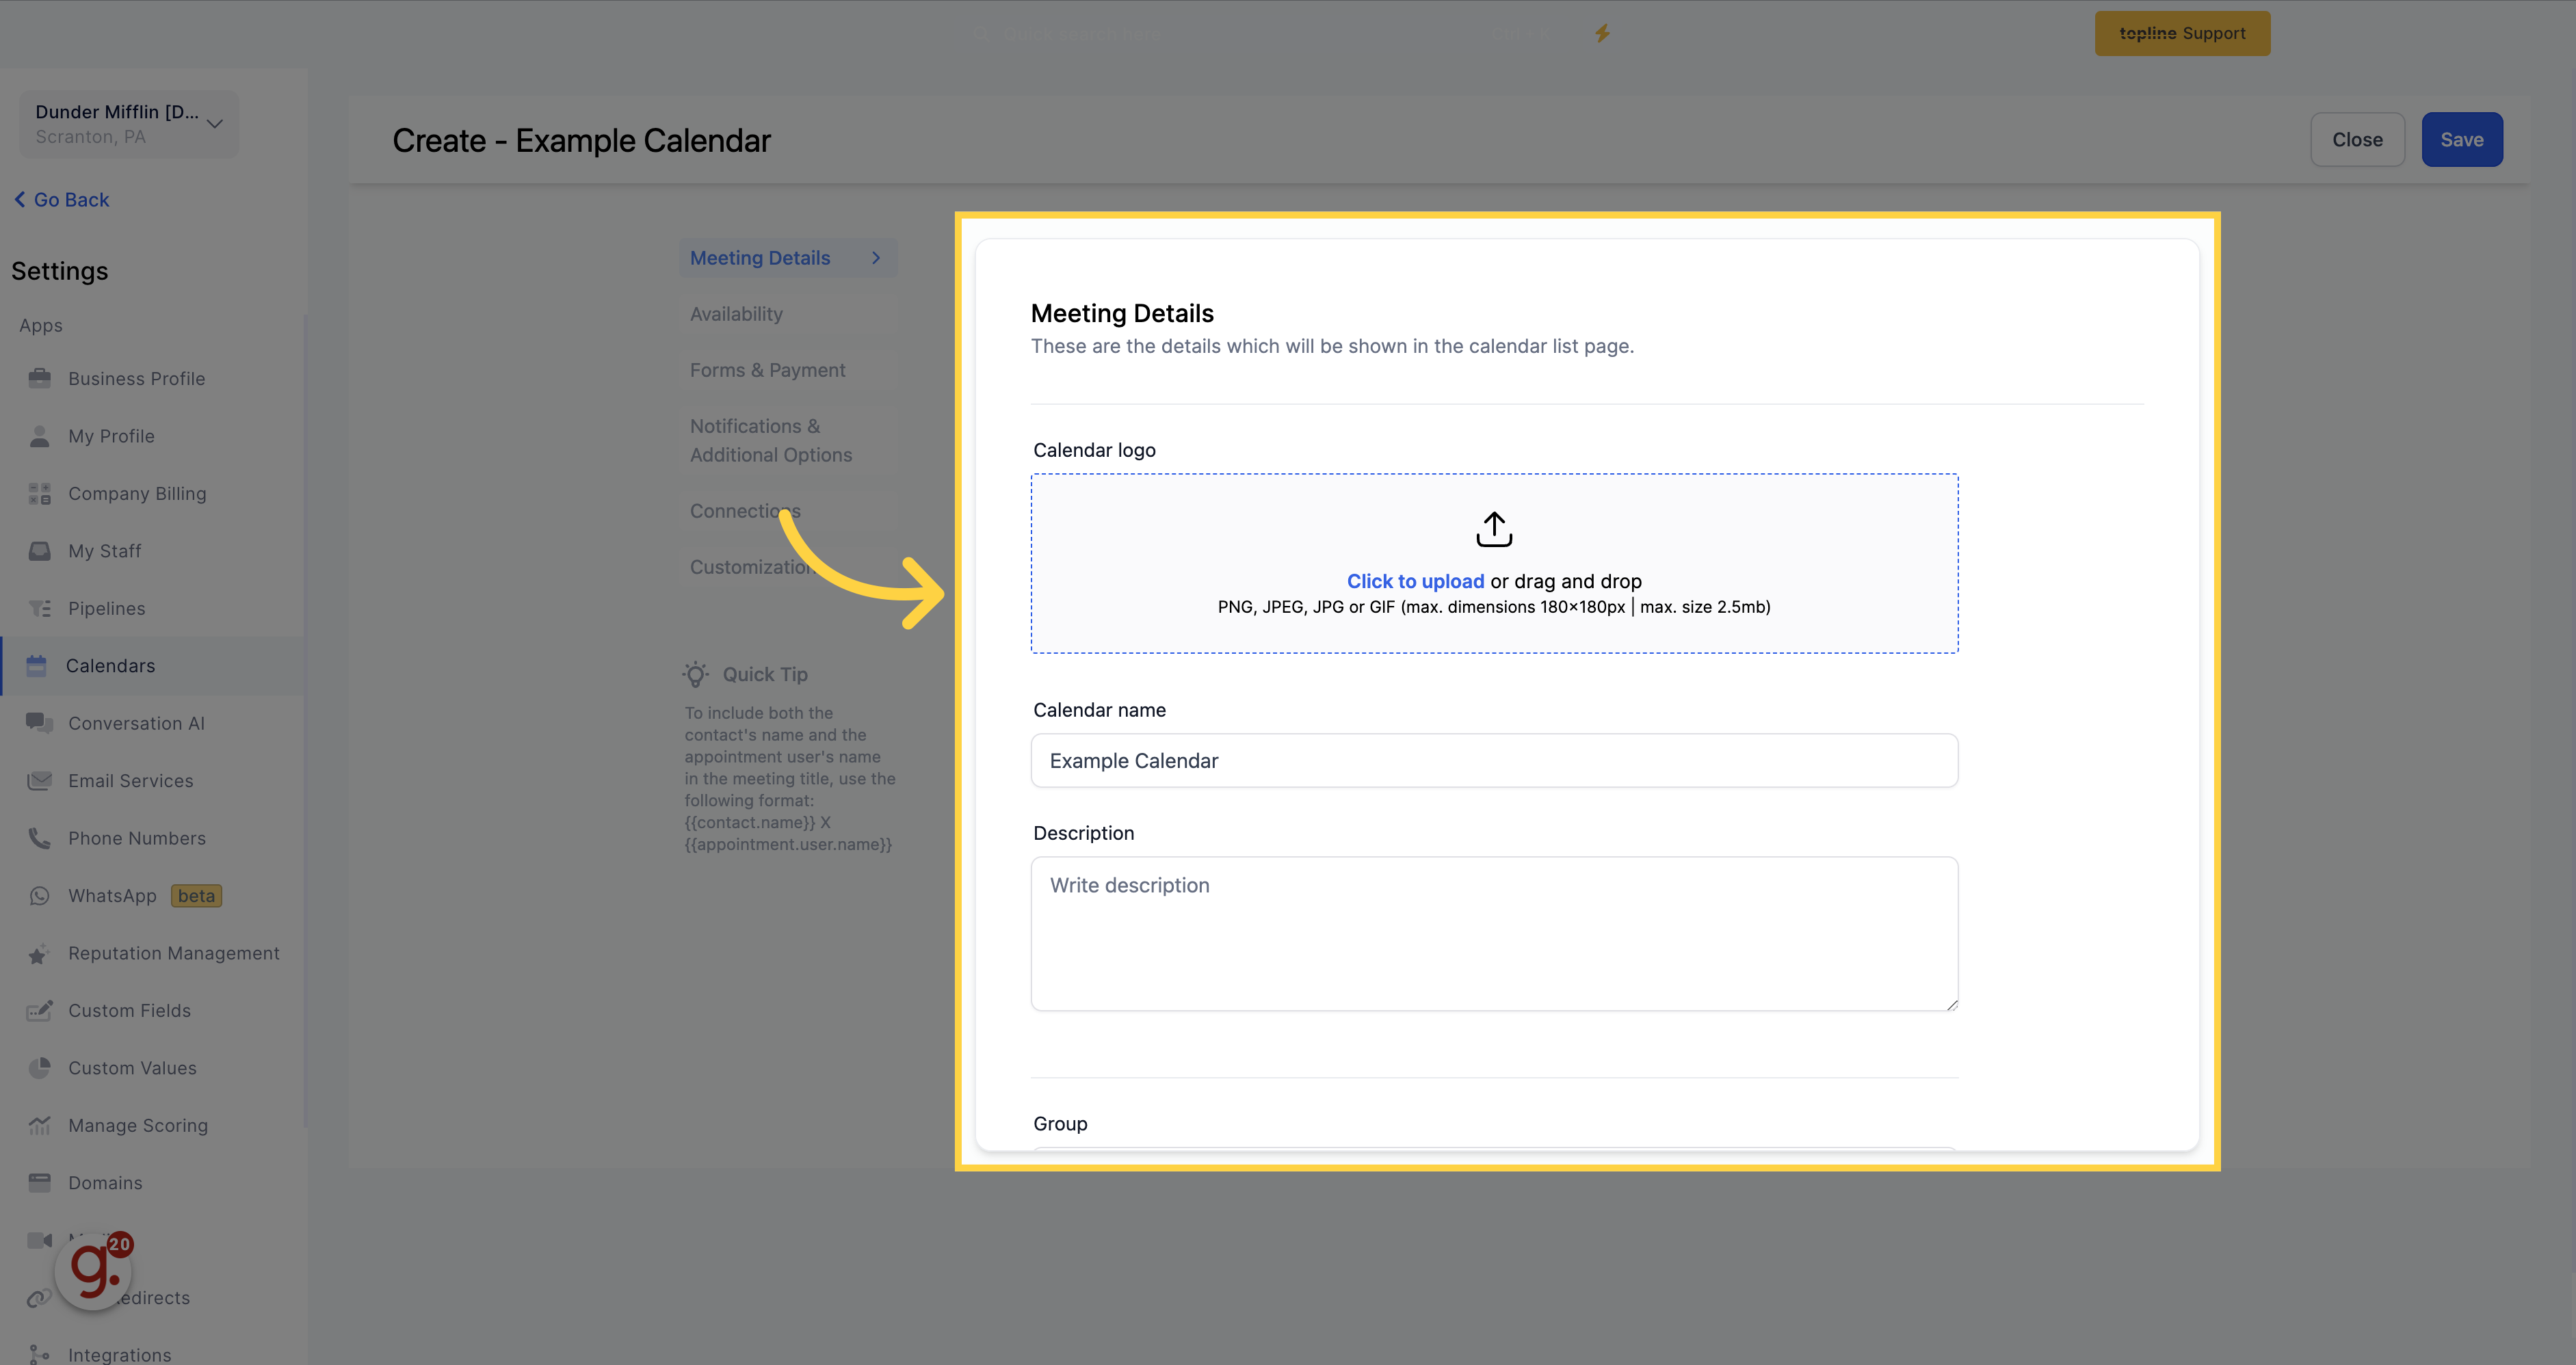
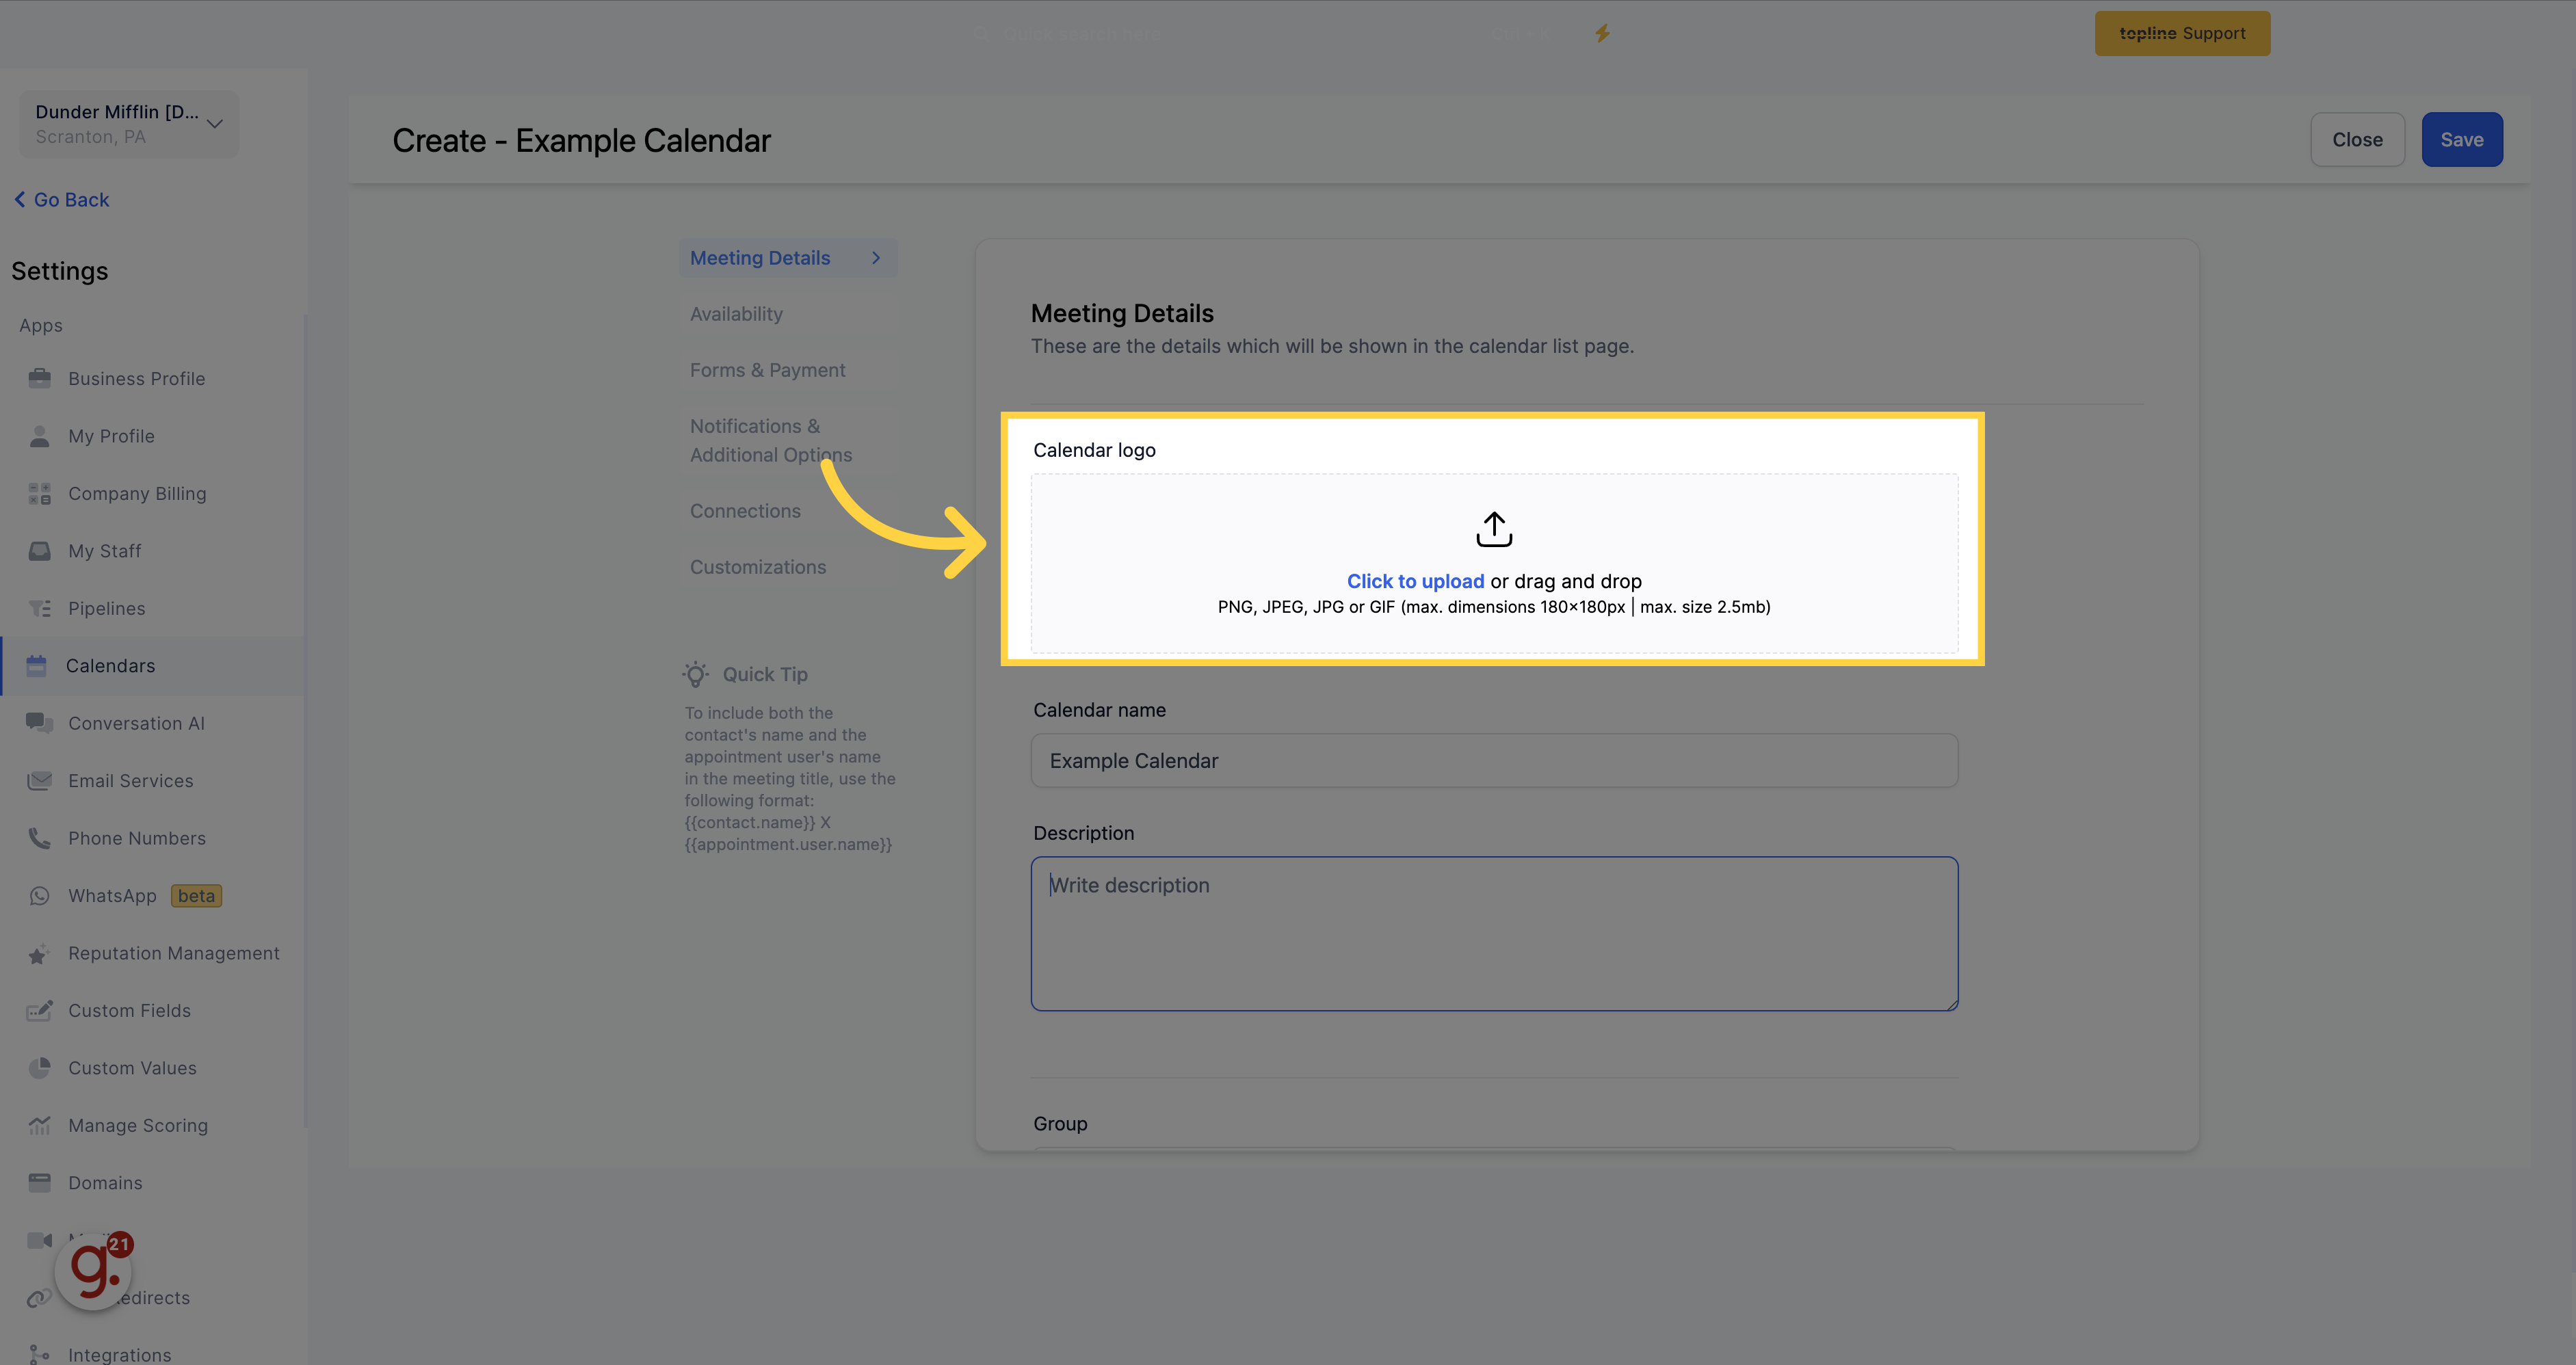
Click on this option to upload a file. It can be PNG, JPEG, JPG, or GIF.
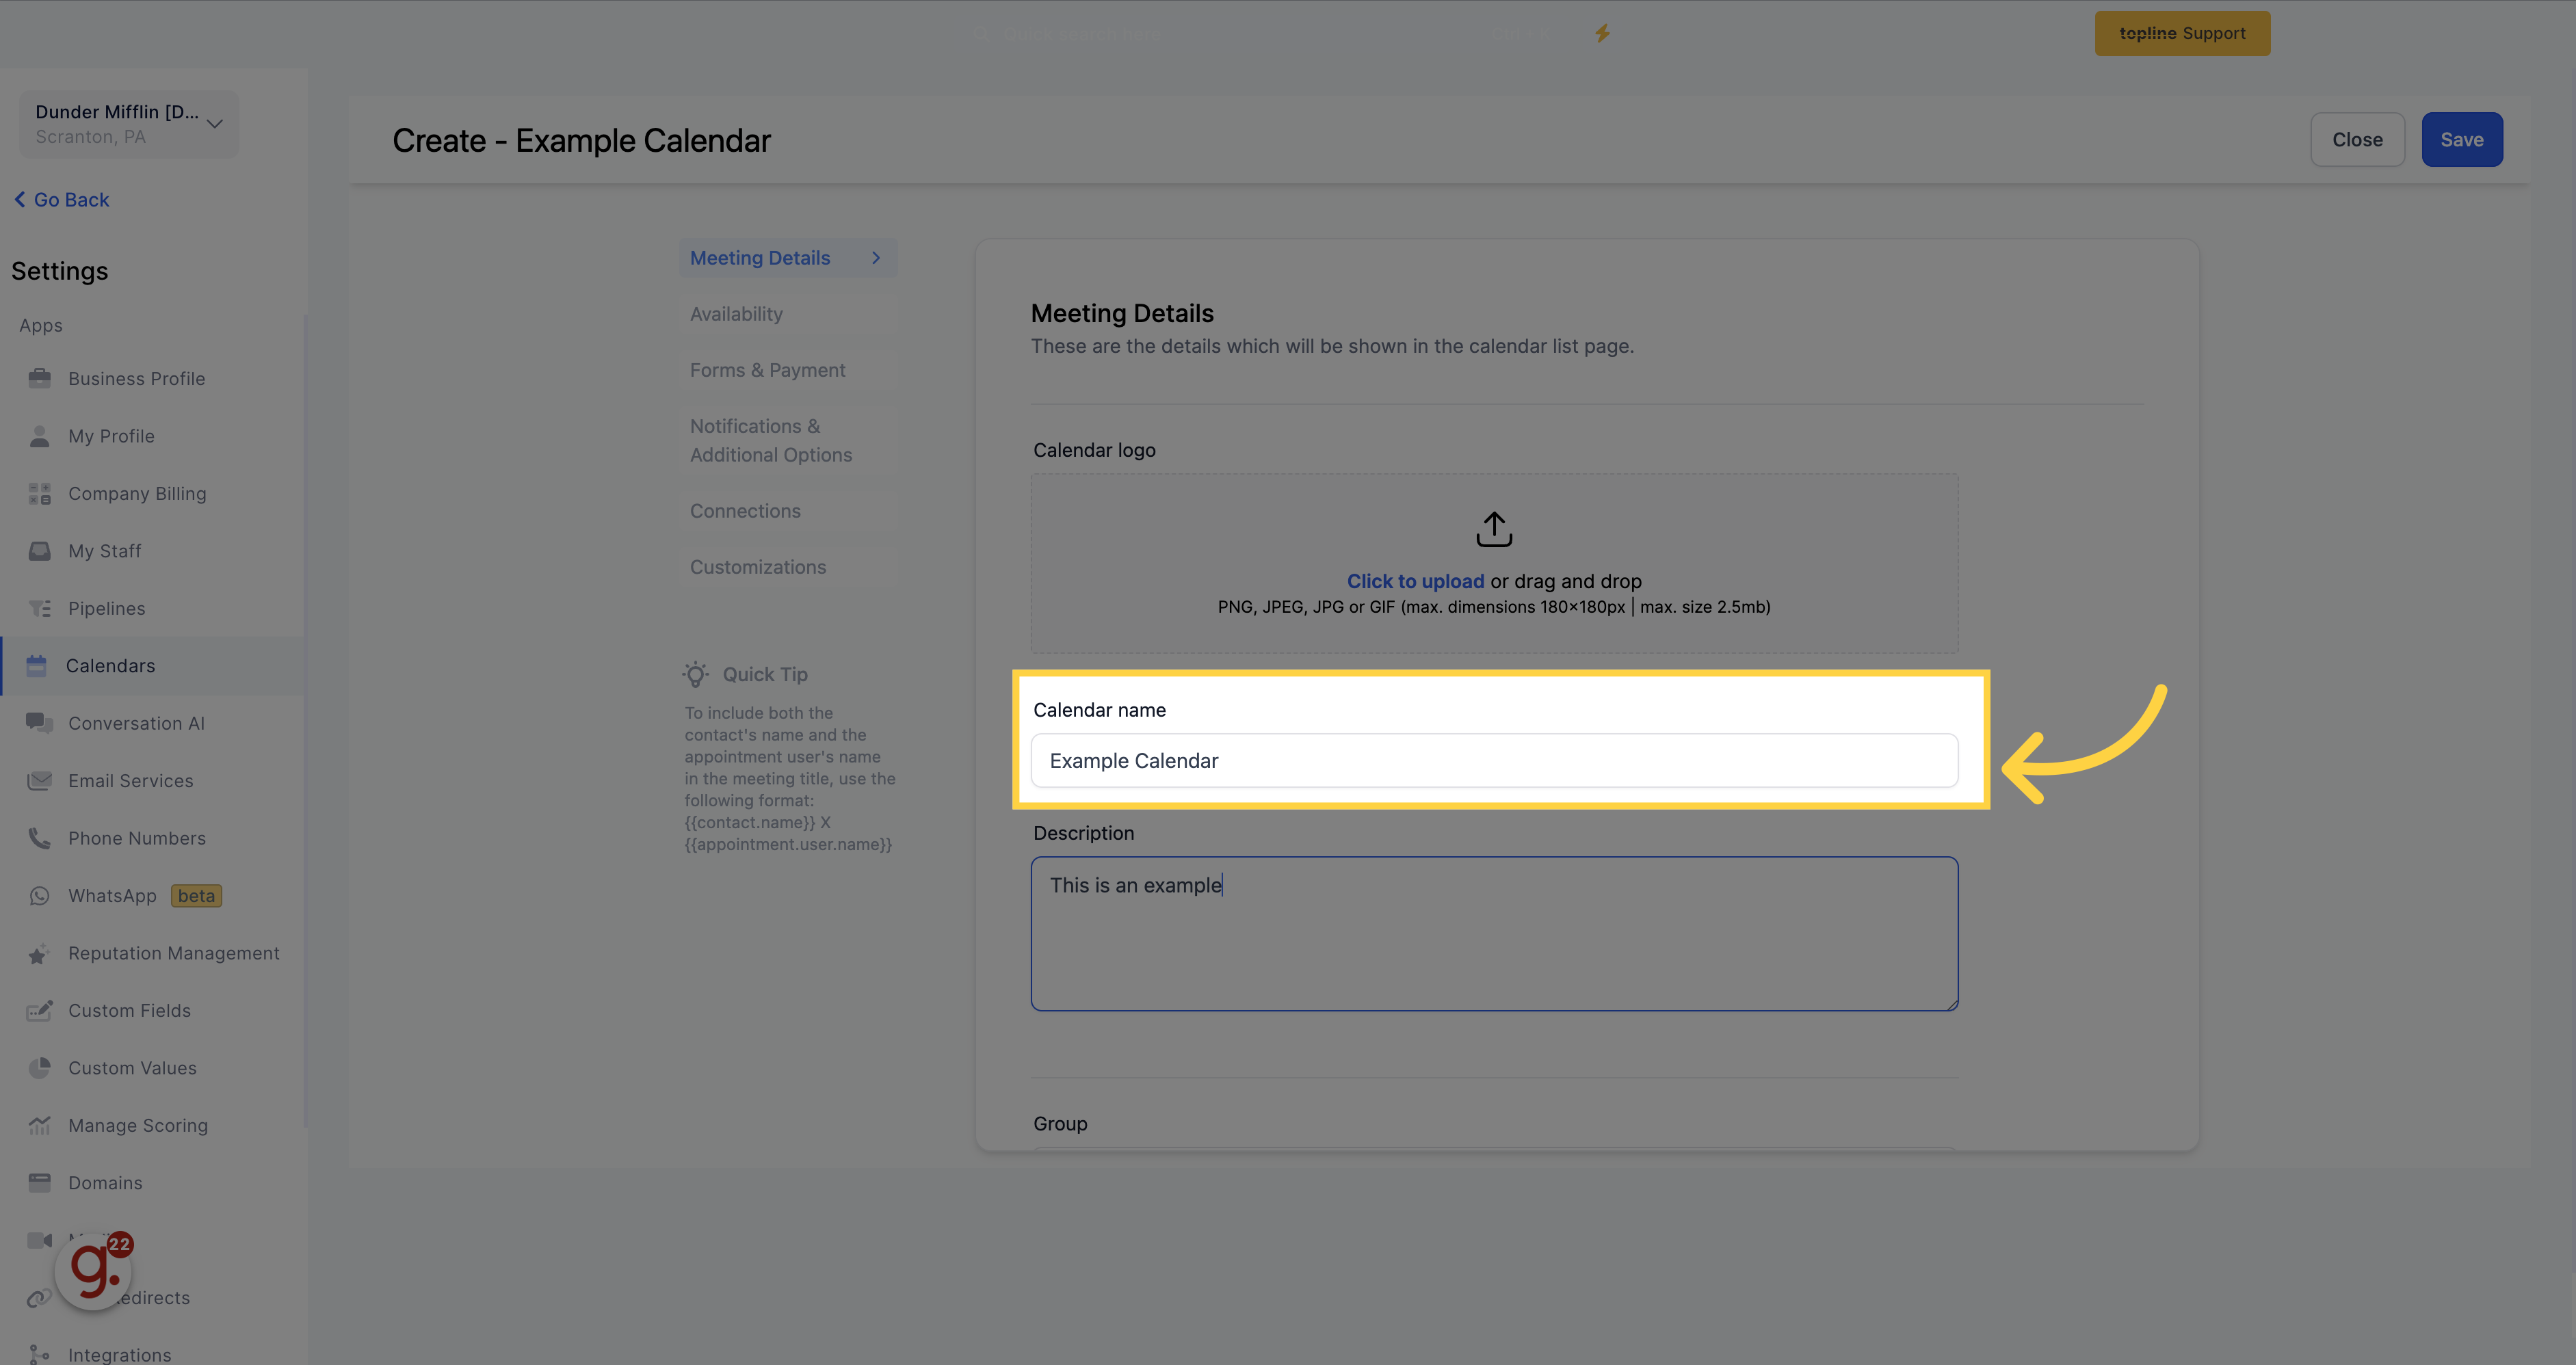
Name your calendar to provide leads and customers with a clear indication of the purpose for scheduling their appointment.
Provide more details about your calendar's topic and subject by adding a description. This description will be visible to anyone scheduling an appointment.
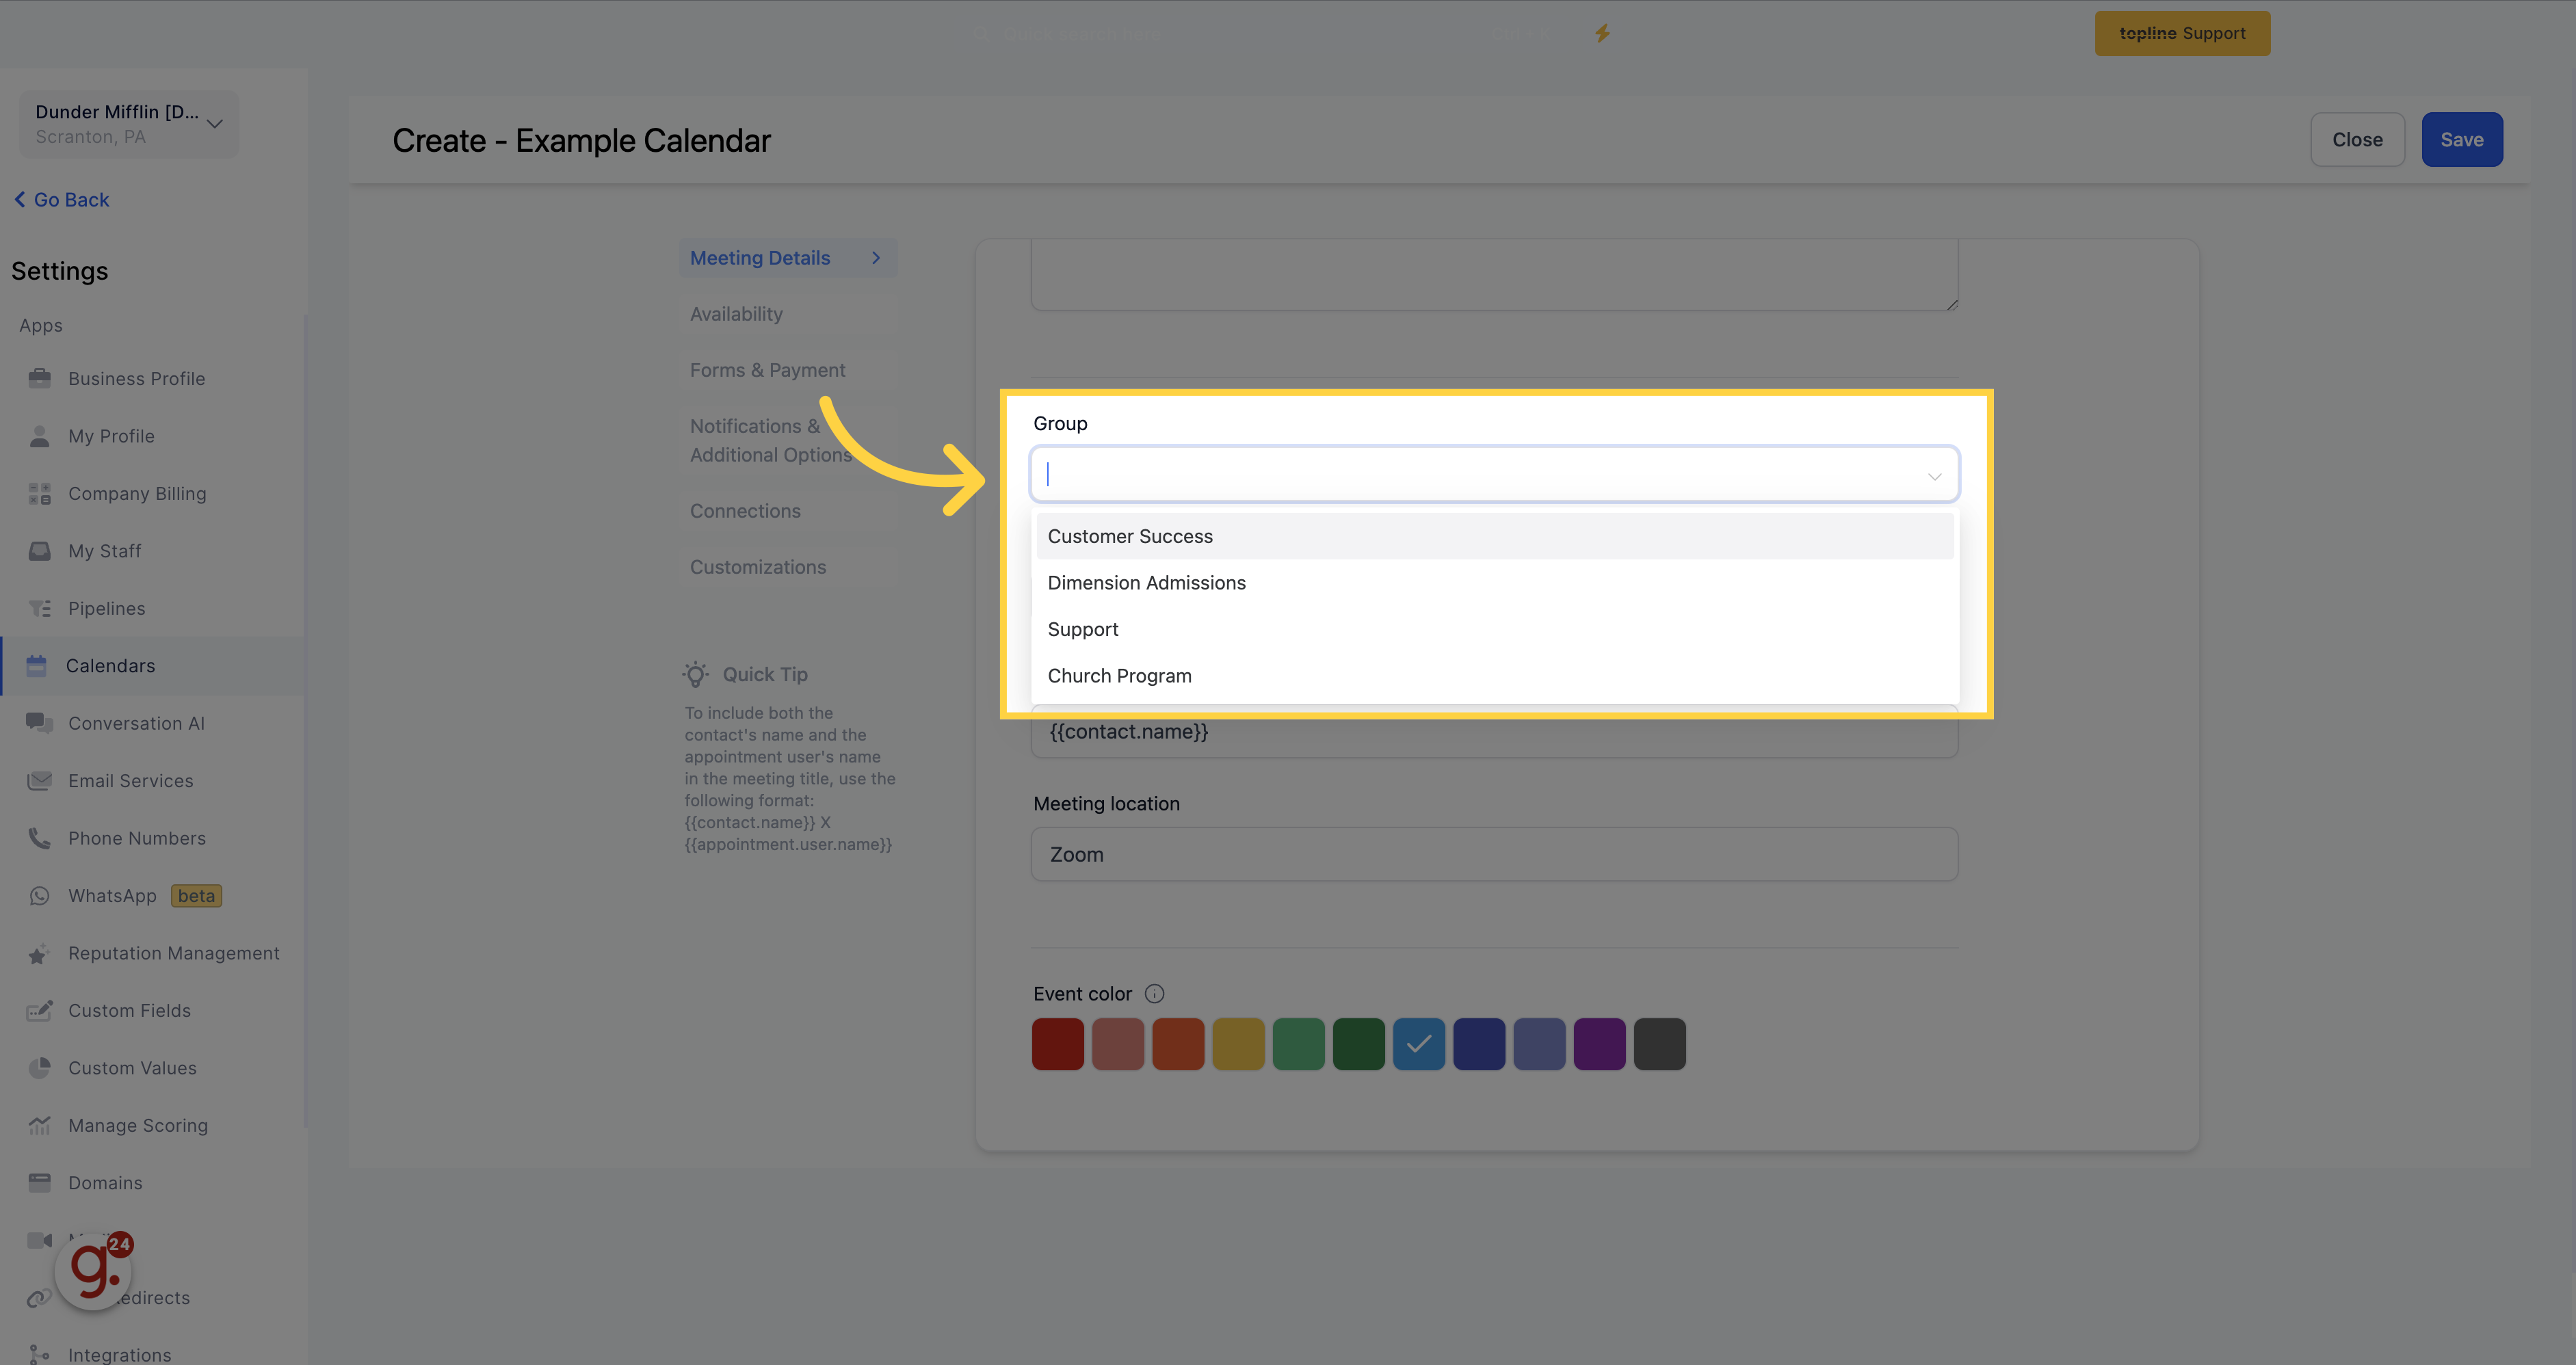
Select the group you want the calendar to belong.
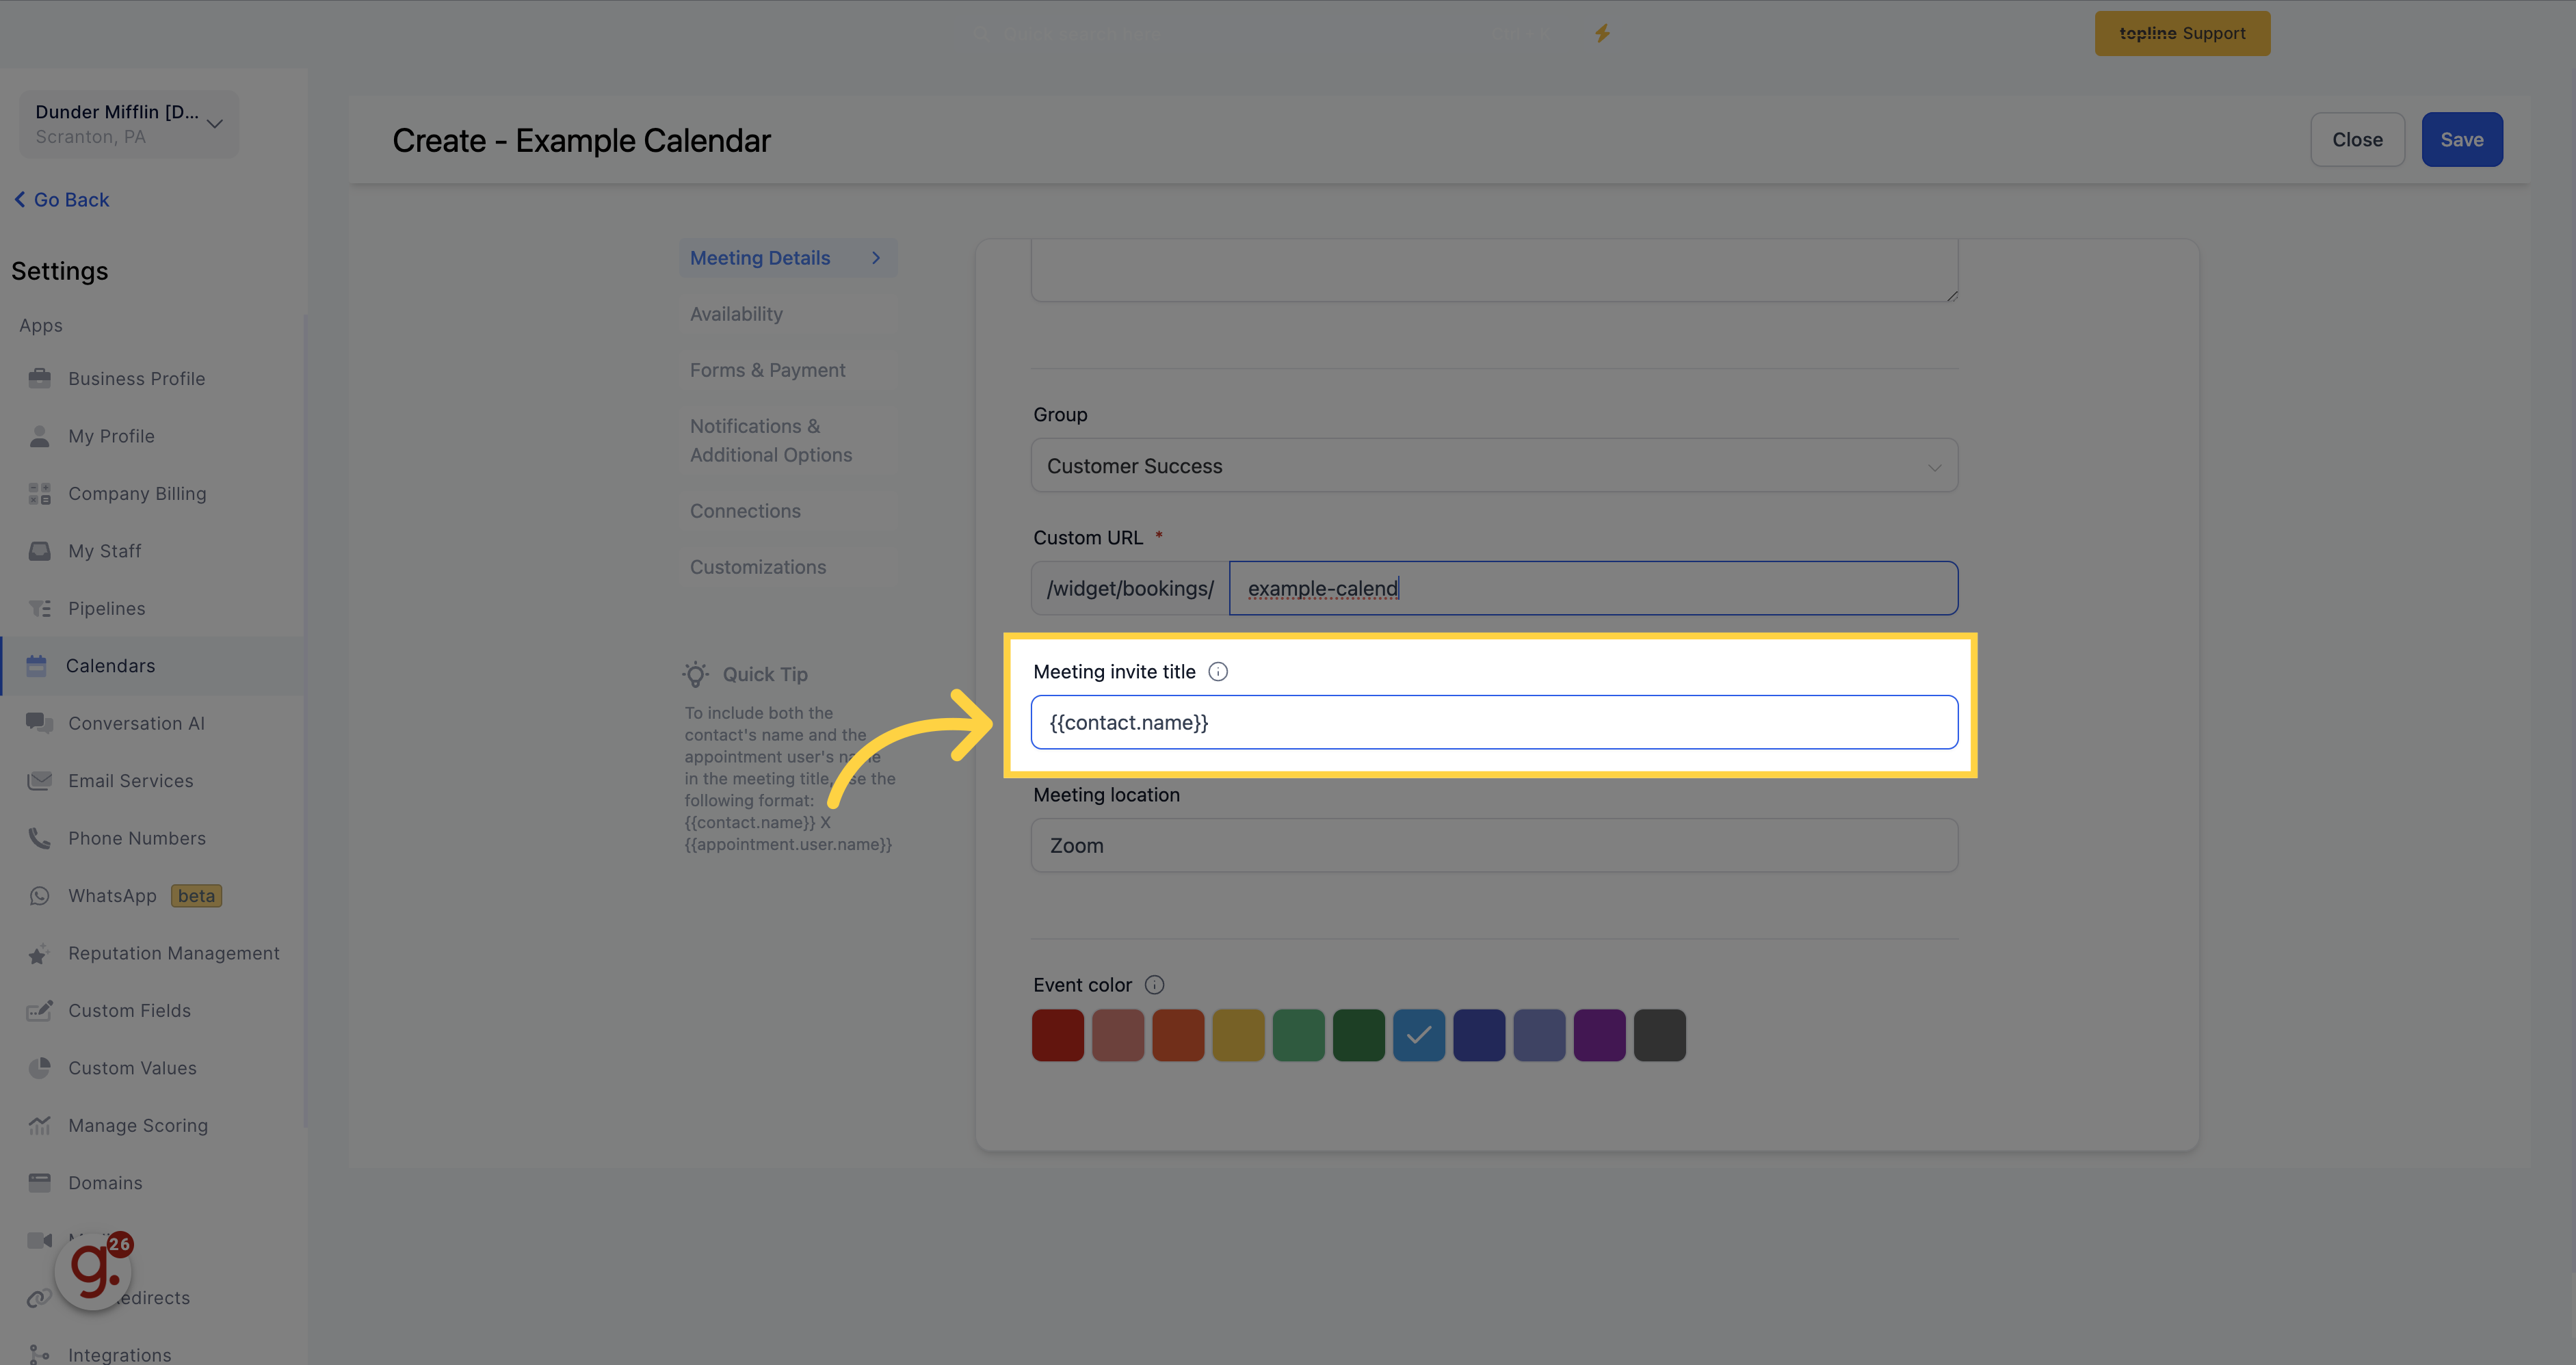
Create a calendar URL slug to help identifies your calendar. This can be done by typing in the desired slug in the provided text box.

Choose a clear and specific appointment title that will be added to your calendar and confirmation emails when a lead/customer schedules an appointment.
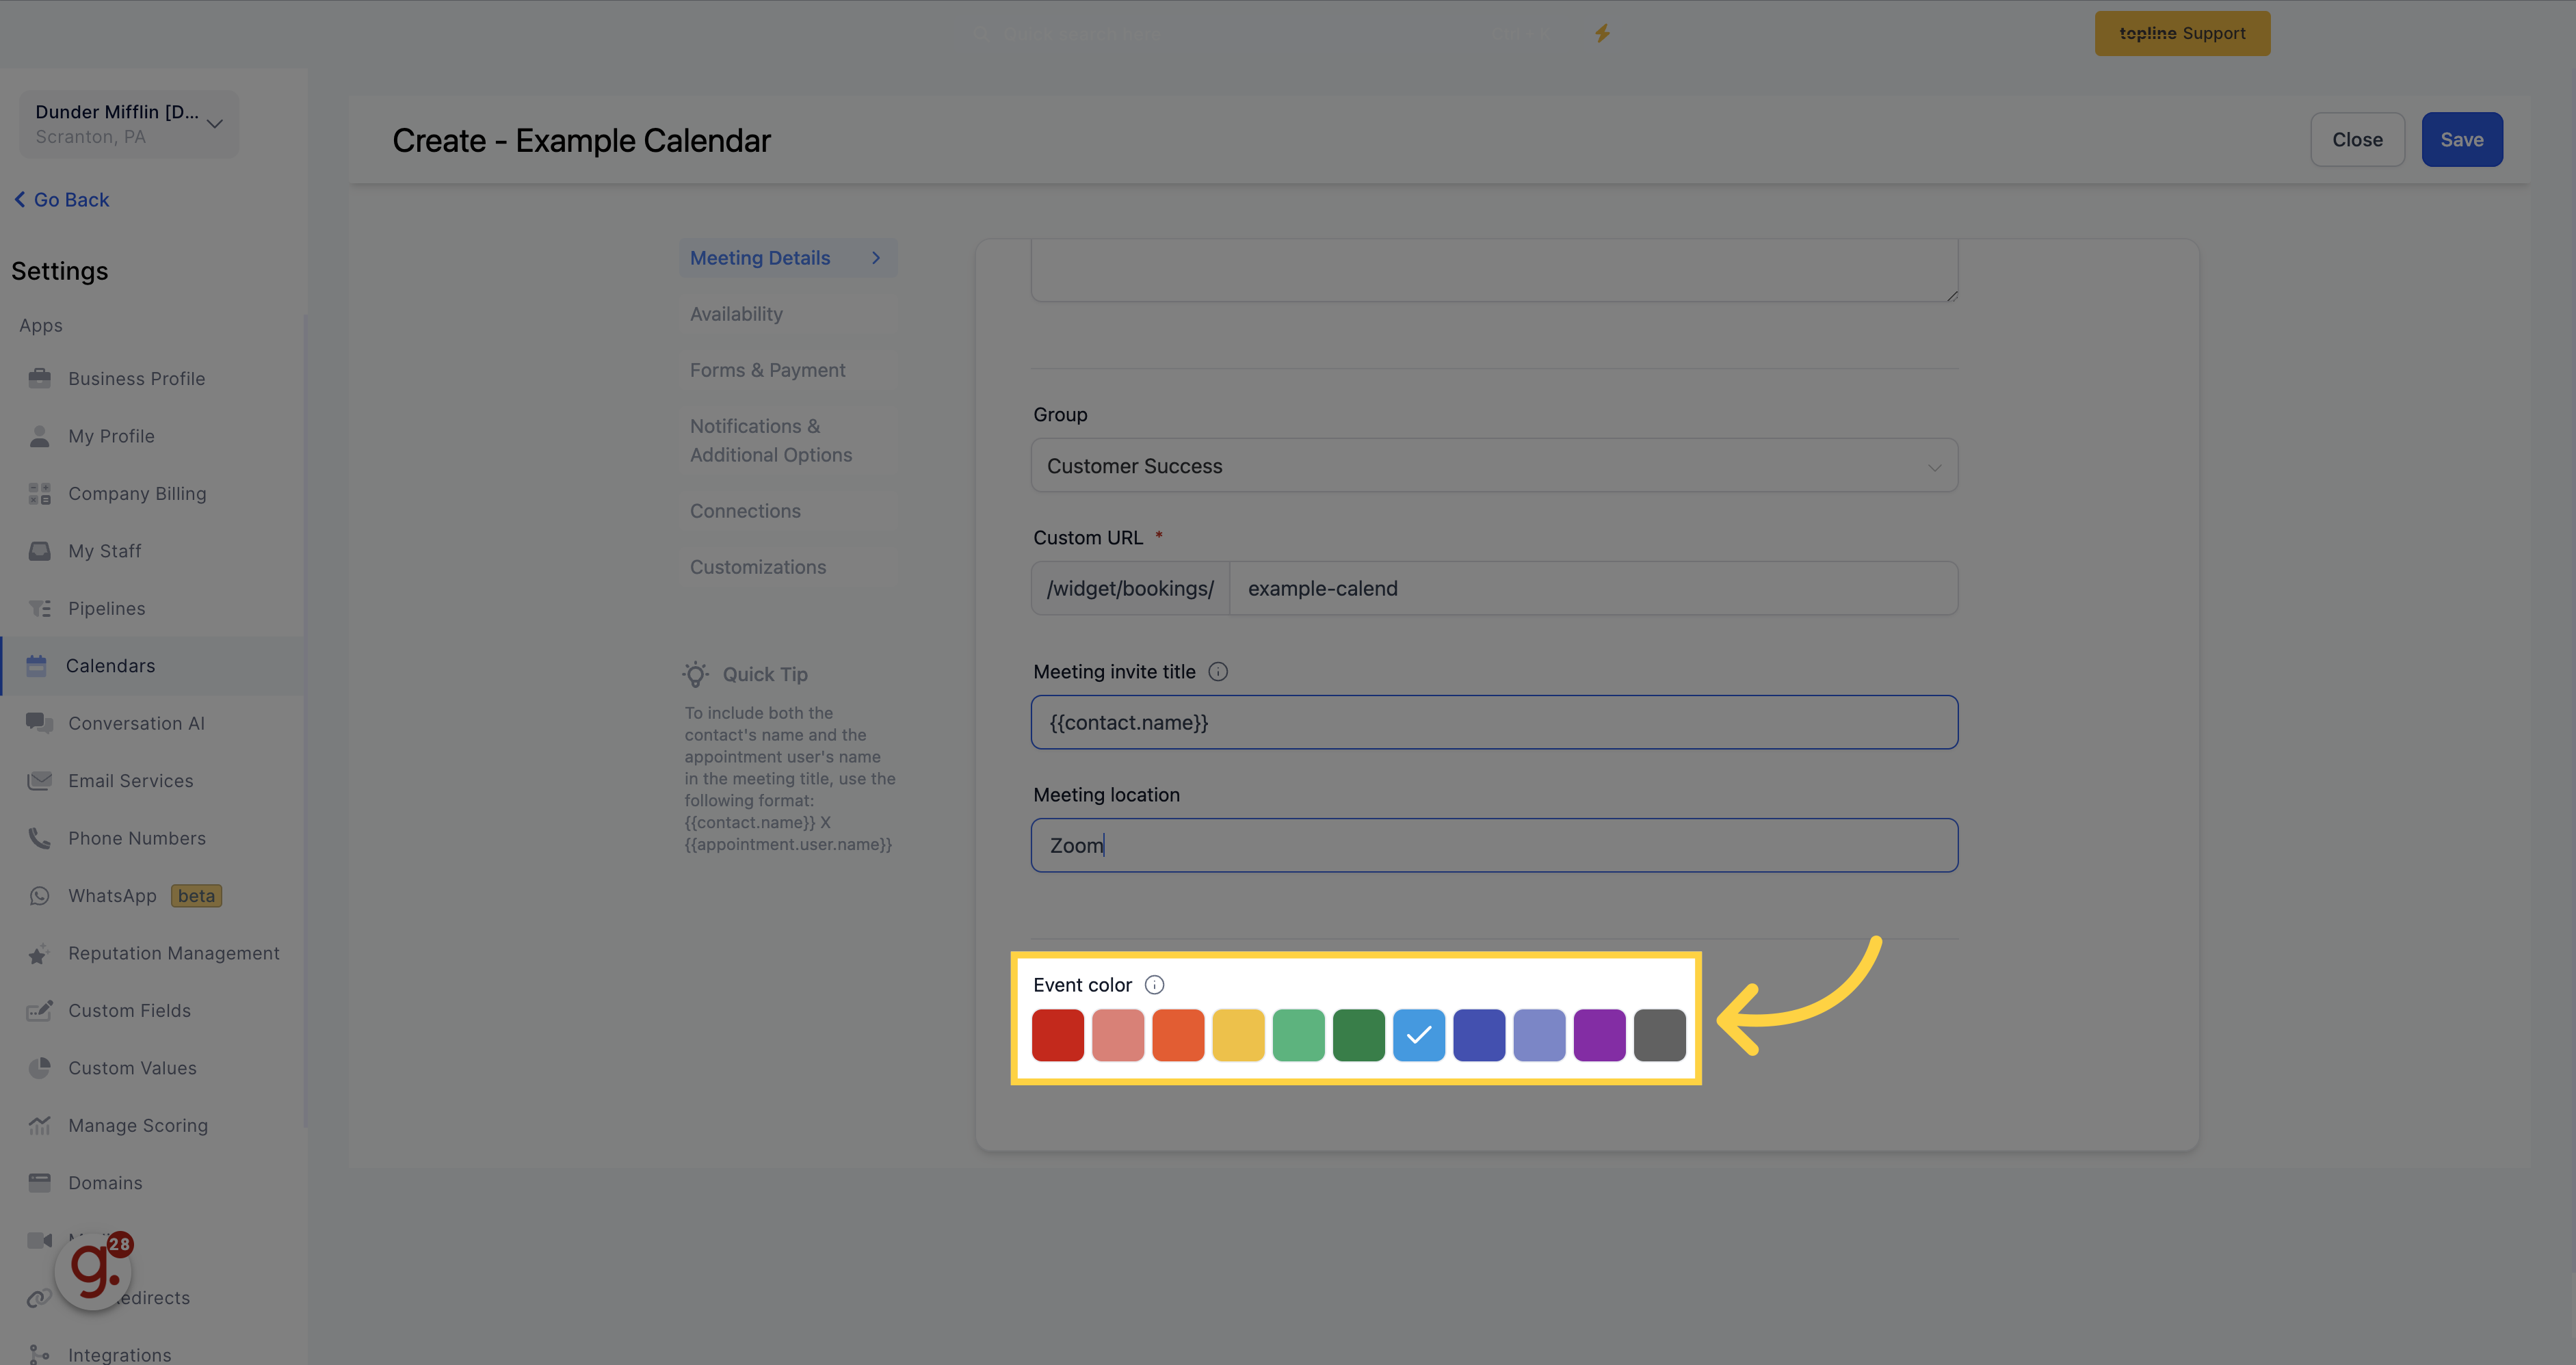
Select an event color to make your meetings and events easier to identify and organize. This color will also be synced to your Google Calendar. Simply click on the desired color to select or unselect it.
Pick a color for your calendar.
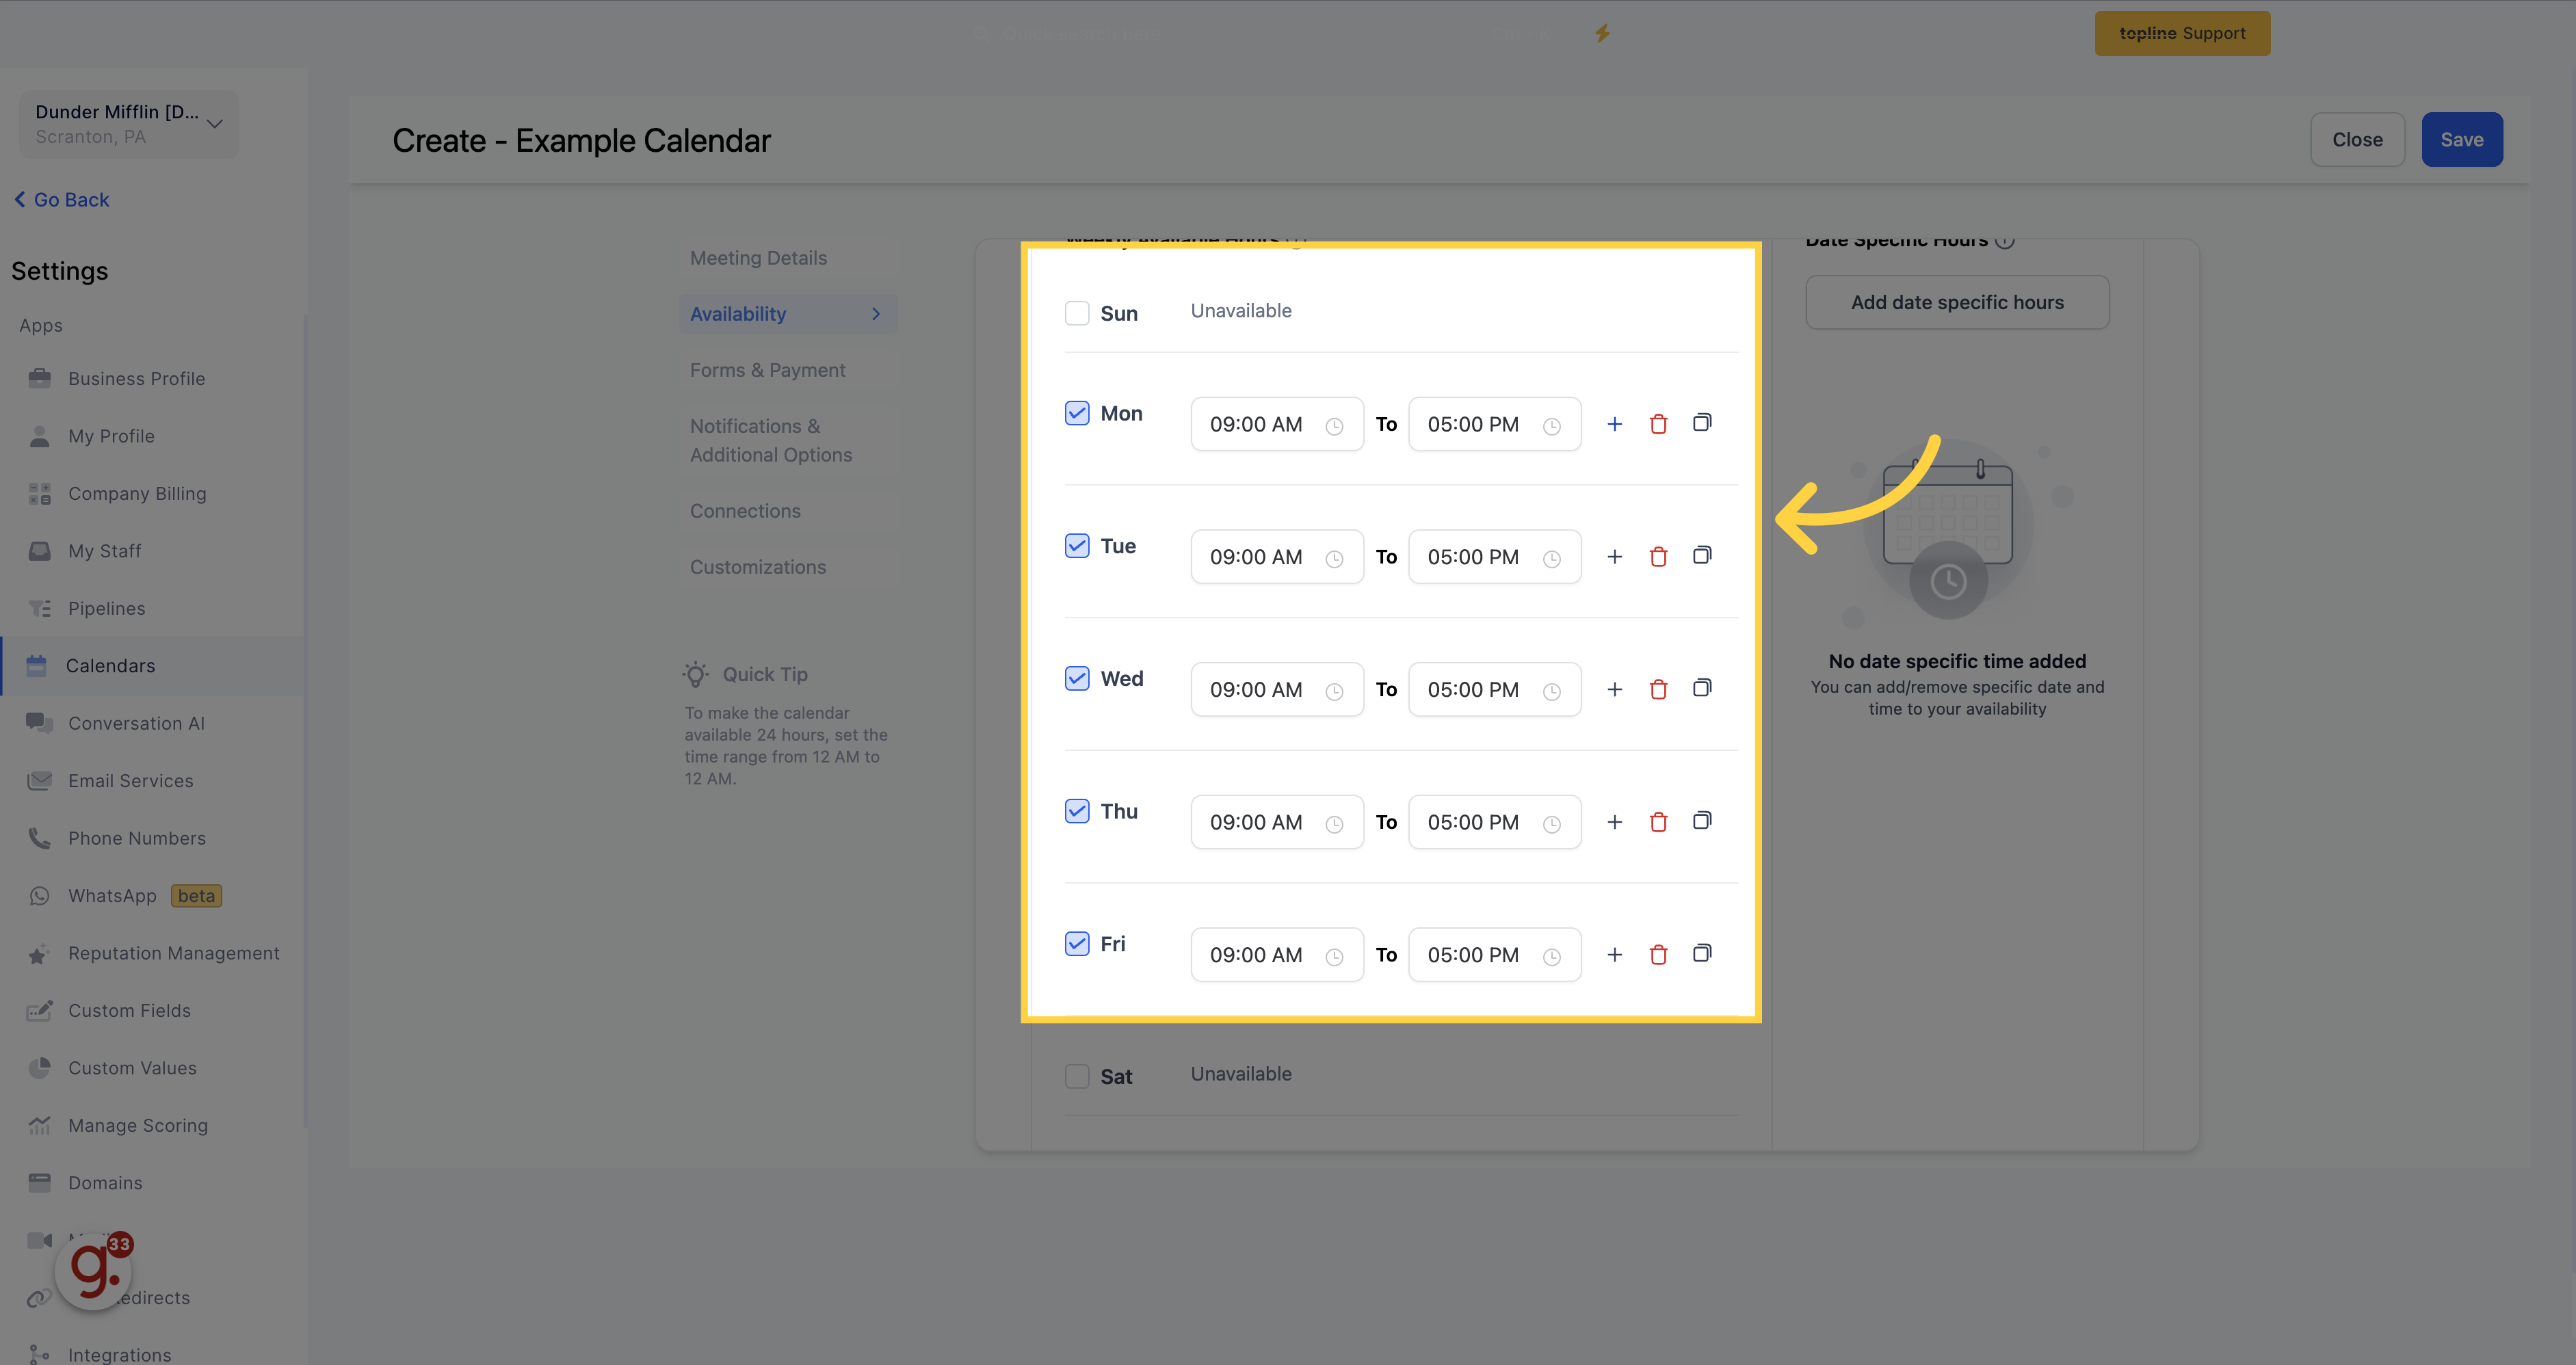
Select your preferred days and times available for people to schedule on your calendar. Click on the buttons representing the days of the week to turn on (or off) availability for that day.
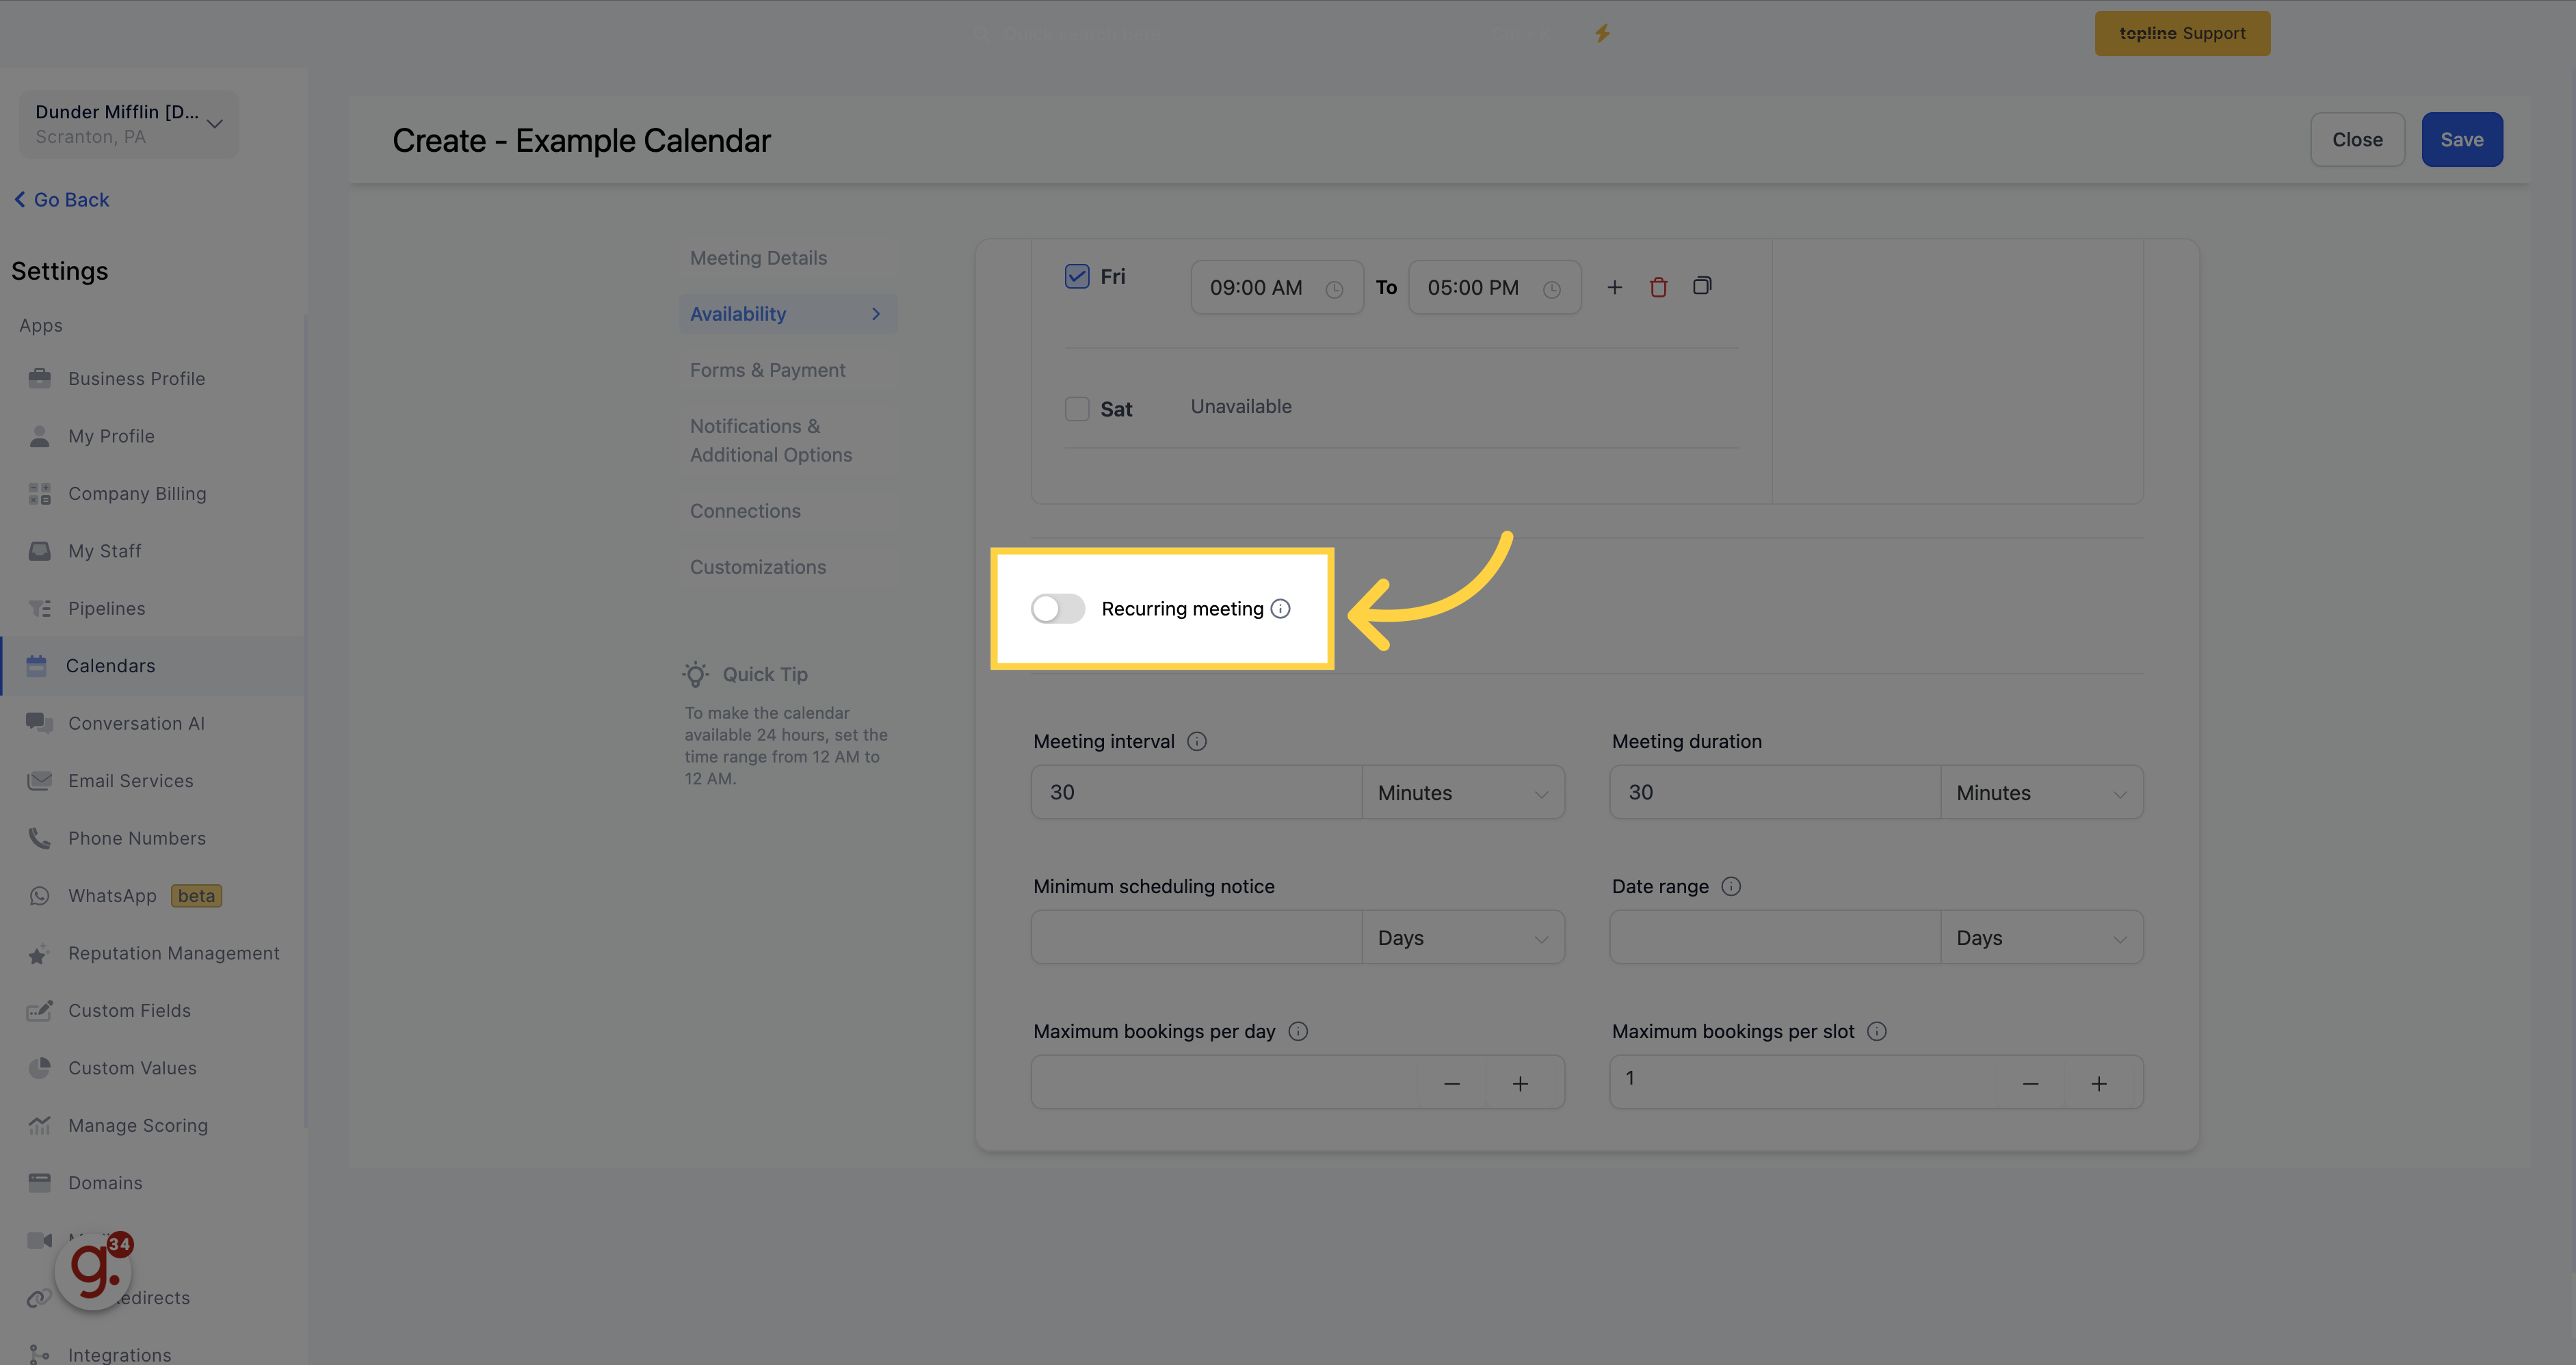
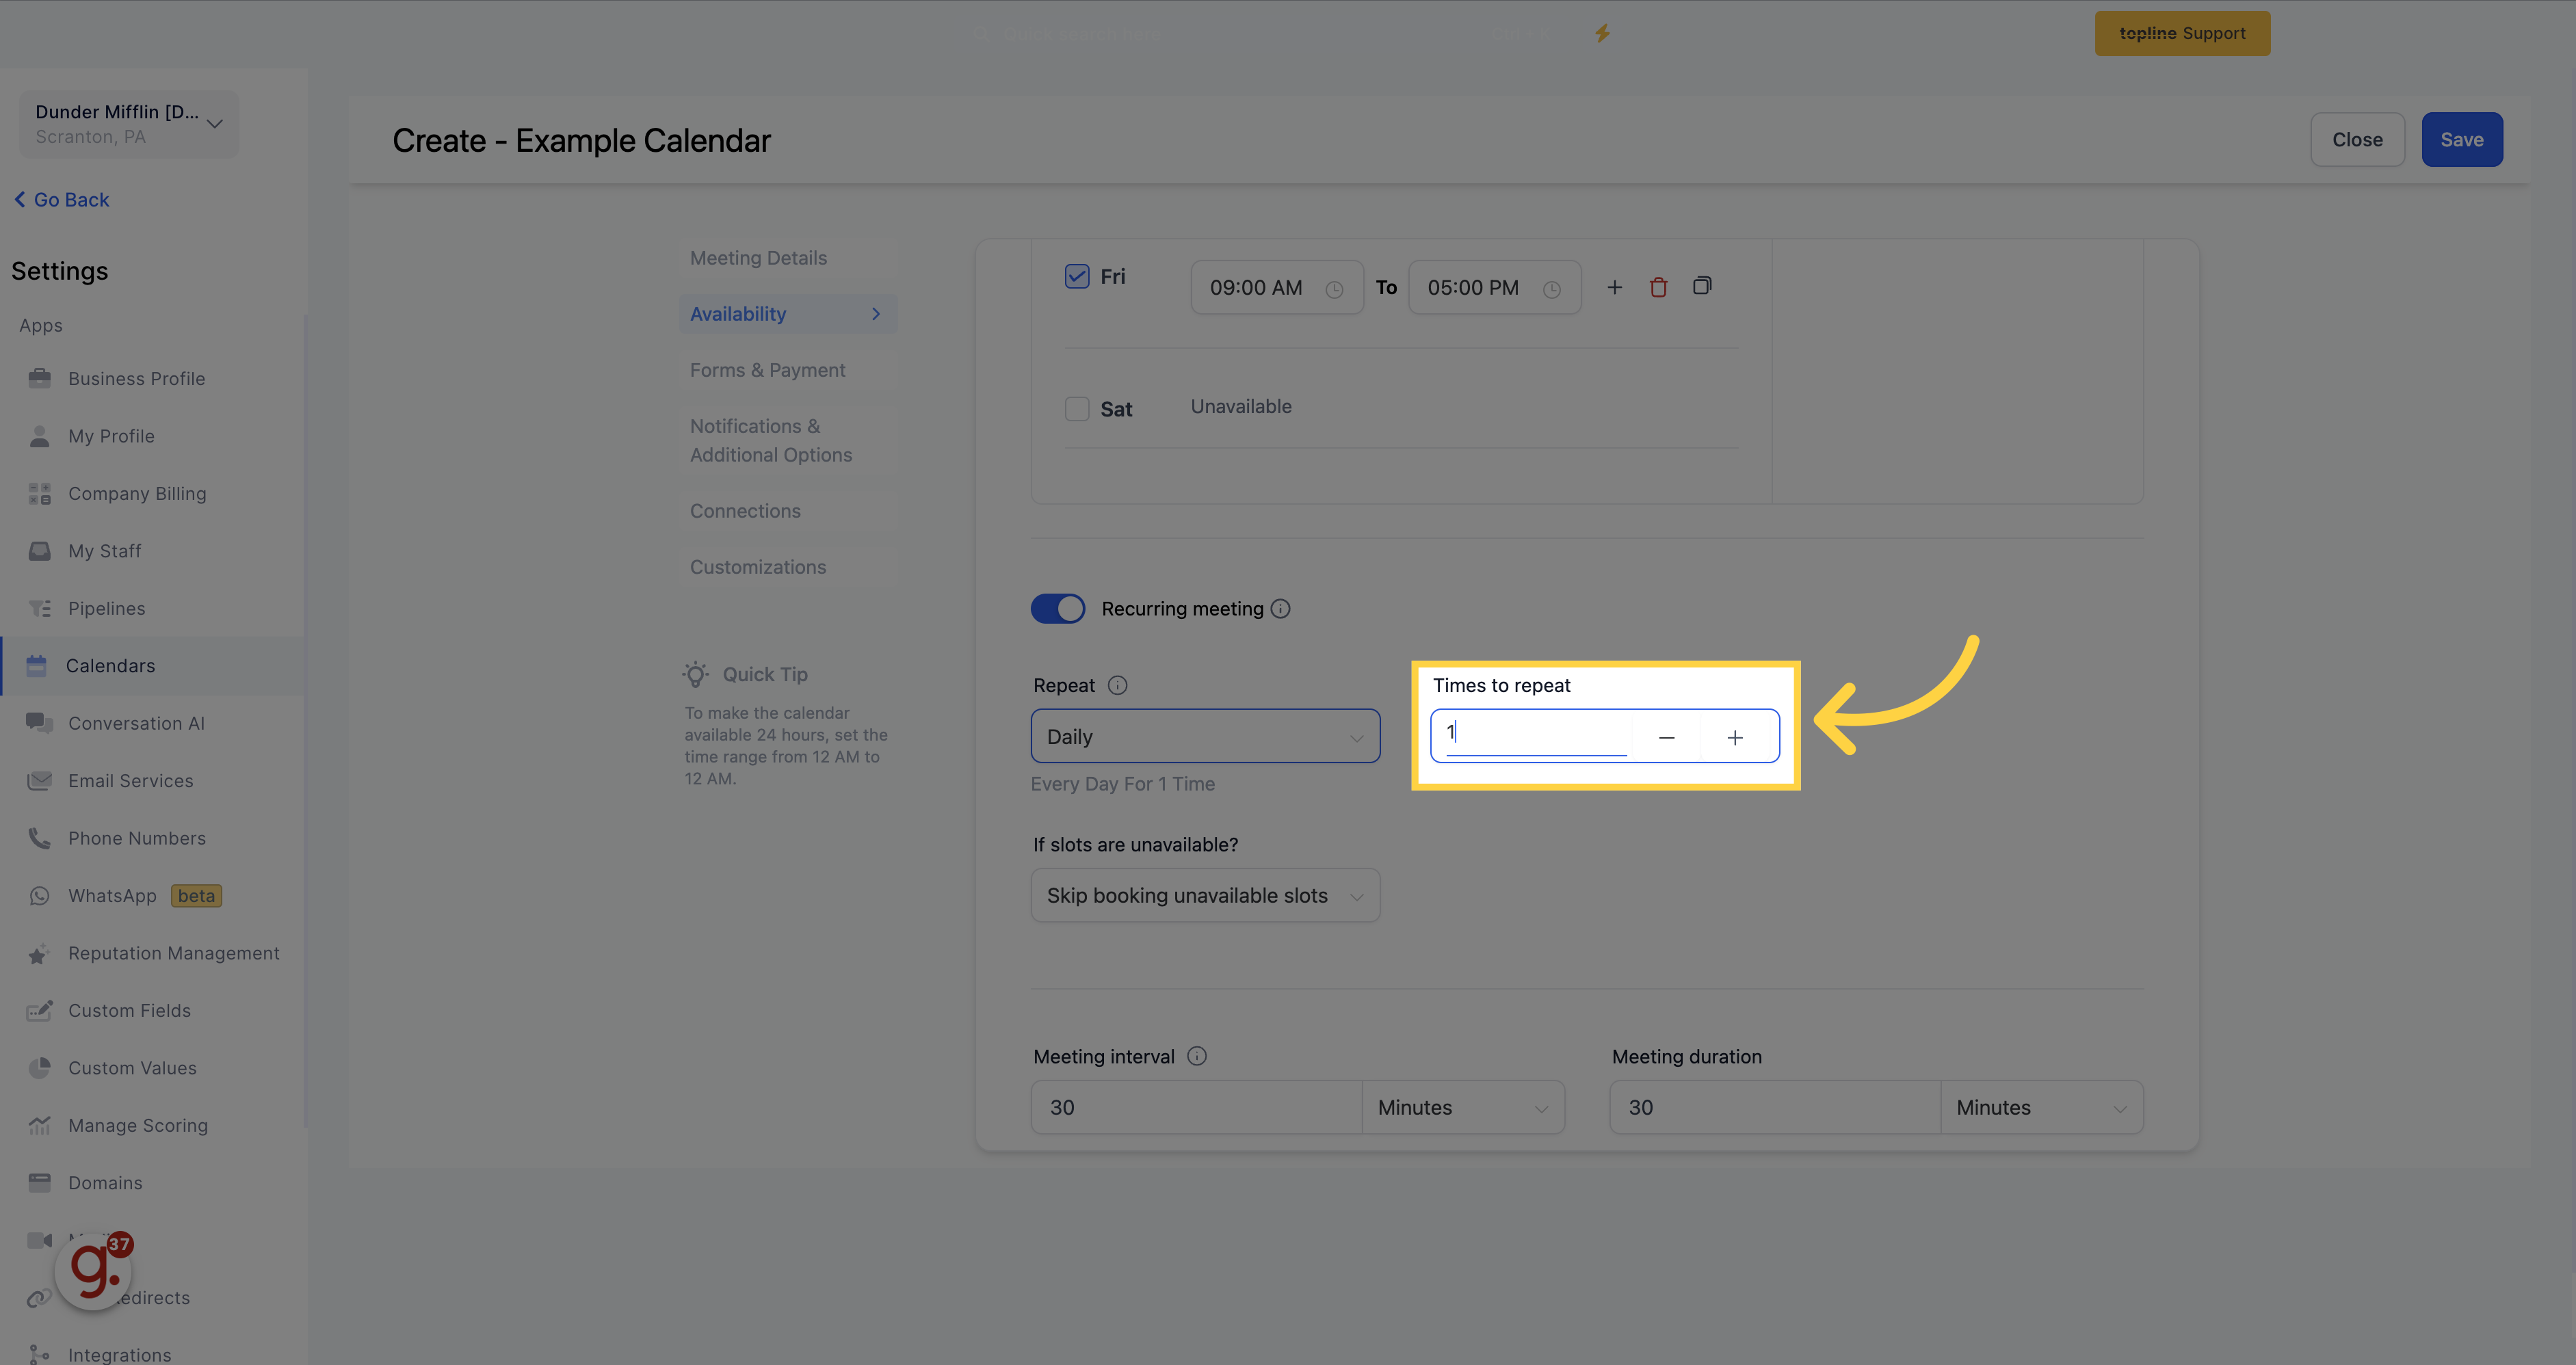
Enable recurring appointments using the following settings:
Select the frequency for booking multiples using the following options: daily, weekly, monthly or custom. If you only require one repeat occurrence, select the "daily" option.
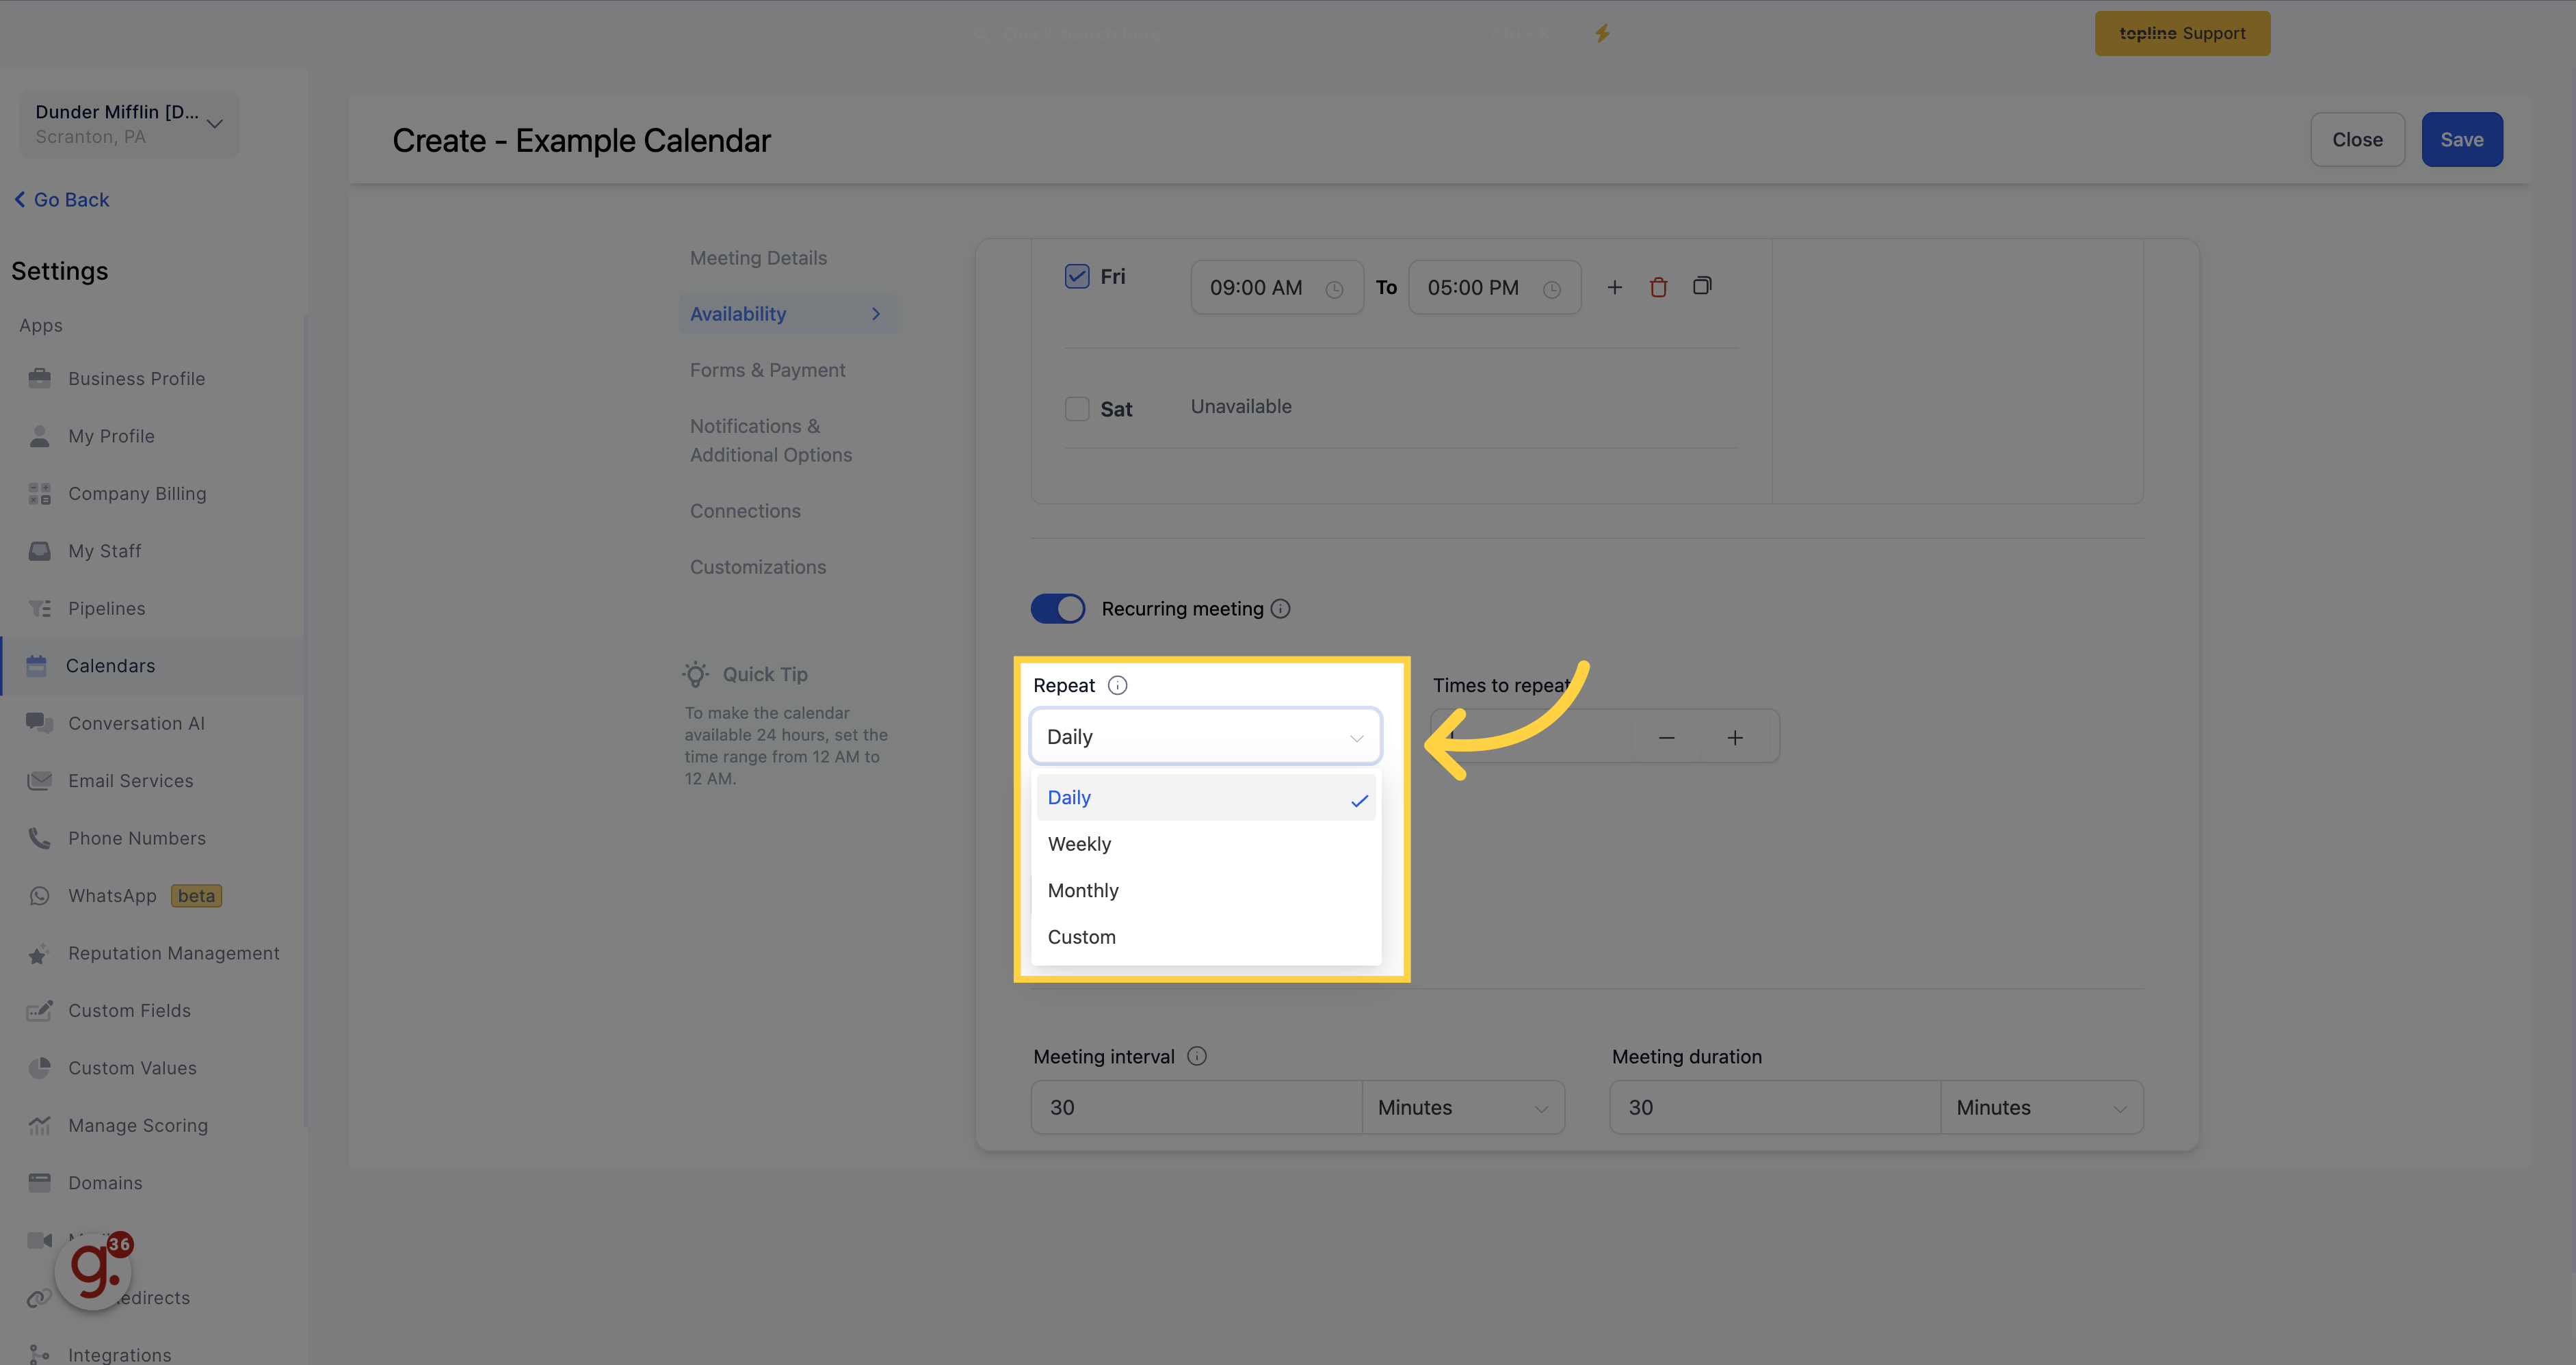
Set the number of times (occurrences) that the booking should repeat. For instance, if you require a booking to be repeated twice a week, set the occurrence to "2 times a week". Add the number of times you want it to be repeated.
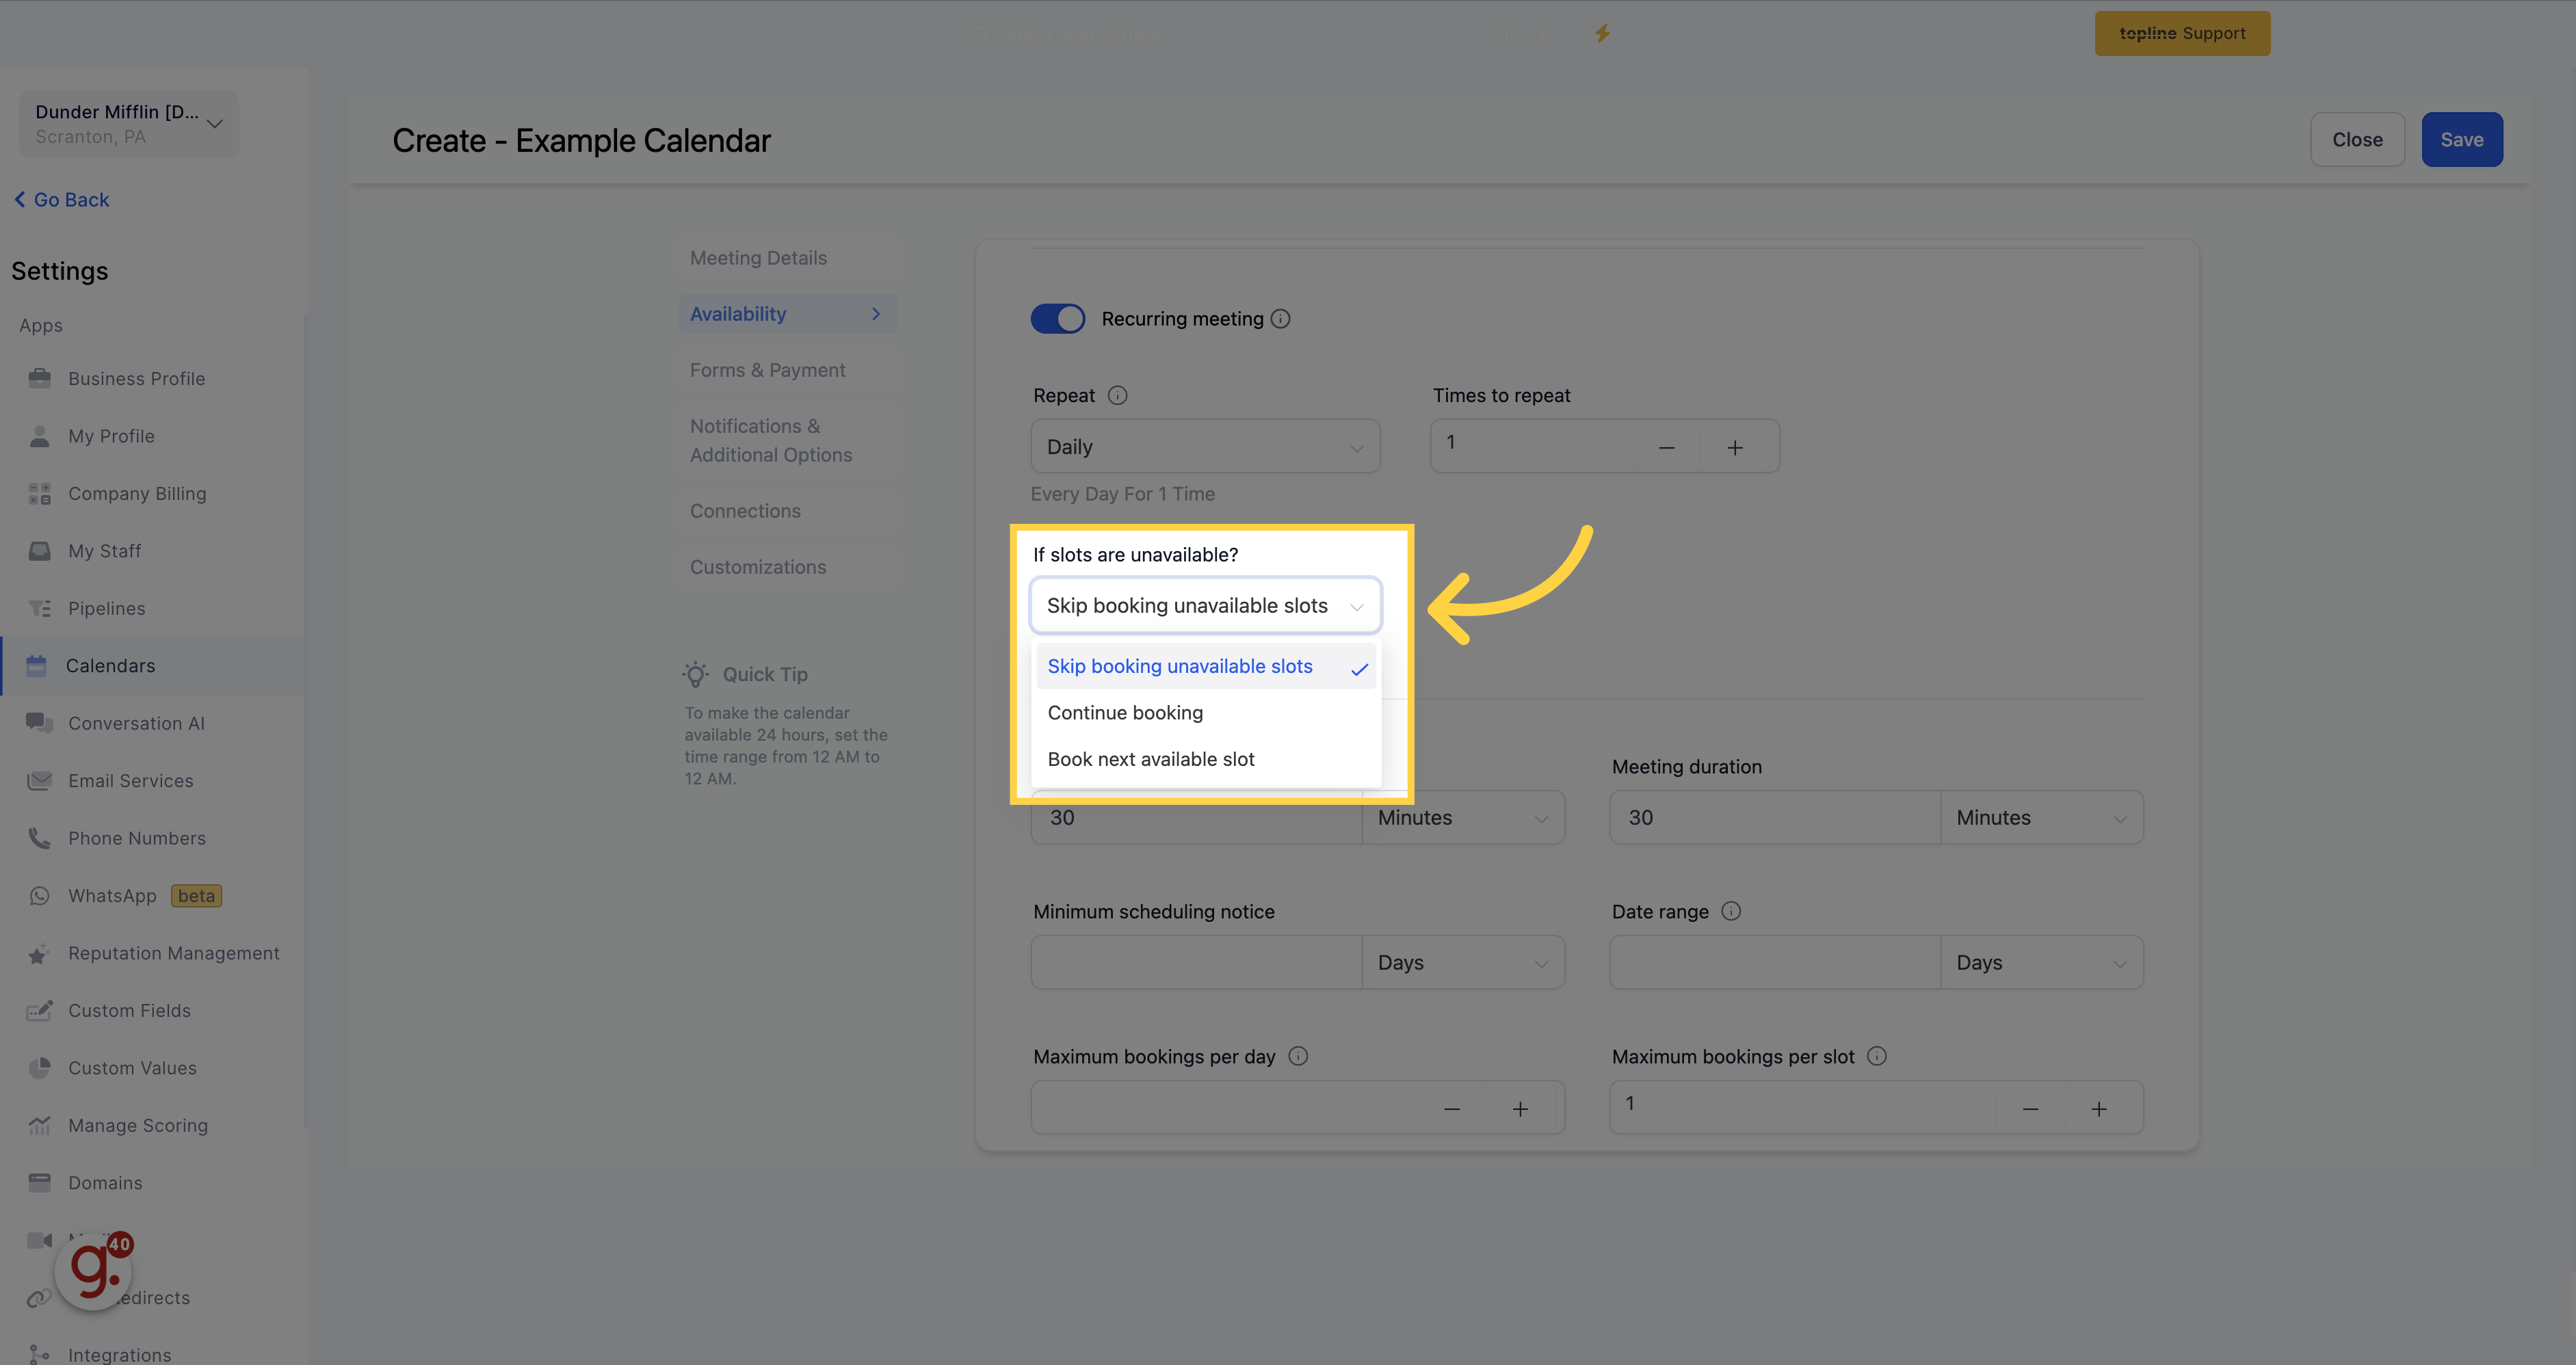
Decide on the action to take when slots are not available using the following options: "Skip booking unavailable slots" or "Book all slots or none". For instance, if you select "Skip booking unavailable slots" and there are 10 occurrences with only 6 slots available, the 6 available slots will be booked, and the 4 unavailable slots will be skipped.
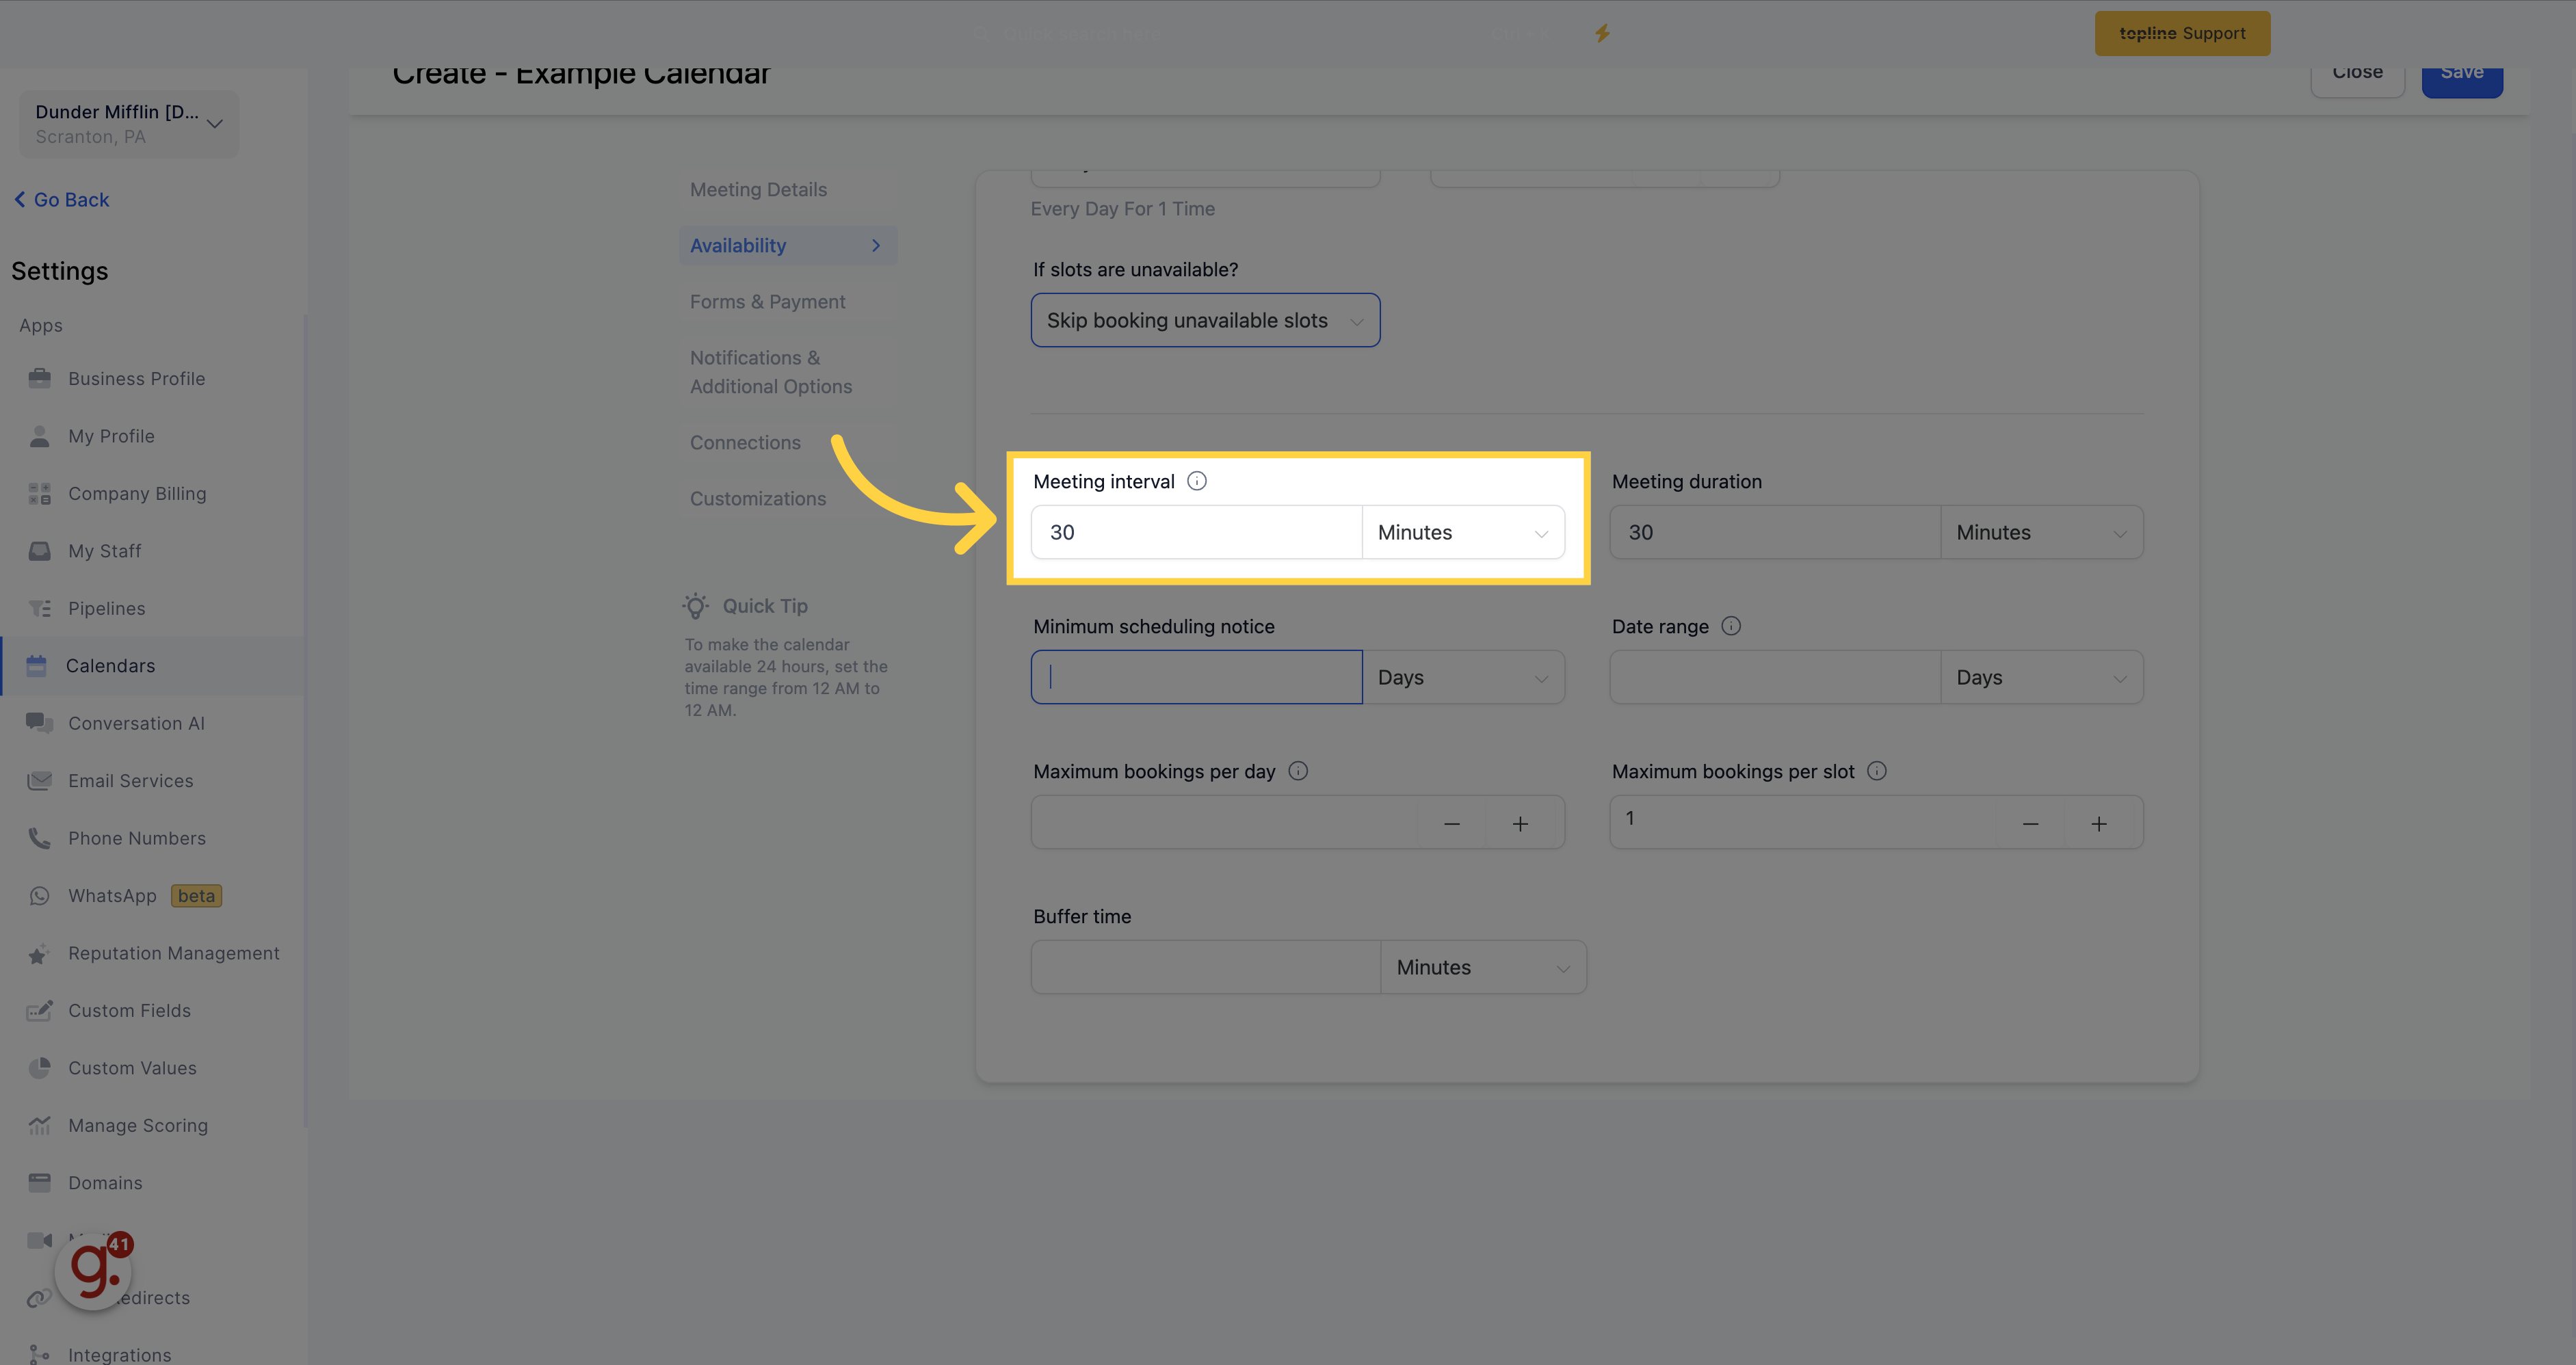
Meeting interval reflects the amount of time the between booking slots that will be shown in the calendar. For a 30 min event that should be available at the top of each hour, the interval would be 1 hr. For a 30 min event that should be available every 30 minutes, the interval would be 30 minutes.
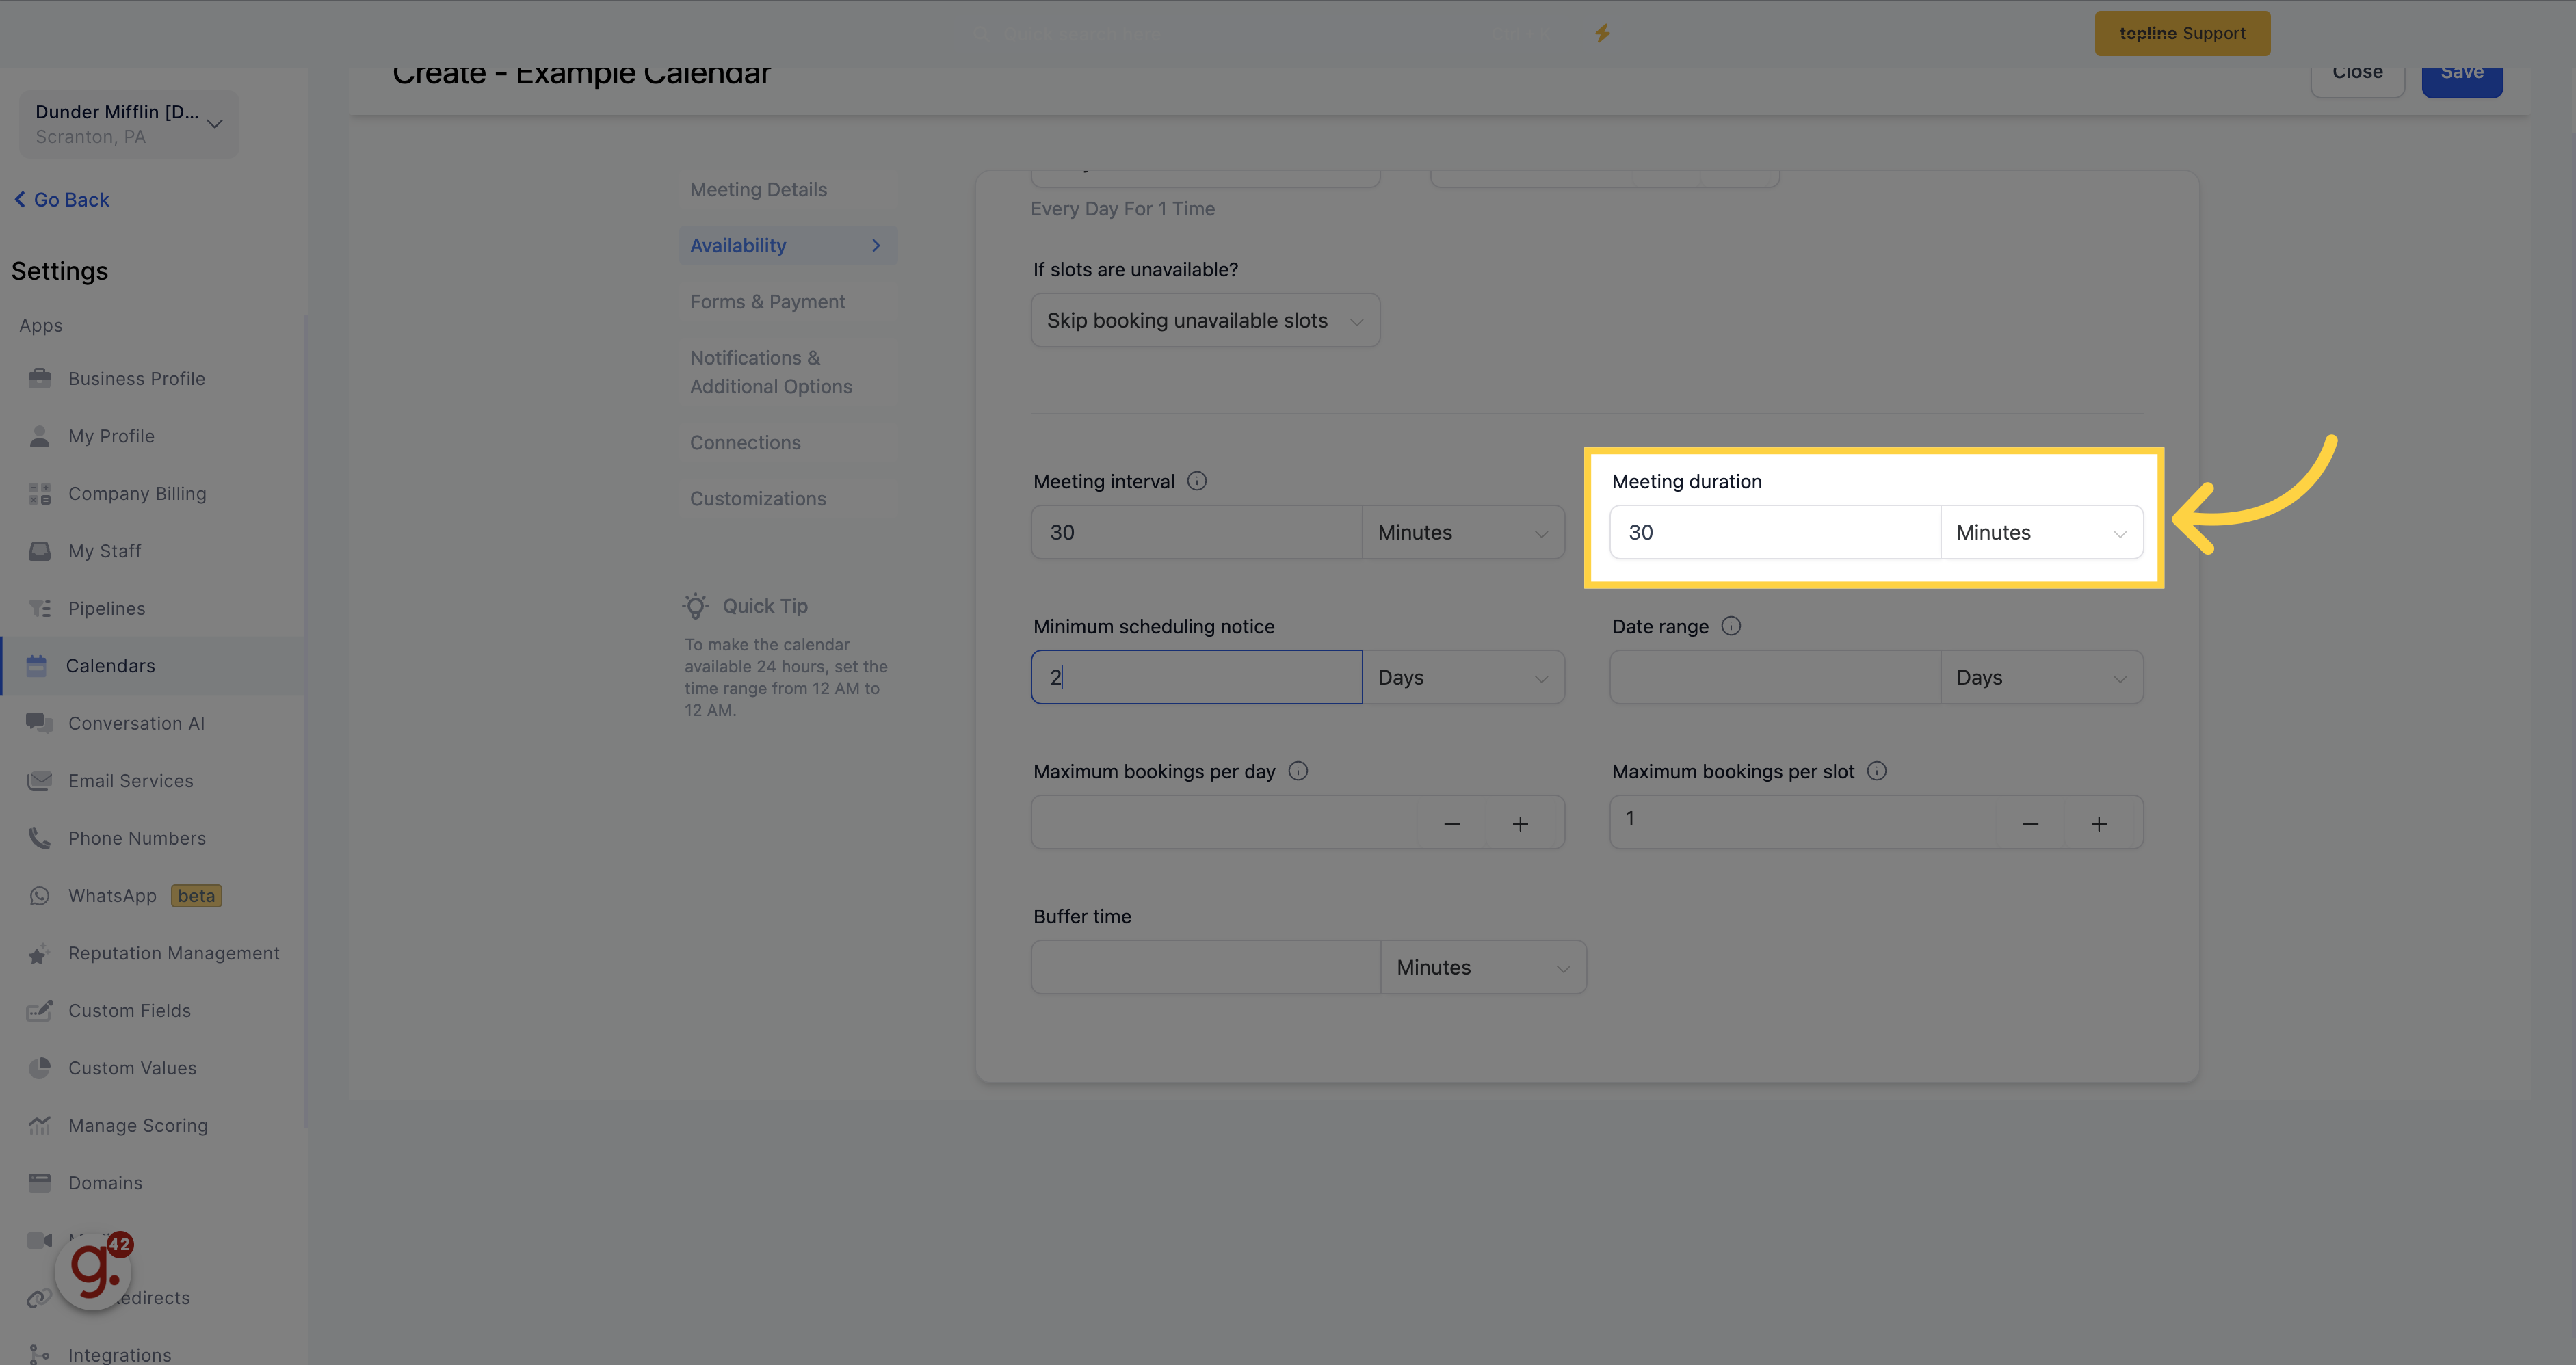
Choose the length of your appointments and display it when people book on your calendar.
Identify the time period people need to wait before they can schedule an appointment. Choose between hours, days, weeks, or months. For example, if you choose 5 days, nobody will be able to book an appointment within 5 days of your next scheduled appointment. This is the minimum time people can schedule time with you.
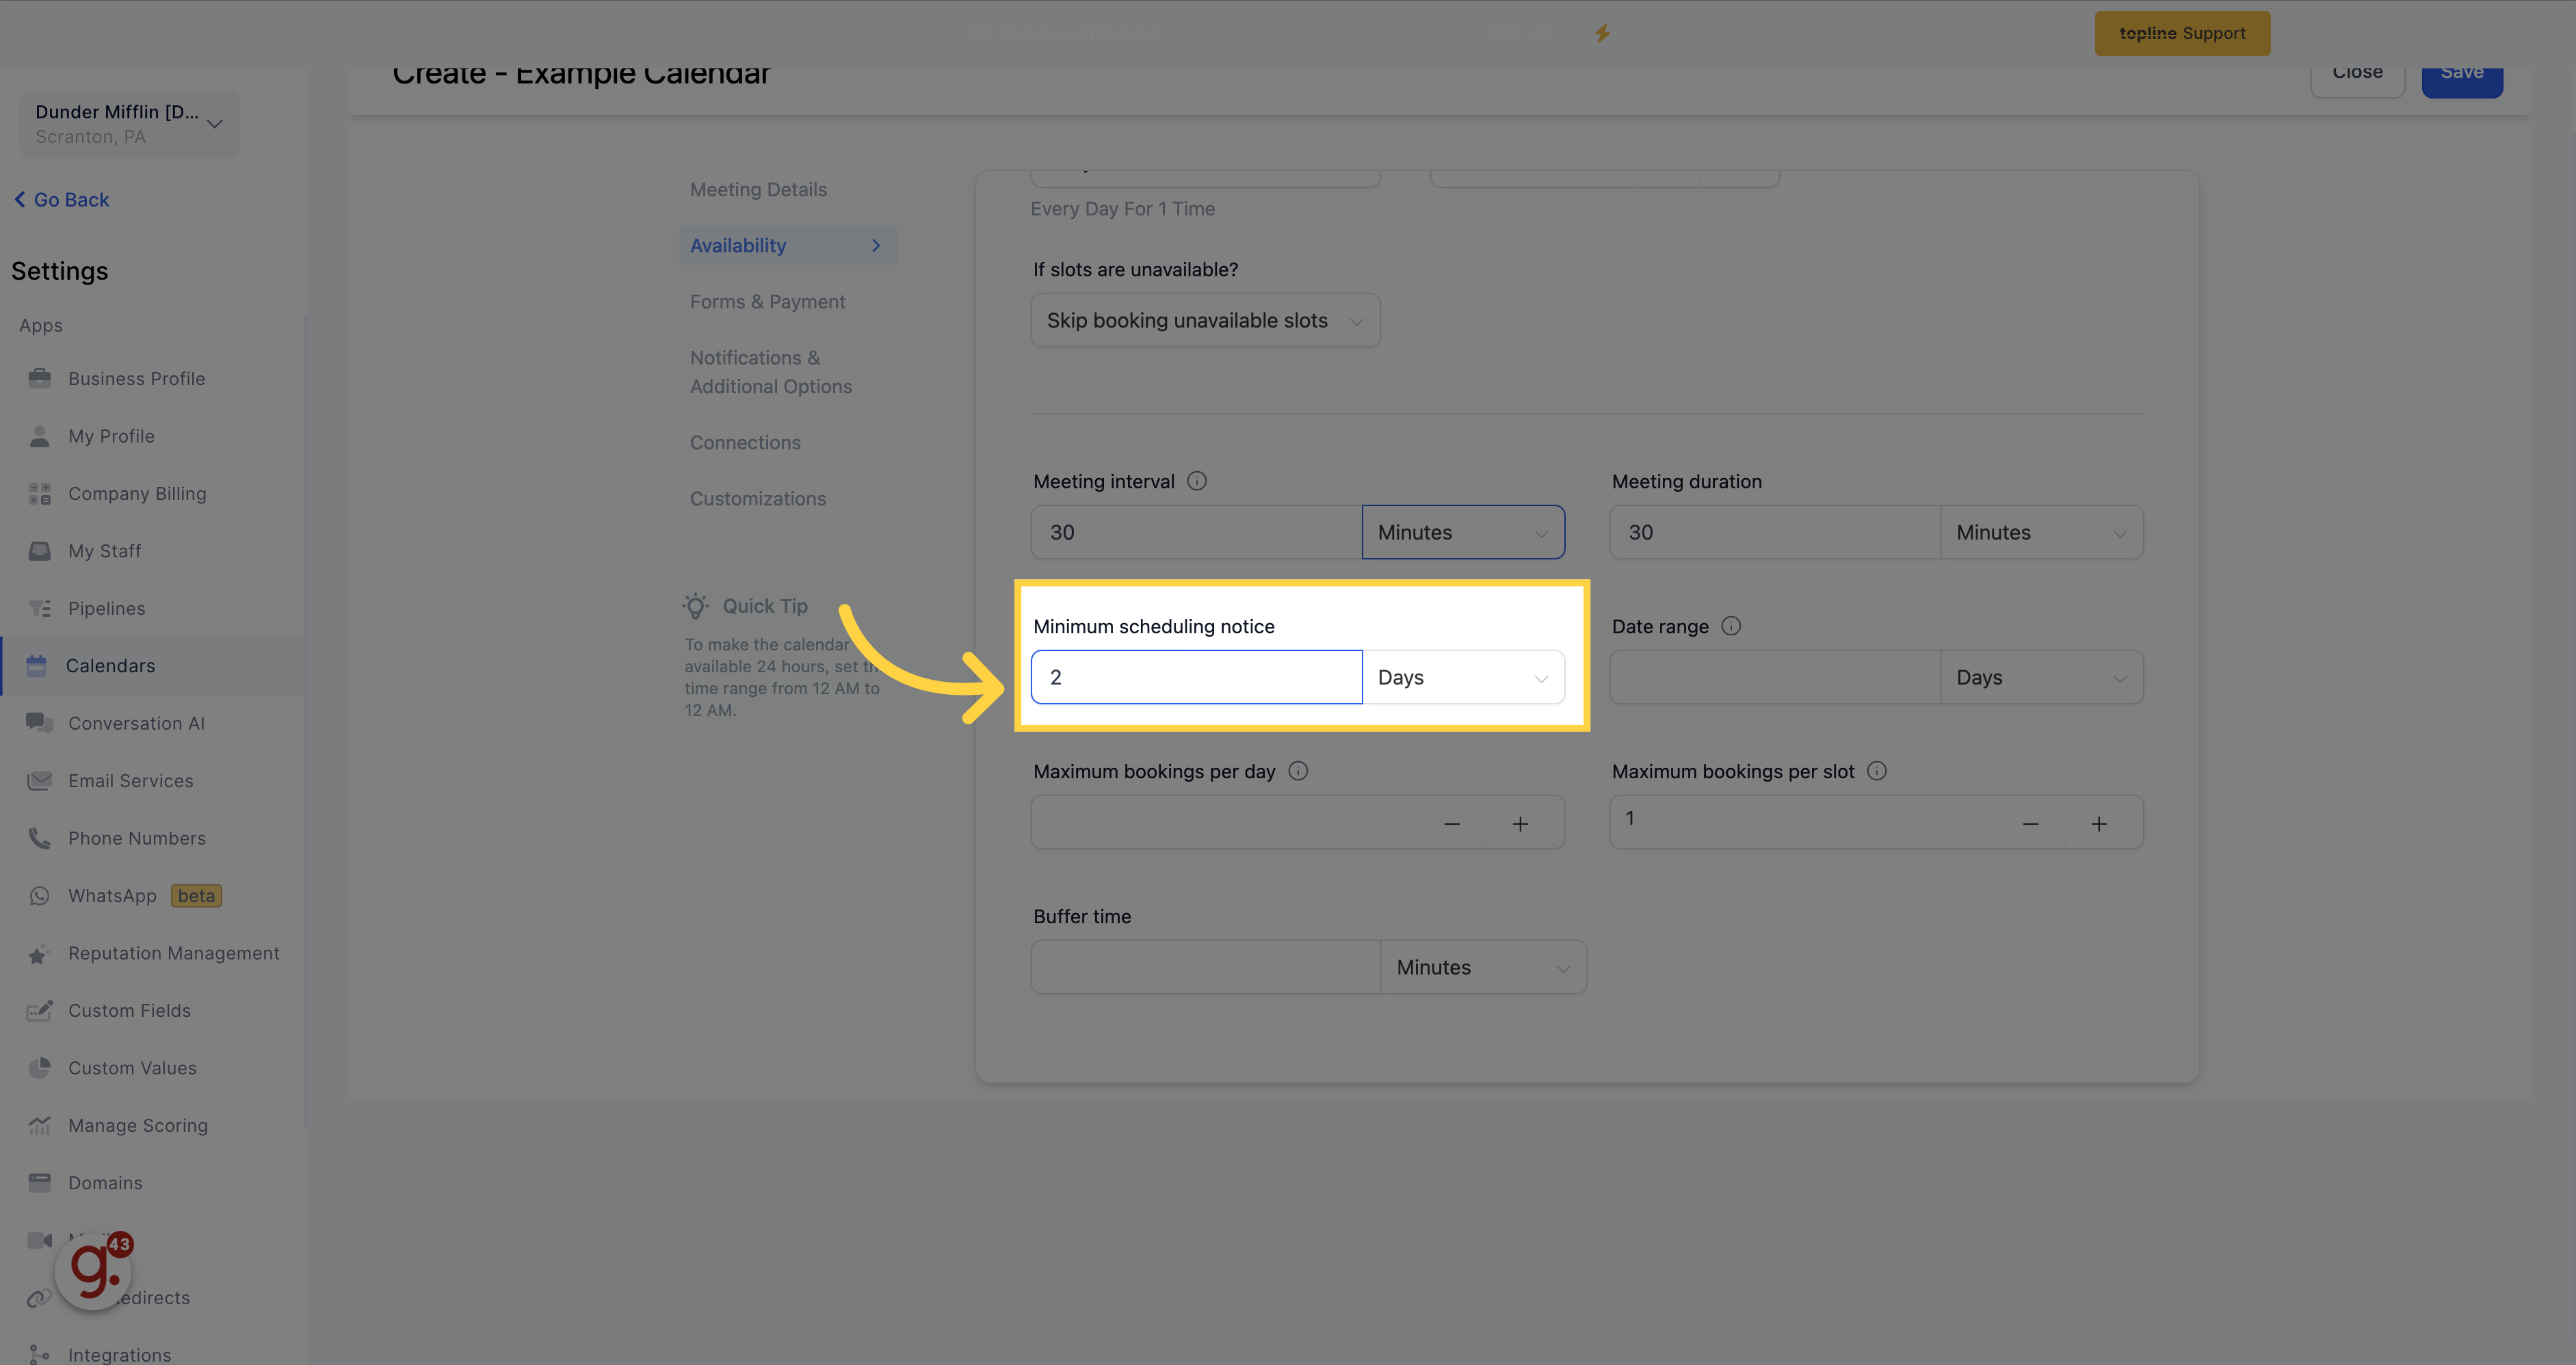
Set a designated time range for your calendar to allow scheduling. For instance, you can display availability for the next 6 hours, 6 days, 6 weeks, or 6 months.
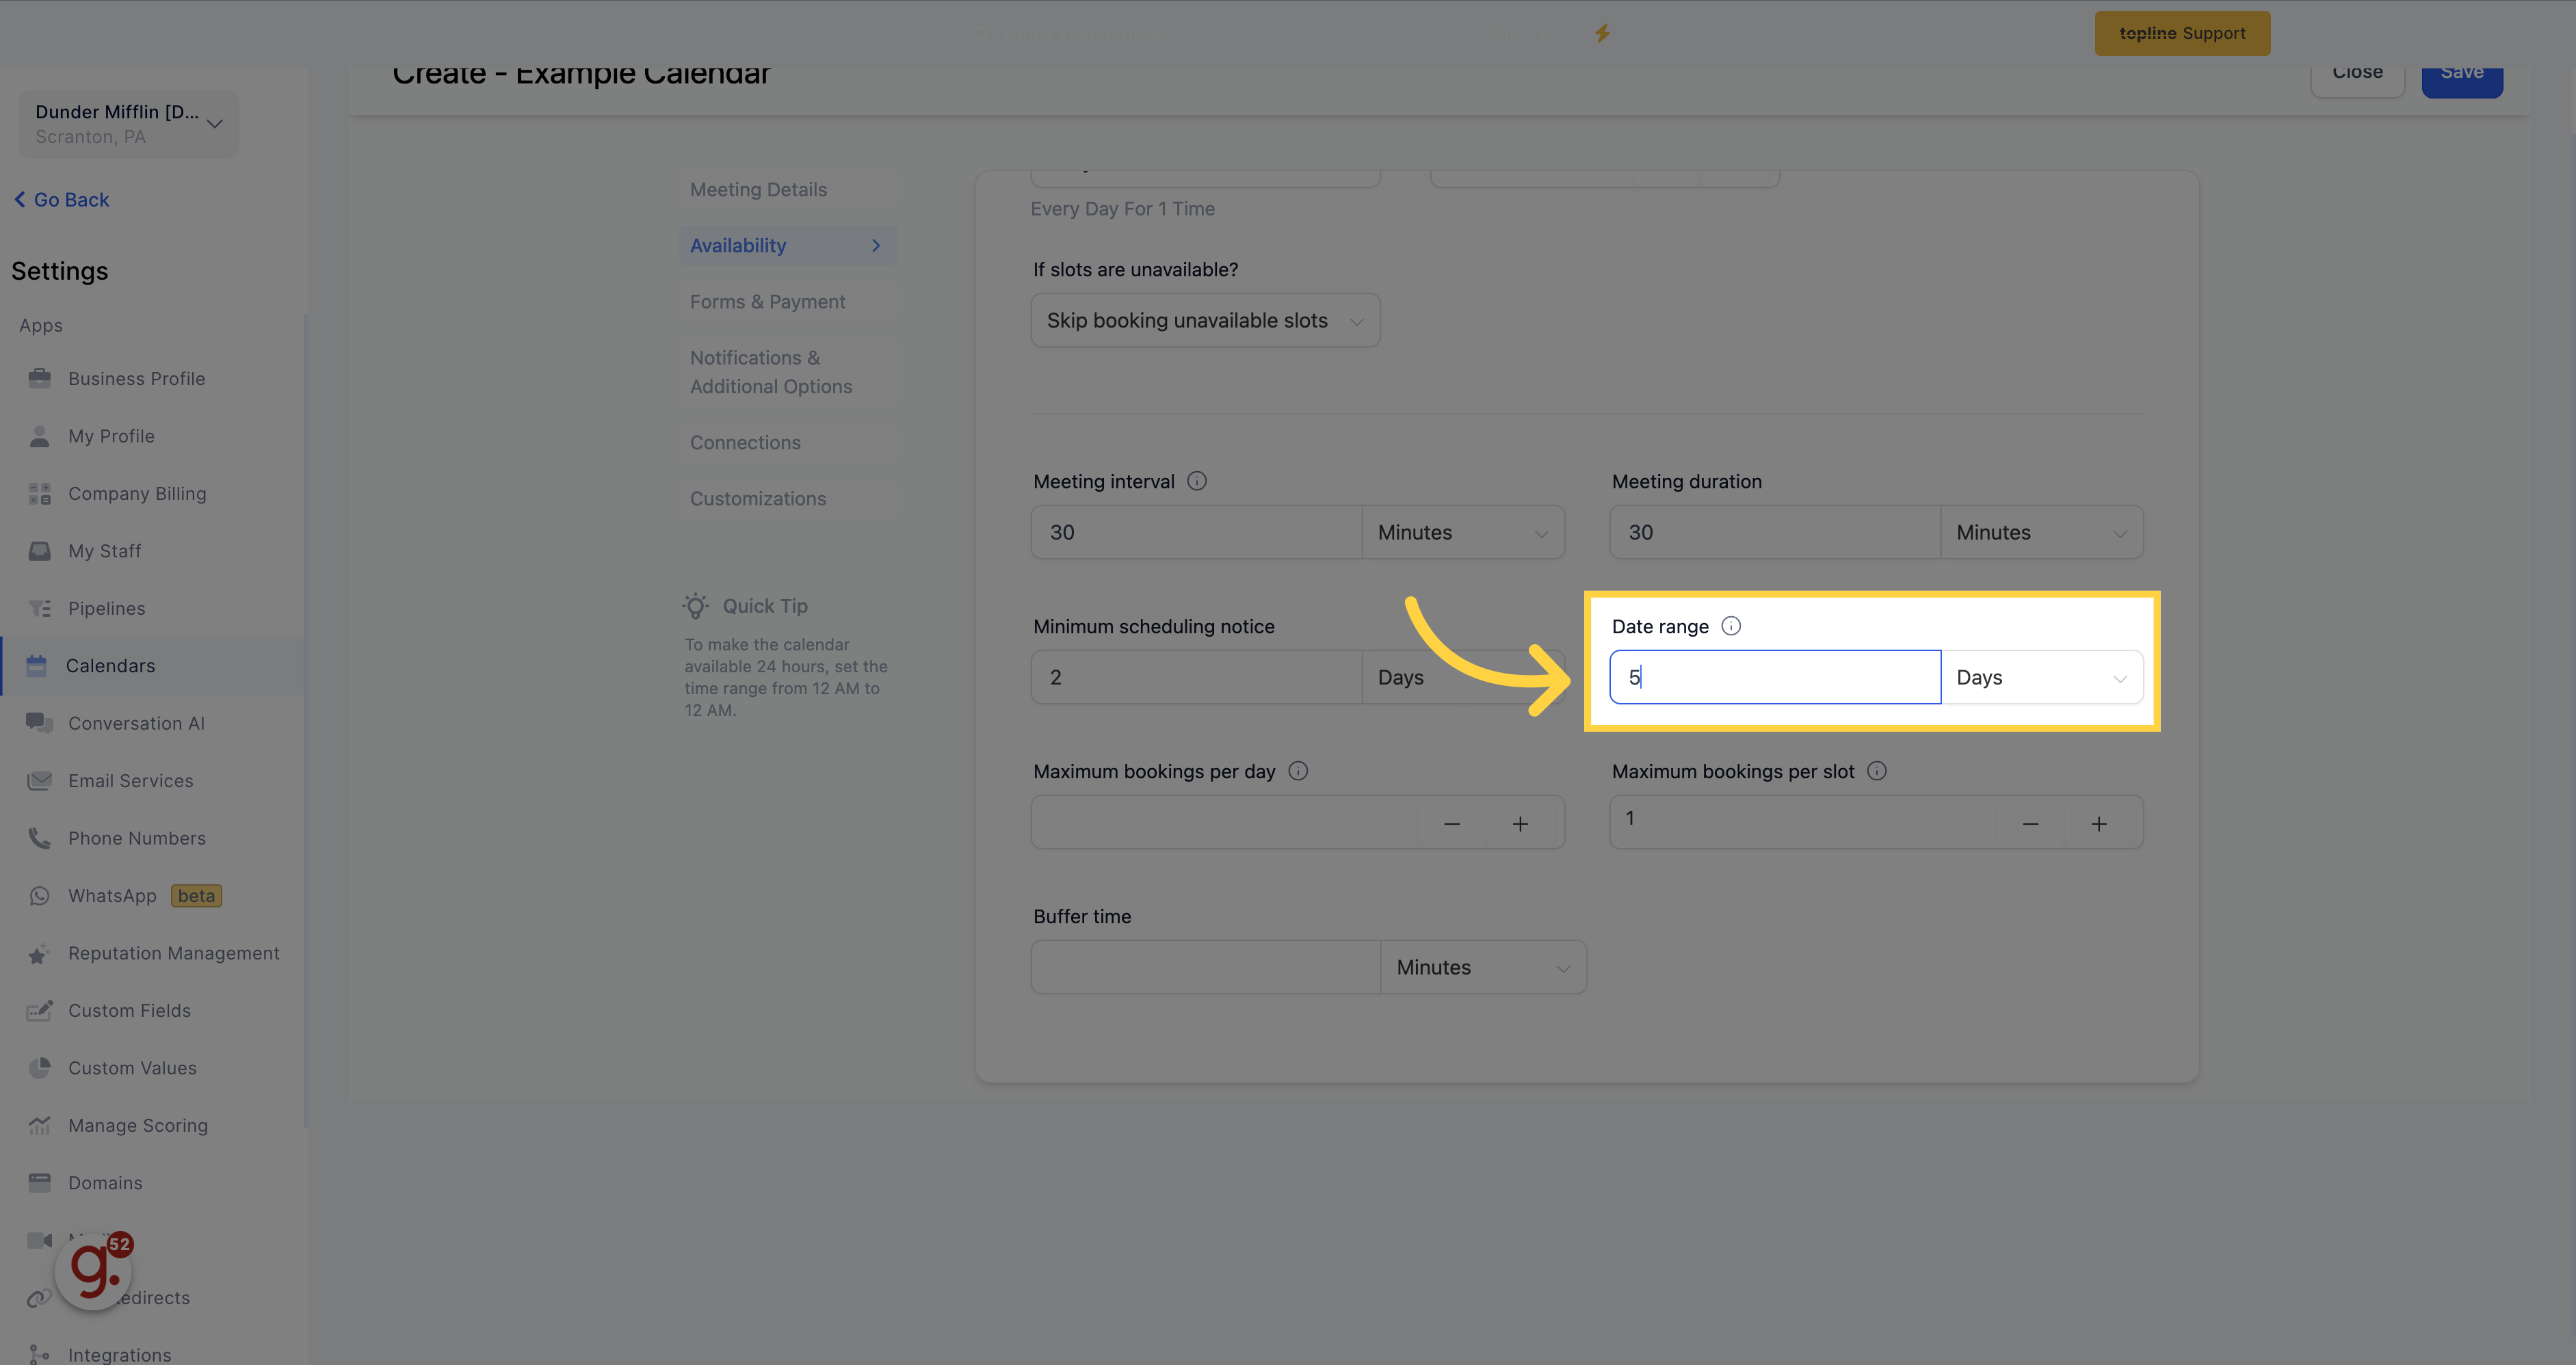
You can set a limit on the number of appointments that can be scheduled per day using this calendar. By doing so, you can avoid overloading your day with calls or appointments.
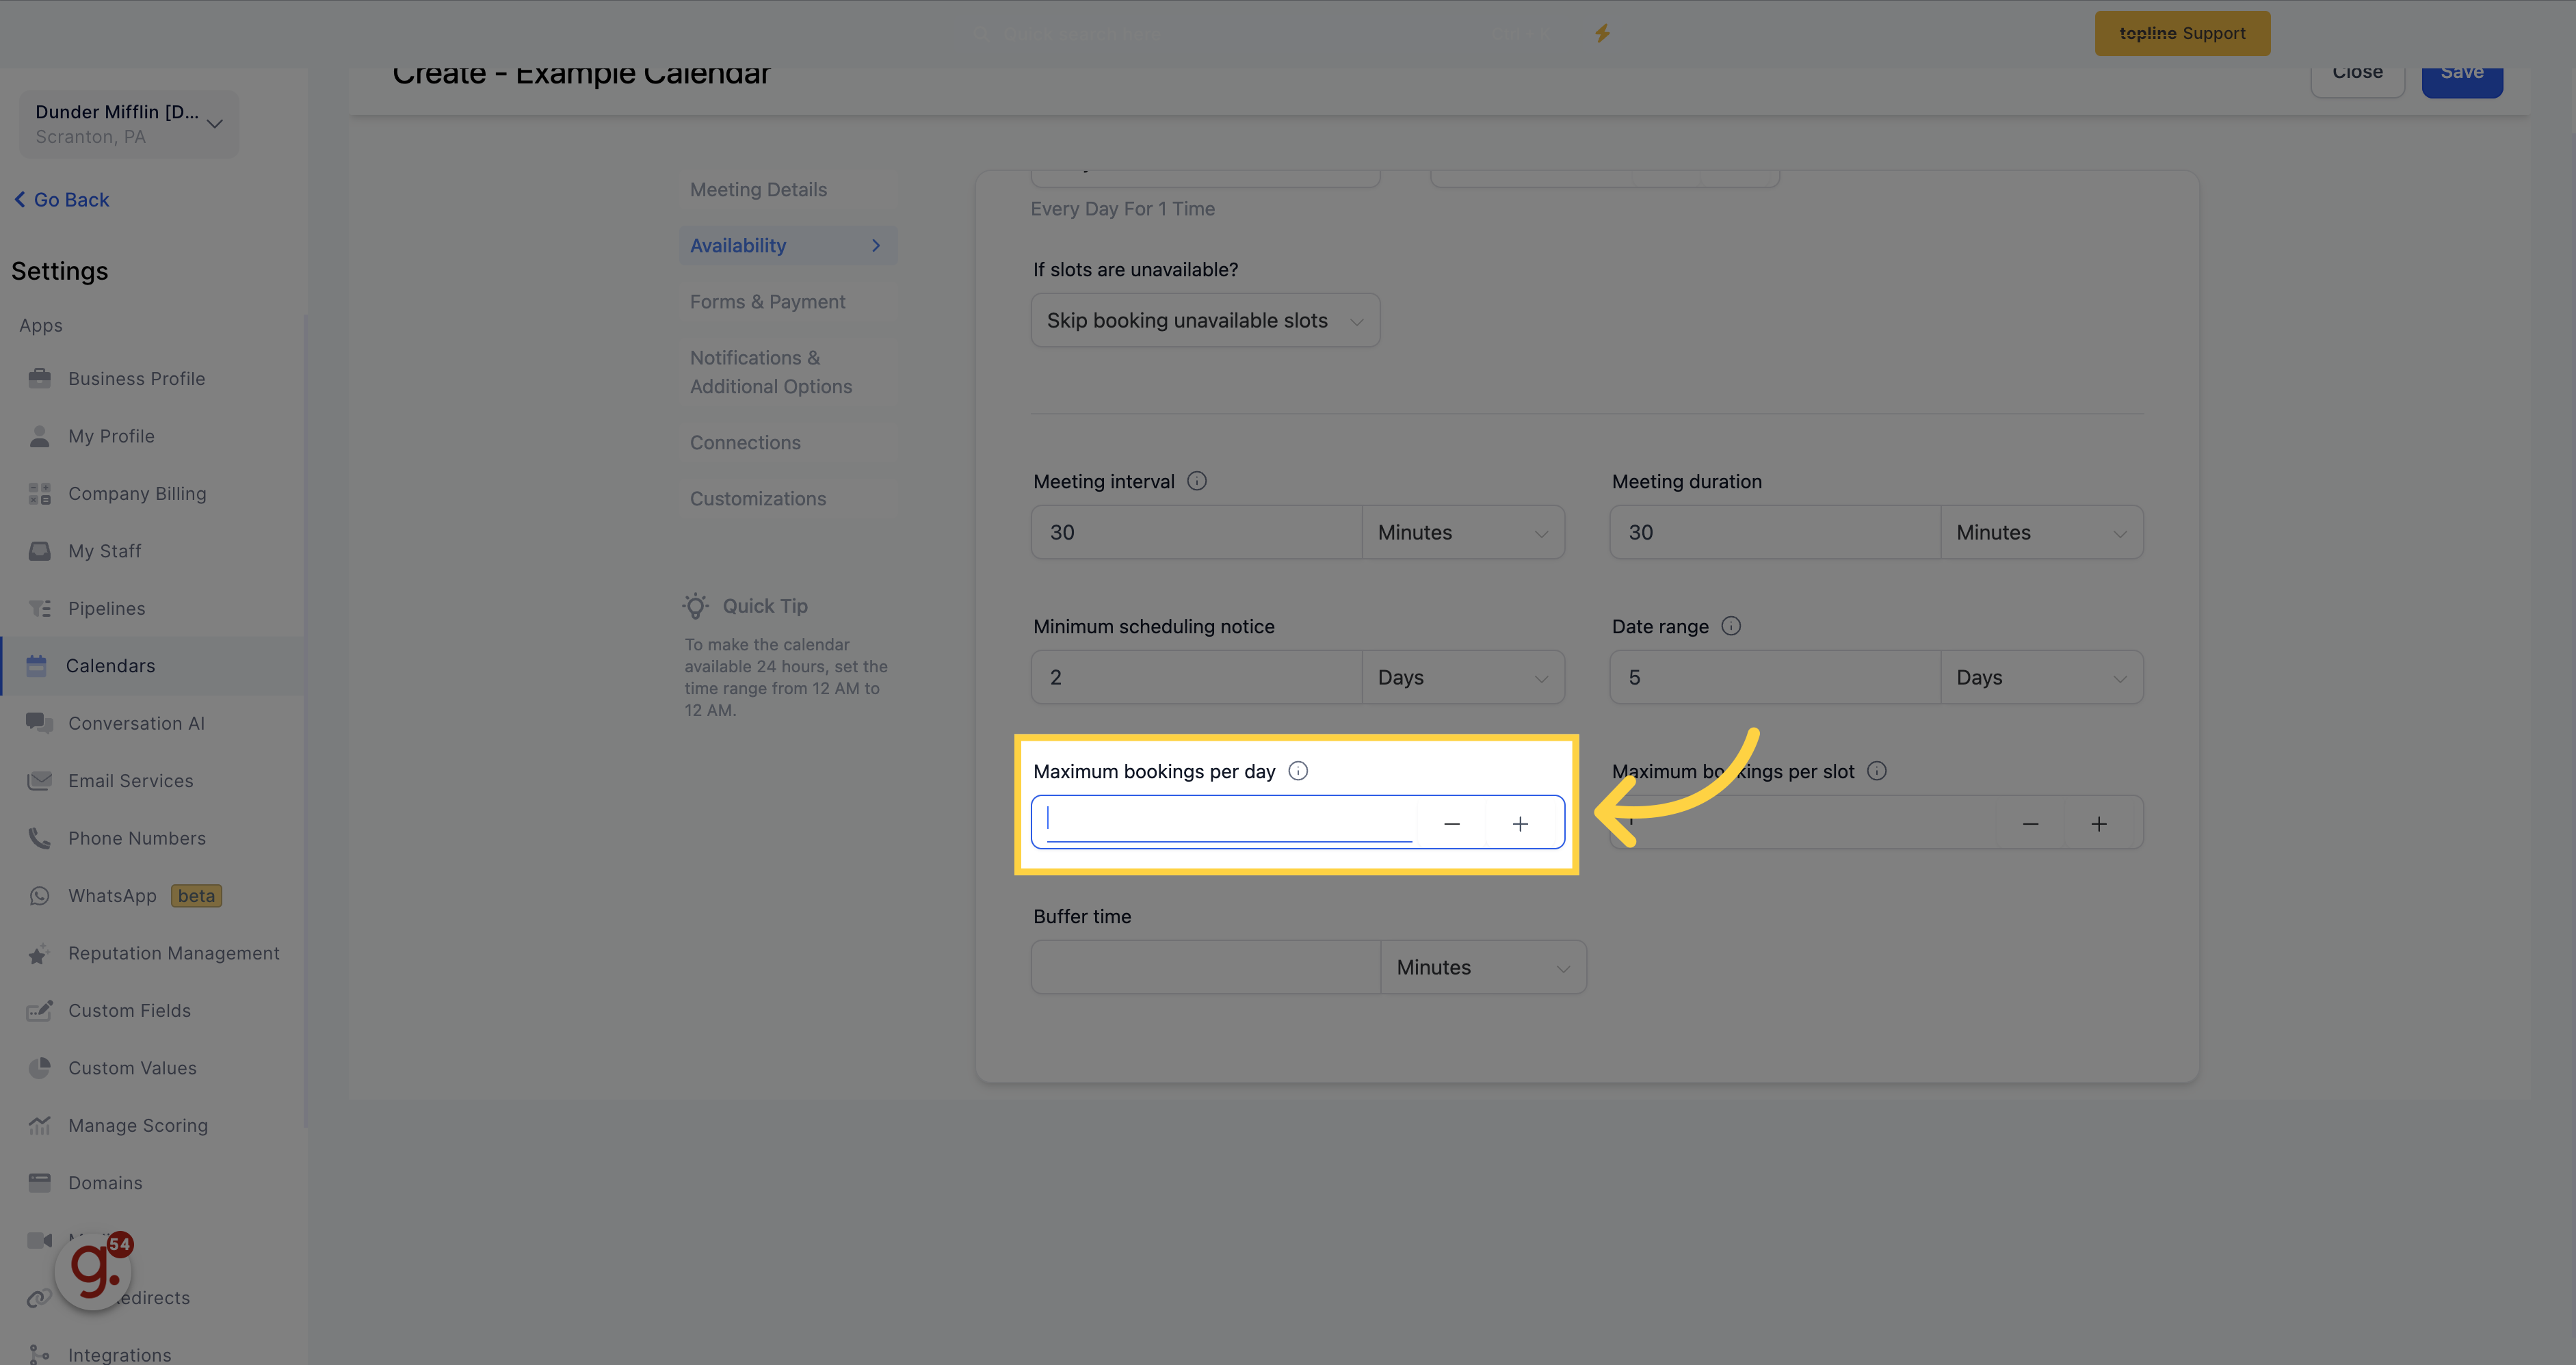
Maximum number of appointments permitted per slot for the user (If the number of appointments exceed for the given slot for the user, then it either switches over to the next user in the round-robin queue or marks the slot unavailable for the prospect to book).
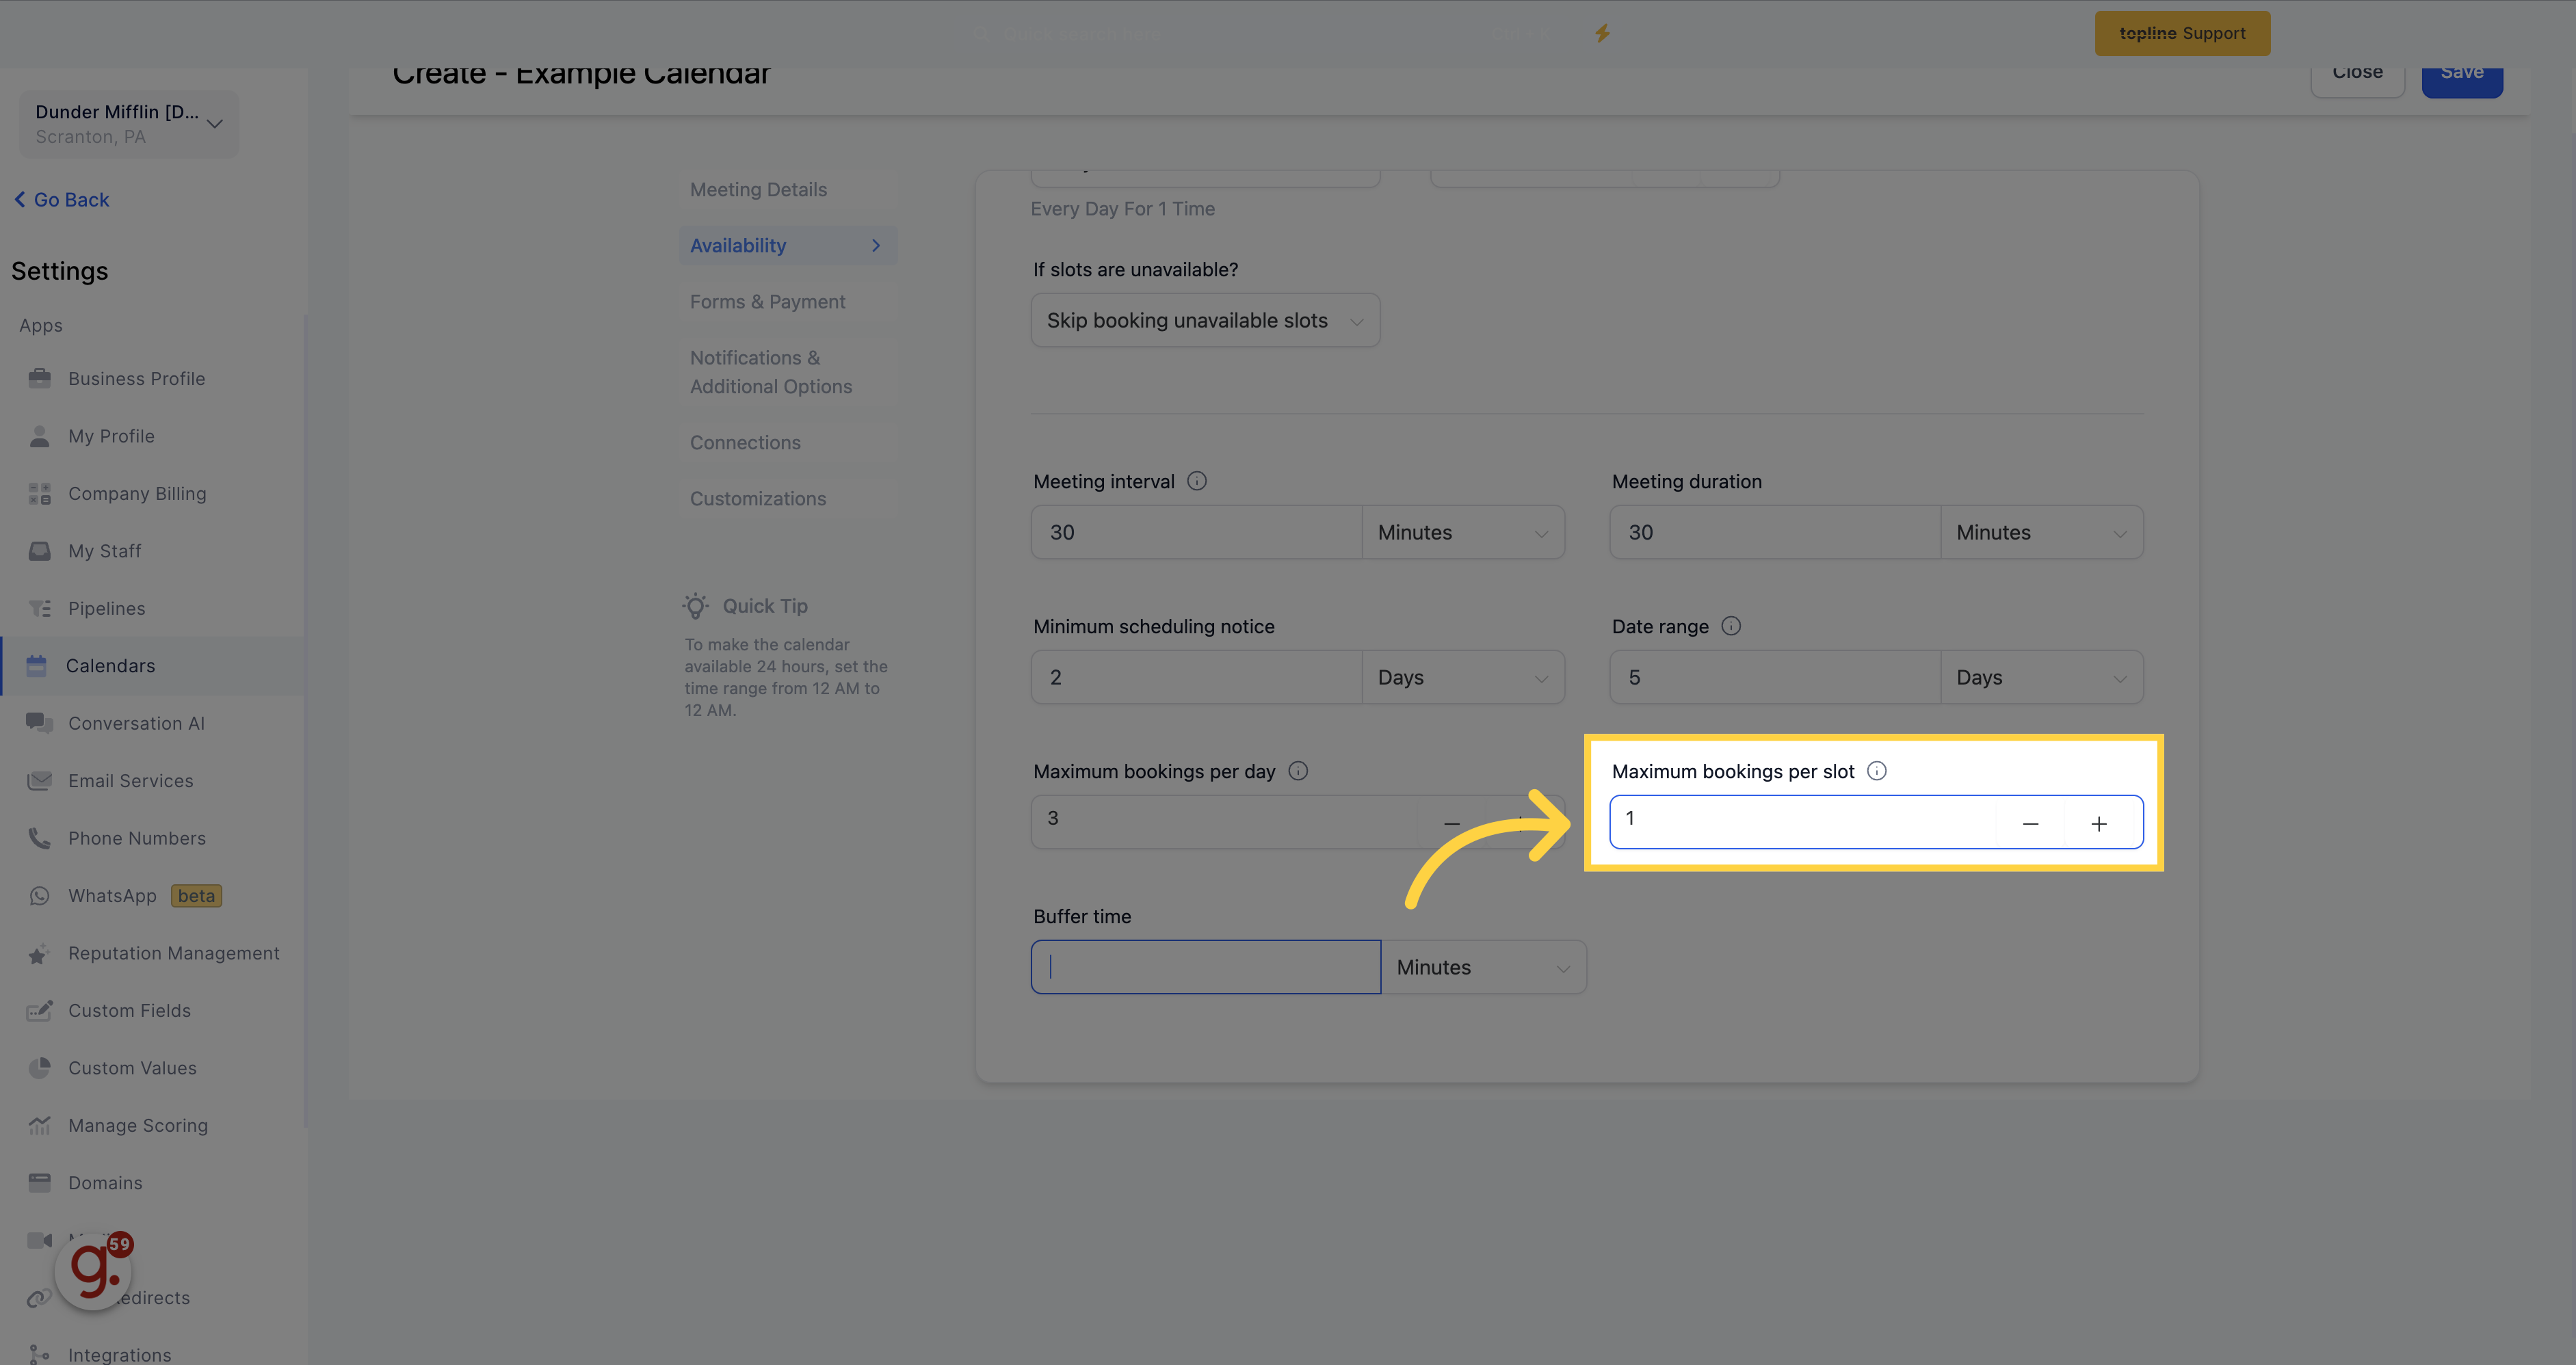
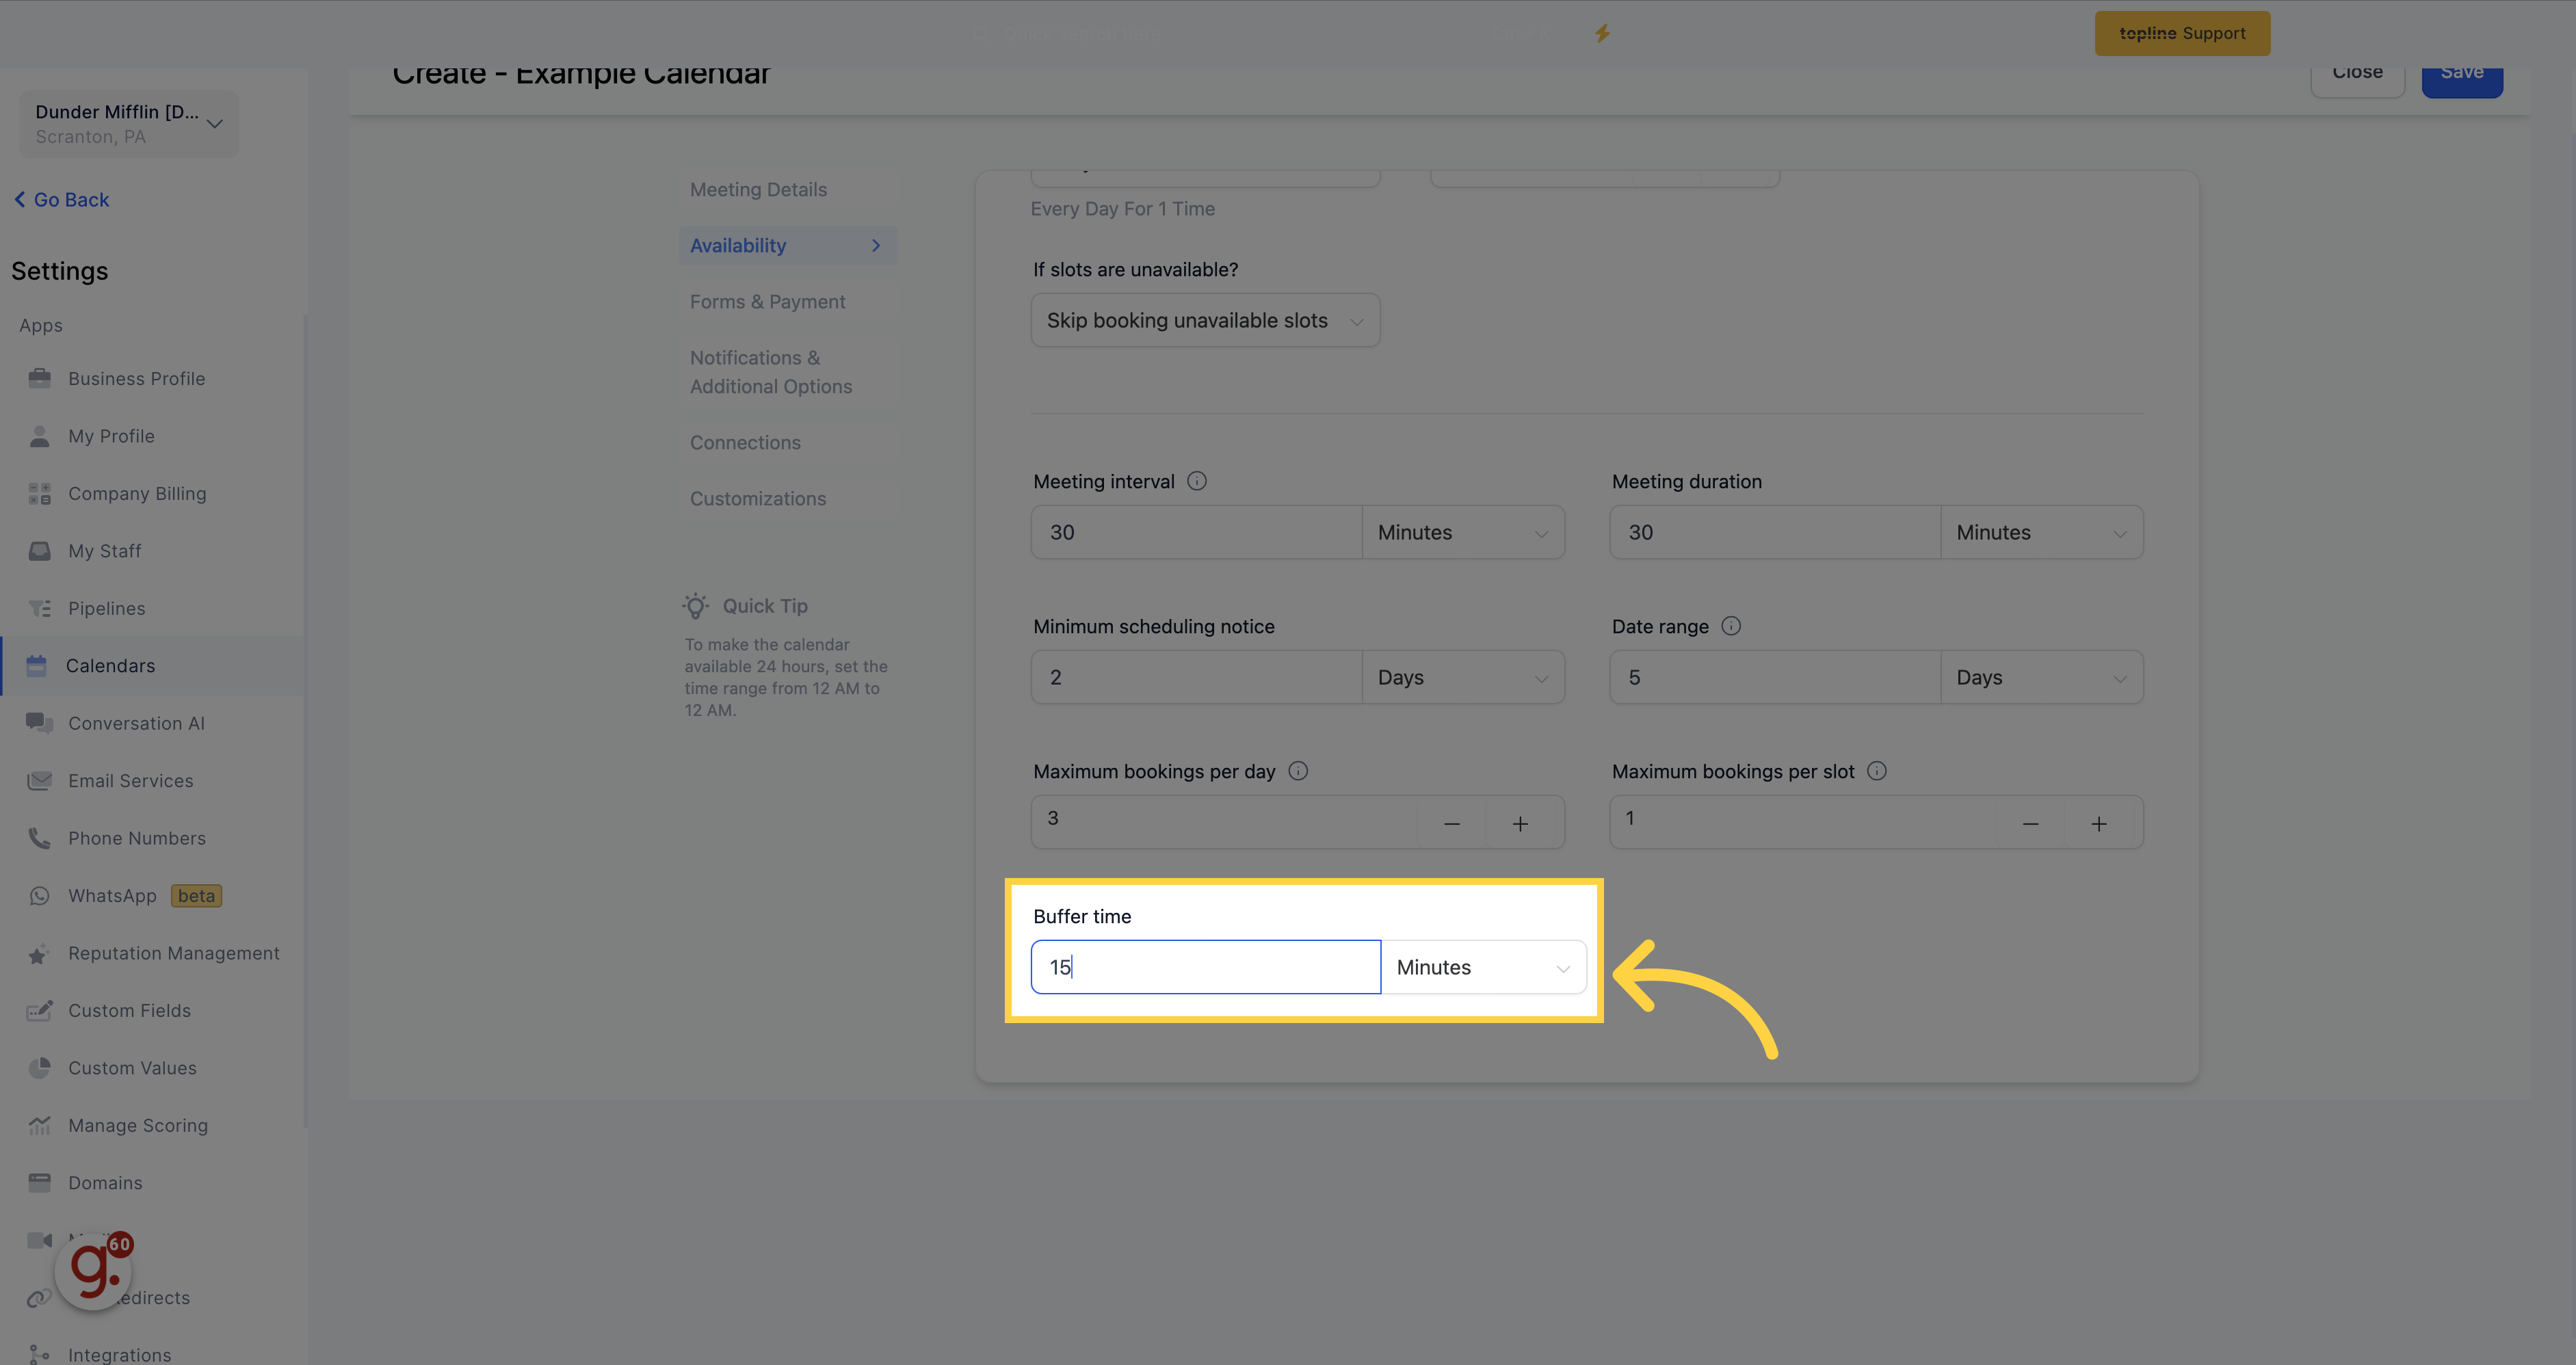
Establish a break time in between appointments to avoid back-to-back scheduling.
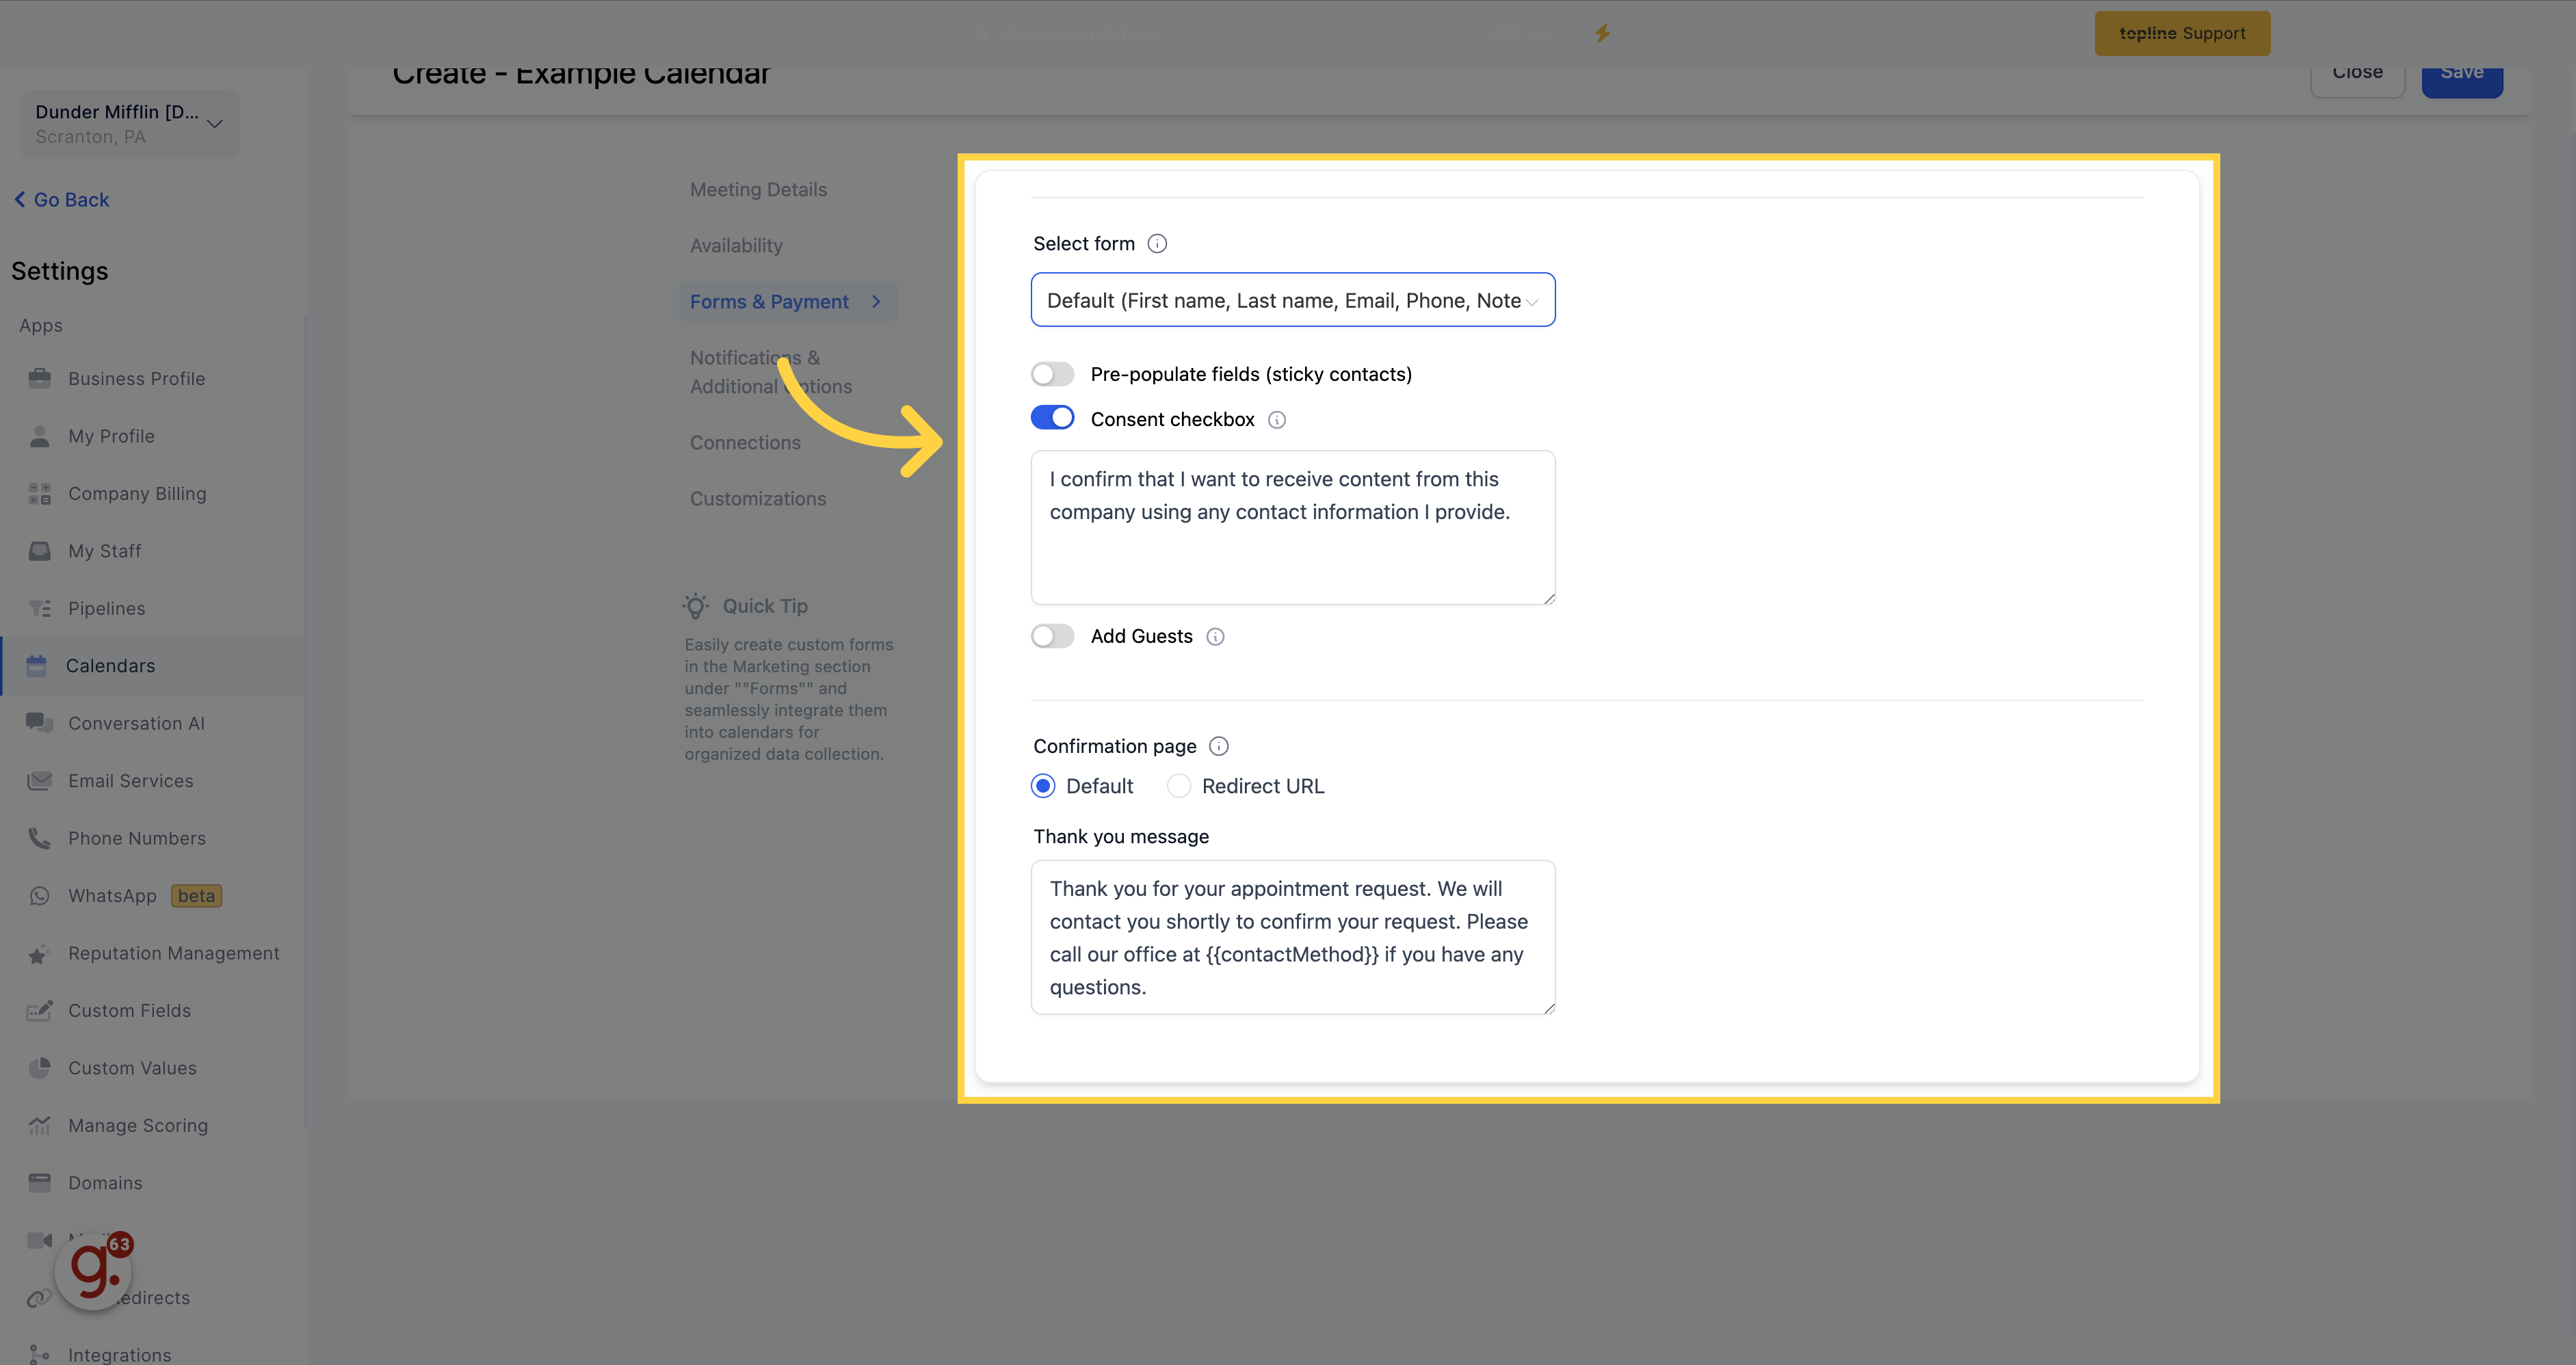
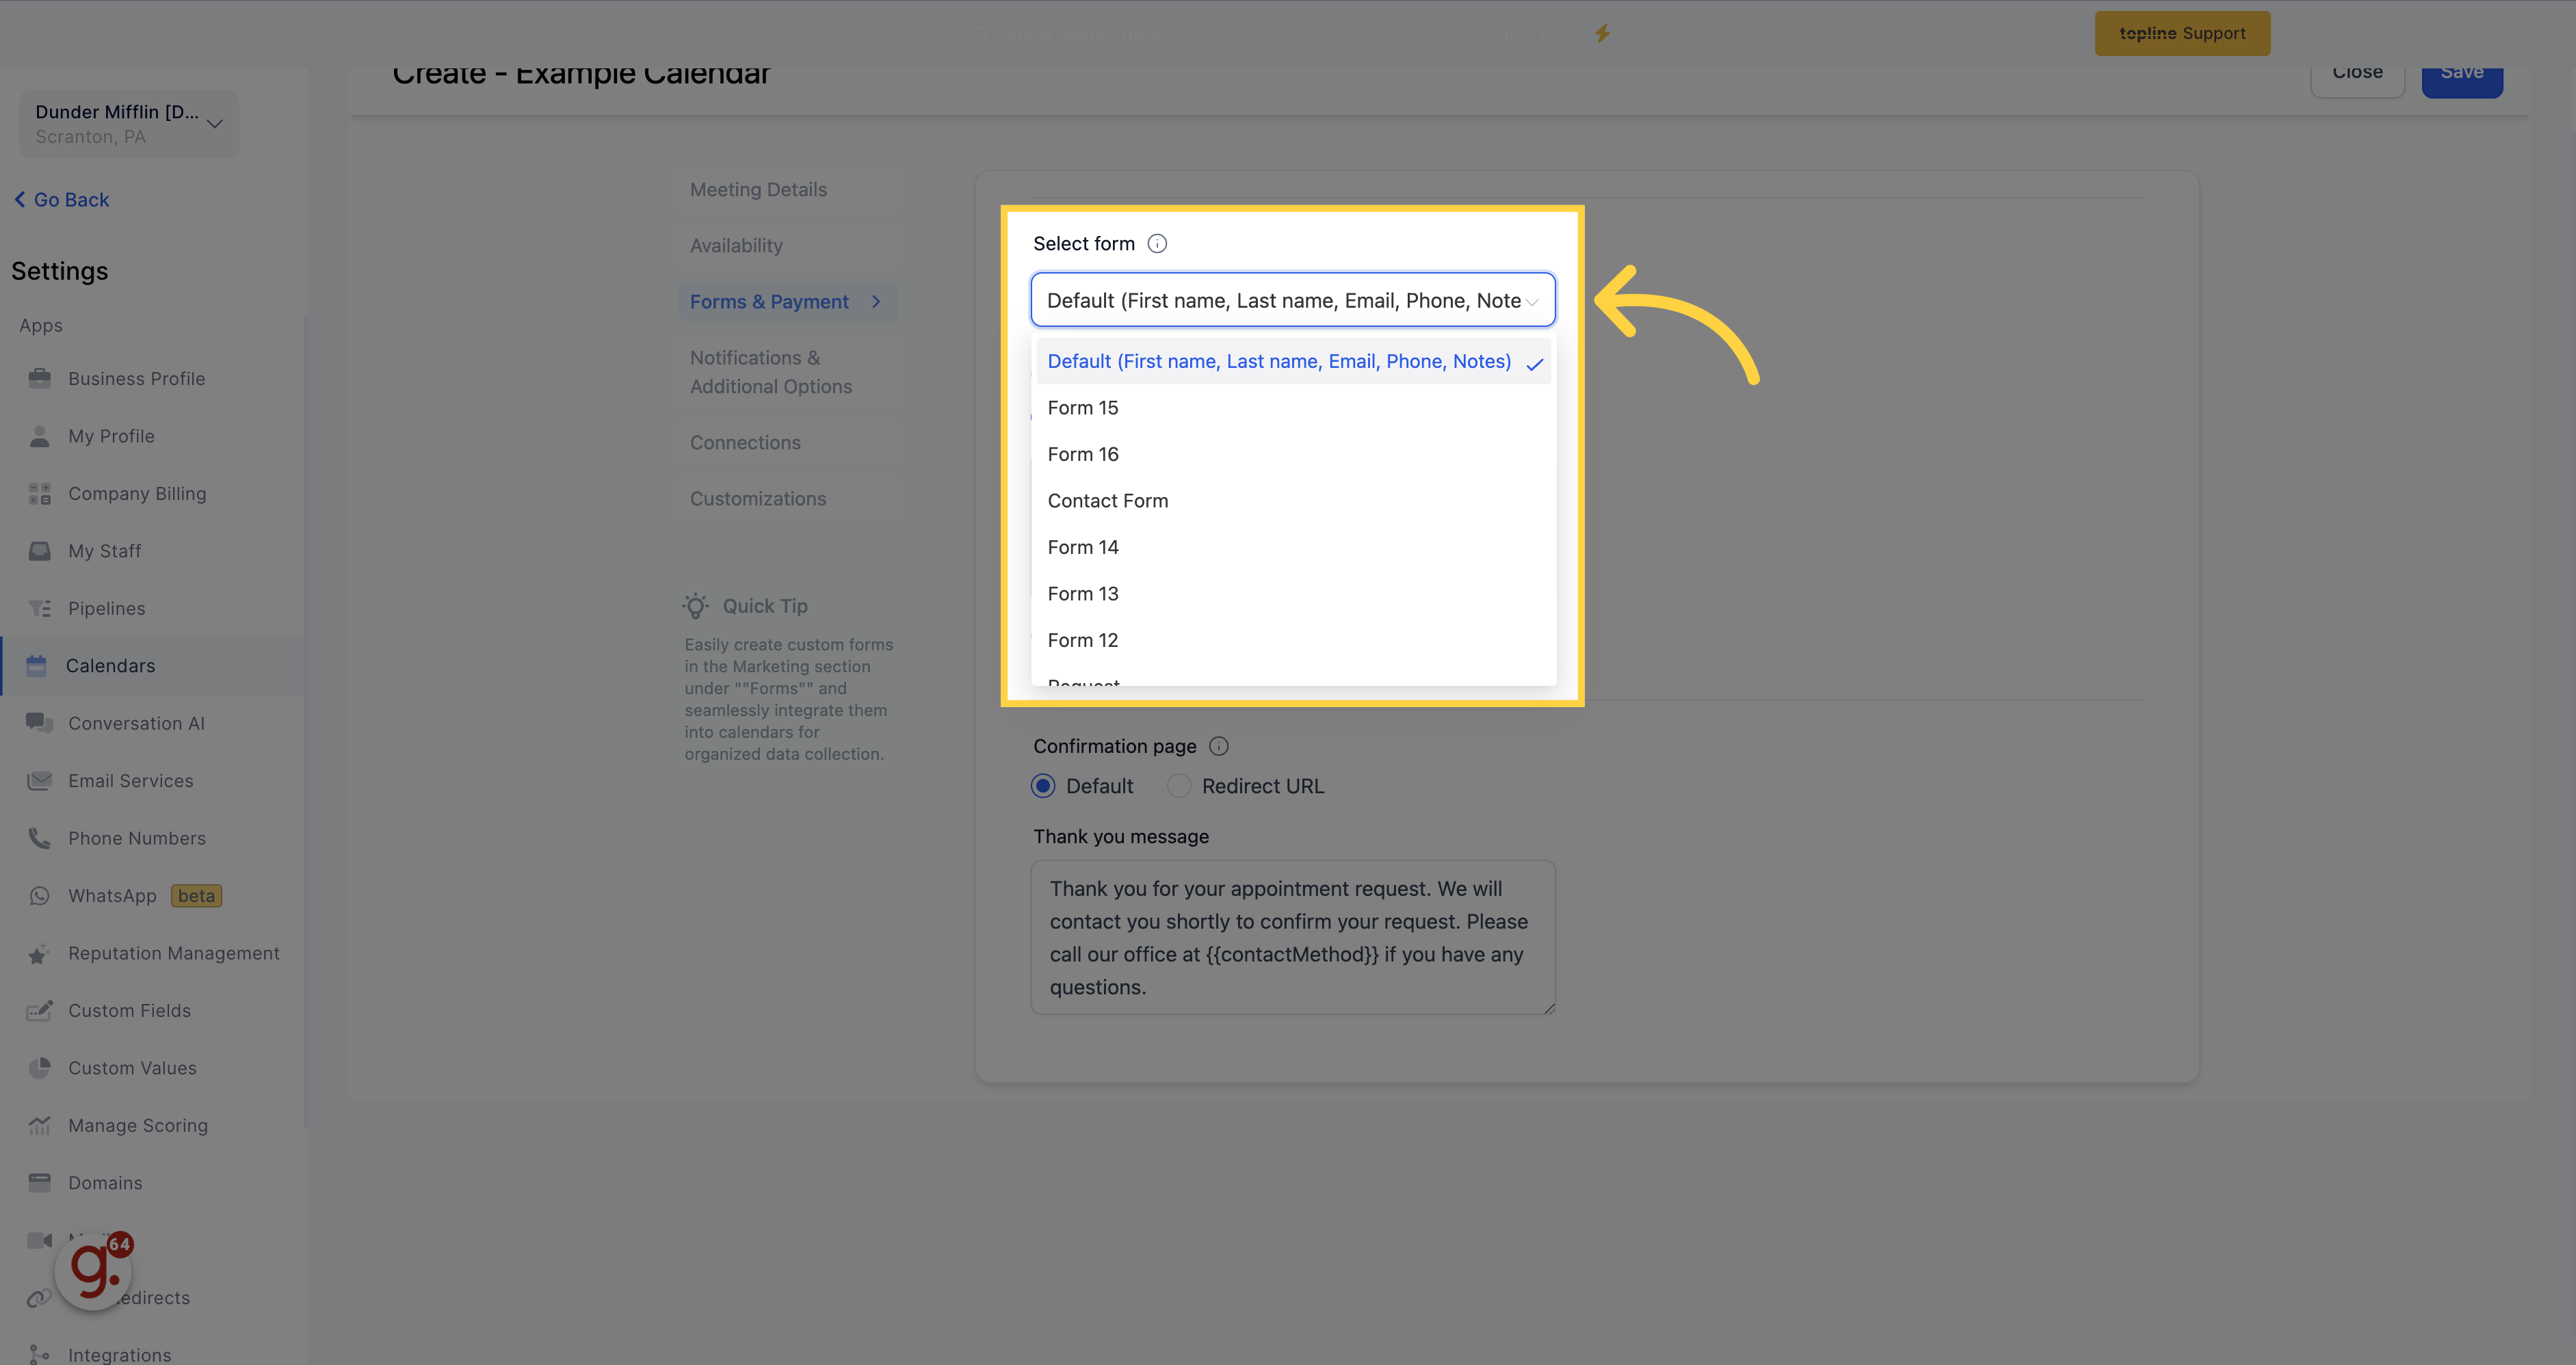
If you would like to collect more information than the standard First Name, Last Name, Email, and Phone from those who book on this calendar, create a custom form in Sites > Forms > Builder then select the form via the dropdown below.
Choose to use custom-built forms from your CRM by selecting them from the drop-down tab.
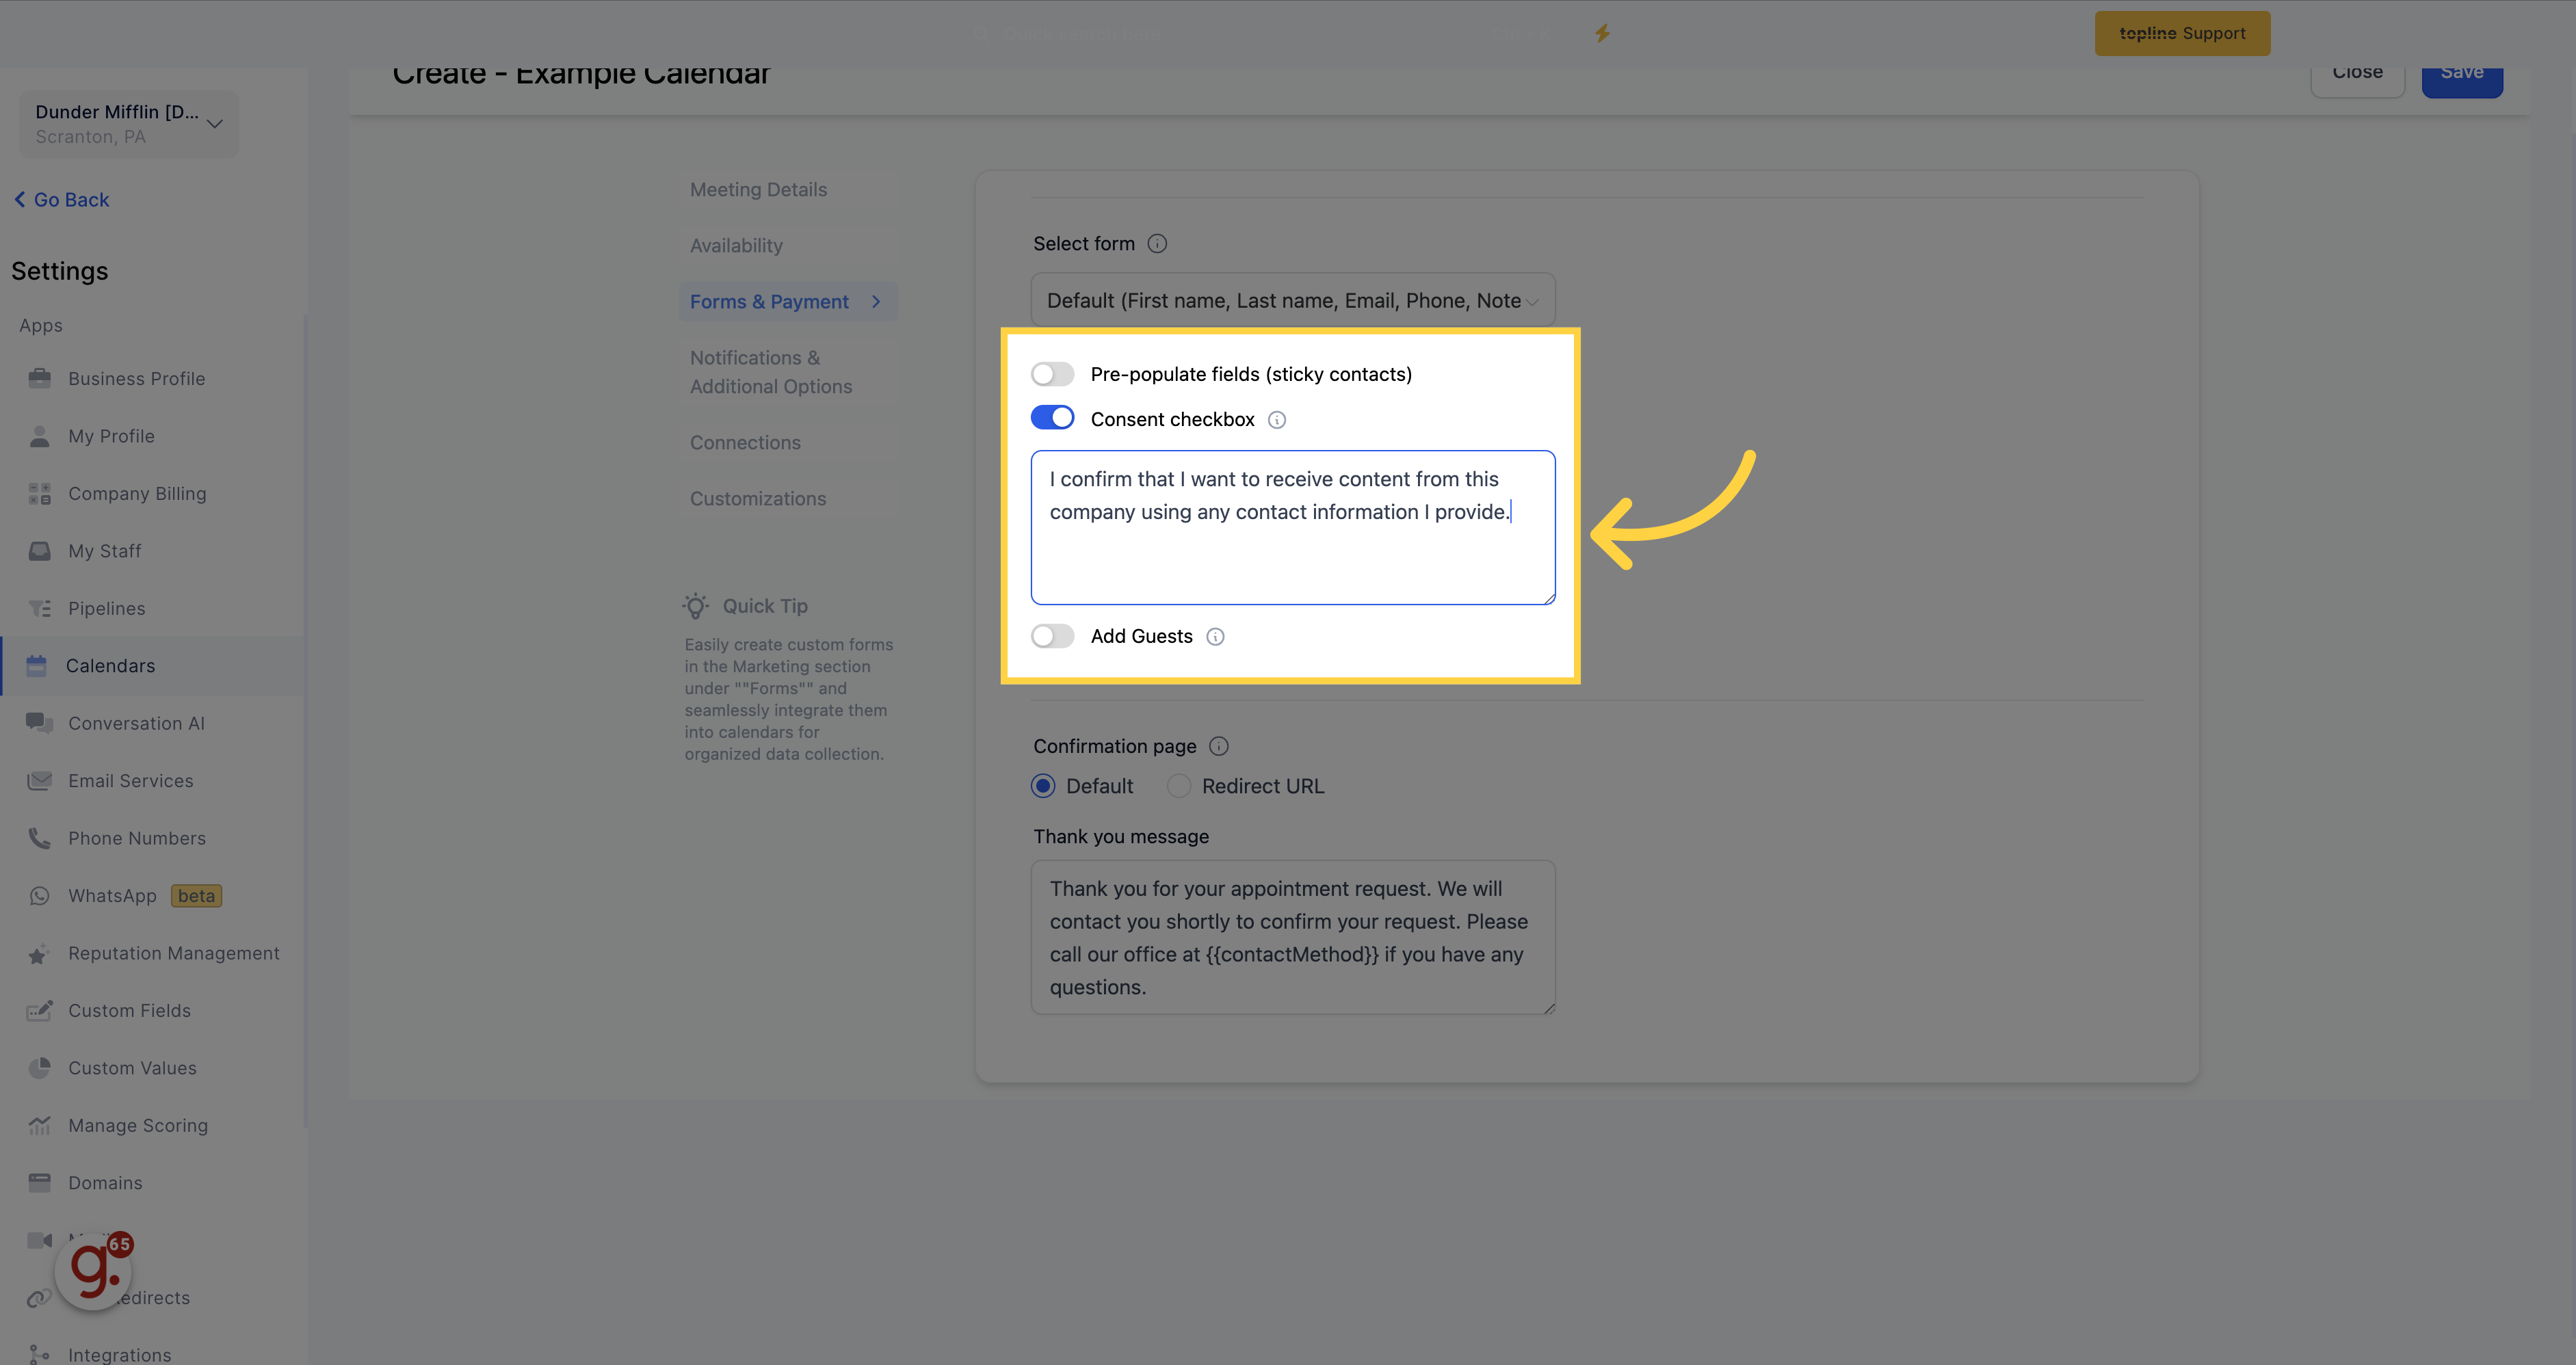
Toggle this option to allow obtaining consent from contacts when they provide their phone number during the appointment booking process.
Turn this on if you want all appointments booked using this calendar to be automatically confirmed. This will mark the appointment as "confirmed," and you can use it to trigger marketing automation based on the confirmed status.
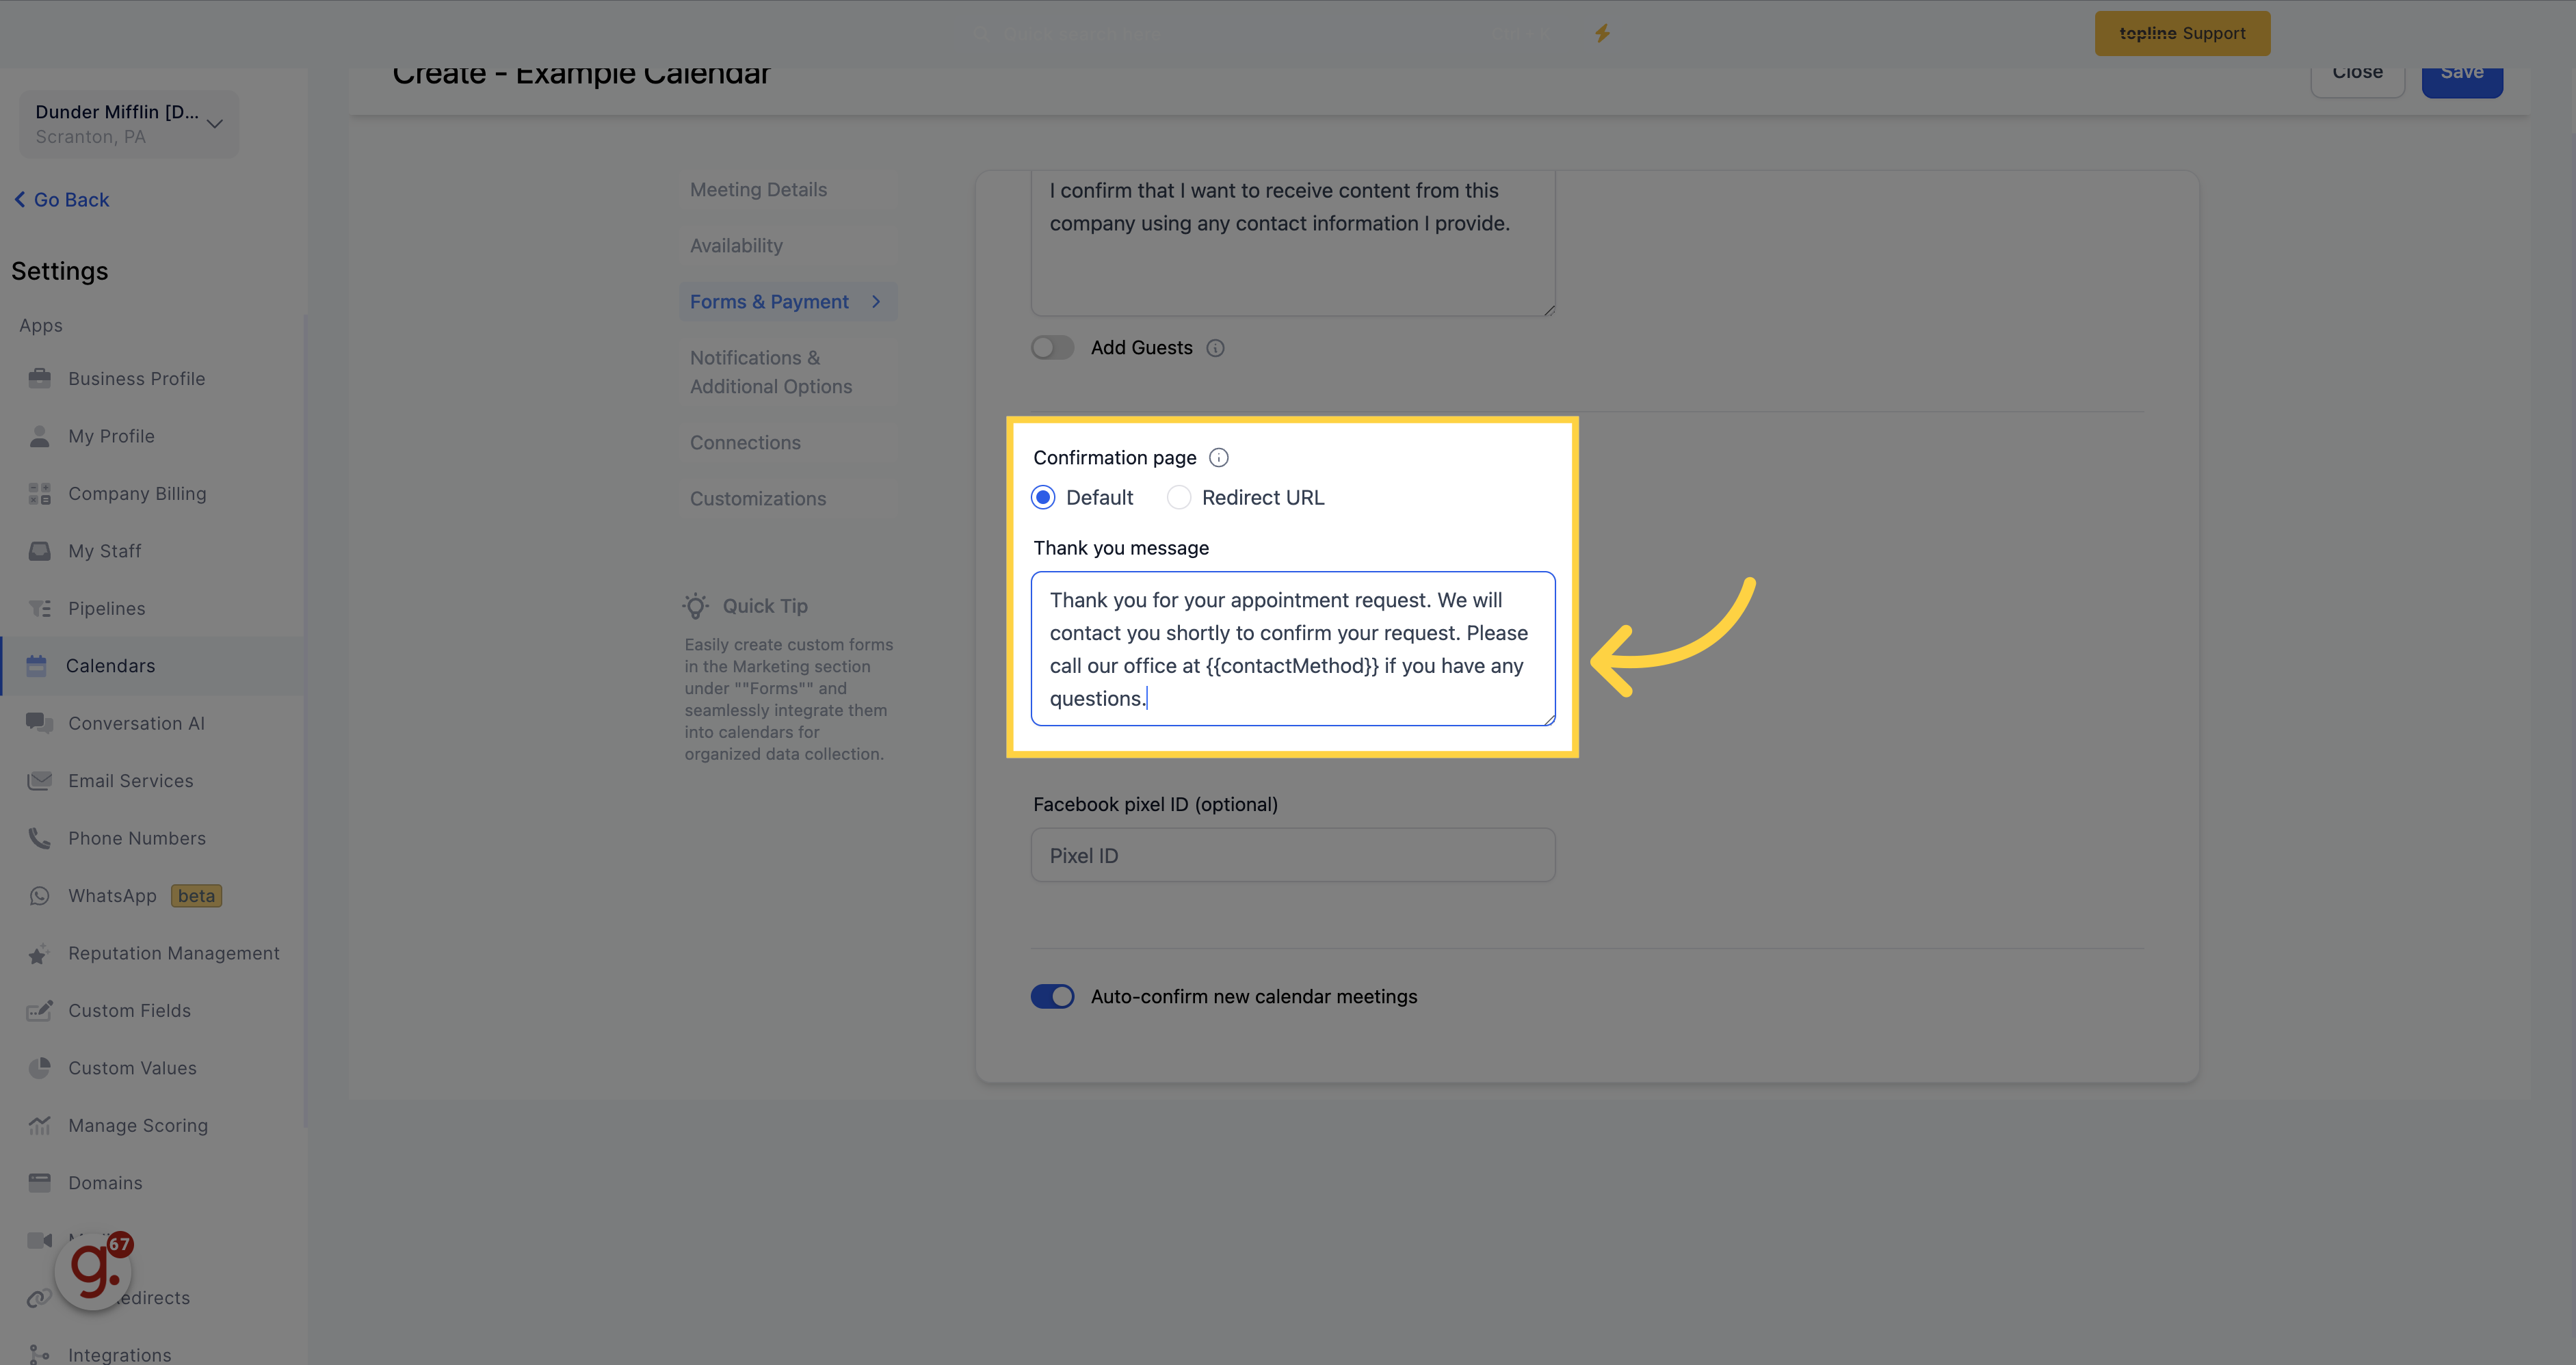
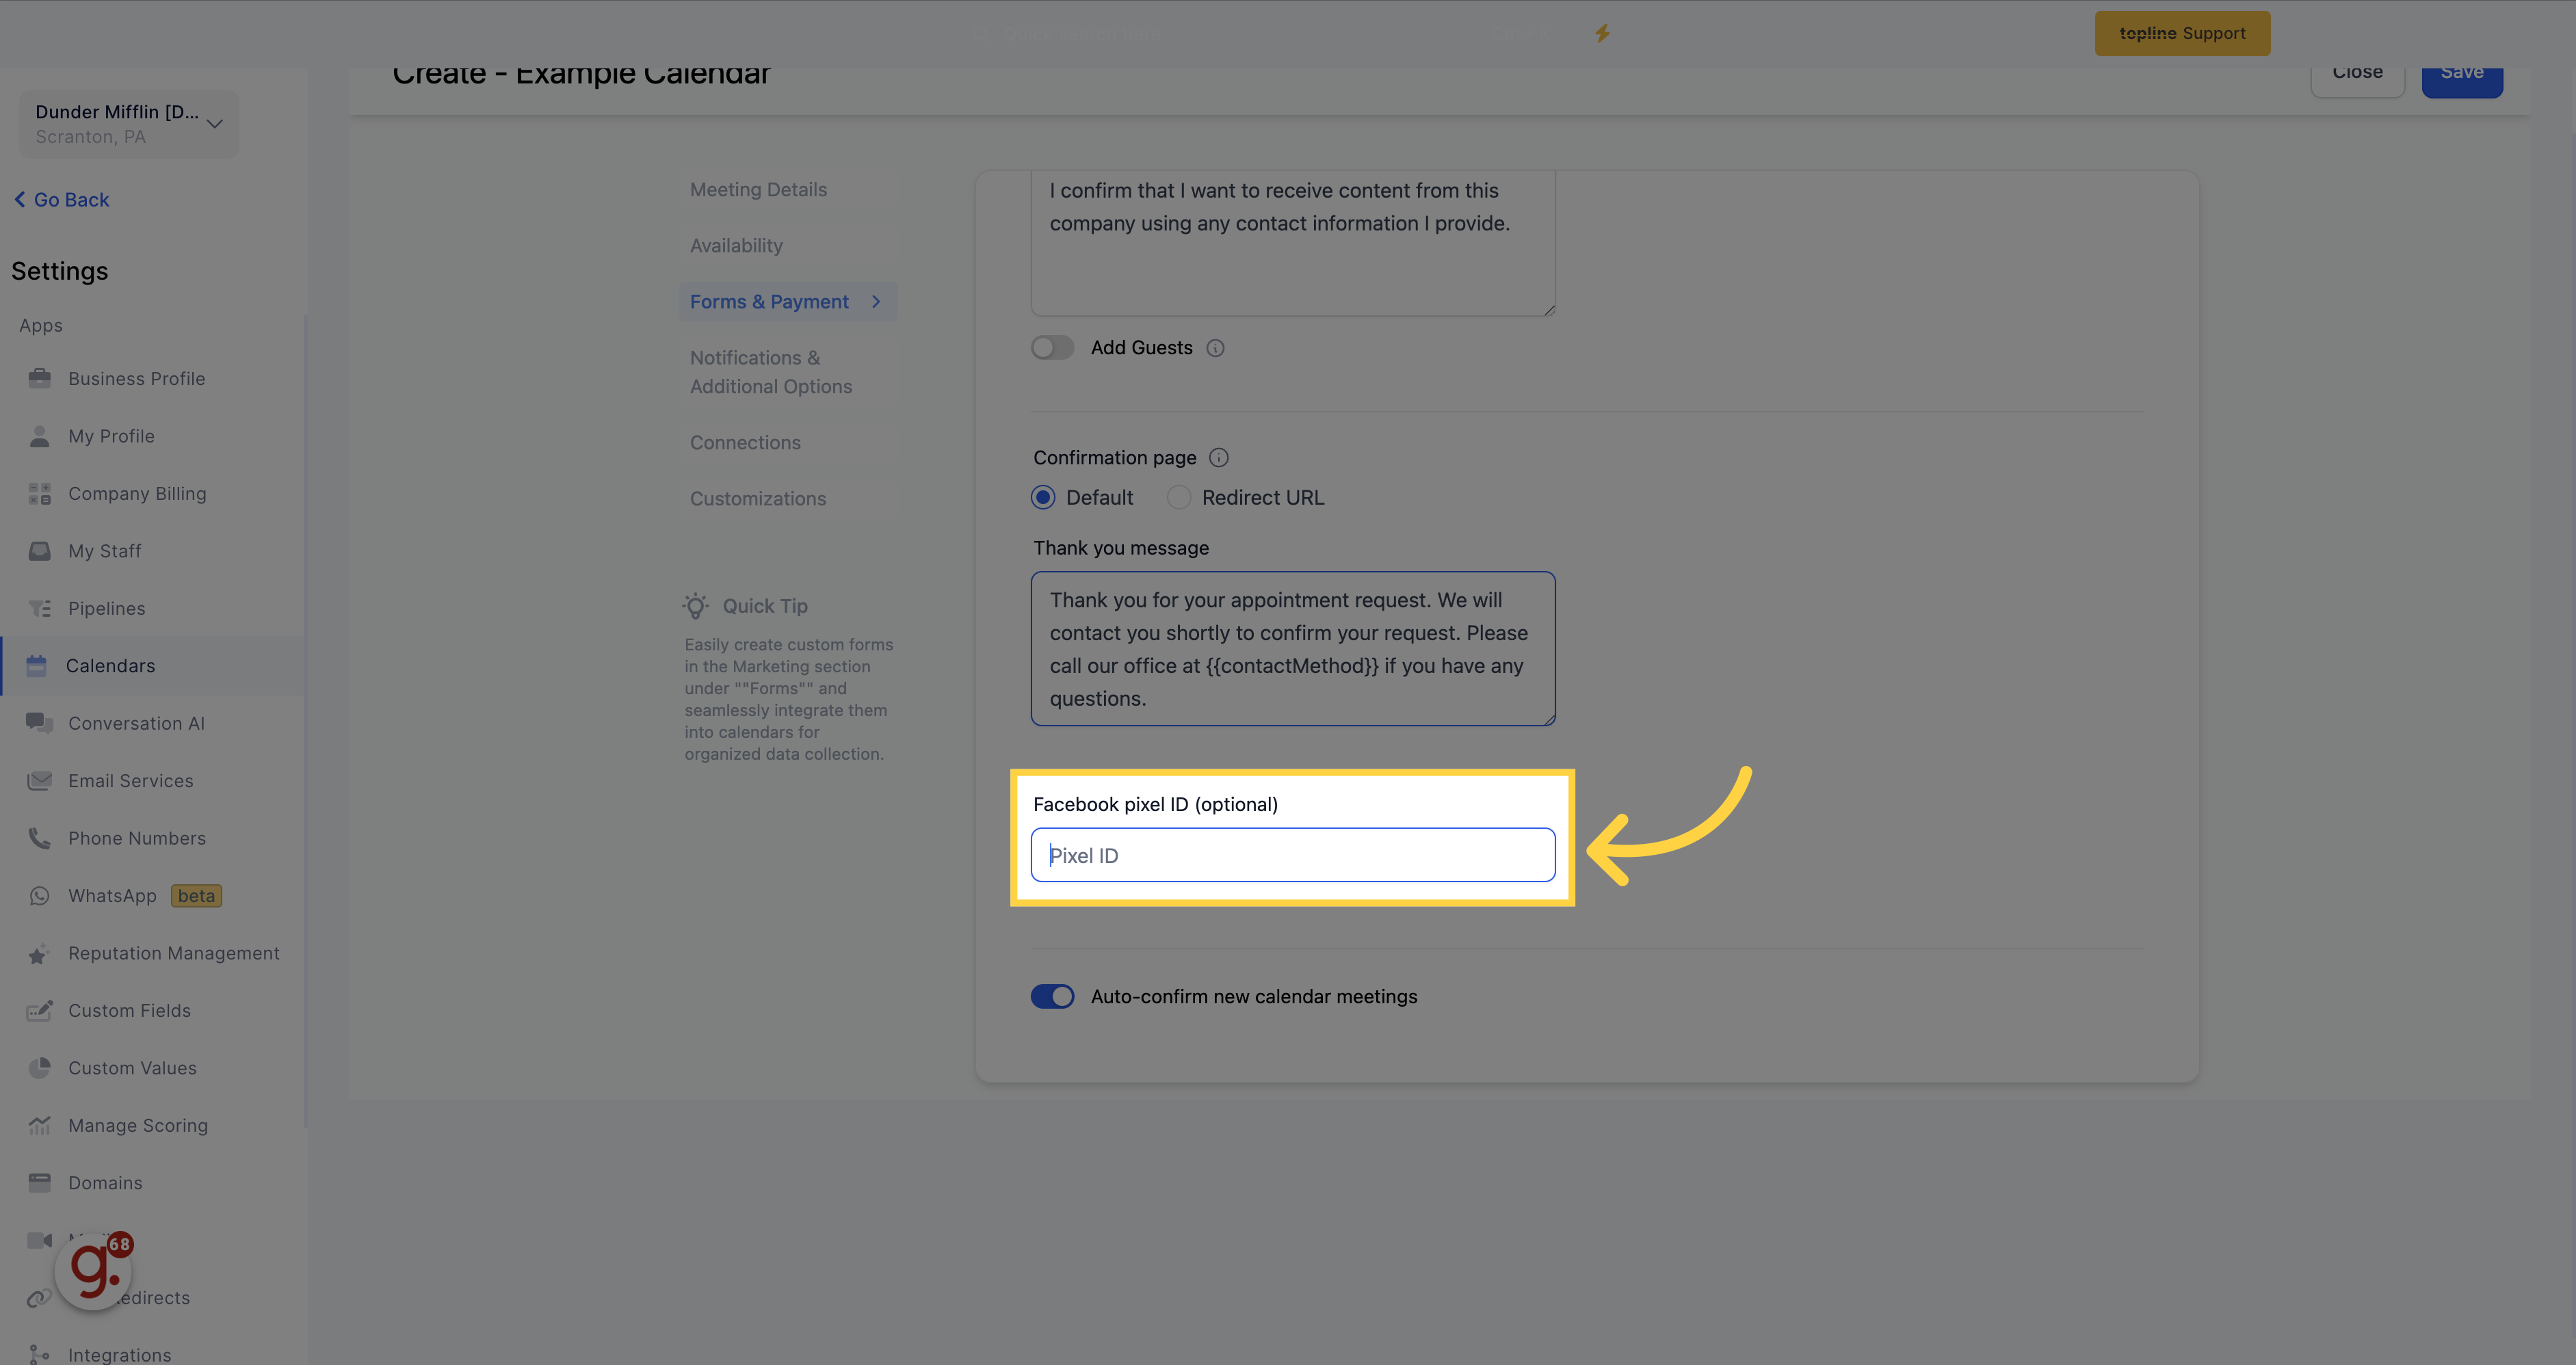
To track new appointment bookings with your Facebook Ads Manager, you can integrate your Facebook Pixel with your appointment booking system.
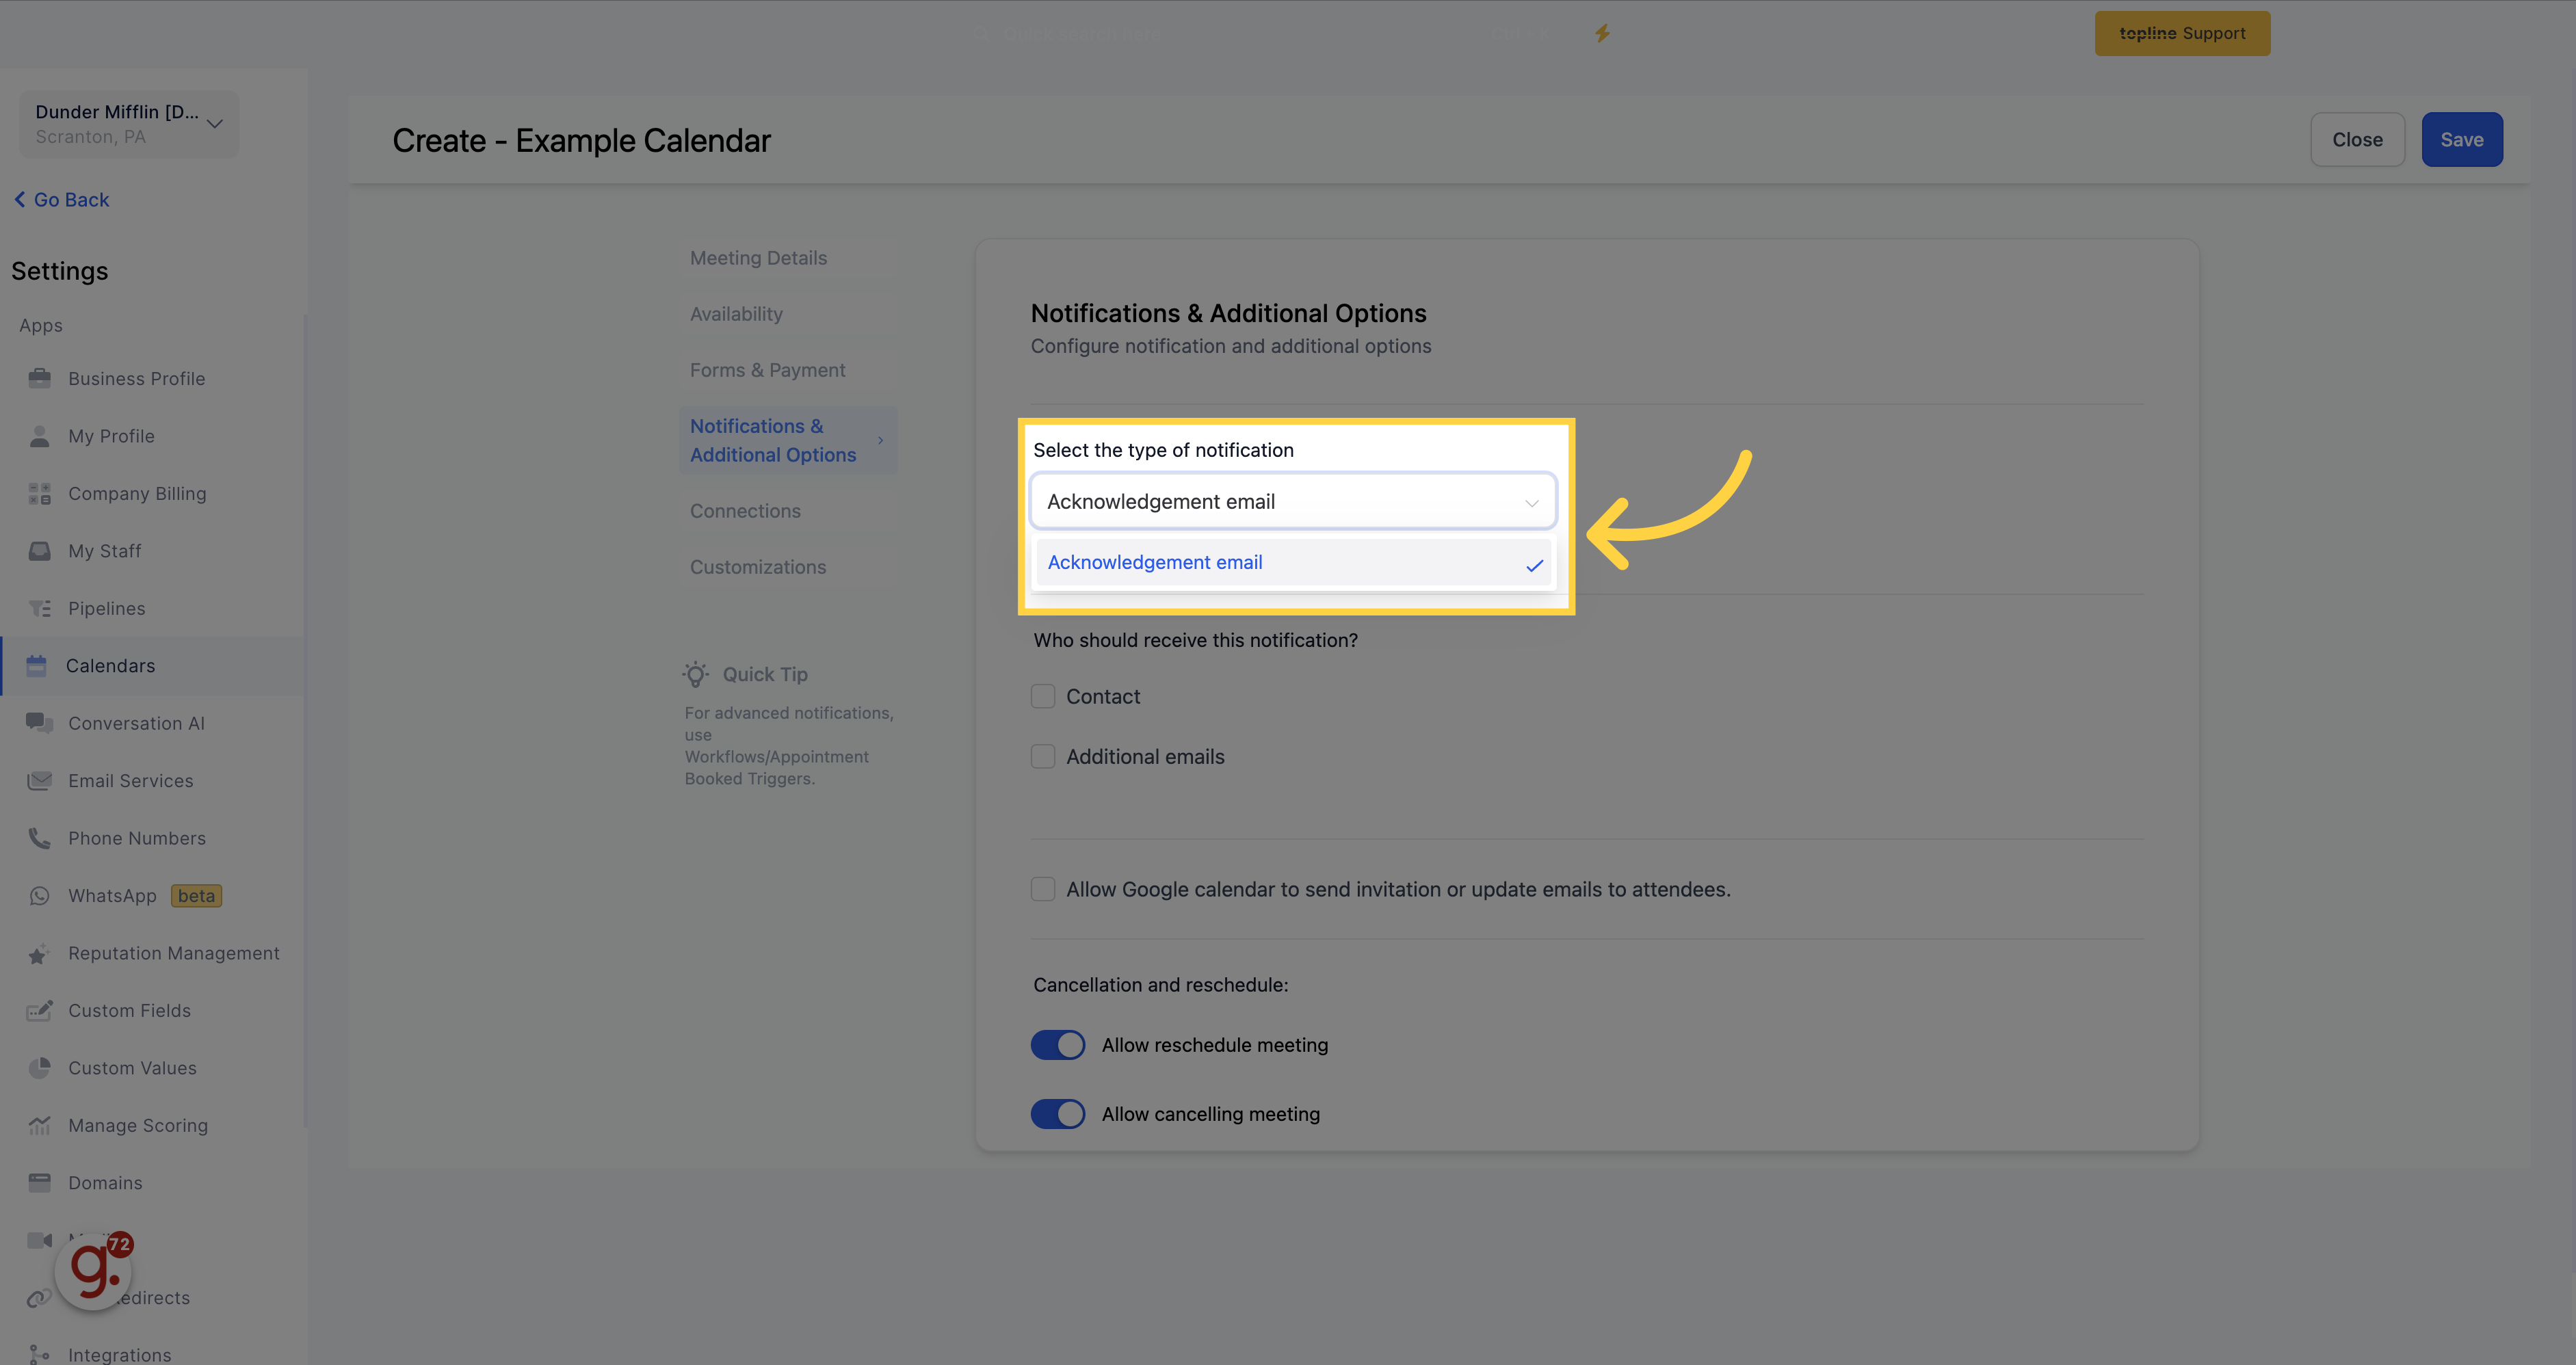
Configure notification and additional options.
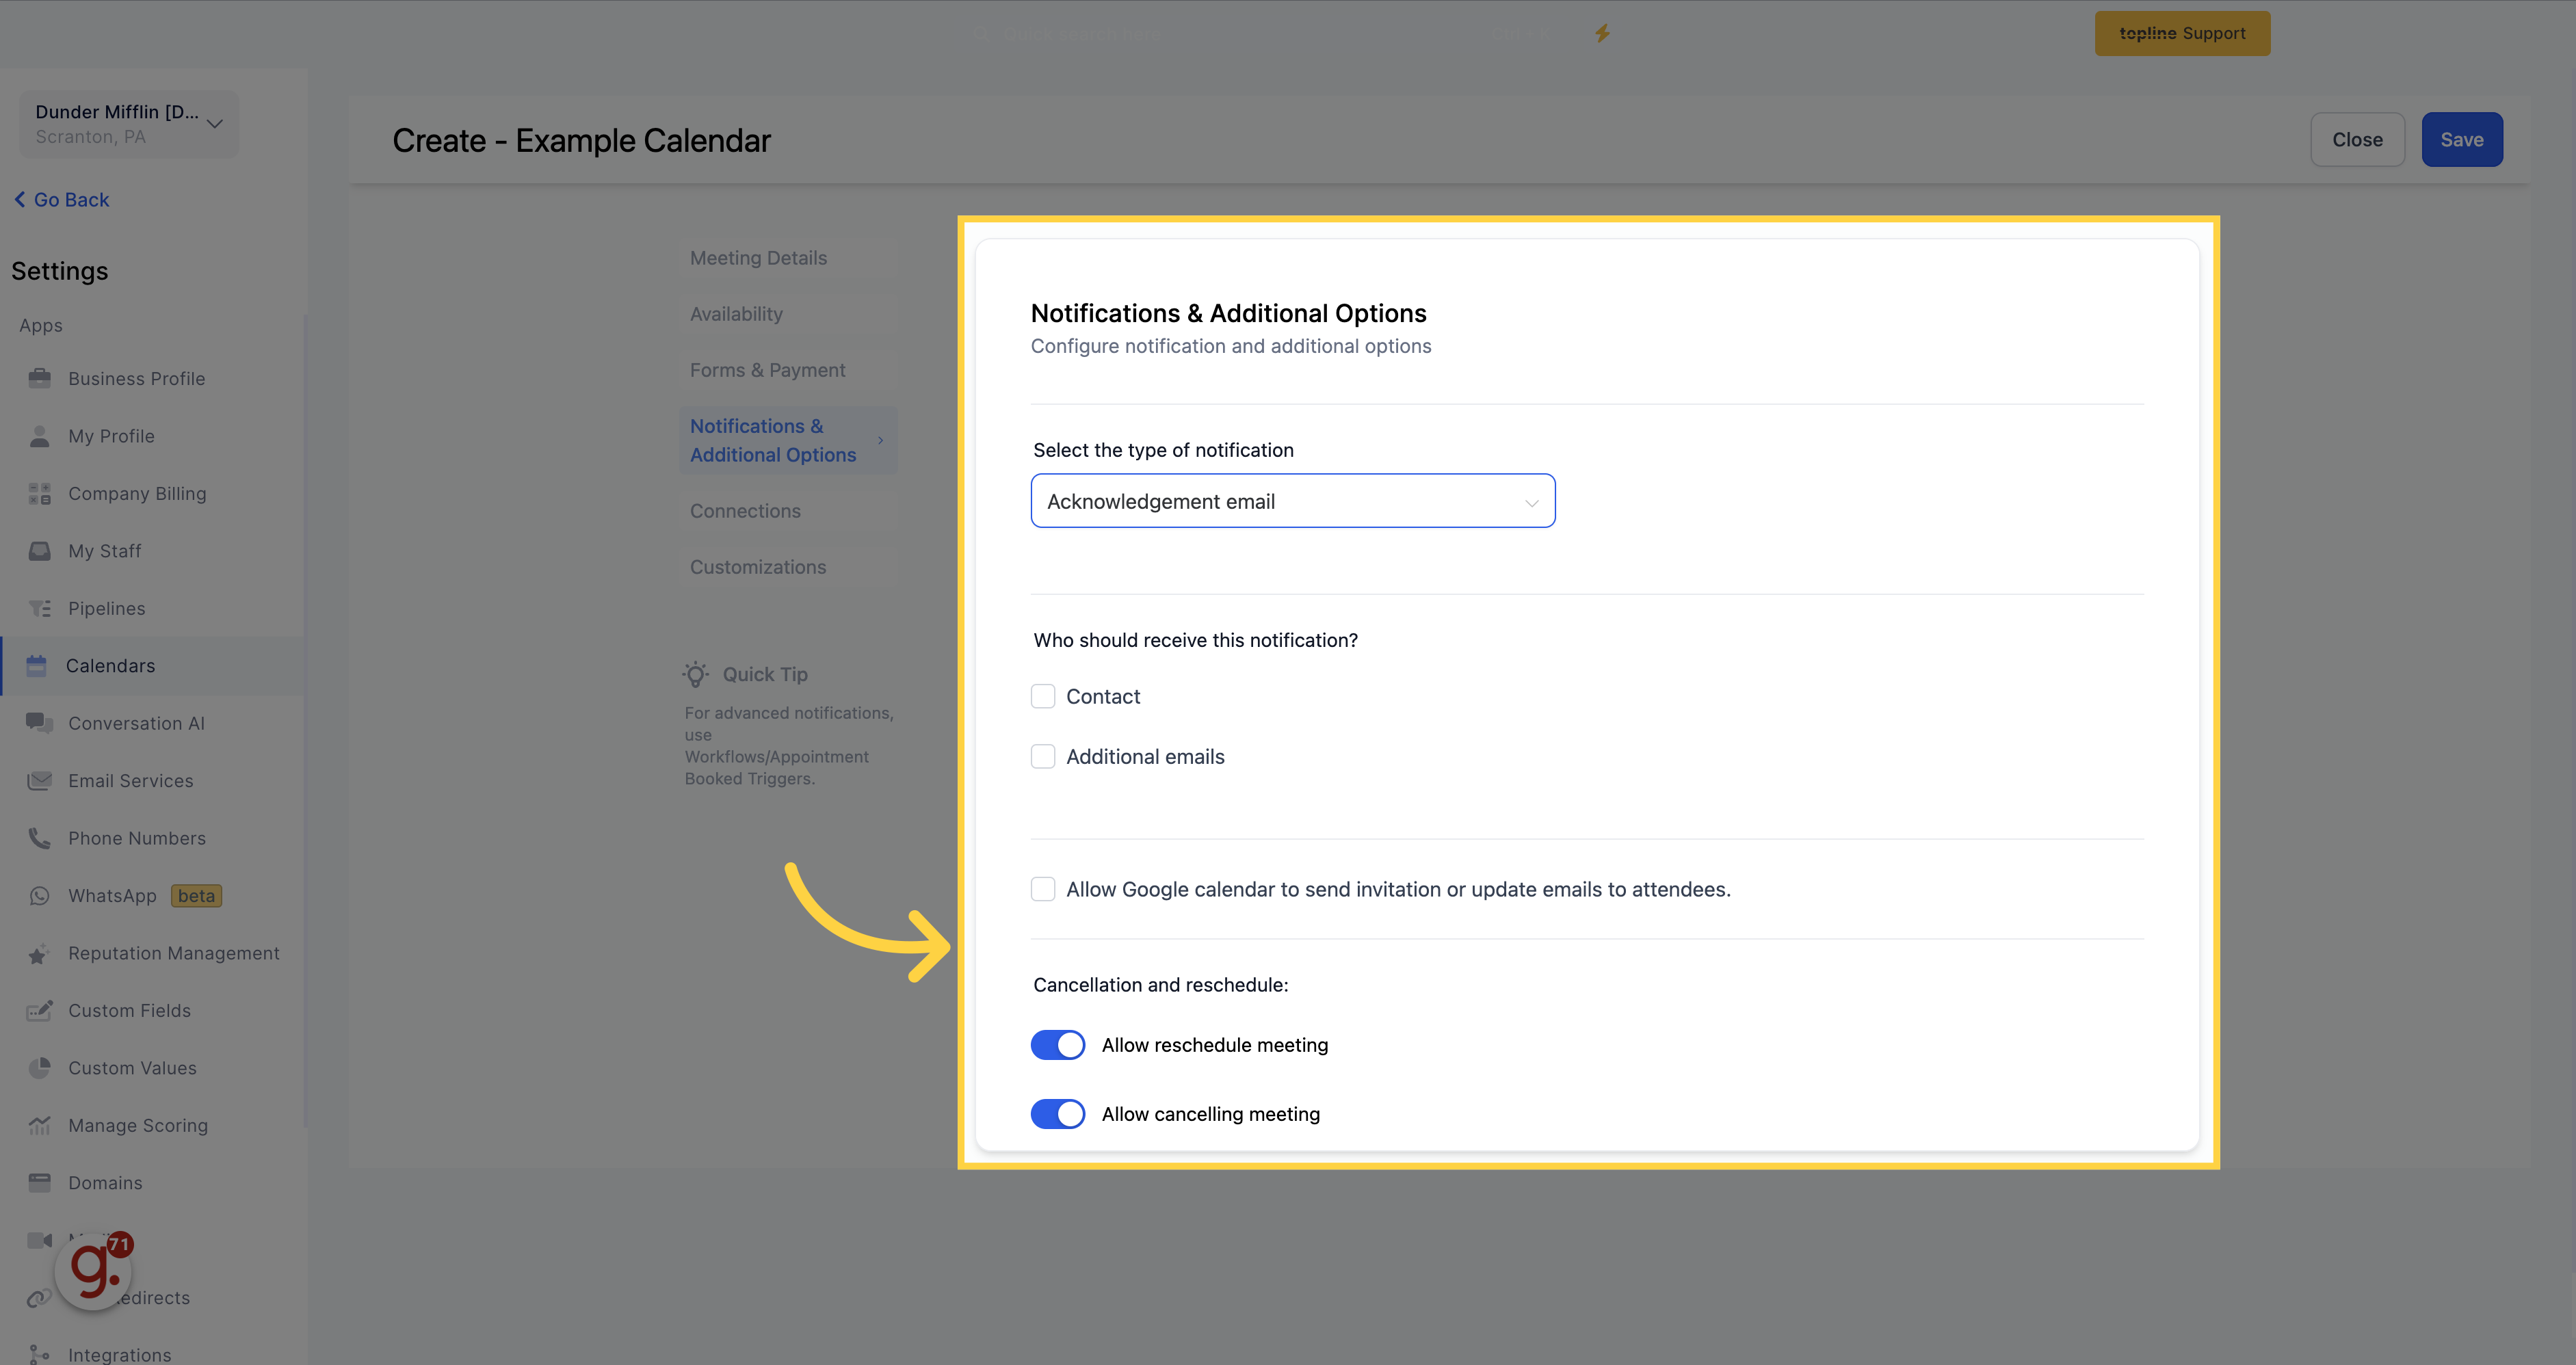
Select "Acknowledgement Email" which is gonna be the notification type.
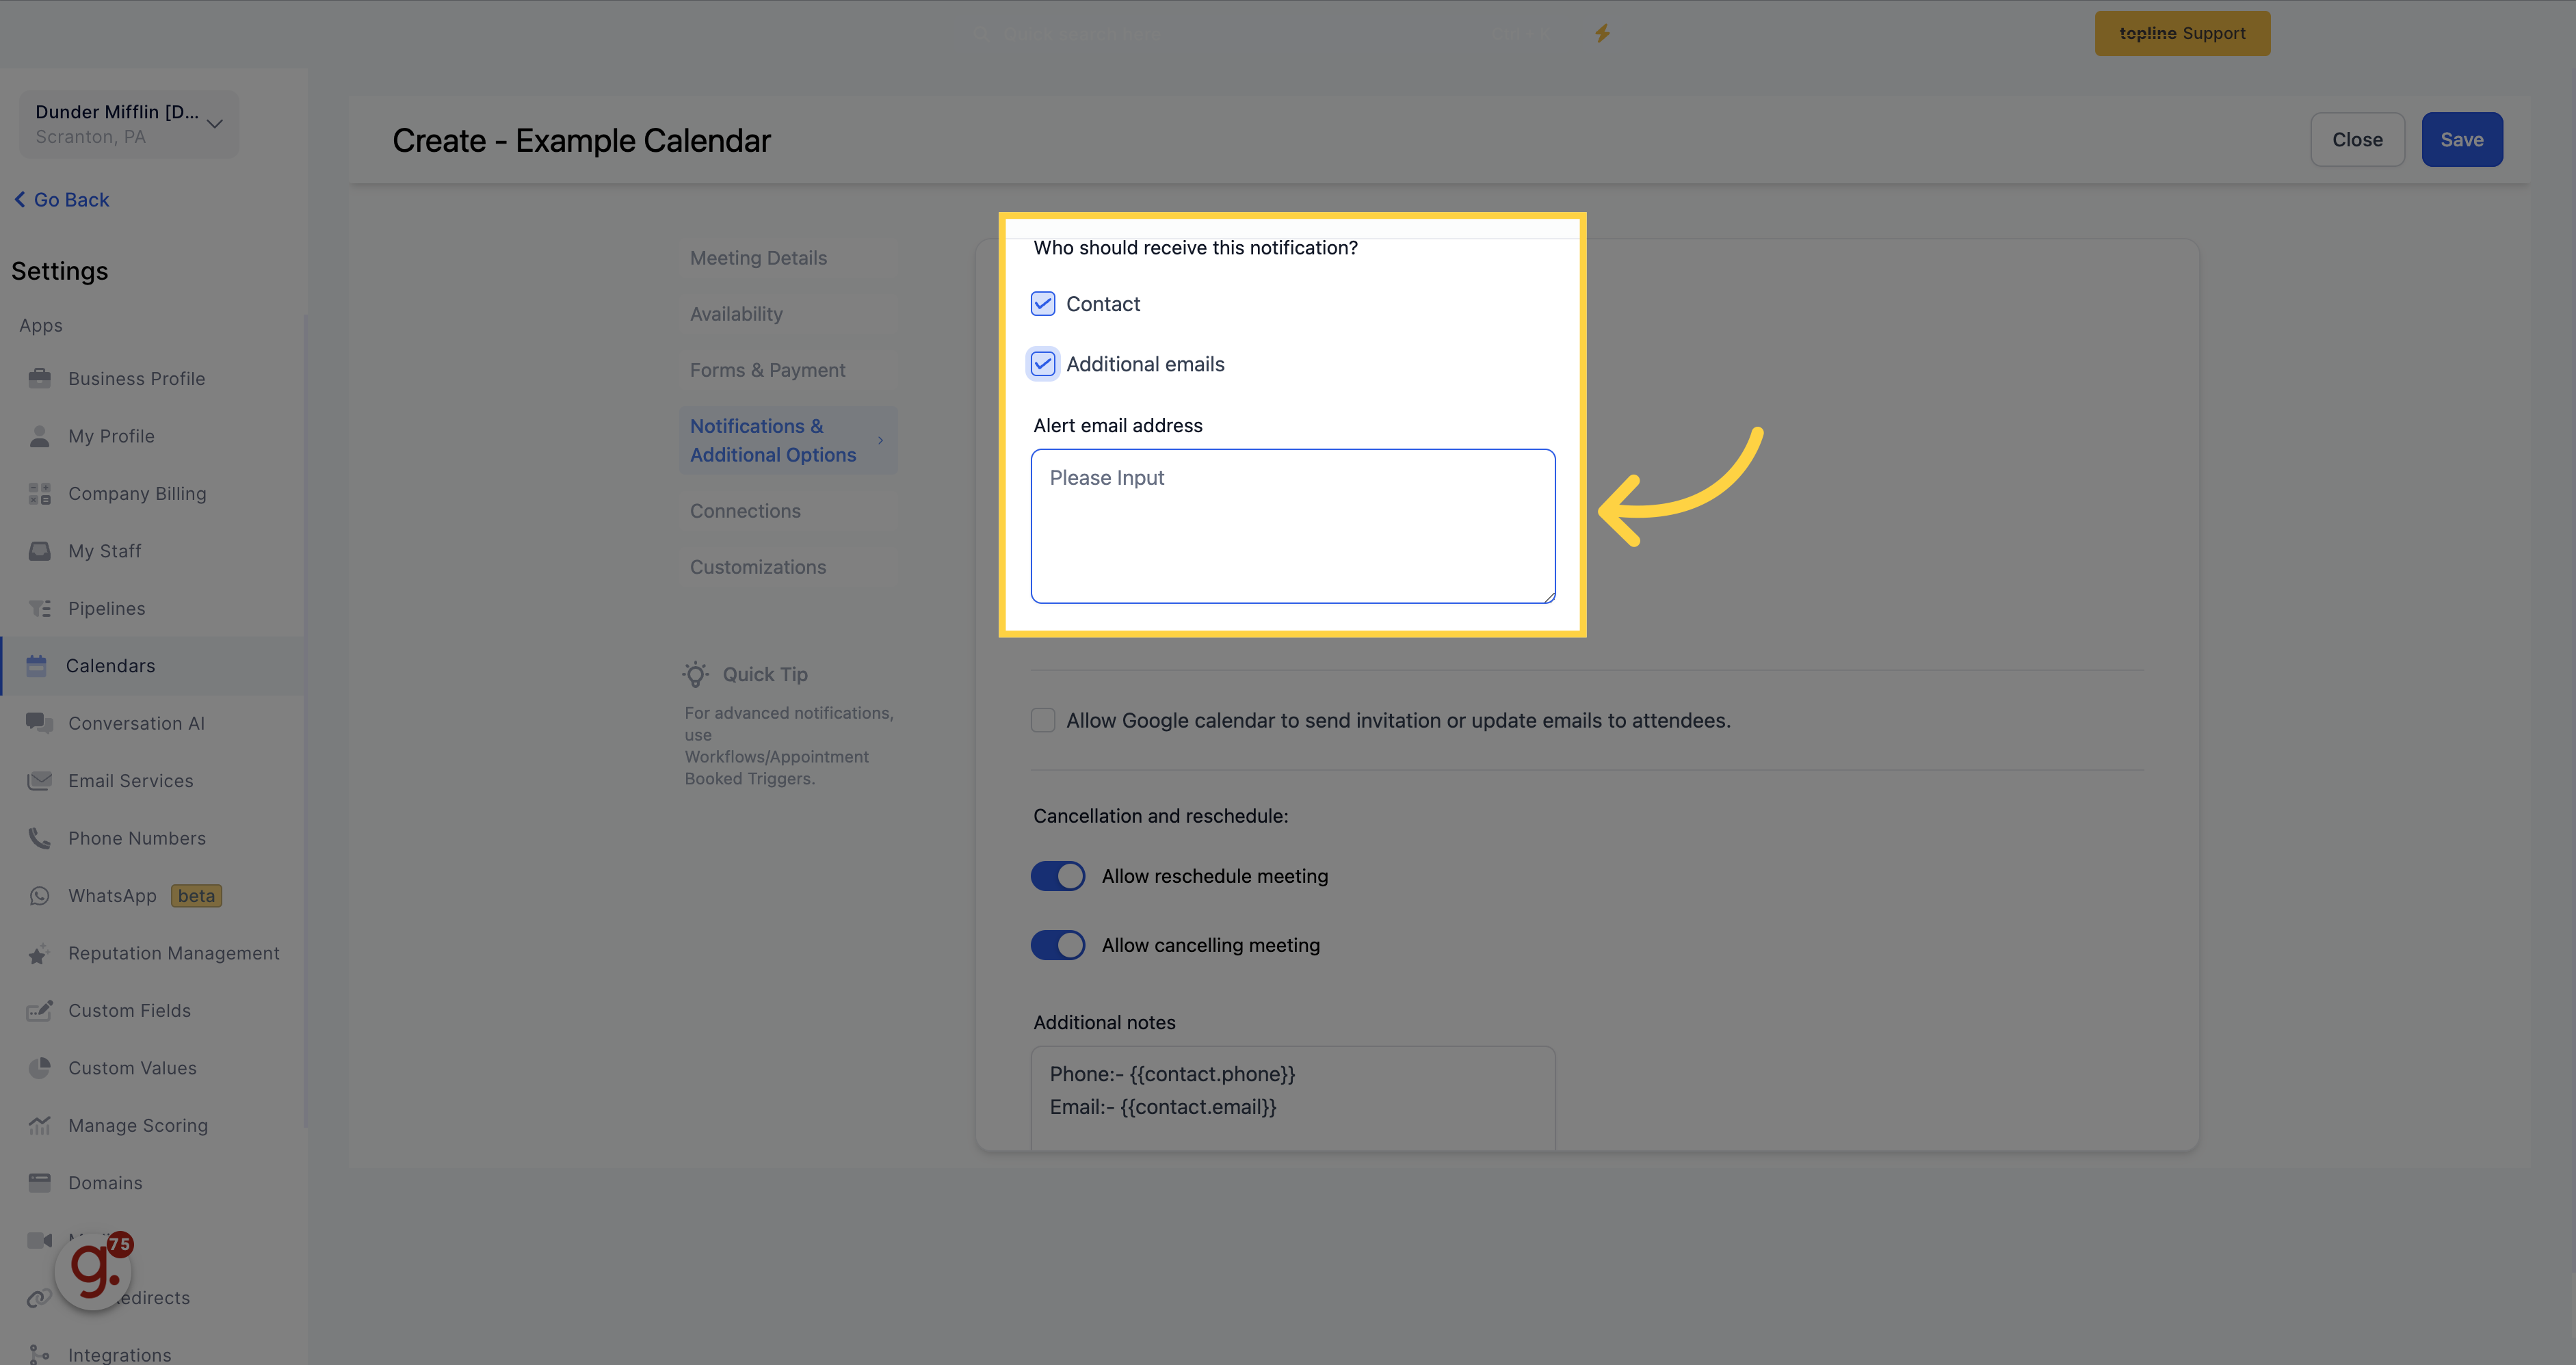
Contact - Toggle this on to send a notification to the contact who booked the appointment.
Additional Emails - Toggle this on to receive email alerts when you have a new appointment request. Enter a single or list of email addresses separated by a comma to receive the notification.
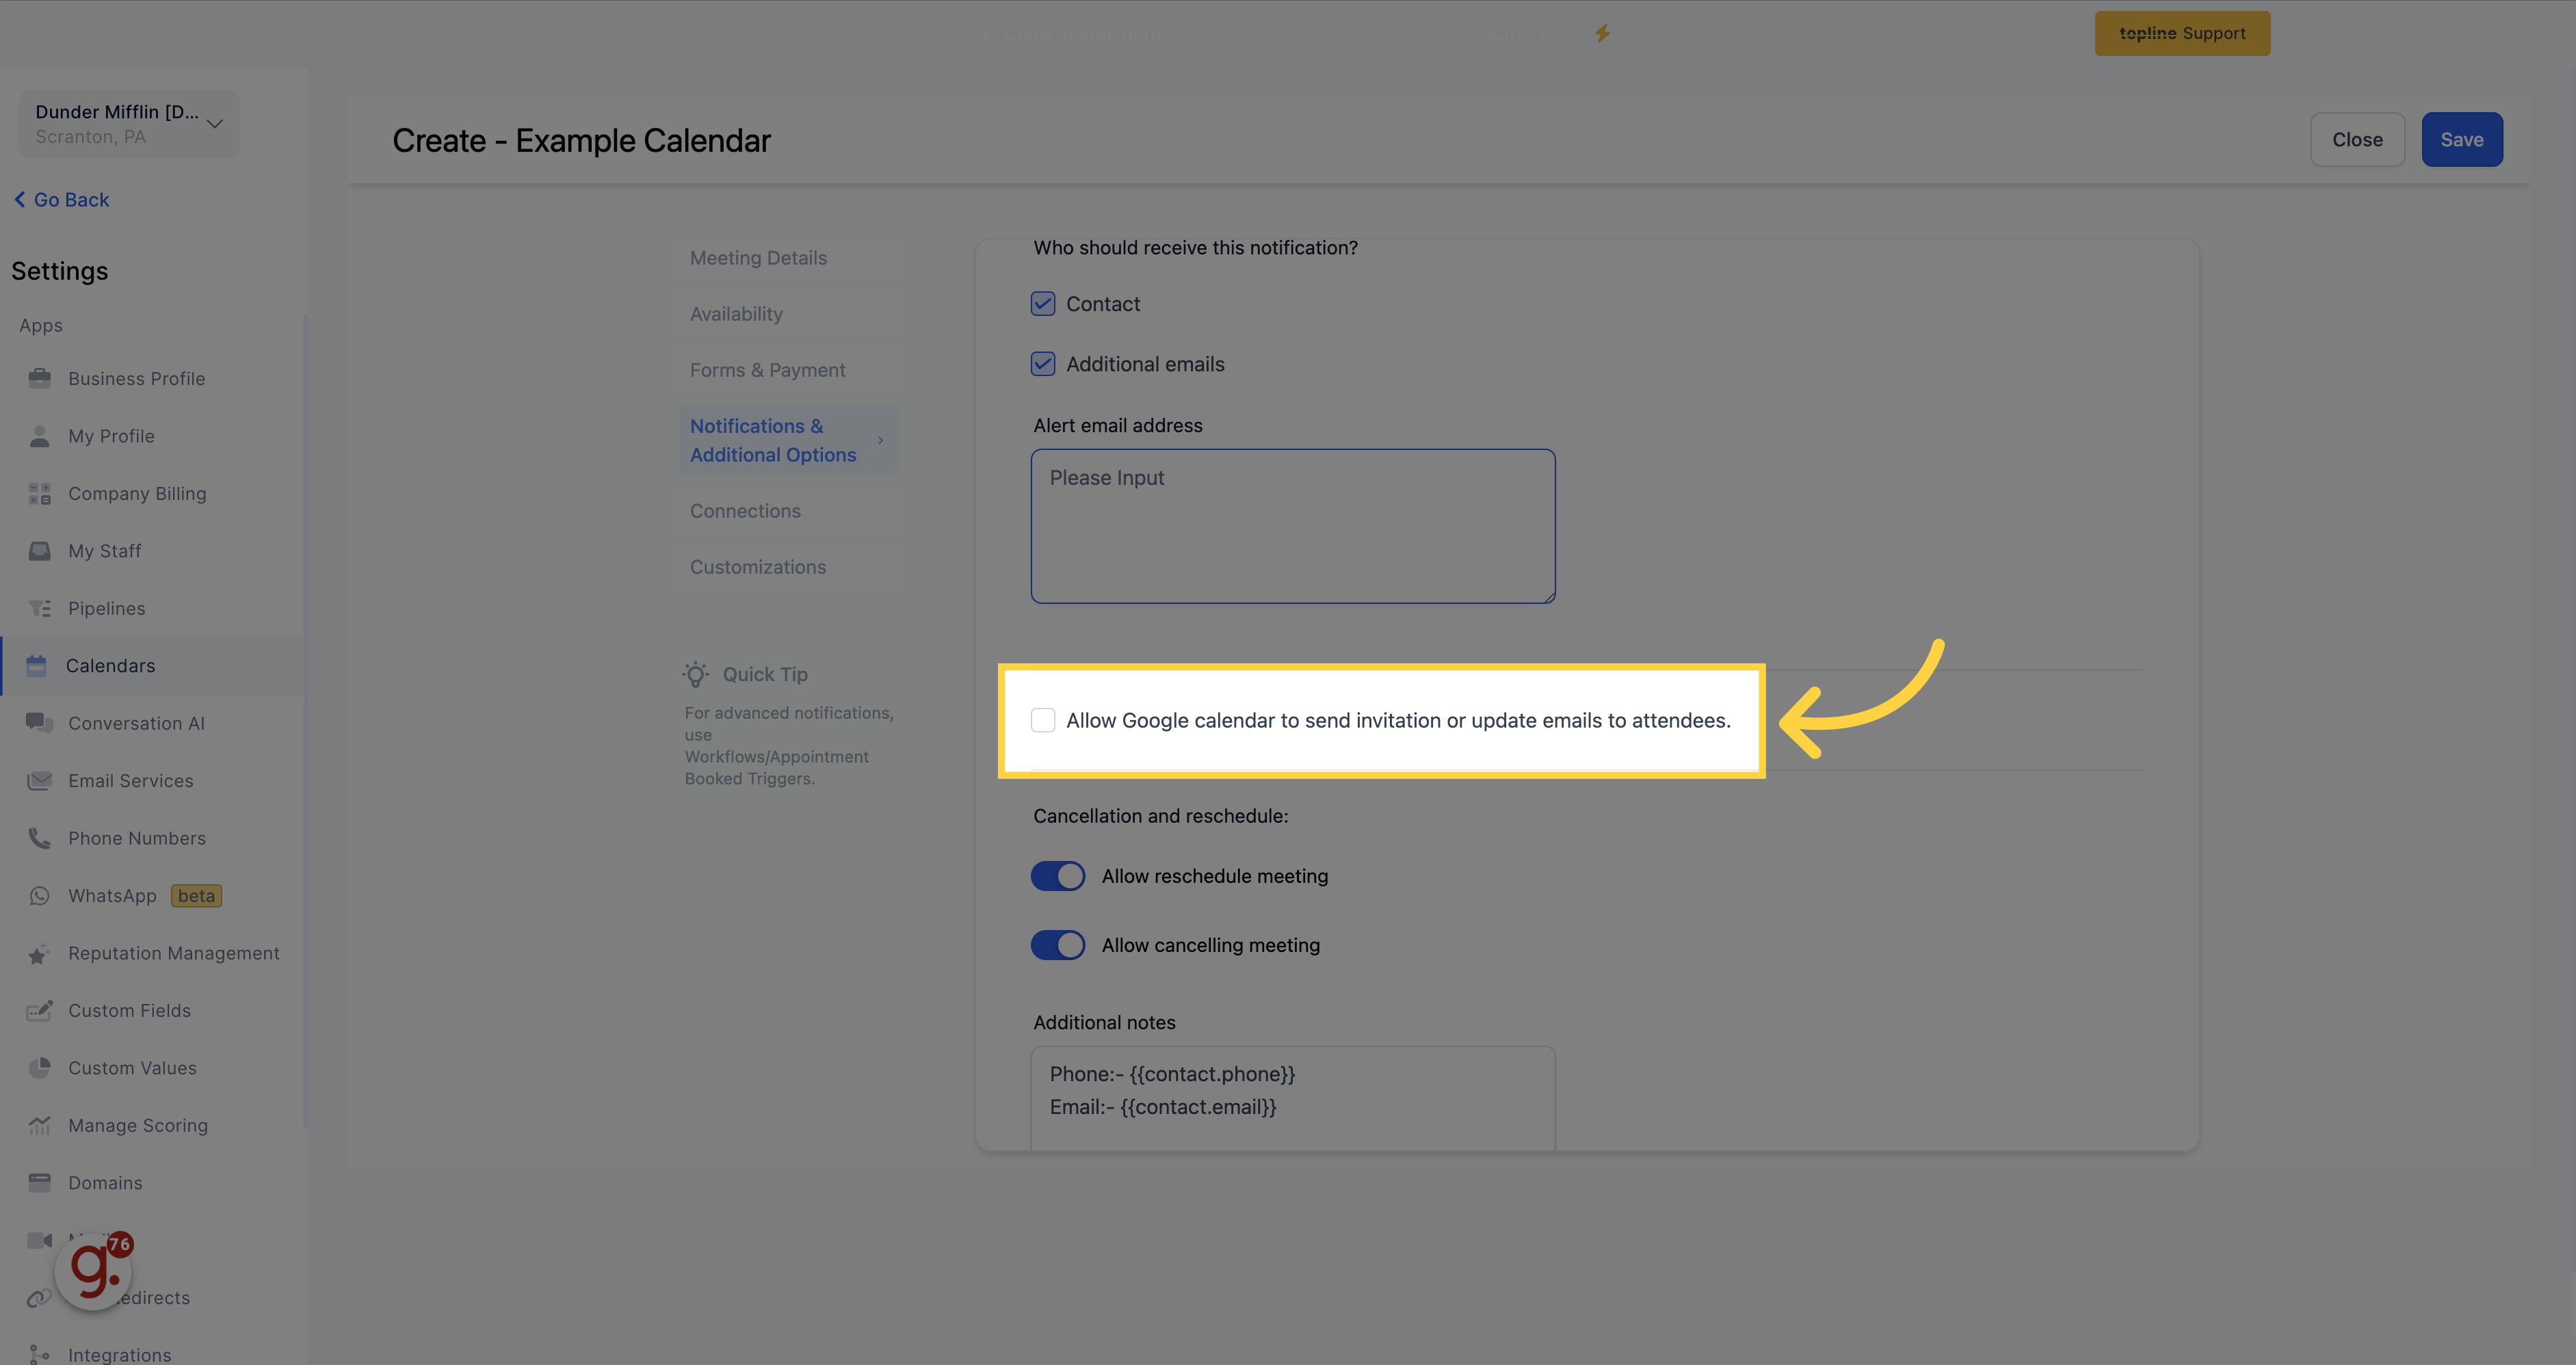
Check this box to allow Google to send an invitation email to all parties. The email will include a lot of detail and ask users to confirm whether they are attending by selecting "yes," "no," or "maybe."
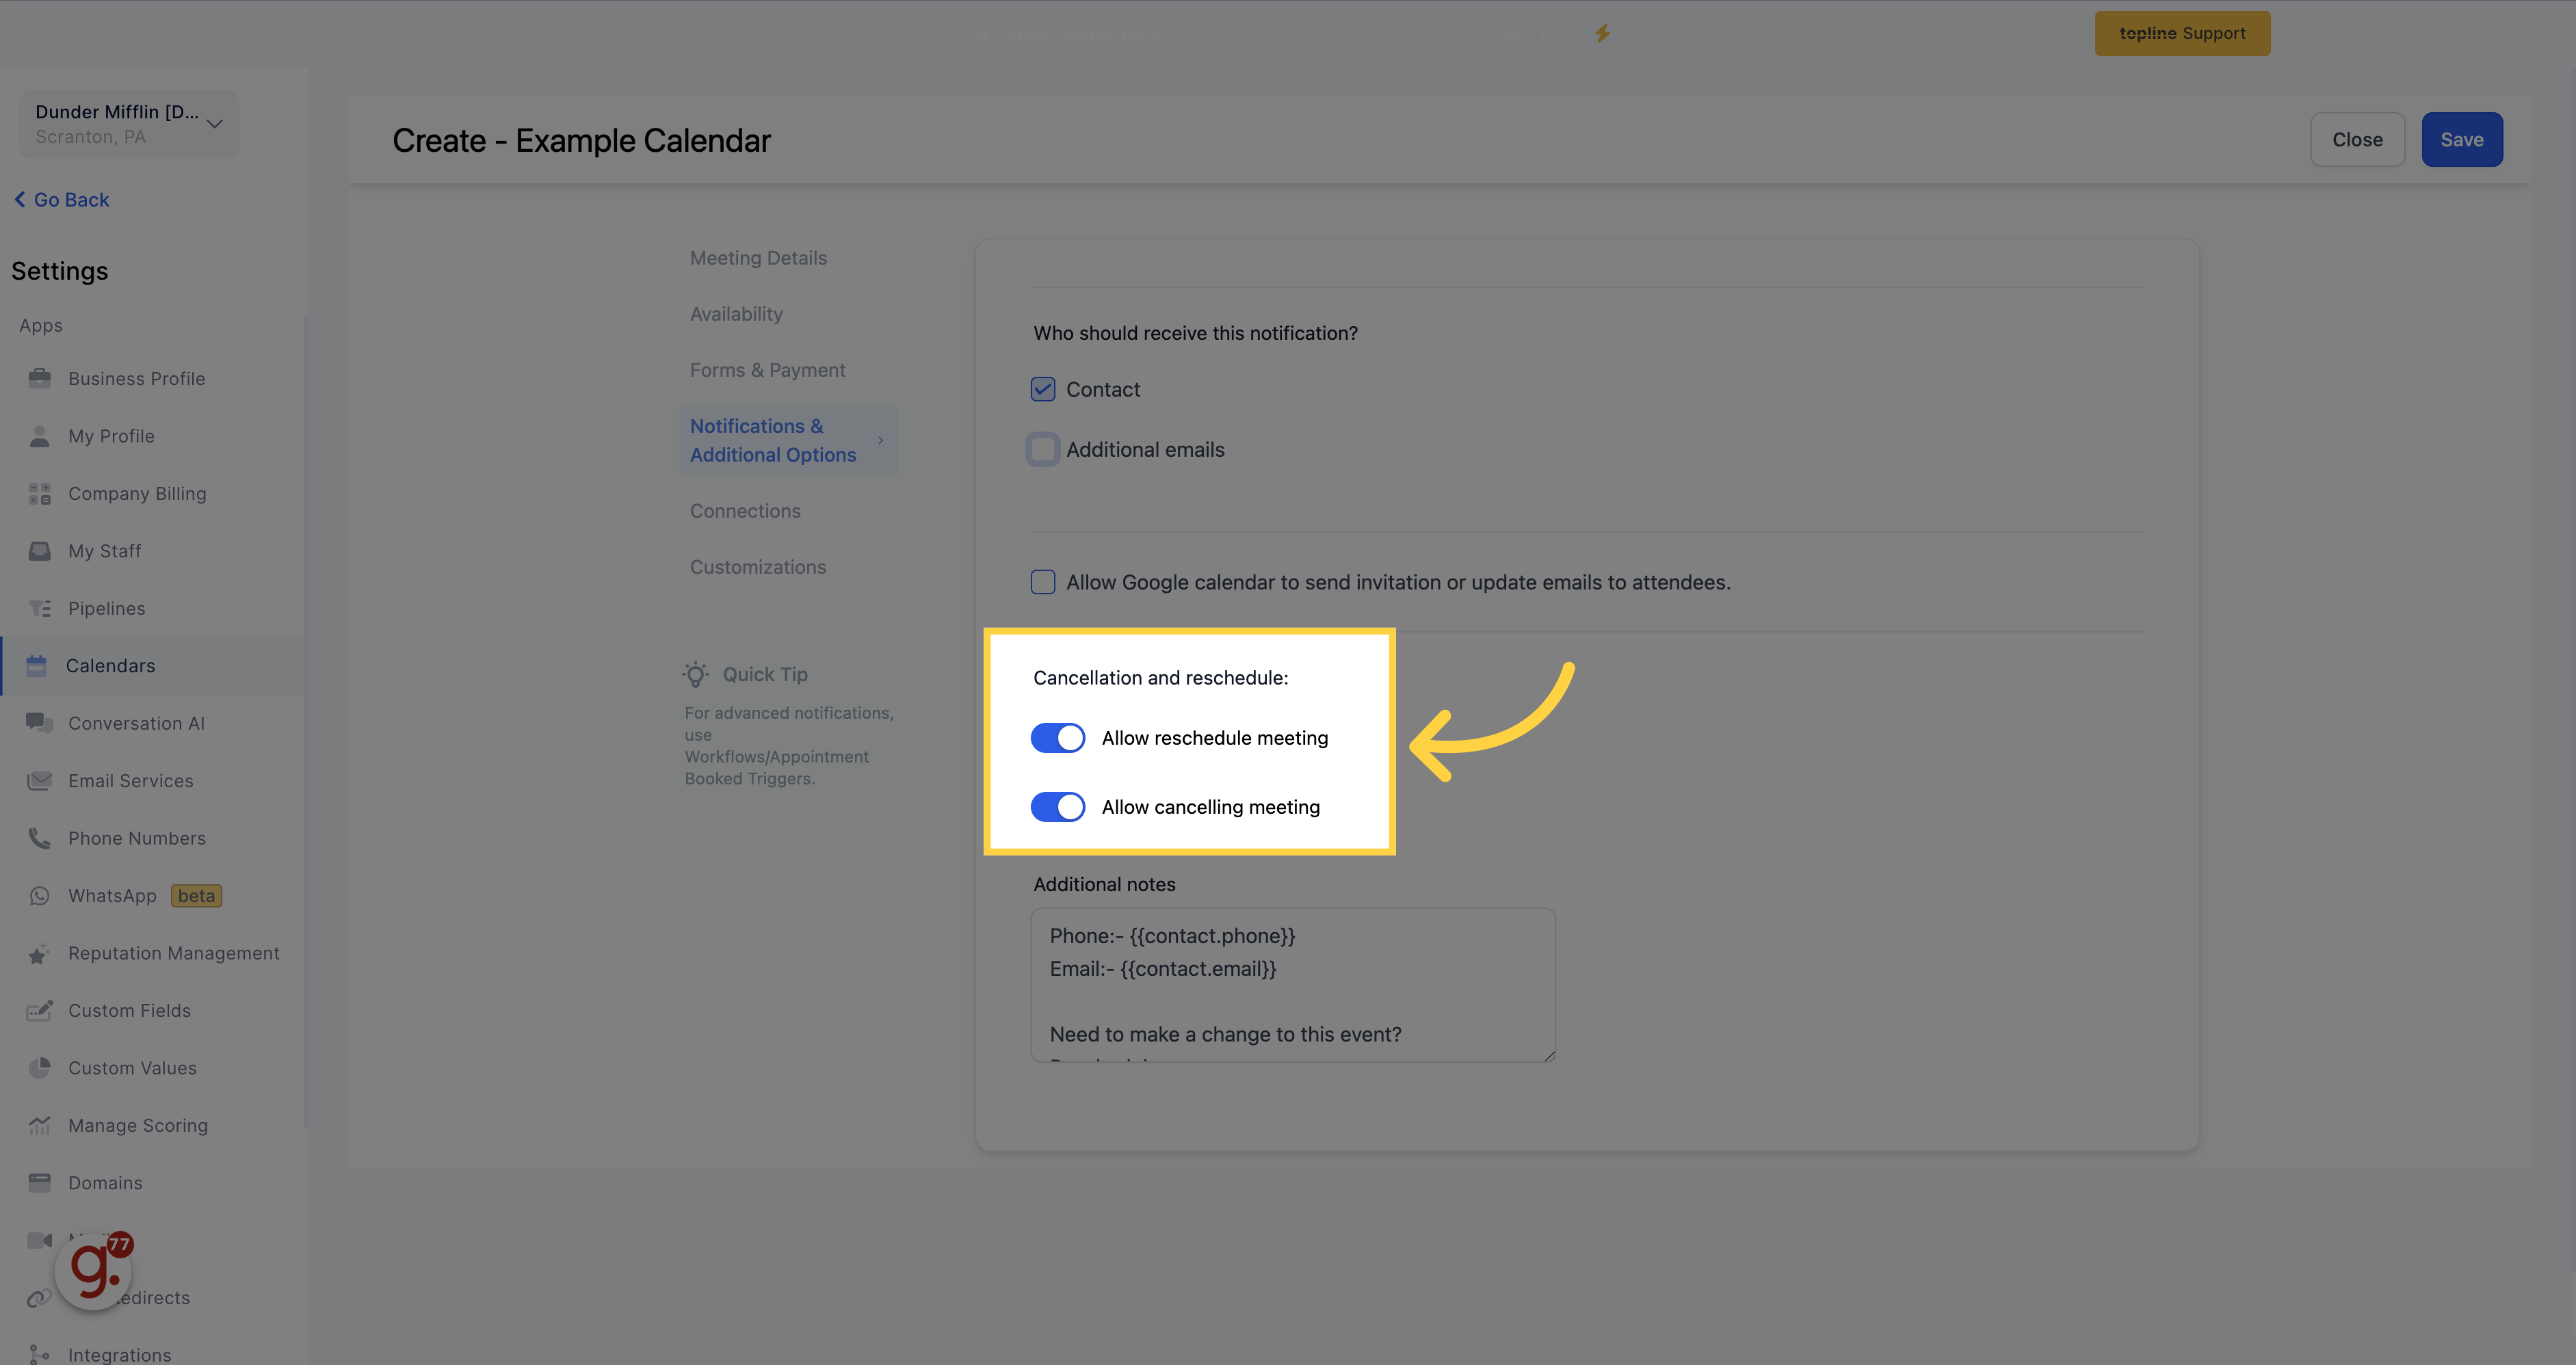
Check this box if you want to give the option to reschedule or cancel appointments. It will send a rescheduling link along with the confirmation email. You can also reschedule appointments manually in your CRM.
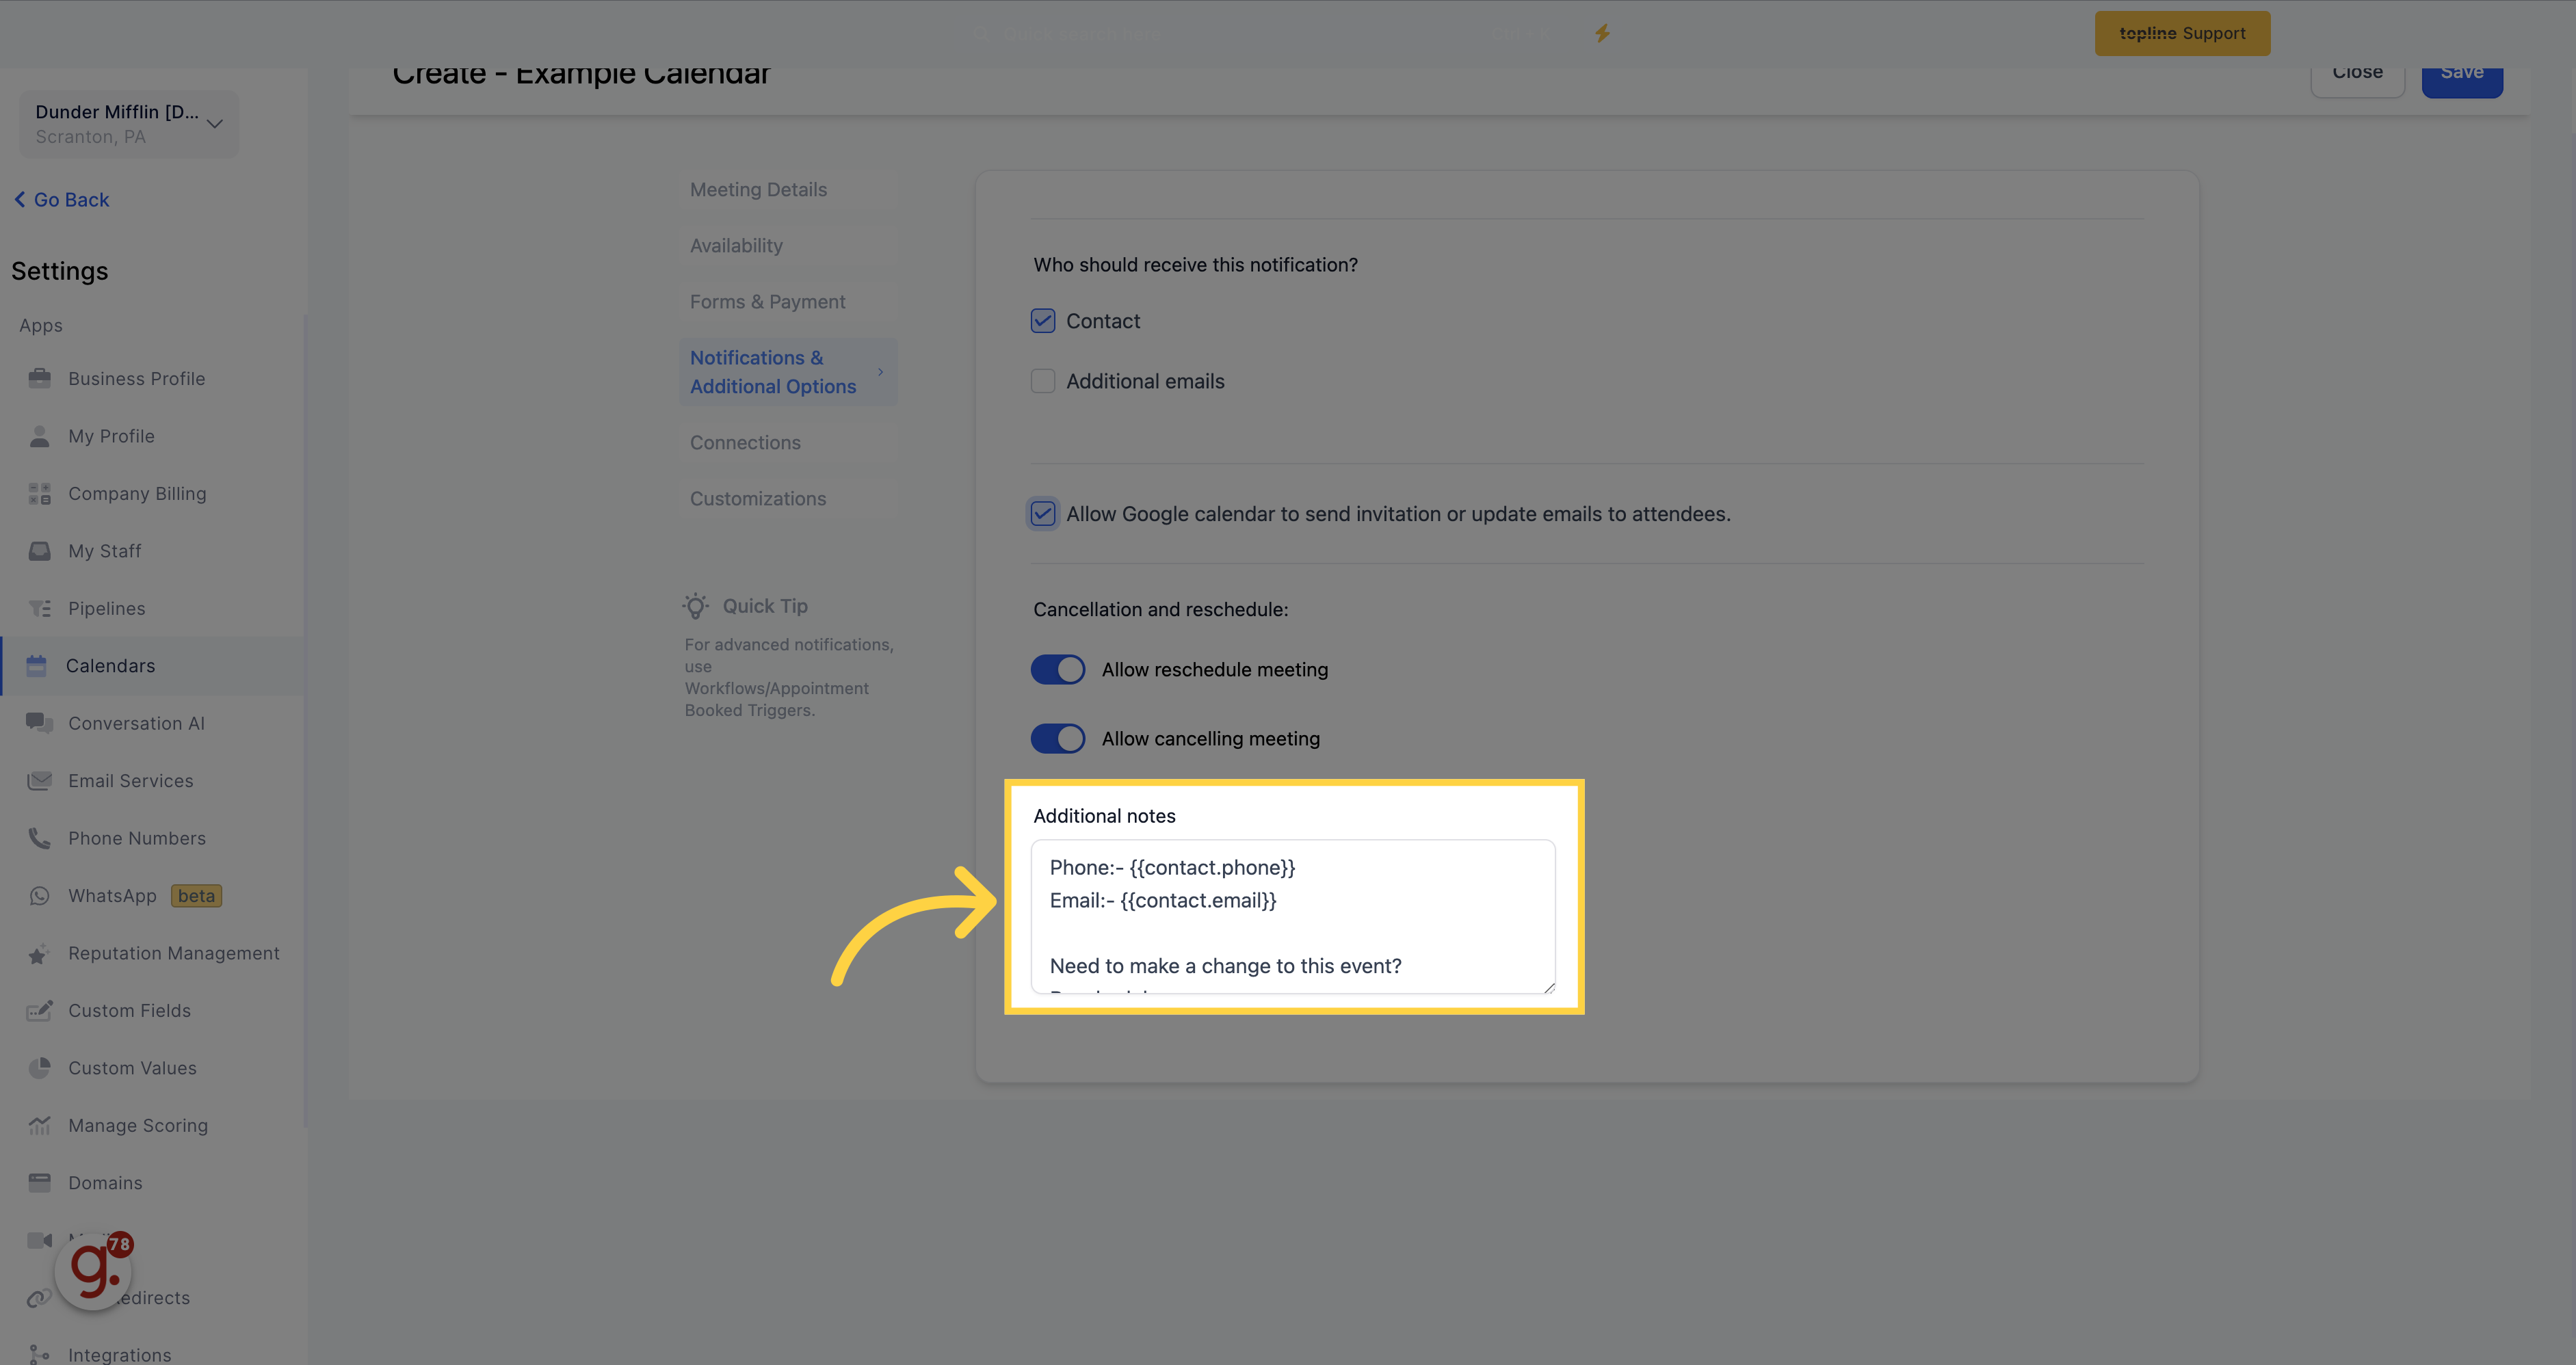
In the Additional Notes section, you can add any relevant notes or information to the appointment details. This is useful for adding context to the appointment, requesting additional information to be brought to the appointment, or any other information that may need to be added after the appointment is booked. Adding notes can help you and your team prepare for appointments and ensure that all necessary details are available for each appointment.
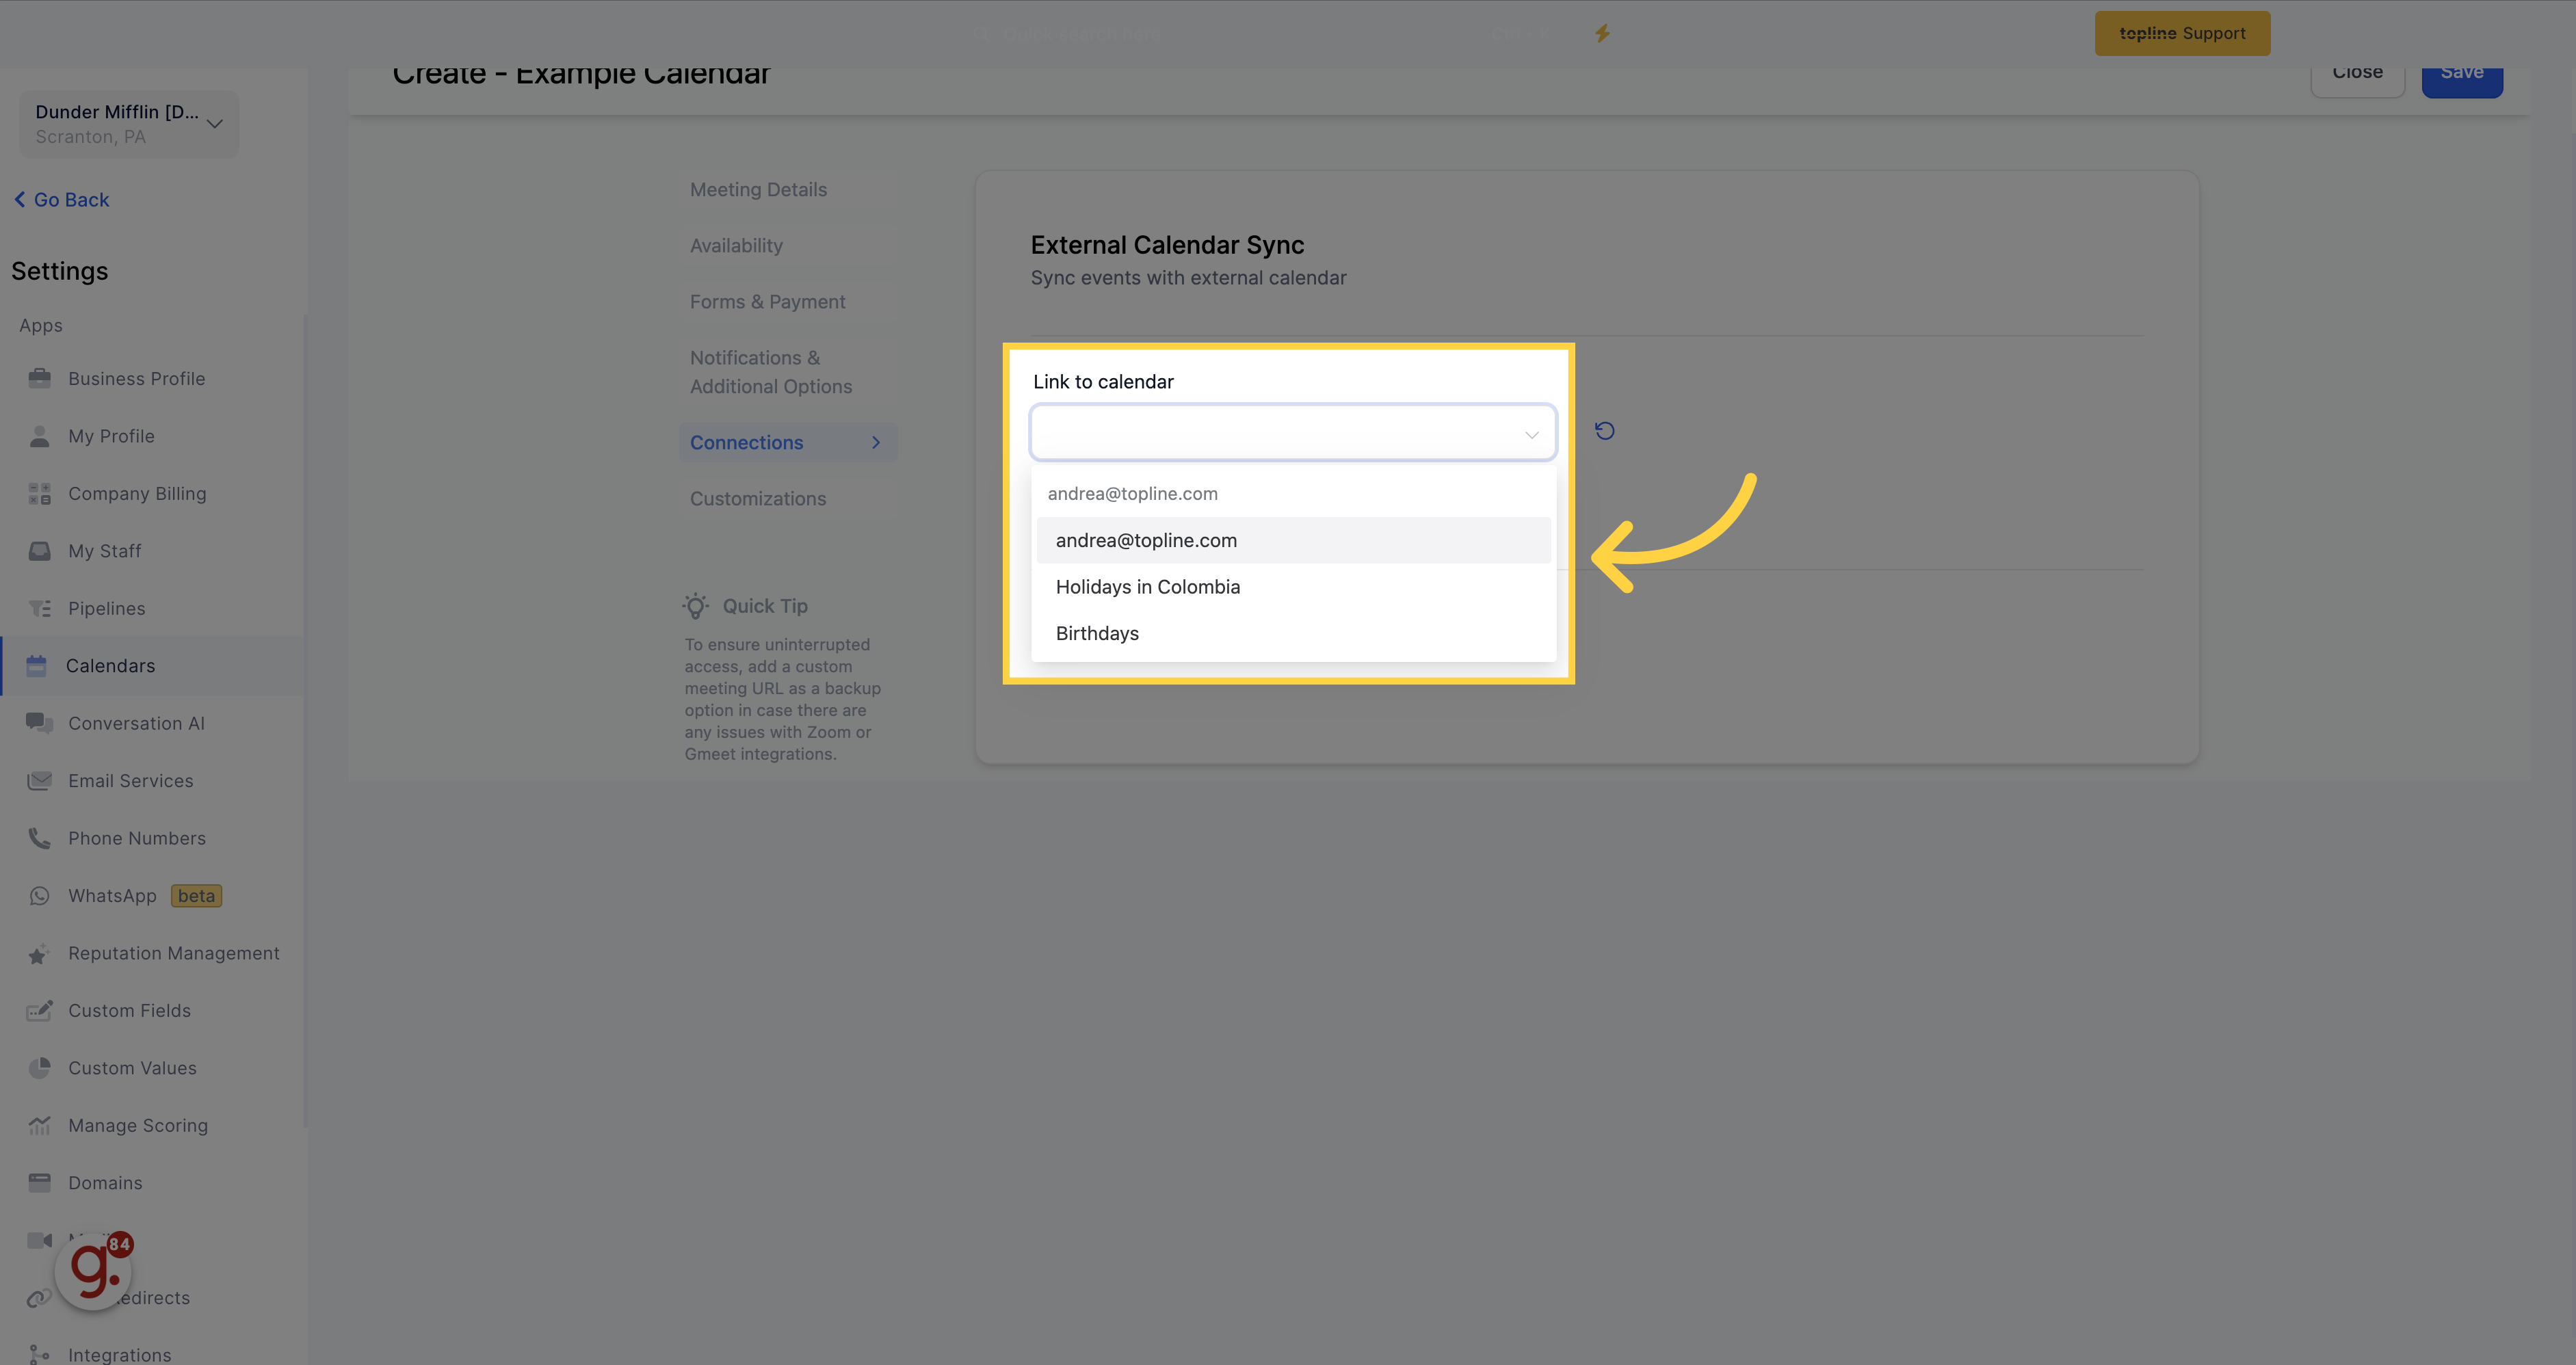
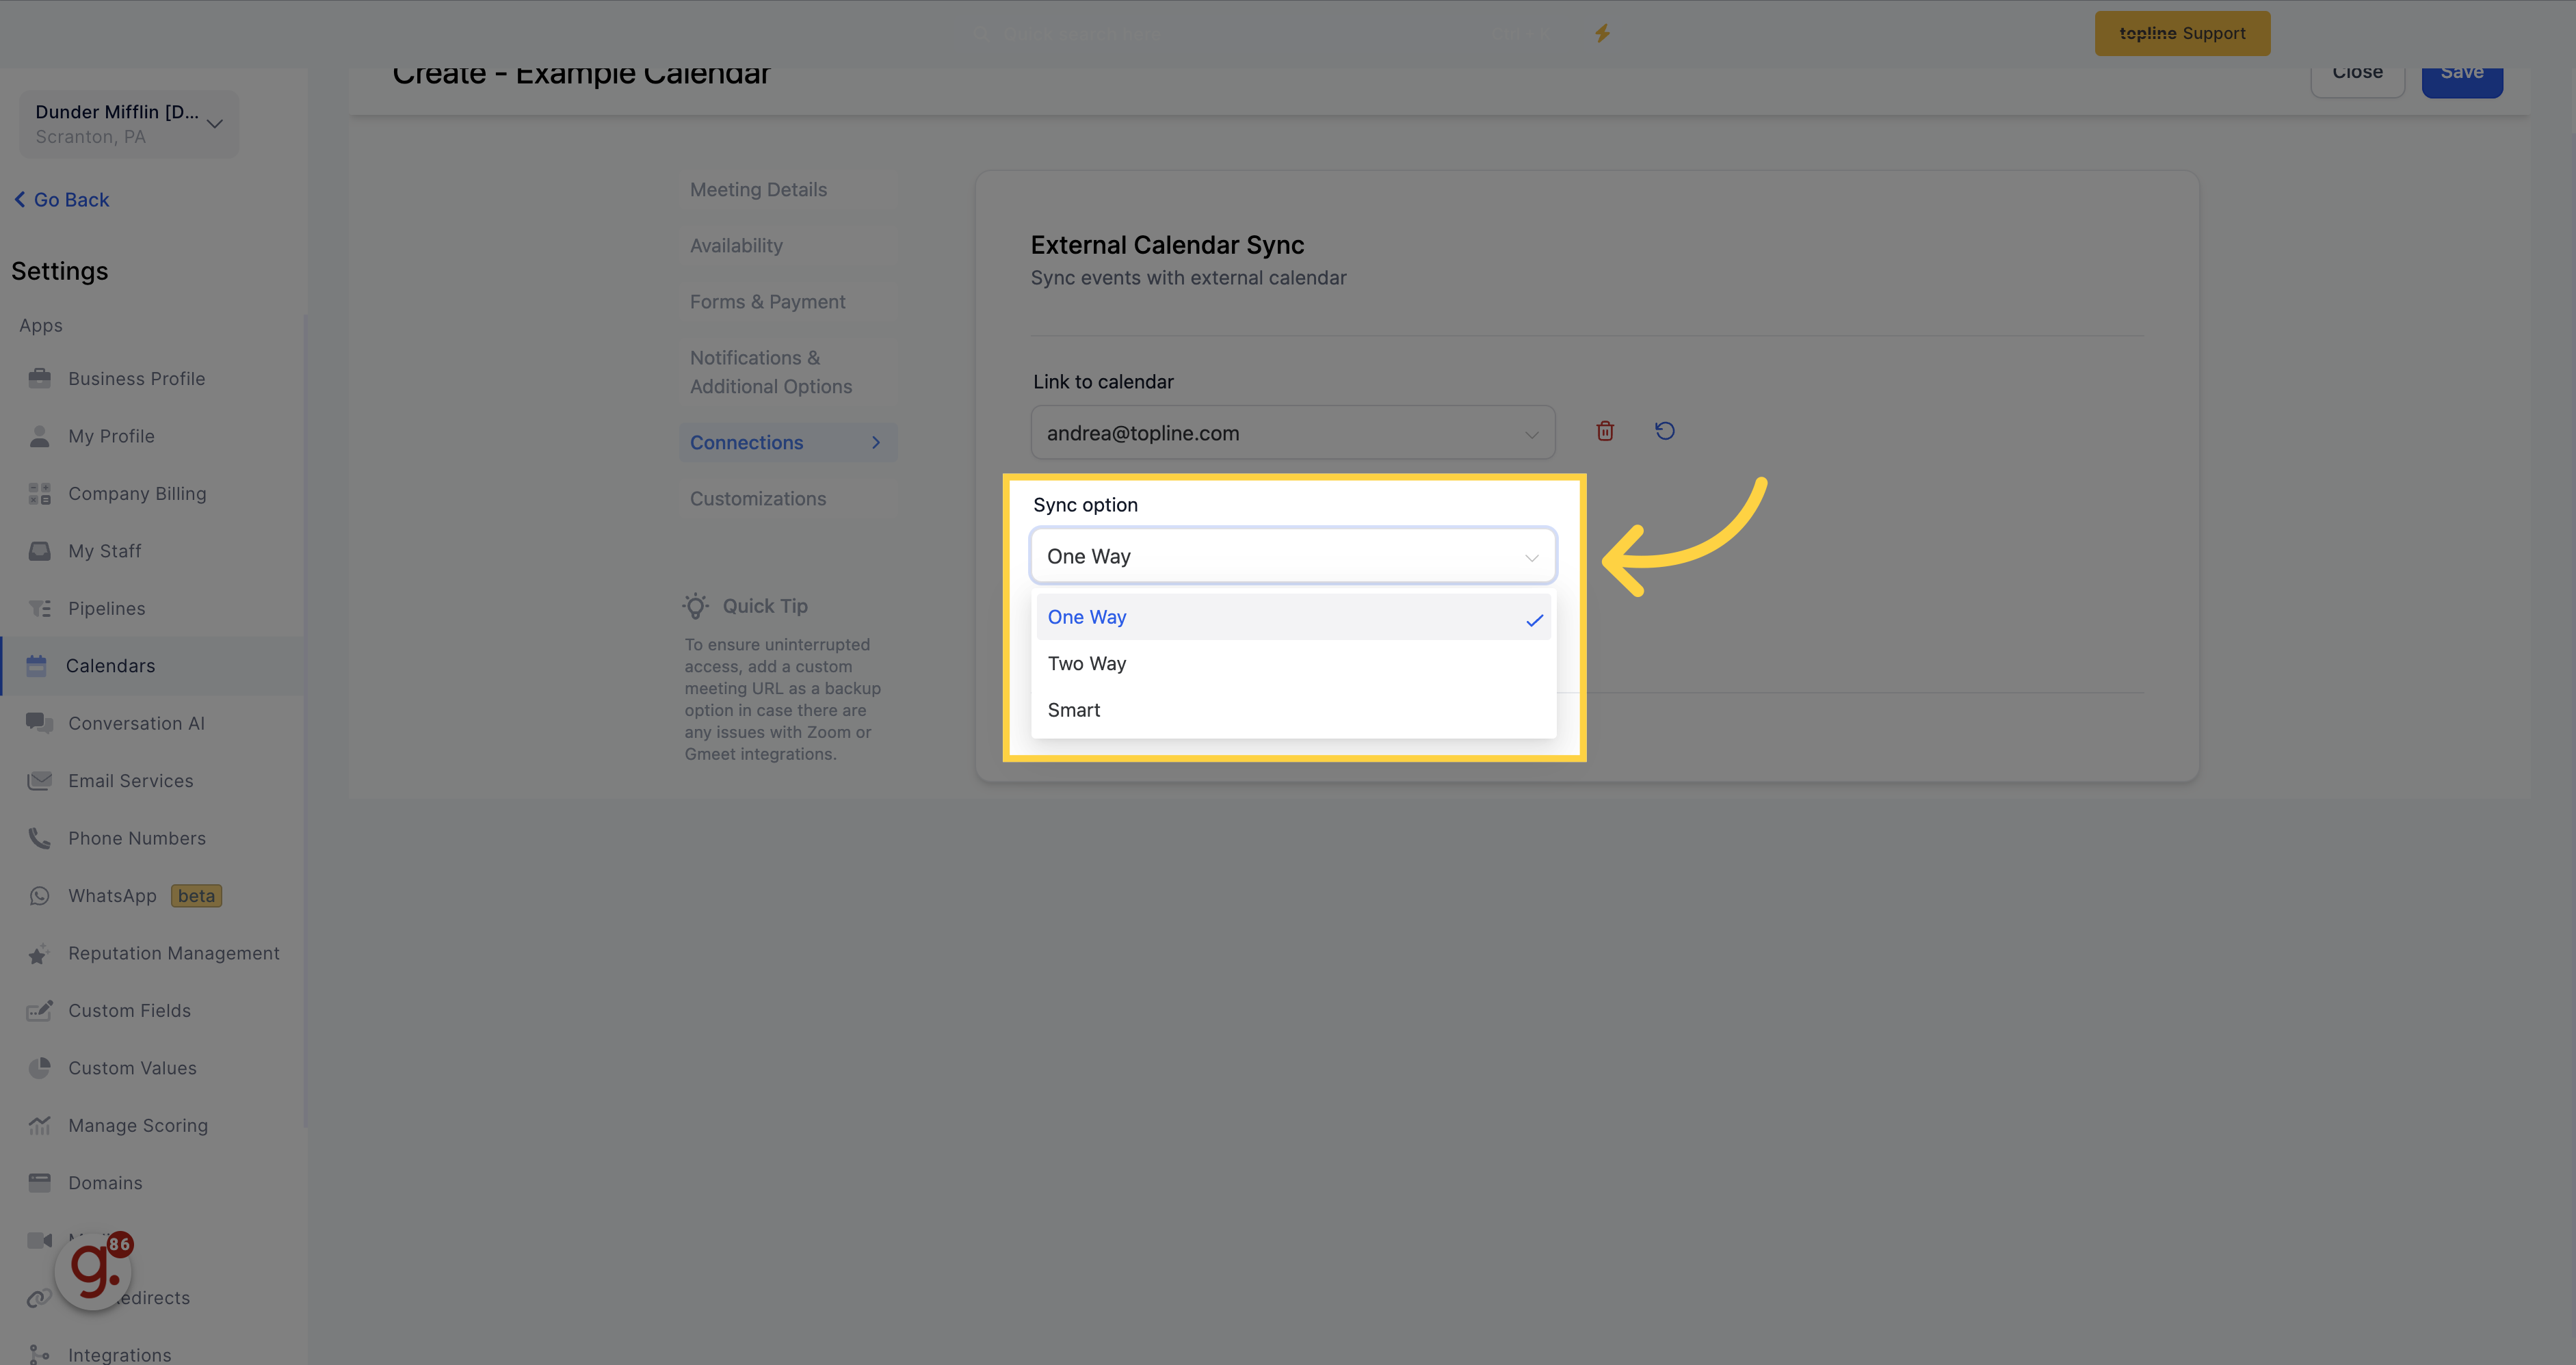
Sync events with external calendar.

Select on the options the calendar you want to link.
One Way - With the one-way sync option, all events from Google Calendar will be displayed as grey in your CRM and your Google Calendar. However, this sync will not add the invitees of the Google event to your CRM system. It will only sync appointments from your CRM system to your Google calendar while blocking off the selected time slot from Google.
Two Way - With the two-way sync option, your CRM system and Google calendar will communicate with each other by color-coding all events. This sync will enable your CRM system to automatically create contact records for the invitees of the Google event and trigger any automation associated with the calendar.
Disable Trigger - In the disable trigger option, all Google Calendar event contacts will be imported into your CRM system as new contacts. However, no triggers associated with your CRM calendar will be activated.
Set the widget style and other preferences.
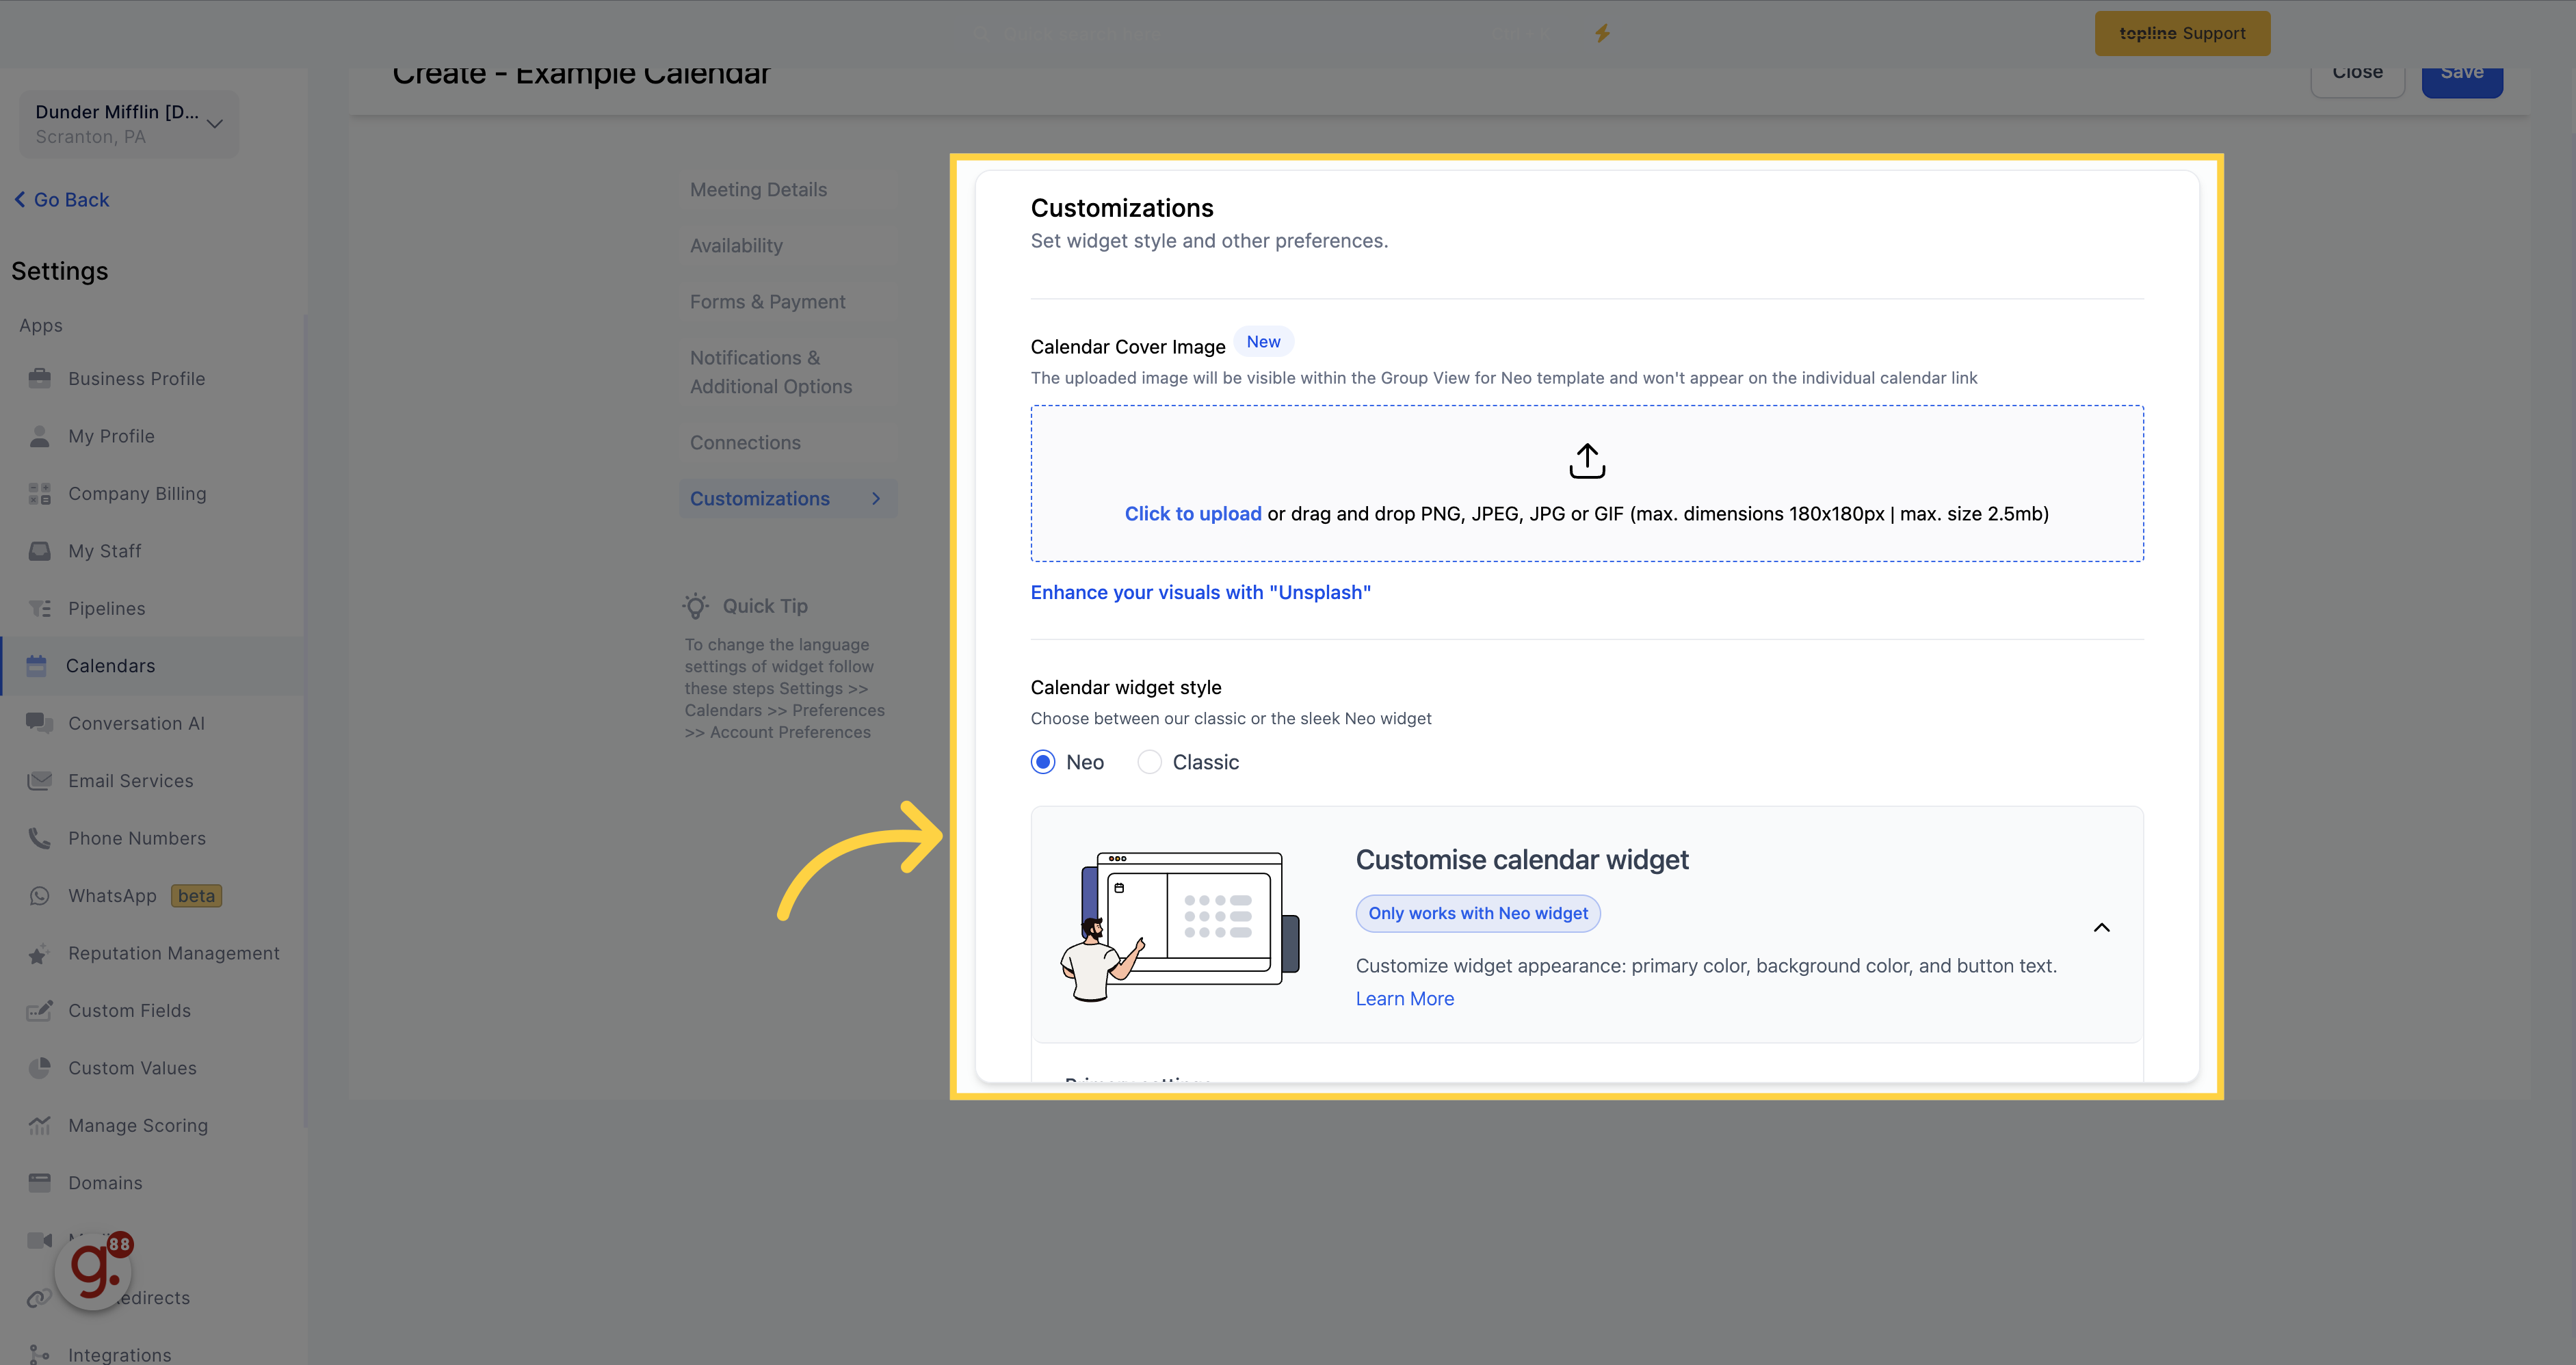
Choose between our classic or the sleek Neo widget.

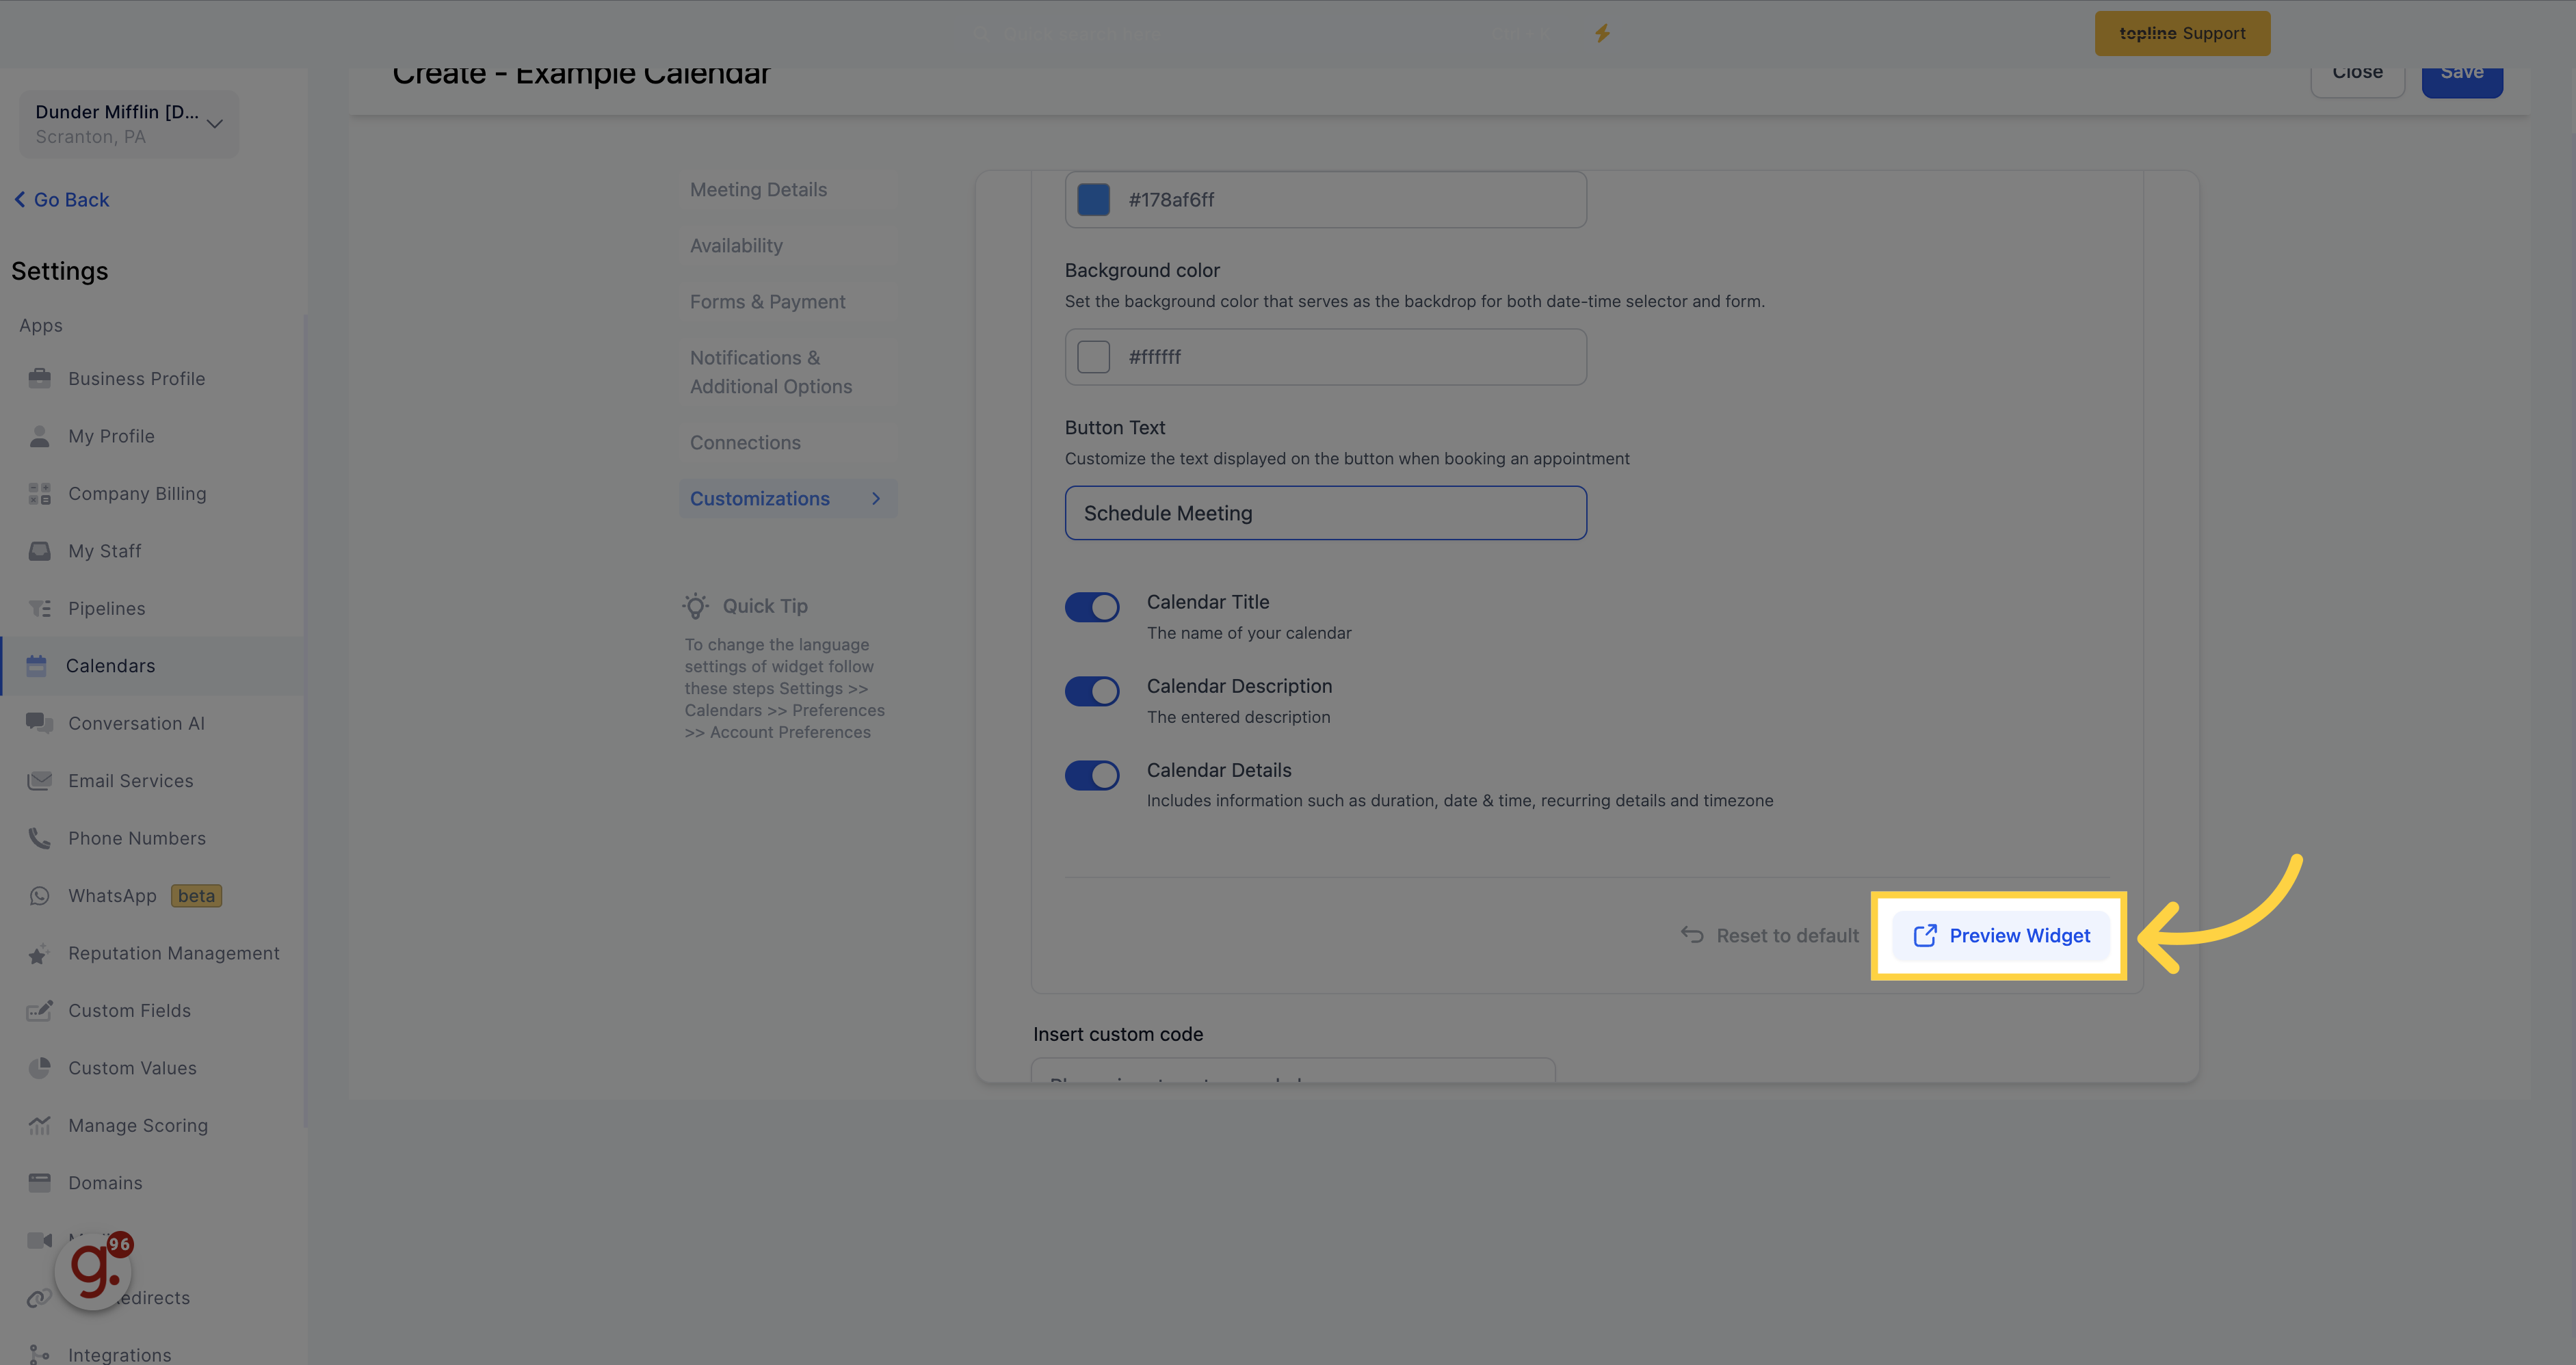
Here you can configure the primary color, background color, and other widget preferences to tailor your calendar widget.

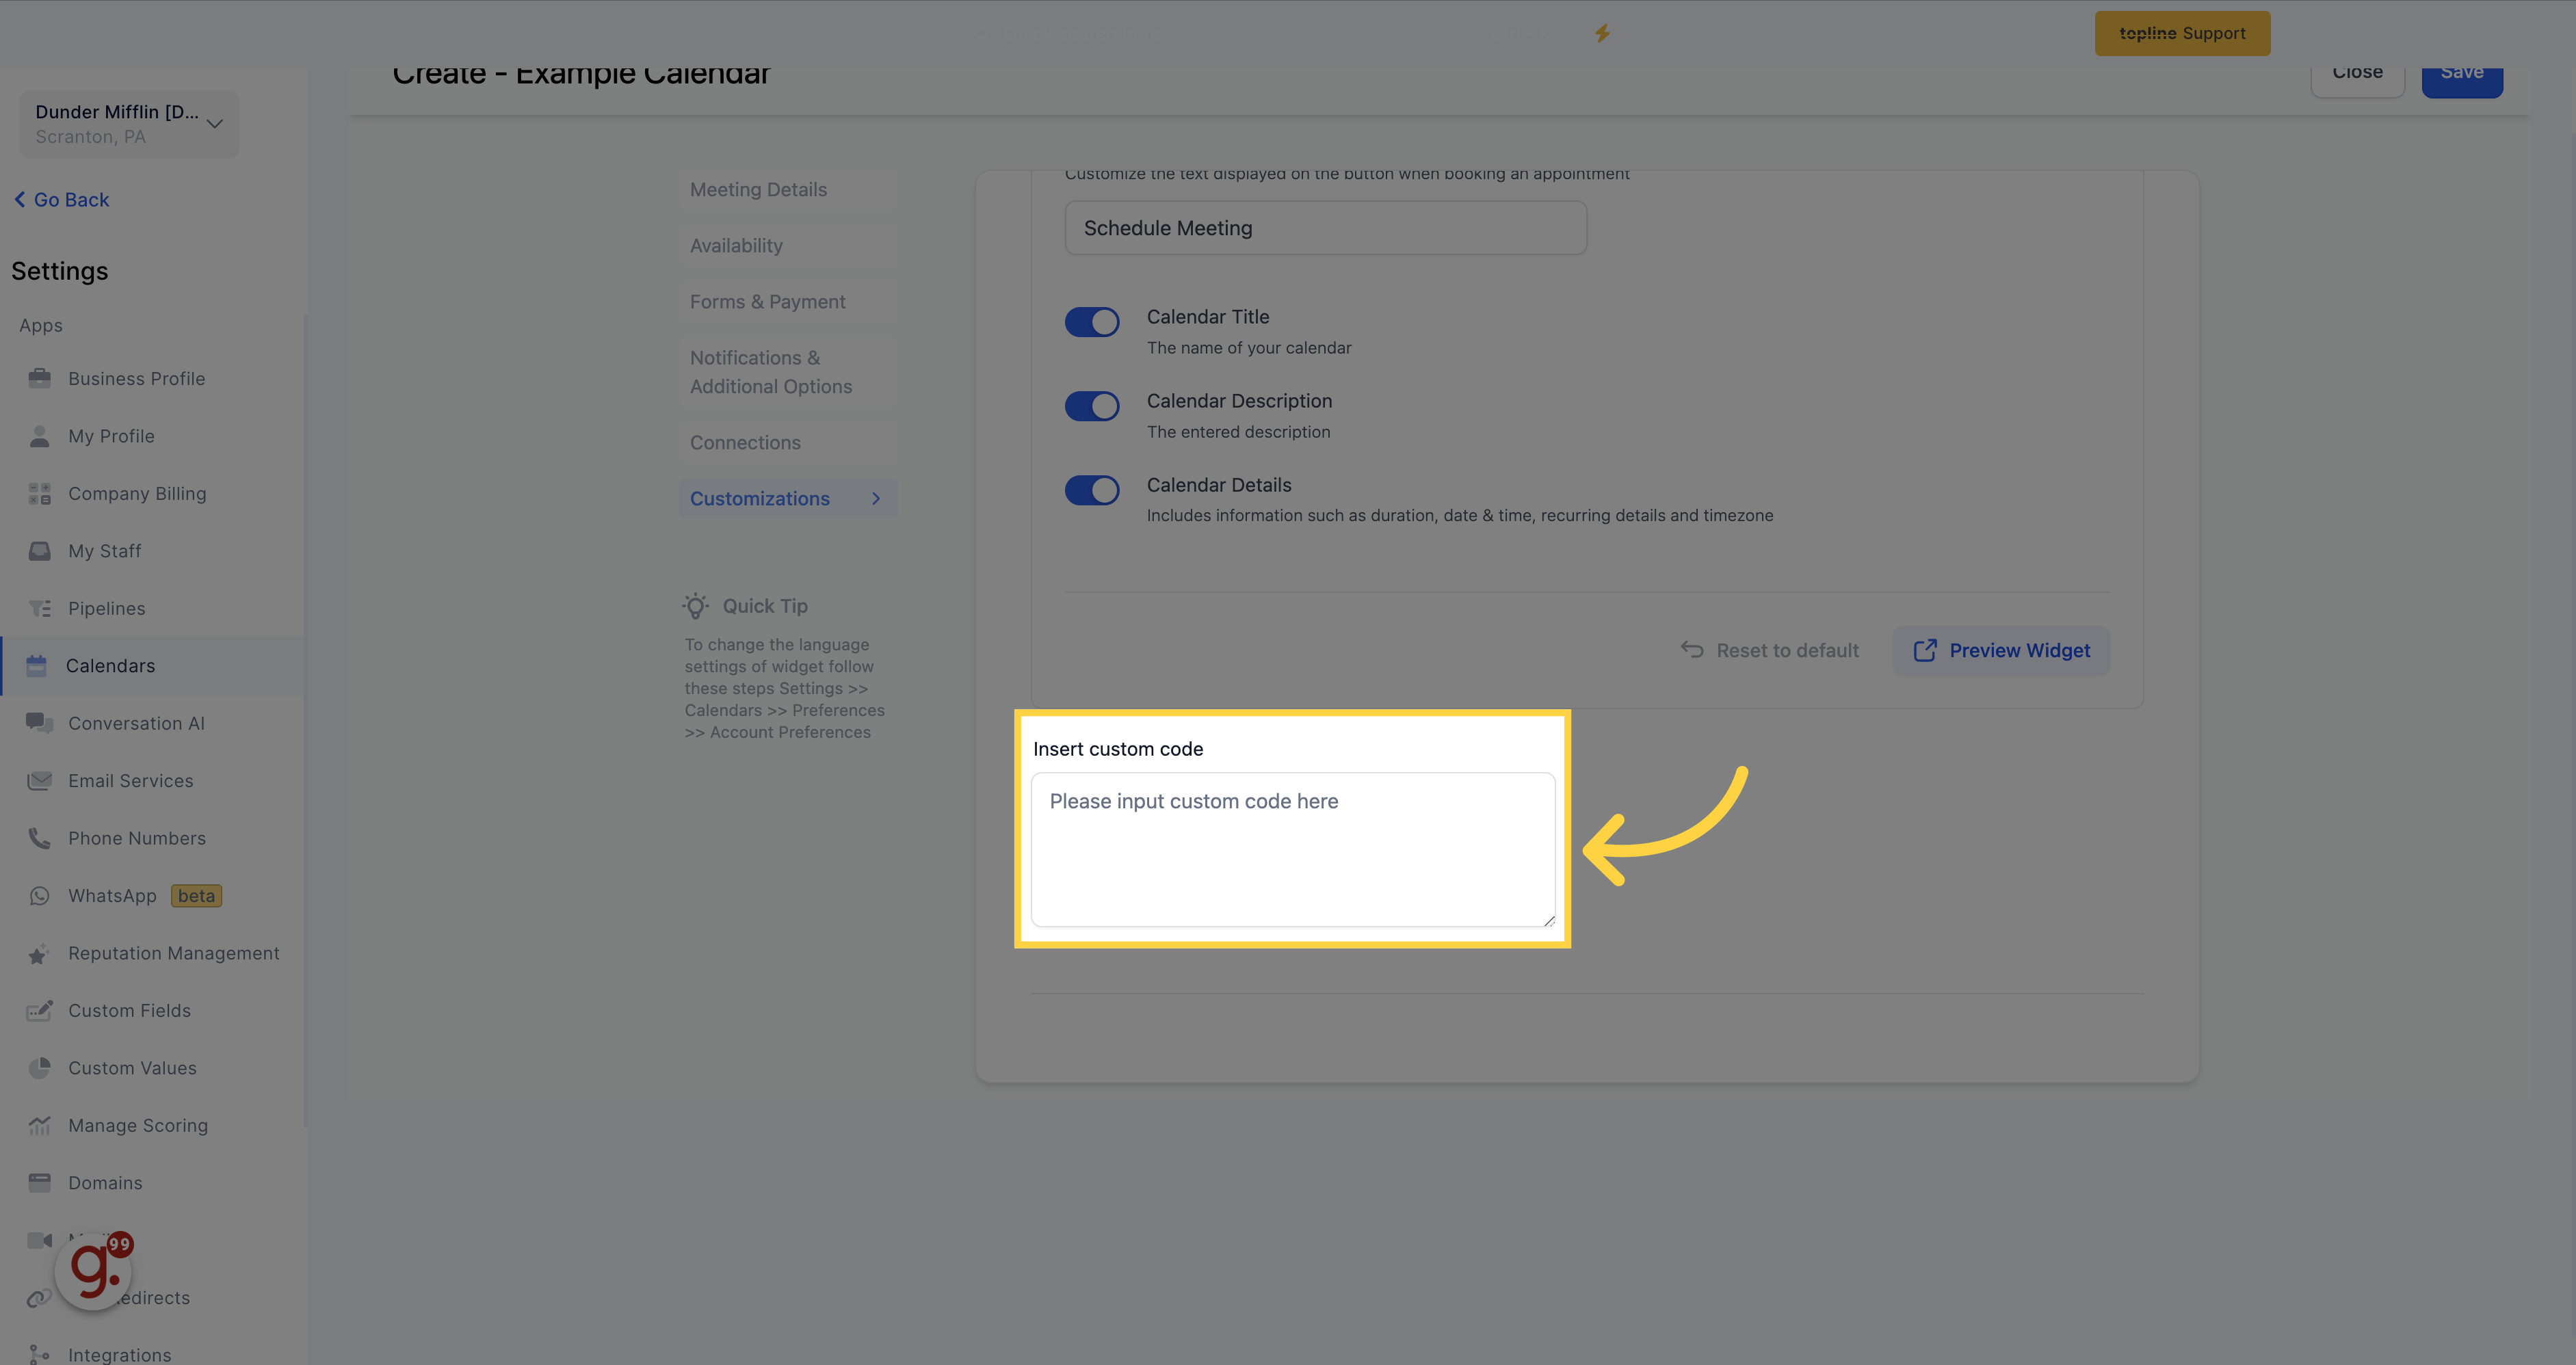
For advanced users with software development skills, you can utilize the Add Custom Code section to write custom code and integrate it into your appointment booking system. This area is designed for advanced users who want to extend the functionality of their appointment booking system beyond the standard features.
Once you have finish with all the steps, click on this button to preview your appointment scheduling calendar.