How to Create a New Scheduler

This guide will walk you through the process of creating a new scheduler using Topline. From accessing the calendar feature to selecting different calendar types, you will be able to efficiently set up calendars tailored to your needs.

Go to app.topline.com

1. Click "Scheduler"

Access to the scheduler feature.

Click 'Scheduler'

2. Click "Scheduler Settings"

Navigate to the scheduler settings.

Click 'Scheduler Settings'

3. Click "Create Calendar"

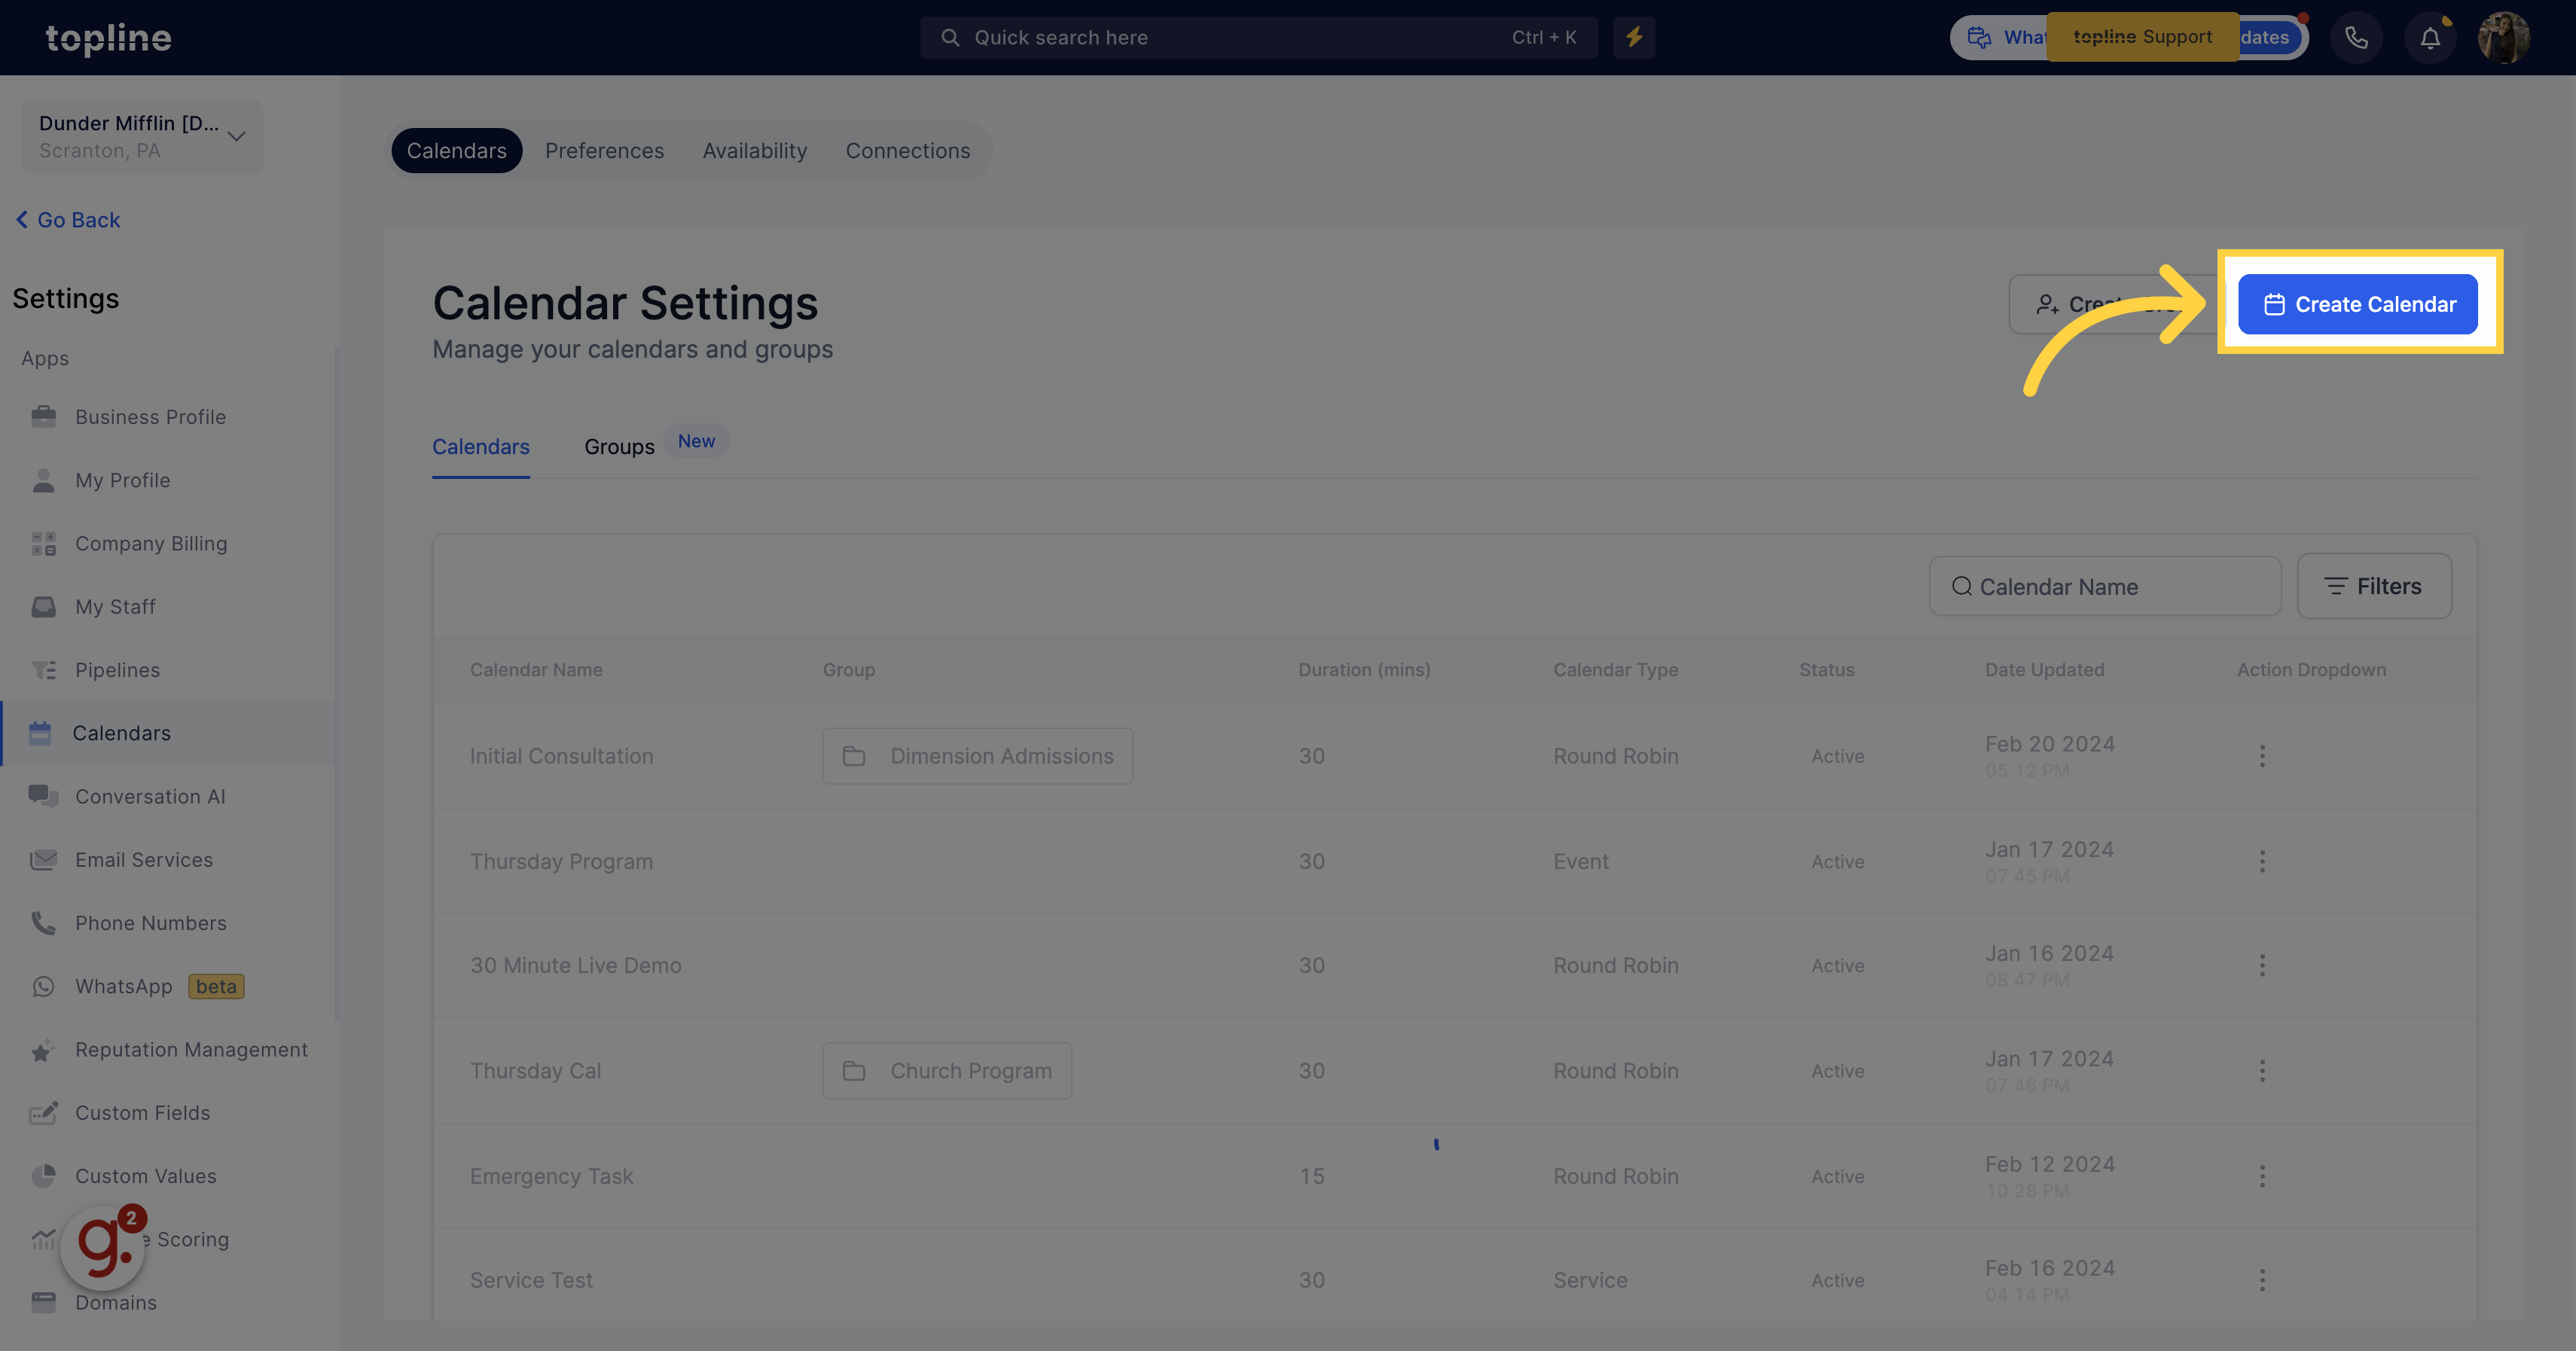
Initiate the process of creating a new calendar by clicking on the "Create Calendar".

Click 'Create Calendar'

4. Service Calendar

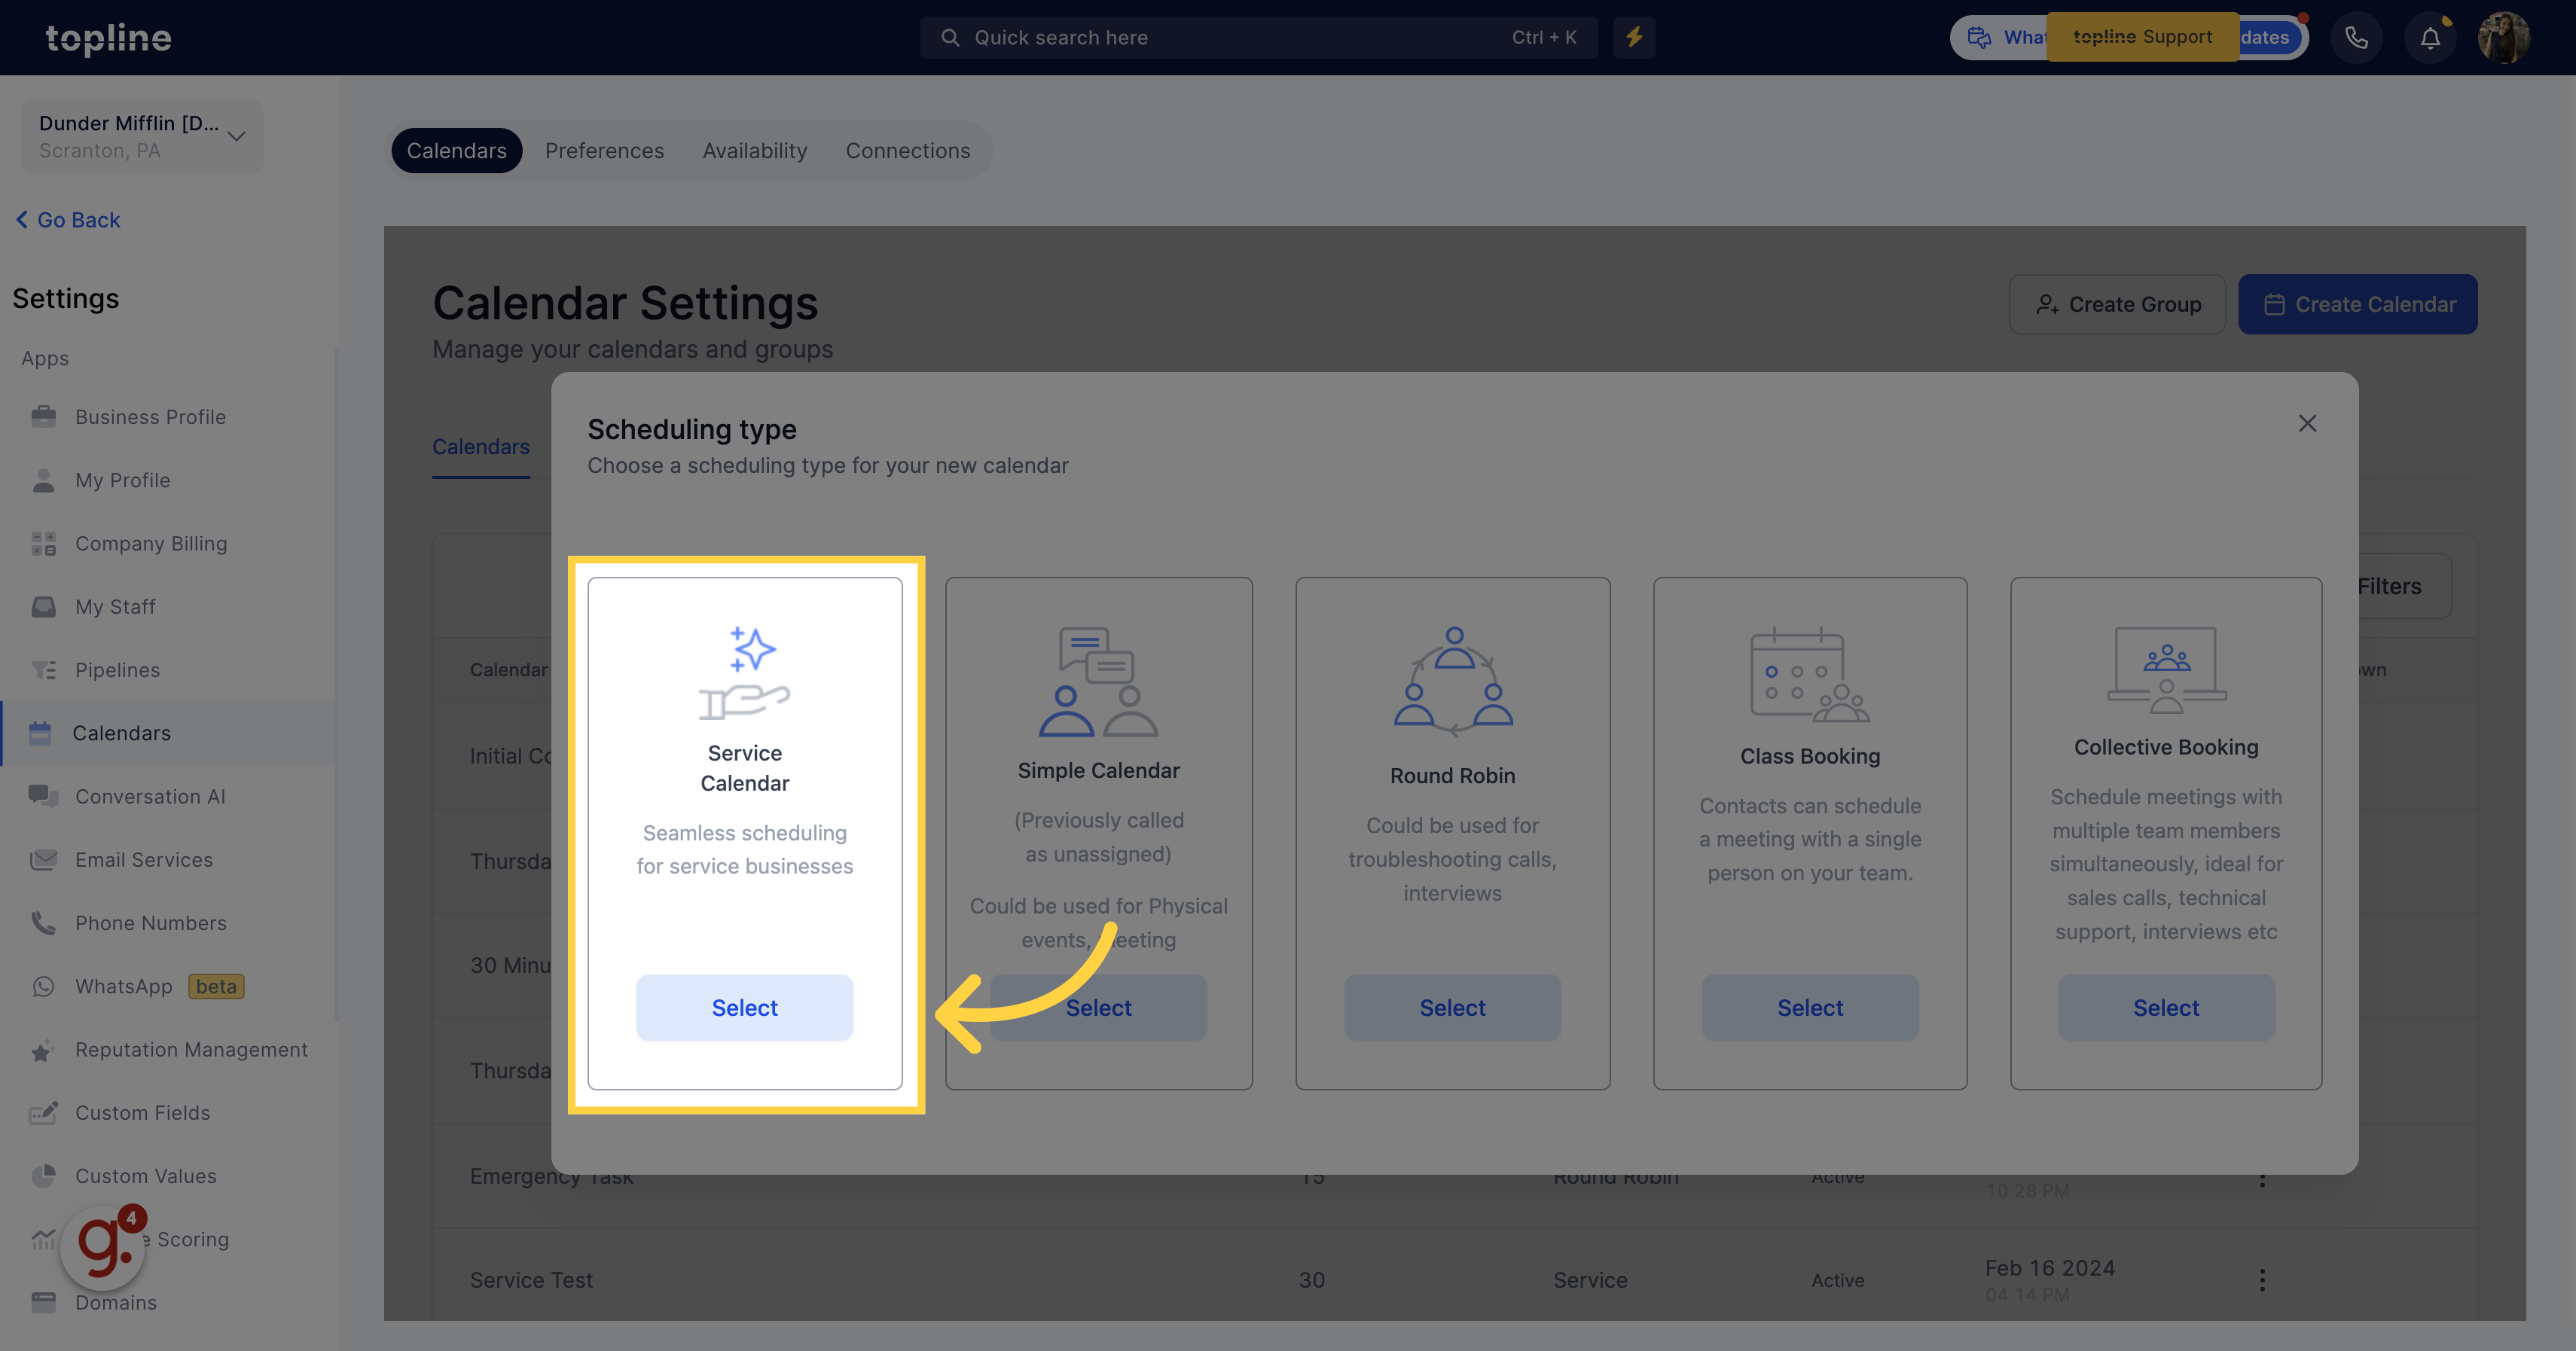
Select the service calendar for seamless scheduling for service businesses.

Service Calendar

5. Simple Calendar

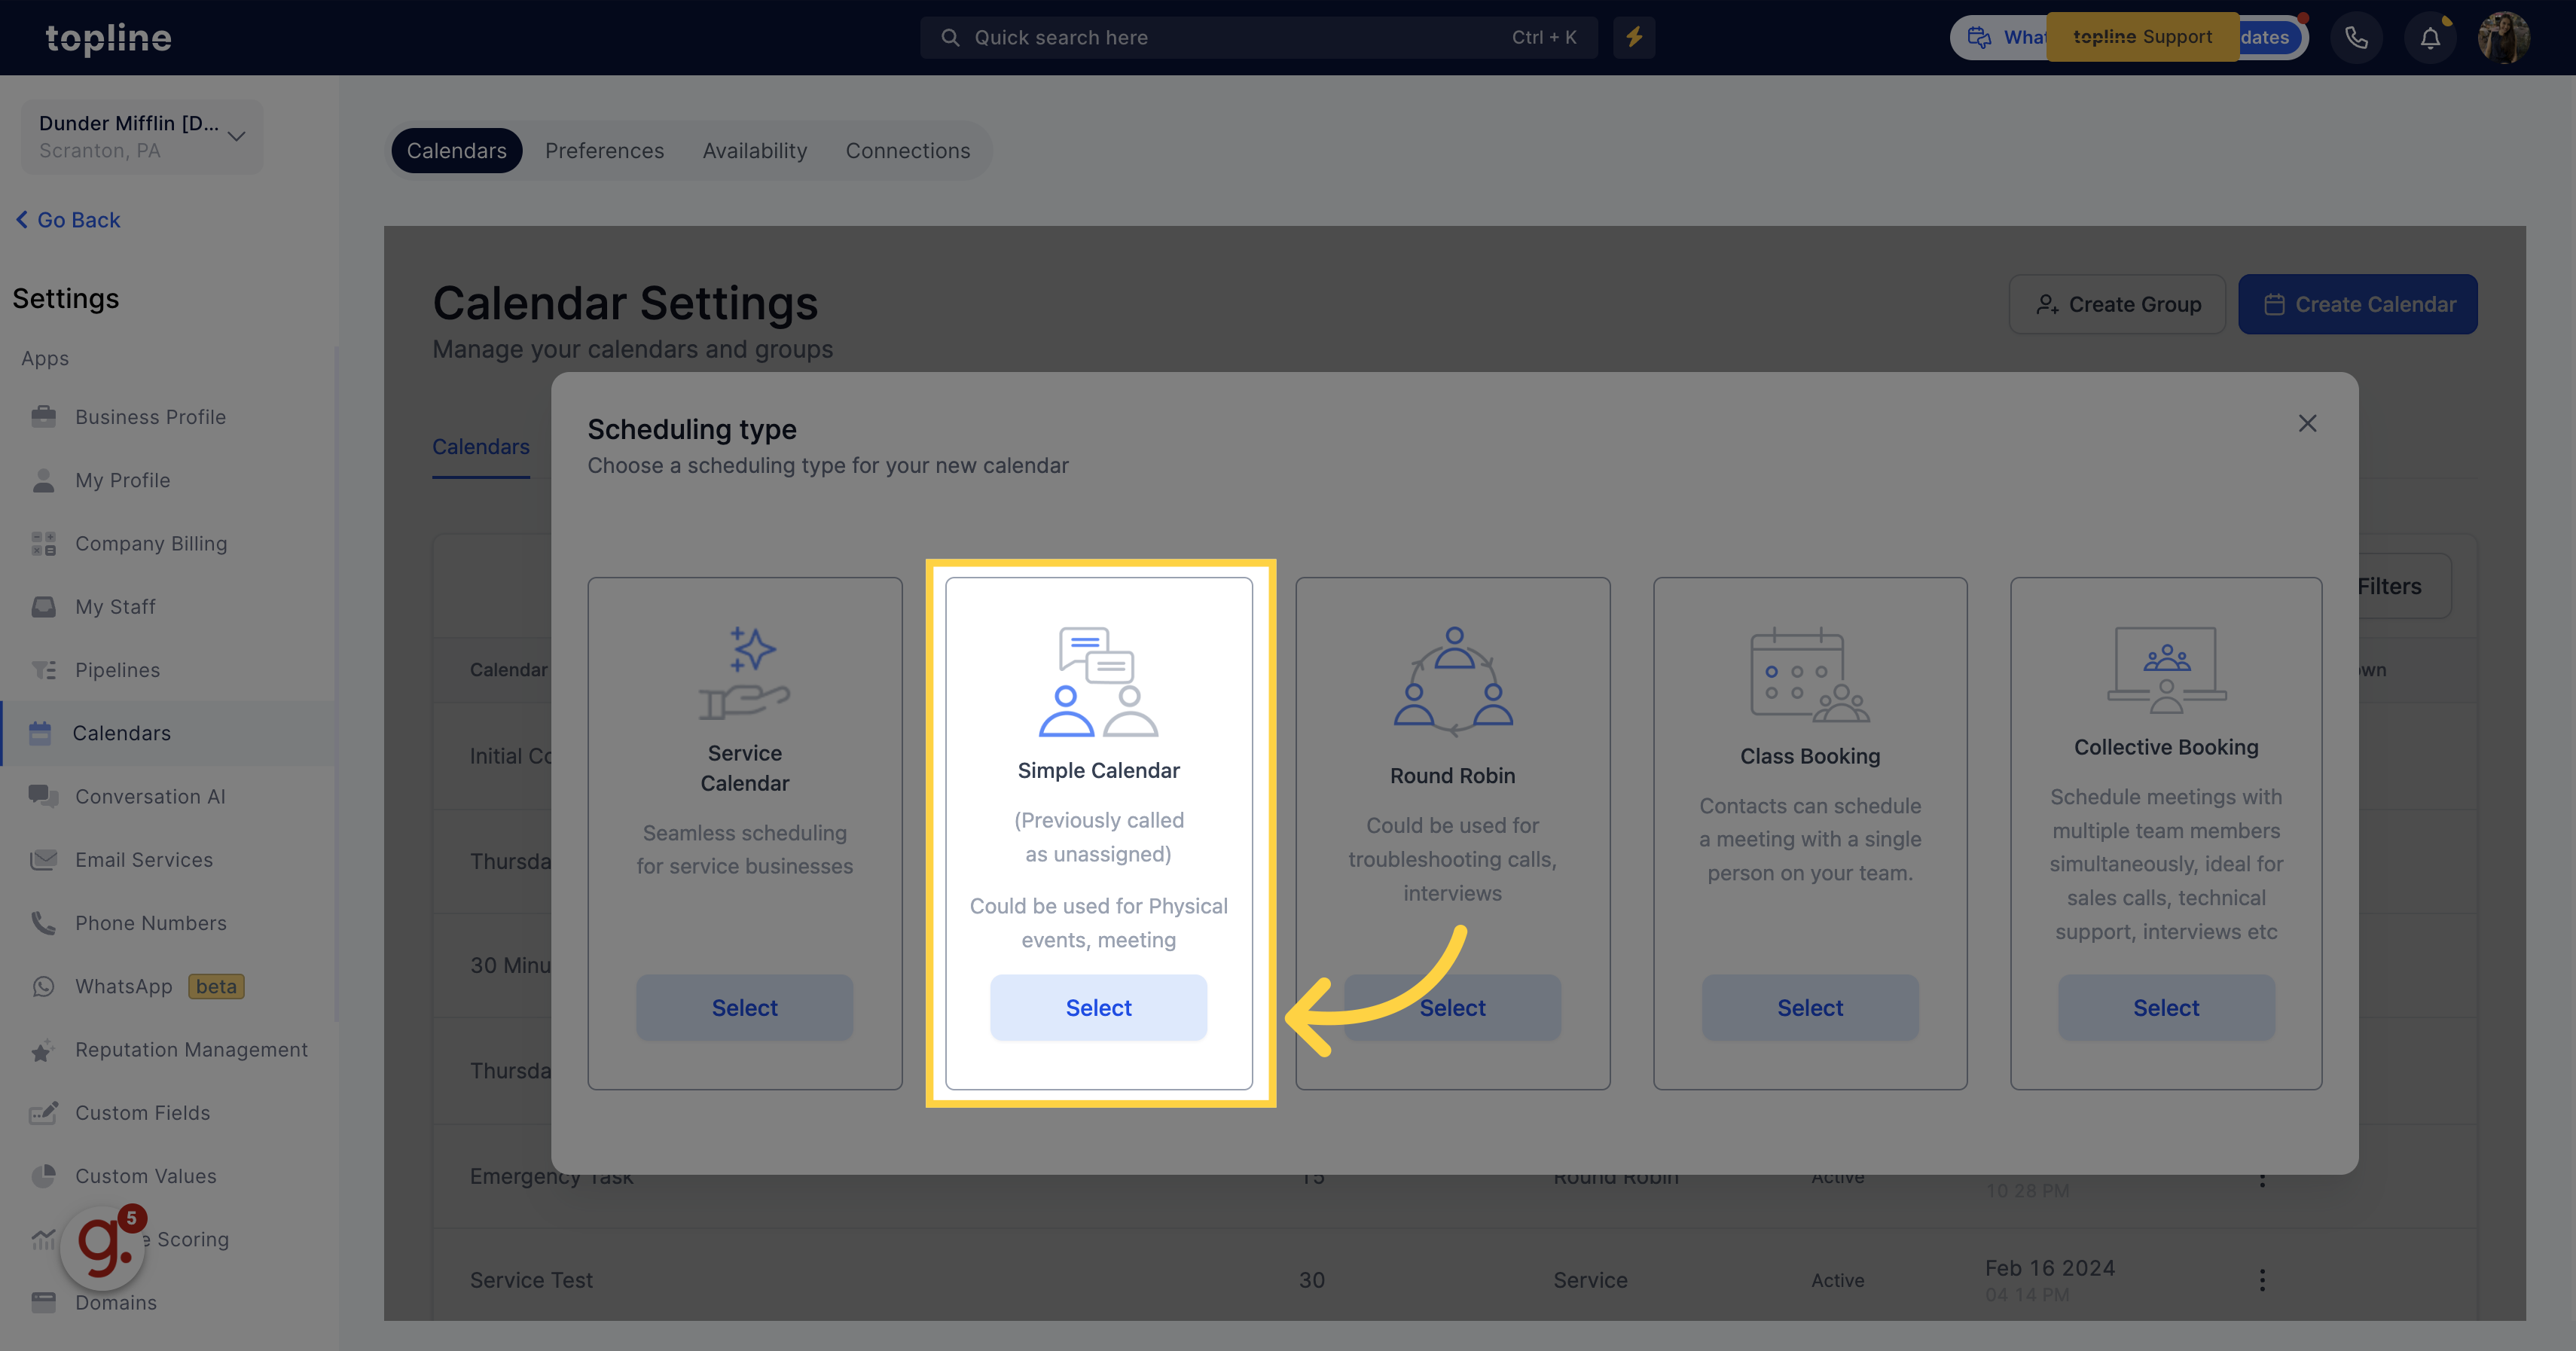
Choose the simple calendar for physical events and meetings.

Simple Calendar

6. Round Robin

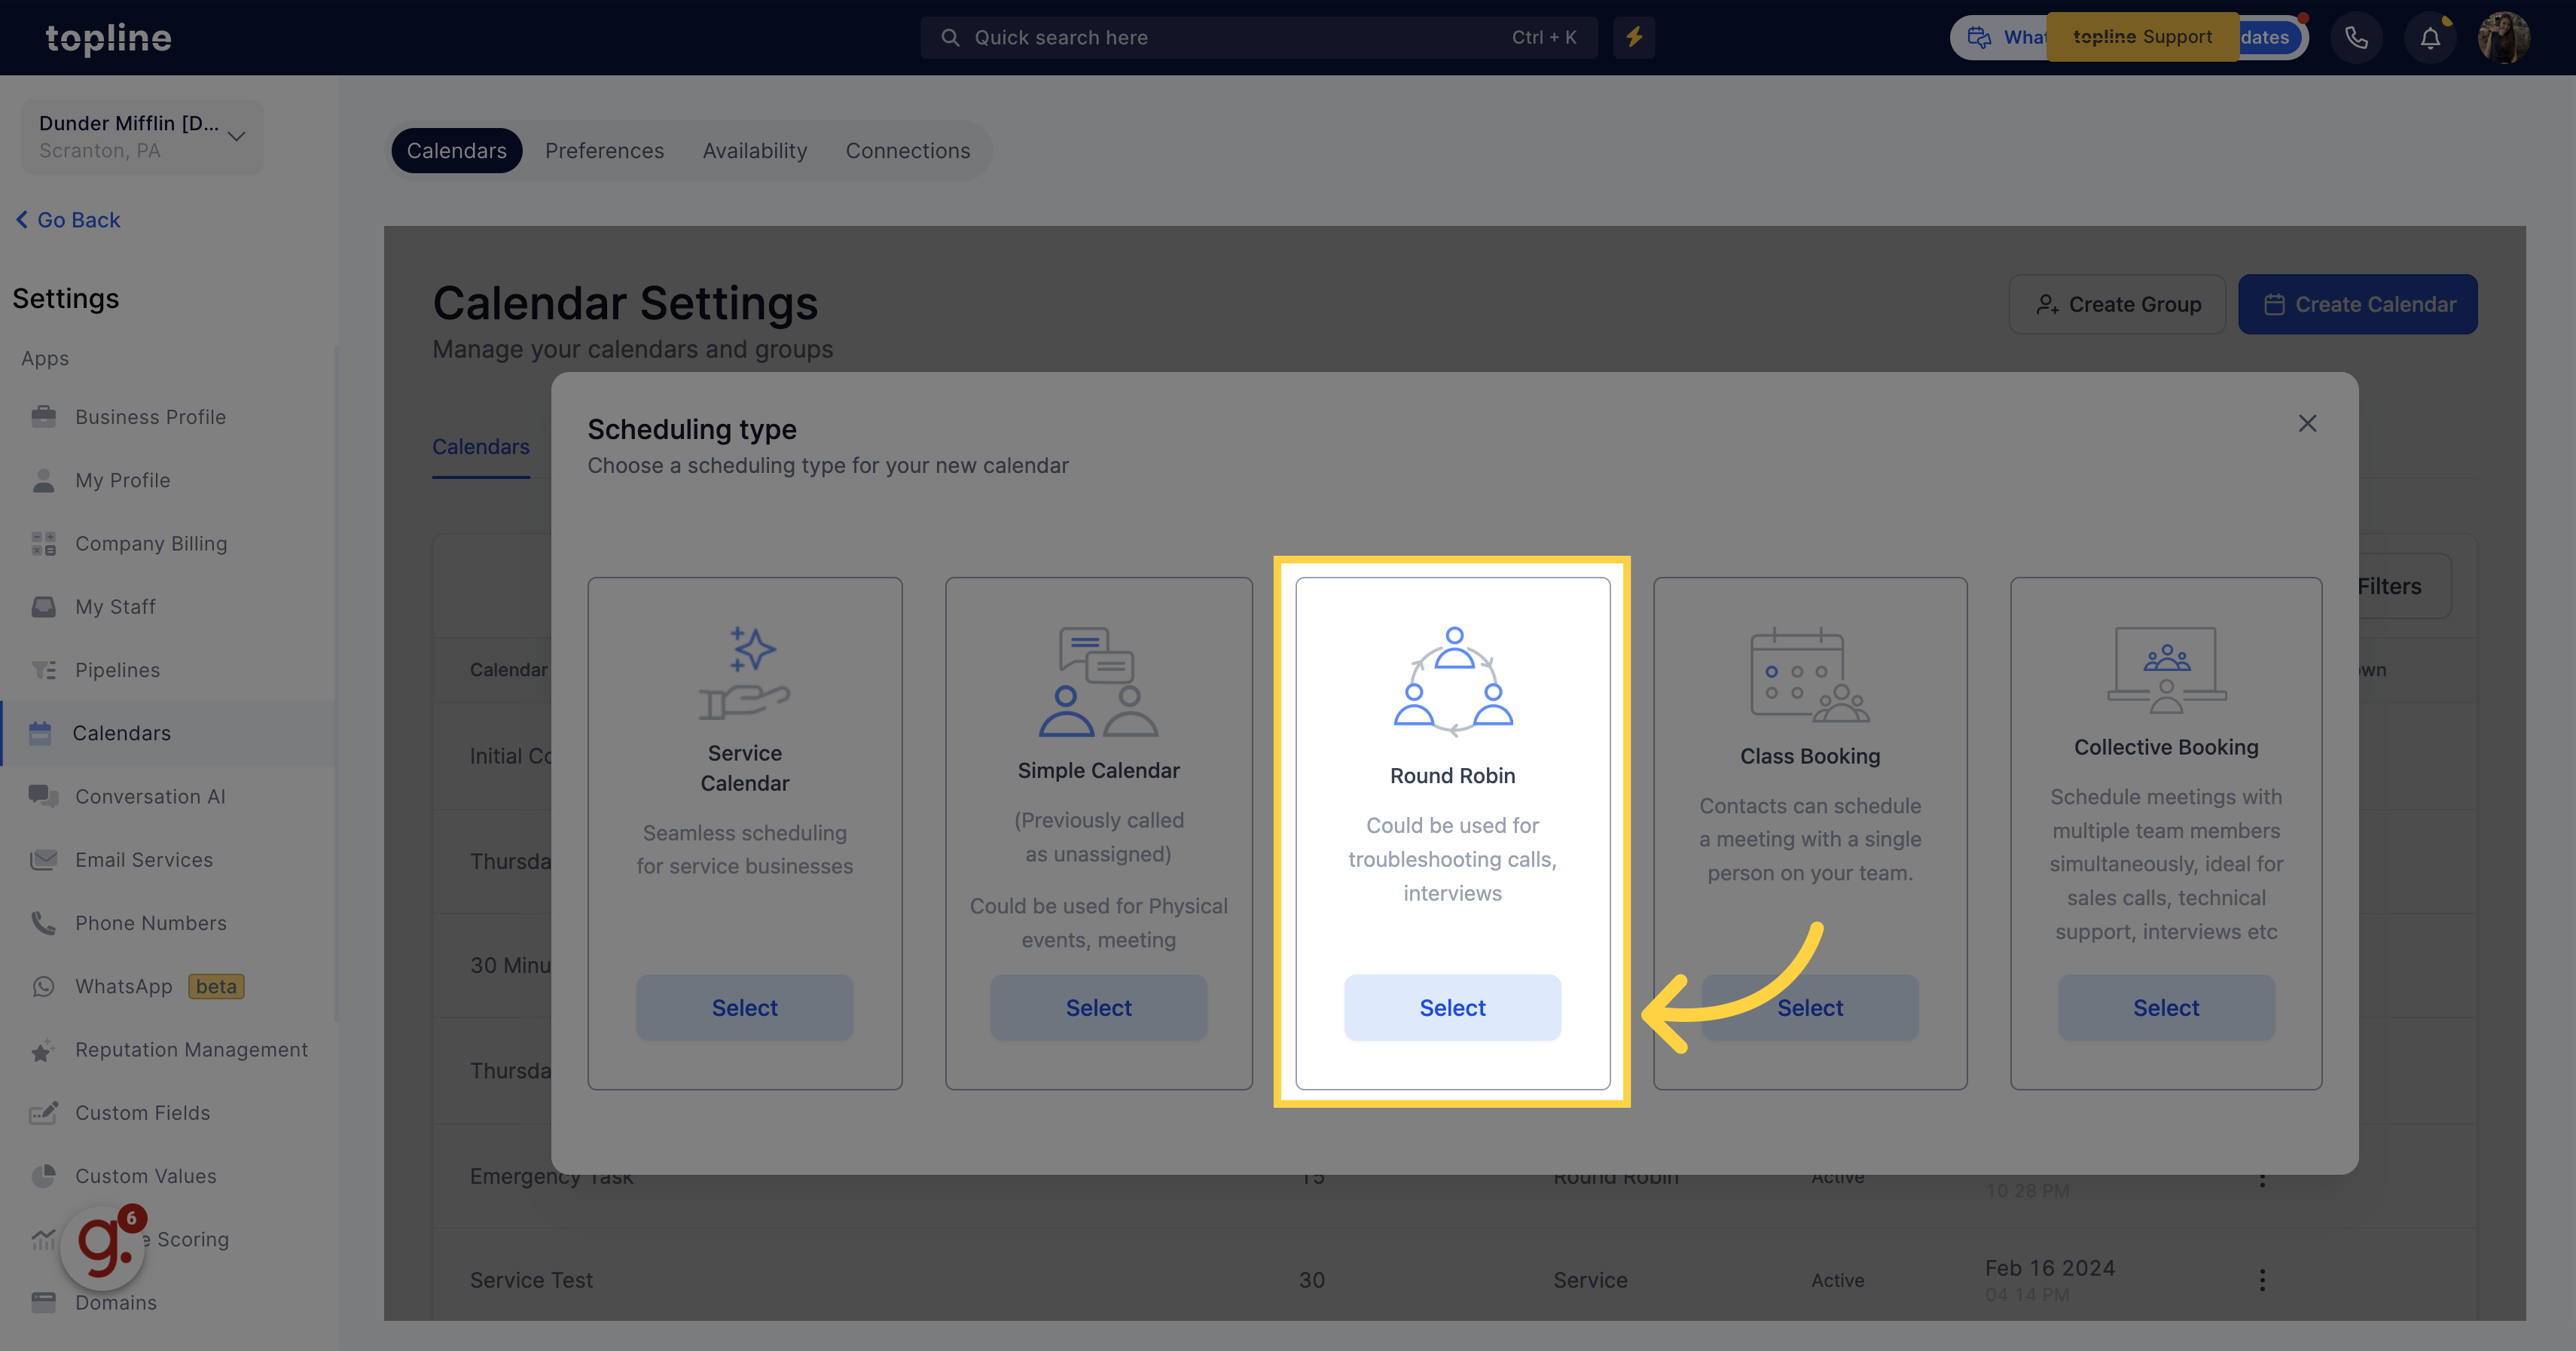
Opt for the Round Robin calendar for troubleshooting calls or interviews.

Round Robin

7. Class Booking

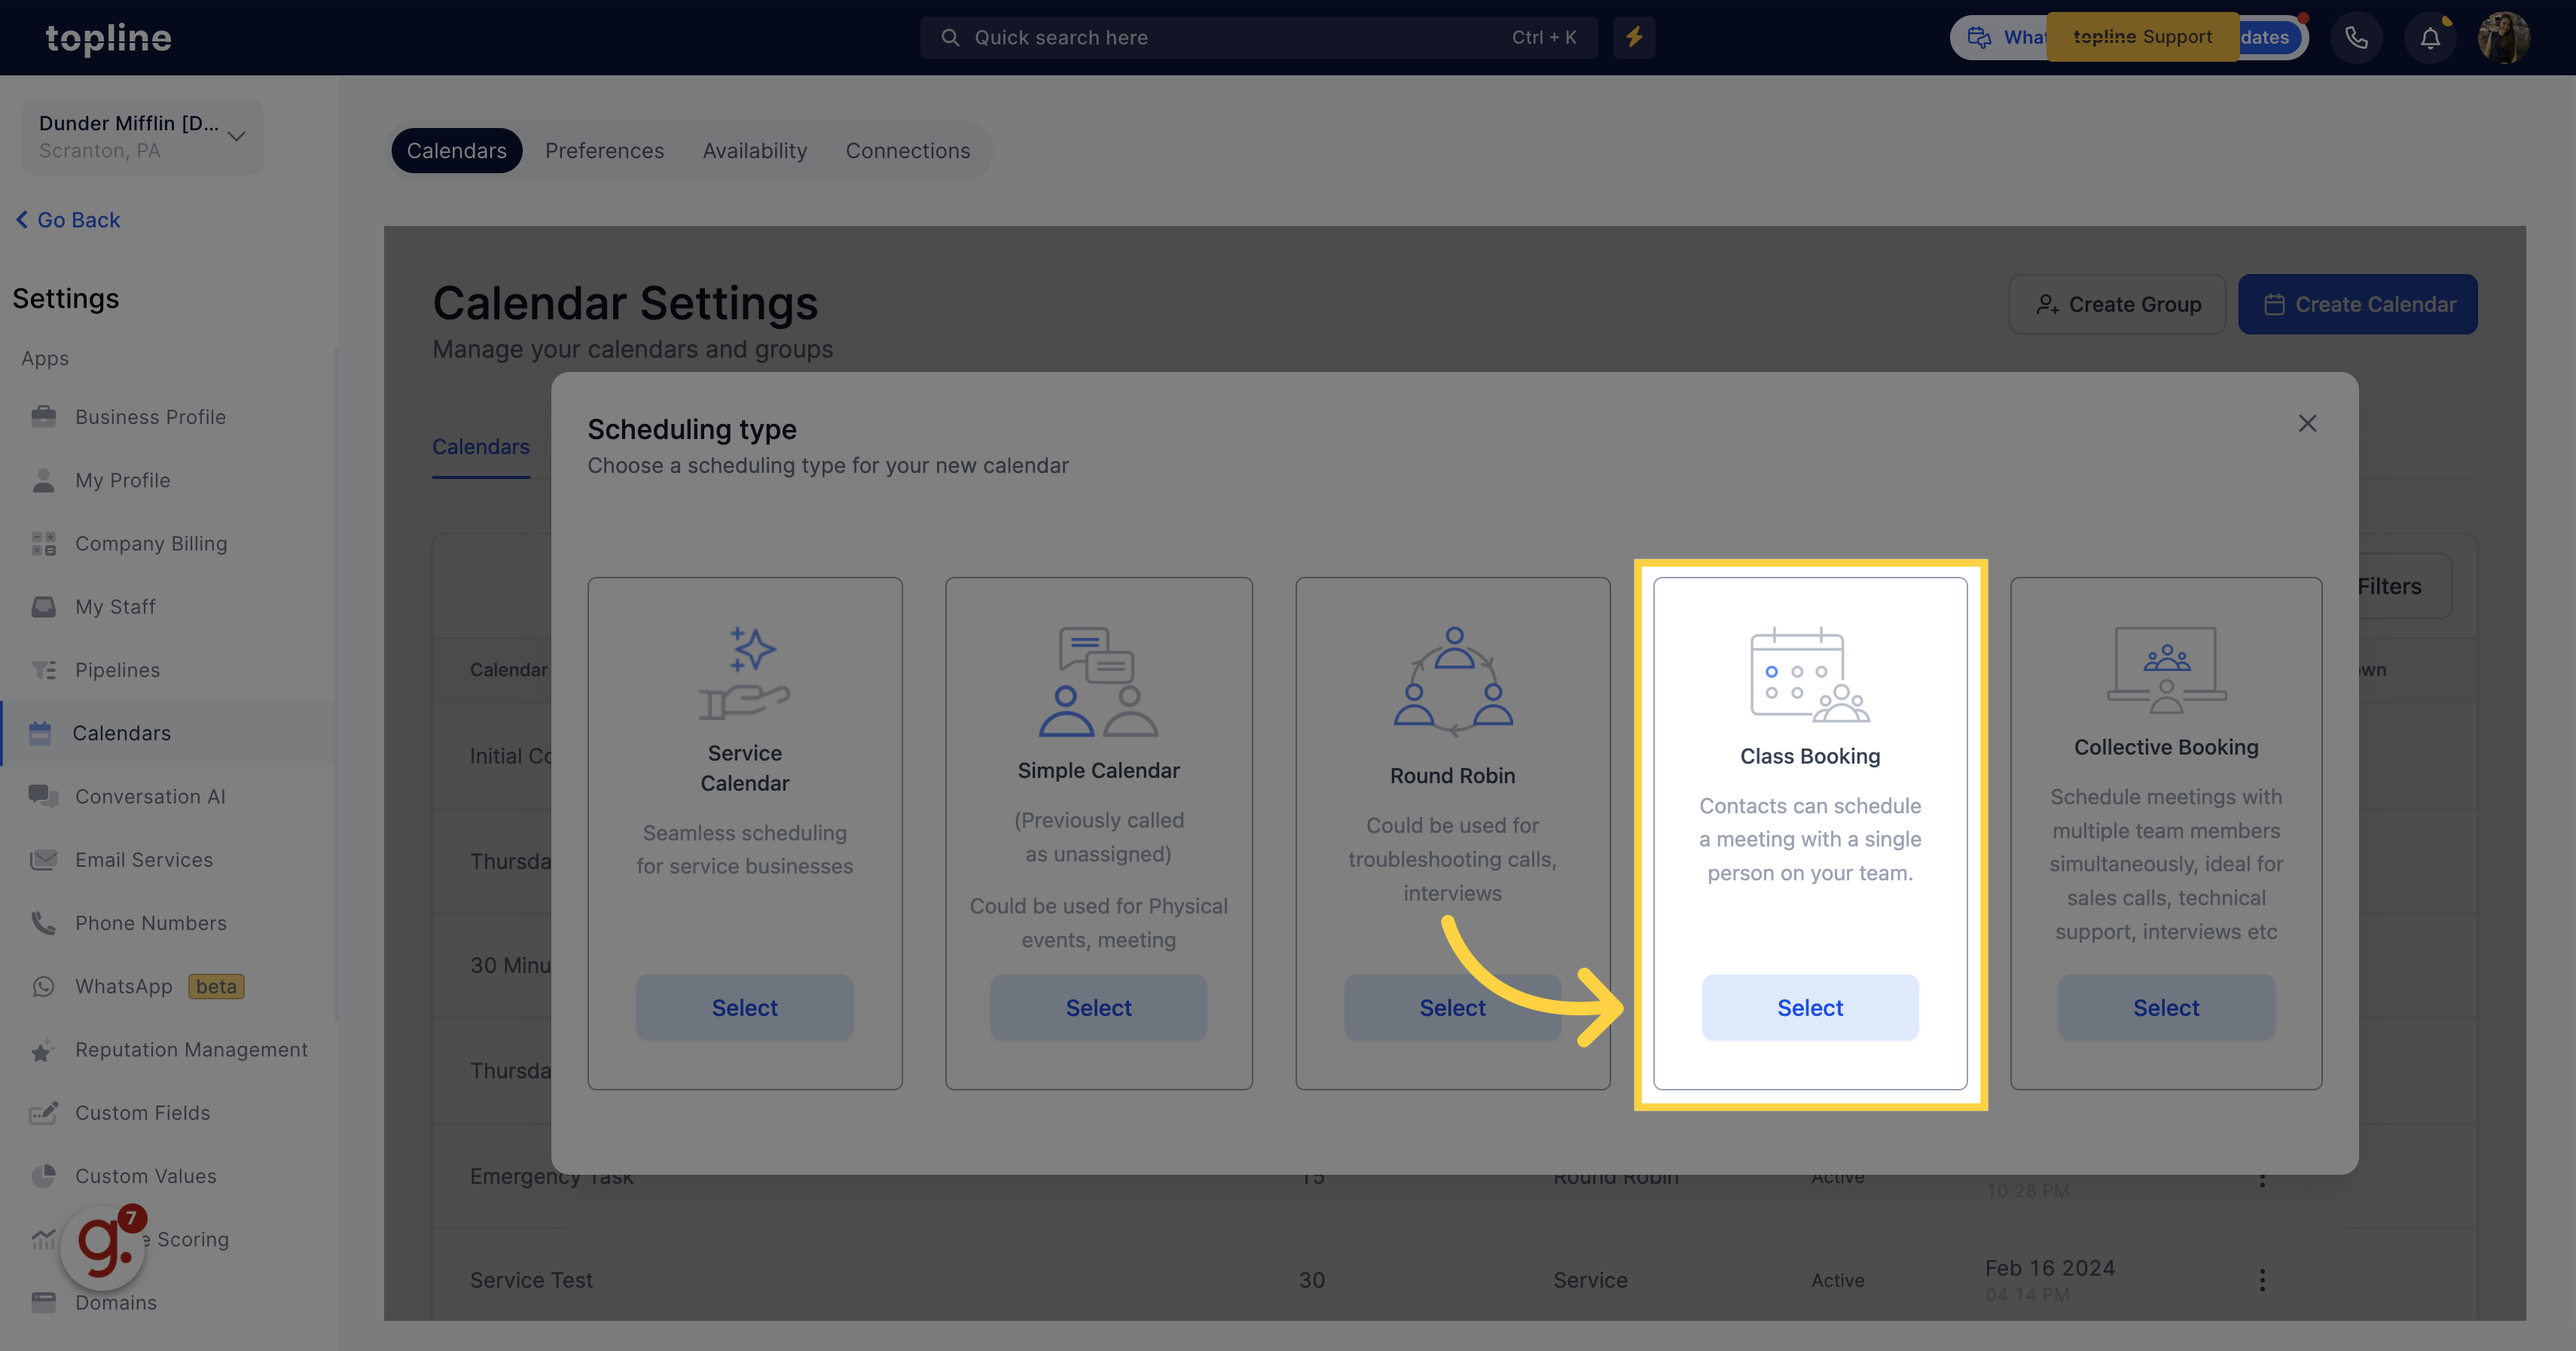
Select the class booking feature to schedule meetings with a single team member.

Class Booking

8. Collective Booking

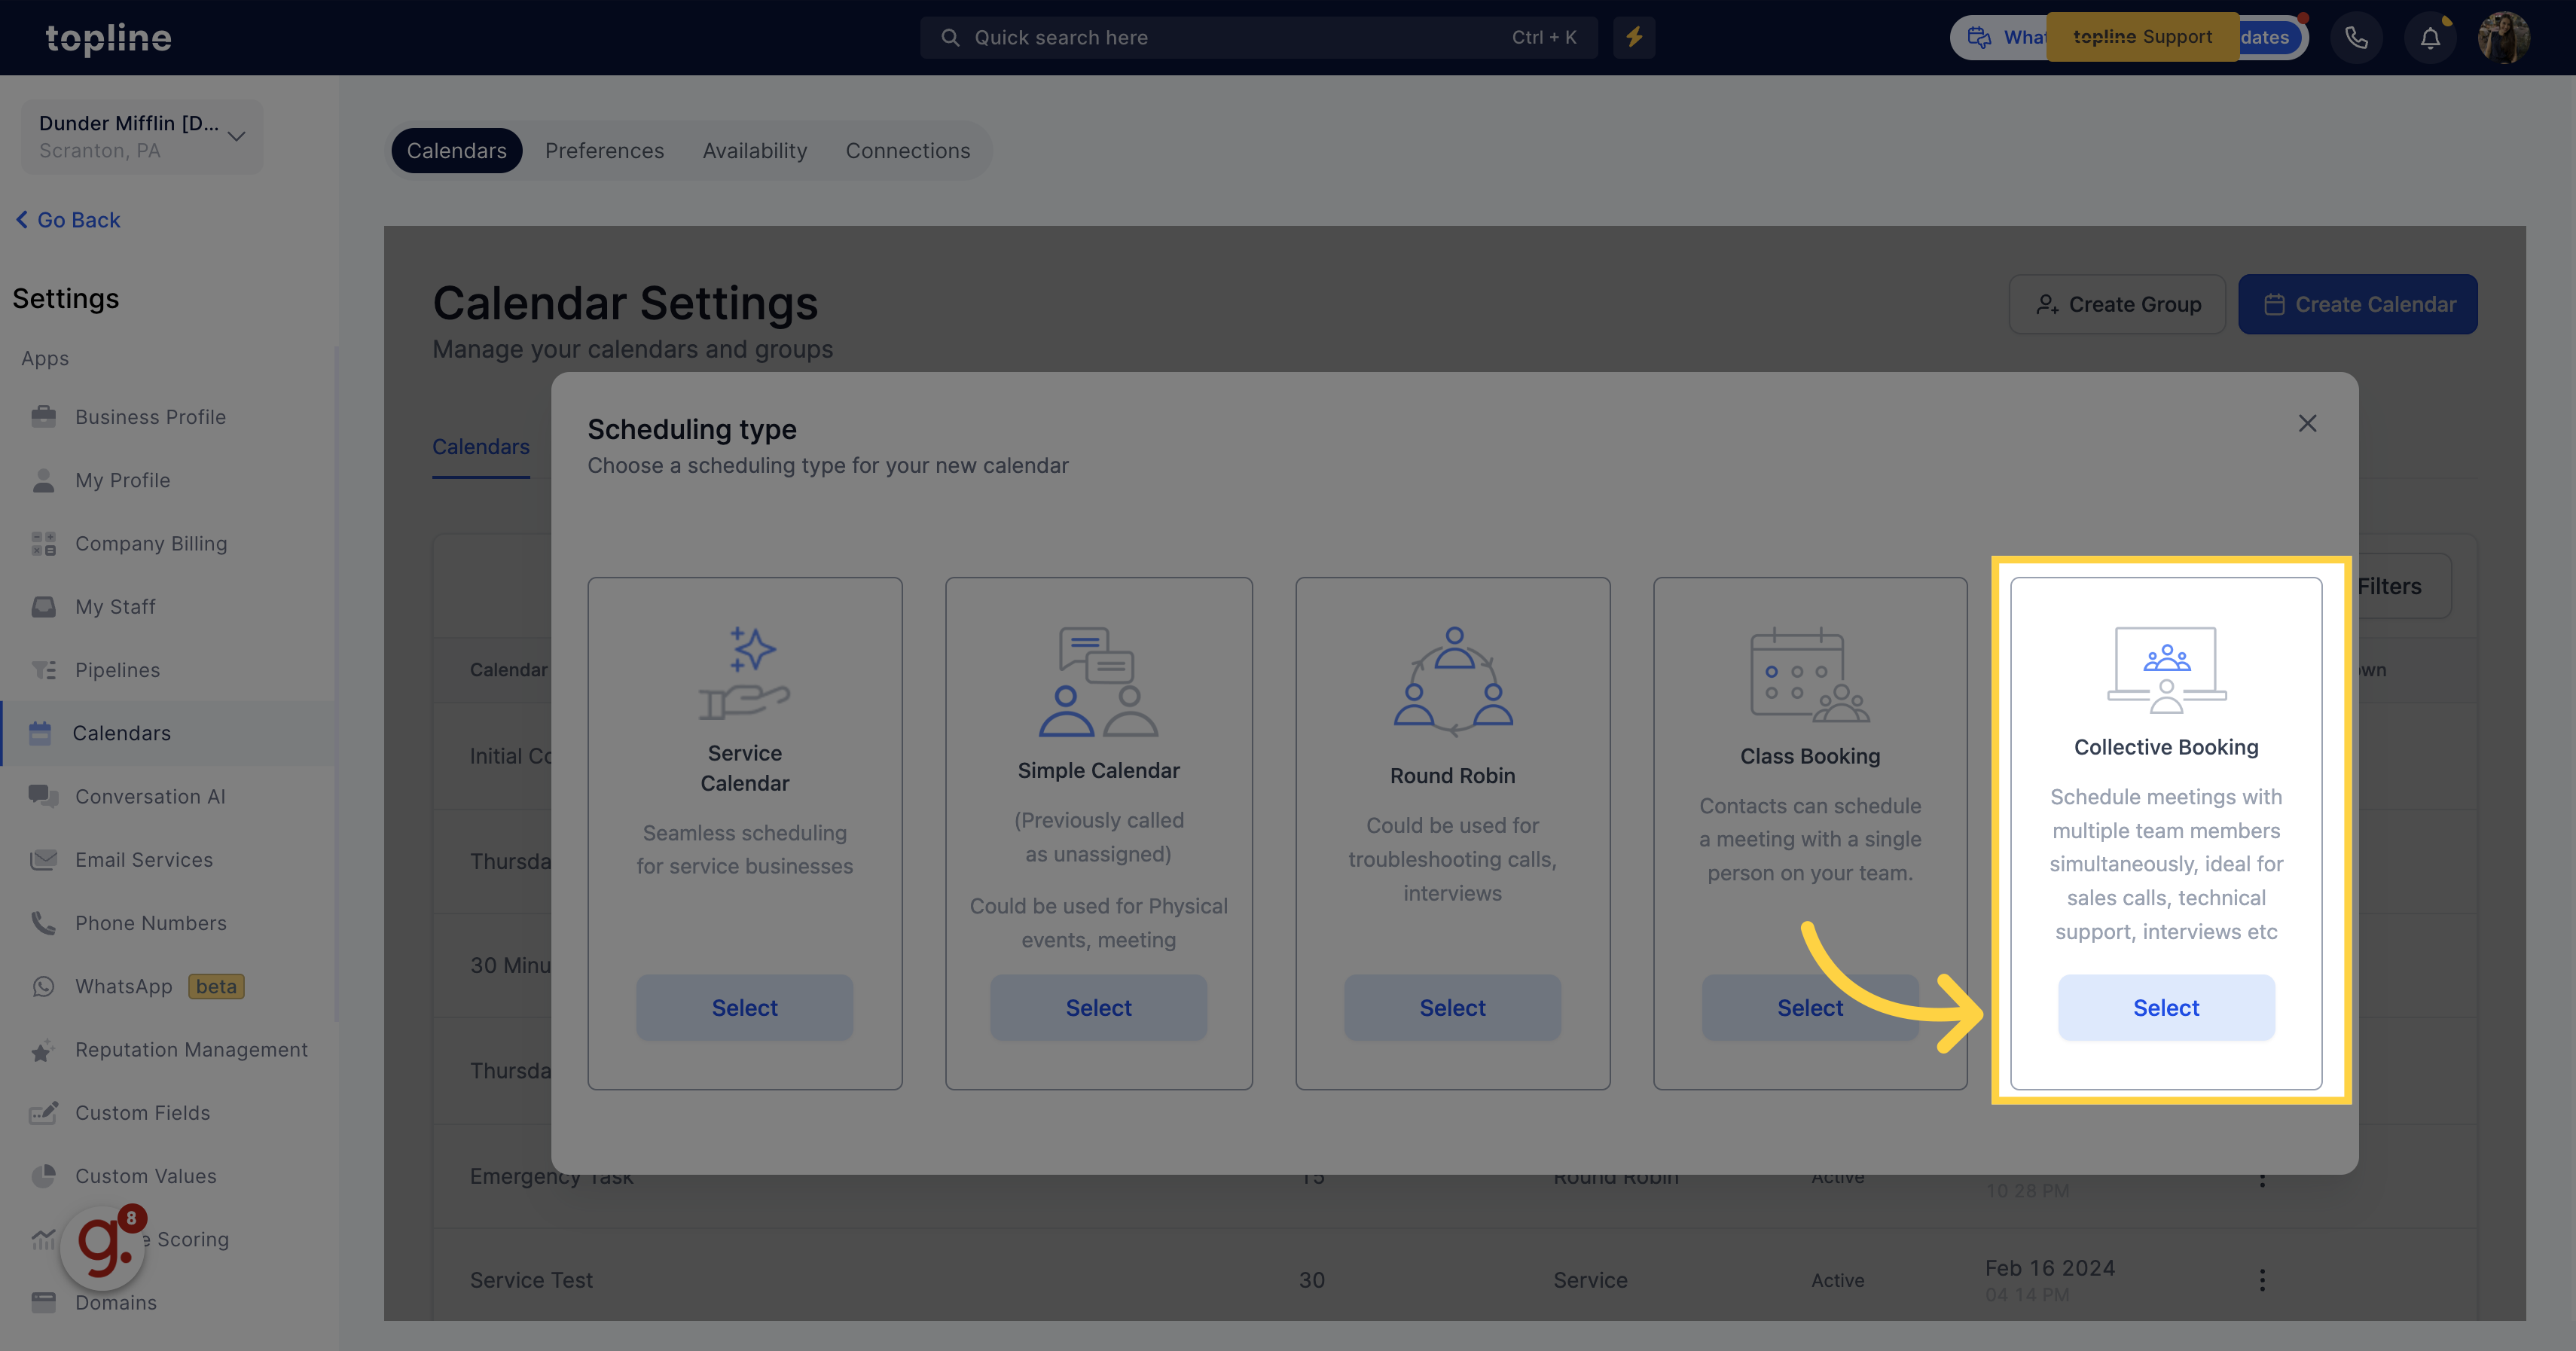
Pick the collective booking option to schedule meetings with multiple team members simultaneously.

Collective Booking
Did this answer your question?
😞
😐
😁