To connect to Outlook Calendar, follow these steps:
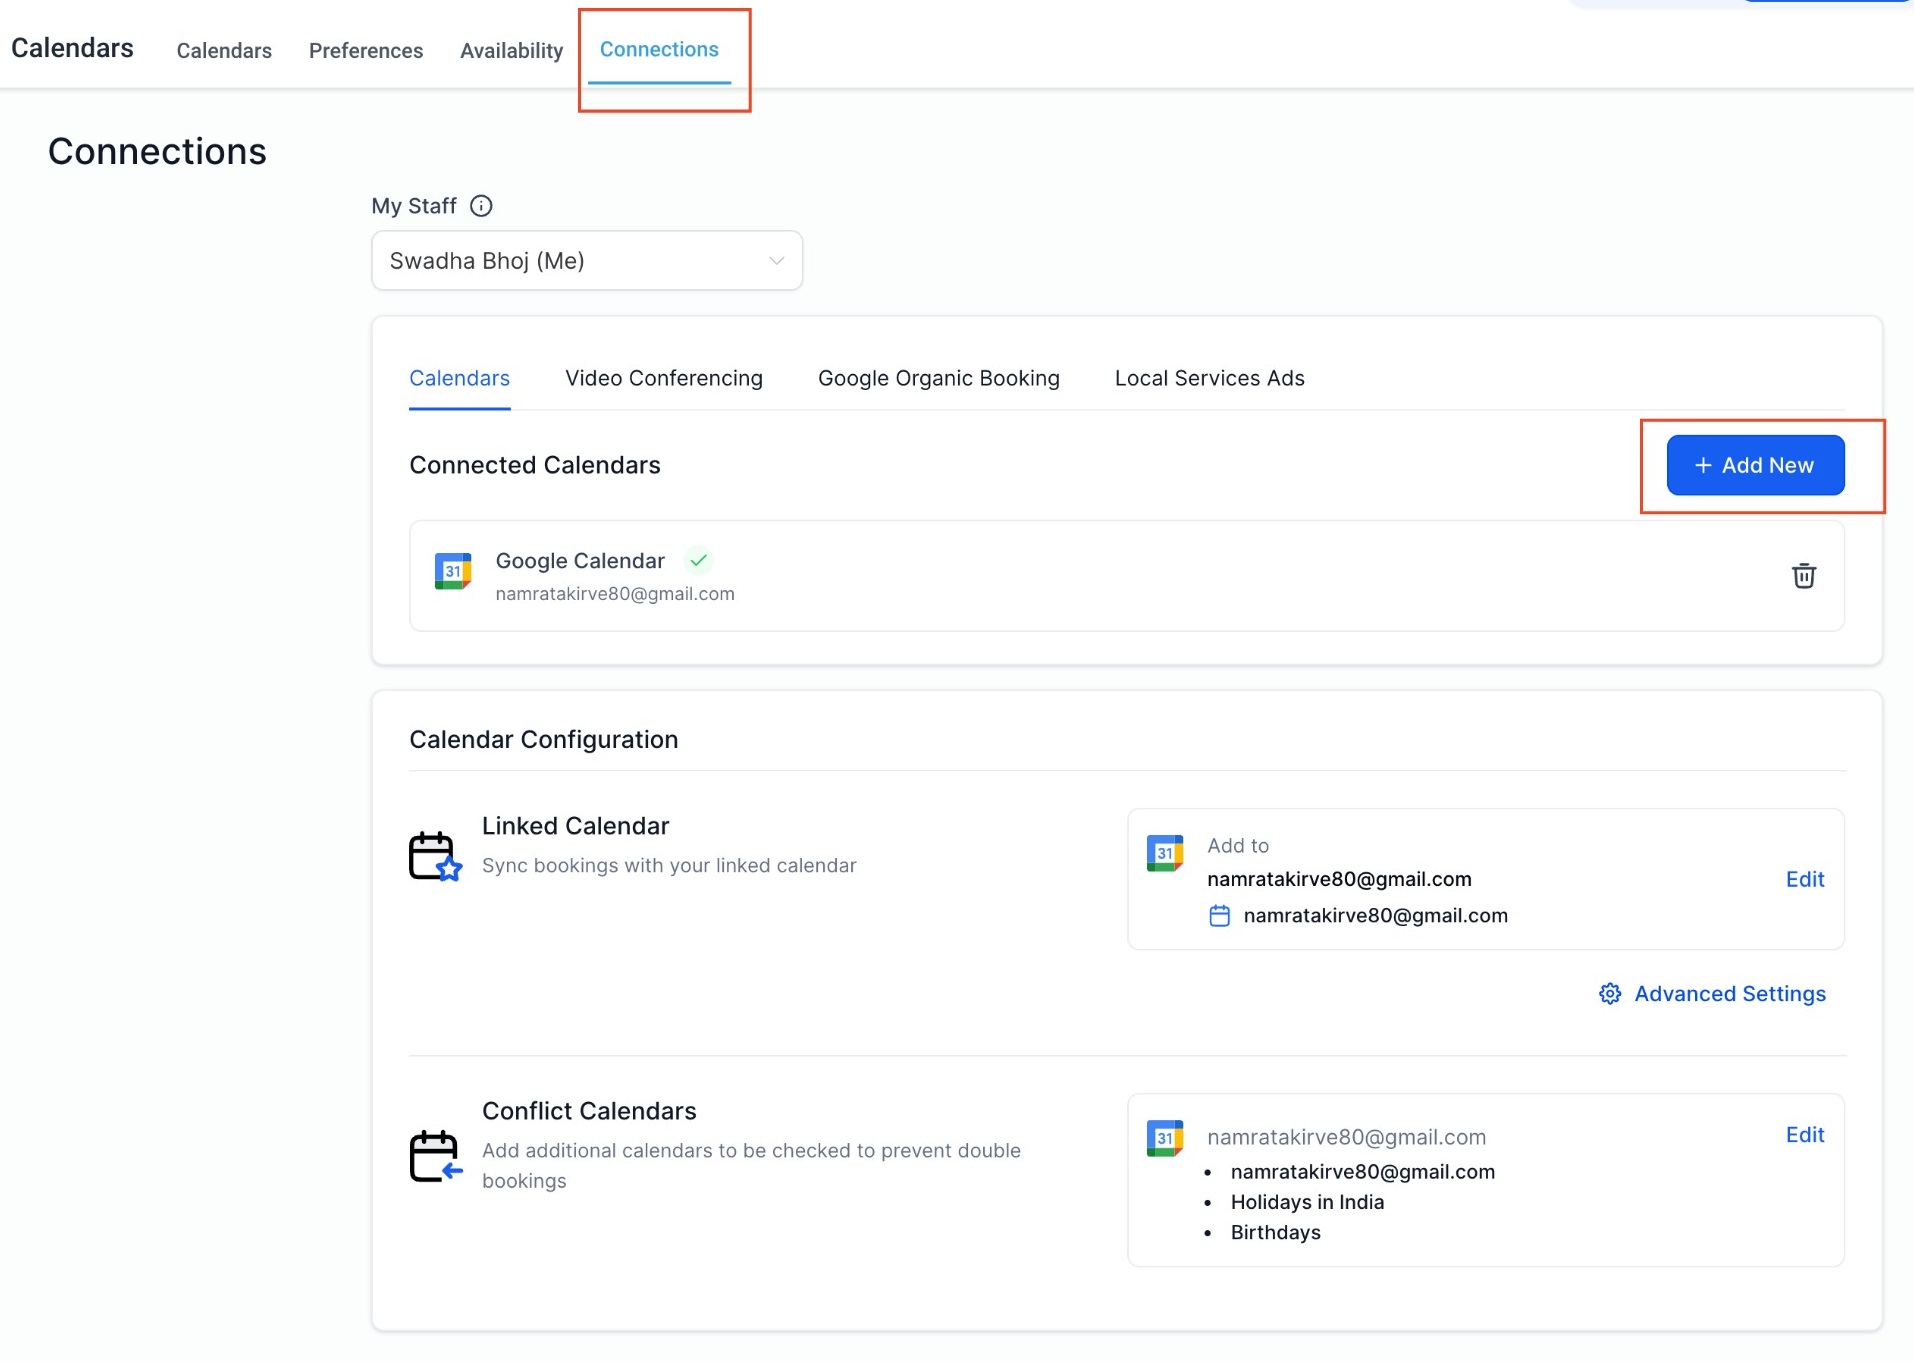
1. Navigate to "Calendars" > "Calendar Settings" > "Connections."
2. Click on "Add New."
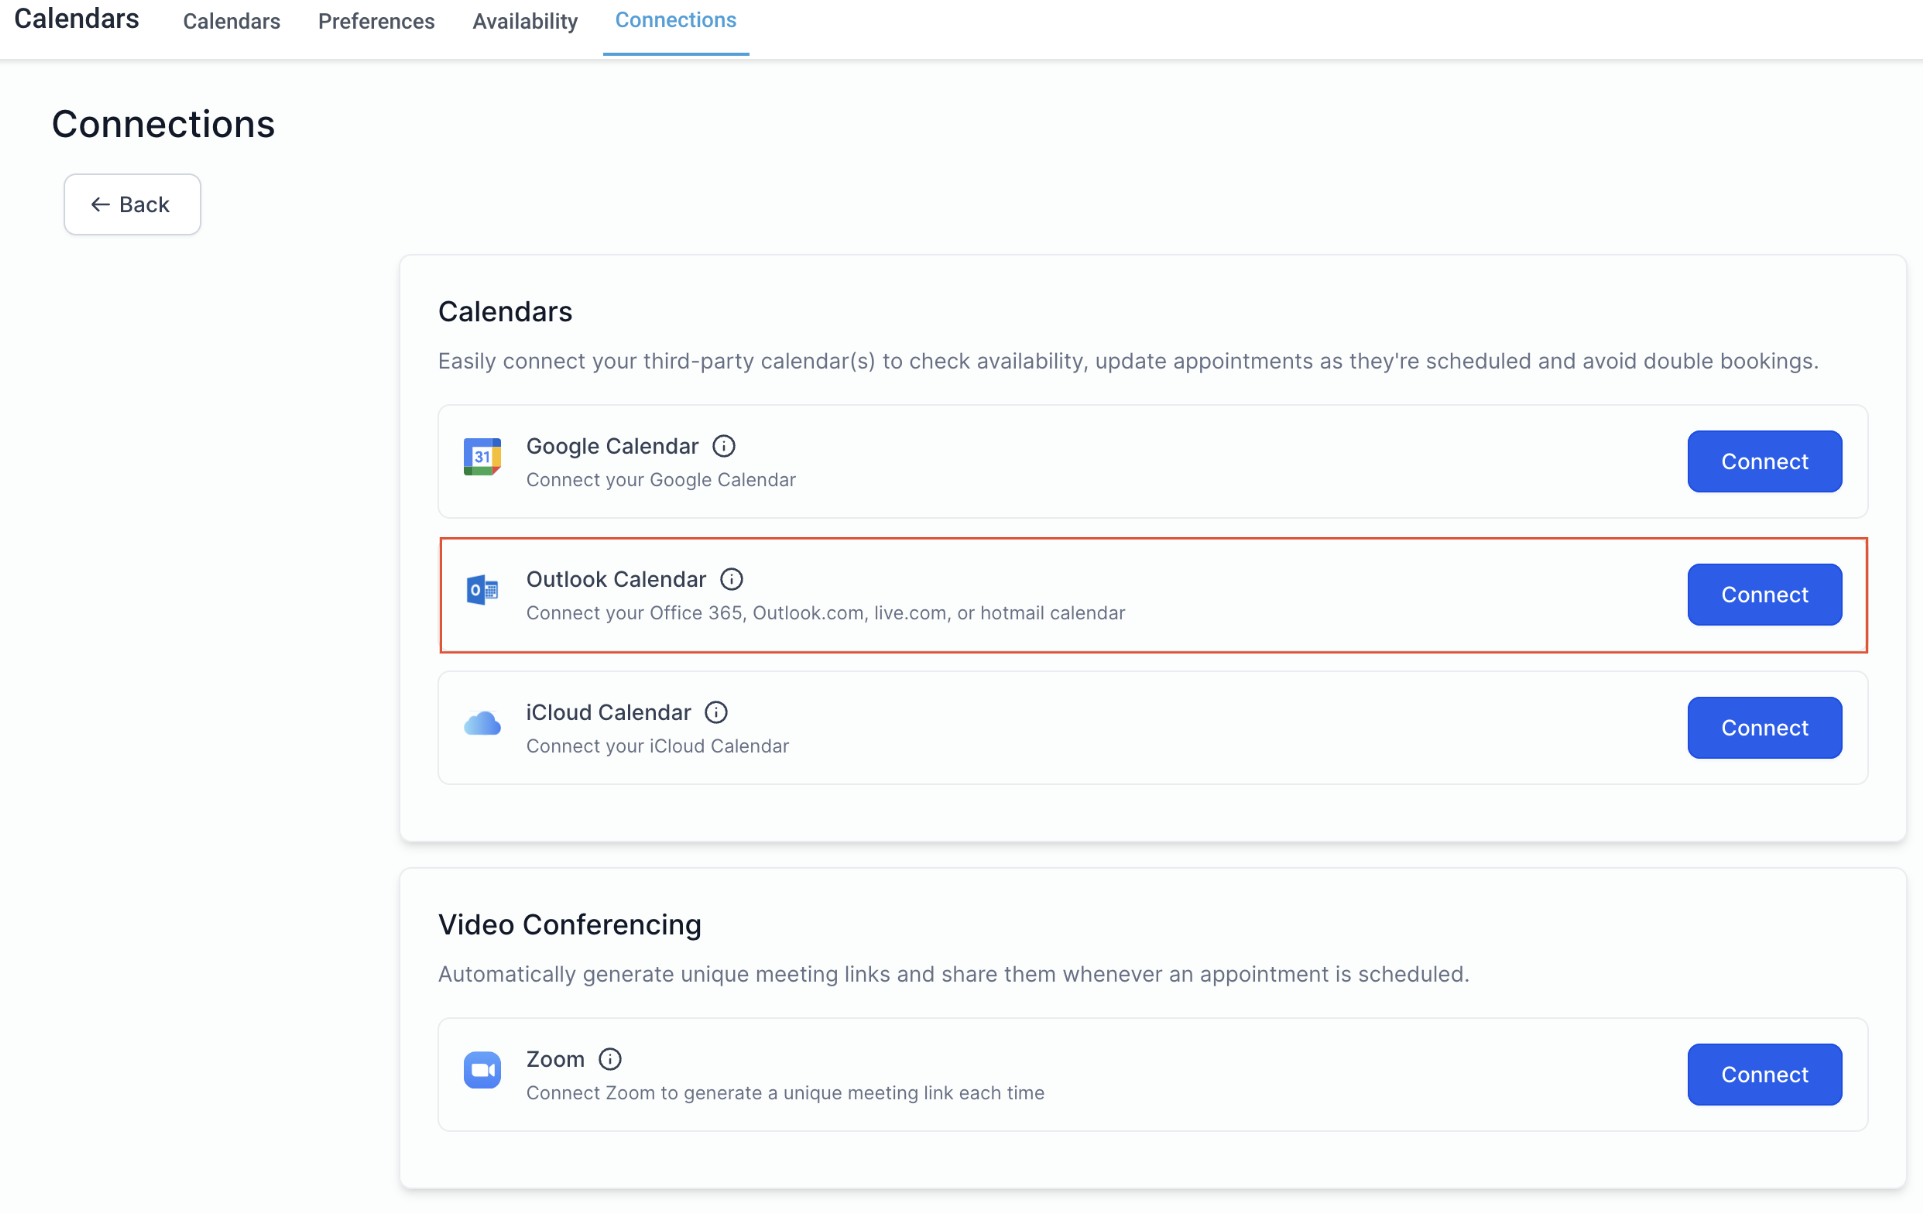
3. Choose "Outlook Calendar" and click "Connect."
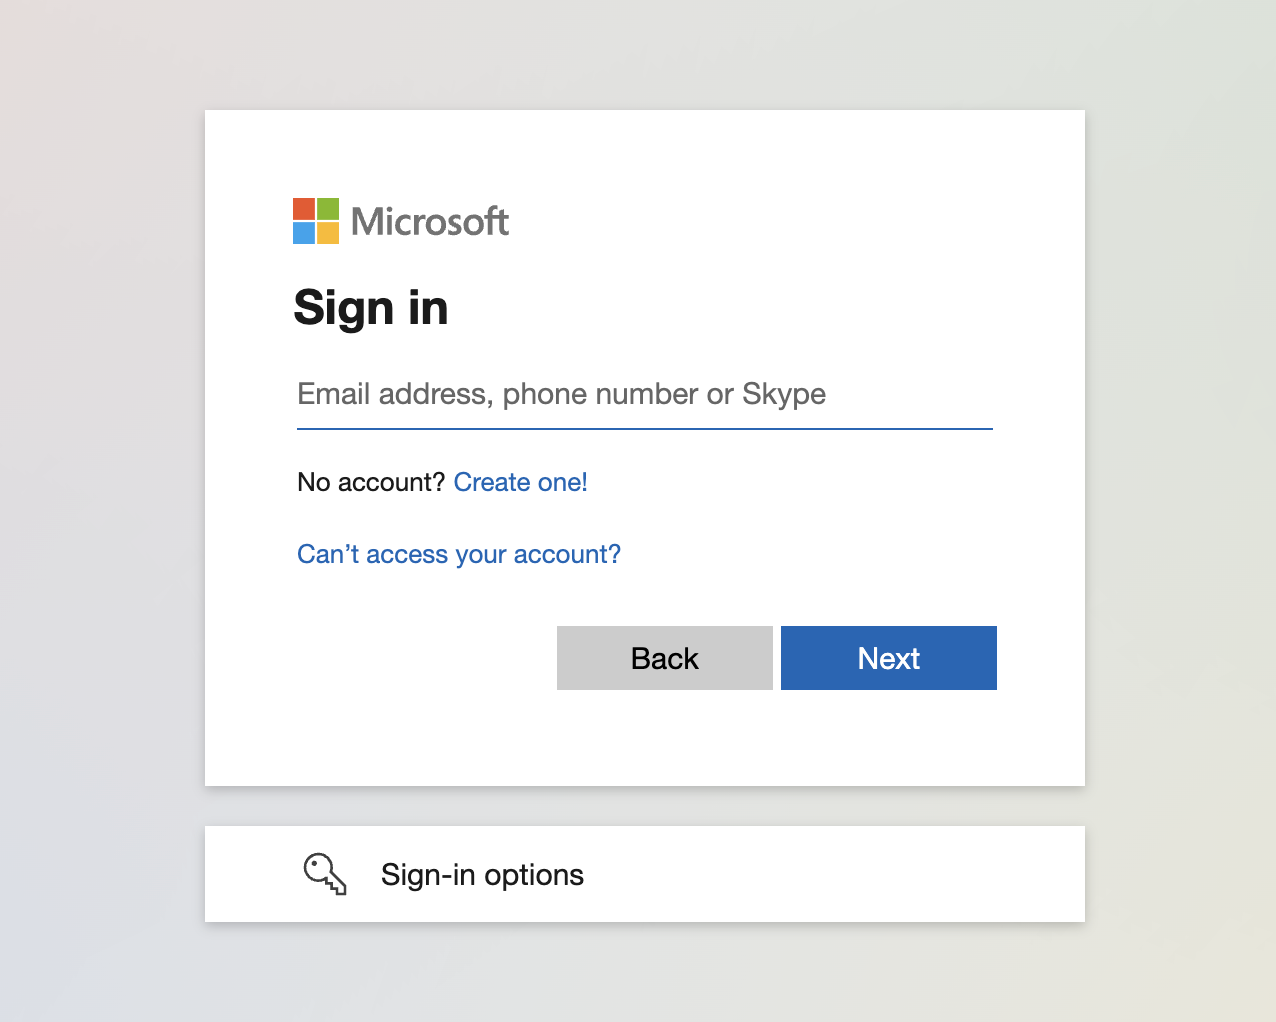
4. Complete the authentication process by signing into your outlook account and granting the necessary access.
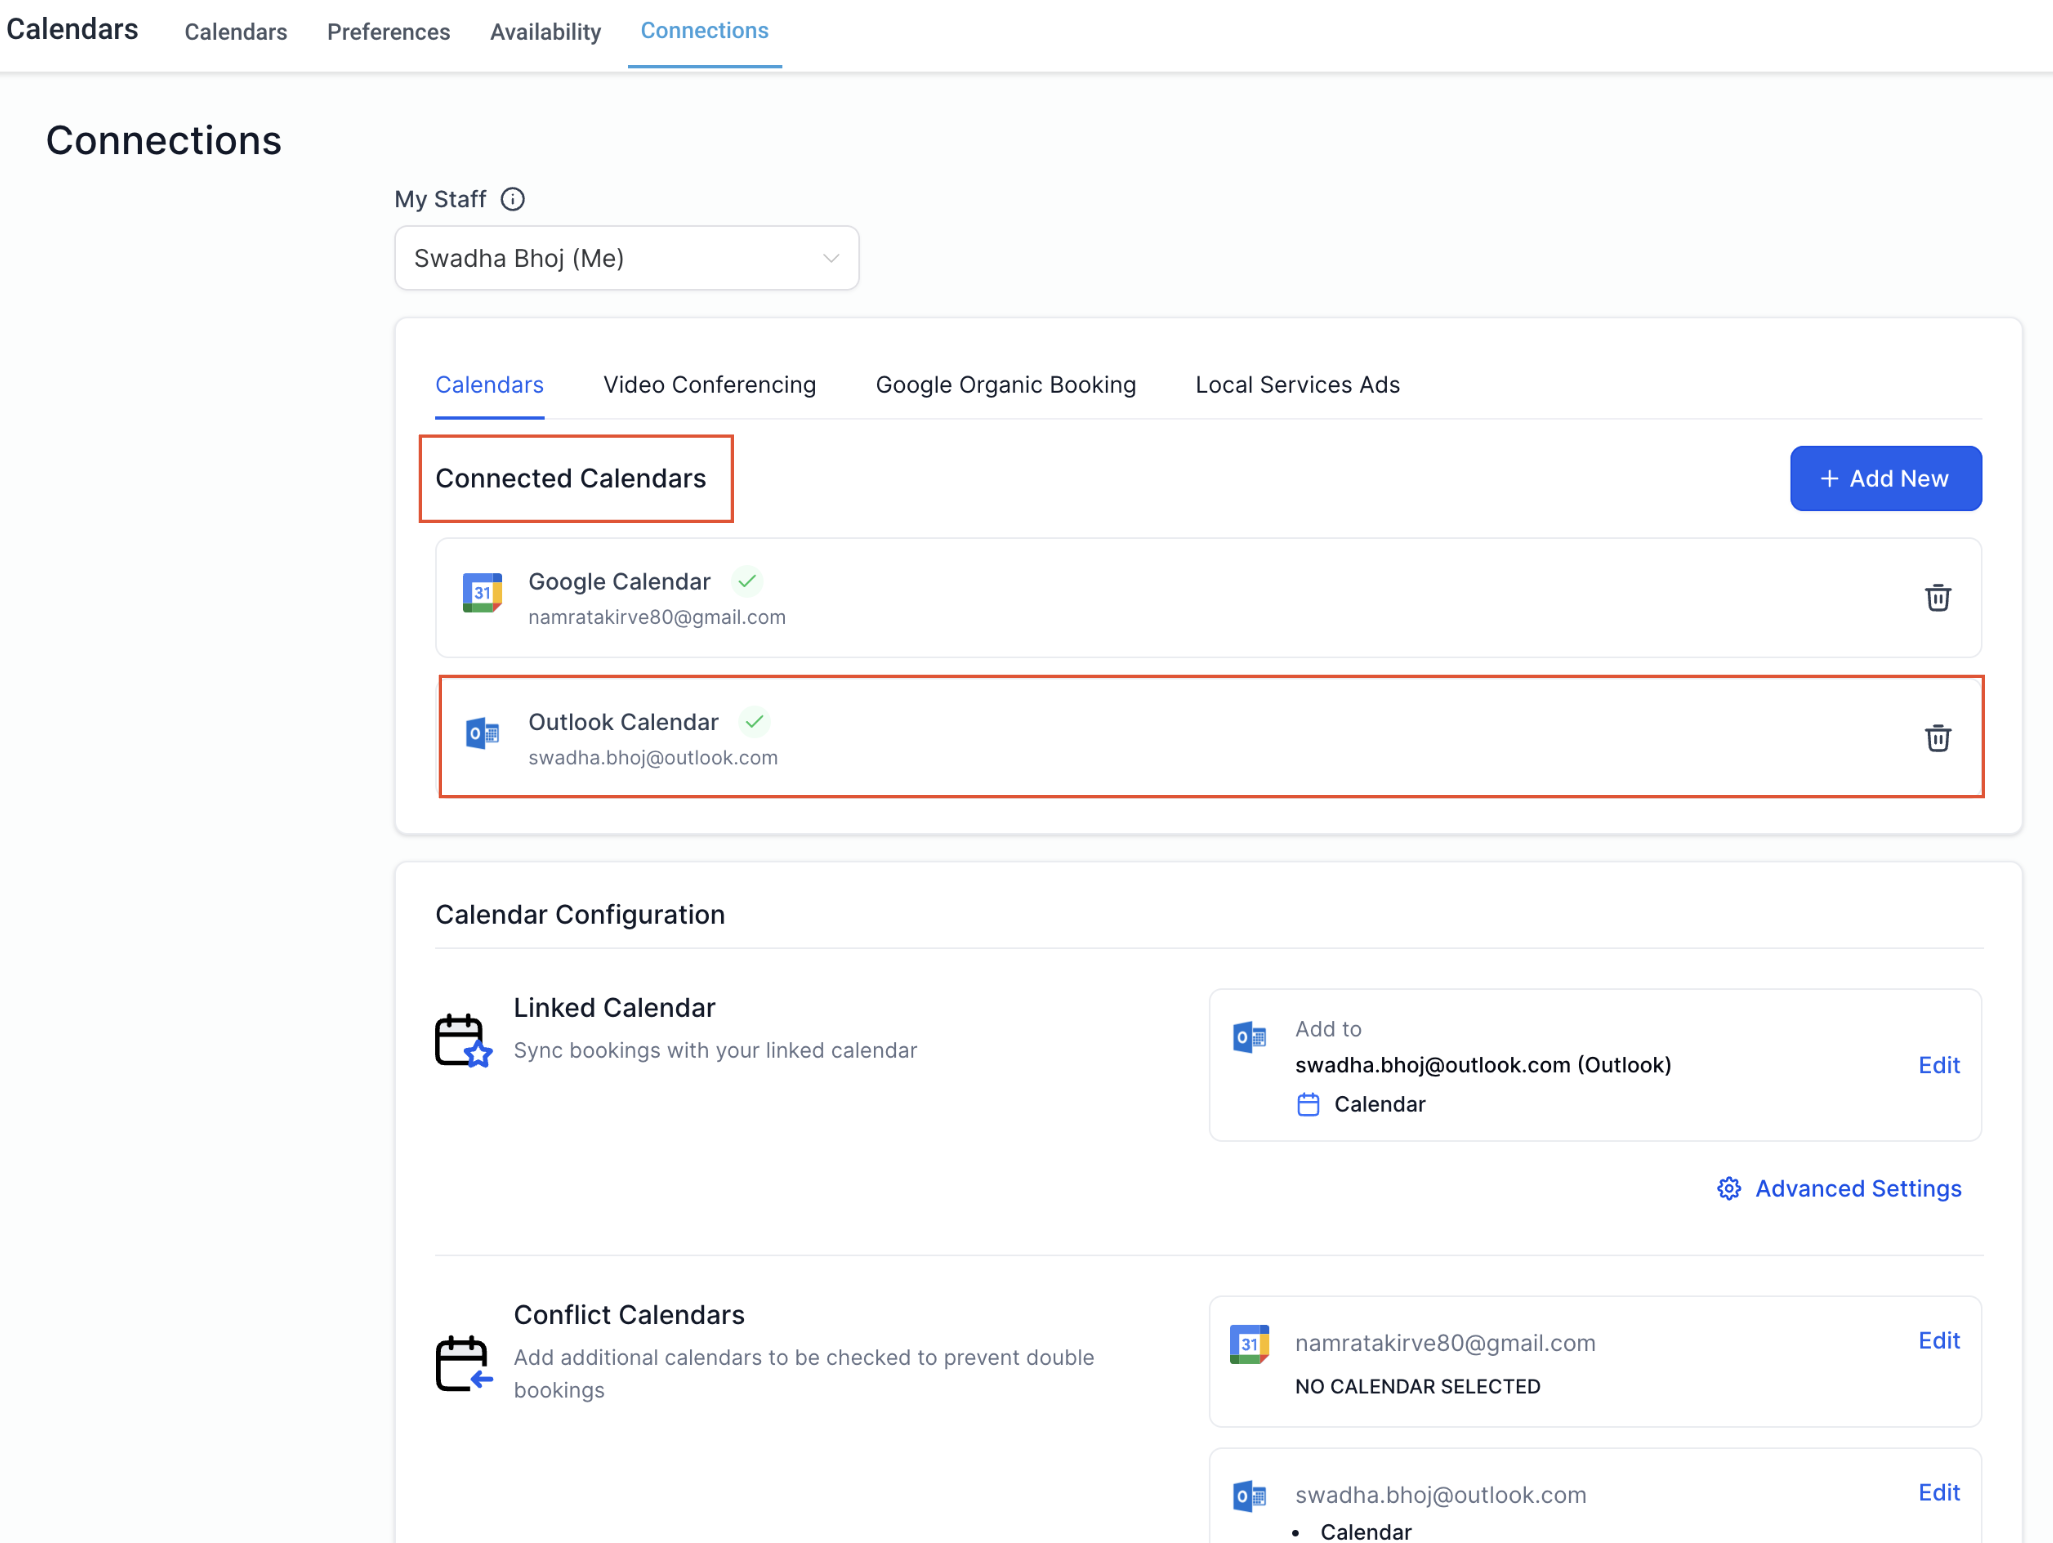
Once your Outlook calendar is successfully connected, you need to complete your calendar configuration by selecting your linked calendar and conflict calendar.
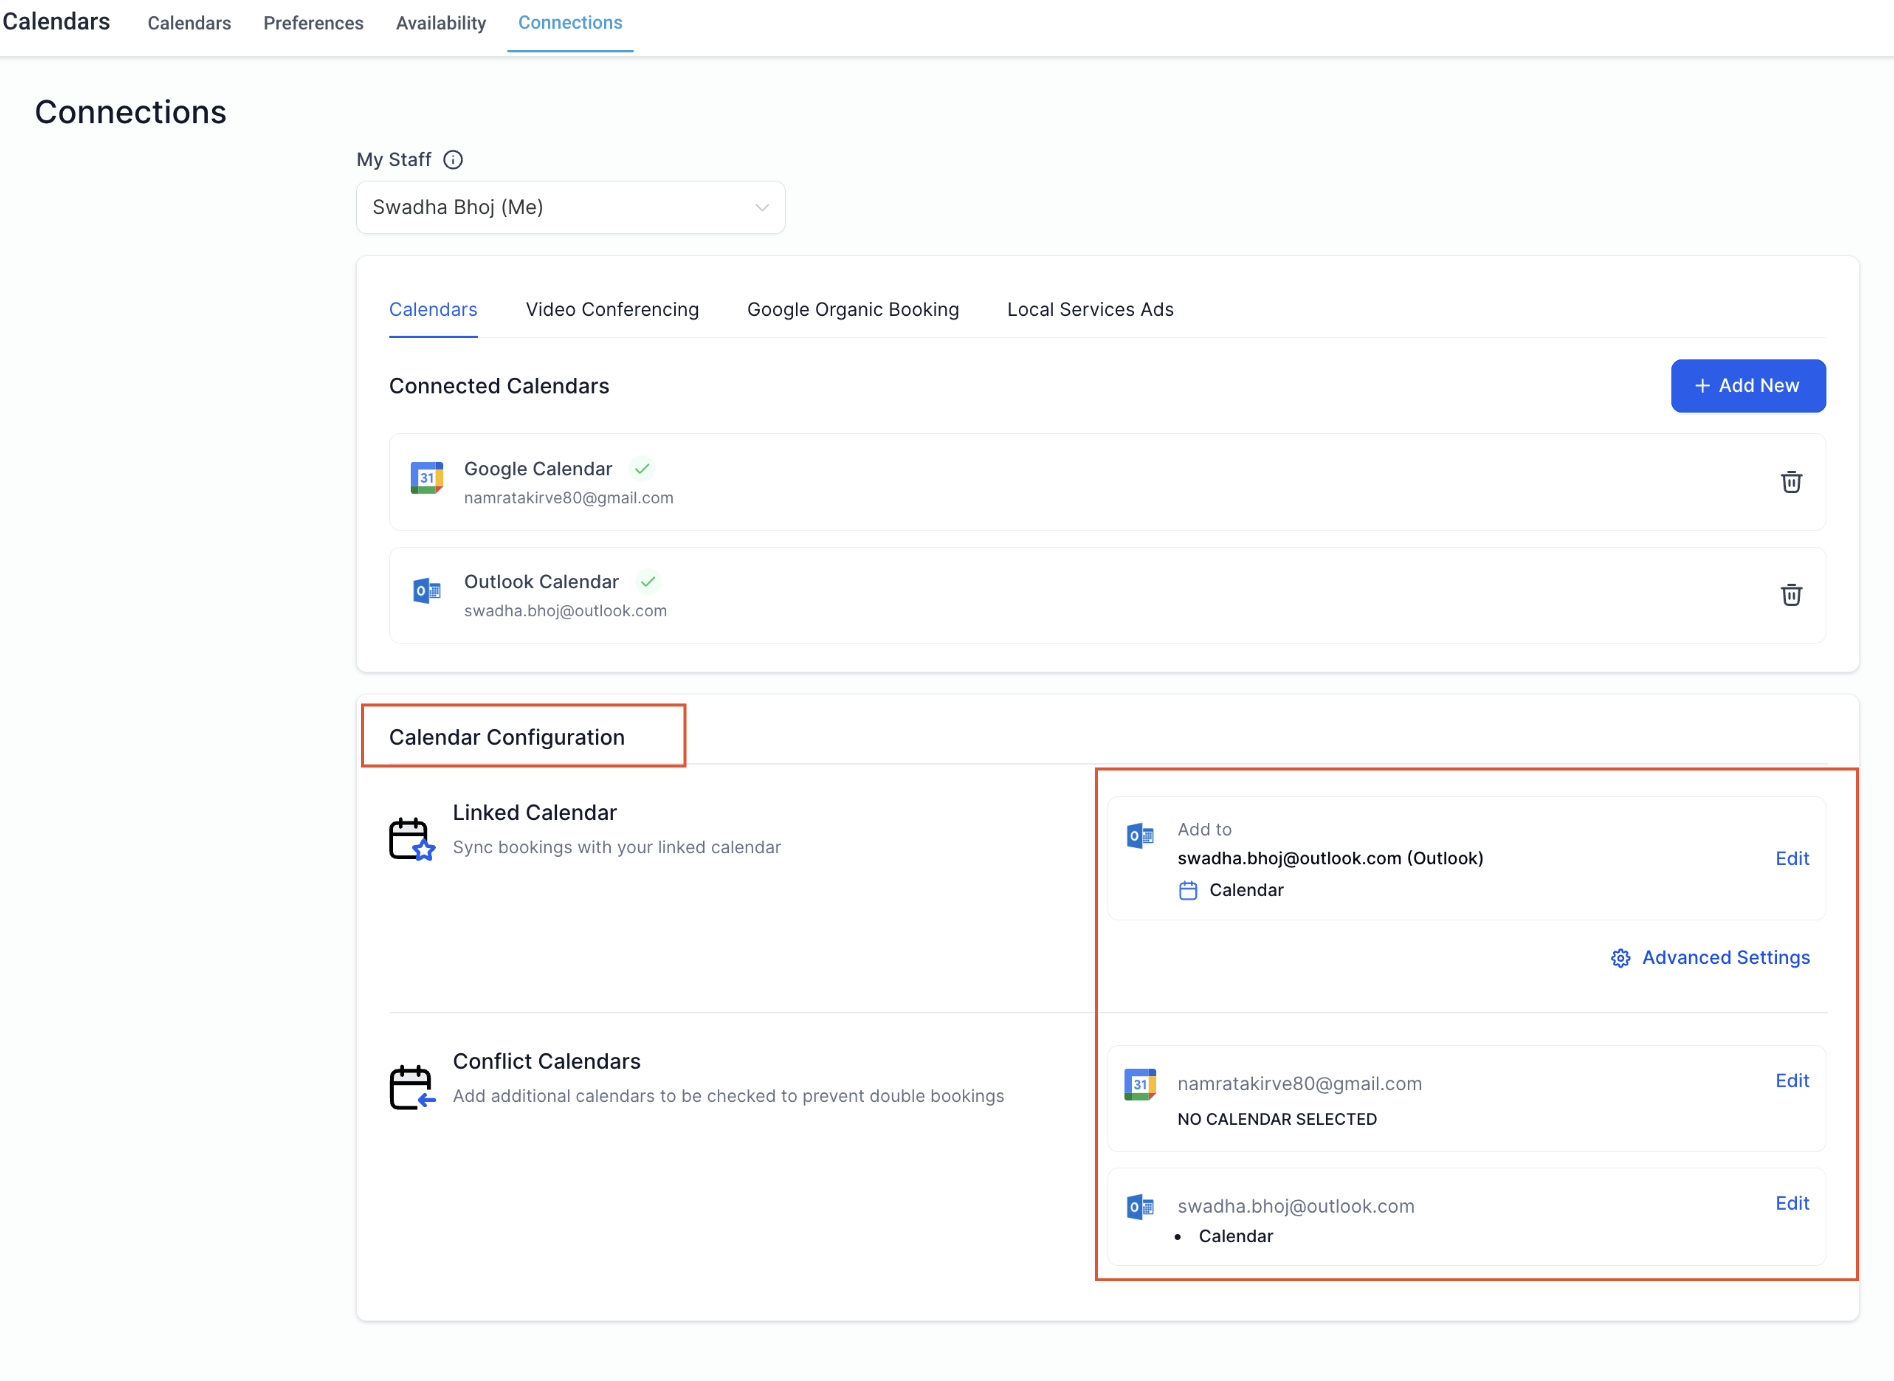
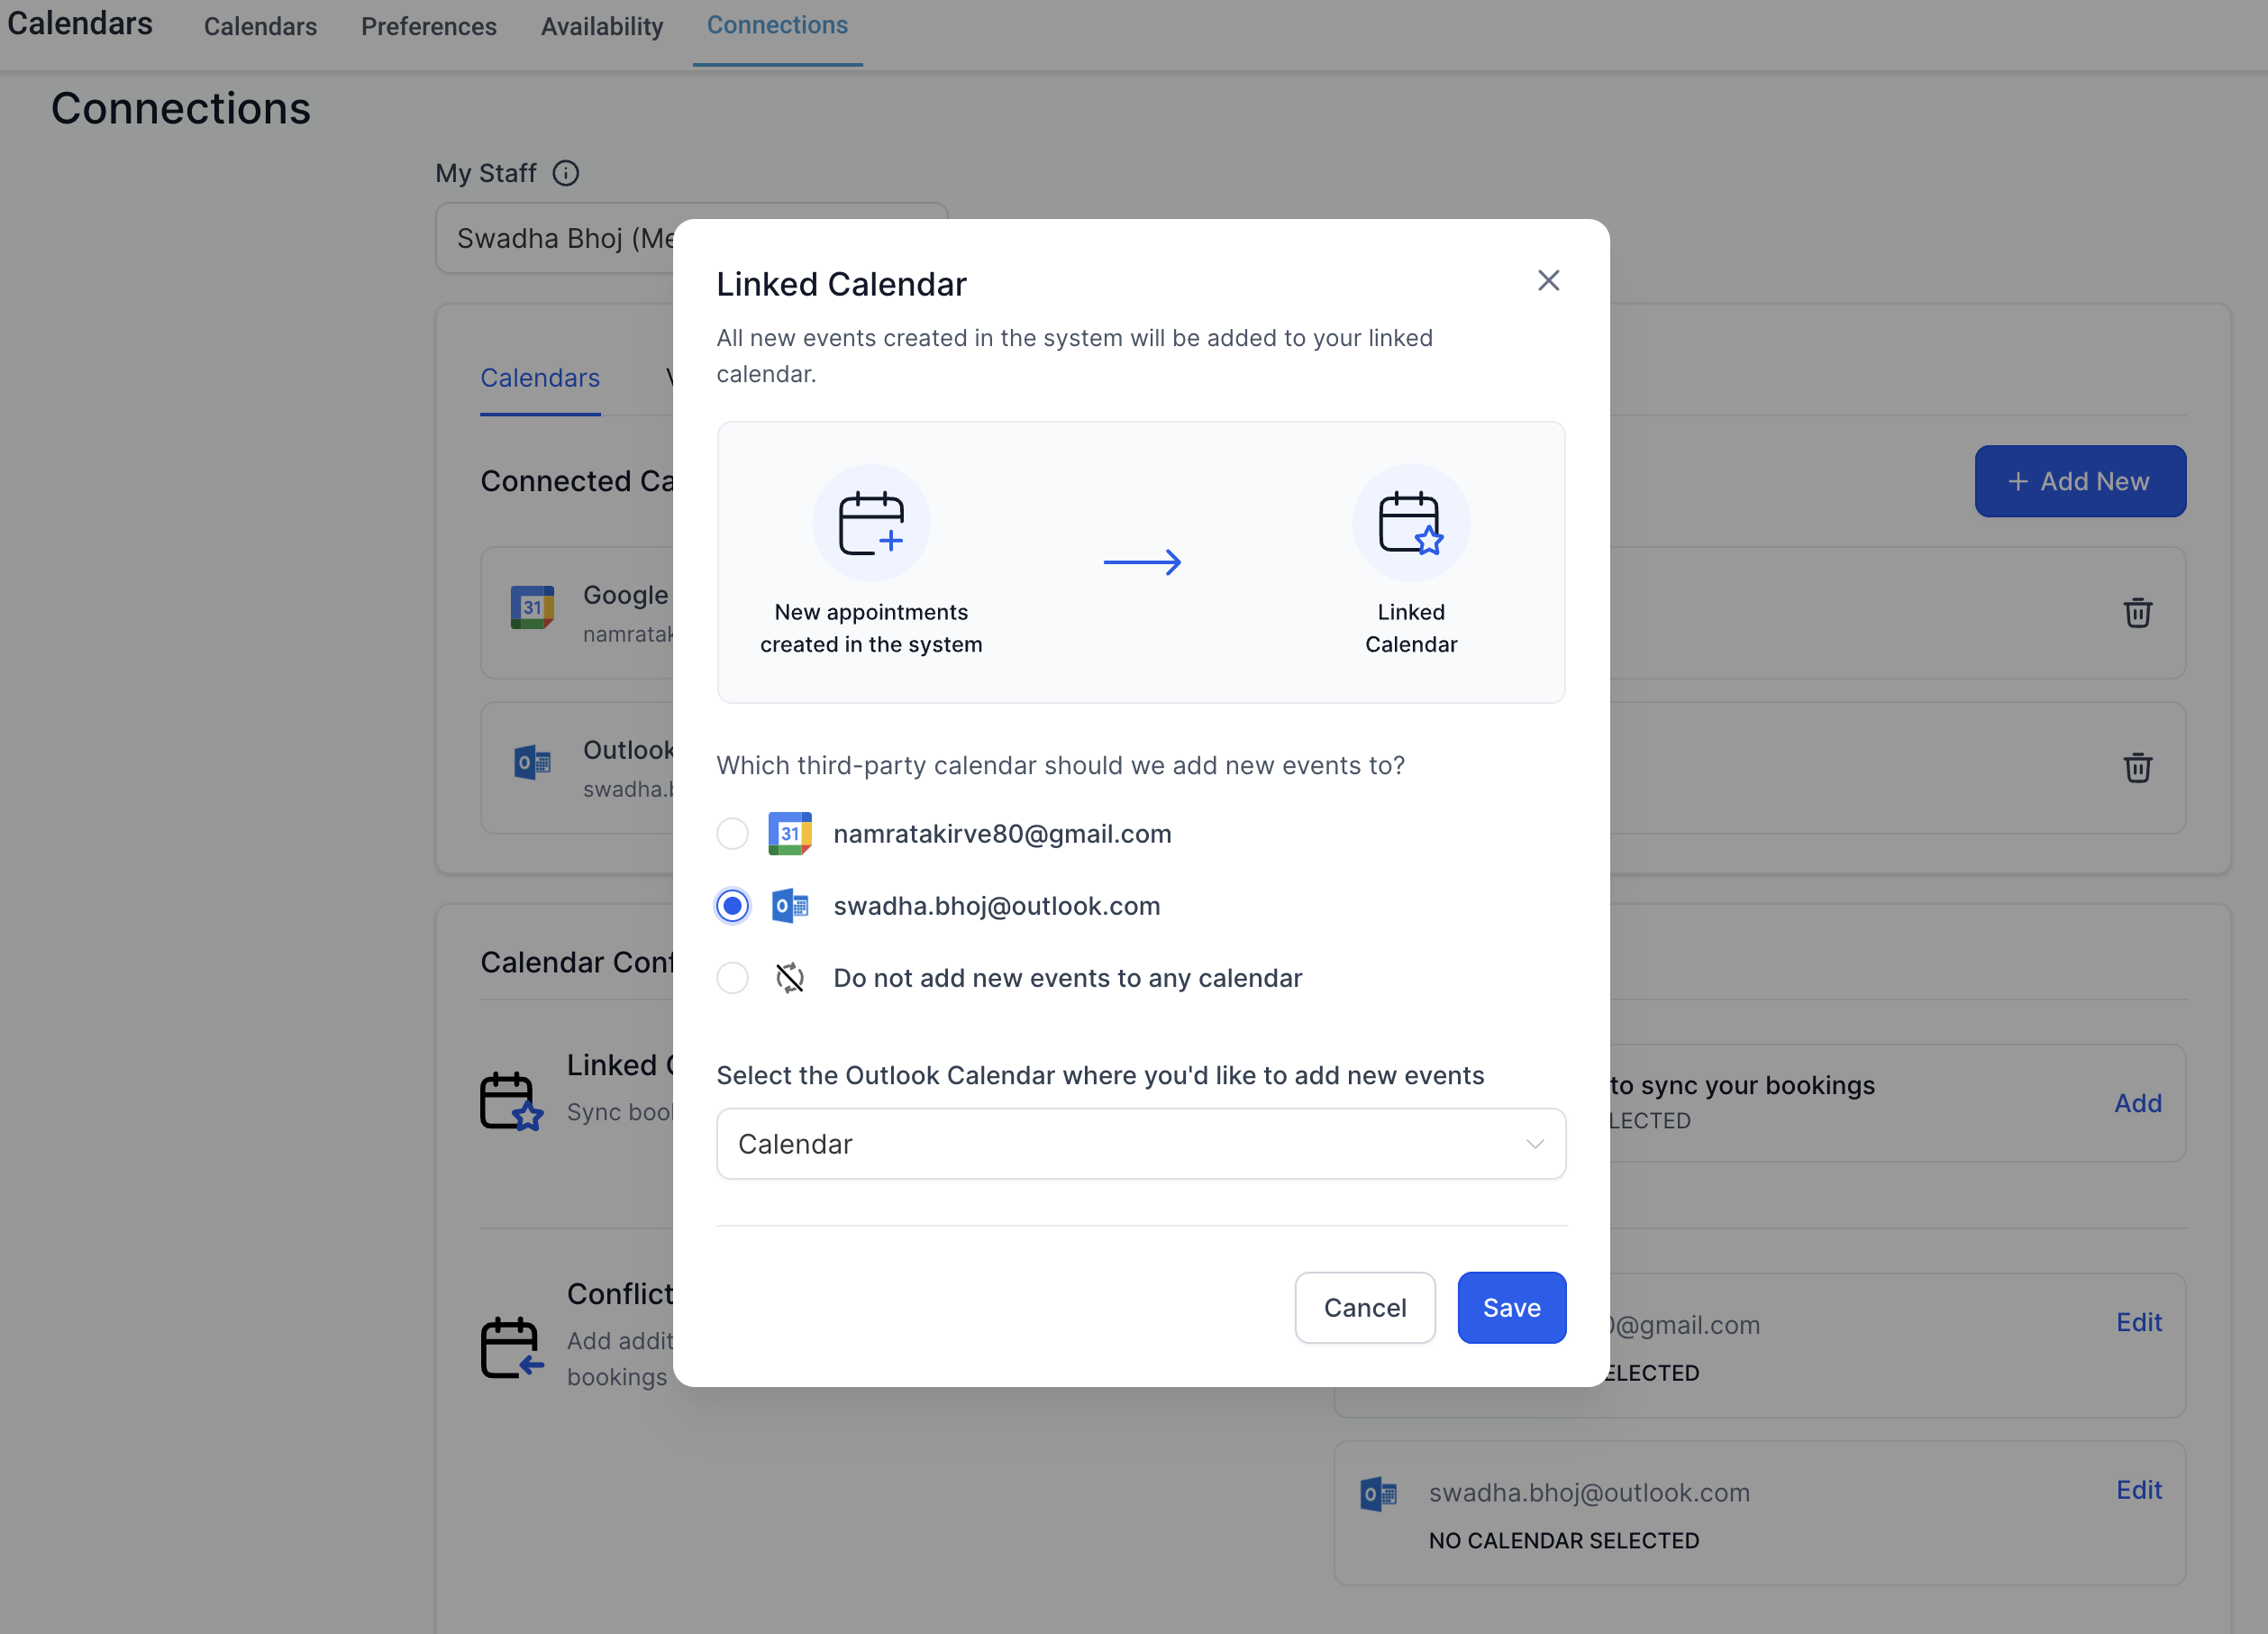
Calendar configuration involves two settings: Linked Calendar & Conflict Calendar.
All new events created in the system will be added to your linked calendar. For example, any new event created in the system will sync to your linked calendar, allowing you to view it directly on this third-party calendar (e.g., Outlook).

Events from third-party calendars added as conflict calendars are synced to the system, blocking your availability for the event's duration.
The availability is blocked only if the event is marked as "BUSY" in the third party calendar. For events marked as "FREE", the events are fetched in the system but the availability remains open.
This ensures accurate availability and avoids double bookings. You can add multiple calendars to be checked to prevent double bookings.
Each user can connect only one Outlook integration per subaccount, and the same Outlook integration cannot be connected across multiple subaccounts. For instance, if User A has already connected their Outlook integration in Subaccount A, they won't be able to link the same outlook integration in Subaccount B.
A: No, Outlook integration does not work with event calendars. Event calendars support only Google Integration.
