
Available Payment Providers and How to Add Them
1. Payments in calendars are supported through two payment gateways, namely Stripe and Authorize.net
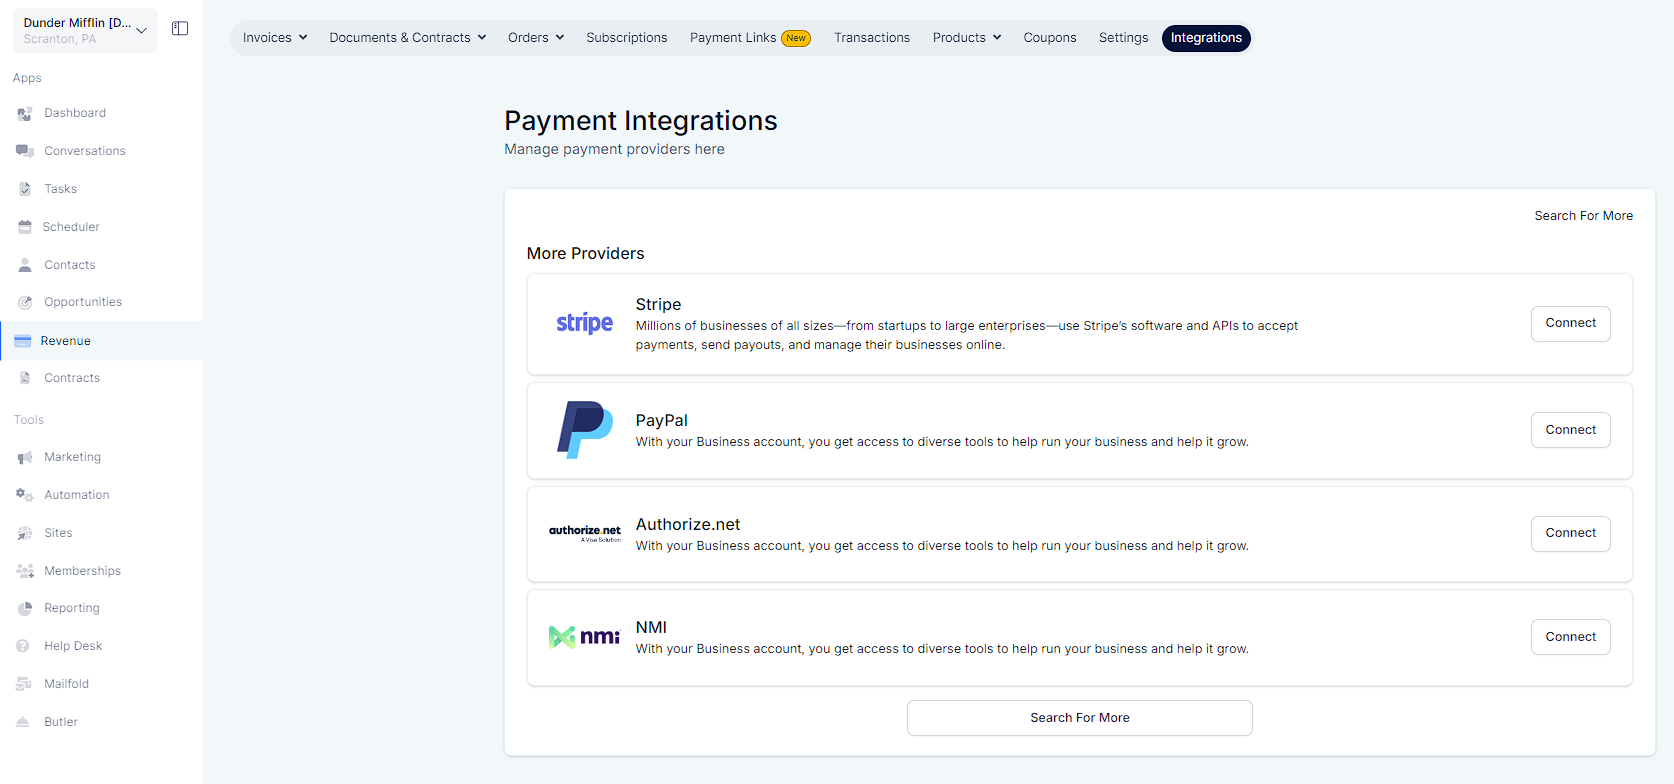
2. Add the payment gateways first from your sub-account by going to the "Payments Tab" > "Integrations"
Please Note:

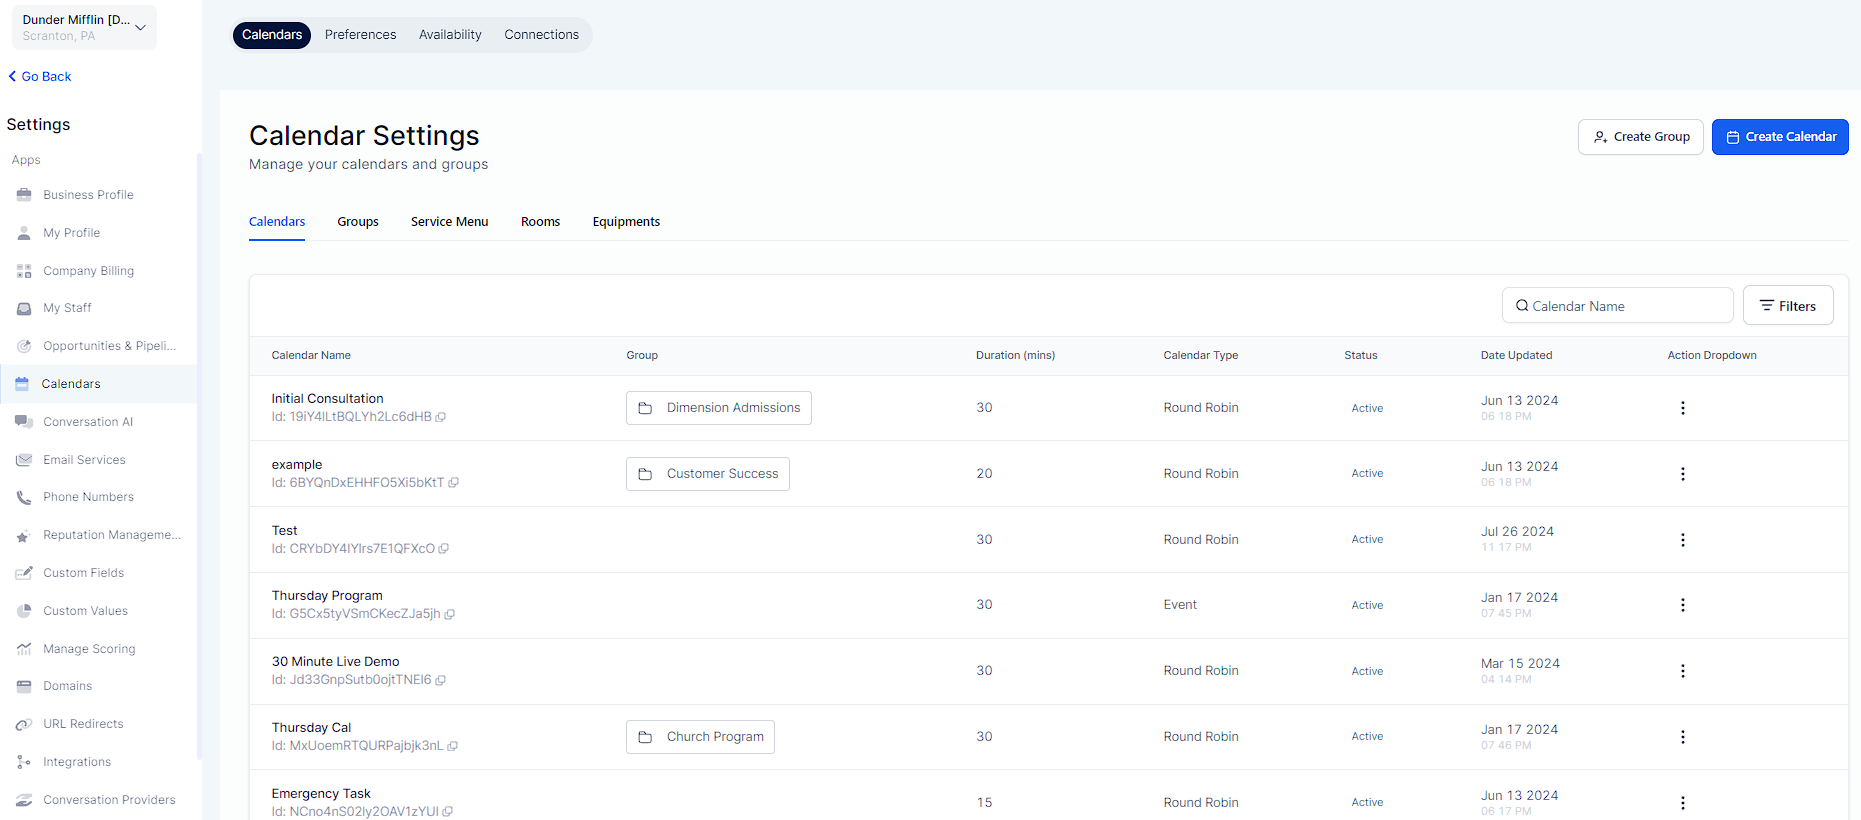
3. Now, go to "Calendar Settings".
3. "Edit" (by clicking on the three dots) an existing calendar or Create a New Calendar (Advanced Settings). Under Forms & Payments you will see a toggle to "Accept Payments".
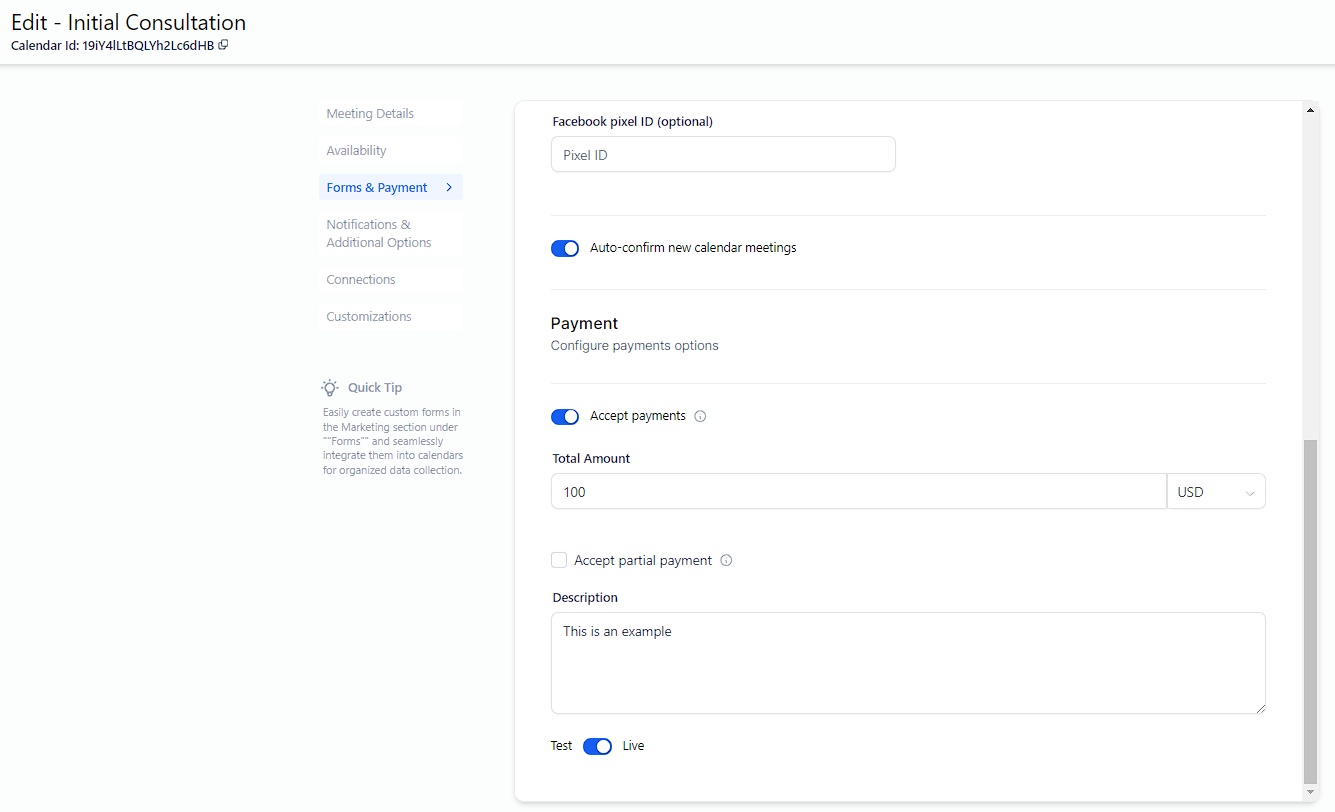
Once enabled, these new form fields would appear:
Amount (with currency)
Description
Payment mode (Test or Live)
Please Note:
REMEMBER: If you don't see the Payment Options like on the screenshot below, it's because you haven't integrated a payment gateway yet or the calendar is a calendar for recurring appointments. Review the steps above to activate Payment Options for Calendars.
