Private groups are specialized, restricted-access communities that allow for confidential discussions and collaboration. Administrators and owners can create and manage these groups, defining roles and approving membership requests. They provide a secure environment for focused interaction, making them perfect for exclusive engagements or sensitive projects.
Private groups are specialized communities designed for controlled access and confidential discussions within the platform. These groups are accessible only to authorized members, ensuring that the content and conversations are restricted to those specifically invited or approved to participate.
An integral part of community management, private groups offer a range of functionalities. Owners and admins can create and manage these groups, converting regular groups to private ones. The distinct roles within a group, such as Owner, Admin, and Contributor, each come with specific responsibilities and authorities, ensuring a well-structured environment.
Please Note:
The table outlines the general capabilities of each role in private groups. 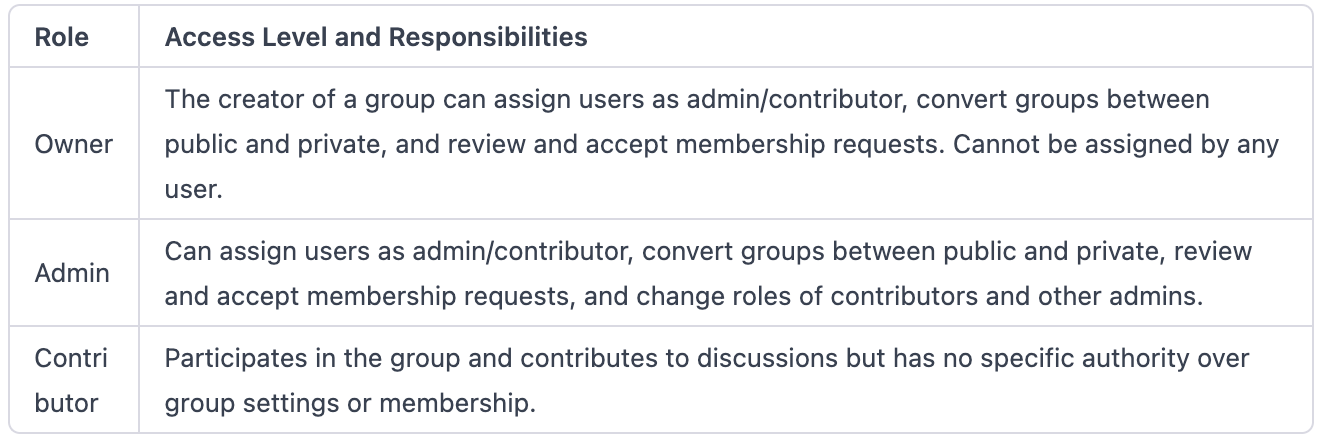
Joining a private group requires members to request access, which admins or owners must approve. This system ensures that only those genuinely interested and approved can engage in the group's activities. Once accepted, members receive an email confirmation with magic links for seamless access.
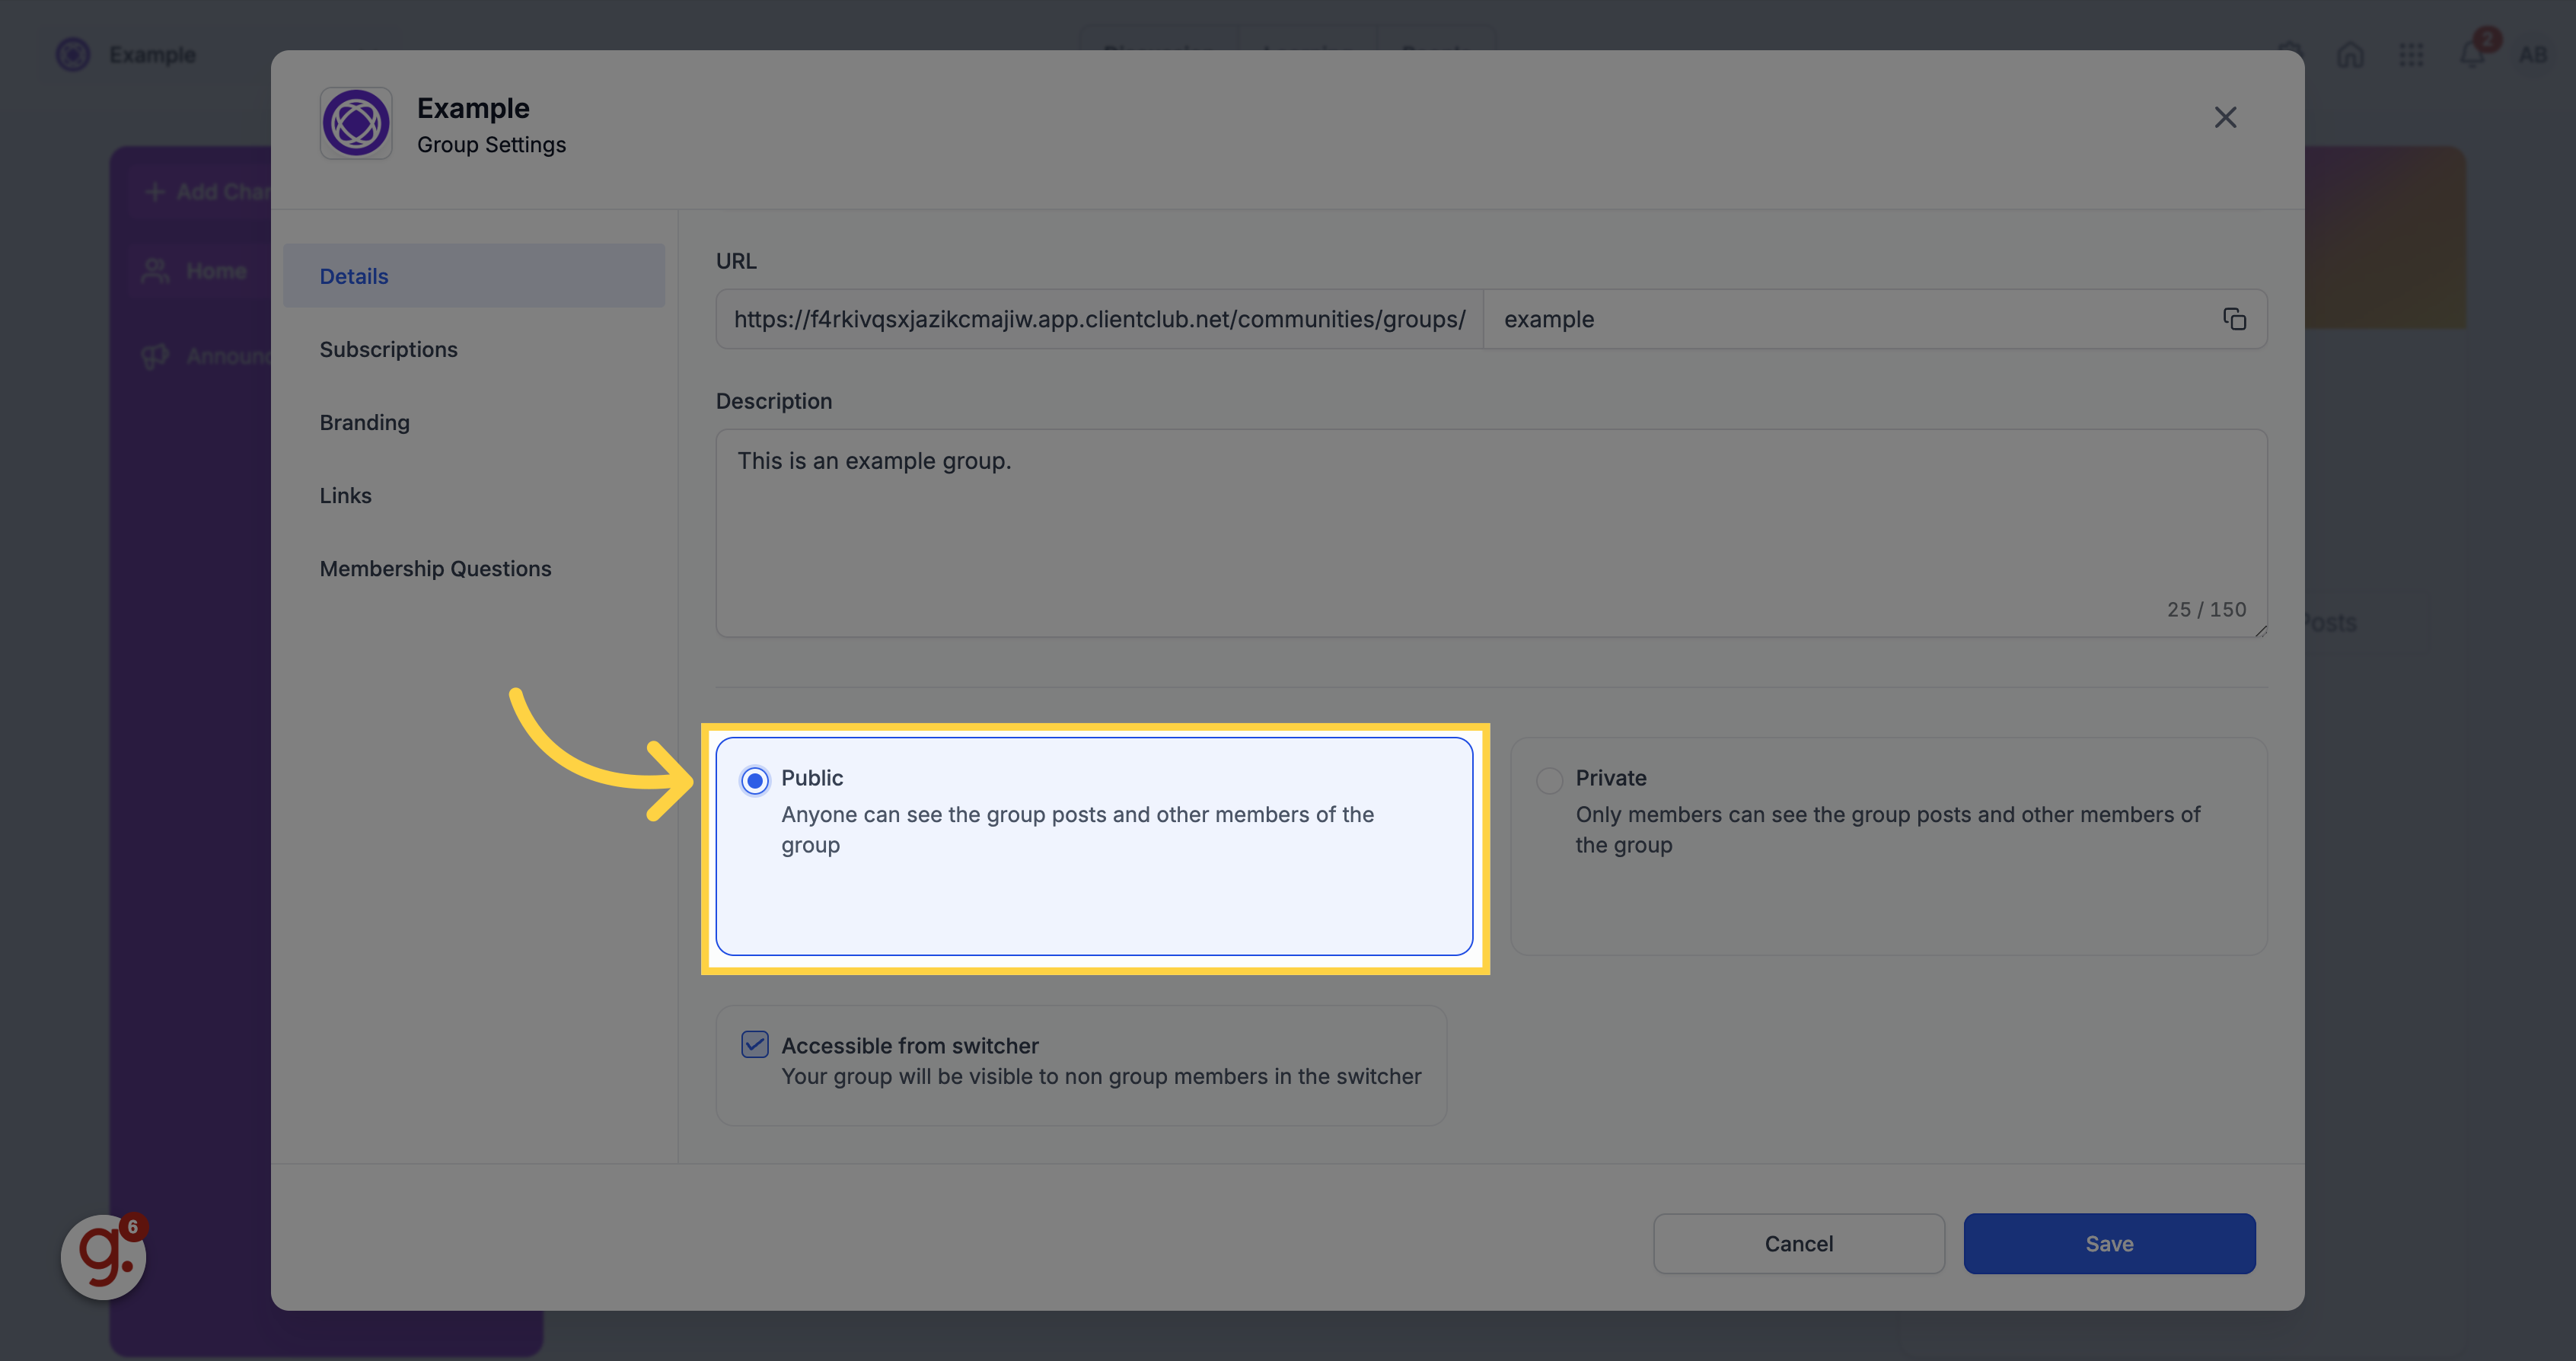
Furthermore, private groups allow for transitions between public and private statuses. This flexibility ensures that content can be controlled and the group can evolve according to its objectives. Whether for internal communications within a business, exclusive community engagement, or focused collaboration, private groups provide a secure and organized space for members to connect and interact.
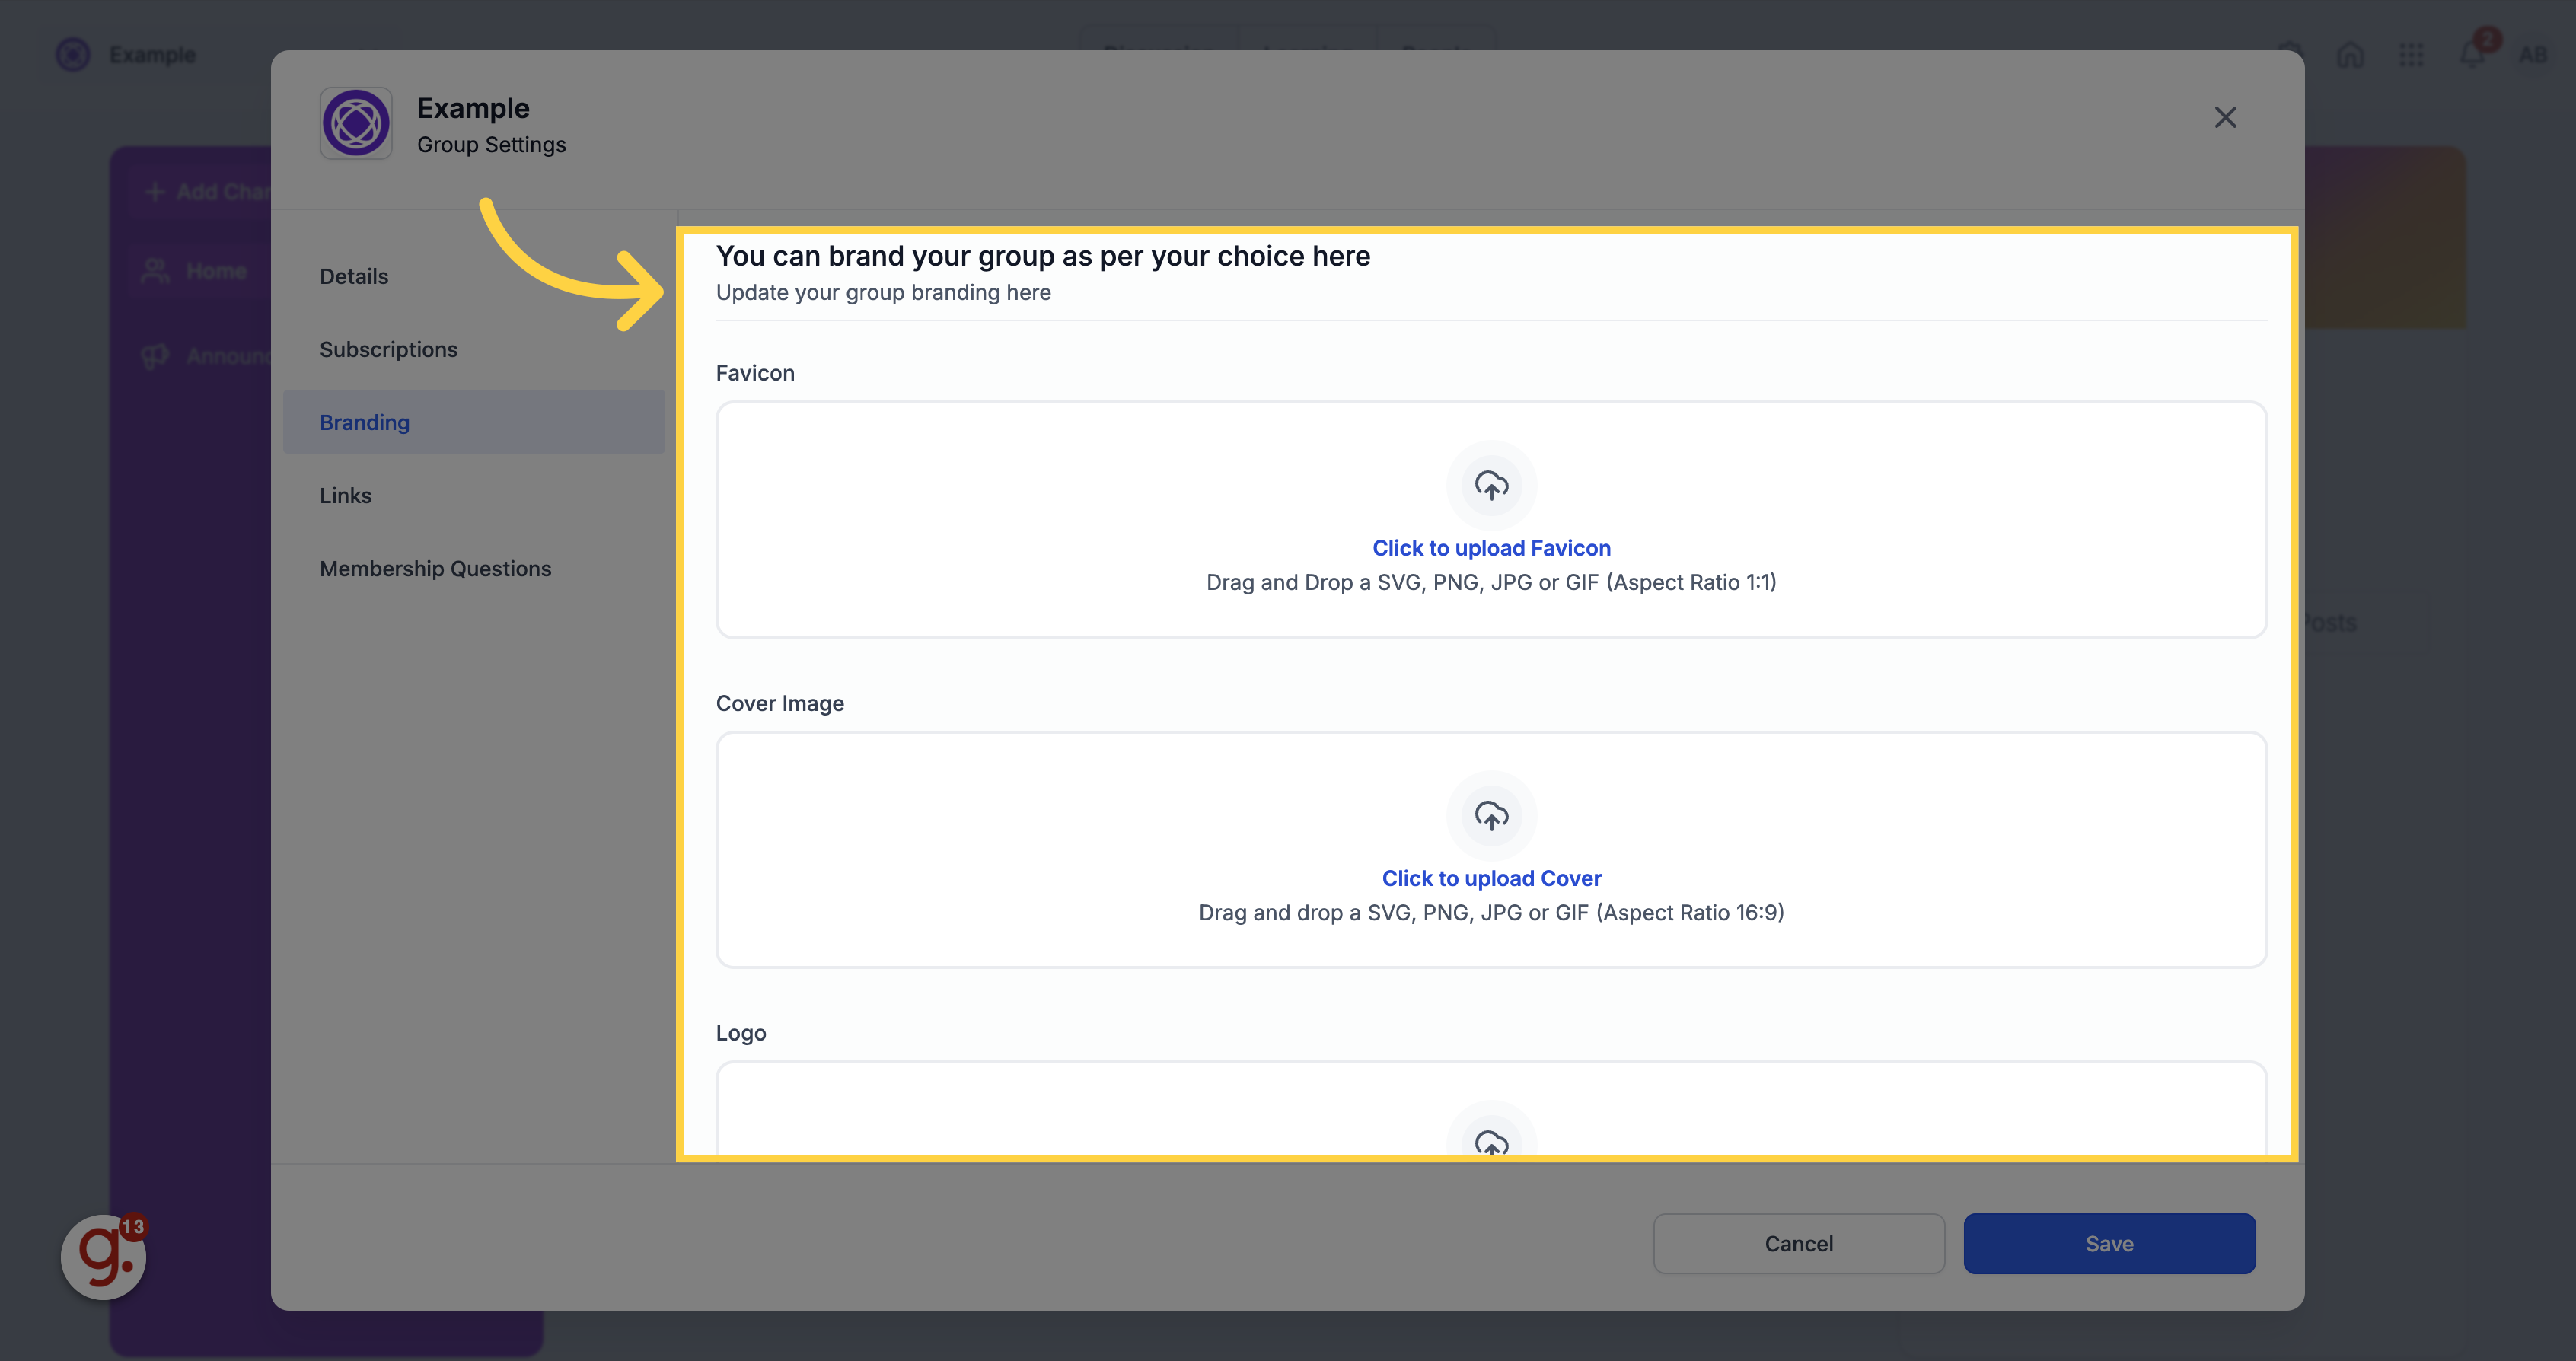
The above features are complemented by a user-friendly interface that allows owners and admins to easily toggle between group types, customize branding, and control visibility to non-group members.
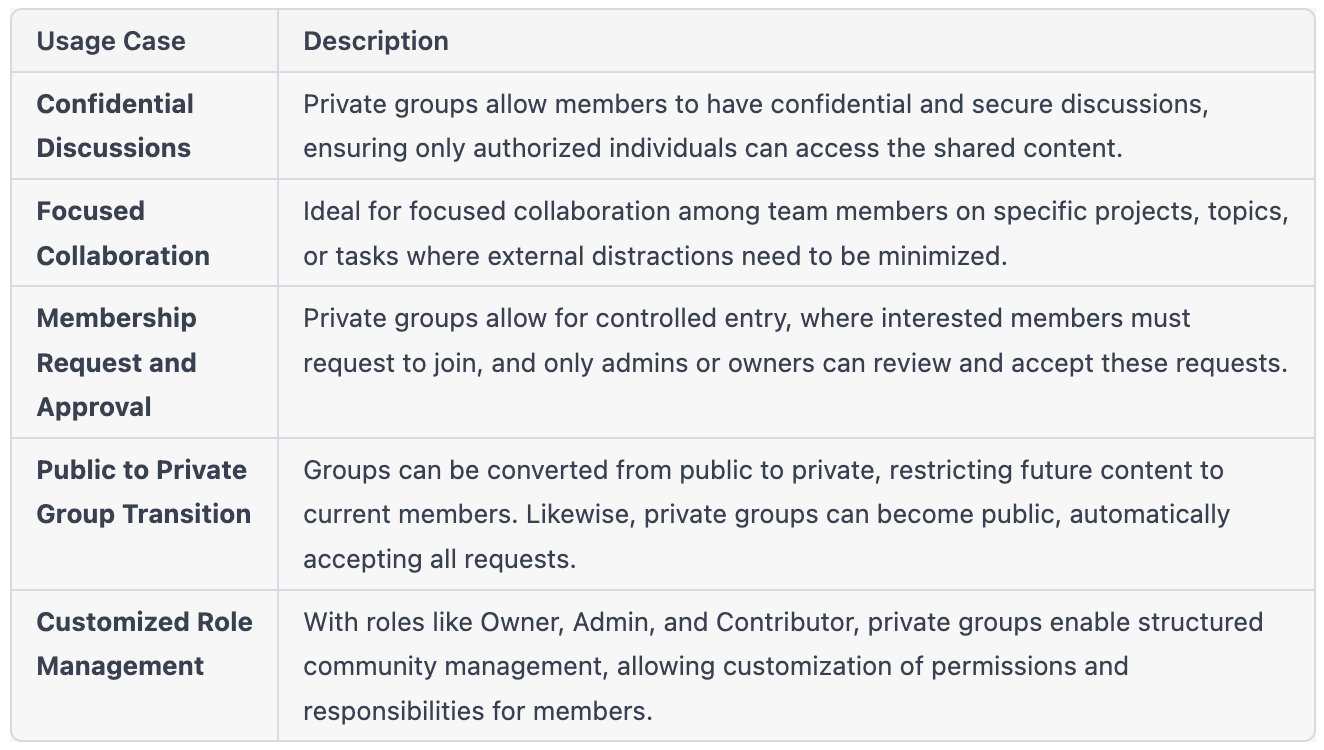
Usage Cases:

Benefits:
Create a New Group: Click on the site and select "Create Group." Name the group, customize its appearance, and click on "Create Group."
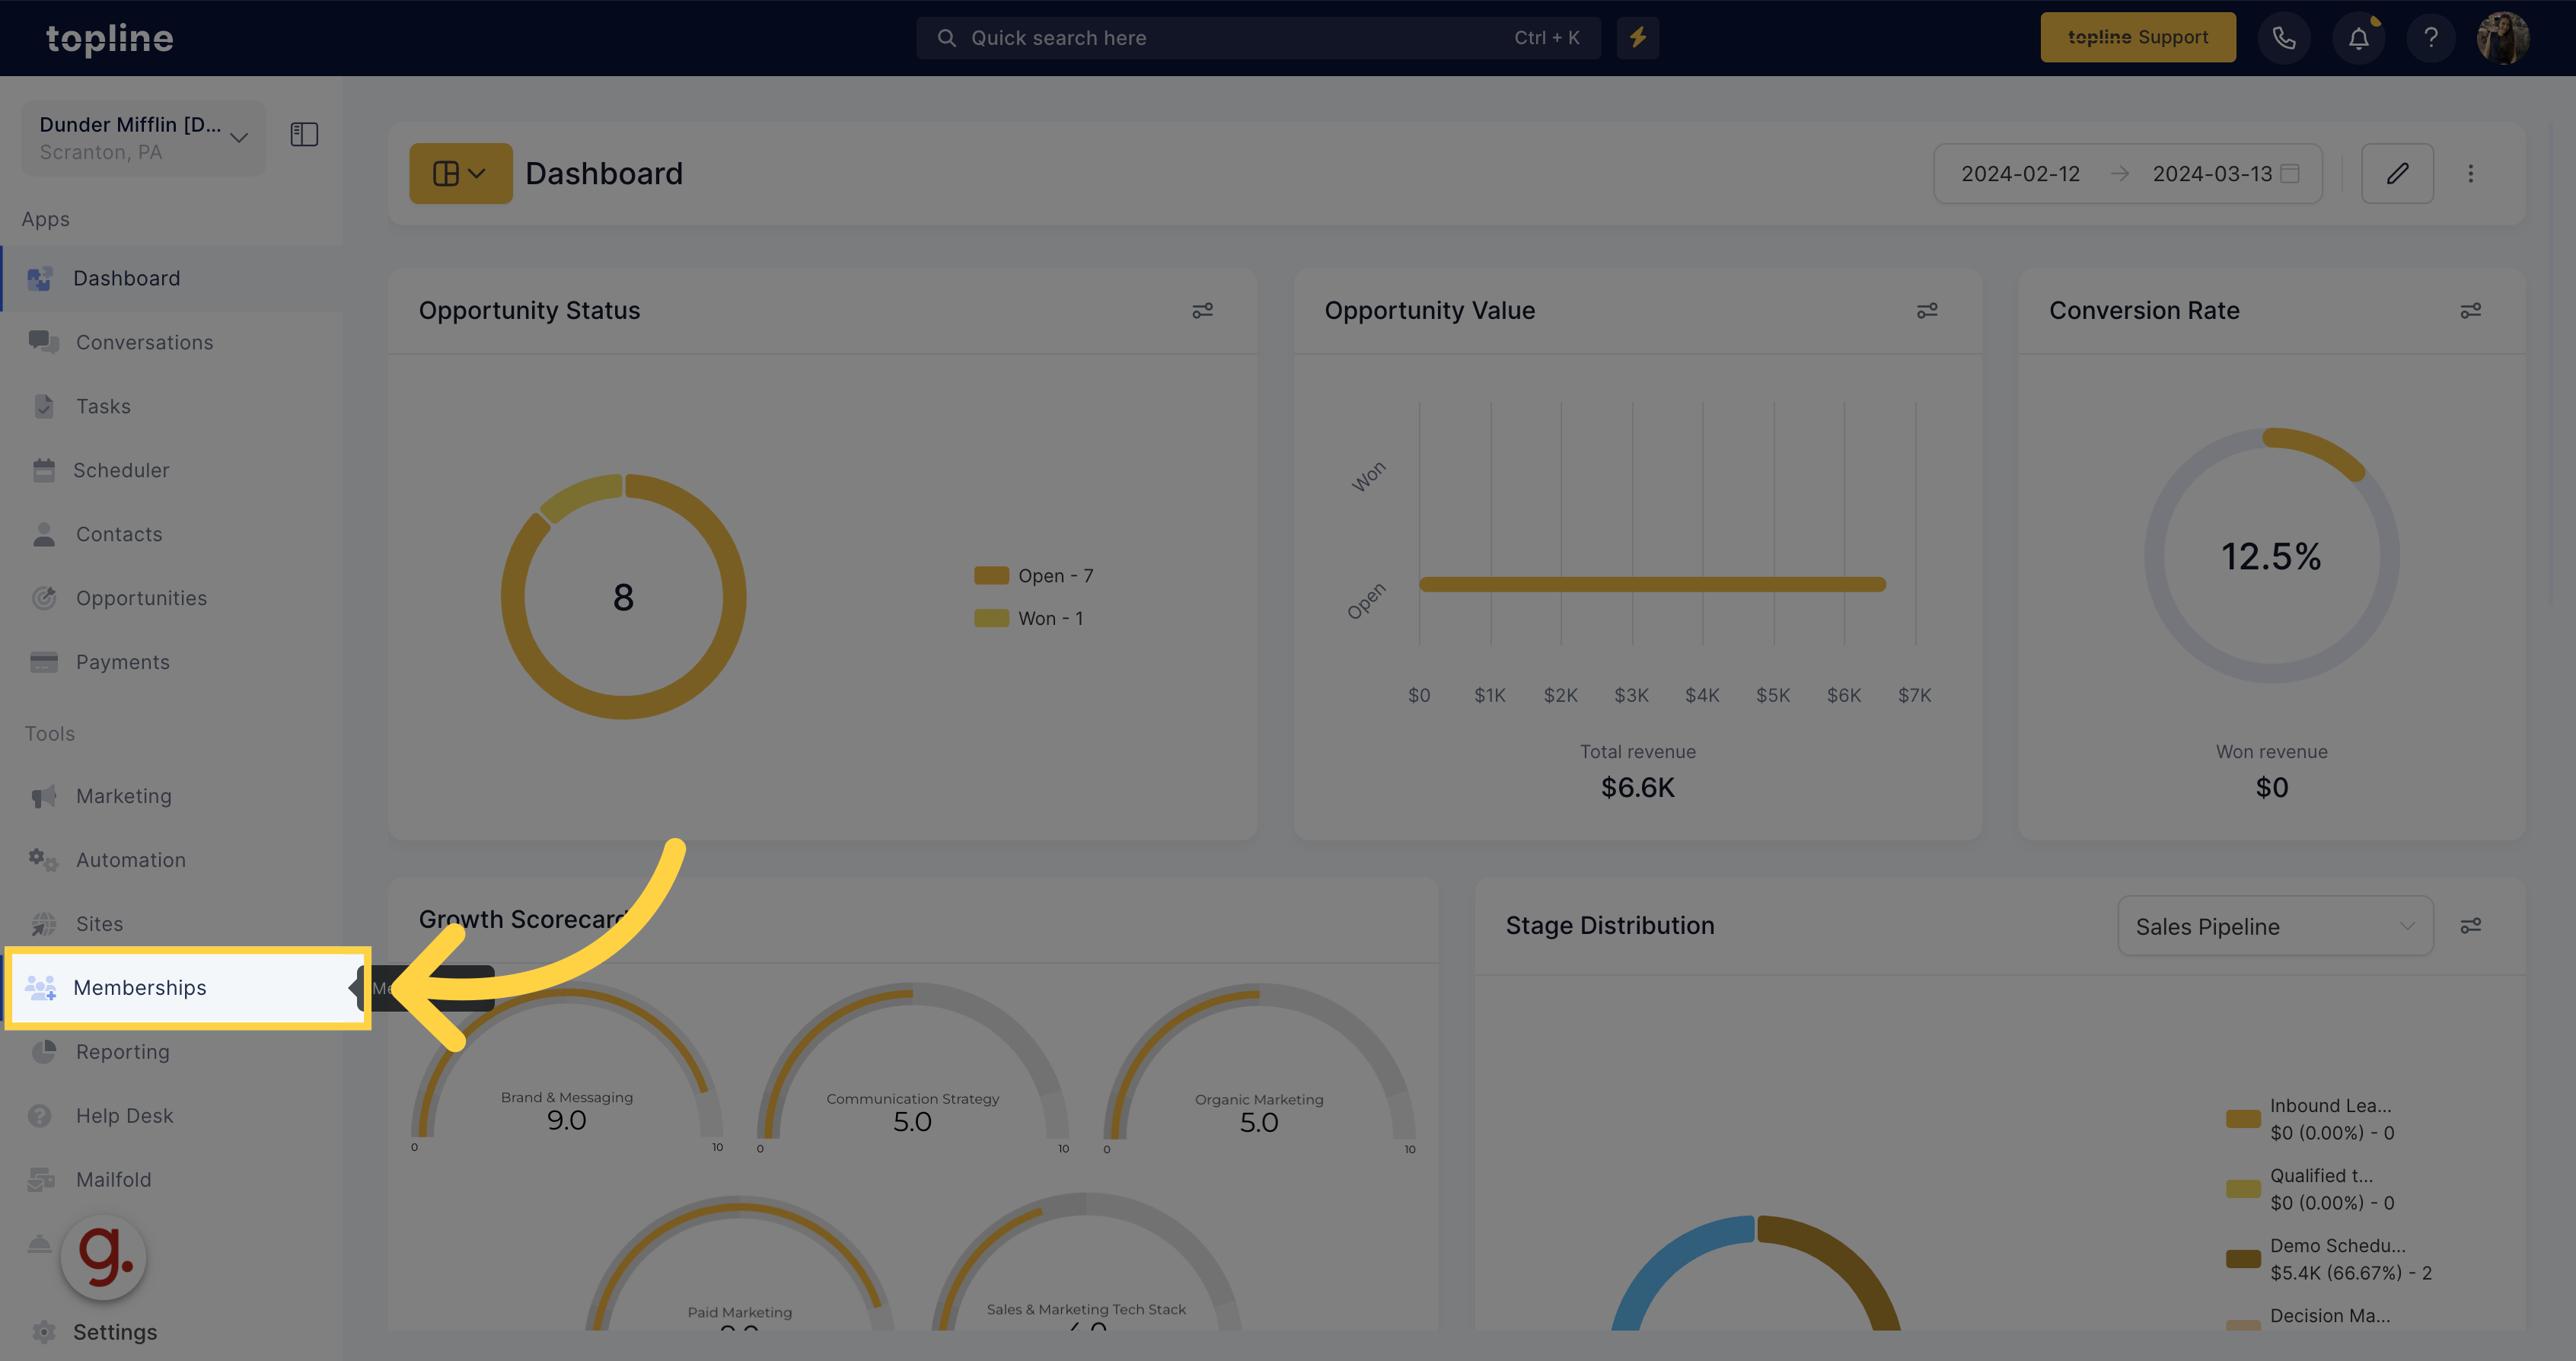
Click on the communities section on the upper menu.

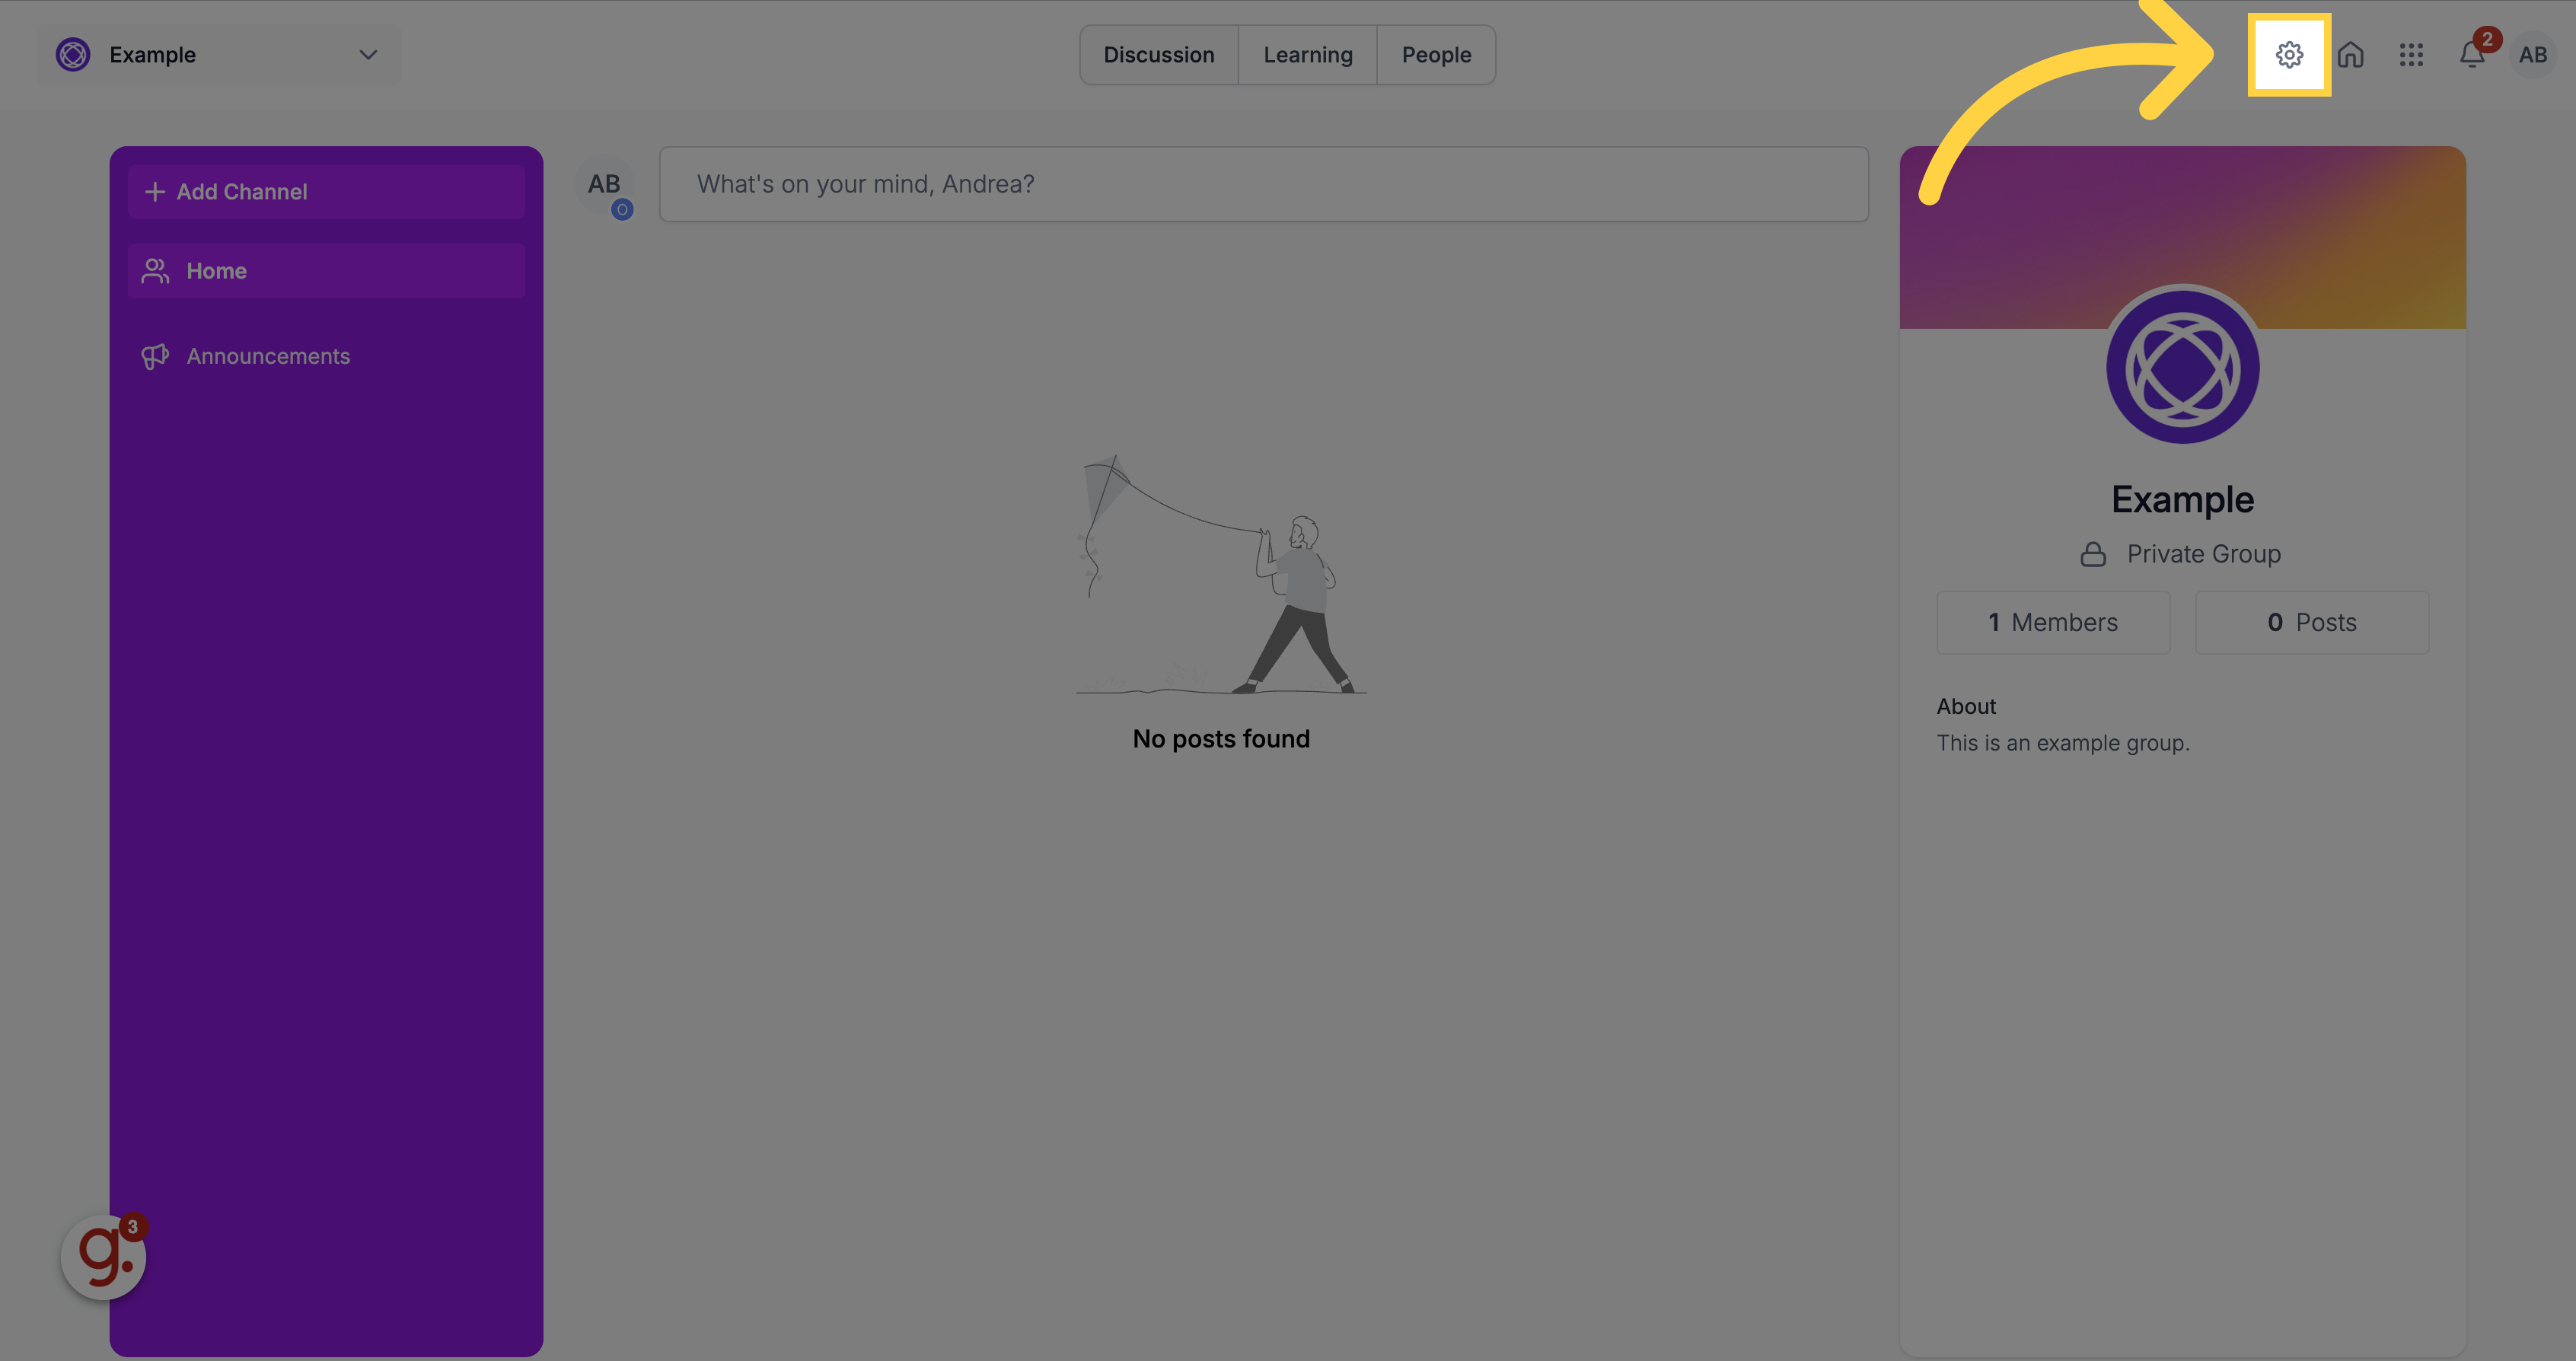
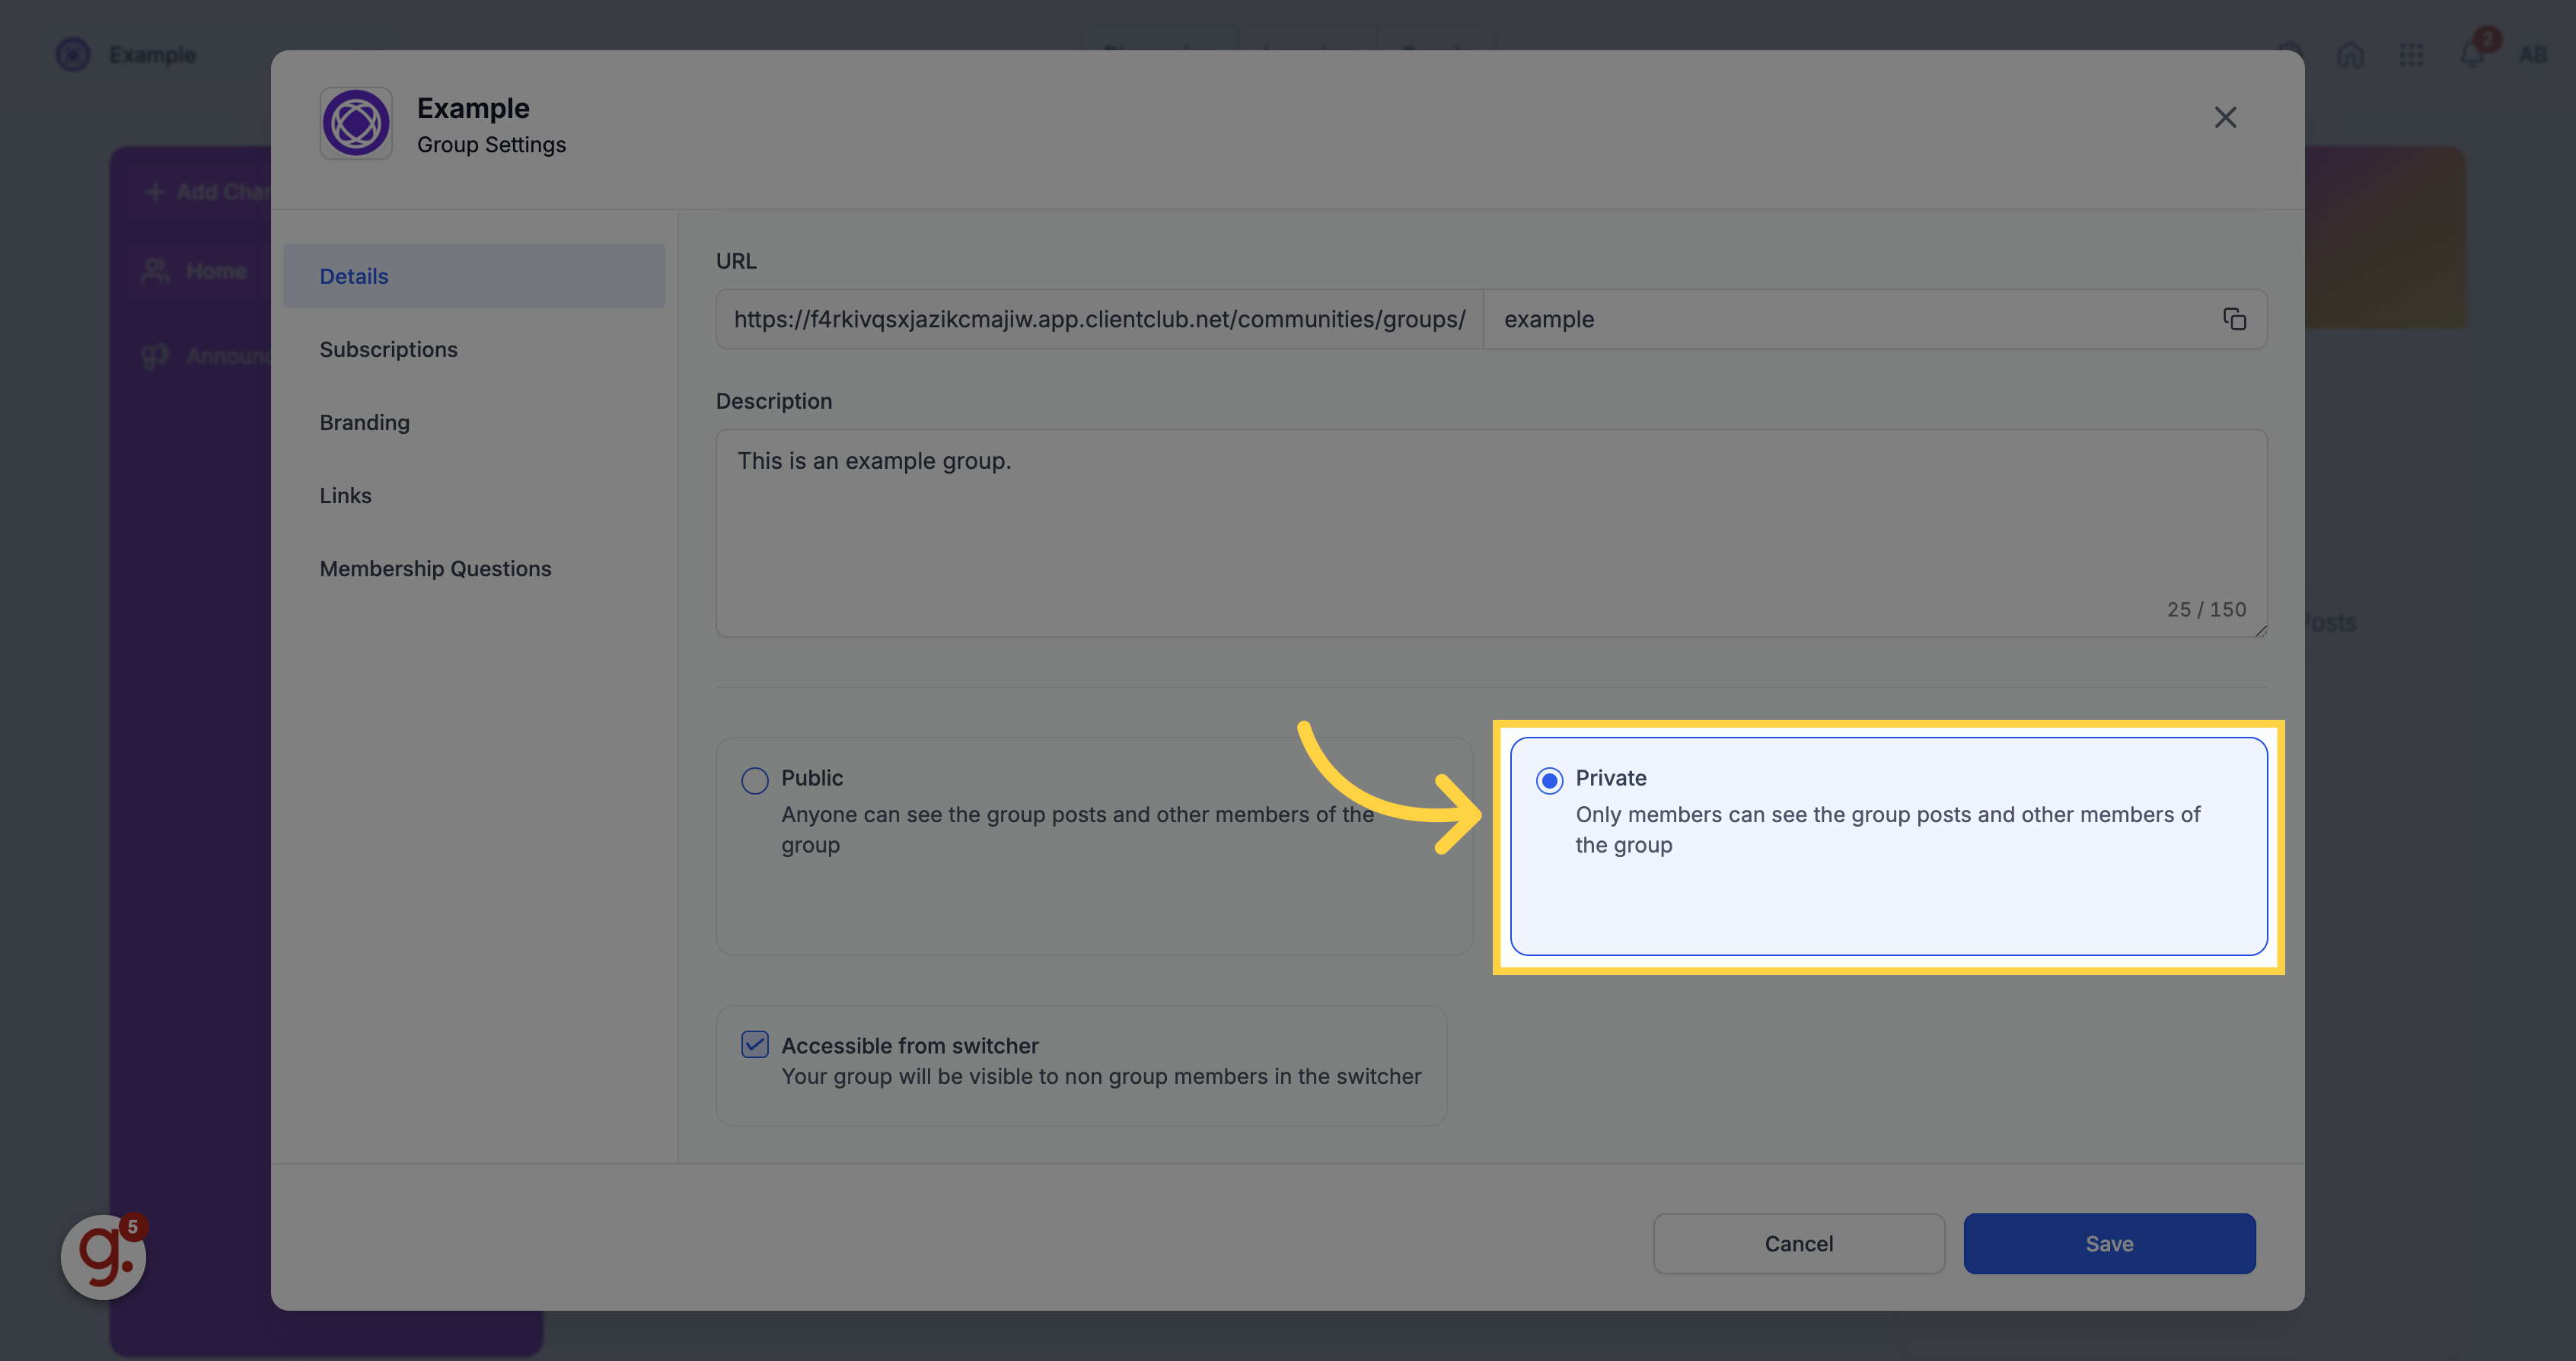
Convert to Private: Administrators and owners can adjust the group settings to make the group private, perfect for confidential discussions. When inside your Group area> Click on the Gear icon> Group Type> Switch to Private> Save.
Ensures only current members have access to previous content.
Automatically accepts all requested members.
You can edit colors, images, and branding to suit your needs.
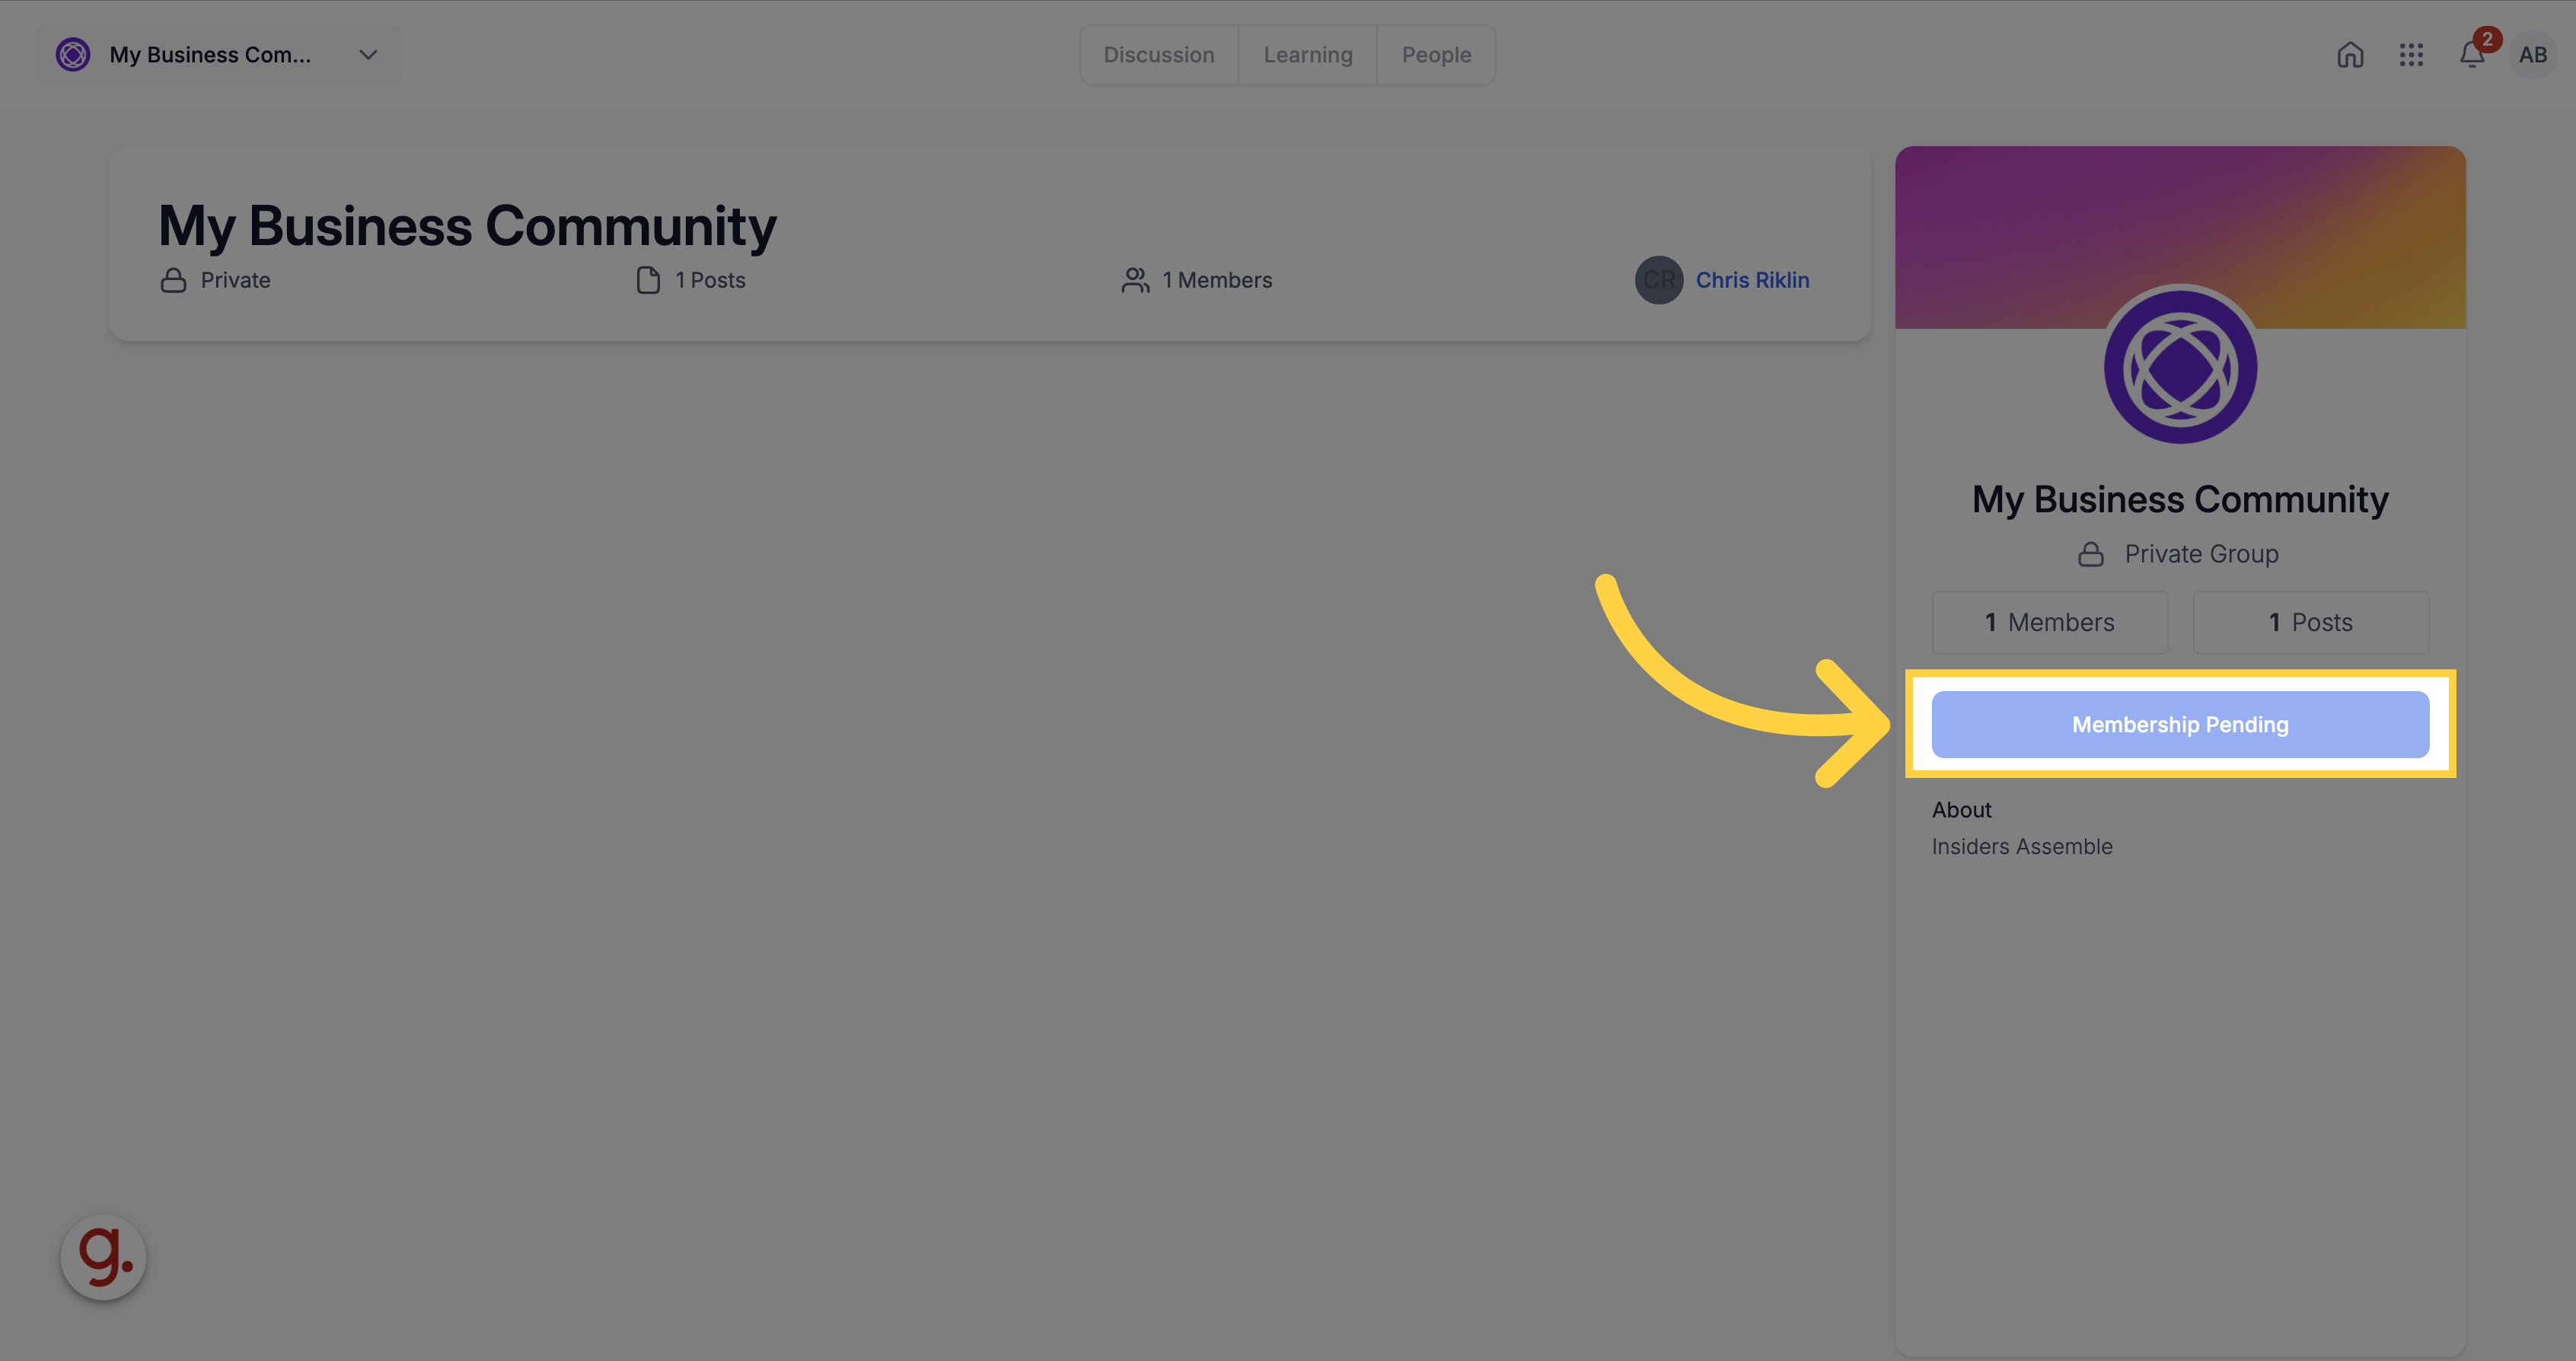
Request to Join: Interested members click on the group URL and request to join. The request button should turn to "requested."
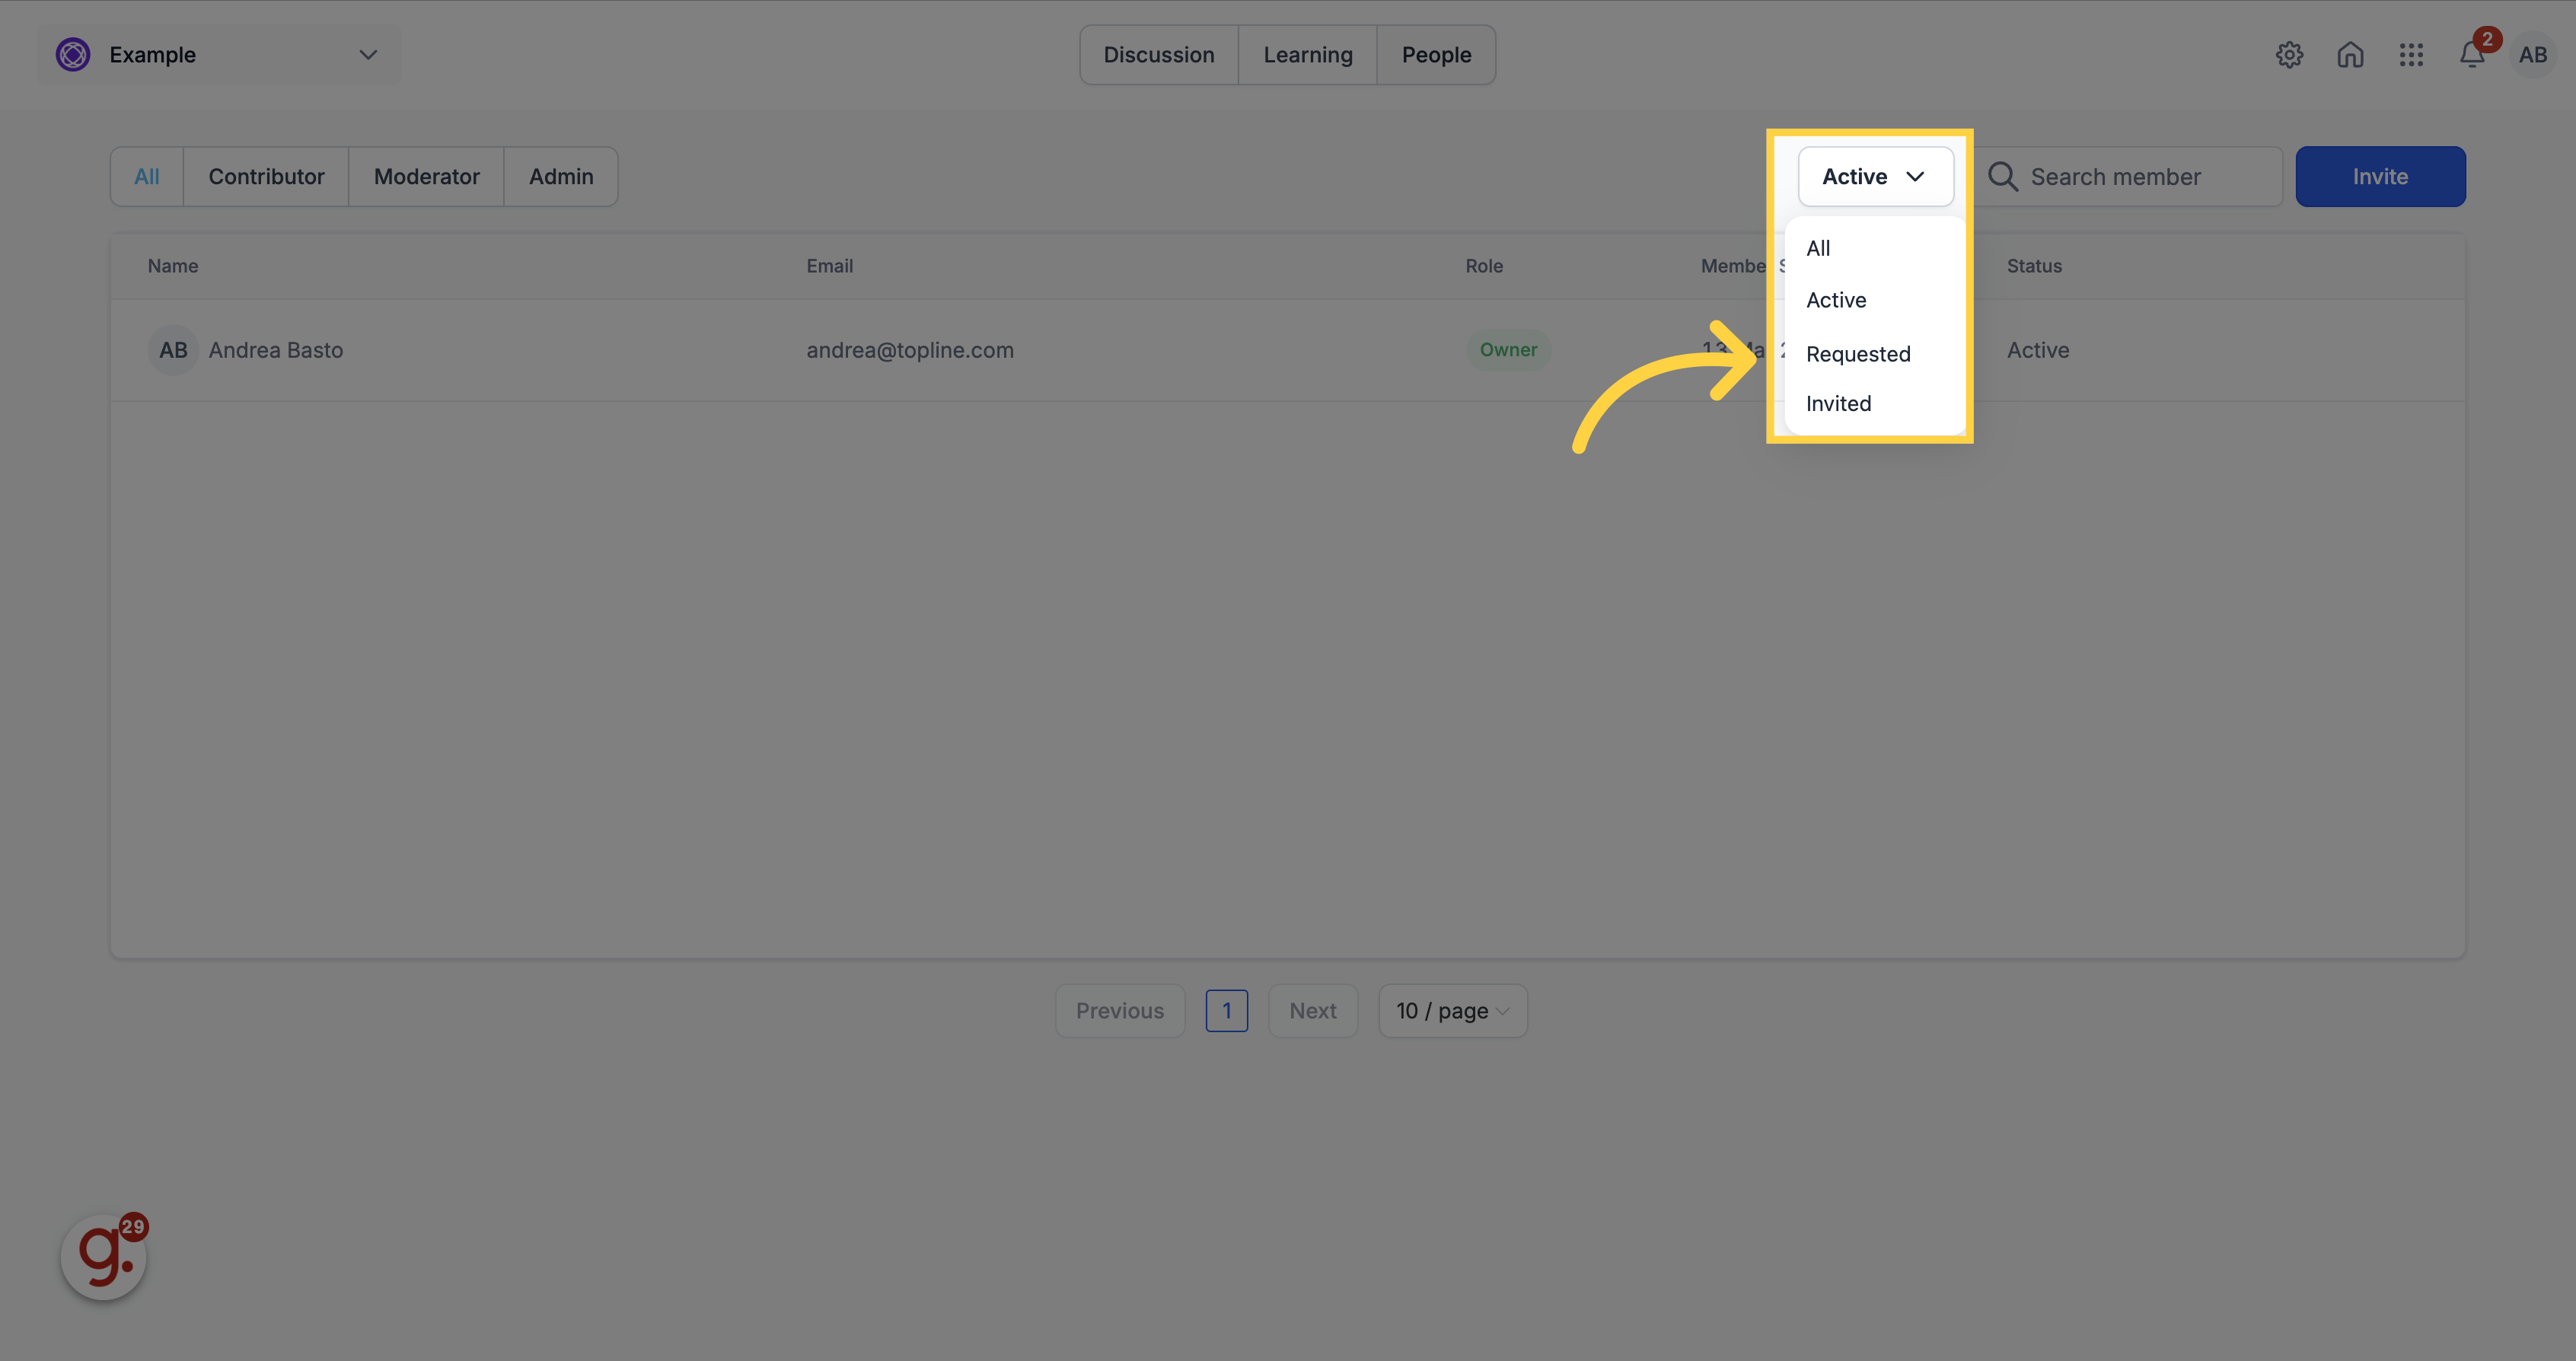
Admins and owners can review and accept or reject requests from the "People" section using the filter "Requested."
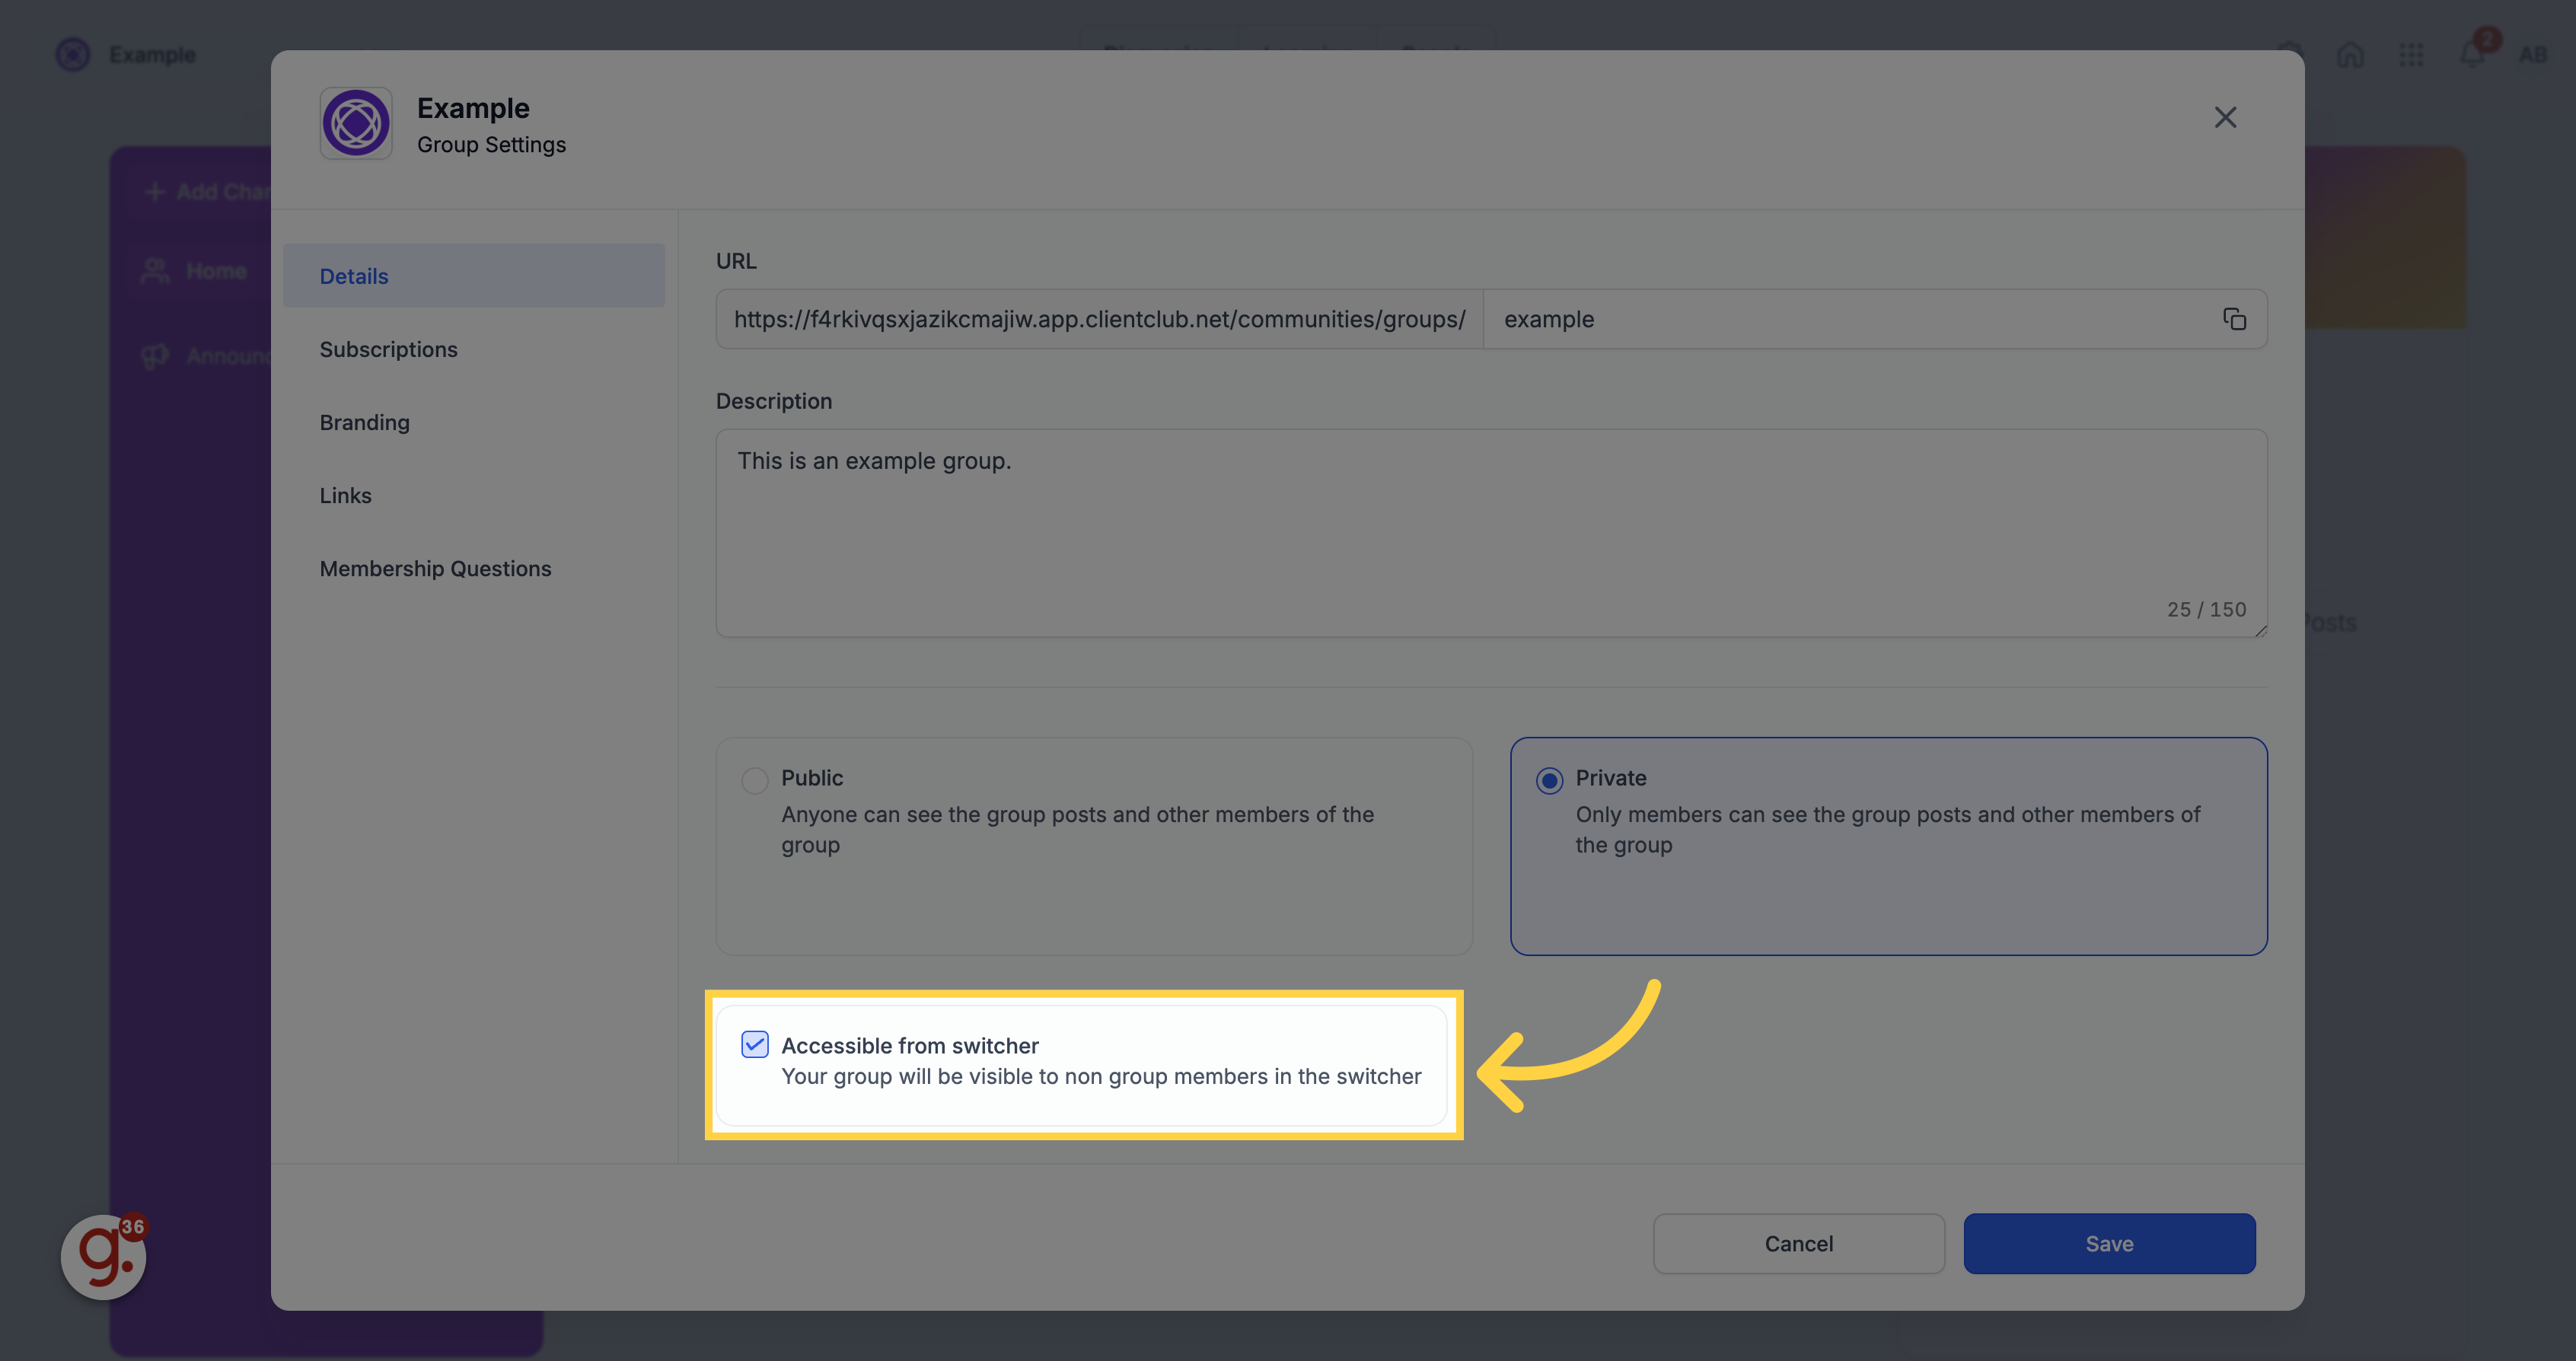
Access Control: Adjust roles and control who can see and participate in the group. Access for Non-Group Members: You can choose to make the group visible to non-members. This setting controls whether non-members of this group, who have access to other groups in the sub account, are able to see your group in the group switcher on the top left or not.