An online store serves as a digital storefront where businesses can offer an array of products and services to a potentially limitless customer base. Unlike traditional brick-and-mortar establishments, online stores can function round-the-clock and transcend geographical limitations.
Global Outreach
An online store allows you to target audiences that were previously unreachable. You're not just a local shop anymore; you're a global enterprise.
24/7 Accessibility
Your business never sleeps when you have an online store. Customers can browse and shop at any time, dramatically boosting your sales potential.
Cost-Effectiveness
By reducing or even eliminating the need for a physical location, you can lower your overhead expenses significantly. The money saved can then be reinvested into growing your business online.
Automation for Efficiency
The CRM enables automated payment processing, inventory tracking, and order management, thereby reducing manual errors and freeing up your time for other critical business tasks.
Go to Payments > Products > Create New Product
Name your product and fill in the description

Upload Media Assets that showcase the product in action or from multiple angles.
Define the cost of the product, taking into account any discounts or package deals you may want to offer.
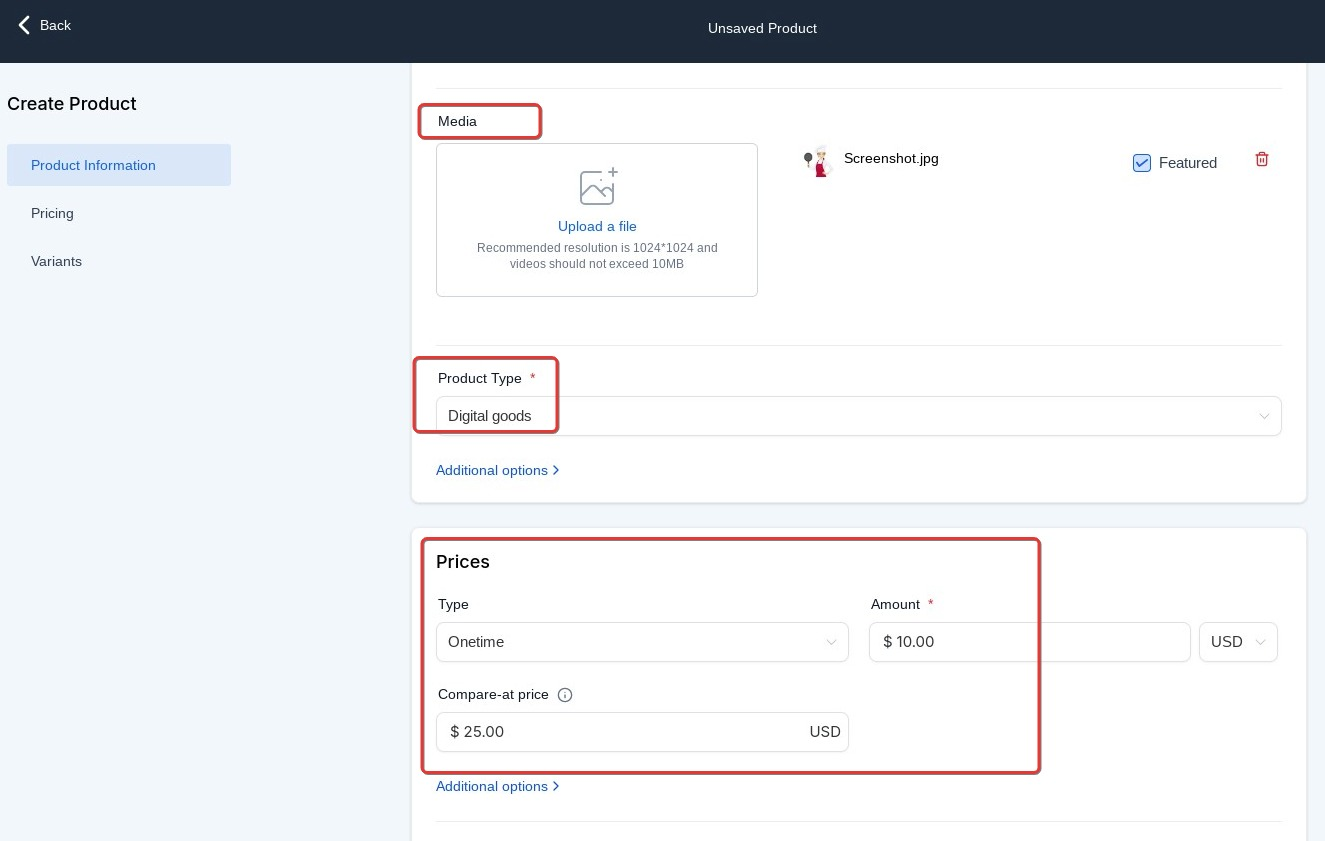
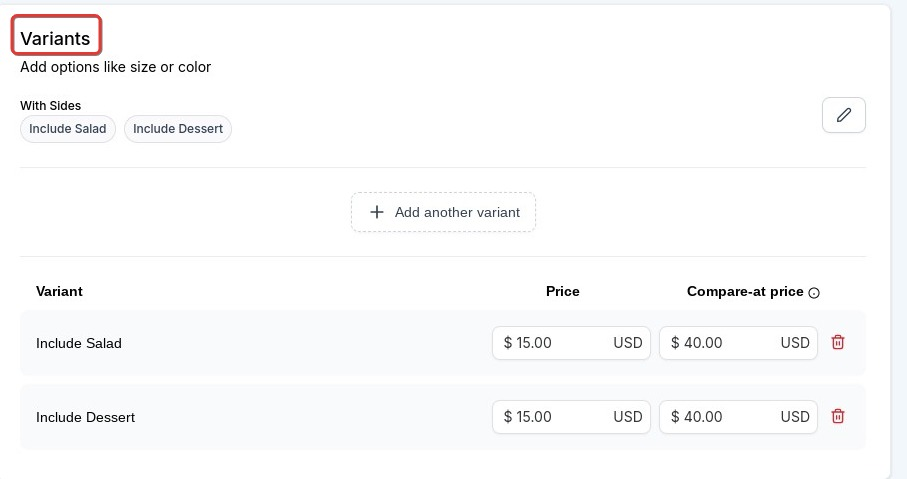
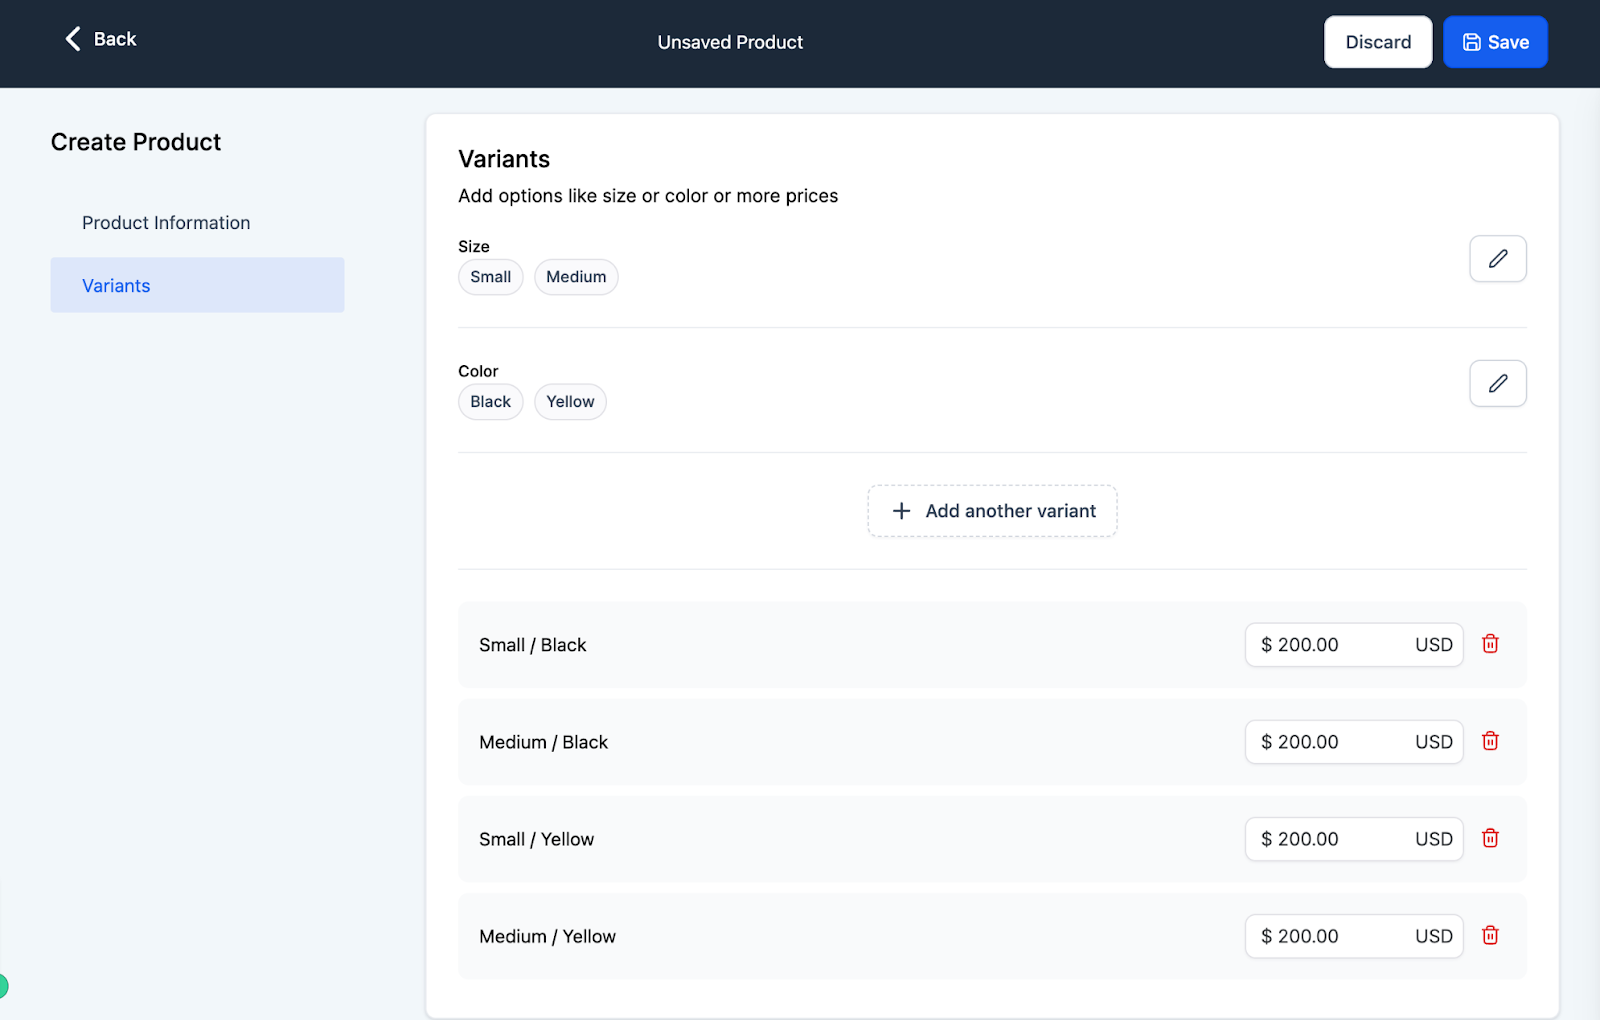
If the product comes in different sizes, colors, or materials, you can specify these options in the product variants
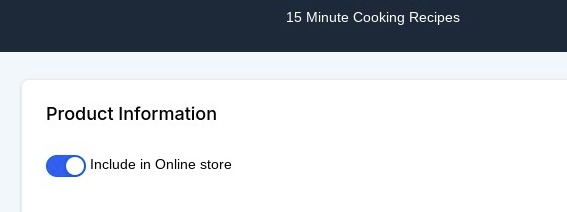
For an enhanced level of customization, a toggle feature is available while creating each product. This toggle allows businesses to specify which products should be visible in their online storefront.
To make your products more appealing and informative, the CRM offers three core functionalities:
Rich Text Descriptions to create dynamic, detailed product descriptions.
Multiple Media Attachments: Businesses have the flexibility to attach an array of images and videos for each product, providing customers with a comprehensive visual understanding of what they're purchasing.
Product Variants: To cater to a diverse customer base with varied needs and preferences, businesses can now add variants like size, color, or material to their product configurations. Each variant can also have its customized price point.
By leveraging these functionalities, businesses can offer a rich, user-friendly experience in their online stores.
Navigate to the Website Builder and either create one or edit an existing one
Add a new page

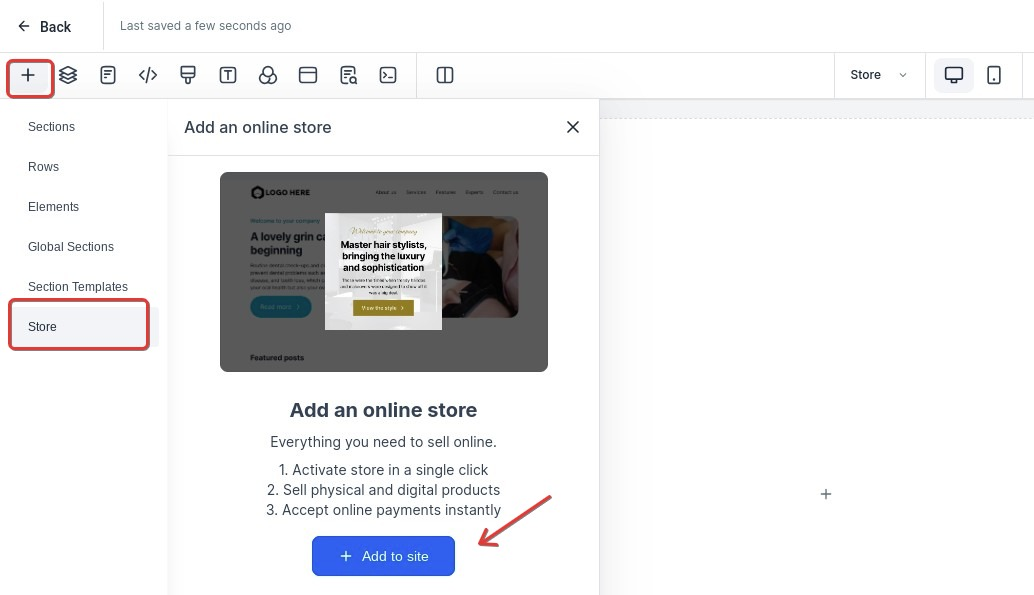
Click on + to see all the elements
Click on Store and then on 'Add Online Store'
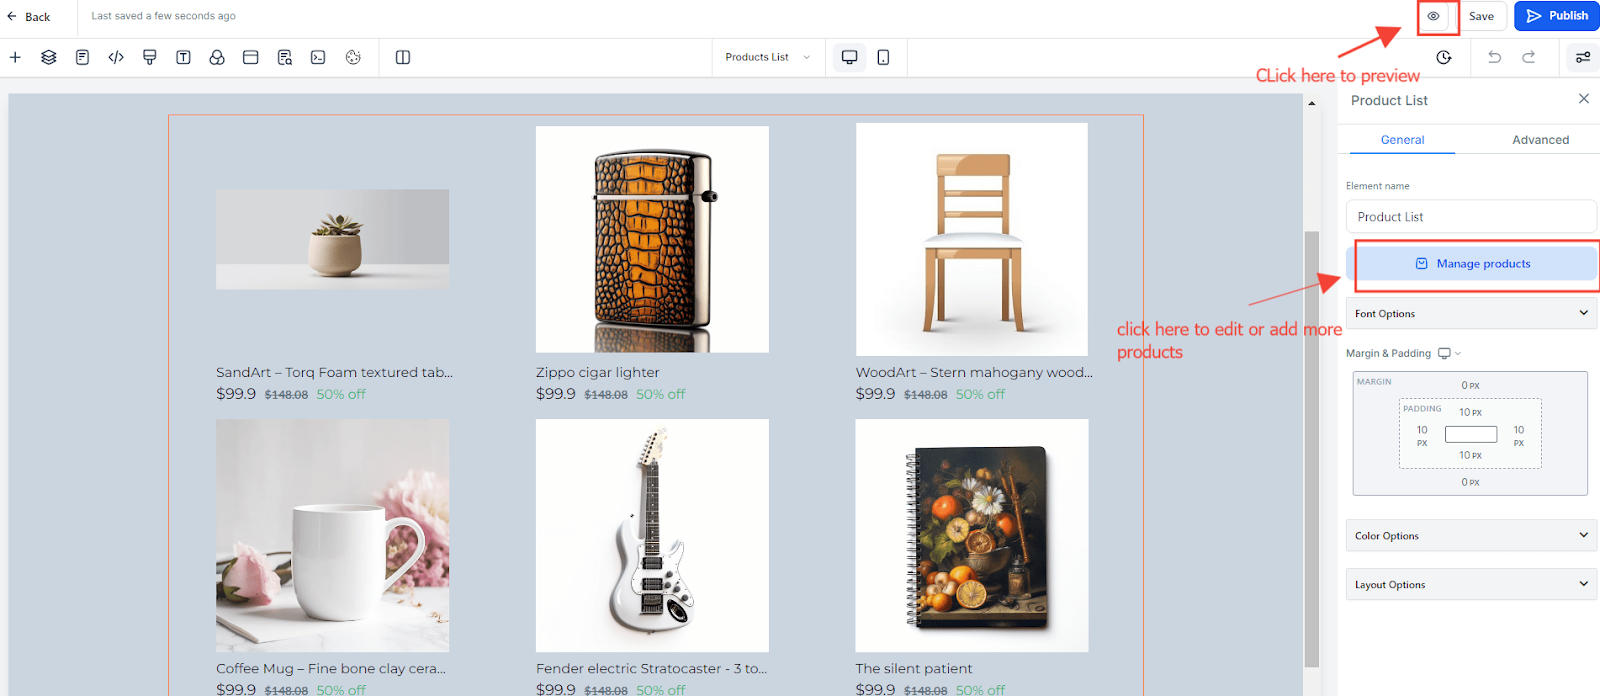
You can edit these elements' padding, colors, fonts, and also borders and shadows on the advanced settings.
Please note: You will see the online store template element with photos and processes of differ products, but they are part of the template. Once you preview the page, you will see your products.
Additional notes while creating an online store
Only one-time products will be included in the online store. Businesses can still sell recurring products using funnels and order forms
Automates sales receipts, Order Submitted trigger, Shopping cart element inside email builder to auto-populate line items purchased, Payments received trigger, and coupon codes will automatically work with any online store created
All existing products will not be available in the online store by default. Businesses can choose which products they would want to showcase in the store and turn the toggle on for those respective products
Businesses will be able to track the orders submitted, payments received, initiate any refunds, etc using the Orders and Transactions lists under the Payments menu
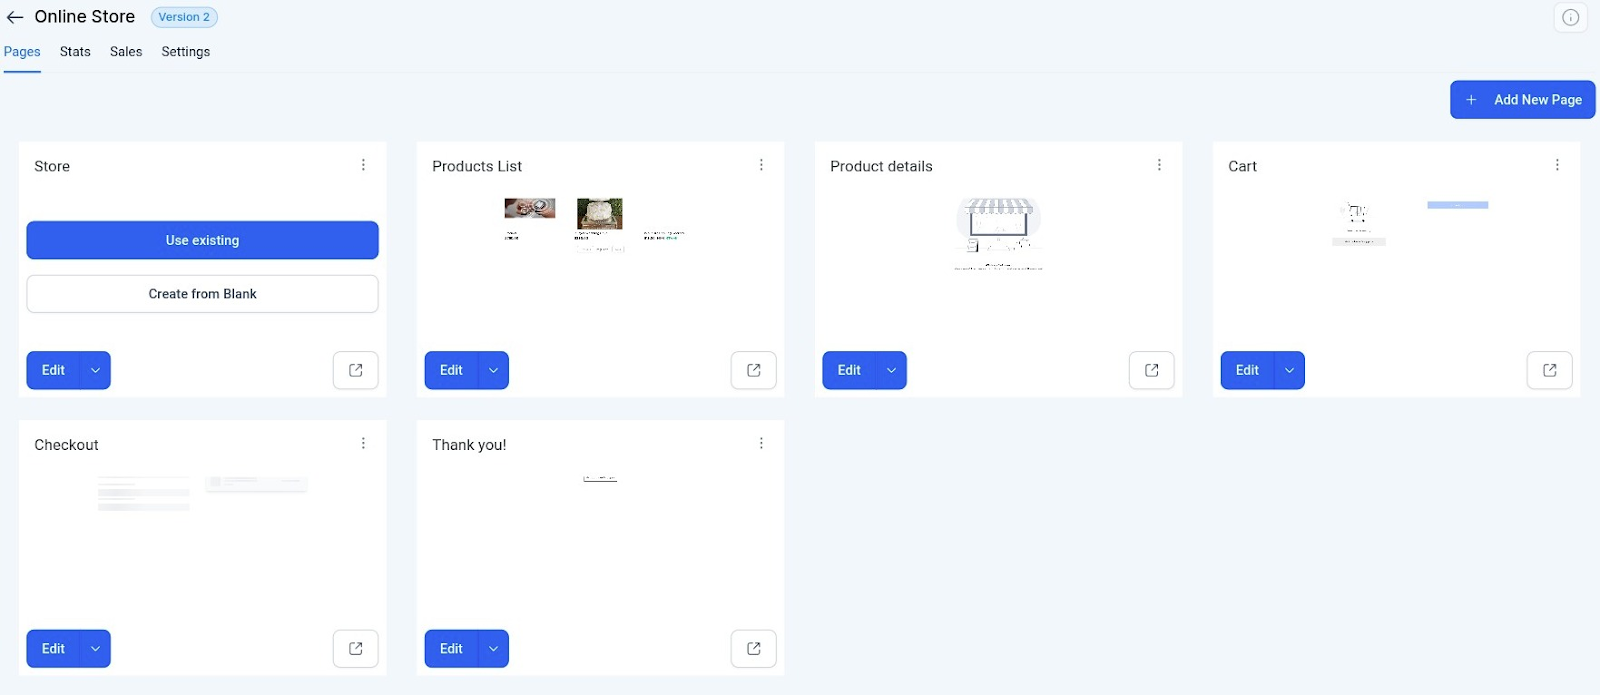
Once you have created your store, the system will automatically add five key pages to build your online store:
Products List Page: A catalog showcasing all your offerings.
Product Details Page: For in-depth information about each product.
Cart Page: A summary page allowing customers to review their orders.
Checkout Page: Captures all necessary details for payment processing.
Thank You Page: A post-transaction page for confirming a successful purchase and offering related products or services.
Note: Edit the design of these pages if needed.
You can use the CRM’s analytics tools to track user behavior, sales metrics, and other KPIs. Follow the next steps to do this:
Navigate to Payments > Orders for a detailed view of order submissions and Payments
Click on Transactions to track payments and initiate refunds.
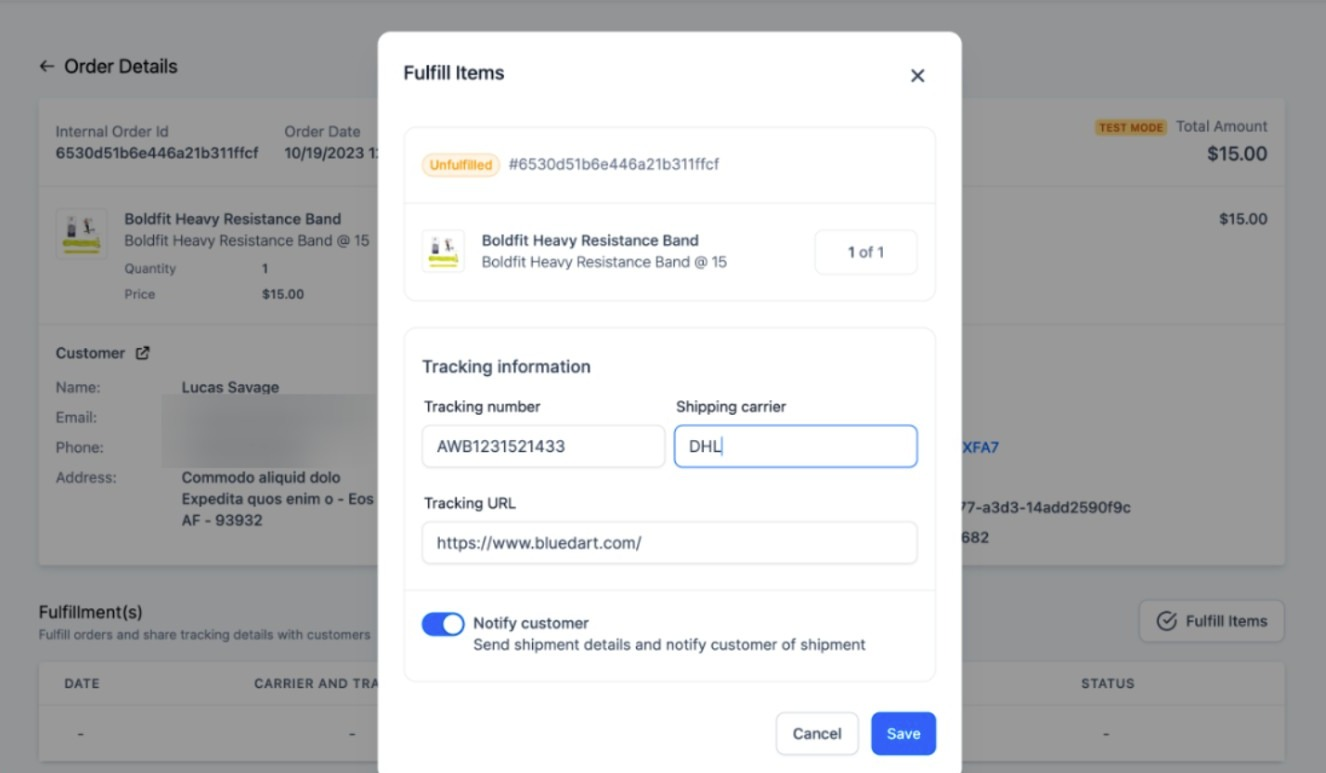
Variant Specific URL:
You can now obtain a unique URL for any specific variant of a product. This feature allows you to direct customers to a particular product and its variant directly. To get the URL for a specific variant, follow these steps:
Go to your website and preview the store.
Navigate to the product you want to share.
Select the desired variant of the product.
Copy the URL from the address bar at the top of your browser.
The URL will include a parameter, such as ?variant=, which specifies the particular variant. By sharing this URL, customers will be taken directly to the product page with the chosen variant pre-selected.
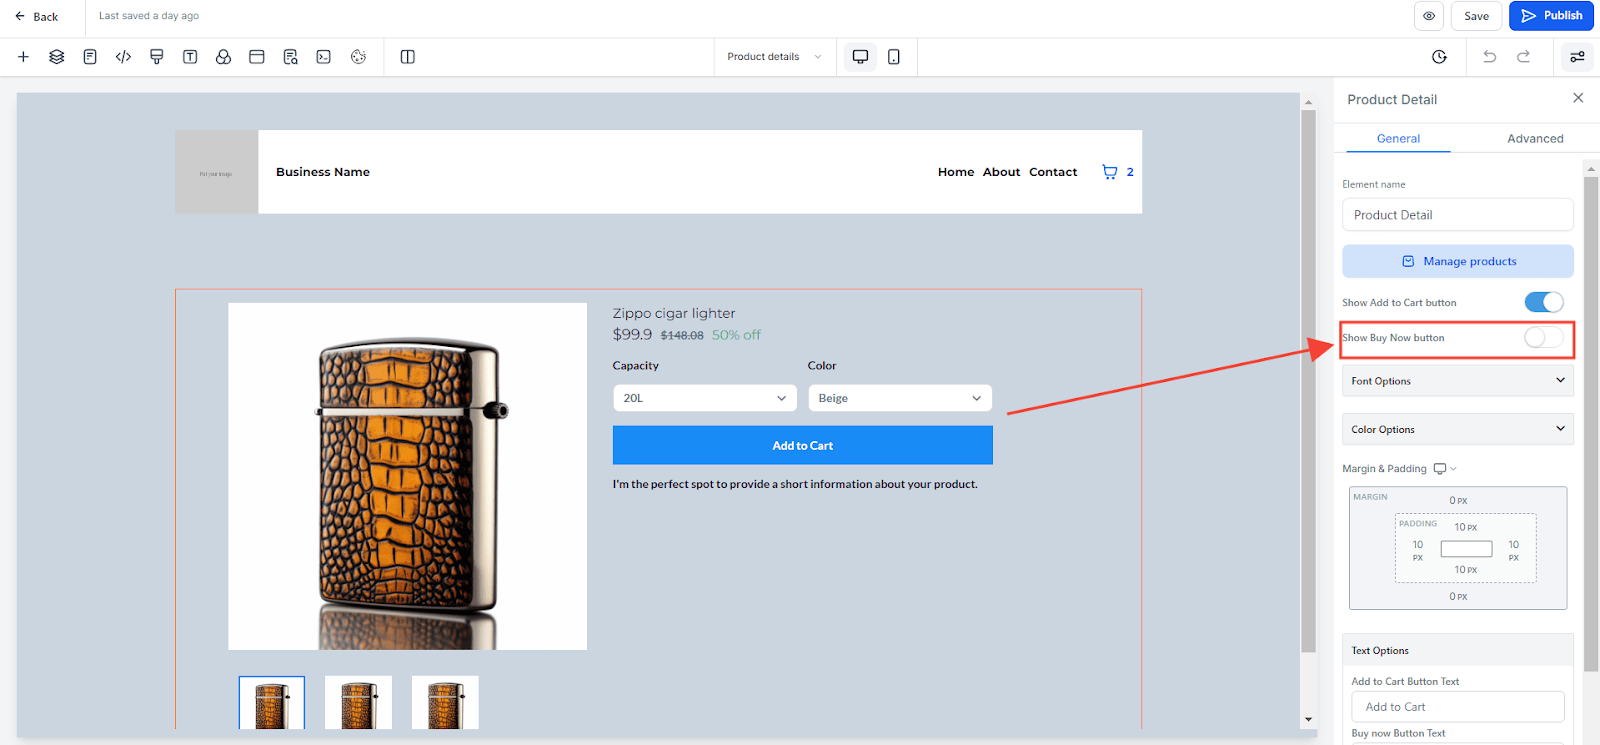
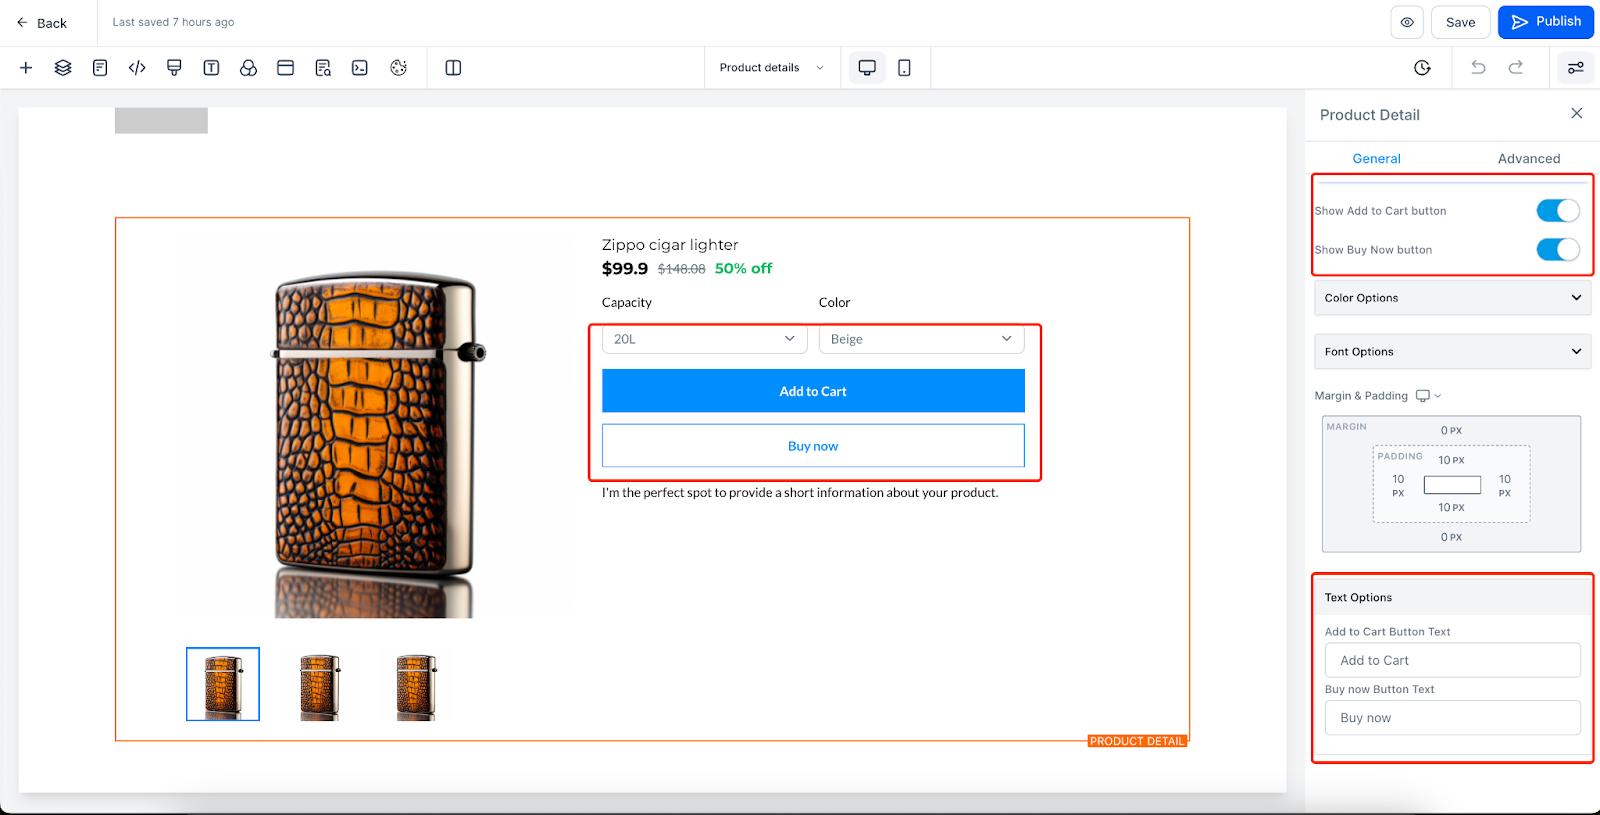
Buy Now Button:
You can enable the "Buy Now" button on the product detail page. This feature allows users to purchase a product directly, bypassing additional steps in the shopping cart process. Customers can select the quantity of the product and proceed with the purchase immediately. To enable the "Buy Now" button:
Go to the product detail page on your website
Click on the product to enable the "Buy Now" button for.
Toggle on the "Buy Now" button option.
This streamlined purchasing option can enhance the shopping experience by making it quicker and easier for customers to buy your products.
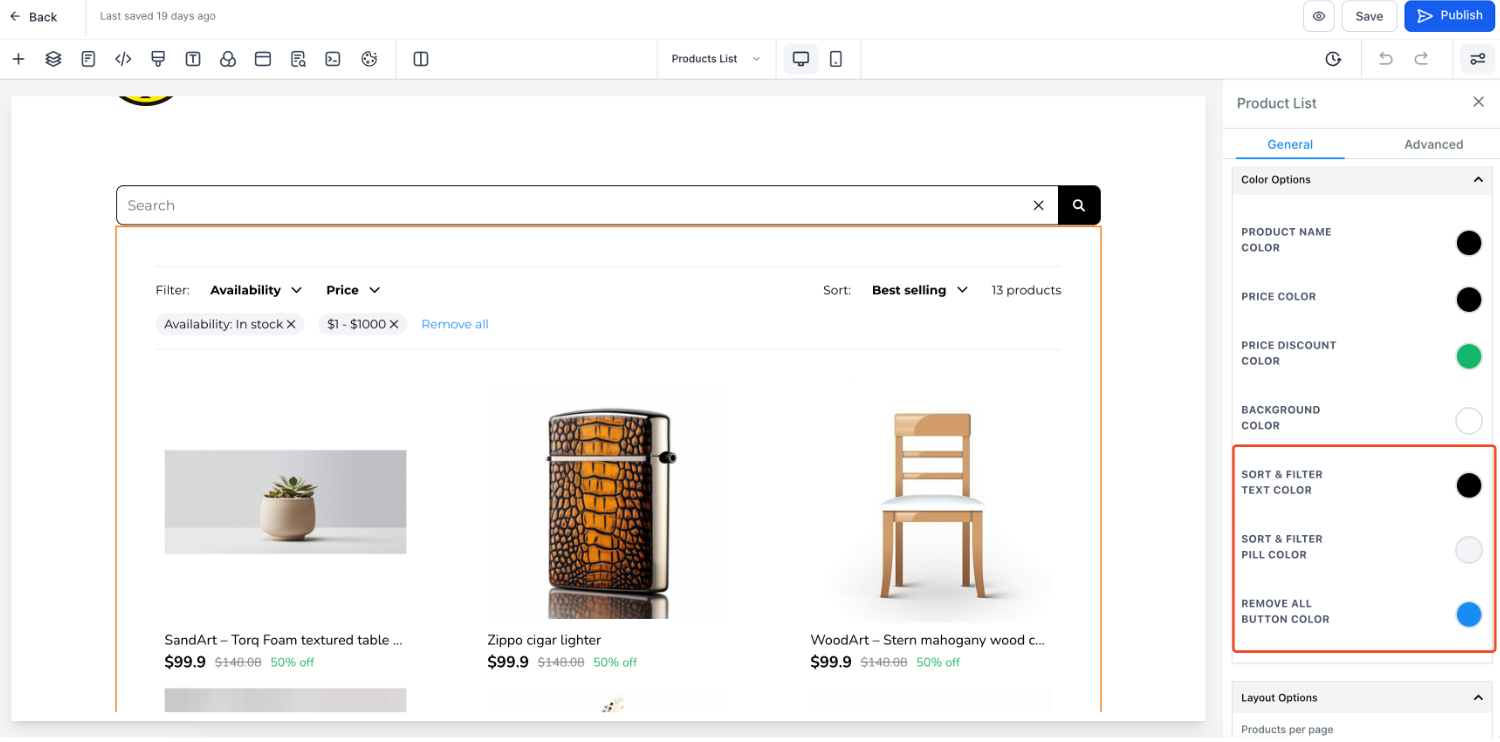
Sort and Filter feature:
The Sort and Filter feature enhances product discoverability on the product list page, allowing buyers to arrange and locate items based on various criteria easily
How to use:
Navigate to the product list page, and select the product list element. There would now be 2 toggles to enable Sorting and Filtering. Enable them to add Sort & Filter elements to your Product List page.
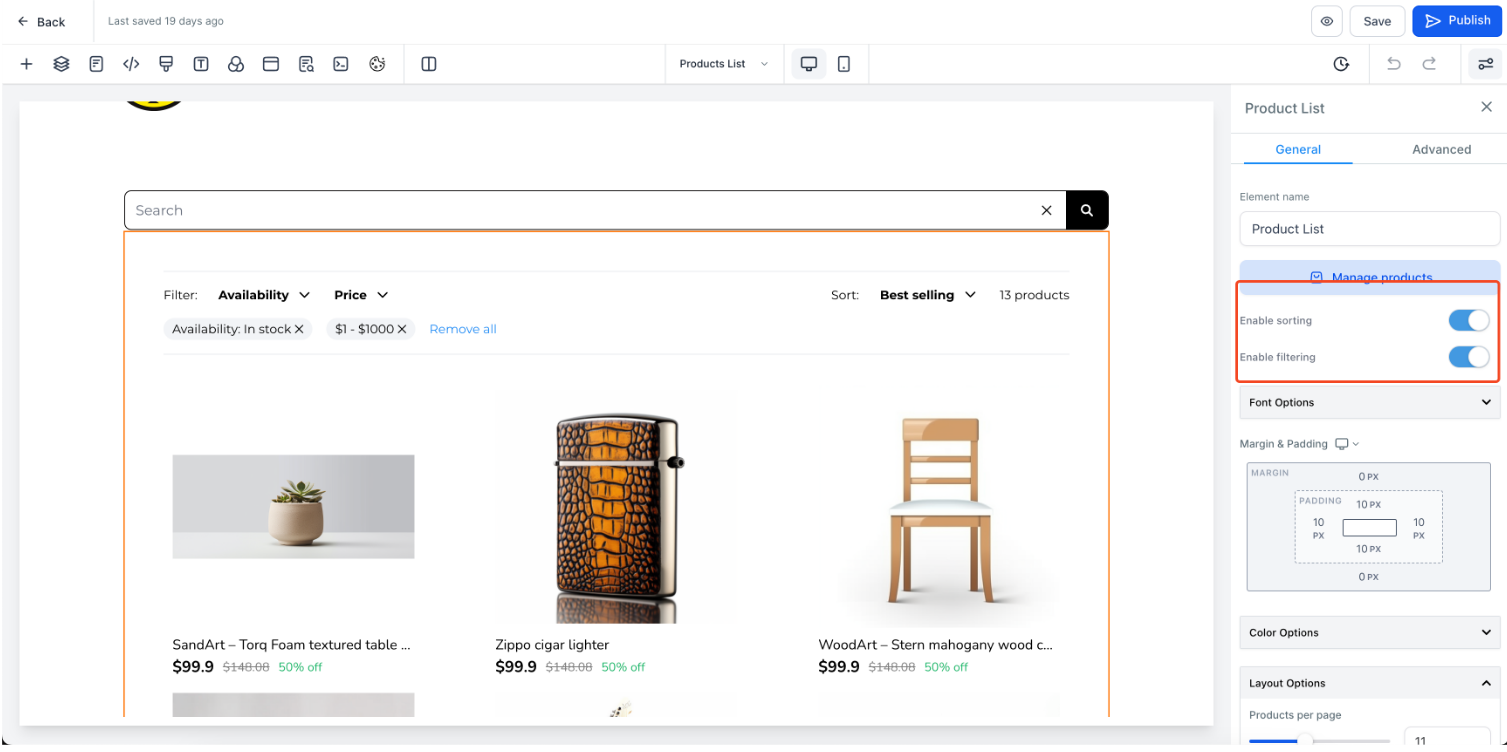
Configure properties for the sort and Filter. Some of the properties that can be configured are:
Sort and filter text color
Sort and filter pill color
Reset button color
Click on save/Publish to view your changes in your site
Notes:
Sort and filter options are only available in the product list page
Default sort order is Date - Old to new
By default all products will be shown without any filters
Search Bar Element:
The Search Bar element improves your experience by simplifying product browsing. You can add the Search Bar in two ways: within the navigation menu or as a dedicated element on your website.
How to use?
Navigate to the page builder of your store, and add the Search bar Element. This would be under the Store section in the "Add elements".
If you would like to enable the Search bar in your navigation menu, you can use the "Show Search bar" toggle present in the navigation menu settings.
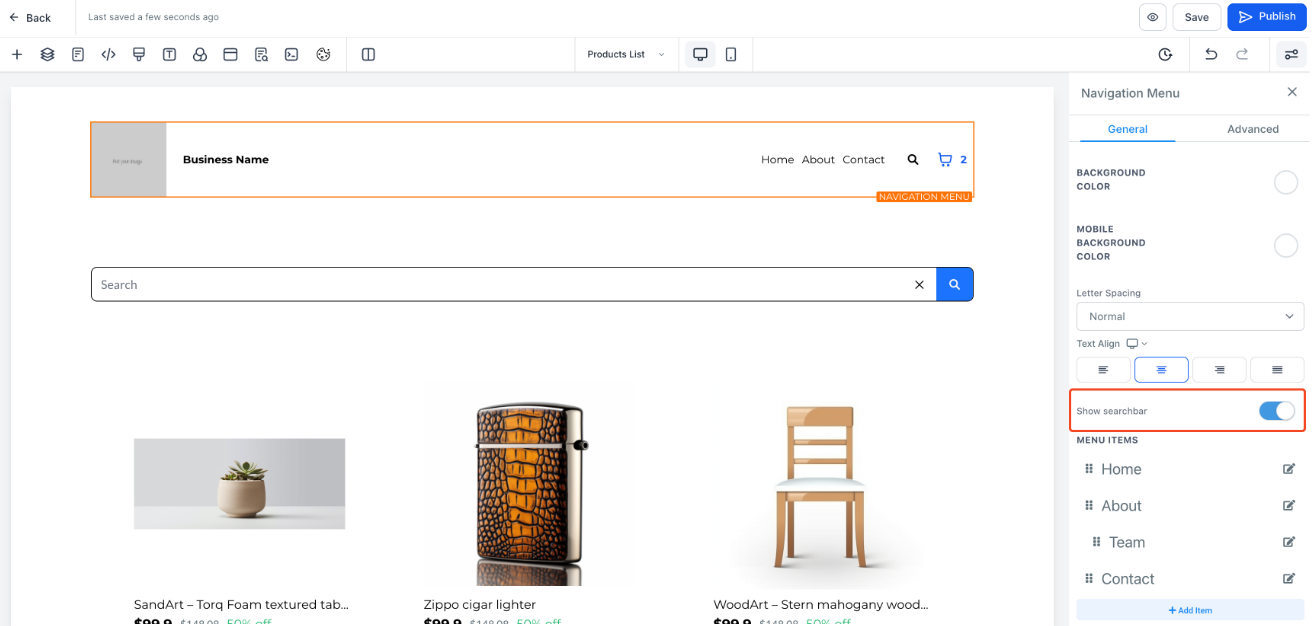
Configure properties for the Search bar. Some of the properties that can be configured are:
Search button color
Search input box text and background color
Search dropdown text and background color
Border color for input field and dropdown
Font size and weights.
Click on Save/Publish to view your changes on your site!
Note:
Only websites and stores can add this element to any page (Store, non-store).
Navigation menu customization for the search bar is limited. All customization options are available only in the standalone element.
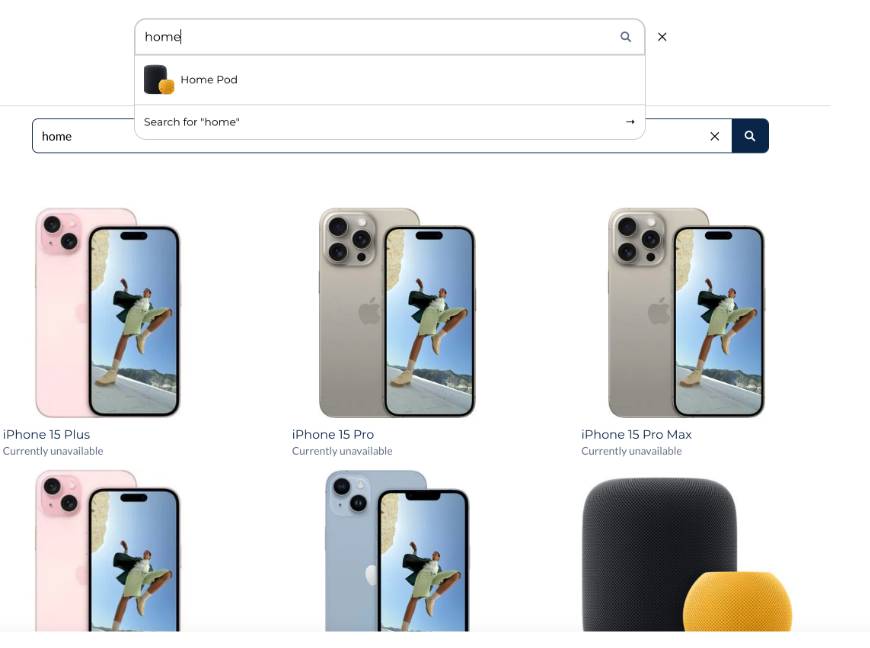
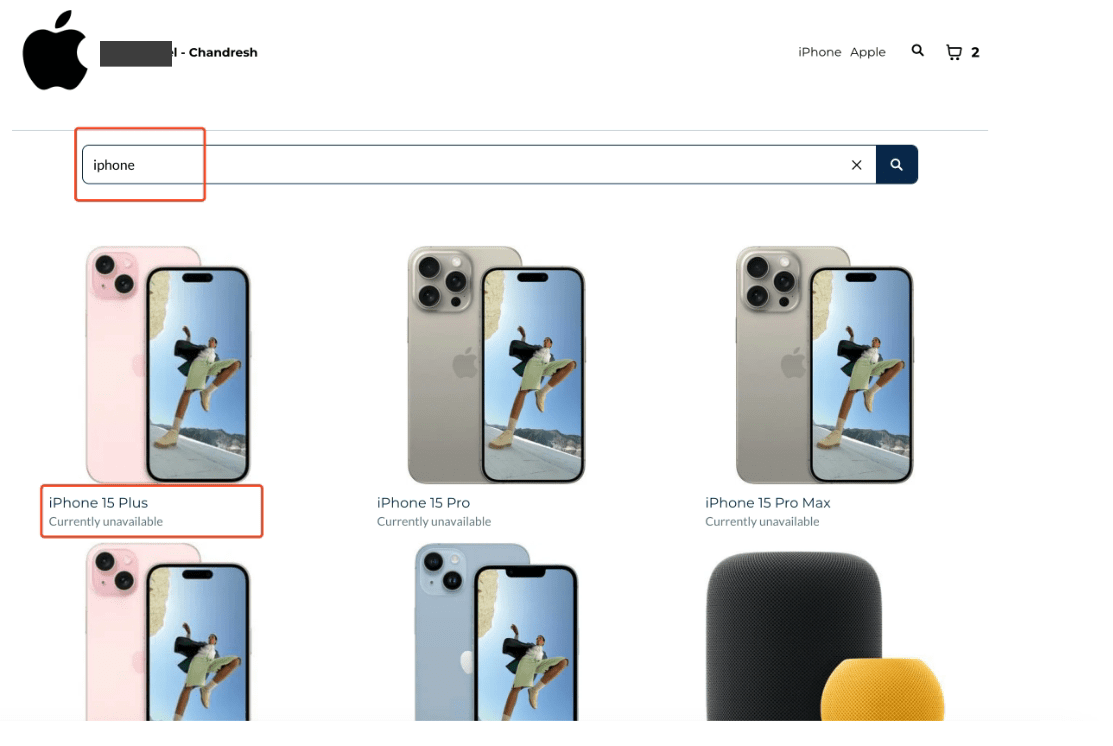
The search suggestions (Dropdown), will have search results searching from the title/name of the product.
Upon clicking on search, the user is navigated to the product list page, showing search results, which would search based on title as well as description
Product Labels/ Ribbons for products in E-commerce stores
This feature allows to showcase products distinctively on product lists and product details pages by allowing them to add customizable product labels or ribbons. You can set a timer to the Product labels as well, post which the label goes away.
How to add a ribbon or a label to a product:
You can setup product labels/ ribbons for products in their e-commerce stores at: Payment > Products > Enable Product label.
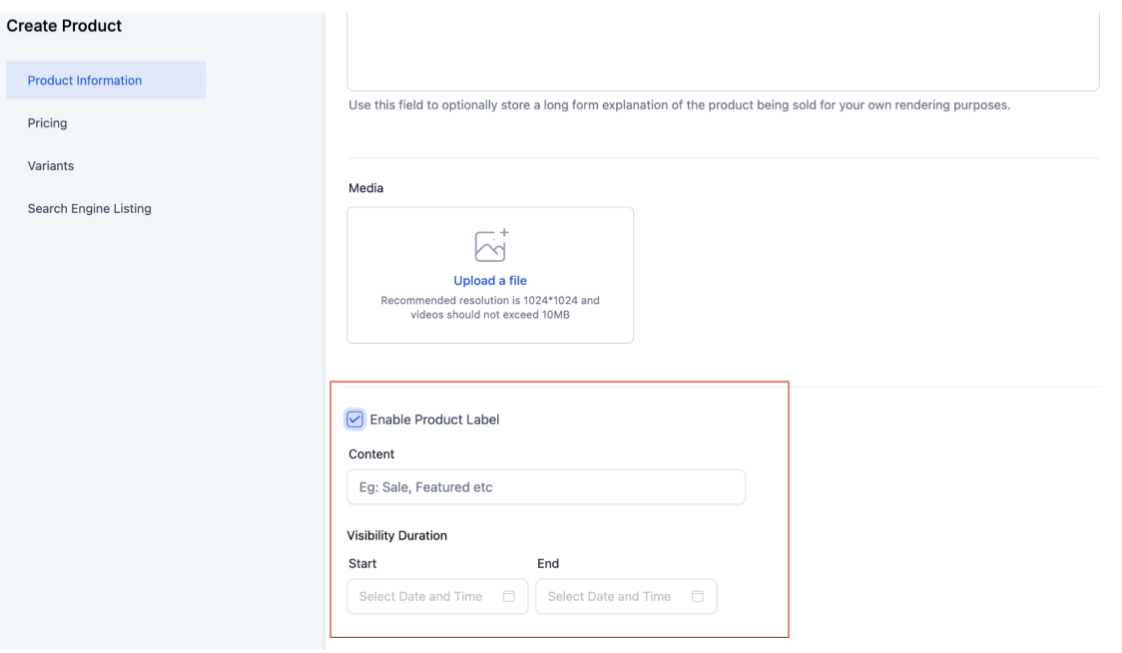
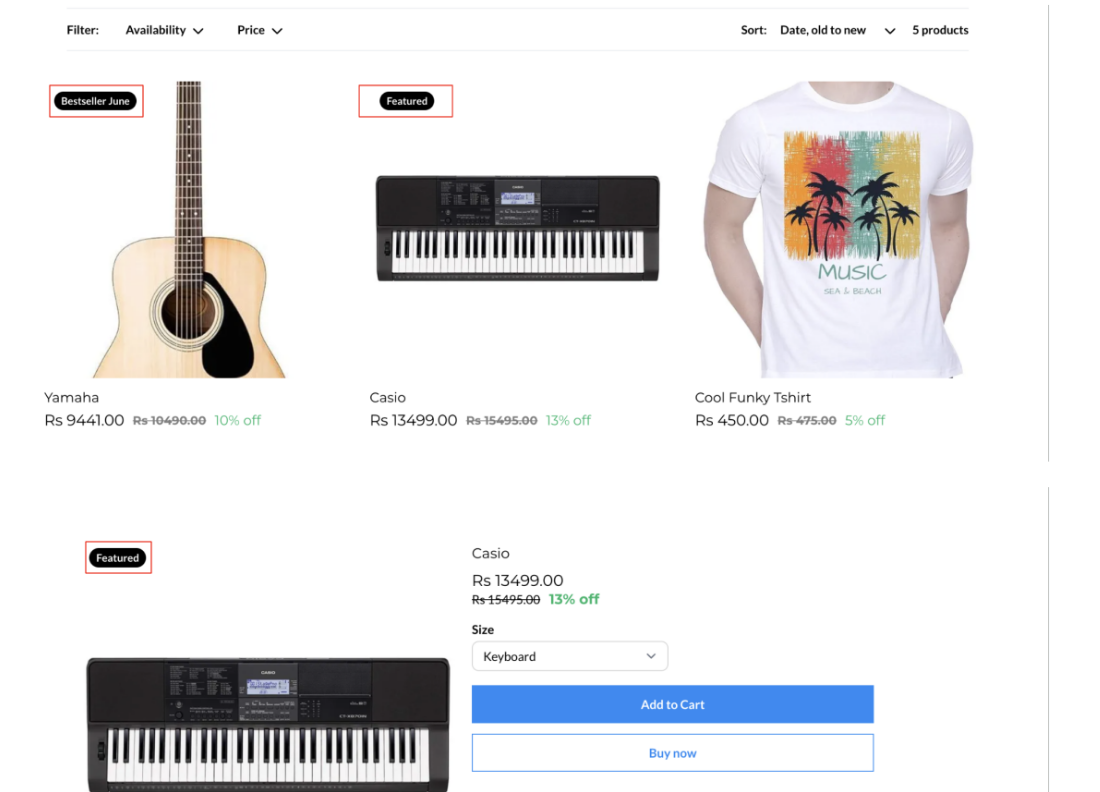
You can set an optional starting and ending date and time to the product labels. Product labels can be added for every product distinctively for any time duration.
Notes:
Starting and Ending date and time will be set according to the sub-account location's time zone.
The end date and time should be greater than start end date and time. Also, end date and time should be greater than current date and time for label to show up.
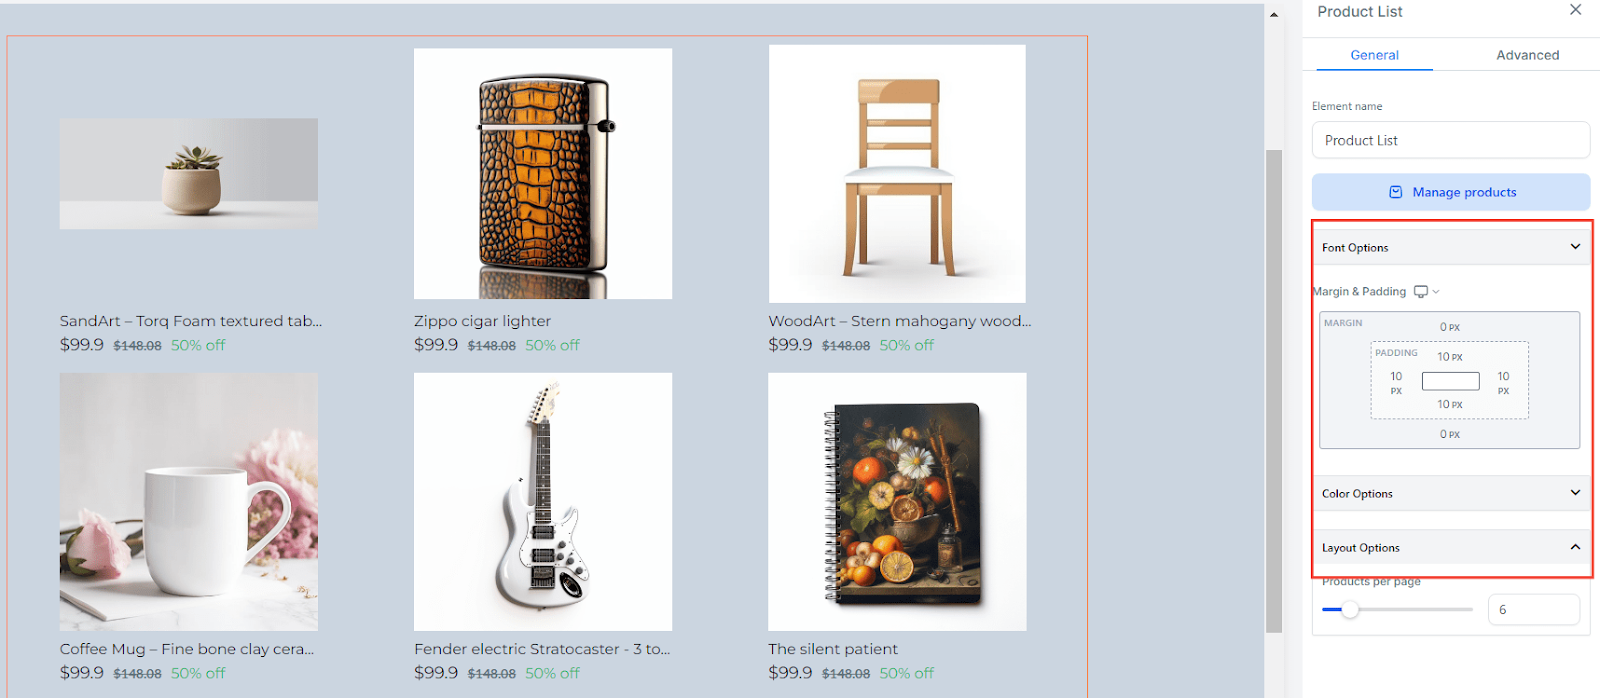
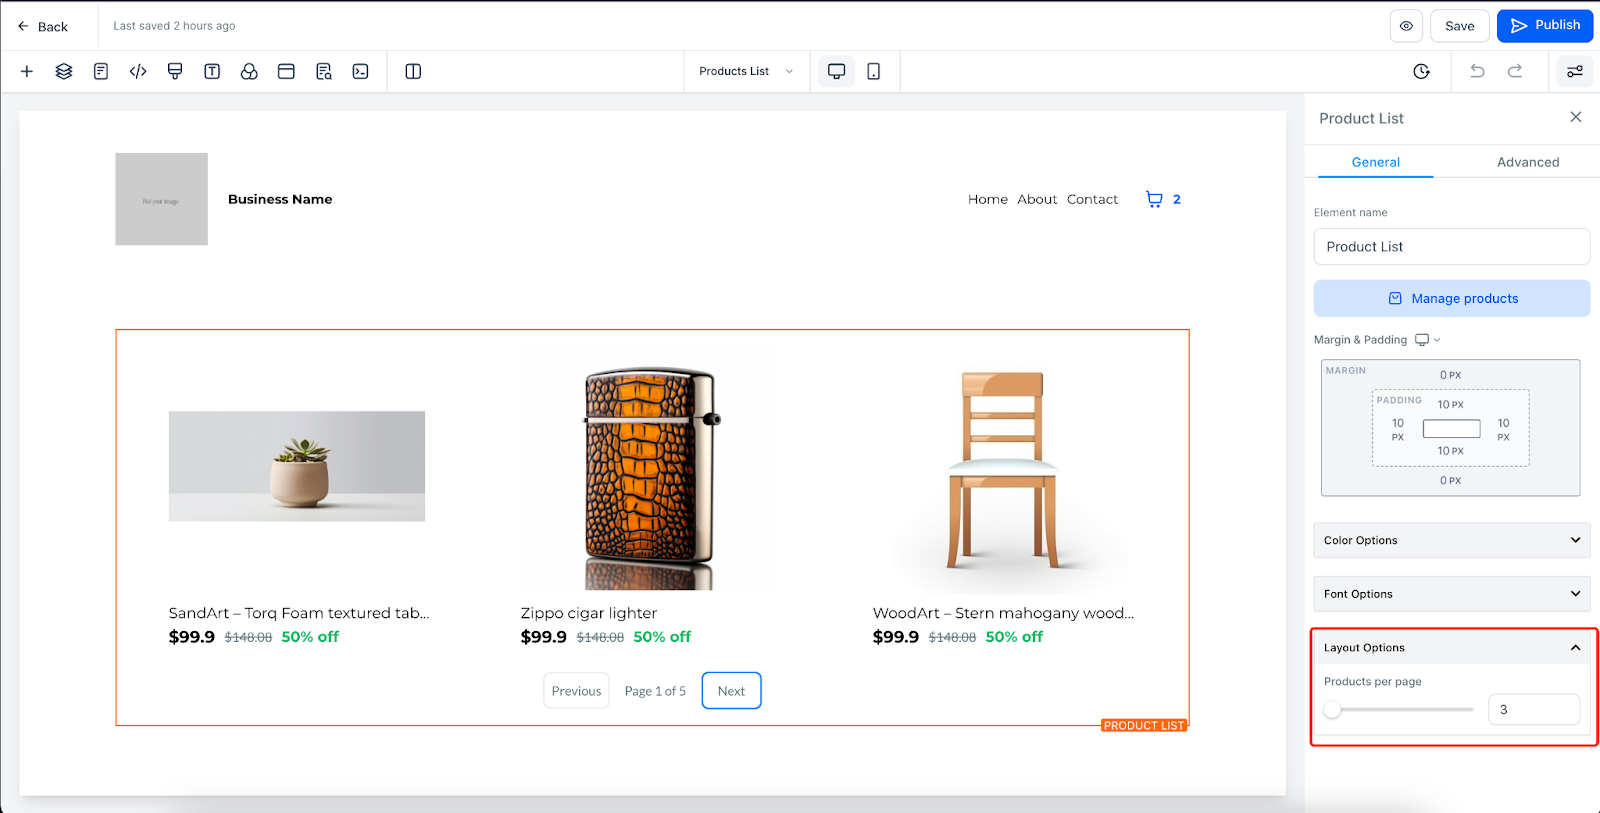
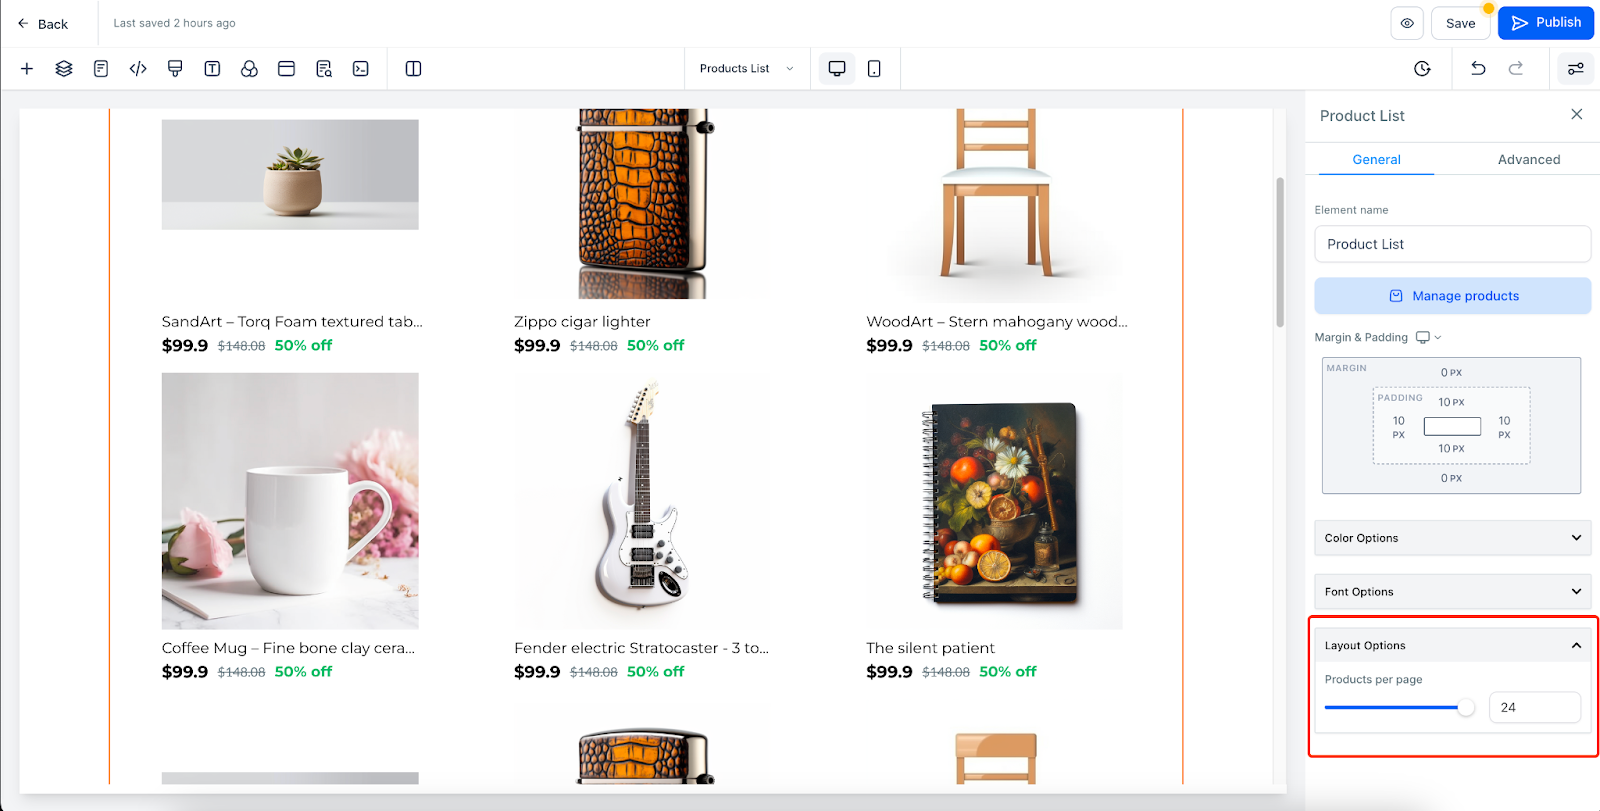
Custom Layout for Product List Page in E-Commerce Stores
E-commerce store owners can now customize the number of products displayed per page on the product list page. Previously, this was restricted to 6 products. The new feature allows a minimum of 3 and 24 products per page. To adjust this setting, select the product list element and navigate to "Layout options," as shown in the image. This enhancement enables store owners to create more flexible and appealing product list layouts.
Q: Can I Include Recurring Products?
A: The CRM currently supports only one-time products for its online stores.
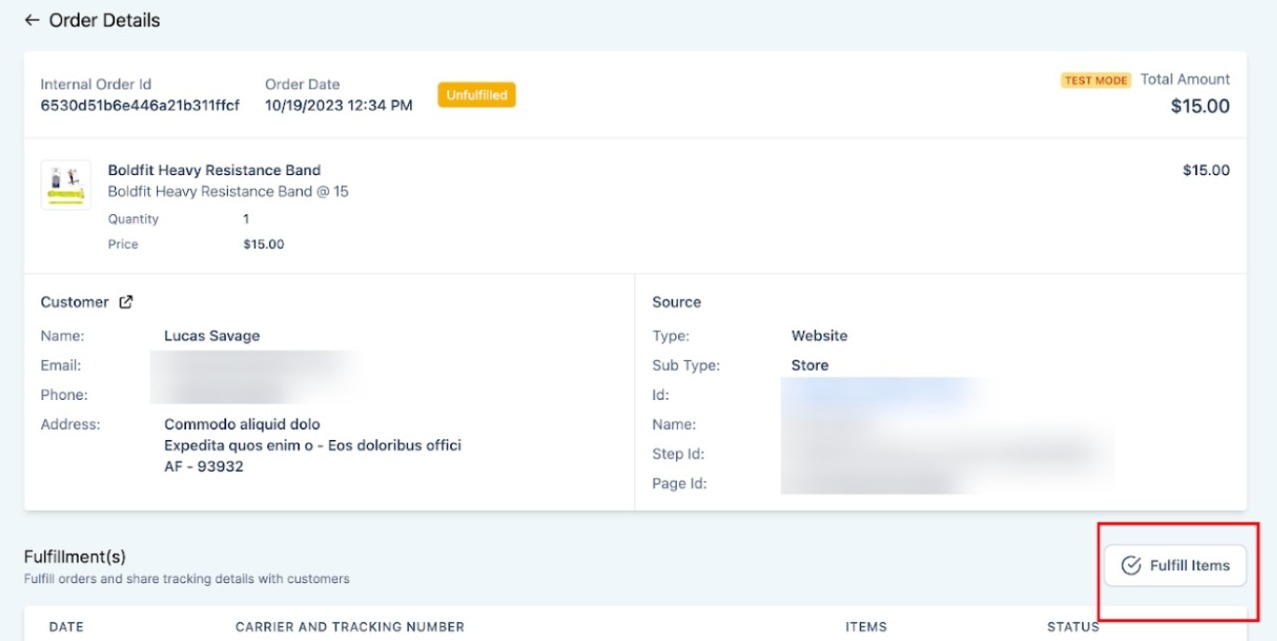
Q: How Do I Handle Fulfilment?
A: Upon receiving an order, it will appear as 'unfulfilled' by default. You can manually mark it as fulfilled and include tracking information for the customer.
Q: Can I Customize Pricing for Different Variants?
A: The CRM allows flexible pricing options for different product variants.
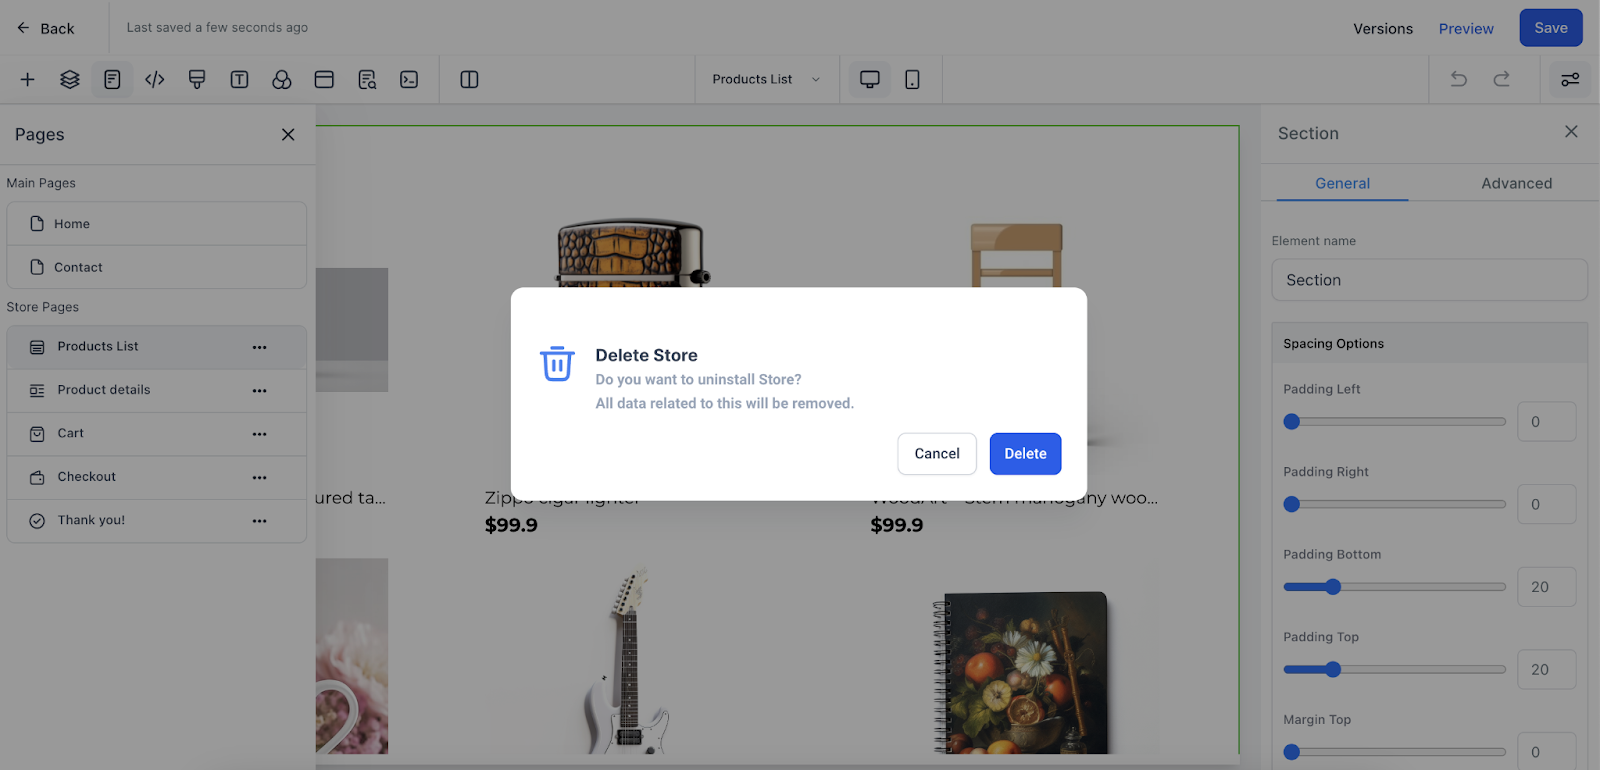
Q: I have created a store for test purposes. How do I delete it now?
A: Users will be able to delete a store by deleting any of the automatically added pages. If they confirm, all data related to the store will be lost.
Q: I have attached multiple images of my products and services. Is there a way I can set the default images for each variant?
A: This is not possible currently. As of now, product images will be shown irrespective of the variant selection.
Q: Is it possible to have different pricing for different variants of a product?
A: Yes, users will be able to customize the price of each variant configured. By default, the price of each variant will be the price of the product.
Q: How do I mark the orders created as fulfilled? How do I share shipment details with my customer?
A: Users will be able to Fulfill items inside the order details and attach a tracking number/URL to automatically send shipping updates to their customers. This is not available currently.
Q: Can I create multiple stores within the same location?
A: Yes, you will be able to create multiple stores within the same location.
Q: Can I create an online store in both funnels/websites?
A: No, an online store can be configured only inside a website. Users will still be able to sell products using order forms on funnels
