Start by navigating to the Sites > Funnels section. You can view a list of your existing funnels here, or, click the blue button to create a new funnel.

Once you create a new funnel, you have to add a step. Each step is an actual page. (As an option, you can import pages from ClickFunnels as well.)
Use the different tabs to set up your funnel
STEPS: Here you can view all your funnel steps or pages.
OVERVIEW: Edit or Preview your funnel step.
PRODUCTS: View the products associated with the funnel page
PUBLISHING: Here you can update the step name and path also known as the slug
STATS: Here you can view the statistics for your funnel. like, a season, a time range of traffic that's been run into your funnel
SALES: This is depreciated, all transactions can be found in the Payments > Orders and Transactions tabs.
SETTINGS: Update the Name, Path, Domain, and Favicon URL: the small icon that shows up in the web browser tab. You can also include Head and Body Tracking Codes: These are scripts that run on each funnel step, like analytics or other features.
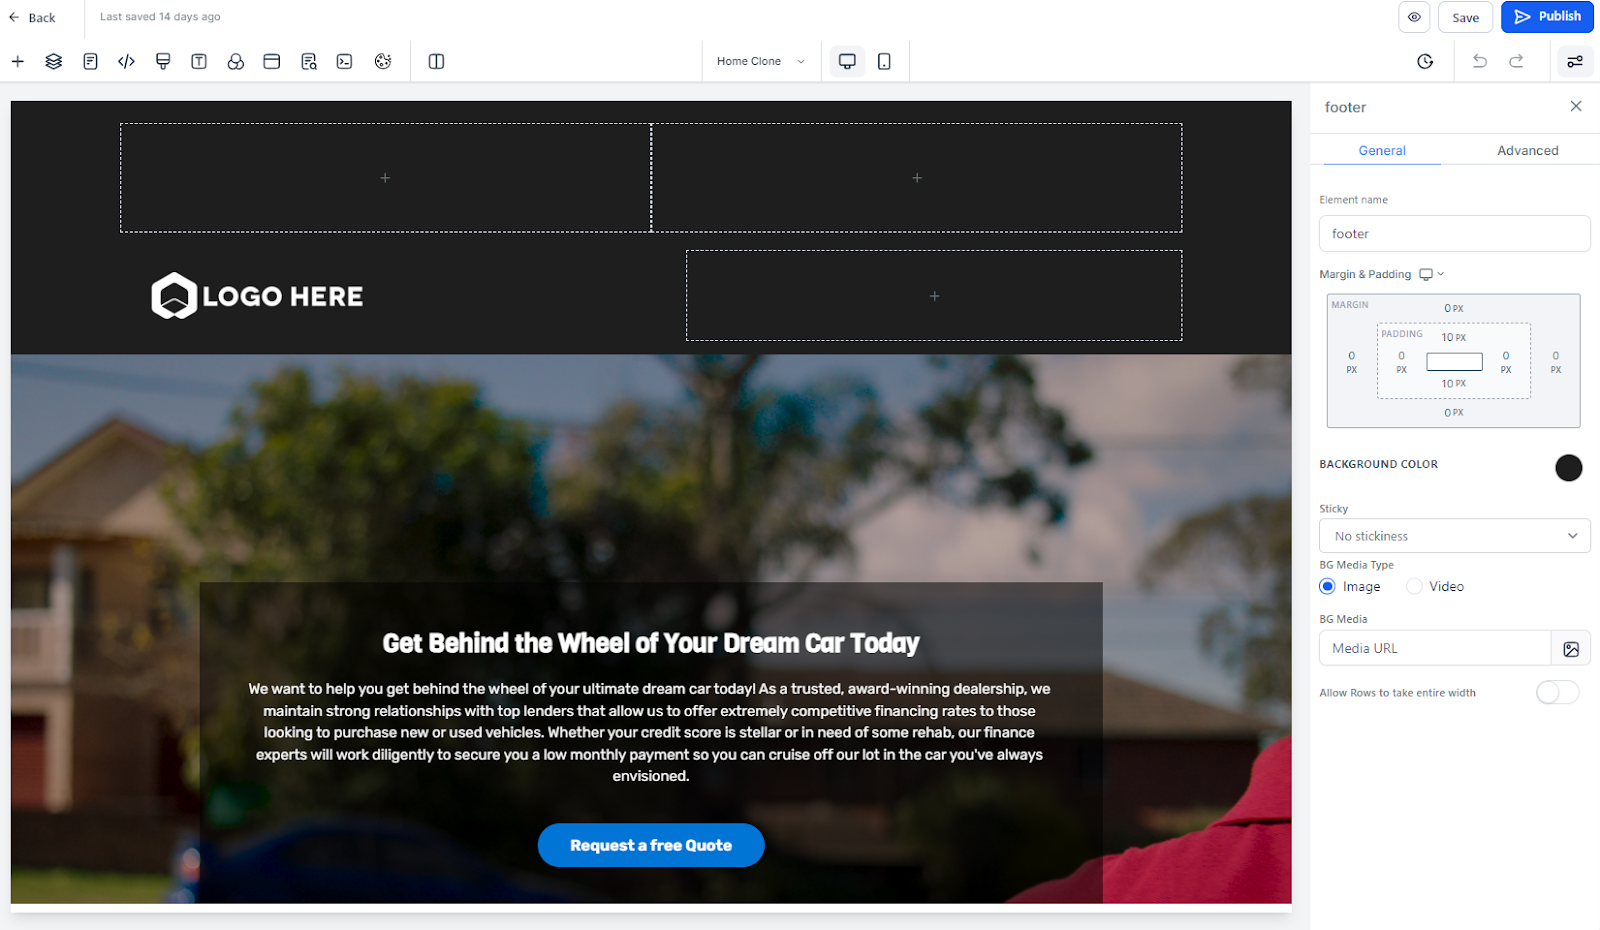
Within the funnel builder, you can completely customize each step. From adding a calendar or map to choosing fonts and colors, creating pop-ups, and more, you can choose exactly what your funnel steps look like.
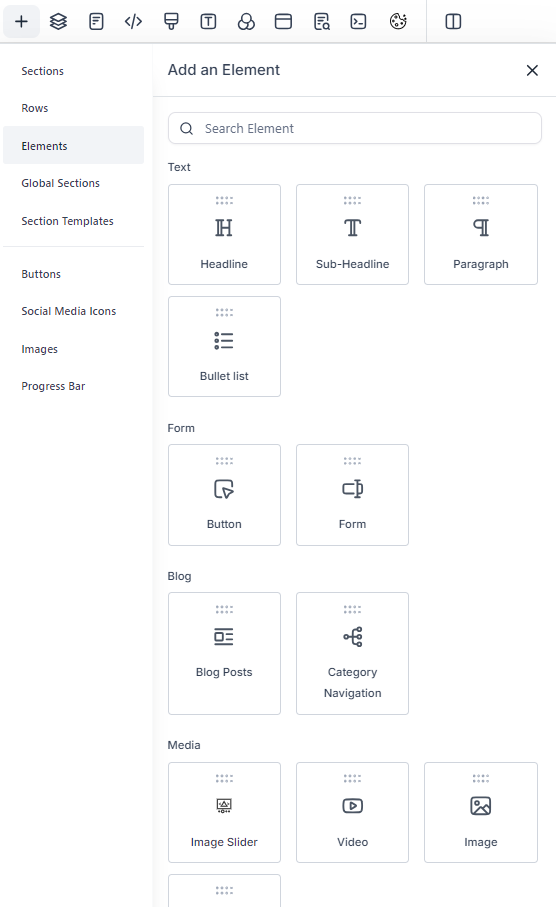
Each page is made up of the following pieces: Sections, Rows, Columns, and Elements. They need to be created in that order. Sections can house multiple rows, rows can house multiple columns and columns can house multiple elements.
Use the drag-and-drop features to add sections, rows, columns, and elements to the builder, and use the edit menu on the right-hand side for each specific piece to customize it as you wish.
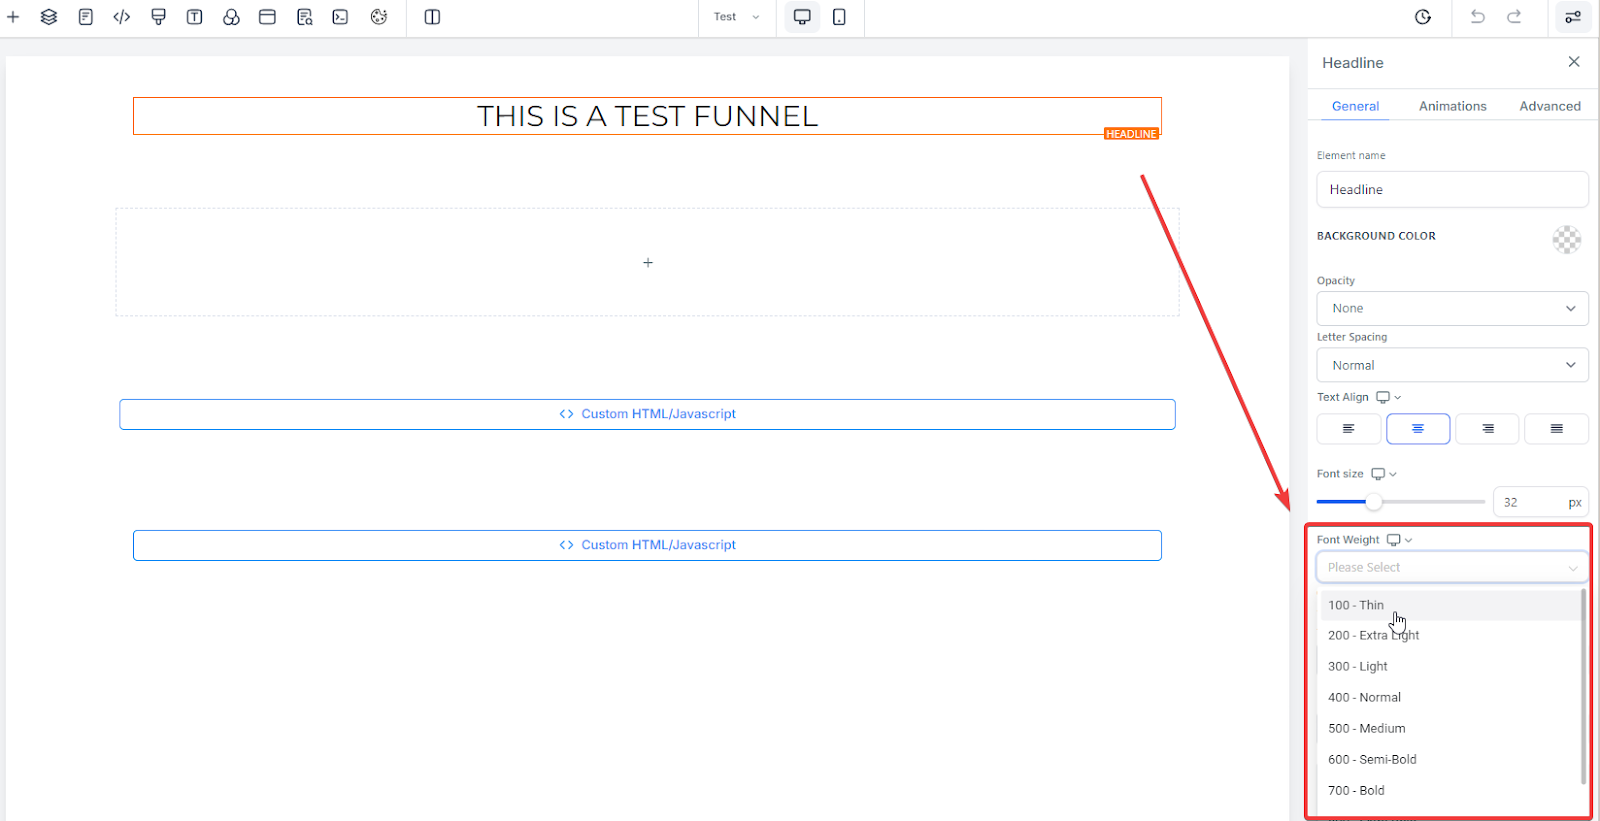
To regulate font weight for various components like text, buttons, and navigation menus in your funnels, navigate to the font weight settings within the builder. Select either the desktop or mobile view, and choose from options like light, medium, or bold to customize the appearance of your text. Ensure any pre-marked bold text is deselected to apply the desired font weight changes.
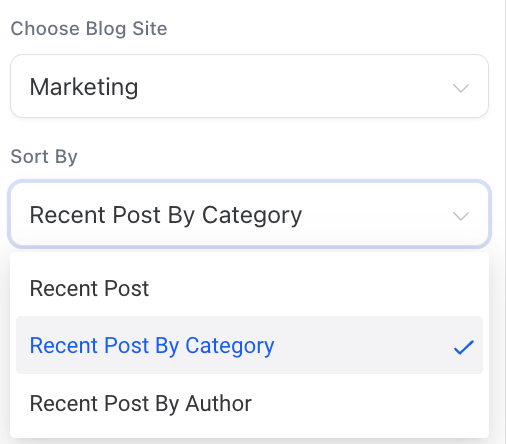
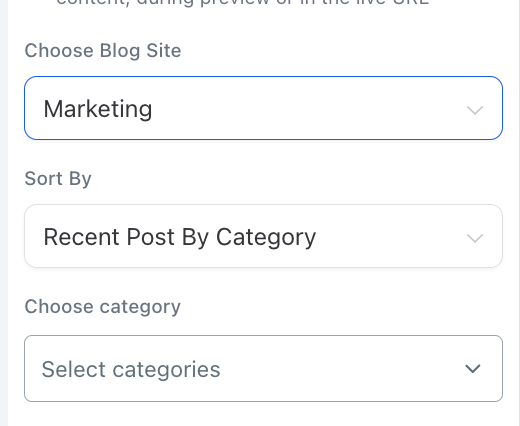
Within the elements section, add a Blog Post element to any funnel step, enabling seamless integration of blog content with various sorting options. This allows for dynamic content display by filtering recent posts, posts by category, or posts by author, making it easier to engage visitors. To use this feature, simply add the Blog Post element, and select the desired blog and filters.
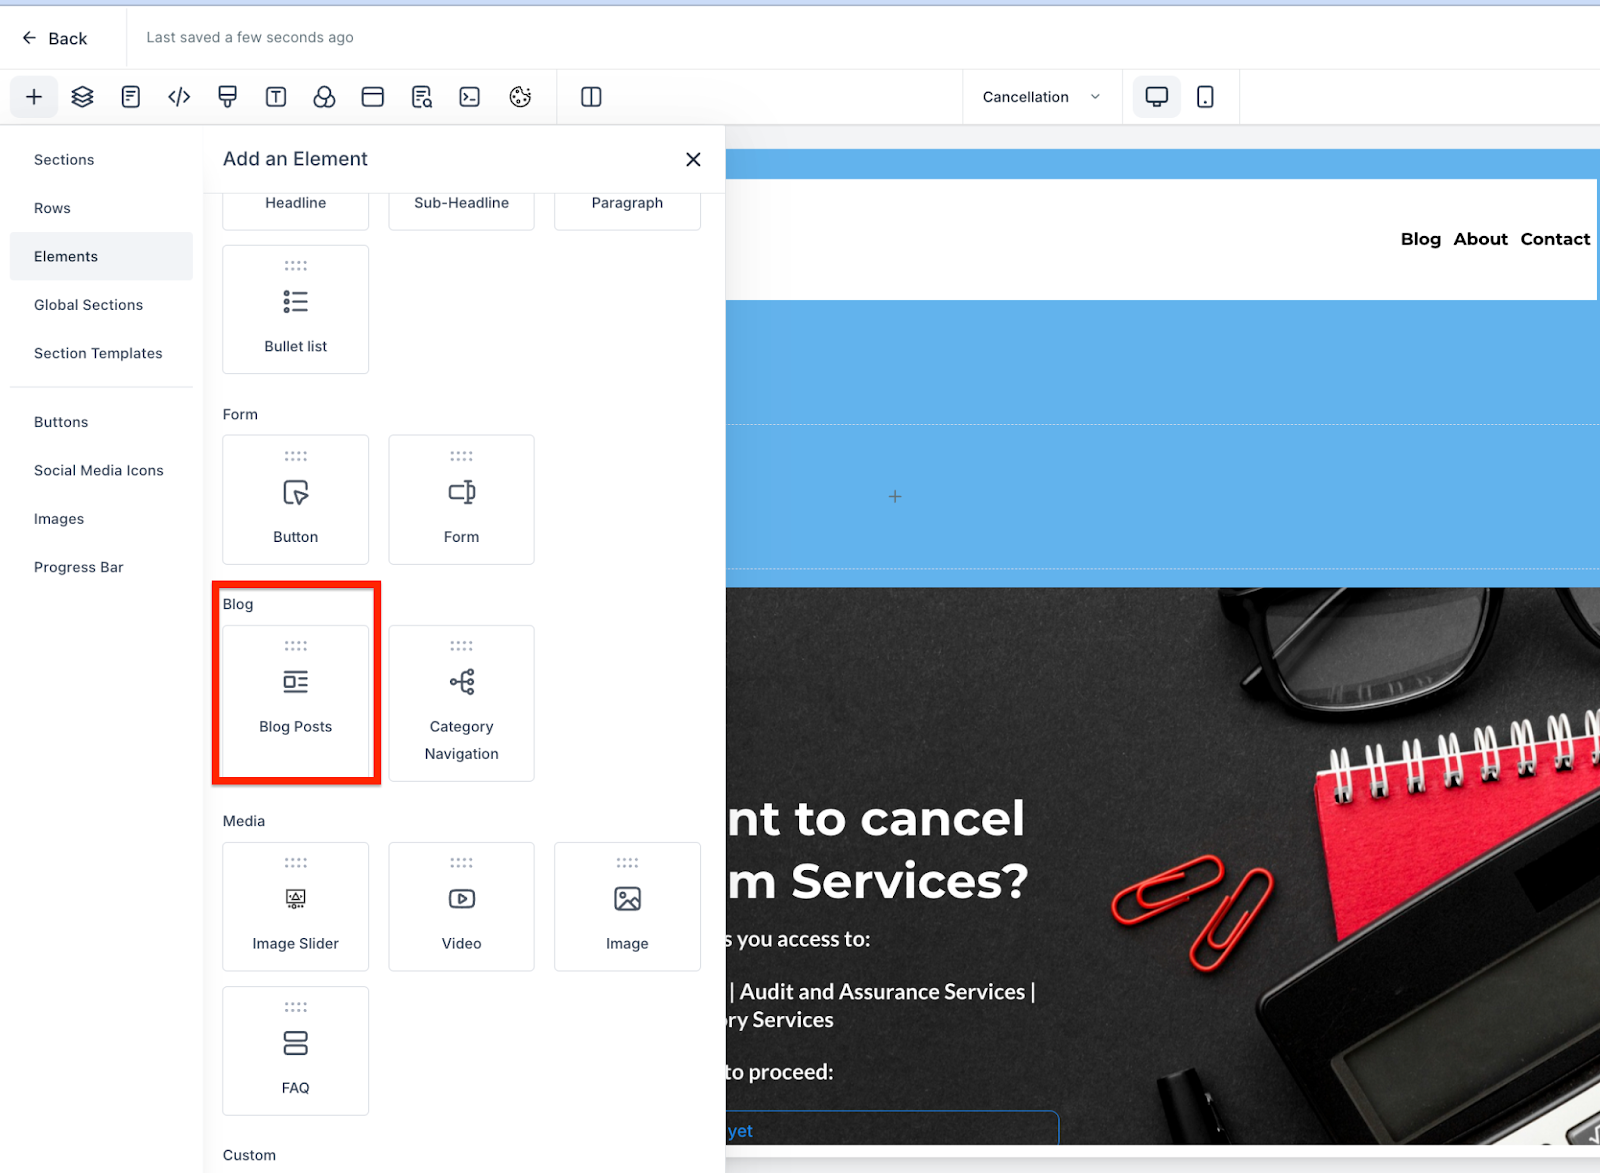
With the blog post element, select the blog name
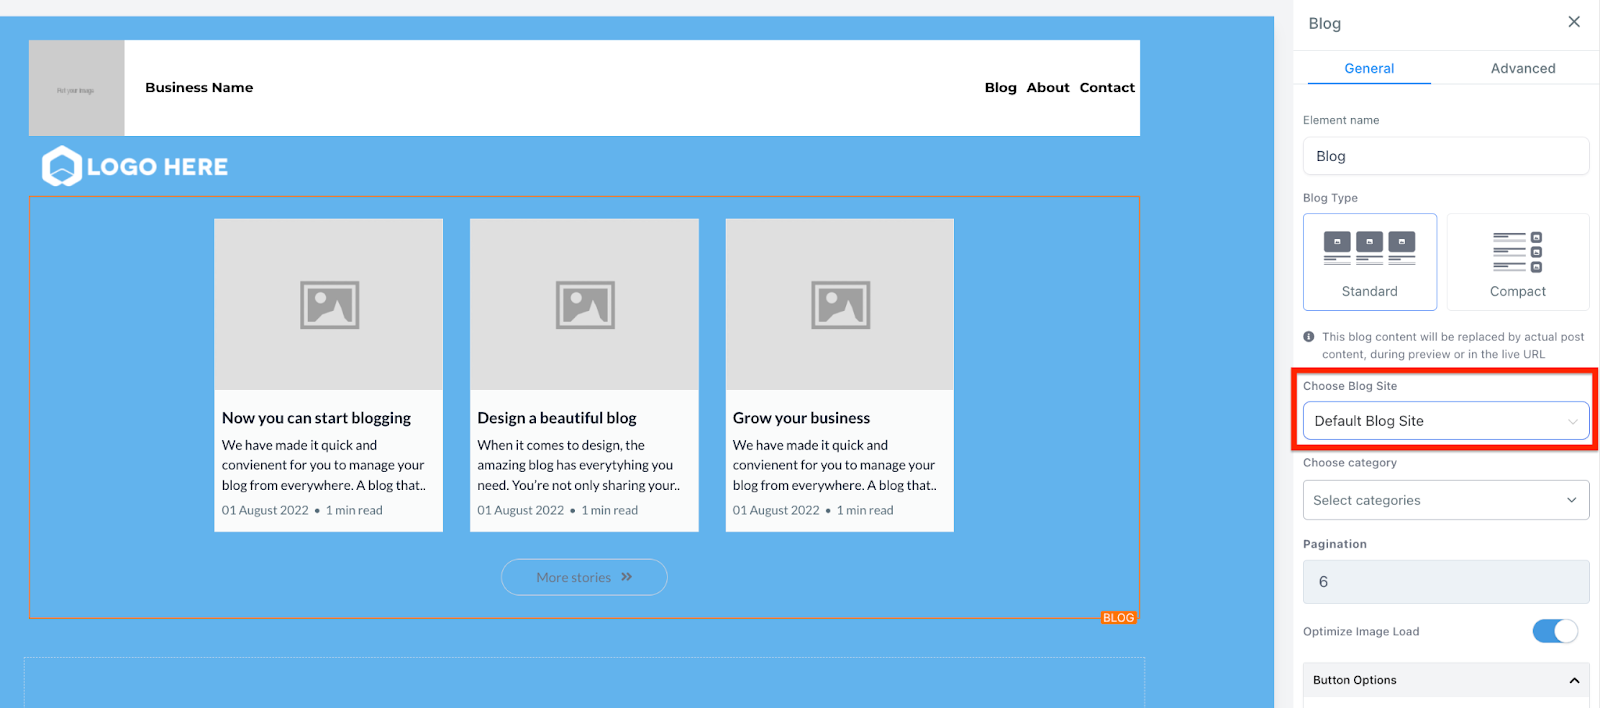
Filter by the blog post - Recent Post, Recent Post by Category and Recent Post by Author and select the category/author.
Note: Filtering will apply on updated date (date when blog post is published)
You can preview the page in its entirety to see what it will look like for your customers.
Be sure to save any changes before leaving the builder to confirm the updates you've made.
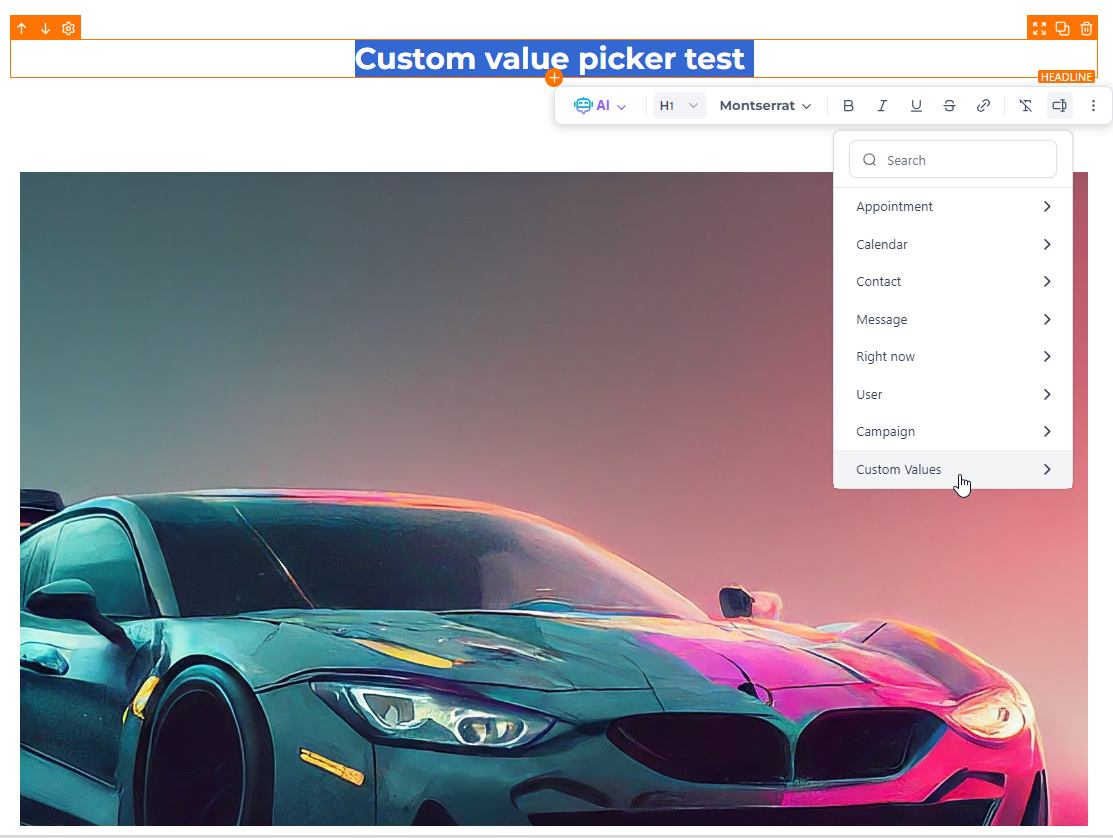
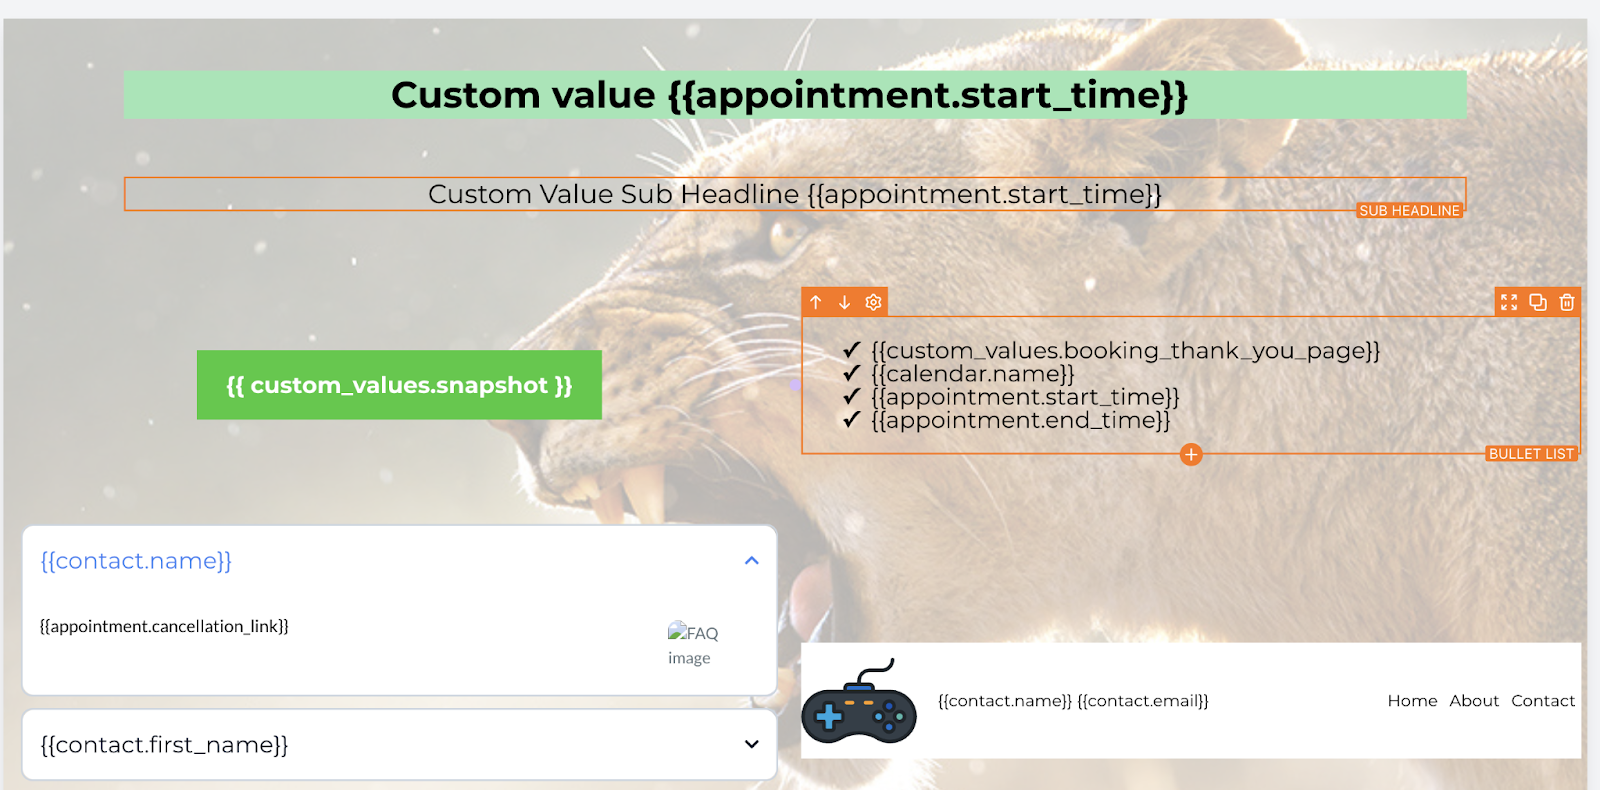
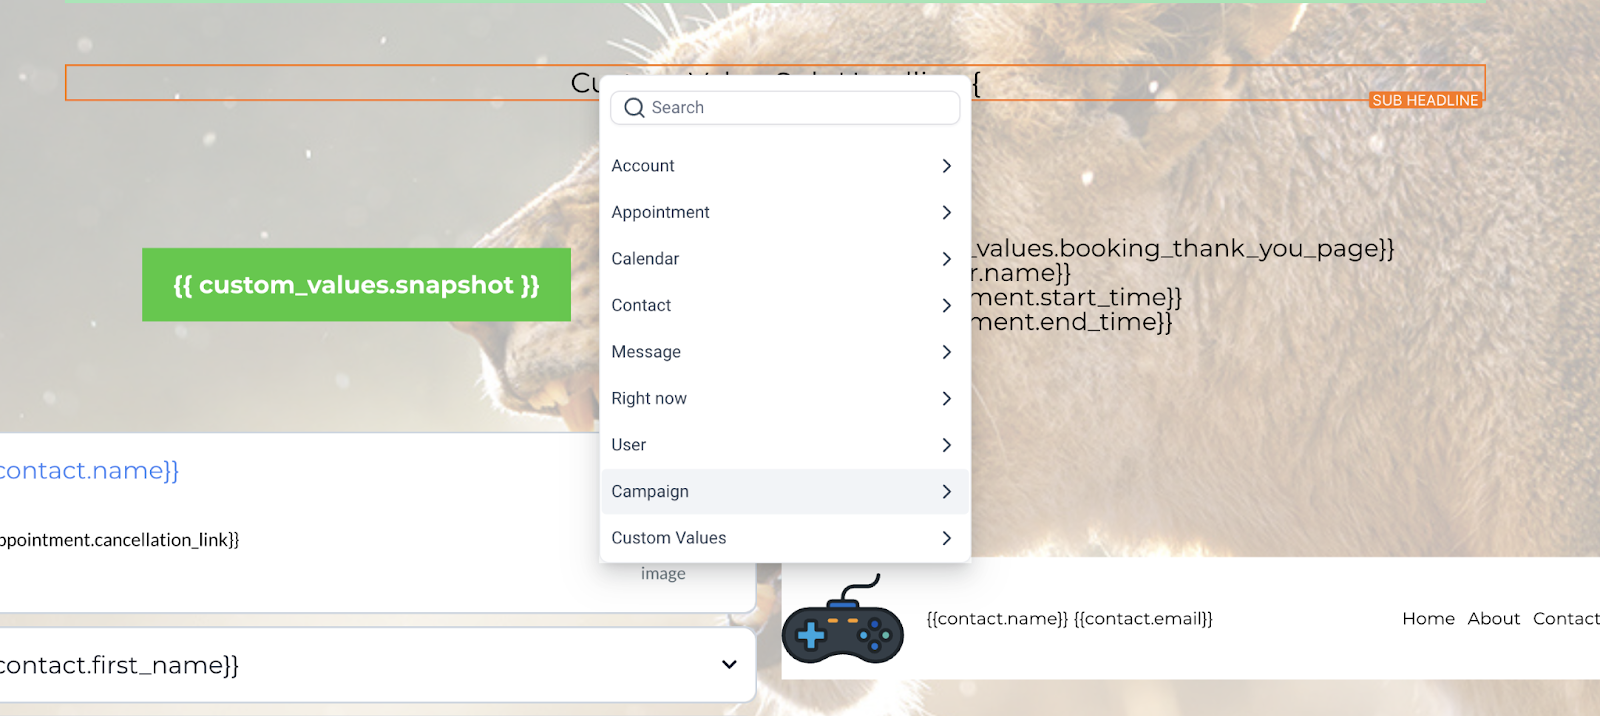
This feature is designed to streamline and accelerate the funnel-building process for users. The Custom Data Option Picker allows easy access and insertion of custom fields and values directly within the funnel page builder. This can be done either through the toolbar or by typing "{" in the text editor, making custom data tasks more efficient.
Benefit: Simplifies the creation process, allowing users to focus on building high-quality funnels quickly.
How to Use: In the funnel page builder, use the toolbar to find the Custom Data Option Picker or type "{" in your text editor to access the picker and insert custom fields/values.

The revenue attribution system now includes v1 orders in funnel conversion metrics. Previously, these orders were not accounted for, leading to incomplete revenue data. This update ensures that all revenue from funnels v1 orders is tracked, providing a more accurate view of sales performance and marketing effectiveness.
Benefit: Offers a comprehensive view of revenue data, improving the analysis of sales performance and marketing efforts.
How to Use: Revenue from v1 orders will now be automatically included in your conversion metrics, reflected in the sales subsection of funnels. No additional steps are required to enable this feature.
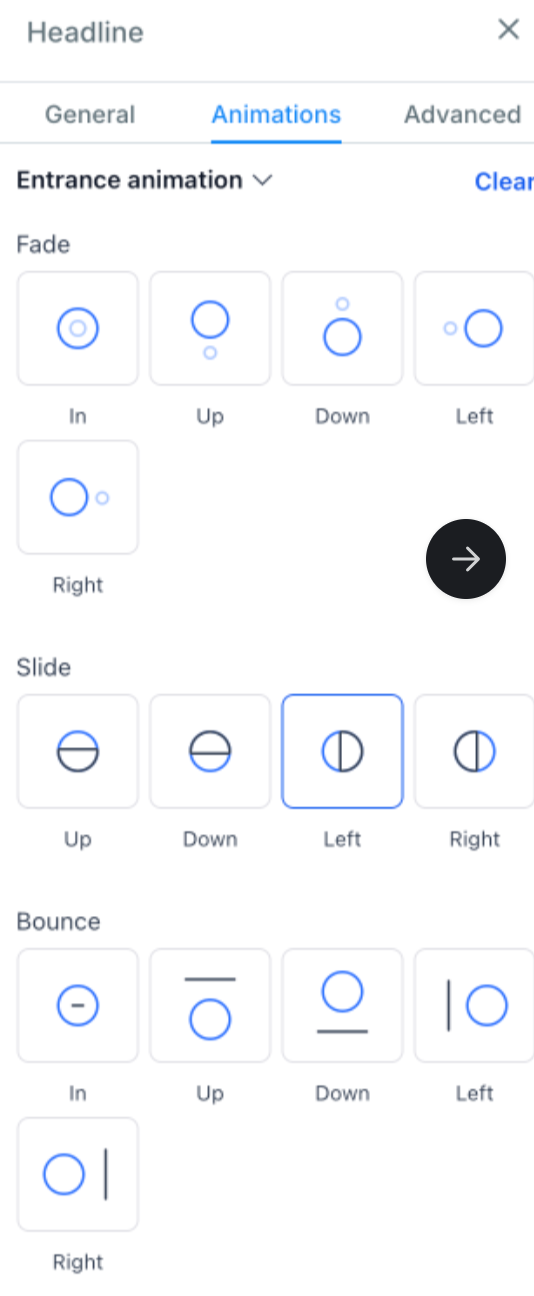
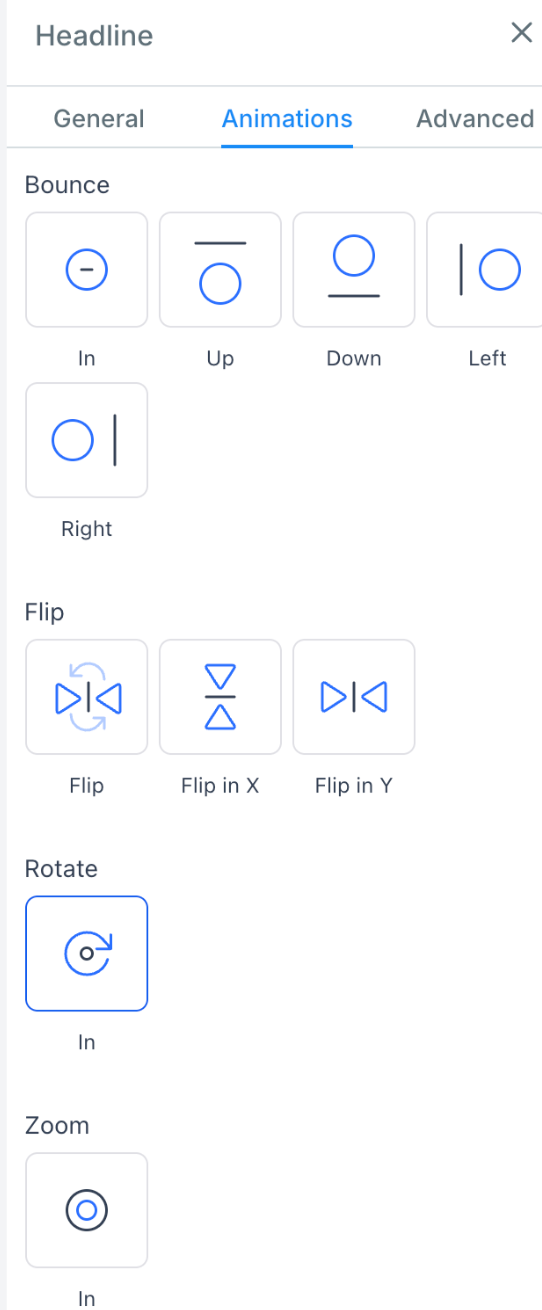
Entrance Animations for Text Elements
Entrance Animations for Text Elements allows you to add dynamic animations to headings, sub-headings, paragraphs, and bullet lists, making your online content more engaging. This feature helps capture audience attention by triggering animations when text comes into view. To use, navigate to the funnel/website editor, select the text to animate, choose an animation from the new animations tab, and preview the effect directly on the builder page before saving and publishing your changes.
Navigate from page to page within the builder: Use the page icon at the top left to go from page to page.

For those operating within the EU, we heard your concerns about GDPR compliance. With just a toggle, you can now make all the fonts in the funnels GDPR-compliant (except fonts loaded via review widgets & custom codes).
Go to Funnel Settings: Navigate to the settings of the funnel working on.
Enable Compliant Fonts: Locate and toggle on the 'GDPR Compliant Fonts' option.
