When you first set up your Facebook Ads account with Ad Manager, you are asked to grant LeadConnector permissions to access and manage the Facebook Business account where you'll run campaigns.
To give permissions from Ad Manager :
Go to "Marketing" > "Ad Manager".
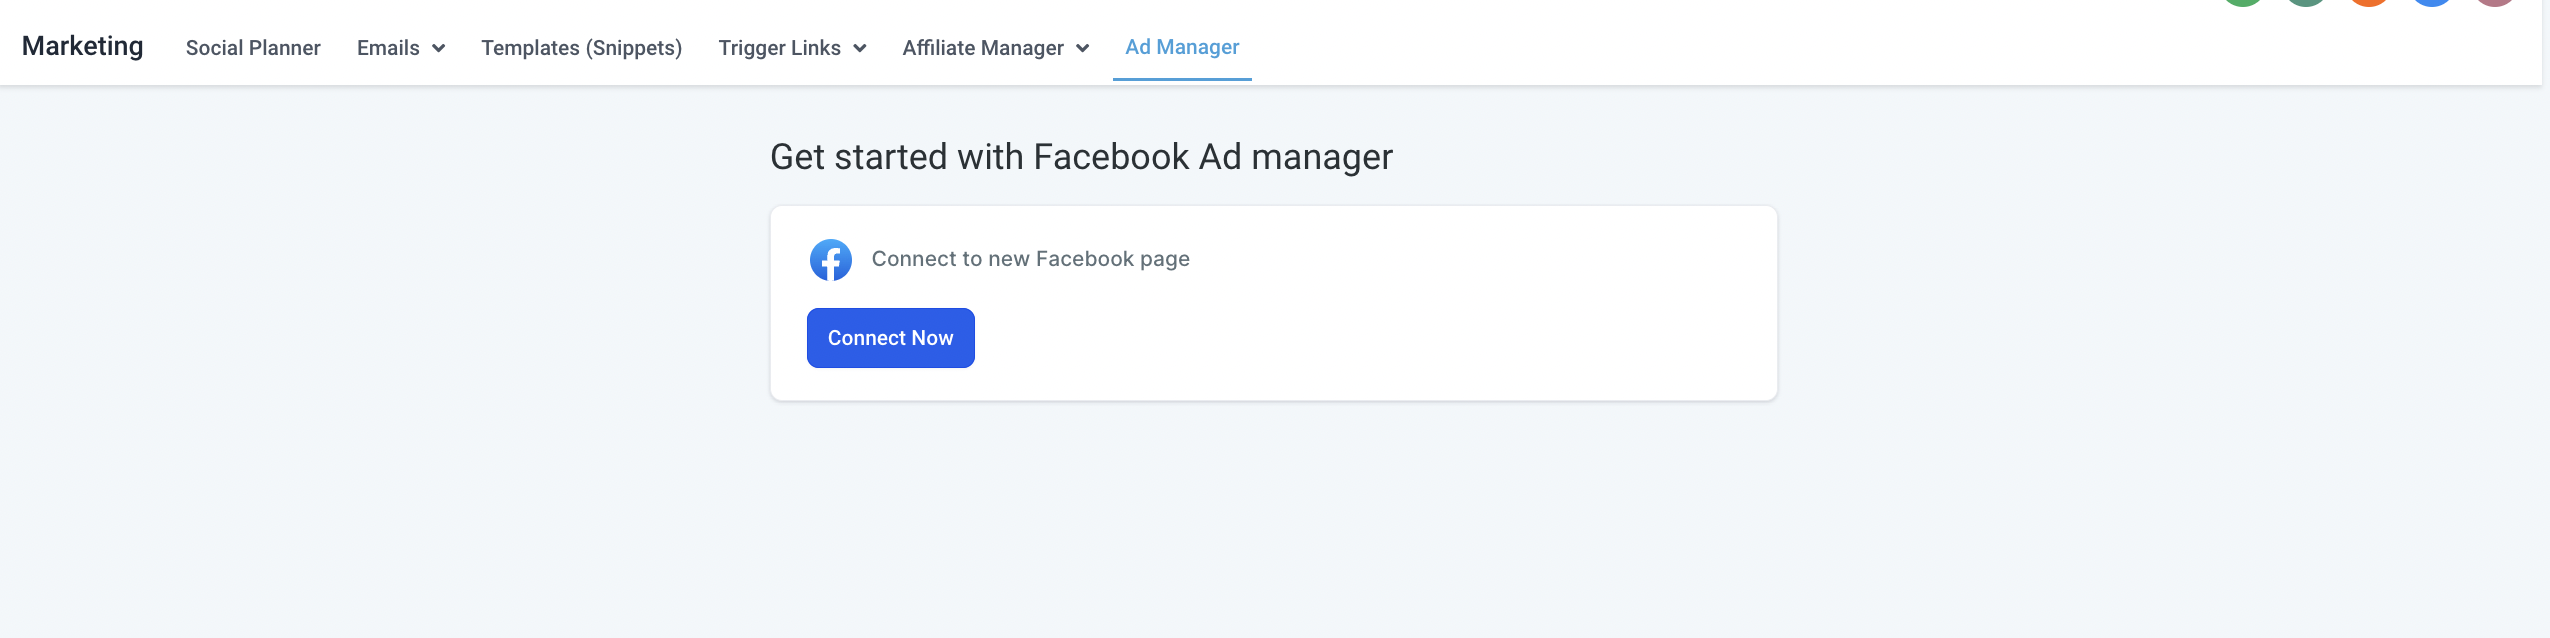
Choose the option to Connect Now or choose the pages you want to connect to.
Note: If you have already connected the account in "Account Settings" > "Integration", it will show all the pages where you are the admin.
By clicking Connect to Facebook, you will need to enter your Facebook username and password, as well as grant the necessary permissions. Check that all toggles and checkboxes are enabled.
When the LeadConnector app has been granted permissions, the next step is identifying the pages you want to connect. If you have multiple business pages, you need to do this.
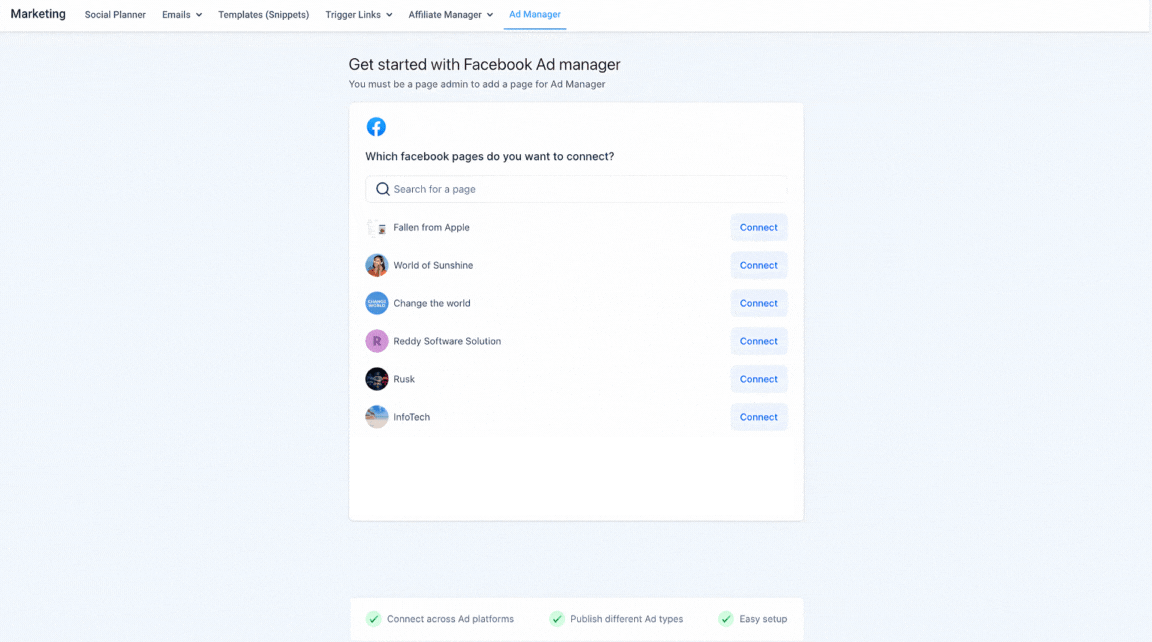
In order to set up a campaign, Ad Manager requires permission from the Facebook Business page where you wish to run the ads. If the page does not appear while you connect the page in Ad Manager, some permissions are missing or you do not have admin permissions.
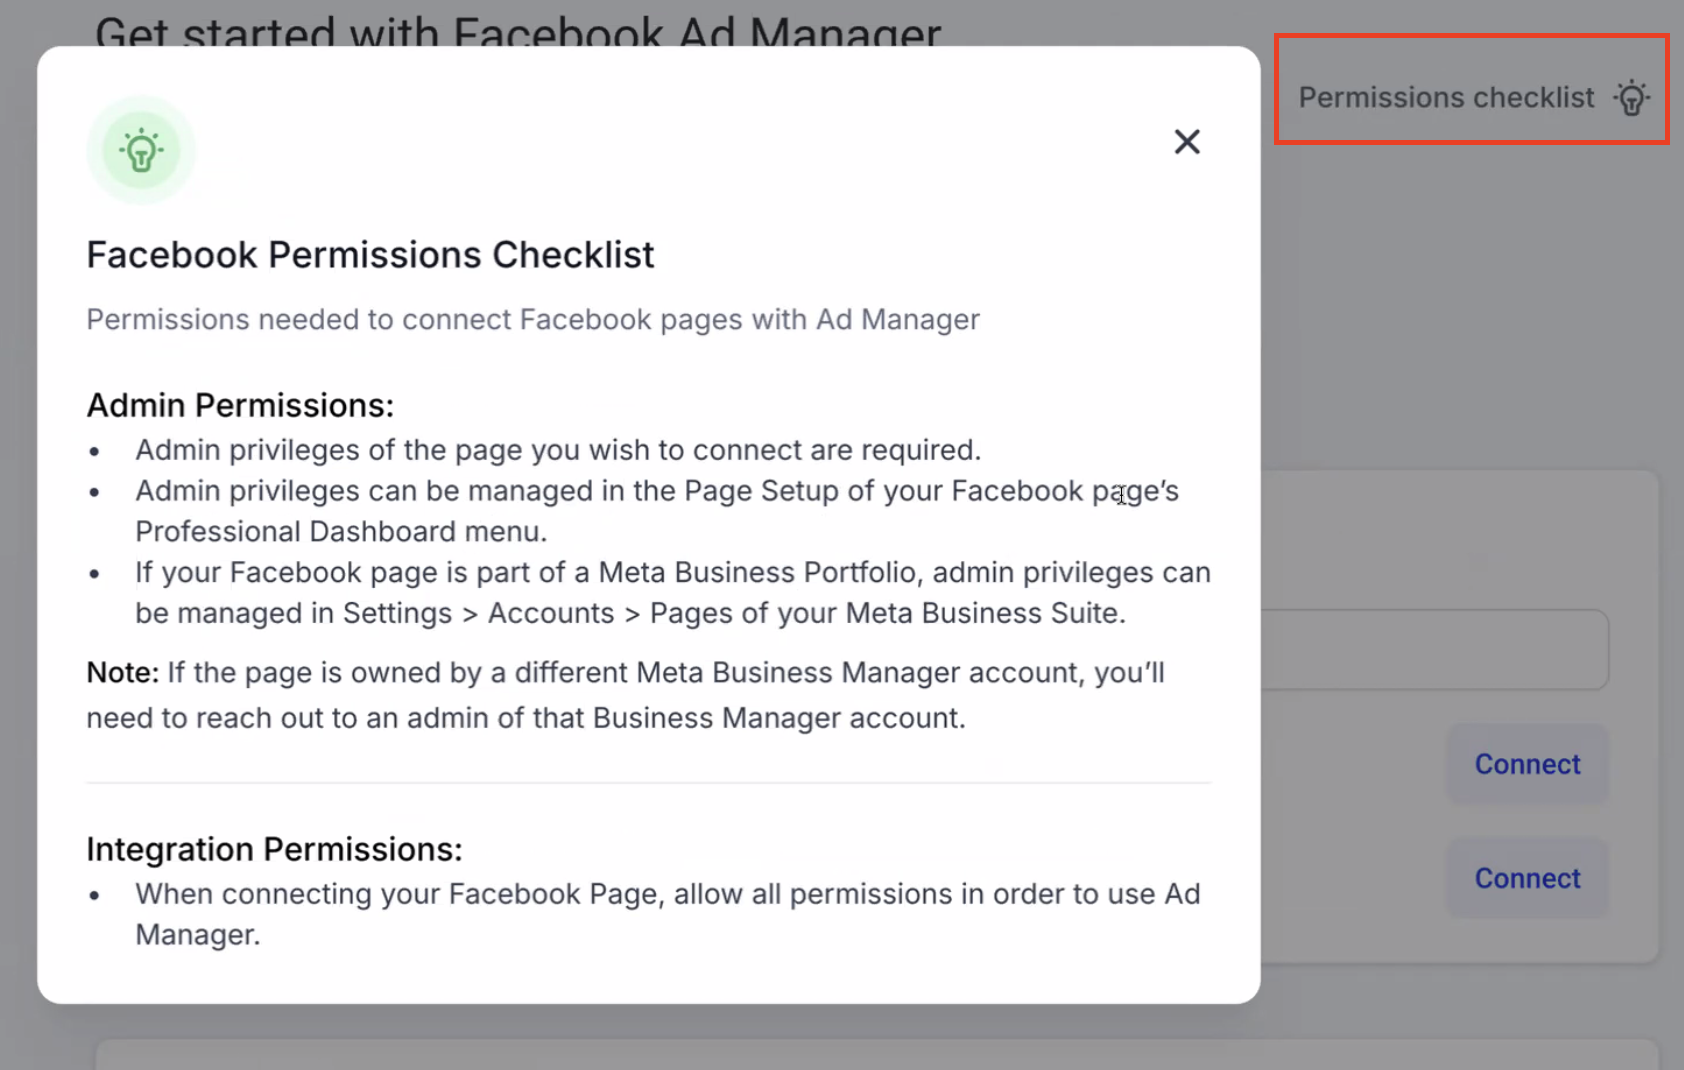
Click on "Permission Checklist" on the corresponding screen to refer to the permission checklist. LeadConnector needs to have all the mentioned permissions in order to use Ad Manager smoothly.
To give Facebook page permissions from your Facebook account:
Sign in to your Facebook account where you created the relevant Pages.
Click the dropdown arrow in the top bar on the right-hand side.
Click "Settings & Privacy".
Click "Settings".
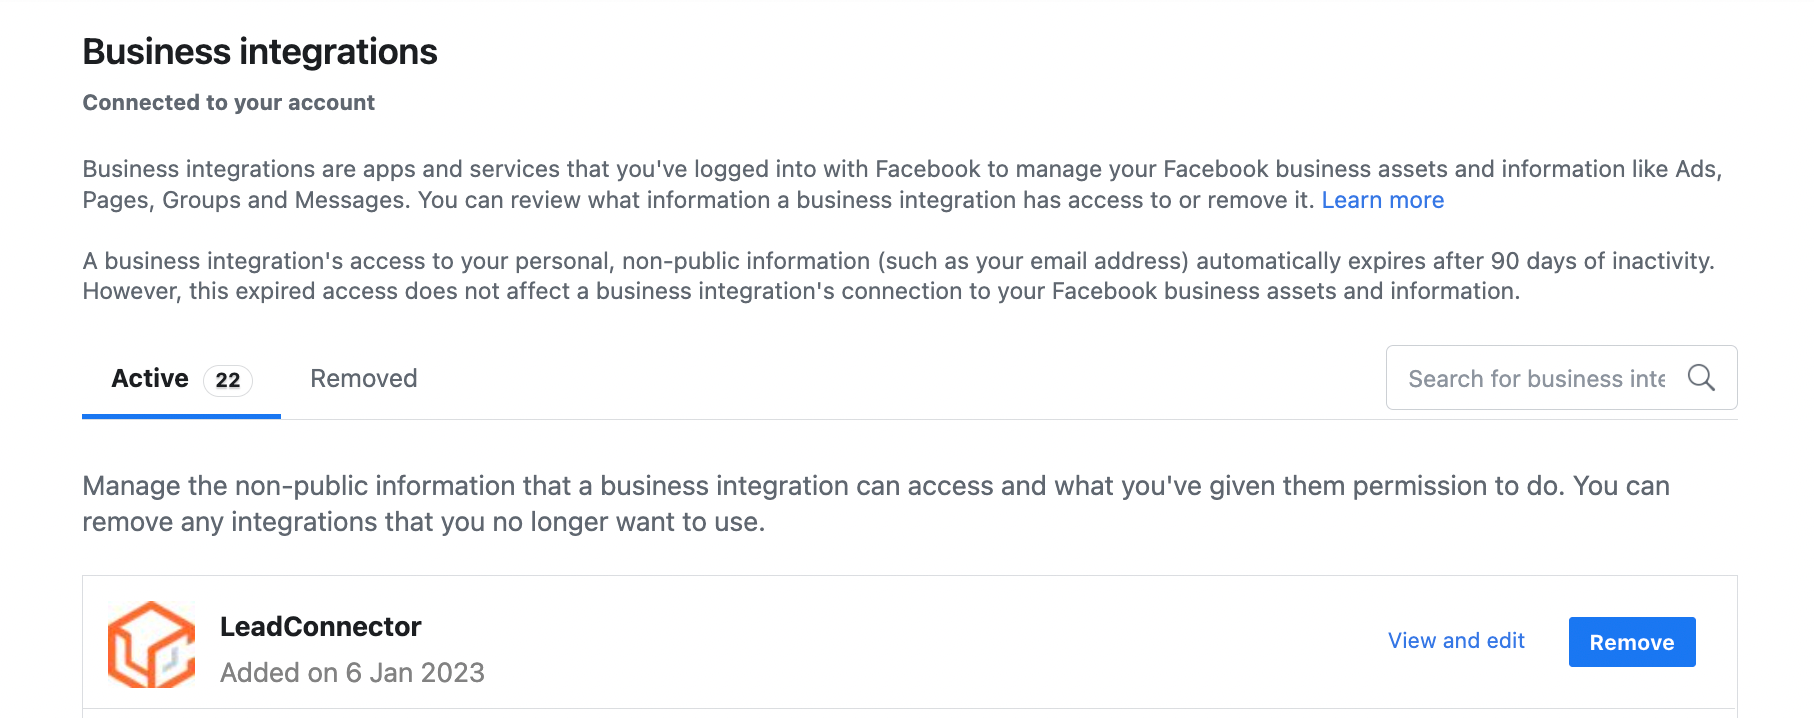
Click "Business Integrations" on the left side.

Select the "Active or Removed" tab at the top to search for LeadConnector business integrations.
Click "View and Edit" next to the relevant LeadConnector permission.
The settings can be adjusted by checking or unchecking the boxes next to your information. By checking the checkboxes or toggle the permissions ON in the view and edit dialog, LeadConnector is able to work seamlessly with Ad Manager.

Click Save when you're done.
Note - If you remove mandatory permissions, your Facebook account will be disconnected. You must reconnect before editing or starting your first campaign. Live ad campaigns will continue as usual.
- Make sure you have the correct admin permissions
To set up and launch an Ad campaign, you need two admin permissions from Facebook.
You need to be the admin of Facebook page. To give permissions to the Facebook page
Sign in to the relevant Facebook account.
From your News Feed, click Pages in the left menu.
Go to your Facebook page and click Manage

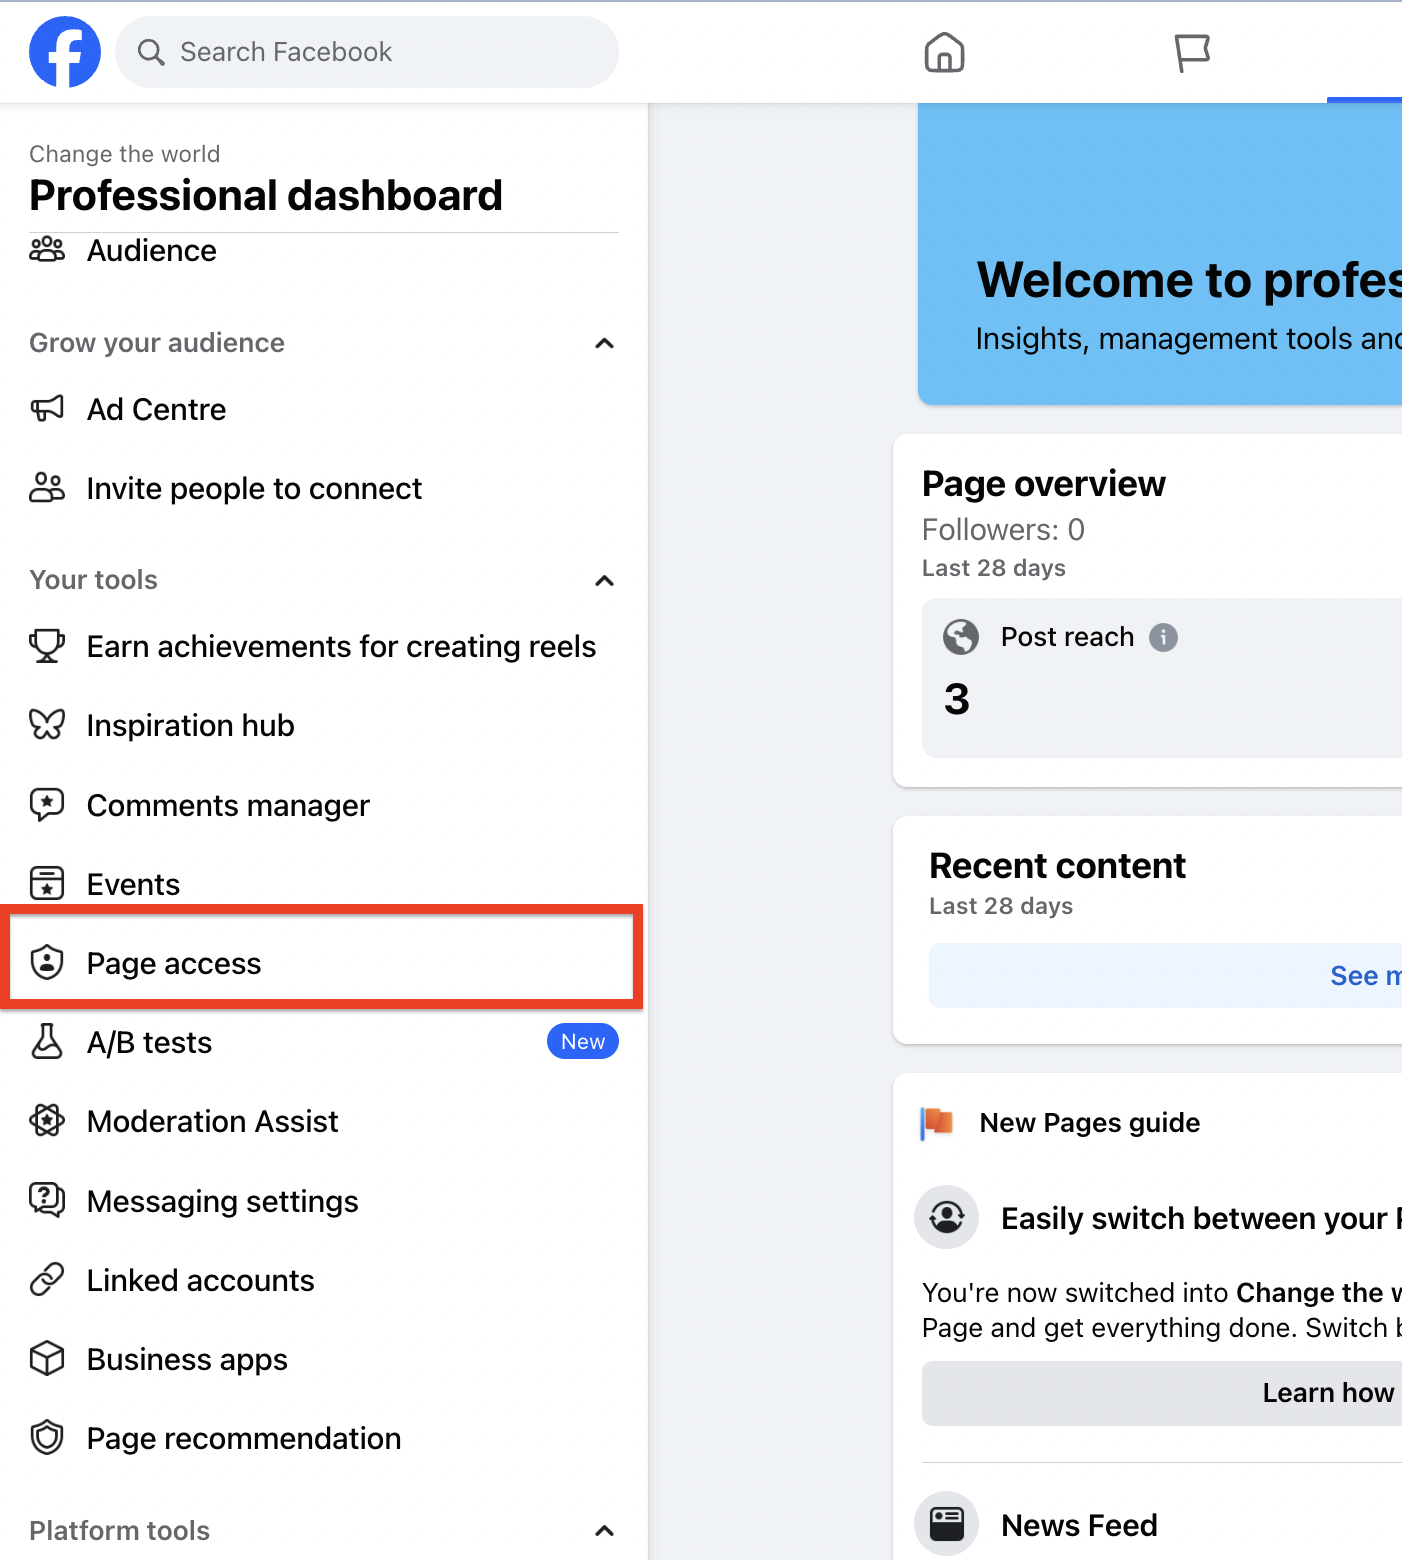
Go to the Page Access option in Left hand panel.
Begin typing a name or email in the text box and select the relevant person.
Click "Editor" to select a role from the drop-down menu and Click "Add".
Enter your password to confirm the new permission.
Note: If you aren't Facebook friends with the person you're adding as page admin, they must first accept your invite before they can manage the Facebook page.
