1. Real-Time Customer Support
Users get instant answers to their questions, reducing wait times and improving the overall customer experience.
Issues can be resolved immediately, enhancing customer satisfaction and loyalty.
2. Increased Engagement and Conversions
Chat widgets encourage interaction by offering help when customers need it, helping to prevent cart abandonment and increase conversion rates.
They can proactively engage users based on behavior, such as spending a long time on a product page.
3. Improved Efficiency and Cost Savings
Automating responses to common questions through a chatbot reduces the volume of queries that need human support, saving on labor costs.
By handling multiple conversations at once, chat widgets improve support efficiency.
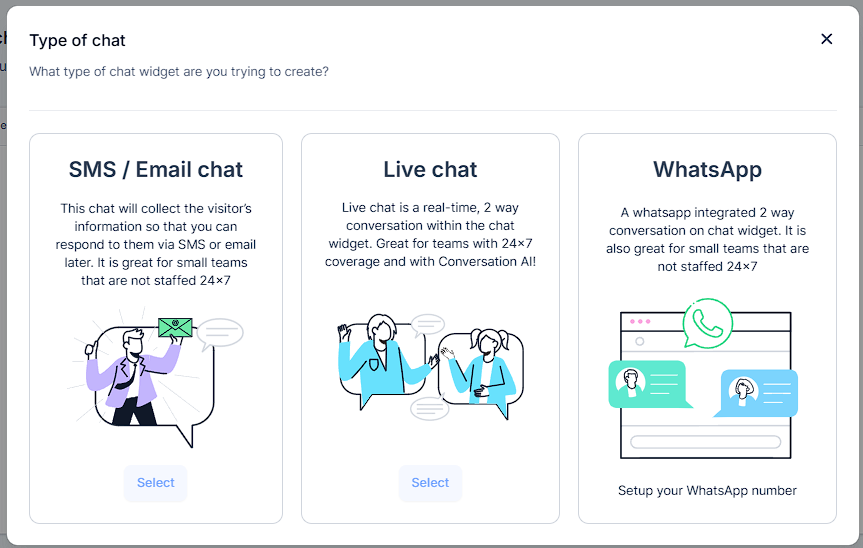
1. Email and SMS Chat - This chat will collect the visitor’s information so that you can respond to them via SMS or email later. It is great for small teams that are not staffed 24x7.
2. Live Chat - Live chat is a real-time, 2 way conversation within the chat widget. Great for teams with 24x7 coverage and with Conversation AI installed.
3. WhatsApp Chat - A WhatsApp integrated 2 way conversation on chat widget. The user needs a WhatsApp approved number. It is also great for small teams that are not staffed 24x7.
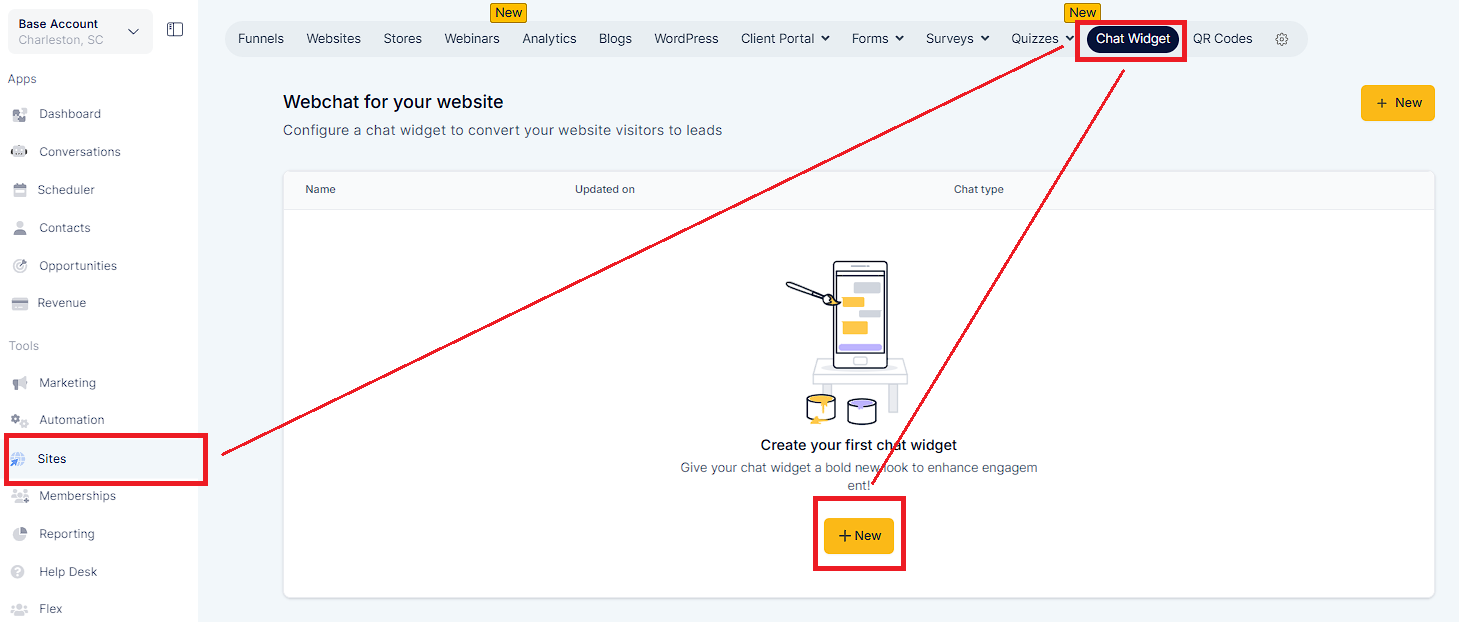
Go to Sites > Chat Widget, click on the New button to start the chat widget.
Select the type of the chat widget, the user wants to add on landing page.
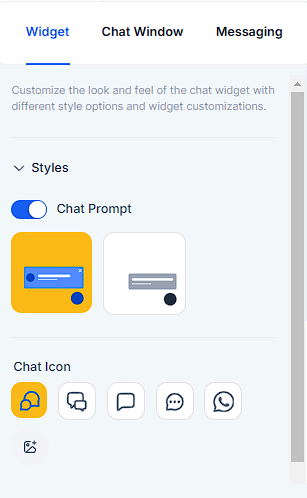
There will three settings to deploy the chat widget.
Widget - User selects the themes, icons and welcome messages. User can also select the avatar and placement of chat widget. User can configure different sizes of chat widget.
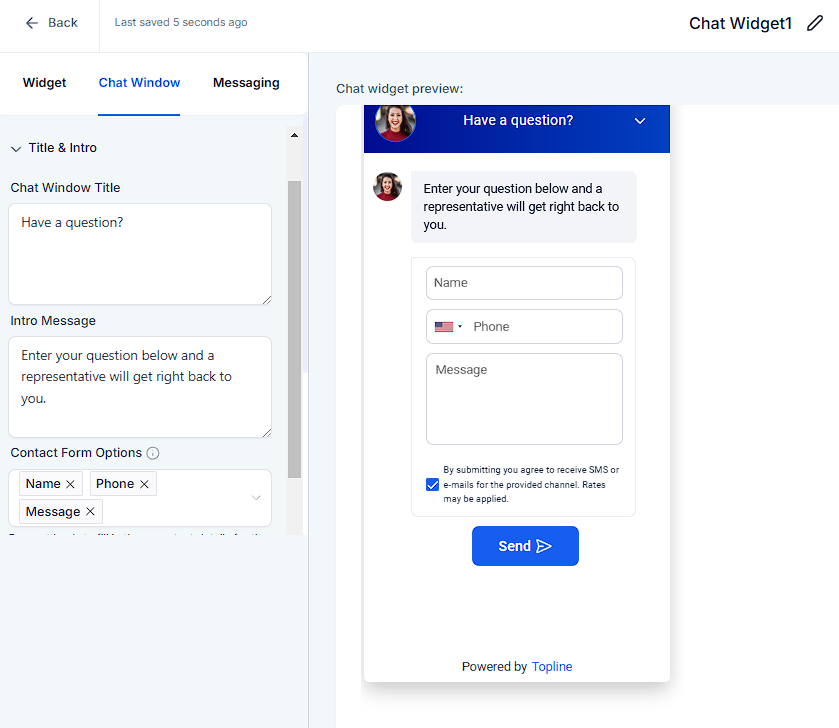
Chat Window - Chat window allows user to customize the title, intro message and contact form customizations. It also allows business to add their own brand url in the chat widget for more visibility and meet any compliance regulations with checkboxes.

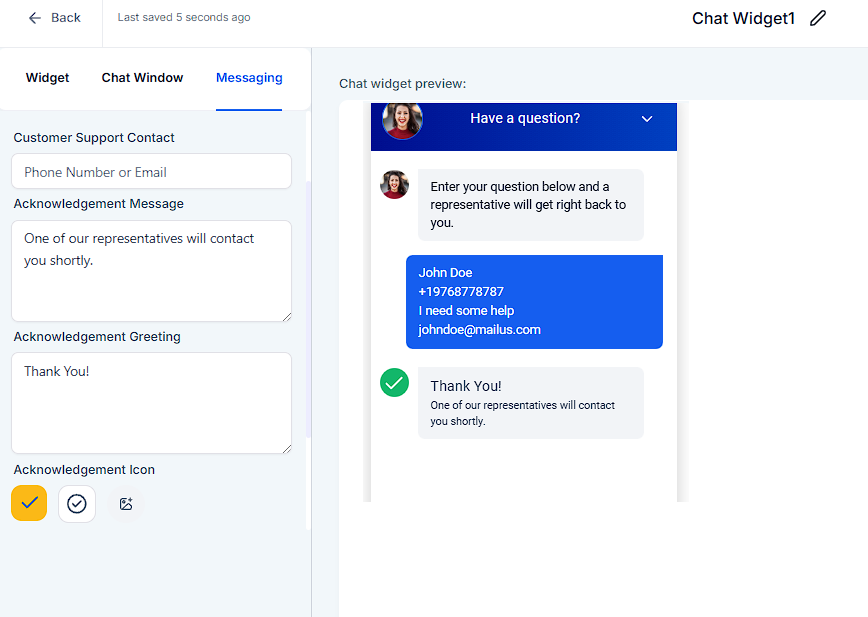
Messaging - Here the user configure the acknowledgement of message and icons. They can also configure the language of chat widget.
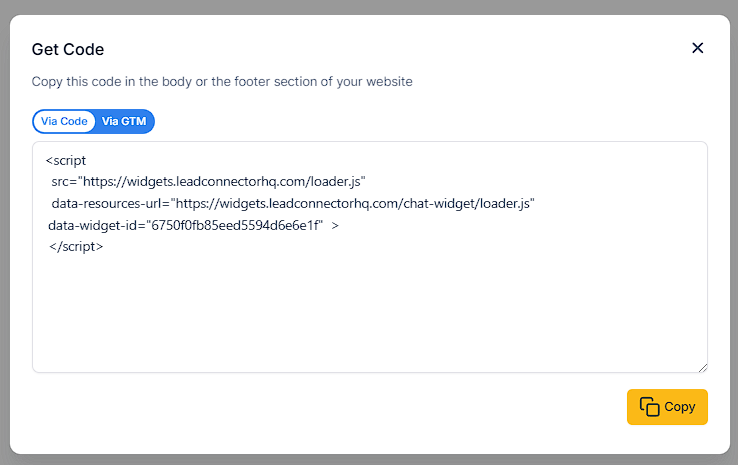
Once the Chat widget is configured, the user can copy the code for landing page or Google tag manager and add it in WordPress. User can go to Funnels, Websites, Blogs to select the chat widget type to directly get added.
How to Add the Chat Widget to Funnels and Websites
Add WhatsApp Chat Widget on Landing Pages
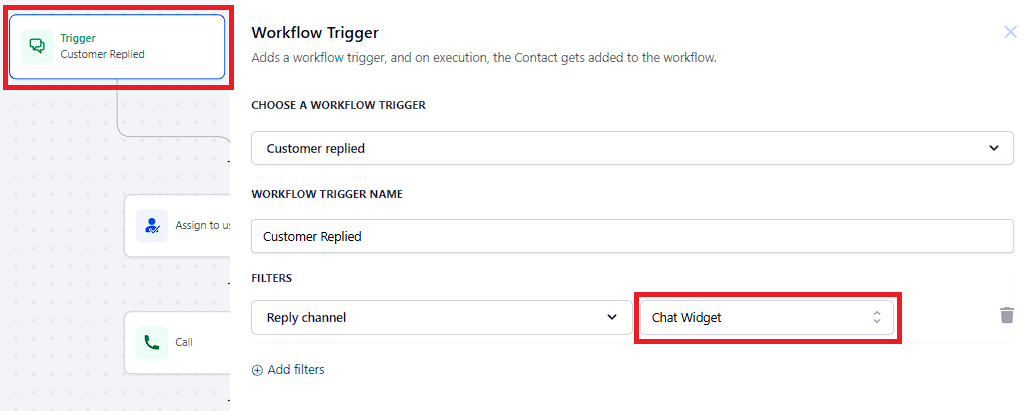
Click the "+ Add New Trigger" and select the trigger or type Customer Replied. The "Customer Replied" trigger initiates a workflow when a customer replies to a message. This is useful for automating follow-up actions, notifications, and responses based on customer interactions.
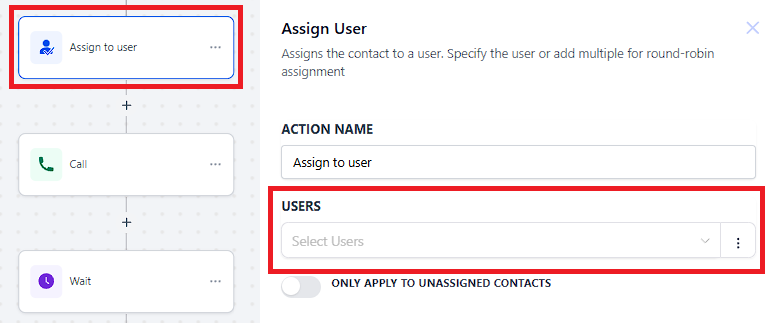
Click the "+" and select the action or type Assign User. This action assigns a contact to a specific user or multiple users within the system.
Click the "+" and select the action or type Assign User. The Call action within a workflow is used to initiate a call to either the assigned user or a designated number. This feature includes playing a whisper message, which provides information before the call connects.
How to Configure
Add the Call Action: In your workflow, select the Call action from the list of available actions.
Set Action Name: Provide a name for this action, such as "Customer Support Call."
Enter Whisper Message: Type the message you want the receiver to hear before connecting. Use custom values if necessary.
Set Call Timeout: Define the time in seconds for the call to attempt connection before ending.
Configure Advanced Settings: Decide whether to enable voicemail detection or require a keypress to connect the call.
Save the Configuration: Once all settings are configured, save the action.

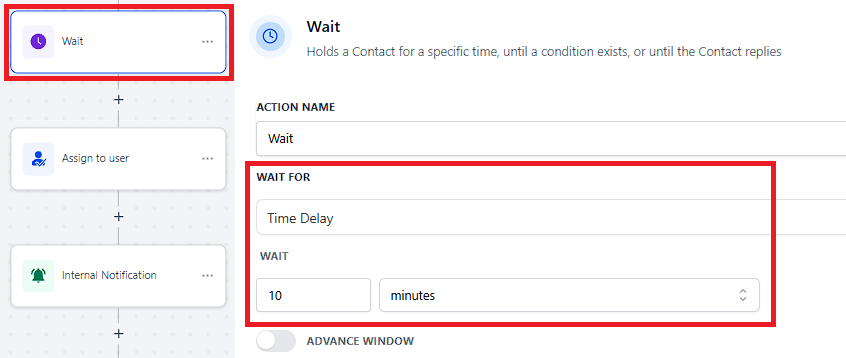
Click the "+" icon and select the action or type Wait. This action holds a Contact for 10 minutes.
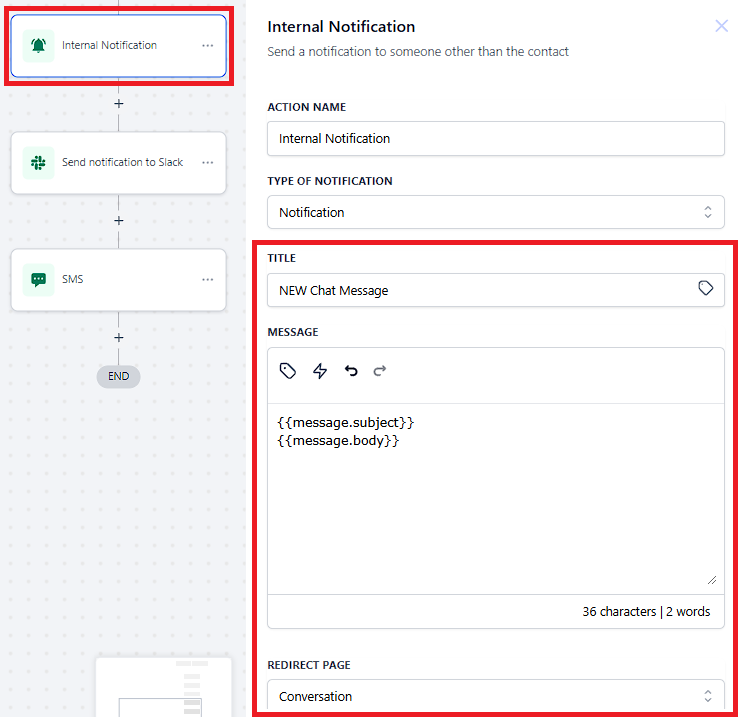
Click the "+" icon and select the action or type Internal Notification. This action sends in-app notifications to users based on specific triggers within a workflow.
Click the "+" icon and select the action or type Slack. The "Slack Message" action enables you to send notifications directly to Slack, whether it's to a specific user, a private channel, or a public channel.
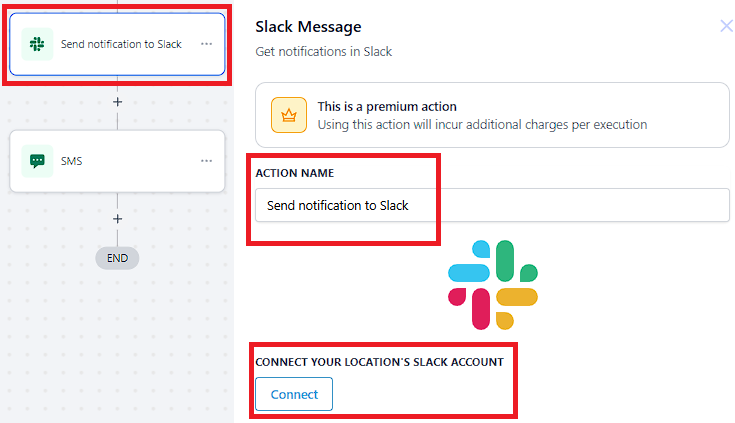
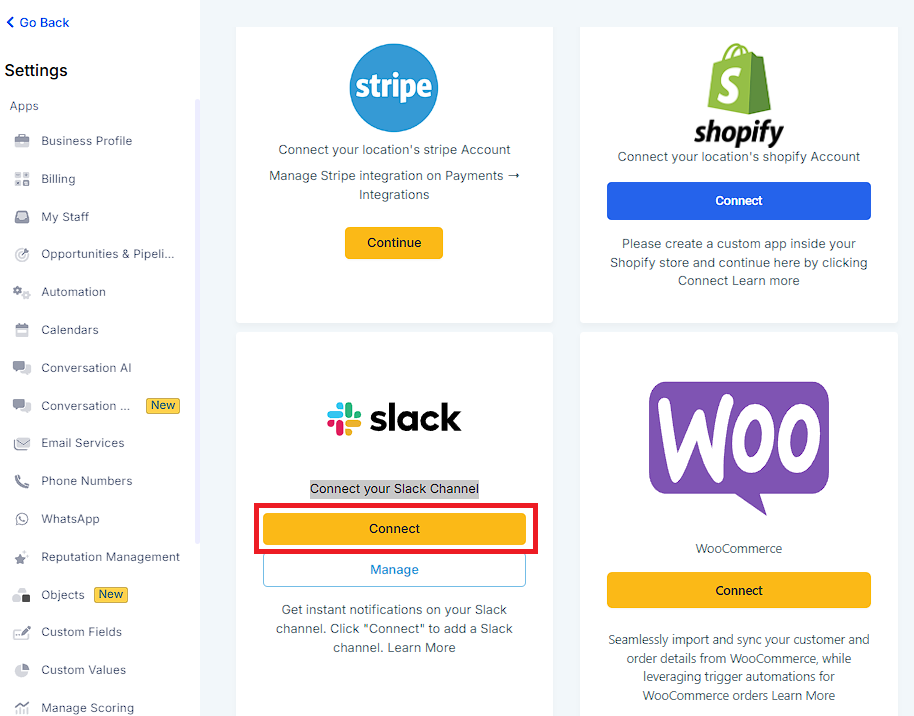
1. Click Connect
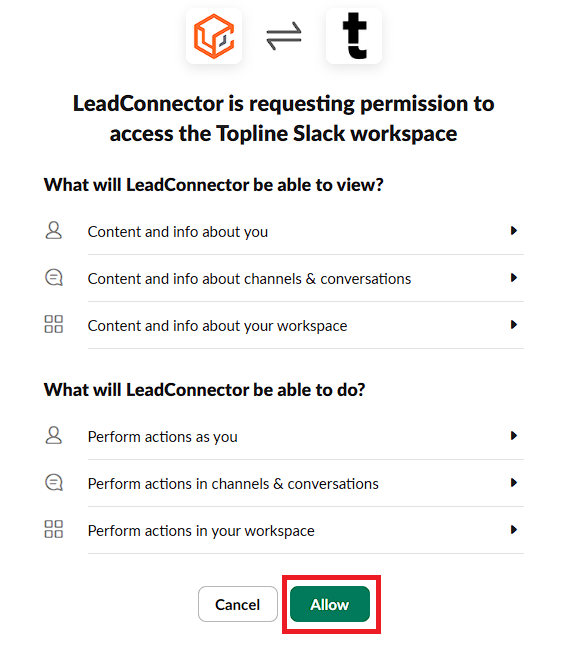
2. Click Allow
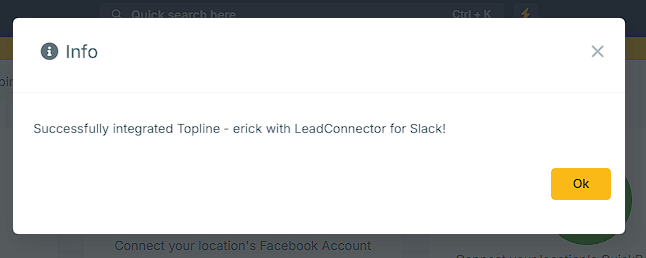
3. Successfully Integrated, click "Ok"
Choose an Account: Select the Slack account from the dropdown list where you want the message to be sent. This is required to ensure the message is delivered to the correct workspace.
Event: Select the type of event you want to trigger the message. Options include:
Send Direct Message to a User: Choose this option to send a private message to a specific Slack user.
Send Private Channel Message: Select this option to send a notification to a designated private channel.
Send Public Channel Message: Use this option to send a notification to a public channel where everyone in the workspace can see it.
Suppose you want to send a Slack notification to the "Marketing Team" channel whenever a new lead is added to the system and tagged with "High Priority."
Workflow Configuration Example:
Trigger: Contact Added
Filters: Tag = High Priority
Action: Send notification to Slack
Choose an Account: Your account
Event: Send Private Channel message
Channel: #Marketing Team
Message: A new high-priority lead has been added. Please check the details.
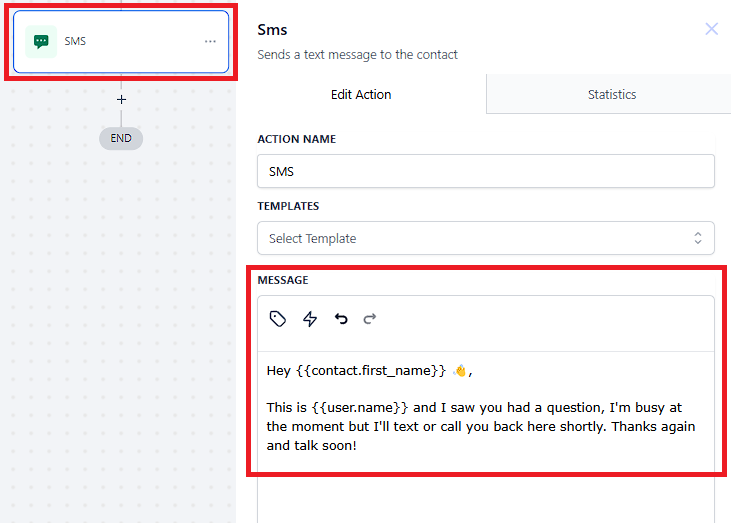
Click the "+" icon and select the action or type SMS. The Send SMS action enables direct communication with your contacts through text messages.