You can use this workflow to organize and collect information submitted by users through your website. By automating the handling of new form submissions, you can ensure that important data is recorded accurately and promptly, allowing your team to respond promptly and efficiently. By doing this, manual tasks can be reduced and user experiences can be improved.
Navigate to your Funnel or Site
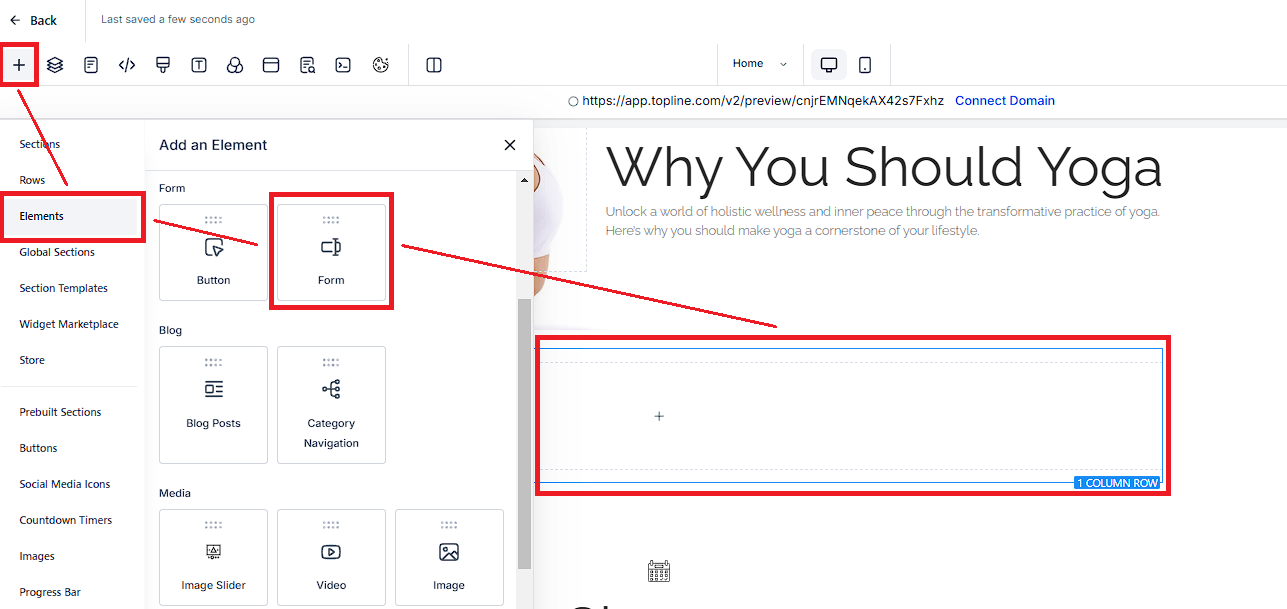
To add a form, click "+" > "Elements" > "Forms" and drag onto the page.
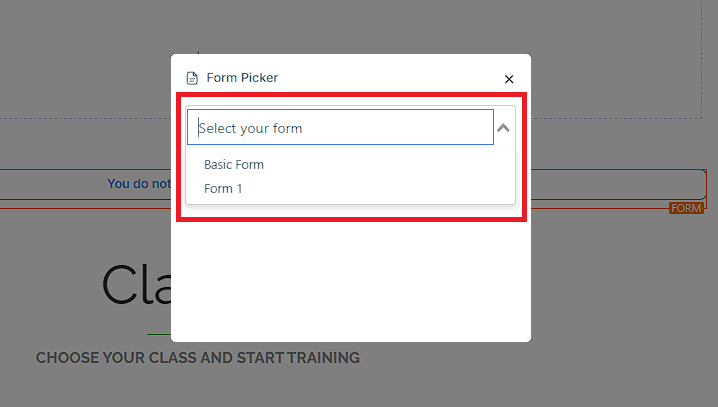
Select your form.
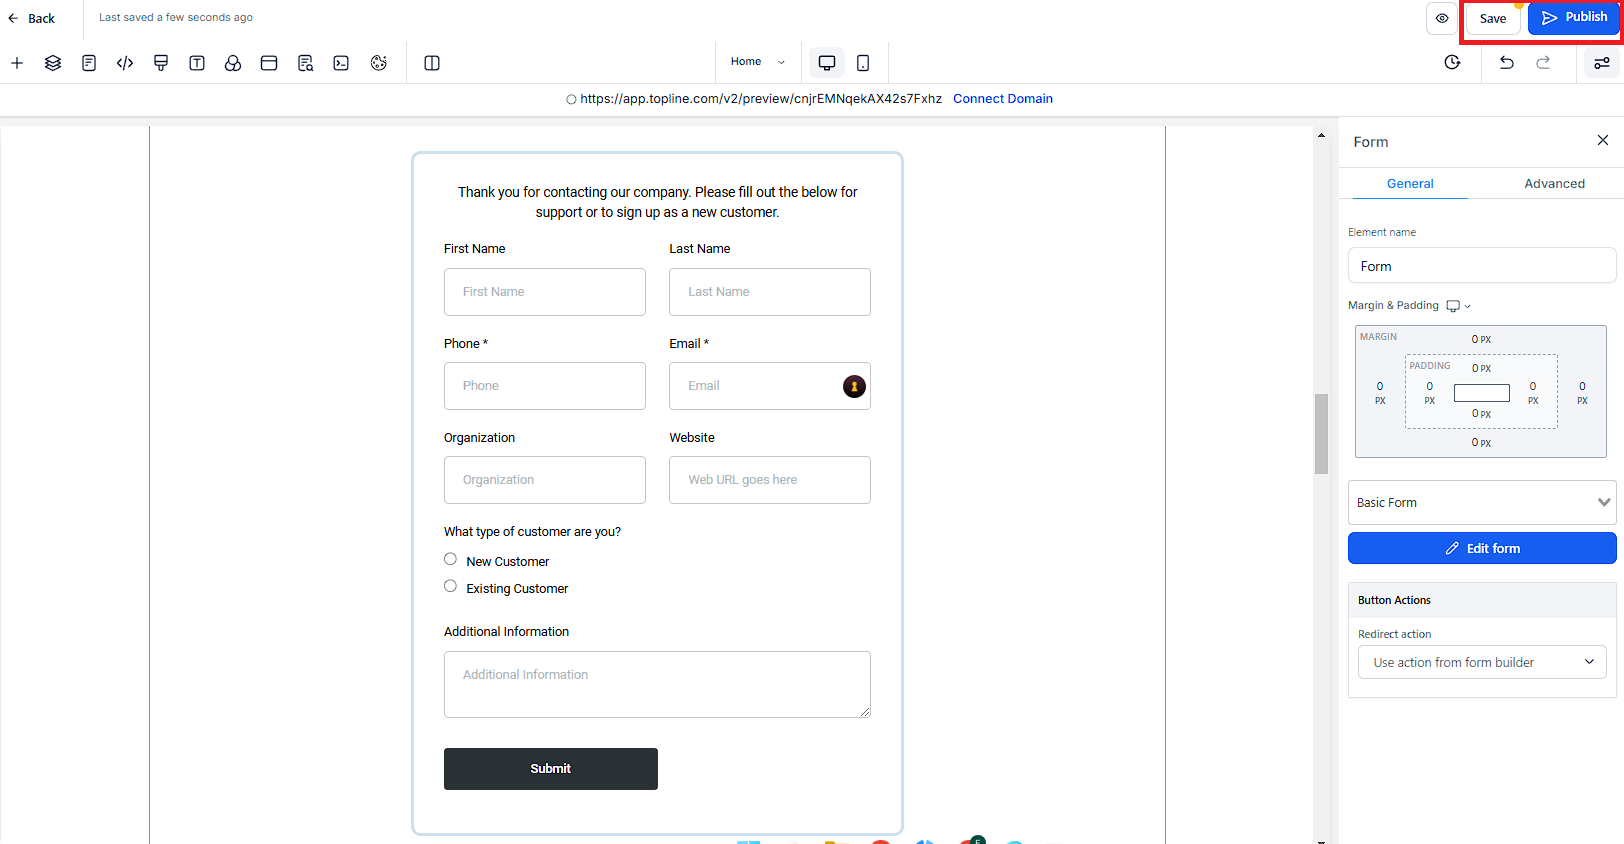
"Save" and "Publish".
How To Create A Custom Website
How To Build, Edit, And Utilize Forms
Understanding the Difference Between One-Step and Two-Step Order Forms

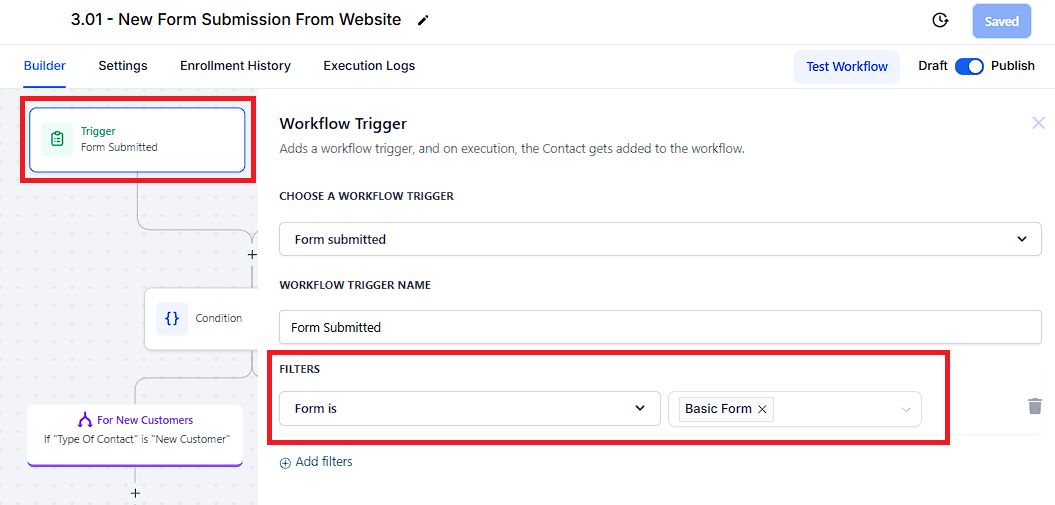
Click the "+" icon and select the action or type Form Submitted. In this case, the trigger is set to activate when a specific form is submitted.
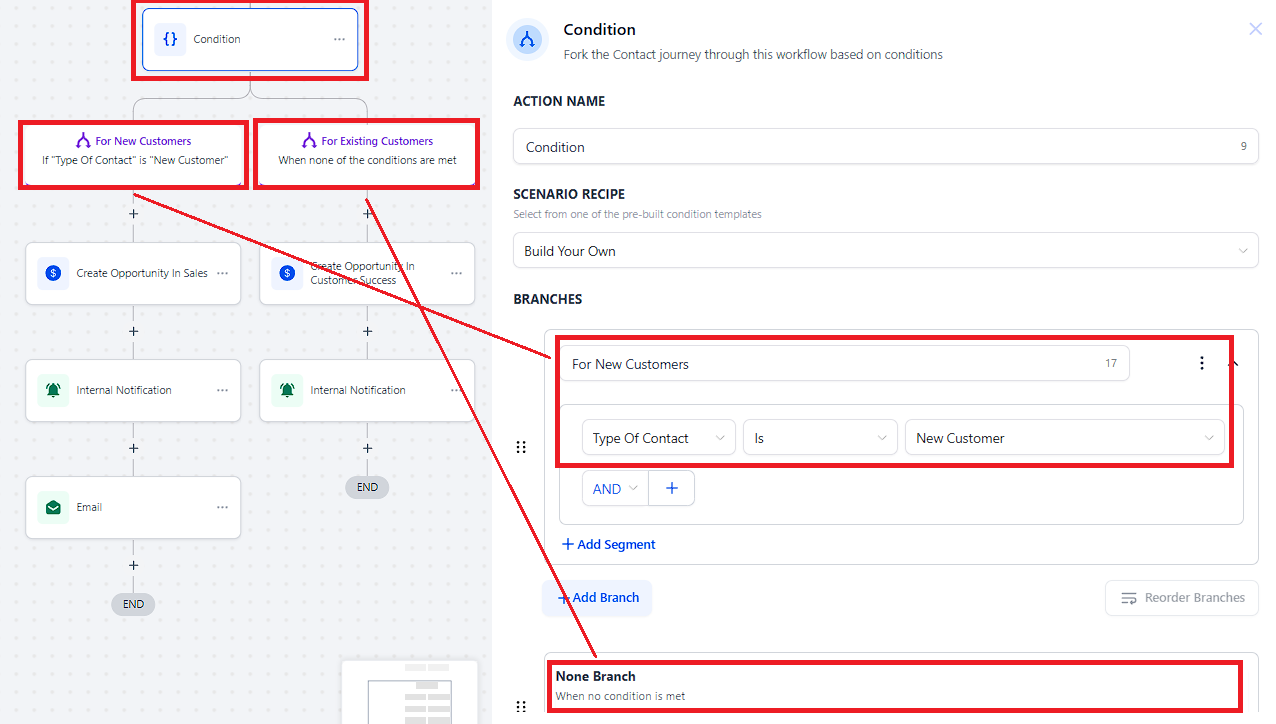
Click the "+" icon and select the action or type If/Else to add the this action. The "If/Else Condition" in your automation workflow allows you to fork the contact's journey based on specific conditions.
Create or Update Opportunity
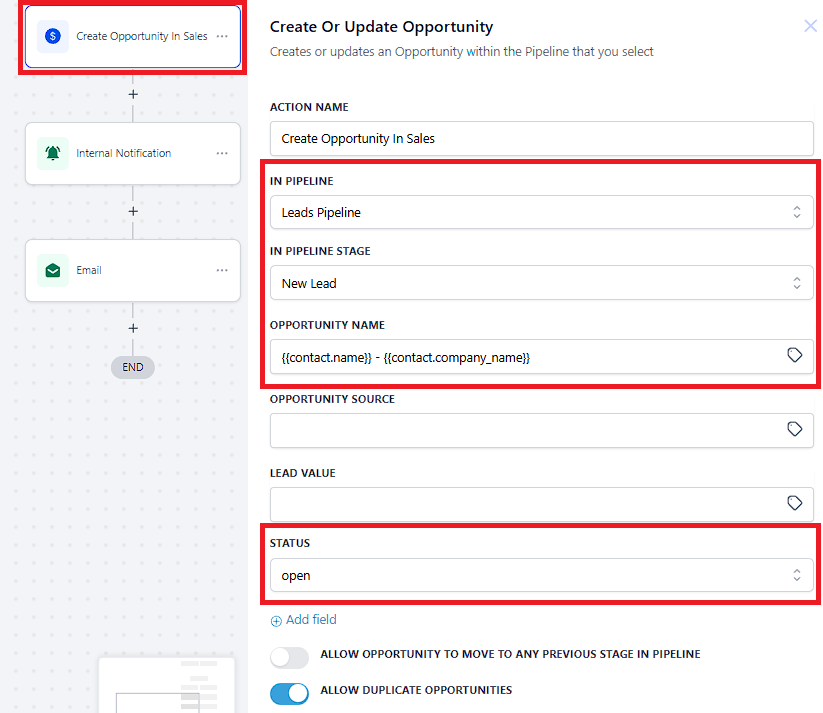
Click the "+" icon and select the action or type Create or Update. The In Pipeline and Pipeline Stage will be changed to "Leads Pipeline" and "New Lead".
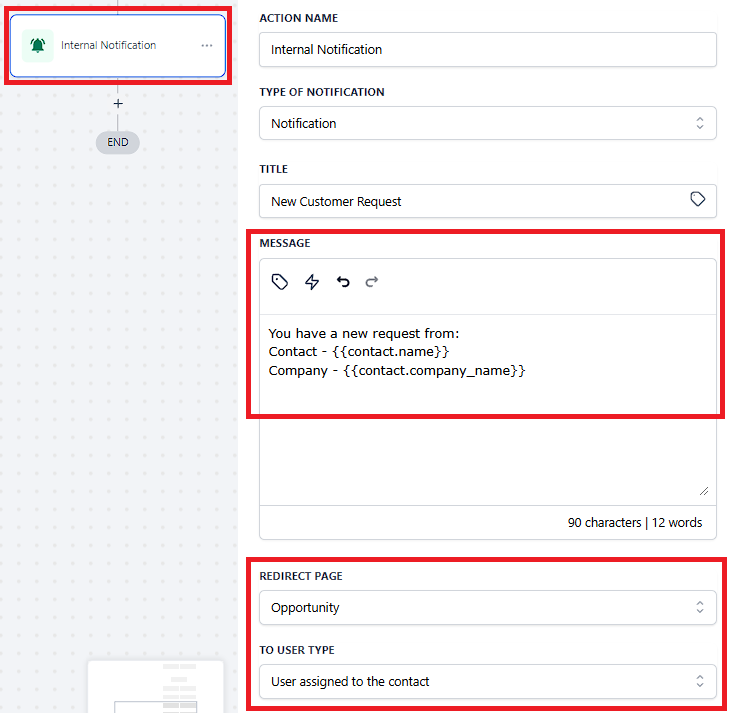
Internal Notification
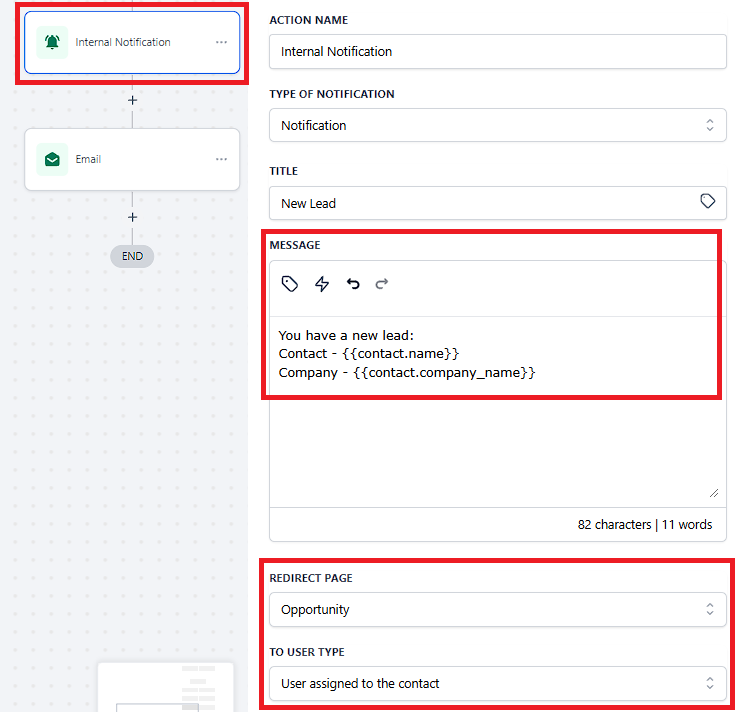
Click the "+" icon and select the action or type Internal Notification. This will send a notification that will appear on the notification icon and redirect user to Opportunity page.
Email Confirmation
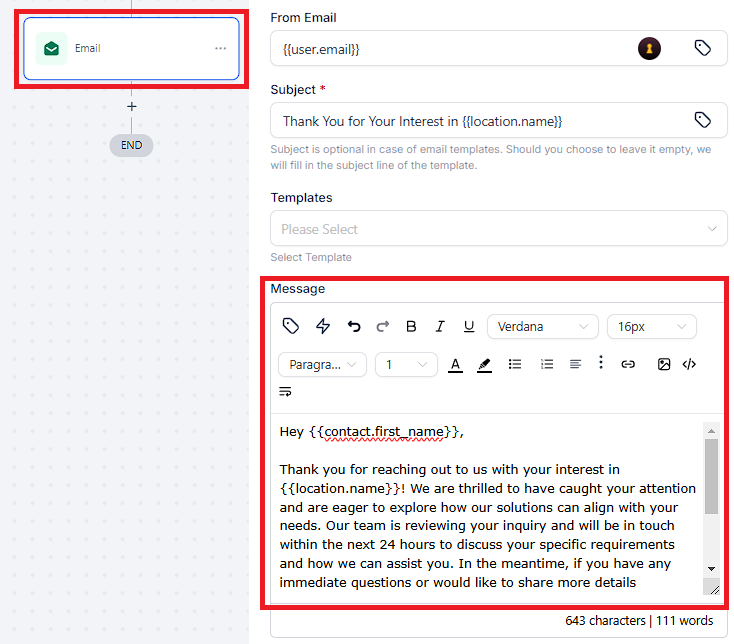
Click the "+" icon and select the action or type Email. The "Email" action will be activated.
Create or Update Opportunity
Click the "+" icon and select the action or type Create or Update. The In Pipeline and Pipeline Stage will be changed to "Customer Success" and "New Ticket".

Internal Notification
Click the "+" icon and select the action or type Internal Notification. This will send a notification that will appear on the notification icon and redirect user to Opportunity page.
1. The "Form Submitted" trigger activates a workflow whenever a specified form is submitted.
2. Upon activation of the If/Else Condition Action, it will have 2 outputs that depend on certain conditions.
New Customer
- Create opportunity to New Lead
- Sends an internal notification
- Email Confirmation Sent
Existing Customer
- Updates opportunity to Customer Success
- Sends an internal notification

