We use this automation to ensure that all contact information is captured for new contacts. By configuring relevant actions and filters, you can ensure a smooth onboarding process for new contacts.
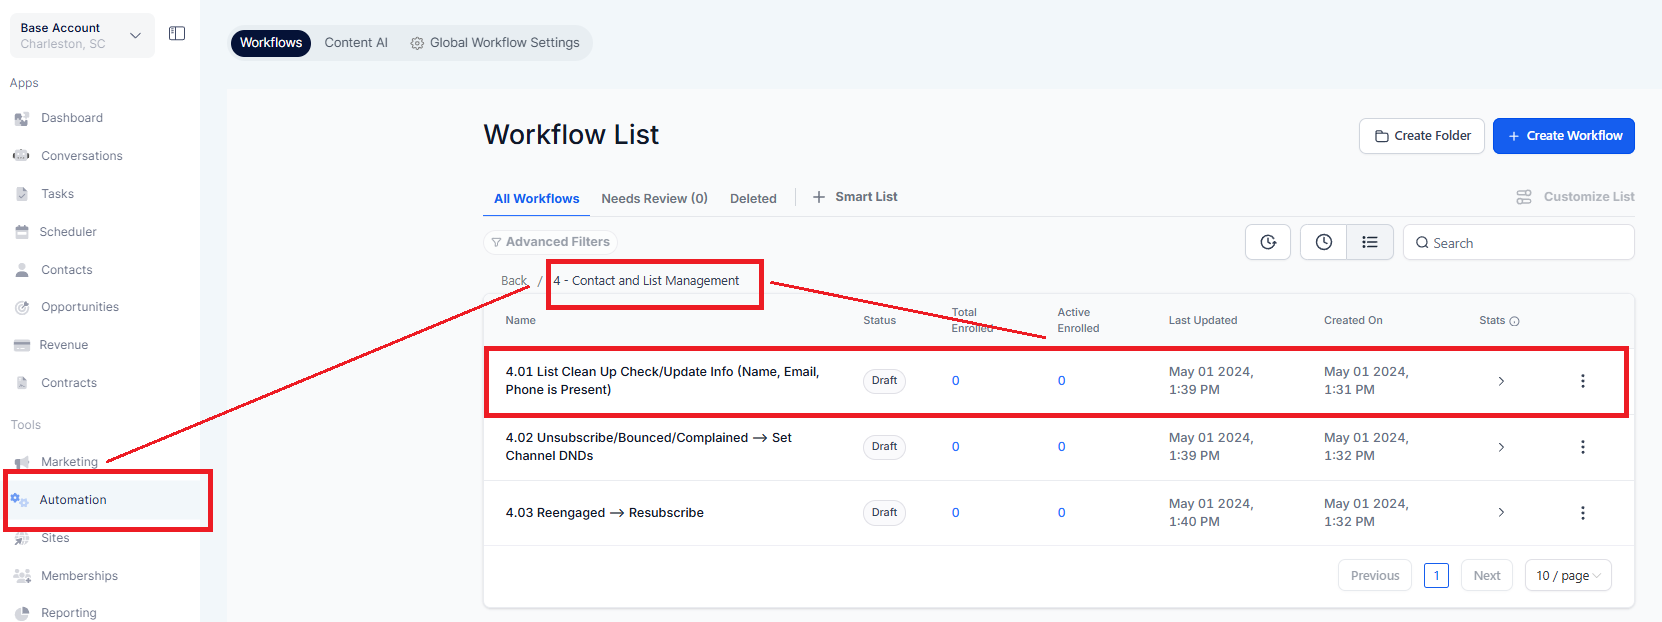
Click the "+" icon and select the action or type Contact Created. In this case, the trigger is set to activate when a contact is created.
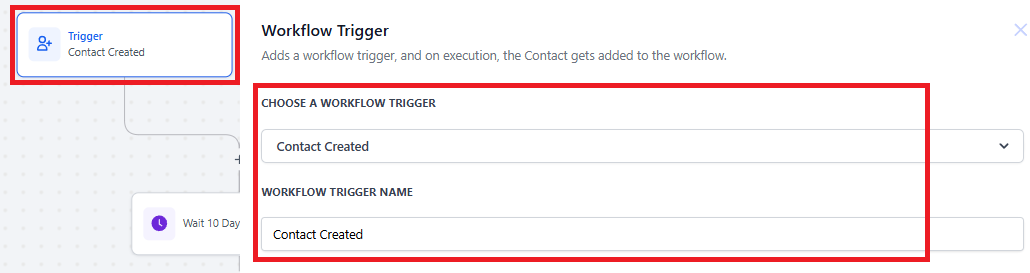
To add this action, click the "+" icon and select or type Wait. This holds a Contact for 8 days before proceeding to the next action.
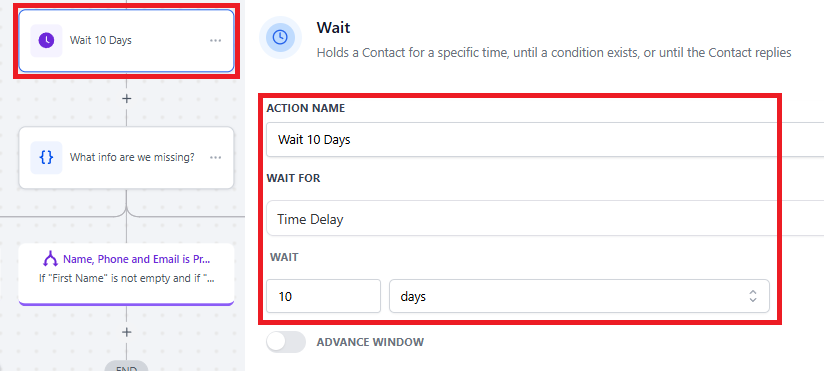
Click the "+" icon and select the action or type If/Else. The "If/Else Condition" action in your automation workflow allows you to fork the contact's journey based on specific conditions.

If the condition is "Name & Phone is Empty".
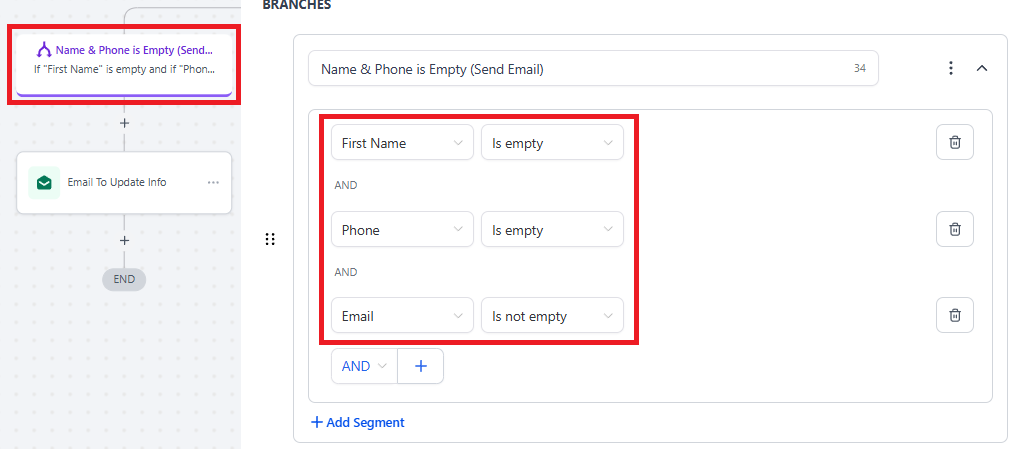
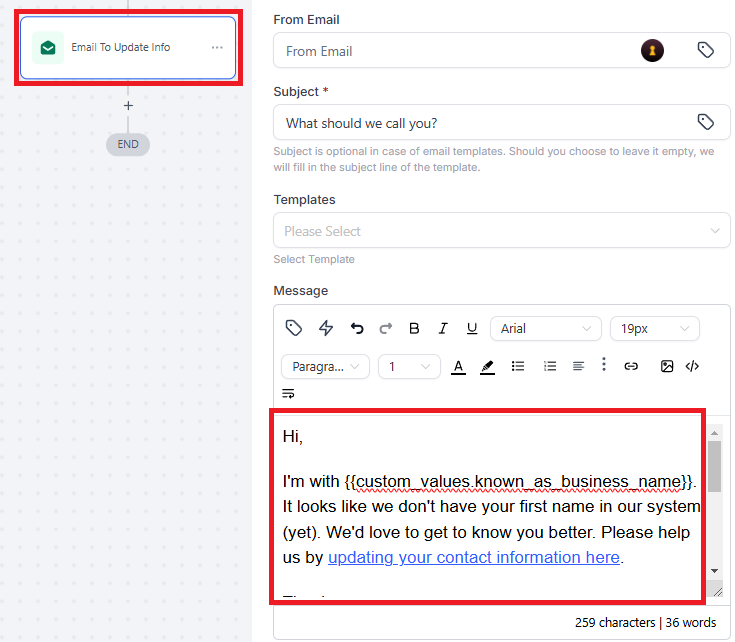
Send Email
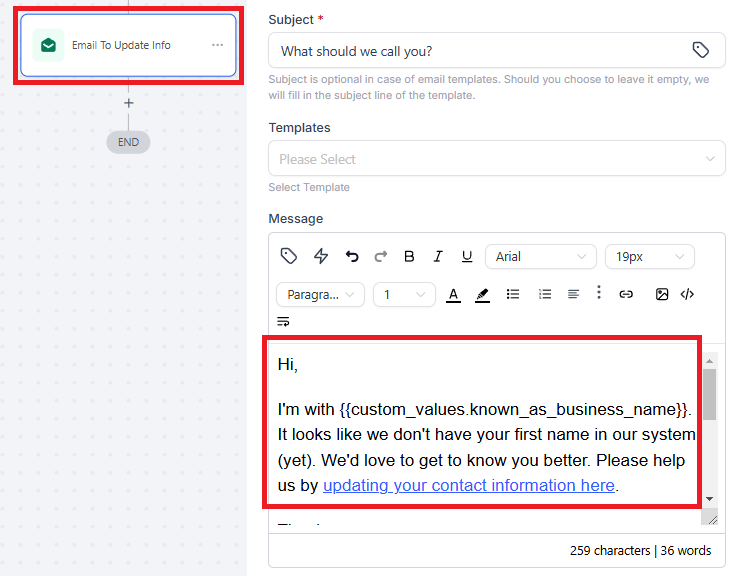
To add this action, click the "+" icon and select or type Email. This action will send an email request to update the contact info.
If the condition is "Name & Email is Empty".
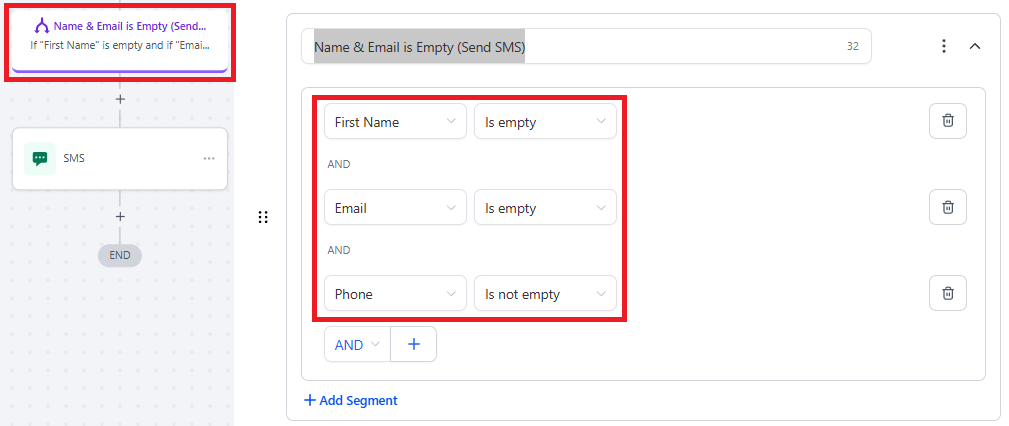
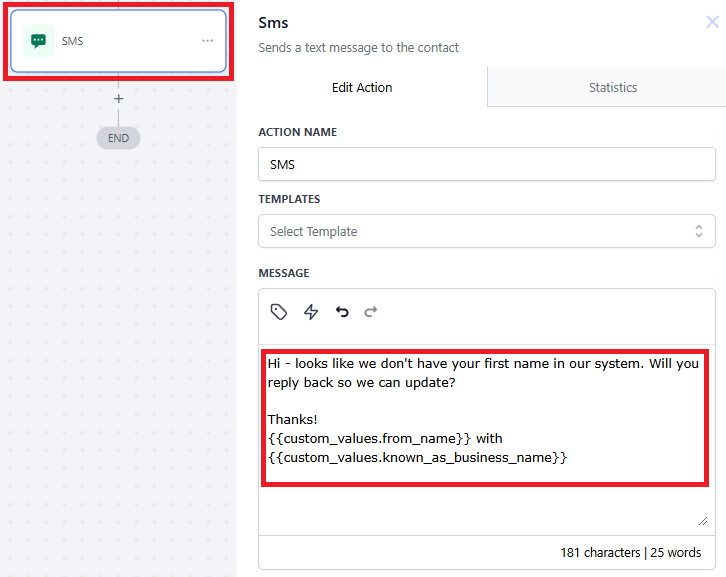
Send SMS
To add this action, click the "+" icon and select or type SMS. This action will send a follow up SMS to the contact to update his name and email address.
If the condition is "Phone and Email is Present, Name is Empty".
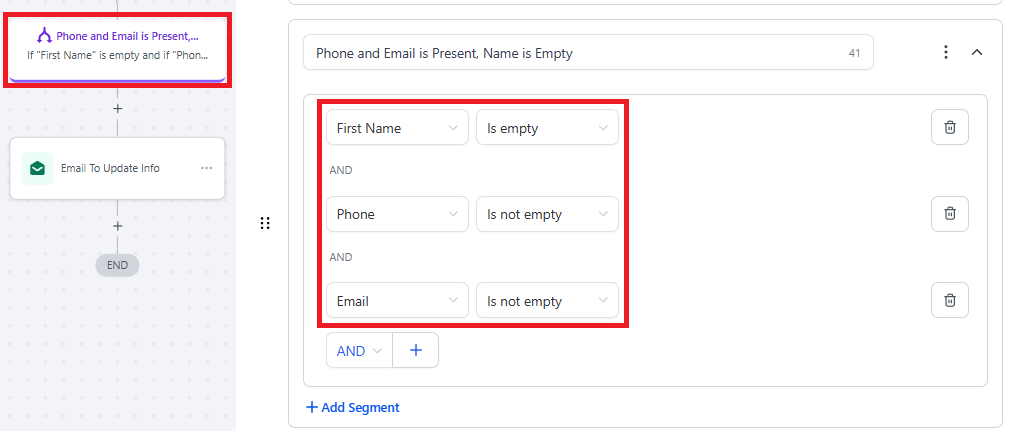
Send Email
To add this action, click the "+" icon and select or type Email. This action will send an email request to update the contact info.
It is crucial to "Save" the workflow before exiting the page and to thoroughly "Test" it before enabling the “Publish” toggle or making it live.
Once you're confident that the workflow is complete and ready to perform as intended, you can enable the “Publish” toggle to activate it. Without enabling this toggle, the workflow will remain in draft mode, and the expected automation will not take place.
Bulk Importing Contacts Via CSV Walkthrough
How to input Multiple Phone Numbers for a Contact
