Booking an appointment requires a Round Robin Calendar, which allows attendees to choose a convenient time with a user.
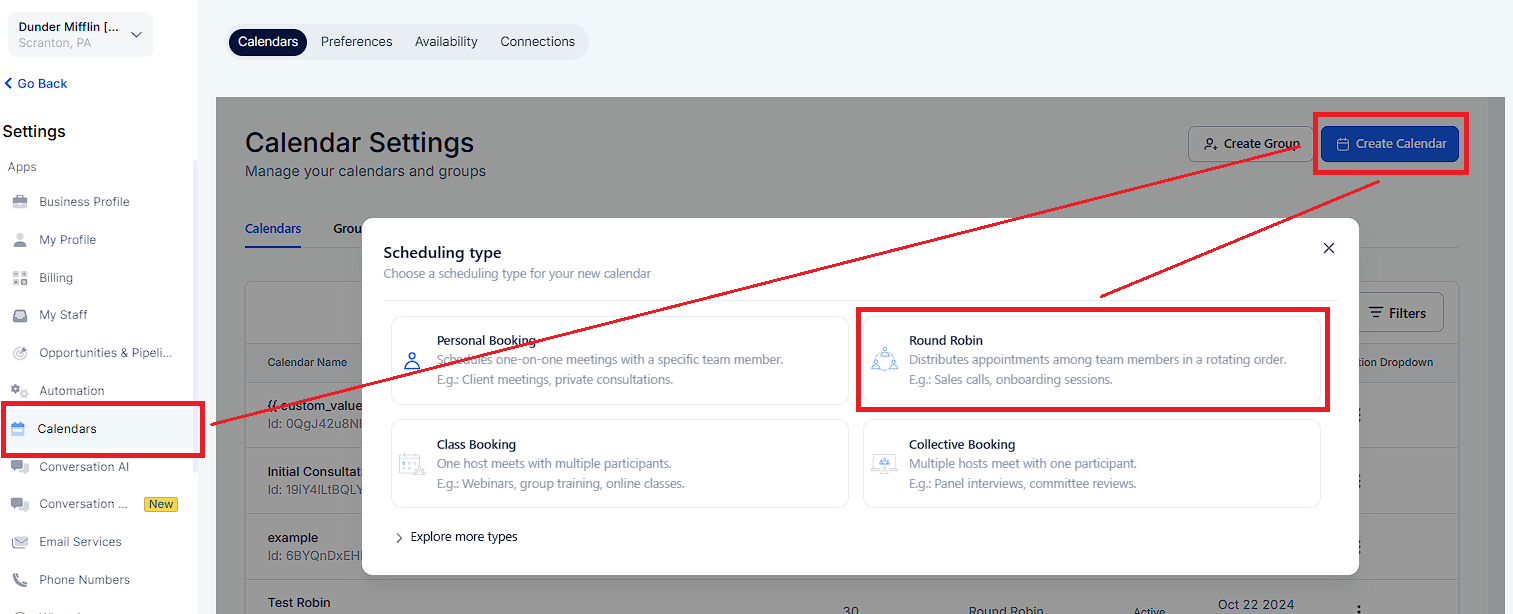
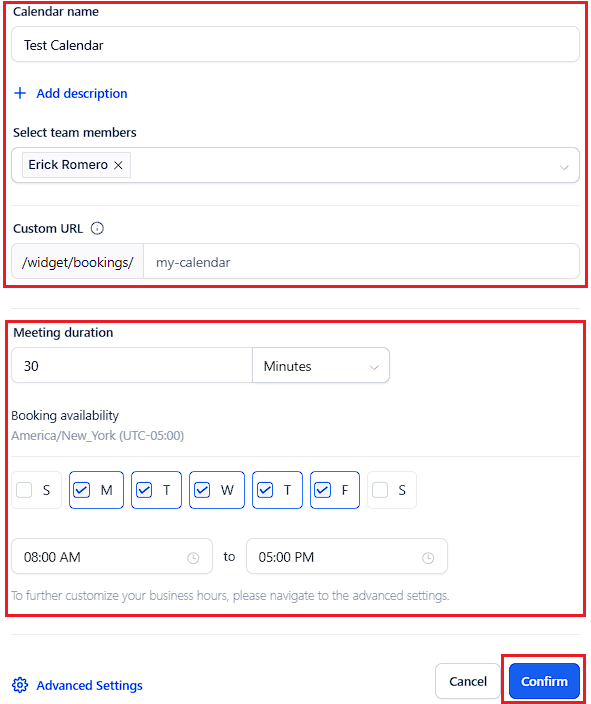
Add your Calendar Name, select Team Members, customize your URL and customize your business hours. You can also click "Advance Settings" to further customize your business hours.
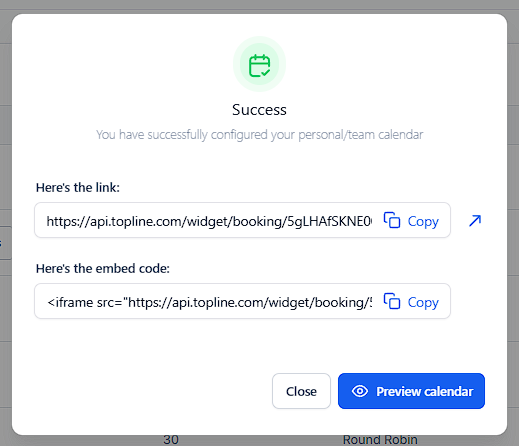
Once a calendar is created, you will be redirected to this page.
Go to "Settings" > "Calendars" > on the calendar you created, click the three-dot icon and click "Edit"
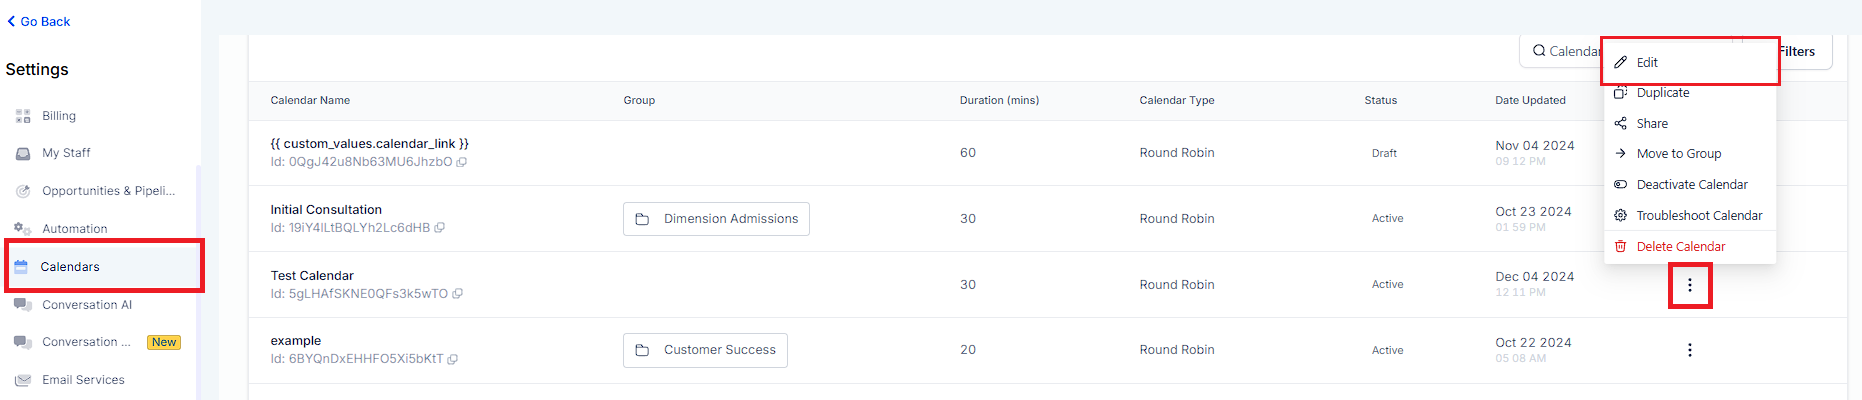
To further customize your meeting interval and duration, click "Availability"
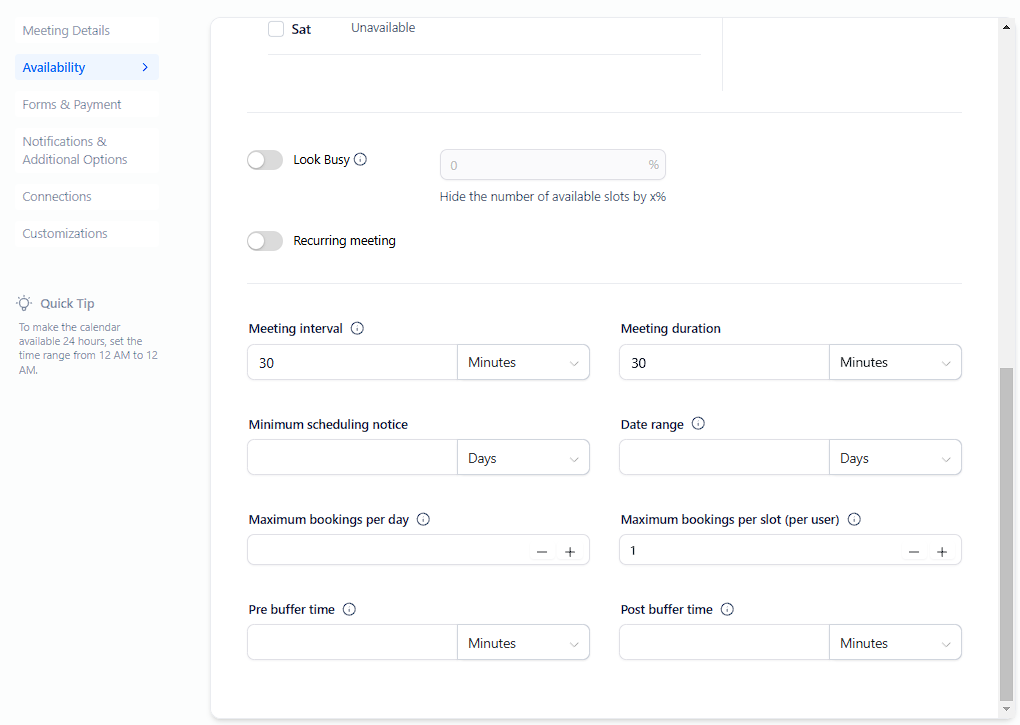
Calendar Availability - Weekly Working Hours & Date-Specific Hours
Understanding Calendar Availability Settings
Team Member Assignment (Round Robin Calendar)
How to Configure Staff Member selection in Round Robin Calendars
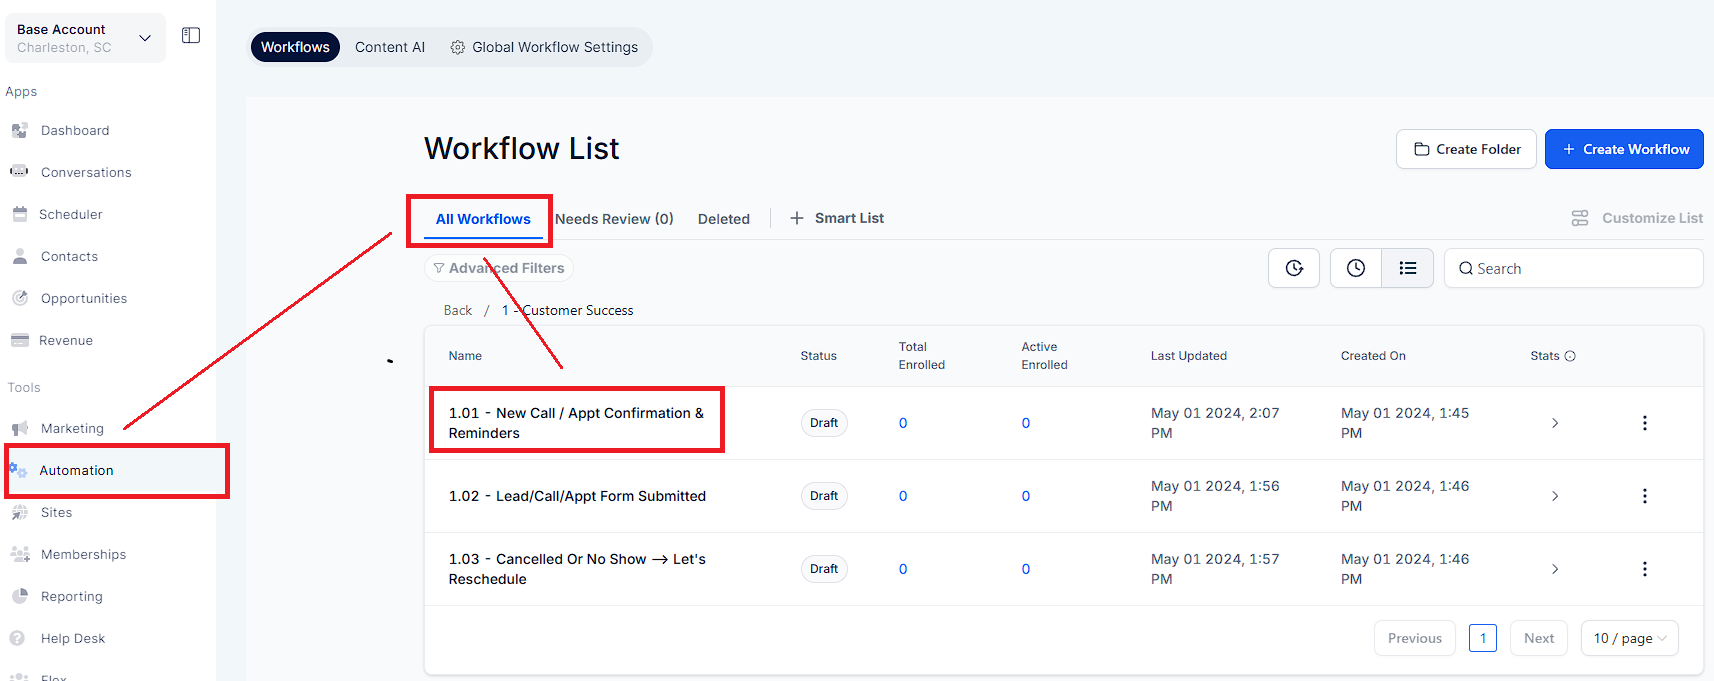
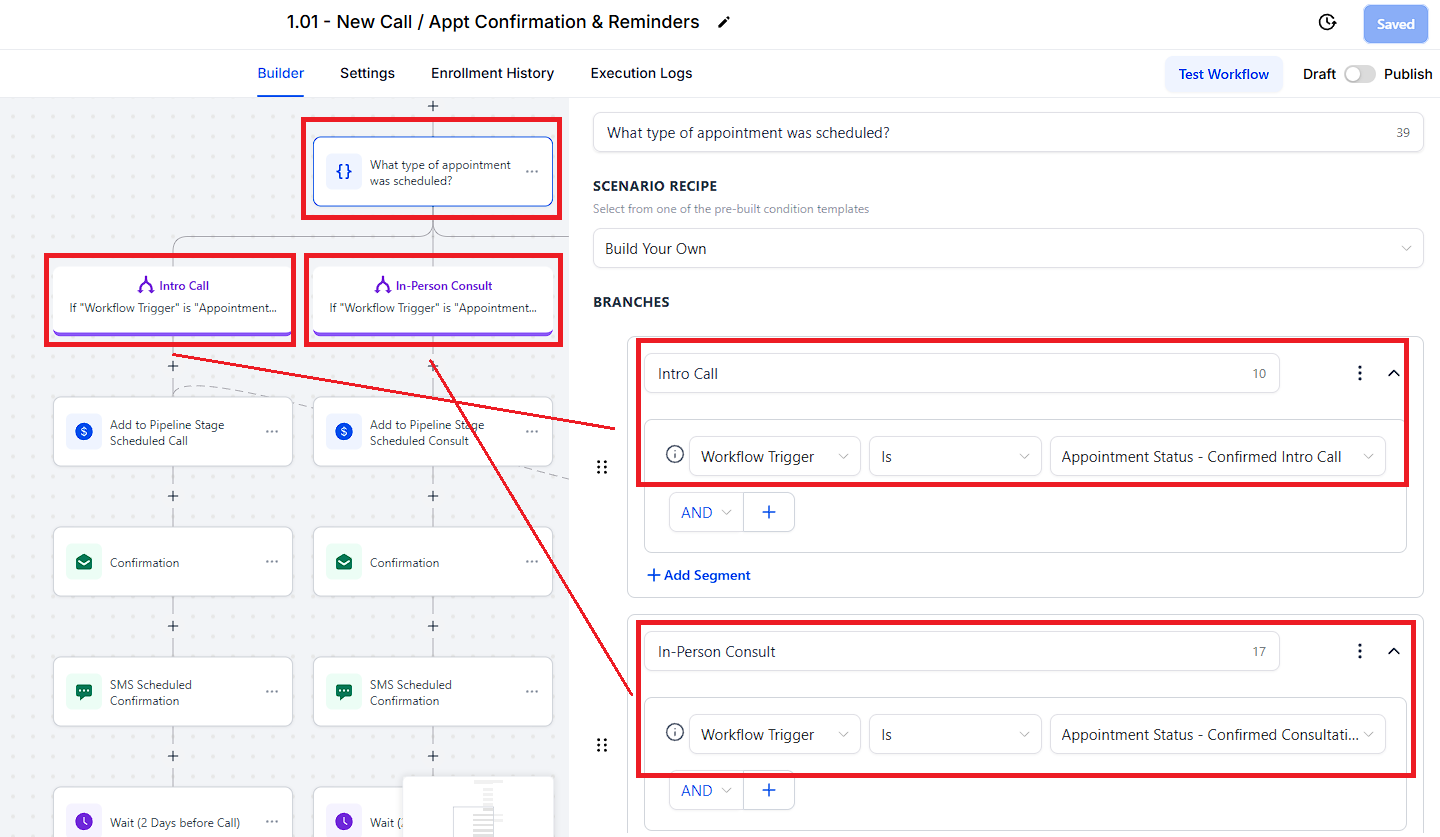
1. Appointment Status - Confirmed Consultation
2. Appointment Status - Confirmed Intro Call
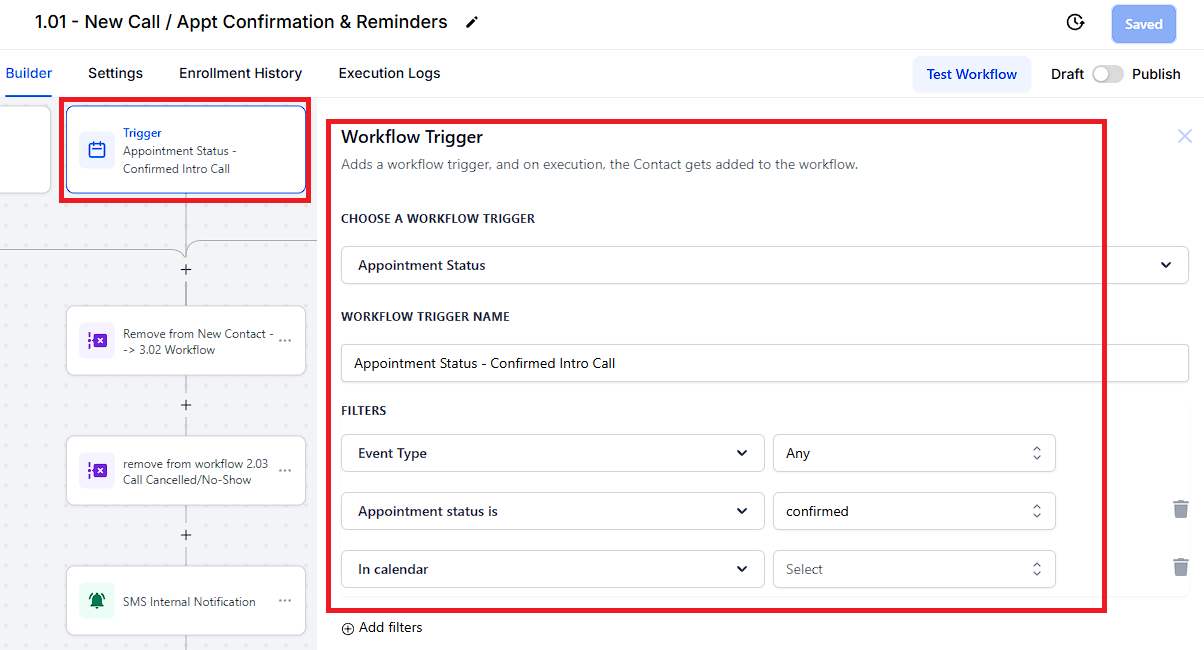
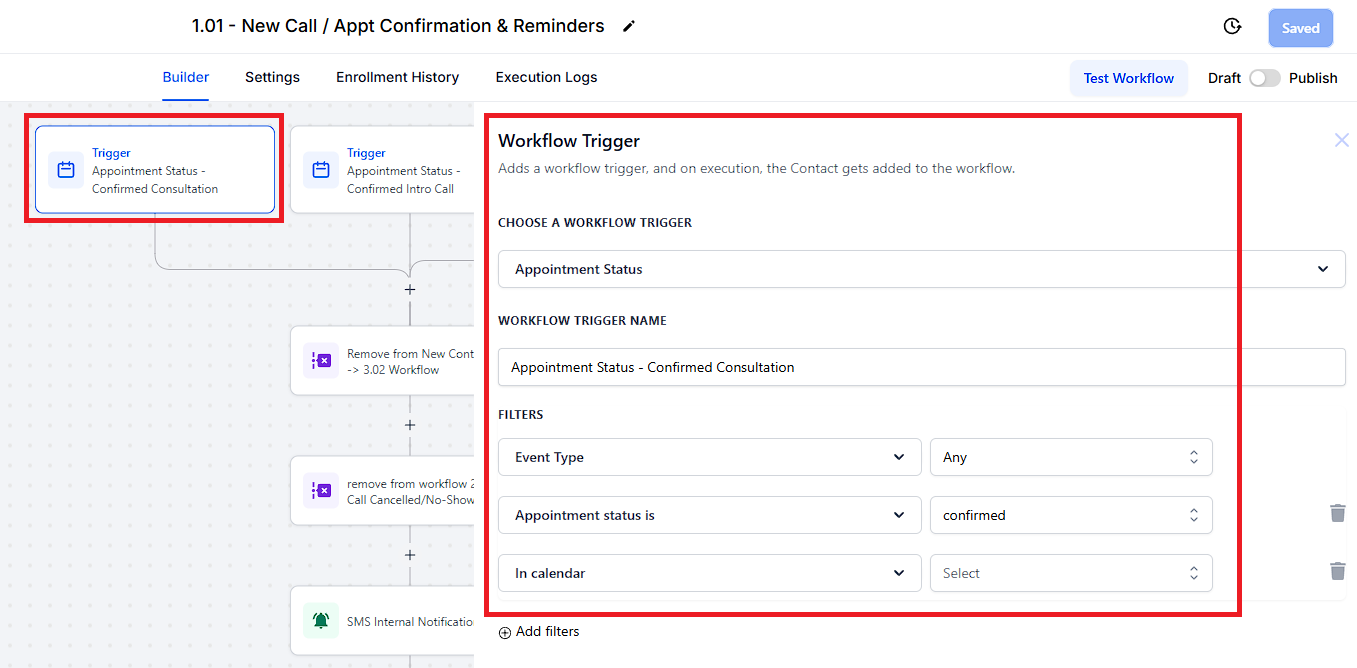
The Workflow Trigger should be "Appointment Status" but you can rename the Workflow Trigger name. You can modify the "FILTERS" depending on the events you wish your leads will came from.
Event Type is "Any"
Appointment status is must be "confirmed"
"In calendar is" filter must be the name of your calendar where the lead booked his appointment.
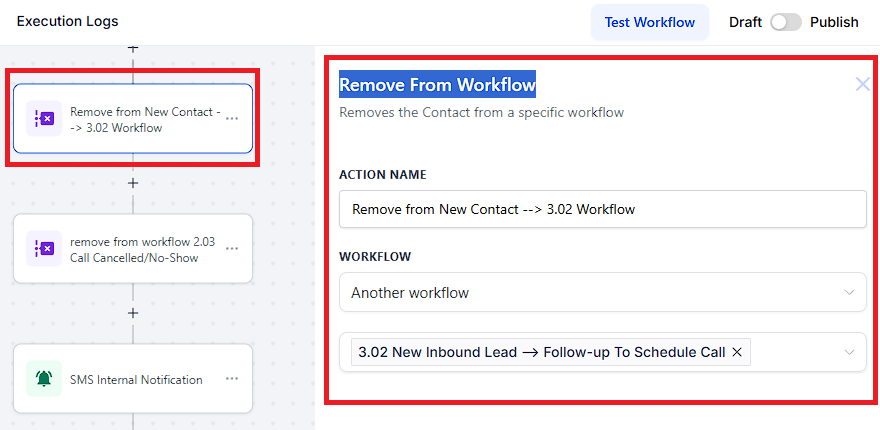
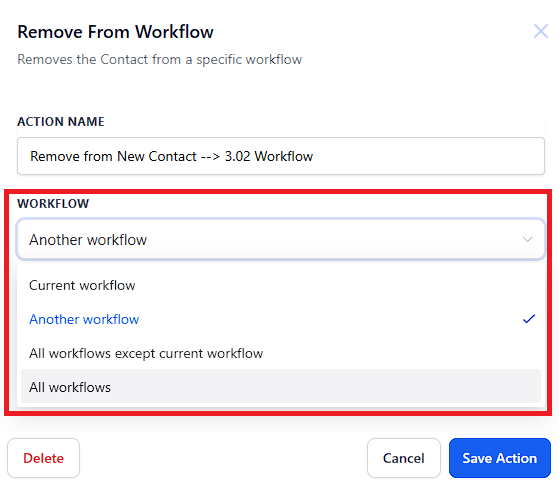
Click the "+" icon and select the action or type Remove From Workflow. This action will remove the Contact from a specific workflow.
Current workflow
Another workflow
All workflows except current workflow
All workflows
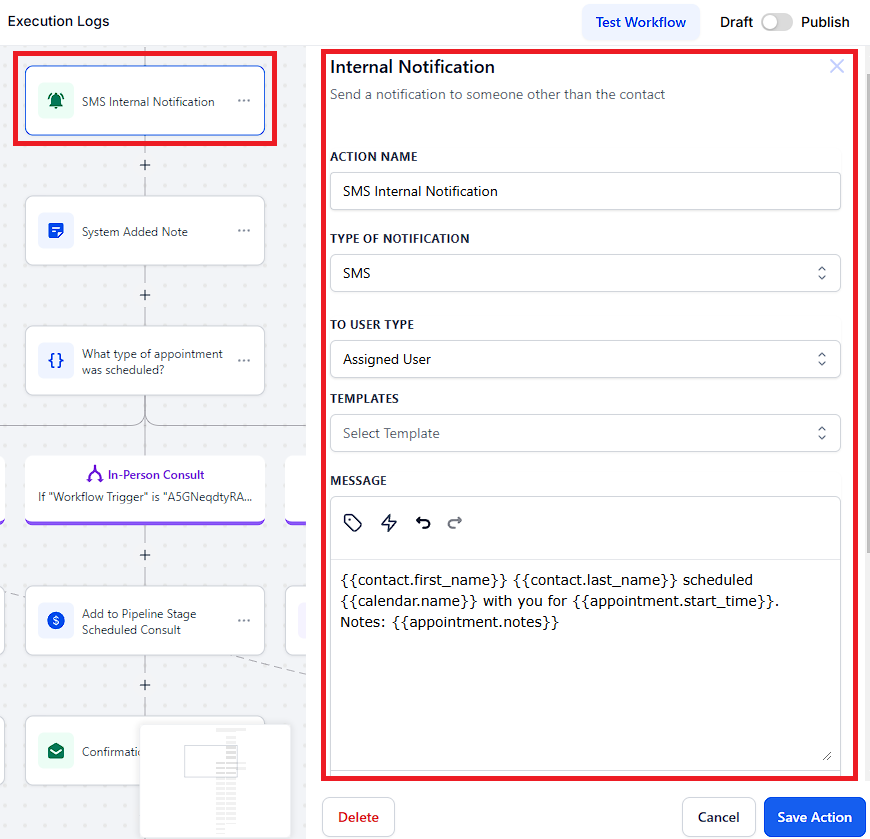
Click the "+" icon and select the action or type Internal Notification. This action sends in-app notifications to users based on specific triggers within a workflow.
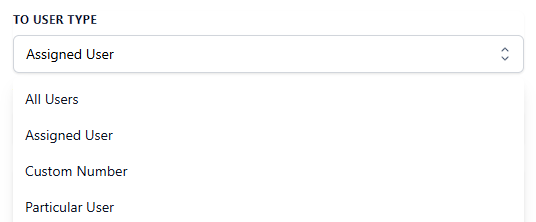
From here you have the option to assign it a specific user type:
All User
Assigned User
Customer Number
Particular User
Email - Send to user's email
Notification - Send a notification onto the notifications icon
SMS - Send a SMS to user's phone number
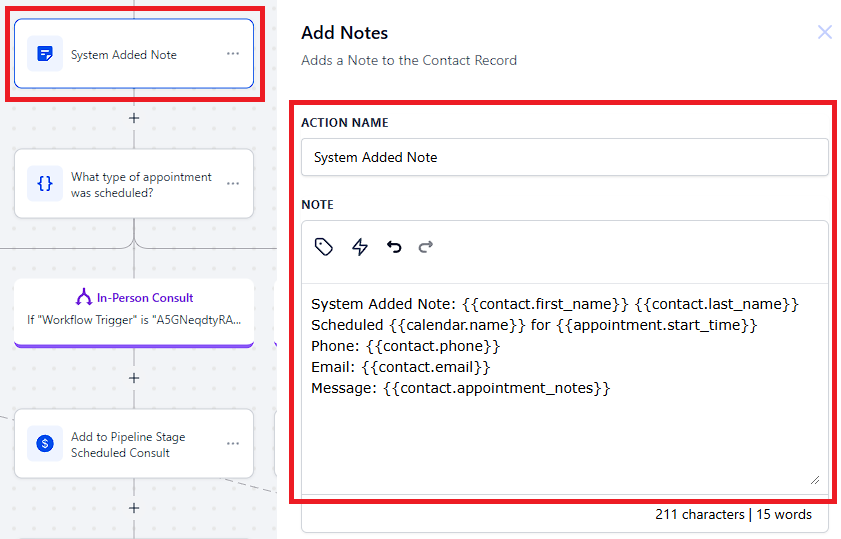
Click the "+" icon and select the action or type Add Notes. This action will allow you to add notes to the contact record.
Click the "+" icon and select the action or type If/Else. The "If/Else Condition" action in your automation workflow allows you to fork the contact's journey based on specific conditions.
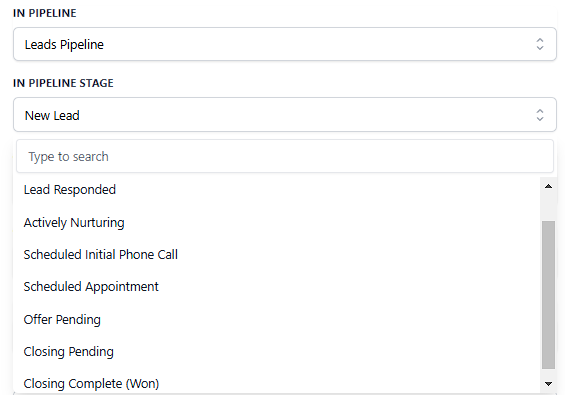
Click the "+" icon and select the action or type Create or Update Opportunity. This action creates or updates an Opportunity within the Pipeline that you select.
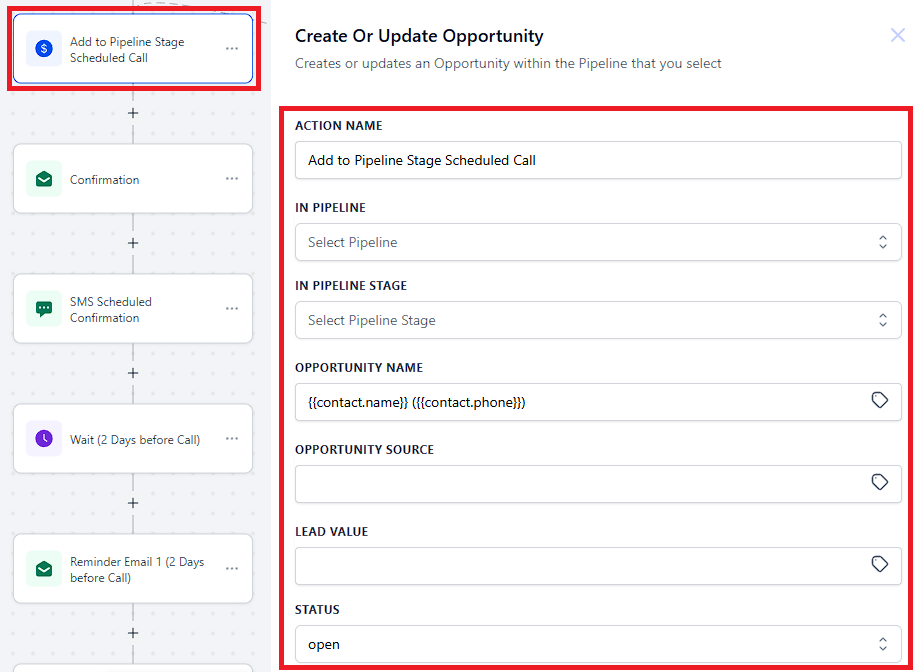
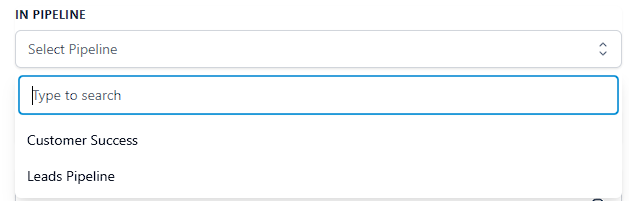
In Pipeline - You can select which pipeline you want to add the contact to by selecting this option. The In Pipeline is changed to Leads Pipeline.
In Pipeline Stage - You can select which stage you want to add the contact. The Pipeline Stage is changed to New Lead in this action.
Click the "+" icon and select the action or type SMS. This action allows you to send SMS to the contact.


Click the "+" icon and select the action or type Wait. This action holds a Contact for a specific time, until a condition exists, or until the Contact replies.
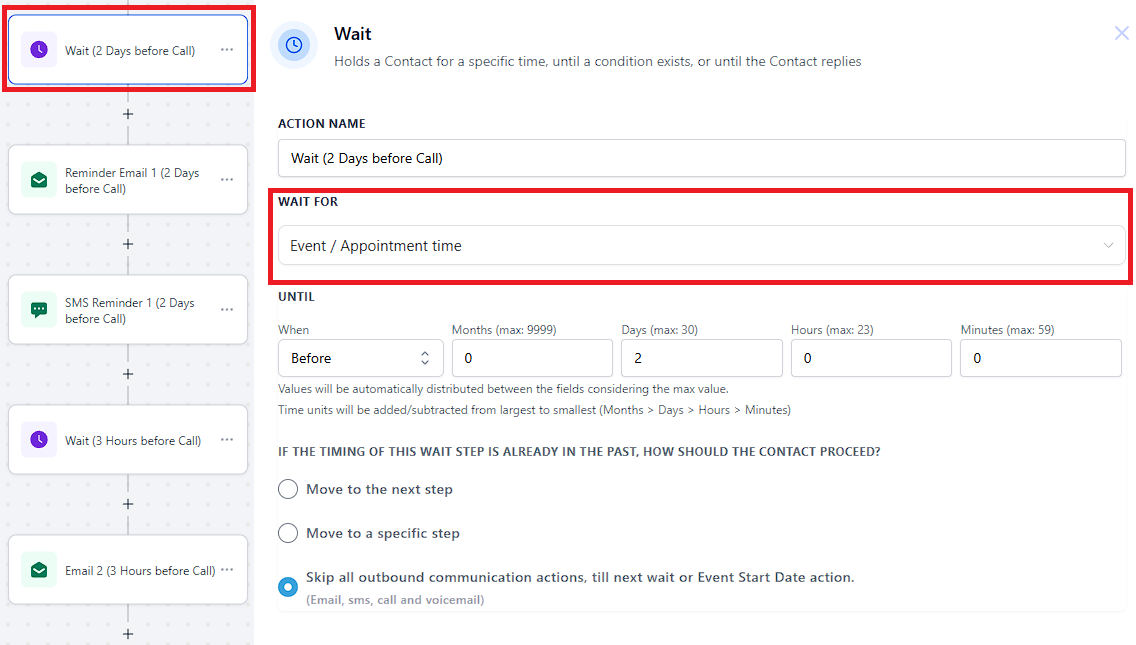
You can Choose the Wait Type - click the dropdown to view and select the type of wait action based on your objective.
Time Delay
Event/Appointment Time
Overdue
Condition
Contact Reply
Trigger Link Clicked
Email Event
Click the "+" icon and select the action or type Email. The Email action in your automation workflow is designed to send emails to your contacts. Make sure to update the "From Name" and "From Email" and save the action.

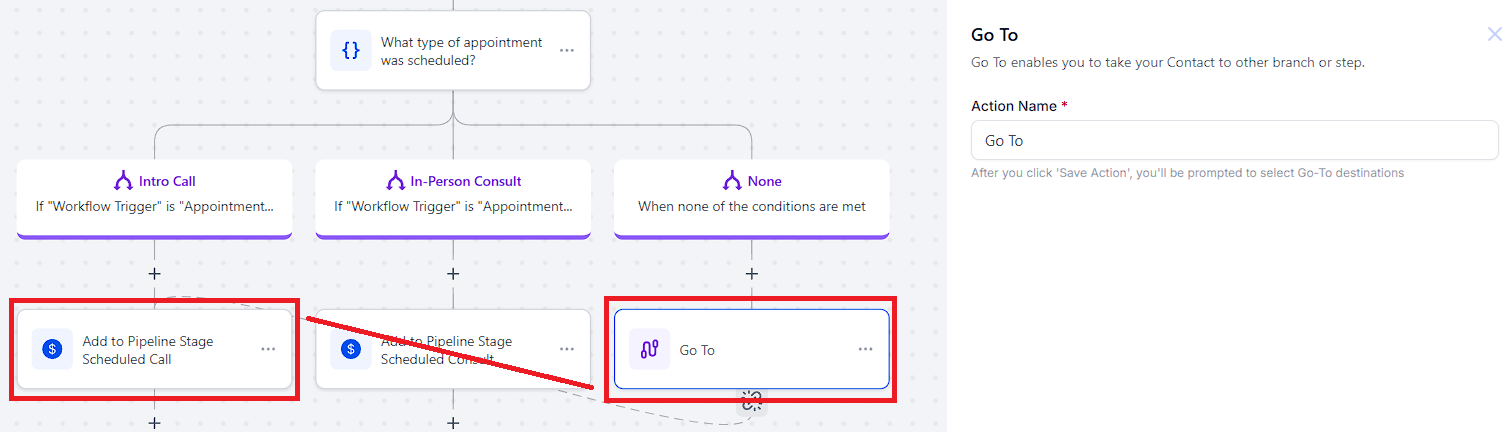
To use a Go-To step, simply add a Go-To event and then draw a line to where you want the contacts to jump. The Go-To event allows you to jump contacts from one event to another in Workflows.
Booking an appointment requires a Round Robin Calendar.
There are 2 triggers that will get the contact added to the workflow.
- Appointment Status - Confirmed Consultation
- Appointment Status - Confirmed Intro Call
Once the the appointment is confirmed, contact will be automatically removed from the 2 specific workflows.
- 3.02 New Inbound Lead - Follow-up To Schedule
- 1.03 Call Cancelled Or No-Show - Let's Reschedule
An internal notification will be sent to an assigned user via SMS.
A System Note will be added to a contact record.
If/Else Condition Action will be activated - it will help you create personalized and dynamic workflows that adapt to your contact's behaviors.
Intro Call
- Contact will be added to Pipeline Stage Scheduled Call
- Confirmation Email will be sent
- SMS confirmation will be sent
- Holds a Contact for 2 days before the call
- Reminder Email 1 (2 Days before Call)
- SMS Reminder 1 (2 Days before Call)
- Will wait (3 Hours before Call)
- Email will be sent (3 Hours before Call)
- SMS Reminder (3 Hours before Call)
- Wait (10 Minutes before Call)
- SMS Reminder 3 (10 Minutes Before the Call)
- Wait 10 Minutes after
- An internal notification will be sent via email to update the status
In-Person Consult
- Added to Pipeline Stage Scheduled Consult
- Confirmation Email will be sent
- SMS Scheduled Confirmation
- Wait (2 Days before appointment)
- Reminder Email will be sent (2 Days before appointment)
- SMS Reminder (2 Days before appointment)
- Wait (3 Hours before appointment)
- Email will be sent (3 Hours before Call)
- SMS Reminder (3 Hours before Call)
- Wait (45 Minutes After)
- How Did It Go - Email
None
- When none of the conditions are met, Go To action will be added and it will jump to to Pipeline Stage Scheduled Call Opportunity.
Don't forget to click "Save Action" for every update you've made.
"Save" and "Publish" the workflow once done.
